松下电饭煲维修手册
- 格式:pdf
- 大小:7.01 MB
- 文档页数:22
![松下-TH-42PV30C(GPH6DA)-中文维修手册3[1]](https://uimg.taocdn.com/0ea07ff79e314332396893d6.webp)
16方框图和线路图 16.1.线路图注意事项16.11.P电路板(6/6)线路图7716.12.PA电路板方框图7816.13.PA电路板(1/3)线路图7916.14.PA电路板(2/3)线路图8016.15.PA电路板(3/3)线路图8116.16.D电路板(1/2)方框图8216.17.D电路板(2/2)方框图8316.18.D电路板(1/12)线路图16.19.D电路板(2/12)线路图8516.20.D电路板(3/12)线路图8616.21.D电路板(4/12)线路图8716.22.D电路板(5/12)线路图8816.23.D电路板(6/12)线路图8916.24.D电路板(7/12)线路图9016.25.D电路板(8/12)线路图9116.26.D电路板(9/12)线路图9216.27.D电路板(10/12)线路图9316.28.D电路板(11/12)线路图9416.29.D电路板(12/12)线路图9516.30.DG电路板(1/2)方框图9616.31.DG电路板(2/2)方框图9716.32.DG电路板(1/8)线路图9816.33.DG电路板(2/8)线路图9916.34.DG电路板(3/8)线路图10016.35.DG电路板(4/8)线路图10116.36.DG电路板(5/8)线路图10216.37.DG电路板(6/8)线路图10316.38.DG电路板(7/8)线路图10416.39.DG电路板(8/8)线路图10516.40.H、TA和TB电路板方框图10616.41.H电路板(1/2)线路图10716.42.H电路板(2/2)线路图10816.43.TA和TB电路板线路图10916.44.JG电路板方框图11016.45.JG电路板(1/2)线路图11116.46.JG电路板(2/2)线路图11216.47.C1, C2, C3, C4, K和G电路板方框图11316.48.C1电路板(1/2)线路图11416.49.C1电路板(2/2)线路图11516.50.C2电路板(1/2)线路图116。
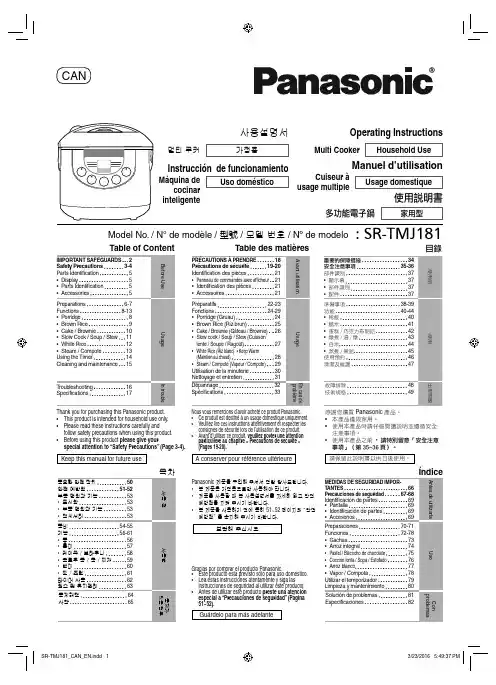
Table des matièresCANOperating InstructionsHousehold UseMulti Cooker 使用說明書家用型多功能電子鍋Manuel d’utilisationUsage domestiqueCuiseur à usage multipleModel No. / N° de modèle / 型號 / 모델 번호 / Nº de modeloThank you for purchasing this Panasonic product.• This product is intended for household use only.• Please read these instructions carefully and follow safety precautions when using this product.• Before using this product please give yourspecial attention to “Safety Precautions” (Page 3-4).Keep this manual for future use感謝您購買 Panasonic 產品。
•本產品僅限家用。
•使用本產品時請仔細閱讀說明並遵循安全注意事項。
•使用本產品之前,請特別留意「安全注意事項」(第 35~36 頁)。
請保留此說明書以供日後使用。
Nous vous remercions d’avoir acheté ce produit Panasonic.• Ce produit est destiné à un usage domestique uniquement.• Veuillez lire ces instructions attentivement et respecter les consignes de sécurité lors de l’utilisation de ce produit.• Avant d’utiliser ce produit, veuillez porter une attention particulière au chapitre « Précautions de sécurité » (Pages 19-20).À conserver pour référence ultérieure:SR-TMJ181Gracias por comprar el producto Panasonic.• Este producto esta previsto sólo para uso doméstico.• Lea estas instrucciones atentamente y siga las instrucciones de seguridad al utilizar este producto.• Antes de utilizar este producto preste una atención especial a “Precauciones de seguridad” (Página 51~52).Guárdelo para más adelanteInstrucción de funcionamientoUso domésticoMáquina decocinar inteligente사용설명서가정용멀티 쿠커Panasonic 제품을 구입해 주셔서 정말 감사드립니다.• 본 제품은 가정용으로만 사용해야 합니다.• 제품을 사용할 때 본 사용설명서를 자세히 읽고 안전 예방책을 지켜 주시기 바랍니다.• 본 제품을 사용하기 전에 특히 51~52 페이지의 “안전 예방책” 을 숙지해 주시기 바랍니다.보관해 주십시오When using electrical appliances, basic safety precautions should always be followed, including the following:1. Read all instructions.2. Do not touch hot surfaces. Use handles or knobs.3. To protect against electrical shock, do not immerse cord, plugs, or appliance in water or other liquid.4. Close supervision is necessary when any appliance is used by or near children.5. Unplug from outlet when not in use and before cleaning. Allow to cool before putting on or taking offparts.6. Do not operate any appliance with a damaged cord or plug or after the appliance malfunctions orhas been damaged in any manner.Return appliance to the nearest authorized service facility for examination, repair, or adjustment. 7. The use of accessory attachments not recommended by the appliance manufacturer may causeinjuries.8. Do not use outdoors.9. Do not let cord hang over edge of table or counter, or touch hot surfaces.10. Do not place on or near a hot gas or electric burner, or in a heated oven.11. Extreme caution must be used when moving an appliance containing hot oil or other hot liquids.12. Always attach plug to appliance fi rst, then plug cord into the wall outlet. To disconnect, turn anycontrol to “off”, then remove plug from wall outlet.13. Do not use appliance for other than intended use.14. This product is intended for household use only.15. SAVE THESE INSTRUCTIONS.CAUTION :a. A short power-supply cord (or detachable power-supply cord) is provided to reduce the riskresulting from becoming entangled in or tripping over a longer cord.b. The cord should be arranged so that it will not drape over the countertop or tabletop where it can bepulled on by children or tripped over unintentionally.c. The use of extension cords is not recommended.This appliance has a polarized plug (one blade is wider than the other). To reduce the risk of electric shock, this plug is intended to fi t into a polarized outlet only one way. If the plug does not fi t fully intothe outlet, reverse the plug. If it still does not fi t, contact a qualifi ed electrician. Do not attempt to modify the plug in any way.23WARNINGIn order to prevent accidents or injuries to the users, other people and damage to property, please follow the instructions below.The following charts indicate the degree of damage caused by wrong operation.CAUTIONPrecaution for UsePlease put in correct amountof rice and water and selectfunctions correctly according tothe operating instructions.(So as to avoid overfl ow of rice water,half-cooked rice or scorched rice.)Before using the appliance, theanti-tarnish paper between theinner pan and the cast heatershould be removed.(So as to avoid poor cooking or fi re.)Do not put ingredients to becooked directly into the appliancein which no inner pan is placed.Do not cook without inner pan.(So as to prevent any impurities fromcausing failure.)Do not cover the outer lid withcloth or other objects when theappliance is in use.(So as to avoid deformation, colorchange of the outer lid or failure.)Avoid using the appliance underdirect sunlight.(So as to avoid color change.)Do not scoop out rice with anymetal object.(So as to avoid scratching the innerpan coating and causing peeling of thecoating.)When there is any overfl owof rice water from thesteam vent, pull out thepower plug immediatelyto disconnect the powersupply. Do not resume theuse until the rice water onthe power plug and theinstrument plug is cleanedwith a dry cloth.The appliance is forhousehold use only. Do notuse it for any commercial orindustrial purposes or anypurposes other than cooking.When power failure occursduring the operation of theappliance, the cooking resultmay be affected.Do not let water spill on thepower plug of the power cord set.(This may result in electric shock.)45DisplayPress this button to:1. Cancel the previous operation orenter Keep Warm function. 2. Preset timer.3. Select cooking menu.4. Select cooking timer.5. Start cooking.Parts Identifi cation61Measure rice with the measuring cup provided.• The volume of the measuring cup is about 180 mL.• For the maximum quantity of rice to be cooked at once, refer to specifi cations in Page 17.Wash the rice till the water turns relatively clear.1Wash the rice quickly with plenty of water and stirring the rice lightly to wash itwhile changing water.2→pour out water), till the water turnsrelatively clear.2ATTENTION• In order to avoid scratching the non-stick coating on the pan surface, do not wash rice in the pan.• Wash the rice thoroughly. Otherwise, rice crust may appear and the residual ricebran may affect the taste of the rice.Add the washed rice or other ingredients into the pan.• Use water line on the pan to measure cooking quantity as follows.31*2 By following water level mark “L” inside the pan.• Wipe the surface of the pan before use. If it is wet, it may cause noise while cooking. Any foreign matters between the pan and the cast heater may damage the unit.• The water level data indicated in above table is only approximation. If rice is too hard or too soft, please adjust water amount according to your personal taste.<LEVEL INDICA TOR> MAXIMUM LEVELDo not cook with more than this levelSR-TMJ1817Put the inner pan into the body and close the outer lid.1In order to closely attach the bottom of inner pan to thecast heater, please rotate the inner pan along the directionindicated by the arrow 2 or 3 times. Please check whether the steam cap is correctly positioned (Page 15).2Close the outer lid until it clicks.4Connect the plugs.1Please insert the instrument plug into the body fi rst.2Connect the power plug. Make sure that both plugsare tightly connected.58Operations(Cooking with the Porridge function.)1Press button.• remaining time reaches 5 minutes.2The cooking is over• Keep Warm function • Keep Warm function as it may become too thick and dry. Pressthe button to exit the Keep Warm function and unplug the power plug.9Operations1• remaining time reaches 13 minutes.2The cooking is overStir and loosen the rice.• • Keep Warm function as it may become affect the taste. Pressthe button to exit the Keep Warm function and unplug the power plug.(Cooking with the Brown Rice function.)10Preparations• Prepare the cake mixture by following your recipe.• Coat the inner pan with butter or margarine to facilitate removing the cake from inner pan.•Pour the cake mixture into the inner pan and level it.Operations(Cooking with the Cake / Brownie function.)Press Menu button to select Cake / Brownie function.40min (40 minutes) will appear on LCD display (as the default baking time for Cake function).1Press button to set the cooking time as your desire.• Y ou can set the cooking time for:Cake function : from 20 to 65 minutes (5 minutes increment).Brownie function : from 1 to 20 minutes (1 minute increment) and 20 to 65 minutes (5 minutes increment).• Keeping the button pressed will make setting faster.2Press button.•3The cooking is over•the Keep Warmlights up automatically).• Keep Warm function as it mayaffect the taste. Press the button to exit the Keep Warm function andunplug the power plug.• Bring out the pan and leave it cool for 2-3 minutes. Then put the pan upsidedown onto a tray or grill.• Decorate the cake surface as your desire.Hand glovePreparations• Place all ingredients into the pan. •Close the lid.Operations(Cooking with the Slow Cook / Soup / Stew function.)PressMenubutton to select Slow Cook / Soup / Stew function.1h (1 hour 0 minute) will appear on LCD display (as the default cookingtime for Slow Cook / Soup / Stew function).1Pressbutton to set the cooking time as your desire.• Y ou can set the cooking time from 1 to 12 hours (30 minutes increment). • Keeping the button pressed will make setting faster.2Press button.• reduce to 1 minute decrement when cooking time is less than 1 hour.3The cooking is over• • Keep Warm function as it may affect the taste. Press the button to exit the Keep Warm function and unplug the power plug.Operations1• The remaining time counter will appear on the LCD display when the remaining time reaches 9 minutes.2The cooking is overStir and loosen the rice.• Keep Warm(Cooking with the White Rice function.)Preparations• Add the required amount of water.• Place foods to be steamed into the steam basket.• Close the outer lid.Operations(Cooking with the Steam / Compote function.)PressMenubutton to select Steam / Compote function.10min (10 minutes) will appear on LCD display (as the default steamingtime for Steam / Compote function).1Pressbutton to set the cooking time as your desire.• Y ou can set the cooking time from 1 to 60 minutes (1 minute increment). • Keeping the button pressed will make setting faster.2Press button.• 3The cooking is over• • Keep Warm function as it may affect the taste. Press the button to exit the Keep Warm function and unplug the power plug.Correspondence between the amount of water andtime of steaming as below serves as a guideline to achieve a satisfactory cooking performance.The presetting time is a countdown timer.• Time can be preset 13 hours in advance.ExampleIf the timer is set for 4H 30min pressed.OperationsPressMenubutton to select function.•1Press button to set the timer as your desire.• The fi• • Keeping the button pressed will make setting faster.23Press button.• •Rice CookingDetailsCooking problems Keep Warm problems No powerStrange sound occursT oo hardUndercookedT oo softWater overfl owBurnt rice at bottomof inner panColor changeBad smellT oo dryWrong rice and water proportion.●●●●●●Pull out plug and check the socket.Sound occurs because of water that has stuck to inner pan.Inadequate washing of rice.●●●●Foreign matters between inner pan and cast heater.●●●●Cooking with a lot of oil.●●●●●The rice has been warmed more than 12 hours.●●●The outer lid is not securely closed.●●●●●The inner pan is not adequately washed.●●The power cord is not connected to the socket securely.●●Cake BakingDetailsBaking Cake problemsNo powerStrange sound occursUndone CakeUndercooked CakeWet CakeThe Cake sticks to the base of panBottom of the Cake burntNot fl uffedCrumblyToo much dough.●●Pull out plug and check the socket.Sound occurs because of water that has stuckto pan.Not enough mixing before baking.●●●Used with incompatible cake mix.●●●●Used with cake mix that contains too much chocolate, sugar or fruit ingredients.●●●●Outer lid not close while cooking.●●●Foreign matters between pan and cast heater.●●●●●Not enough butter or cooking oil applied to the bottom of the pan.●Cake left in the pan too long.●●Inadequate mixing or mixed too long.●●Wrong ingredient quantity.●●●●Model No.SR-TMJ181Power Source 120 V60 HzPowerConsumptionIn the Cooking Function 670 W In the Keep Warm Function 108 W CapacityWhite Rice 3 - 10 cups Sticky Rice 3 - 6 cups Mixed Rice3 - 8 cups Brown Rice 3 - 7 cups Porridge1 -2 cups Slow Cook / Soup / Stew 1,1 - 3,2 L Cake / Brownie1,660 g Dimensions (Width x Length x Height) (approx.)274 x 275 x 276 mmWeight (approx.)3,1 k g Keep Warm12 hours• For power cord replacement and product repair, please contact Panasonic authorized service center.Lors de I’utilisation de tout appareil électrique, il est toujours recommandé de prendre certaines précautions, dont les suivantes:1. Lire toutes les instructions.2. Éviter de toucher aux surfaces chaudes. Toujours utiliser les poignées ou les anses.3. Afi n de prévenir tout risque de choc électrique, ne pas immerger le cordon, les fi chesd’alimentation ou l’appareil dans l’eau ou tout autre liquide.4. Ne jamais laisser des enfants utiliser I’appareil sans surveillance.5. Après usage et avant le nettoyage, toujours débrancher I’appareil. Laisser refroidir avantde retirer des pièces ou de les remettre en place.6. Ne jamais utiliser I’appareil si sa fi che ou son cordon est endommagé ou après avoirconstaté une défectuosité ou des dommages. Le cas échéant, l’appareil doit être retournéau centre de service le plus près pour vérifi cation, réparation ou ajustement.7. L’utilisation d’accessoires non recommandés par le fabricant peut représenter un risquede blessures.8. Ne pas utiliser I’appareil à I’extérieur.9. Ne pas laisser le cordon pendre d’une table ou d’un comptoir, ni le mettre en contact avecune surface chaude.10. Ne pas placer I’appareil sur le dessus ou à proximité d’un brûleur à gaz ou électrique, nidans un four chaud.11. Être extrêmement prudent lors du déplacement d’un appareil contenant de I’huile chaudeou tout autre liquide chaud.12. Toujours brancher le cordon d’alimentation à I’appareil avant d’en brancher la fi che dansune prise secteur. Avant de débrancher, couper le contact, puis retirer la fi che de la prise secteur.13. N’utiliser I’appareil qu’aux fi ns recommandées.14. Cet appareil est conçu seulement pour l’utilisation domestique.15. CONSERVER CE MANUEL.ATTENTION :a. Le cordon d’alimentation (ou le cordon amovible) fourni est court, de manière à prévenirles risques d’emmêlement et d’accidents.b. Le cordon ne doit pas pendre du comptoir ou de la table, afi n d’éviterque des enfants tirent dessus ou trébuchent accidentellement.c. L’utilisation d’un cordon prolongateur n’est pas recommandée.Cet appareil est équipé d’une fi che polarisée (une des broches est plus large que les autres). Afi n de réduire le risque de choc électrique, cette fi che doit être enfi chée dans une prise polarisée dans un seul sens. Si elle ne s’enfi che pas complètement dans la prise, l’inverser.Si elle ne s’enfi che toujours pas, contacter un électricien qualifi é. Ne pas tenter de modifi er la fi che de quelque façon que ce soit.AVERTISSEMENTAfi n d’éviter les accidents ou blessures aux utilisateurs, à d’autres personnes et des dégradations matérielles, veuillez suivre les instructions ci-dessous.Les tableaux suivants indiquent la gravité des dommages provoqués par des mauvaises manoeuvres.A TTENTIONPrécautions d’utilisationVeuillez mettre la bonne quantitéd’eau et de riz et sélectionnerles fonctions correctement etconformément aux instructionsd’utilisation.(Pour éviter un débordement de l’eaudu riz, le riz à moitié cuit ou le riz brûlé.)Avant d’utiliser l’appareil, lepapier anti-ternissure placé entrele panier de cuisson et la plaquechauffante doit être retiré.(Pour éviter une mauvaise cuissonou un incendie.)Ne mettez pas d’ingrédients àcuire directement dans l’appareilsi aucun panier de cuisson nes’y trouve. Ne cuisinez pas sanspanier de cuisson.(Pour empêcher toute impureté deprovoquer une panne.)Ne couvrez pas le couvercle extérieuravec un linge ou d’autres objets lorsquel’appareil est en cours d’utilisation.(Pour éviter la déformation,le changement de couleur ducouvercle extérieur ou une panne.)Évitez d’utiliser l’appareil sous lalumière directe du soleil.(Pour éviter tout changement de couleur.)Ne servez pas le riz avec unobjet en métal.(Pour éviter de rayer lerevêtement du panier de cuissonet de provoquer l’écaillage durevêtement.)En cas de débordement d’eaudu riz par l’évent à vapeur,retirez la fi che d’alimentationimmédiatement pour couperl’alimentation électrique.Ne reprenez pas l’utilisationavant que l’eau du riz sur lafi che d’alimentation et la fi checôté appareil ne soit retiréeavec un chiffon sec.L’appareil est réservé à un usagedomestique. Ne l’utilisez pas à dequelconques fi ns commercialesou industrielles ou à des fi nsautres que la cuisson.Si une panne d’alimentationsurvient pendant le fonctionnementde l’appareil, le résultat de lacuisson peut être affecté.Ne laissez pas de l’eau déverser sur laprise d’alimentation de l’ensemble ducordon d’alimentation.Ceci peut entraîner un choc électrique.Panneau de commandes avec affi cheurIdentification des piècesAppuyez sur ce bouton pour:1. Annuler l’opération précédente oupour activer la fonction Maintien au chaud.2. Prérégler la minuterie.3. Sélectionner le menu de cuisson.4. Régler la minuterie de cuisson.5. Lancer la cuisson.1Mesurez le riz avec le verre mesureur fourni.• Le volume du verre mesureur est d’environ 180 mL.• Référez-vous aux spécifi cations à la page 33 pour connaître la quantité de riz qu’il est possible de cuire en une fois.Rincez le riz jusqu’à ce que l’eau devienne assez claire.1Rincez le riz rapidement à grande eau, en l’agitant légèrement pour le rincertout en changeant l’eau.2→déversez l’eau), jusqu’à ce que l’eau devienne assez claire.2ATTENTION• Pour éviter de rayer le revêtement anti-adhésif de la surface du panier de cuisson,ne rincez pas le riz dans le panier de cuisson.•Rincez le riz avec soin. Sinon, de la croûte de riz risque d’apparaître et le son de riz résiduel peut affecter le goût du riz.Ajoutez le riz rincé ou autres ingrédients dans le panier de cuisson.• Utilisez le repère de niveau d’eau du panier de cuisson pour mesurer la quantité d’eau comme suit.3*1 En respectant la graduation de niveau d’eau “CUP” située à l’intérieur du panier de cuisson.*2 En respectant la graduation de niveau d’eau “L” située à l’intérieur du panier de cuisson.• Séchez la surface extérieure du panier de cuisson avant l’utilisation. Si elle est mouillée, du bruit pourra être généré pendant la cuisson. T out corps étranger entre le panier et la plaque chauffante peut endommager l’appareil.• Les données de niveau d’eau indiquées dans le tableau ci-dessus sont seulement des approximations. Si le riz est trop dur ou trop mou, ajustez la quantité d’eau en fonction de vos goûts personnels.<INDICA TEUR DE NIVEAU>NIVEAU MAXIMUMSR-TMJ181extérieur.1Pour que le fond du panier de cuisson soit bien en contact avec la plaque chauffante, veuillez le faire pivoter dans le sens indiqué par la fl èche 2 ou 3 fois. Veillez à ce que le capuchon d’échappement de la vapeur soit bien positionné ( p. 31).2Fermez le couvercle extérieur jusqu’à ce qu’il s’enclique.4Branchez les fi ches.1Veuillez insérer d’abord la fi che côté appareil dans le boîtier.2Branchez la fi che d’alimentation. Veillez à ce que les deux fi ches soient bien connectées.5OpérationsAppuyez sur le boutonMenupour sélectionner la fonction Porridge (Gruau).• Le 1.• Le • cheur ACL lorsque le temps restant atteint 5 minutes.2La cuisson est terminée• à la fonction Keep Warm (Maintien au chaud)automatiquement).• T Keep Warm (Maintien au chaud) car le riz pourrait Keep Warm (Maintien au chaud) et débranchez la fi che d’alimentation.(Cuisson avec la fonction Porridge (Gruau))Opérations(Cuisson avec la fonction Brown Rice (Riz Brun))Appuyez sur le boutonMenupour sélectionner la fonction Brown Rice (Riz brun).• Le 1.• Le • Un compte à rebours apparaît à l’affi cheur ACL lorsque le temps restant atteint 13 minutes.2La cuisson est terminéeMélangez et aérez le riz.• à la fonction Keep Warm (Maintien au chaud)automatiquement).• T Keep Warm (Maintien au chaud) car elle pourrait Keep Warm (Maintien au chaud) etdébranchez la fi che d’alimentation.Préparatifs• Préparez le mélange à gâteau en suivant les indications de votre recette.• Enduisez le panier de cuisson de beurre ou de margarine pour faciliter le démoulage du gâteau.• Versez le mélange à gâteau dans le panier de cuisson, puis égalisez-en la surface.Operations(Cuisson avec la fonction Cake / Brownie (Gâteau / Brownie))Appuyez sur le bouton Menu pour sélectionner la fonction Cake / Brownie (Gâteau / Brownie).• Le 40min (40 minutes) s’affi che sur l’affi cheur ACL (il s’agit du temps de cuisson par défaut pour la fonction Cake (Gâteau).1Appuyez sur le bouton pour régler le temps de cuisson de votre choix.• Vous pouvez sélectionner le temps de cuisson :Fonction gâteau : de 20 à 65 minutes (par incrément de 5 minutes).Fonction brownie : de 1 à 20 minutes (par incrément d’une minute) et de 20 à 65 minutes (par incrément de 5 minutes).• Maintenez le bouton enfoncé pour faire défi ler les chiffres plus rapidement.2.• Le• L’affi cheur ACL indique le temps restant par incrément d’une minute.3La cuisson est terminée• Lorsque la cuisson est terminée, le cuiseur à usage multiple émet des bips etKeep Warm (Maintien au chaud). (Le•chaud)la fonction Keep Warm (Maintien au chaud) et débranchez la fi• Sortez le panier de cuisson de l’appareil, puis laissez-le refroidir pendant 2 à3 minutes. Retournez ensuite le panier de cuisson sur un plateau ou sur une grille.• Décorez la surface du gâteau selon vos préférences.Gant isolantPréparatifs•Placez tous les ingrédients dans le panier de cuisson.• Fermez le couvercle extérieur.Opérations(Cuisson avec la fonction Slow cook / Soup / Stew (Cuisson lente / Soupe / Ragoût))Appuyez sur le bouton Menupour sélectionner la fonction Slow cook / Soup / Stew (Cuisson lente / Soupe / Ragoût).• Le 1h (1 heure 0 minute) s’affi che sur l’affi cheur ACL (il s’agit dutemps de cuisson par défaut pour la fonction Slow cook / Soup / Stew (Cuisson lente / Soupe / Ragoût).1Appuyez sur le boutonpour régler le temps de cuisson de votre choix.• Vous pouvez régler le temps de cuisson de 1 à 12 heures (par incrément de 30 minutes).• Maintenez la pression sur le bouton pour un défi lement plus rapide.2.• Le • L ’affi cheur ACL affi che le temps restant par incrément de 30 minutes puis par incrément d’une minute lorsque le temps de cuisson est inférieur à 1 heure.3La cuisson est terminée• à la fonction Keep Warm (Maintien au chaud)automatiquement).• T Keep Warm (Maintien au chaud) car elle pourrait Keep Warm (Maintien au chaud) etdébranchez la fi che d’alimentation.Opérations(Cuisson avec la fonction White Rice (Riz blanc))Appuyez sur le boutonMenupour sélectionner la fonction White Rice (Riz blanc).• Le 1.• Le • cheur ACL lorsque le temps restant atteint 9 minutes.2La cuisson est terminéeMélangez et aérez le riz.• à la fonction Keep Warm (Maintien au chaud)automatiquement).Maintien au chaudPréparatifs• Ajoutez la quantité d’eau nécessaire.• Placez les aliments à étuver dans le panier d’étuvage ajustable.• Fermez le couvercle extérieur.EauOpérations(Cuisson avec la fonction Steam / Compote (Vapeur / Compote))Appuyez sur le boutonMenupour sélectionner la fonction Steam / Compote (Vapeur / Compote).• Le 10min (10 minutes) s’affi che sur l’affi cheur ACL (il s’agit dutemps de cuisson par défaut pour la fonction Steam / Compote (Vapeur / Compote).1Appuyez sur le boutonpour régler le temps de cuisson de votre choix.• Vous pouvez régler le temps de cuisson de 1 à 60 minutes (par incrément d’une minute).• Maintenez la pression sur le bouton pour un défi lement plus rapide.2.• Le • Après ébullition de l’eau, l’affi cheur ACL affi che le temps restant par incrément d’une minute.3La cuisson est terminéePanier d’étuvage ajustable Correspondance entre la quantité d’eau et le tempsd’étuvage comme ci-dessous sert de guide pour réaliser une performance de cuisson satisfaisante.• à la fonction Keep Warm (Maintien au chaud)automatiquement).• T Keep Warm (Maintien au chaud) car elle pourrait Keep Warm (Maintien au chaud) etdébranchez la fi che d’alimentation.。
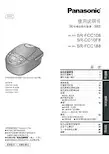
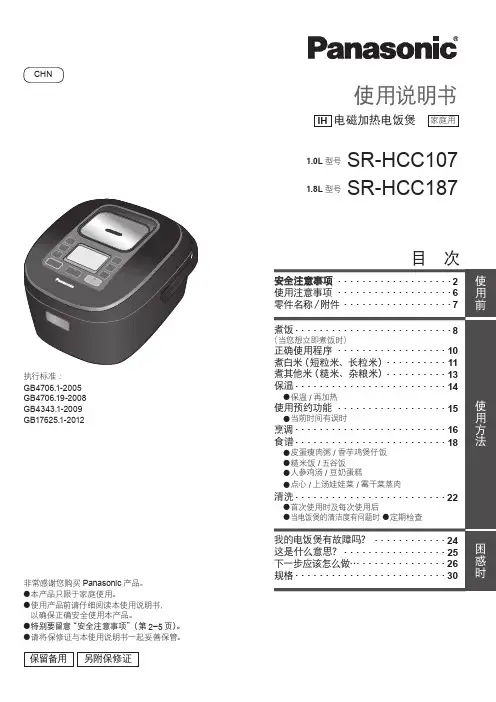
使用说明书目 次●●●●保留备用内含保修证家庭用IH 电磁加热电压力饭煲该使用说明书的最终解释权归本公司所有非常感谢您购买Panasonic的产品本产品只限于家庭使用。
使用产品前,请仔细阅读本使用说明书, 以确保正确安全使用本产品。
特别要留意【安全注意事项】(第2 - 4 页)。
请妥善保管本使用说明书,以便日后查阅。
型号执行标准:GB 4706.1-2005GB 4706.14-2008GB 4706.19-2008扫描二维码关注松下服务官方微信平台在线人工客服一键报修报装服务进度查询获取新品咨询安全注意事项为防止造成人身伤害、财产损失,请务必遵守以下安全注意事项。
■以下图标表示错误操作可导致的危害程度。
■符号的分类及解释如下。
请务必遵守!2● 如电源线或电源插头已损坏或电源插座与电源插头的接口松脱,请勿使用产品。
(以免导致触电或因短路导致火灾。
)→如果电源线损坏,必须用从Panasonic认定 服务店购买的专用组件来更换。
● 请勿损坏电源线或电源插头。
·绝对禁止进行以下操作:损伤、加工、使其接触或靠近高温部、 强行 弯曲、扭转、拉拔、挂在角上、 在其上放置 重物、扎成束、夹入、拉动 电源线移动。
(以免因电源线和电源插头破损而触电,或因短路导致火灾。
)● 请勿以湿手插入或拔掉电源插头。
·接触电源插头或产品前请务必确保手是干燥的。
(以免导致触电或受伤。
)● 请勿将水或其它液体溅到本体插头上。
(以免导致触电或因短路导致火灾)● 请勿让任何人舔本体插头。
(以免导致触电或受伤。
)·特别要留意婴幼儿。
● 务必要单独使用规格为AC 220 V/10 A 的交流电的电源插座。
(以免与其他电器并用,因发热而引起火灾。
)·务必使用规格至少为10 A的接线板。
● 务必要将本体插头、电源插头切实插到底。
(以免导致冒烟、火灾或触电。
)● 本产品应使用单向两极带接地的电源插座, 并保证其可靠接地。

2010年电饭煲散件维修手册(新版本)2010年电饭煲维修手册一、美的电脑煲电路主板应用情况概述………………………….1.1电源主板:(变压器直流电源/开发节能控制直流电源)1.2控制主板:(LED/数码管/液晶显示控制主板)二、重大器件应用及检测介绍………………………………………2.1 线性变压器2.2 三端稳压器/稳压二极管2.3 继电器2.4 可控硅2.5 开关电源管理芯片2.6 快速开关二极管2.7 单片机主控芯片三、电脑煲的使用及保养说明…….……………………………………3.1 电脑煲的正确操作方法.3.2 电脑煲的日常使用保养3.3 电脑煲的日常使用注意事项四、电脑煲各电路板模块原理图及分析………………………………………4.1 电脑煲加热原理4.2 电脑煲电路控制原理4.3 电脑煲工作控制流程4.4 电脑煲电气性能参数4.5 电脑煲各种功能控制原理:4.5.1 线性变压器直流电源电路模块4.5.2 开关节能控制直流电源电路板模块4.5.3 继电器控制电路模块4.5.4 可控硅控制电路模块4.5.5 温度传感电路模块4.5.6 数码显示控制模块4.5.7 液晶显示控制模块4.5.8 蜂鸣器控制模块五、常见故障现象分析……………………………………………………….5.1 不通电5.2 通电不显示5.3 显示异常5.4 煮不熟饭5.5 煮焦饭5.6 煮饭/煮粥溢出5.7 常见故障代码描述六、电脑煲维修实例…………………………………………………………6.1 案例一:不通电6.2 案例二:煮饭不熟6.3 案例三:煮焦饭6.4 案例四:故障报警第一章美的电脑煲电路主板应用情况概述1.1电源主板目前美的电饭煲上用的电源板主要就两种,一种是线性变压器电源,另一种是开关电源。
线性变压器电源的可靠性高、稳定,主要用于中端和低端产品;开关电源性能稳定,而且能效高、体积小,由于成本高,故主要用于中高端产品;由于两种电源方案差异很大,故在后面会单独对其介绍。
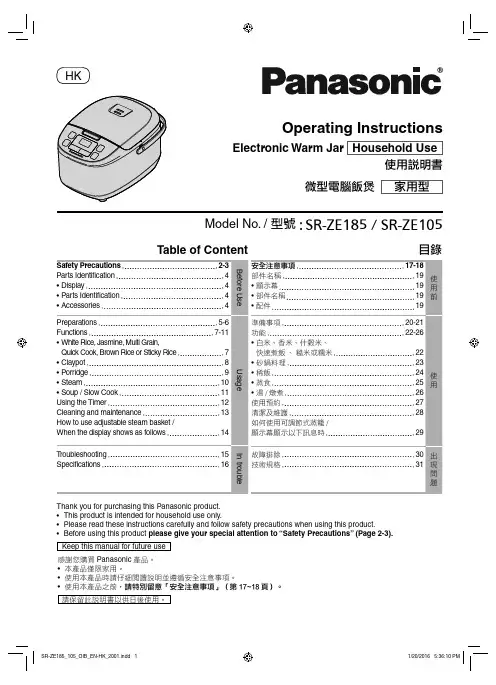
HKOperating InstructionsHousehold UseElectronic Warm Jar 使用說明書家用型微型電腦飯煲Thank you for purchasing this Panasonic product.• This product is intended for household use only.• Please read these instructions carefully and follow safety precautions when using this product.• Before using this product please give your special attention to “Safety Precautions” (Page 2-3).Keep this manual for future use感謝您購買 Panasonic 產品。
•本產品僅限家用。
•使用本產品時請仔細閱讀說明並遵循安全注意事項。
•使用本產品之前,請特別留意「安全注意事項」(第 17~18 頁)。
請保留此說明書以供日後使用。
Model No. / 型號 SR-ZE185 / SR-ZE105:Table of Content目錄2WARNINGIn order to prevent accidents or injuries to the users, other people and damage to property, please follow the instructions below.The following charts indicate the degree of damage caused by wrong operation.CAUTIONPrecaution for UsePlease put in correct amountof rice and water and selectfunctions correctly according tothe operating instructions.(So as to avoid overfl ow of rice water,half-cooked rice or scorched rice).Before using the appliance, theanti-tarnish paper between thepan and the cast heater shouldbe removed.(So as to avoid poor cooking or fi re).Do not put ingredients to becooked directly into the appliancein which no pan is placed. Do notcook without pan.(So as to prevent any impurities fromcausing failure).Do not cover the outer lid withcloth or other objects when theappliance is in use.(So as to avoid deformation, colorchange of the outer lid or failure).Avoid using the appliance underdirect sunlight.(So as to avoid color change).Do not scoop out rice with anymetal object.(So as to avoid scratching the pancoating and causing peeling of thecoating).When there is any overfl owof rice water from thesteam vent, pull out thepower plug immediatelyto disconnect the powersupply. Do not resume theuse until the rice water onthe power plug and theinstrument plug is cleanedwith a dry cloth.The appliance is forhousehold use only. Do notuse it for any commercial orindustrial purposes or anypurposes other than cooking.When power failure occursduring the operation of theappliance, the cooking resultmay be affected.Do not let water spill on thepower plug of the power cord set.(This may result in electric shock).34DisplayPress this button to: 1. Select a cooking function.2. Enter Keep Warm mode.3. Preset timer.4. Start setting cooking timer.5. Cancel the operation.6. Start cooking.Parts Identifi cation51Measure rice with the measuring cup provided.• The volume of the measuring cup is about 180 mL.• For the maximum quantity of rice to be cooked at once, refer to specifi cations in Page 16.Wash the rice till the water turns relatively clear.1Wash the rice quickly with plenty of water and stirring the rice lightly to wash itwhile changing water.2→pour out water), till the water turnsrelatively clear.2ATTENTION• Wash the rice thoroughly. Otherwise, rice crust may appear and the residual rice bran may affect the taste of the rice.Add the washed rice or other ingredients into the pan.• Use water line on the pan to measure cooking quantity as follows :3• In the Soup / Slow Cook function, the total amount of ingredients and water shall not exceed the maximum water line for “White Rice”.• Dry the outside surface of the pan. If it is wet, it may cause noise while cooking. Any foreign matters between the pan and the cast heater may damage the unit.• Please make sure that the pan is on leveled surface.• Please measure water by aligning water line left side and right side.• If rice is too hard or too soft, please adjust water amount according to your personal taste.SR-ZE1856Put the pan into the body and close the outer lid.1In order to closely attach the bottom of pan to thecast heater, please rotate the pan along the directionindicated by the arrow 2 or 3 times.2Please check whether the inner lid is properly attached. (Refer to Page 13)3Close the outer lid until it clicks.4Connect the plugs.1Please insert the instrument plug into the body fi rst.2Connect the power plug. Make sure that both plugsare tightly connected.57Operations(Cooking with the White Rice, Jasmine, Multi Grain,Quick Cook, Brown Rice or Sticky Rice function).button to point to White Rice, Jasmine, Multi Grain, Quick Cook, 12The cooking is overStir and loosen the rice.• Keep Warm function Keep Warm8Operations(Cooking with the Claypot function).button to point to Claypot function.1button.2The cooking is over• Keep Warm functionbutton to exit the Keep Warm function and unplug the power plug.9Operations(Cooking with the Porridge function).button to pointto Porridge function.1button.2The cooking is over• Keep Warm function button to exit the Keep Warm function and unplug the power plug.10Preparations•Add the required amount of water.• Place the adjustable steam basketinto the pan as shown.• Place foods to be steamed into theadjustable steam basket.• Close the outer lid.Correspondence between the amount of water andWaterAdjustablesteam basketOperations(Cooking with the Steam function).button to point to Steam function.indicator and blink (as the default cooking time for Steam function).• Keeping the button pressed will make setting faster.Press button.•minute decrement.3The cooking is over• When cooking is over, the electronic warm jar beeps and automatically switches to the Keep Warm functionbutton to exit the Keep Warm function and unplug the power plug.Preparations• Place all ingredients into the pan. • Close the outer lid.• Keeping the button pressed will make setting faster.• When cooking is over, the electronic warm jar beeps and automatically switches to the Keep Warm function button to exit the Keep Warm function and unplug the power plug.The presetting time is a countdown timer.• Time can be preset 13 hours in advance.ExampleIf the timer is set for 2h, cooking will be completed in* soon asbutton is pressed.Operations• 1Press button to set the timer as your desire.• The fi• The timer will advance 30 minutes each time.• Keeping the button pressed will make setting faster.23Press button.• •When the display shows as followsRice CookingDetailsCooking problemsKeep WarmproblemsNo power Strange sound occurs Too hard Undercooked T oo soft Water overflow Burnt rice at bottomof pan Color change Bad smell T oo dryWrong rice and water proportion.●●●●●●Pull out plug and check the socket.Sound occurs because of water that has stuck to pan. Inadequate washing of rice.●●●●Foreign matters between pan and cast heater.●●●●Cooking with a lot of oil.●●●●●The rice has been warmed more than 5 hours.●●●The outer lid is not securely closed.●●●●●The pan is not adequately washed.●●The power cord is not connected to the socket securely.●●Model No.SR-ZE185SR-ZE105Power Source 220 V ~ 50 HzPowerConsumptionIn the Cooking Function 750 WIn the Keep Warm Function 59.9 W 50.1 W CapacityWhite Rice 2 - 10 cups 1 - 5.5 cups Jasmine 2 - 10 cups 1 - 5.5 cups Multi Grain 2 - 8 cups 1 - 4 cups Claypot2 - 4 cups 1 - 2 cups Quick Cook 2 - 10 cups 1 - 5.5 cups Brown Rice 2 - 6 cups 1 -3 cups Sticky Rice 3 - 6 cups 1 - 3 cups Porridge0.5 - 2 cups0.5 - 1 cup Soup / Slow Cook3.2 L1.8 LDimensions (Width x Length x Height) (approx.)261 x 385 x 241 mm261 x 385 x 201 mmWeight (approx.) 3.5 k g3.1 k g Keep Warm5 hours• For power cord replacement and product repair, please contact Panasonic authorized service center. • The design and specifi cations are subjected to change without prior notice.Function Cooking time (approximate) *1White Rice 40 min Jasmine 35 min Multi Grain 45 min Claypot 35 min Quick Cook*215 min Brown Rice 120 min Sticky Rice 40 min Porridge60 min*1 Cooking time may vary depending on supply voltage, room temperature, kind of rice, cooking quantity, water quantity and water temperature.*2 Rice cooked (white rice at minumum cooking quantity) within 15 minutes. (Under Panasonic test method)警告為了防止使用者或其他人員出現意外或人身傷害或出現財物損害,請遵循以下說明。
17部件布置18包装分解图19维修部品表参考号部件号部件名称及说明数量备注1EAB827AL2左重低音喇叭12EAB827AR2右重低音喇叭1EAK7H12BL2左喇叭SP (左)1EAK7H12BR2右喇叭SP (右)13EUR7635050遥控器1FBL08A12LS 冷却风扇4J0KD00000041噪音过滤器2J0KD00000071铁氧磁芯44J0KF00000018噪音过滤器(小)55J0KG00000014噪音过滤器(大)36K2CK3DH00016电源线1K5D312BL0008L/副保险丝(PF 线路板F902)1K5D802BNA003L/主保险丝(PF 线路板F900F901)27MC106H30F6A 屏体18R6DW/2STA L/干电池2TBMF587模块铭牌(42PV30C)19TBXA39901电源开关(涂装)110TBXA40003搜索按钮111TEK6935门锁112TEKC011调节器113TES4G204电源开关弹簧114TESD060门弹簧1THEL023Z L/带垫螺丝24THEL027N 带垫螺丝(D:3)3THEL035N L/螺丝(高频头:7 PA:4PF:4 挂钩:2)127THEL036N L/螺丝8THTD010N L/螺丝1215TKEA07906面框本体116TKGA5124前面玻璃板(滤光玻璃)117TKKC5175-1导光板118TKKL5231-1盖子419TKKL5269-1调整盖120TKKL5275端子盖121TKKL5276小门122TKKL5277-2孔盖2TKPA79603前面屏(有机玻璃)1TKPA79901面框罩123TKPA80002下部门本体(涂装)124TKPA80701IC 光电窗125TKRA19904A 后盖把手2TKRA34301装饰条(左)1TKRA34304装饰条(右)1TKRA34401A ESC 边角块(右)1TKRA34501A ESC 边角块(左)126TKUX06603后盖本体1TMK18021FELT 2TMKA381FELT2TMM15414-2空中线夹127TMM17499线夹1TMME108扎带1TMME206端子/线夹2TMMX095塑料挂钩2TMMX102M8 支撑件4TMXX023L/芯子支座428TPCB63501包装箱内箱129TPCB63601包装箱内箱底箱130TPD0A9002L 包装箱箱扣8TPDA0848L/缓冲材顶/底(第2重)2TPDA0862-2L/边角保护垫(右)1TPDA0863-2L/边角保护垫(左)131TPDA1023L/缓冲材(顶面)132TPDA1024L/缓冲材(底面)133TPDF0764L/附属品箱134TPDF1268内箱顶板1TPDF1269L/顶板(第2重)135TPEH165塑料袋1TPGA2490L/PC (第2重)1TPGA2500L/PC 底箱(第2重)136TQEF035袋子1TQFC527L/线夹说明标签137TQZC645说明书138TQZF163保修证1TSXL139SUS-FPC8TSXL214柔性导线(FPC)(D-C1)1TSXL216SCN-FPC8TSXL222L/柔性导线(C1-C2)2TSXL289柔性导线(L FPC)(D-C3)1TSXL290柔性导线(FPC)(D-C4)1TSXL308柔性导线(L FPC)(D-C2)1TSXL323FPC(DG7-G7)1TXAUX01UFSC 高频头块(半成品)1TXFUX010QKS 玻璃按压金具上(备品)1TXFUX020QKSA 玻璃按压金具下(备品)1TXFUX03UHSE 玻璃按压金具左(备品)1TXFUX04UHSU 玻璃按压金具(备品)1TXJ/G5UHSE G5-(H9)连线1TXJ/P20QJS SC2-P2连线1TXJ/P7QCSU L/PA7-P71TXJ/W1UHSE L/PA1-WR/WL 连线(带芯)1TXJC320QJS L/SS32-C321TXJD120QCS L/PA12-D121TXJD200QBS SC20-D20连线1TXJD250QJS L/D25-P251TXJD270QJS L/D27-P271TXJDG12UHSB DG12-S4/K12连线(带芯)1TXJDG18UGSE DG18-(G18)连线1TXJDG3QFSH DG3-D3连线1TXJFAN0QKS L/FAN-PA2TXJFGN0QCS AC 引入-接地连接板1TXJFN10QKS L/FAN-PA2TXJG18UHSE G18-(DG18)连线1TXJH10QCSE H10-T10连线1TXJH11QCSC H11-T11连线1TXJJG3UFSA L/DG10-JG31TXJK24QKSU K24-C24连线1TXJP110QJS L/P11-SS111TXJP120QJS L/P12-SS121TXJP230QJS SC23-P23连线1TXJPA1UHSE PF10-PA10连线1TXJPA20QCS PA2-DG2连线1TXJPA3UHSE L/PA3-SPL/SPR 1TXJPA40QCS L/PA4-D41TXJPA50QKS L/PA5-P51TXJPA6UJSE PA6-DG6连线1TXJPA8QCSU PA8-DG8连线1TXJPF10QCS AC 引入-PF11TXJPF20QKS PF2-P9连线1TXJS340QKS S34-SS34连线1TXJS420QKS L/SS42-C421TXJS450QMS-1L/SU45-SC45/SD46-SC462TXJTNRQCSC TA-TB1TXN/D1UFSC D 线路板(半成品)包装入1TXN/G1UFSC G 线路板(半成品)包装入1TXN/K1UFSC K 线路板(半成品)包装入1TXN/P1UFSC P 线路板(半成品)包装入1TXN/S1UFSC S 线路板(半成品)包装入1TXNC11UFSC C1线路板(半成品)包装入1TXNC21UFSC C2线路板(半成品)包装入1TXNC31UFSC C3线路板(半成品)包装入1TXNC41UFSC C4线路板(半成品)包装入1TXNDG1UFSC DG 线路板(完成品)1TXNJG1UGSC JG 线路板(半成品)包装入1TXNPA1UFSC PA 线路板(半成品)包装入1TXNPF1UFSC PF 线路板(半成品)包装入1TXNSC1UFSC SC 线路板(半成品)包装入1TXNSD1UFSC SD 线路板(半成品)包装入1TXNSS1UFSC SS 线路板(半成品)包装入1TXNSU1UFSC SU 线路板(半成品)包装入1XTB4+10A L/螺丝(前面玻璃按压:22)22XTB4+12AFZ 螺丝20XTB4+12J L/螺丝(SP:12 SCB:4 FS:7PBM:2 FGM:4)29XTB4+15A 螺丝6XTB4+15AFZ L/螺丝(CAB-BC)10XTB4+20A L/螺丝4XTV3+10JFZ 螺丝3XTW3+8T L/螺丝(导光板)2XTW4+35D 螺丝(工艺面框)10XTW4+Z15D L/SP 螺丝7XYC4+FJ35FZ L/螺丝11XYN3+F10L/螺丝(支架-玻璃按压金具(下))2XYN3+F10FZ L/螺丝(AC 接口:2)2XYN3+F8L/螺丝40XYN4+E8接地螺丝1XYN5+C20L/带垫螺丝(支架)8参考号部件号部件名称及说明数量备注20更换部件清单20.1.更换部件清单注意事项20.2.电器部件更换清单参考号部件号部件名称及说明件数备注C11K1MN80B00002连接接头1C12K1MN20B0004320P 连接接头1C21K1MN80B00002连接接头1C22K1MN20B0004320P 连接接头1C31K1MN80B00002连接接头1C32K1KA12A0022712P 连接接头1C33K1MN20B0004320P 连接接头1C41K1MN80B00002连接接头1C42K1KA04A001994P 连接接头1C43K1MN20B0004320P 连接接头1C44K1KA08A002328P 连接接头1C001F2A0J1020040 E 1000UF,6.3V1C002,03F2A1H100A182 E 10UF,50V2C004F2A0J1020040 E 1000UF,6.3V1C006ECJ1VC1H220J C 22PF,J,50V1C007ECJ1VF1C104Z C 0.1UF,Z,16V1C009ECJ1VF1H104Z C 0.1UF,Z,50V1C013,16ECJ1VF1C104Z C 0.1UF,Z,16V2C017ECJ3VB1C474K C 0.47UF,K,16V1C018,19ECJ1VC1H330J C 33PF,J,50V2C020ECJ2VF1C104Z C 0.1UF,Z,16V1C021ECJ1VC1H101J C 100PF,J,50V1C022F1K0J3350002 C 33UF,J,25V1C023ECJ1VF1H102Z C 1000PF,Z,50V1C024ECJ1VC1H221J C 220PF,J,50V1C051ECJ2VF1C104Z C 0.1UF,Z,16V1C052,53ECJ1VC1H330J C 33PF,J,50V2C054ECJ1VC1H220J C 22PF,J,50V1C055F2A0J1020040 E 1000UF,6.3V1C056ECJ1VF1C104Z C 0.1UF,Z,16V1C058F2A1H100A182 E 10UF,50V1C059ECJ1VF1H104Z C 0.1UF,Z,50V1C063F2A1H100A182 E 10UF,50V1C064,67ECJ1VF1C104Z C 0.1UF,Z,16V2C068ECJ3VB1C474K C 0.47UF,K,16V1C069F2A0J1020040 E 1000UF,6.3V1C070ECJ1VC1H101J C 100PF,J,50V1C071F1K0J3350002 C 33UF,J,25V1C300F2H1C470A009 E 47UF,16V1C301ECJ3YB0J106M C 10UF,M,6.3V1C309ECJ1VB1H103K C 0.01UF,K,50V1C401F0CAF105A021 C 1UF,250V1C402ECJ2XC1H101J C 100PF,J,50V1C403ECKCNA222MEB C 2200PF,M1C404F0CAF105A021 C 1UF,250V1C407EEUEB2W220B E 22UF,450V 1C408F2A1H470A123 E 47UF,50V1C409F0CAF105A021 C 1UF,250V1C410F2A1H470A123 E 47UF,50V1C411F2A1H100A123 E 10UF,50V1C412ECJ2XB1H103K C 0.01UF,K,50V1C413ECJ2XB1H104K C 0.1UF,K,50V1C416F1J1V474A001 C 0.47UF,35V1C417F2A1H100A123 E 10UF,50V1C419ECJ2XB1H104K C 0.1UF,K,50V1C421,22ECJ2XB1H103K C 0.01UF,K,50V2C423ECJ2XB1H472K C 4700PF,K,50V1C424,25ECJ3YB1E105K C 1UF,K,25V2C426ECJ2XC1H471J C 470PF,J,50V1C427F1J1A1050002 C 1UF,Z,50V1C428ECJ2XC1H221J C 220PF,J,50V1C429,30F1K2J1530002 C 0.15PF,J,630V2C431ECJ2XB1H102K C 1000PF,K,50V1C432,36F1J1C1050011 C 1UF,Z,50V2C440F2A1H100A123 E 10UF,50V1C443,44F1A3A102A040 C 1000PF,J,1KV2C445F1J1C1050011 C 1UF,Z,50V1C446,48F2B2W3310006 C 330UF,450V2C449,50F1A3A102A040 C 1000PF,J,1KV2C451F1A3A101A040 C 100PF,J,1KV1 C455F1A3A221A040 E 220UF,1KV1 C457ECWH8203RHV P 0.020PF,J,8KV1 C458ECWH8683RHV P 0.068PF,J,8KV1 C459F1K2J1530002 C 0.15PF,J,630V1C460,61F1A3A331A039 E 330UF,1KV2C462ECJ3YB1E105K C 1UF,K,25V1C463ECJ2XC1H220J C 22UF,J,50V1C464ECJ2XB1H104K C 0.1UF,K,50V1C465ECKDNA471KB7 C 470PF,Z,1C501,02ECJ2XB1H103K C 0.01UF,K,50V2C503,04ECJ2XB1H104K C 0.1UF,K,50V2C506-08ECJ2XB1H103K C 0.01UF,K,50V3C509F2A1E101A097 E 100UF 25V1C511F1J1C1050011 C 1UF,Z,50V1C513,14ECJ2XC1H471J C 470PF,J,50V2C515EEUFC1A102 E 1000UF,10V1C516F1J1A1050002 C 1UF,Z,50V1C517ECA1EM221 E 220UF,25V1C518F2A1E470A097 E 47UF,25V1C521F2A1H100A123 E 10UF,50V1C522ECJ2XB1H103K C 0.01UF,K,50V1C523F2A1E101A097 E 100UF 25V1C524EEUEB1H220SB E 22UF,50V 1C525ECJ2XB1H103K C 0.01UF,K,50V1C526ECJ2XB1H104K C 0.1UF,K,50V1C527ECJ2XB1H102K C 1000PF,K,50V1C528ECJ2XB1H104K C 0.1UF,K,50V1C529F2A1E101A097 E 100UF 25V1C530ECJ2VB1H333K C 0.033UF,K,50V1C531,32ECJ2XB1H104K C 0.1UF,K,50V2C534ECJ2XC1H681J C 680PF,J,50V1C535ECJ2XB1H103K C 0.01UF,K,50V1C536ECJ2XB1H104K C 0.1UF,K,50V1C537ECJ2XB1H102K C 1000PF,K,50V1C538ECJ2XB1H103K C 0.01UF,K,50V1C539ECJ2VB1H333K C 0.033UF,K,50V1C540ECJ2XC1H152J C 1500PF,J,50V1C541,44F1J1C1050011 C 1UF,Z,50V2C546F2A1E101A097 E 100UF 25V1C547ECJ2VB1H333K C 0.033UF,K,50V1C549F1J2E1030004 C 0.1PF,J,250V1C550F2A1E681A099 E 680UF,25V1C552F1J1C1050011 C 1UF,Z,50V1C553,54ECJ2XB1H104K C 0.1UF,K,50V2C555ECA2AHG102 E 1000UF,100V1C556F2A1C152A126 E 1500UF,16V1C557F2A1E681A099 E 680UF,25V1C558F2B2D1720001 E 1700UF,200V1C559ECJ2XB1H104K C 0.1UF,K,50V1C560ECA2AHG102 E 1000UF,100V1C561ECJ2XB1H103K C 0.01UF,K,50V1C562F2B2D1720001 E 1700UF,200V1C565F2A1E4710065 E 470UF,25V1C573F1J1C1050011 C 1UF,Z,50V1C574EEUFC0J122 E 1200UF,6.3V1C576F2A1E470A097 E 47UF,25V1C577F2A2A101A023100YXF101MK1C578F2A1E470A097 E 47UF,25V1C579ECJ2XB1H223K C 0.022UF,K,50V1C580ECJ2XB1H103K C 0.01UF,K,50V1C581ECJ2XB1H223K C 0.022UF,K,50V1C583ECJ2XB1H103K C 0.01UF,K,50V1C585,86ECJ2XB1H104K C 0.1UF,K,50V2C587ECJ2XB1H103K C 0.01UF,K,50V1C598F2A1E470A097 E 47UF,25V1C599ECJ2XB1H104K C 0.1UF,K,50V1C600,01ECJ2XB1H103K C 0.01UF,K,50V2C602ECJ2XB1H102K C 1000PF,K,50V1C603,04ECJ2XB1H104K C 0.1UF,K,50V2C605ECJ2XB1H103K C 0.01UF,K,50V1C606ECJ2XB1H102K C 1000PF,K,50V1C607F1J1C1050011 C 1UF,Z,50V1C608,09ECJ2XB1H103K C 0.01UF,K,50V2C614F2A1H100A123 E 10UF,50V1C901ECQU2A105BN9P 1UF,250V1C902ECQU2A224BN9P 0.22UF,250V1C903ECQU2A105BN9P 1UF,250V1C910ECKCNA221MBB C 220PF,M1参考号部件号部件名称及说明件数备注C911ECKCNA221KB7C 220PF,M,1C914ECKCNA221MBB C 220PF,M 1C915ECQU2A224BN9P 0.22UF,250V 1C916,17ECKCNA471KB7 C 470PF,Z,2C920EETHC2W151J E 150PF,450V 1C921EEUFC1H330B E 33PF,50V 1C922ECJ2VF1H104Z C 0.1UF,Z,50V 1C923ECQF4103JZH P 0.01UF,250V 1C924ECKW3D471KBR C 470PF,K,2KV 1C926ECJ2VC1H471J C 470PF,J,50V 1C927ECJ2VC1H221J C 220PF,J,50V 1C928ECJ2VC1H222J C 2200PF,J,50V 1C929ECA1HHG100B E 10UF,50V1C930ECJ2VF1H103Z C 0.01UF,Z,50V 1C931ECJ2VC1H151J C 150PF,J,50V 1C970ECKR3A331KBP C 330PF,K,1KV 1C971EEUFC1V122B E 1.2UF,35V 1C972ECKR3A331KBP C 330PF,K,1KV 1C973EEUFC1E102E E 1000UF,25V 1C974ECJ2VB1H332K C 3300PF,K,50V 1C990ECA1HHG100B E 10UF,50V 1C1000ECJ1VB1C104K C 0.1UF,Z,16V 1C1001EEEHB0J470R C 47PF,J,6.3V 1C1002ECJ1VB1C104K C 0.1UF,Z,16V 1C1003EEEHB0G221P C 220PF,J,4V 1C1004ECJ1VB1C104K C 0.1UF,Z,16V 1C1005EEEHB1C470P C 47PF,J,16V 1C1006ECJ1VB1C104K C 0.1UF,Z,16V 1C1007EEEHB0G101R C 100PF,J,4V 1C1008EEEHB1C470P C 47PF,J,16V 1C1009ECJ1VB1C104K C 0.1UF,Z,16V 1C1013ECJ1VF1C104Z C 0.1UF,Z,16V 1C1014EEEHB0J101P C 100PF,J,6.3V 1C1016,17ECJ1VF1C104Z C 0.1UF,Z,16V 2C1018EEEHB0J470R C 47PF,J,6.3V 1C1019ECJ1VF1C104Z C 0.1UF,Z,16V 1C1020EEEHB1H4R7R C 4.7PF,J,50V 1C1021,23ECJ1VB1C104K C 0.1UF,Z,16V 2C1024EEEHB0J101P C 100PF,J,6.3V 1C1025ECJ2VC1H102J C 1000PF,J,50V 1C1027ECJ1VF1C104Z C 0.1UF,Z,16V 1C1028ECJ1VB1C104K C 0.1UF,Z,16V 1C1029,30ECJ2VC1H330J C 33PF,J,50V 2C1031ECJ2YB1H563K C 0.056UF,K,50V 1C1032EEEHB0G101R C 100PF,J,4V 1C1033ECJ1VF1H104Z C 0.1UF,Z,50V 1C1034EEEHB0J101P C 100PF,J,6.3V 1C1035ECJ2VF1C105Z C 6800PF,K,50V 1C1036EEEHB0G221P C 220PF,J,4V 1C1037EEEHP1C100R C 10PF,J,16V 1C1038-40ECJ1VF1C104Z C 0.1UF,Z,16V 3C1041EEEHB1C470P C 47PF,J,16V 1C1042ECJ1VF1C104Z C 0.1UF,Z,16V 1C1044ECJ1VB1C104K C 0.1UF,Z,16V 1C1045ECJ1VC1H151J C 150PF,J,50V 1C1046EEEHB1C100R C 10PF,J,16V 1C1047EEEHB0G221P C 220PF,J,4V 1C1048-50ECJ1VF1C104Z C 0.1UF,Z,16V 3C1051EEEHB0G101R C 100PF,J,4V 1C1052ECJ1VB1H103K C 0.01UF,K,50V 1C1053ECJ1VF1C104Z C 0.1UF,Z,16V 1C1054EEEHB0G221P C 220PF,J,4V 1C1055ECJ1VF1C104Z C 0.1UF,Z,16V 1C1057,58ECJ1VF1C104Z C 0.1UF,Z,16V 2C1060,62ECJ1VF1C104Z C 0.1UF,Z,16V 2C1063ECJ1VC1H220J C 22PF,J,50V 1C1064ECJ1VF1C104Z C 0.1UF,Z,16V 1C1065ECJ1VC1H220J C 22PF,J,50V 1C1066ECJ1VF1C104Z C 0.1UF,Z,16V 1C1068-73ECJ1VF1C104Z C 0.1UF,Z,16V 6C1075ECJ2VC1H101J C 100PF,J,50V 1C1076ECJ1VF1C104Z C 0.1UF,Z,16V 1C1077EEEHB1C100R C 10PF,J,16V 1C1078ECJ1VF1C104Z C 0.1UF,Z,16V 1C1081EEEHB0G101R C 100PF,J,4V 1C1082ECJ1VC1H221JC 220PF,J,50V1C1083,84ECJ1VF1C104Z C 0.1UF,Z,16V 2C1086-89ECJ1VF1C104Z C 0.1UF,Z,16V 4C1090ECJ3YB1A335K C 0.033UF,K,10V 1C1092ECJ1VF1C104Z C 0.1UF,Z,16V 1C1093ECJ1VB1H103K C 0.01UF,K,50V 1C1152ECJ1VB1C104K C 0.1UF,Z,16V 1C1201ECJ2VF1C105Z C 6800PF,K,50V 1C1202ECJ1VC1H221J C 220PF,J,50V 1C1203ECJ1VC1H101J C 100PF,J,50V 1C1204ECJ1VC1H221J C 220PF,J,50V 1C1205ECJ1VC1H101J C 100PF,J,50V 1C1206,07ECJ1VC1H221J C 220PF,J,50V 2C1208ECJ1VC1H101J C 100PF,J,50V 1C1209ECJ1VC1H221J C 220PF,J,50V 1C1210EEEHB0G221P C 220PF,J,4V 1C1211EEEHB0G101R C 100PF,J,4V 1C1231EEEHB0J101P C 100PF,J,6.3V 1C1234ECJ1VF1H103Z C 0.01UF,Z,50V 1C1235,36ECJ1VC1H271J C 270PF,J,50V 2C1238,39ECJ1VC1H101J C 100PF,J,50V 2C1240EEEHB1C101P C 100PF,J,16V 1C1241EEEHB0J221UP C 220PF,J,6.3V 1C1242ECJ1VB1C104K C 0.1UF,Z,16V 1C1254ECJ1VC1H101J C 100PF,J,50V 1C1270ECJ2VF1C104Z C 0.1UF,Z,16V 1C1271-73ECJ2VF1C105Z C 6800PF,K,50V 3C1274EEEHB1C470P C 47PF,J,16V 1C1275-81ECJ2VF1C105Z C 6800PF,K,50V 7C1301,02ECJ1VB1C104K C 0.1UF,Z,16V 2C1306,08EEEHB1C470P C 47PF,J,16V 2C1309-12EEEHB0J470R C 47PF,J,6.3V 4C1315-17EEEHB0G101R C 100PF,J,4V 3C1318,19EEEHB1C470P C 47PF,J,16V 2C1320EEEHB0G101R C 100PF,J,4V 1C1324EEEHB1E330P C 33PF,J,25V 1C1325ECJ1VF1H103Z C 0.01UF,Z,50V 1C1326,27ECJ1VF1C104Z C 0.1UF,Z,16V 2C1329EEEHB1H1R0R C 1.0PF,J,50V 1C1332,33EEEHB0G101R C 100PF,J,4V 2C1334EEEHB0G221P C 220PF,J,4V 1C1338EEEHB0G101R C 100PF,J,4V 1C1339EEEHB0G221P C 220PF,J,4V 1C1340ECJ1VB1C105K C 0.01UF,K,16V 1C1341EEEHB1C100R C 10PF,J,16V 1C1342-44EEEHB0G101R C 100PF,J,4V 3C1345EEEHB0G221P C 220PF,J,4V 1C1348EEEHB0J470R C 47PF,J,6.3V 1C1350EEEHB0G101R C 100PF,J,4V 1C1351ECJ1VF1A105Z C 1UF,Z,10V 1C1352,53EEEHB0G221P C 220PF,J,4V 2C1354EEEHB0J470R C 47PF,J,6.3V 1C1355EEEHB0G101R C 100PF,J,4V 1C1356ECJ1VF1A105Z C 1UF,Z,10V 1C1357EEEHB0G101R C 100PF,J,4V 1C1358,59ECJ1VF1A105Z C 1UF,Z,10V 2C1360EEEHB1C100R C 10PF,J,16V 1C1361EEEHB0G101R C 100PF,J,4V 1C1362ECJ1VF1A105Z C 1UF,Z,10V 1C1363ECJ1VB1H103K C 0.01UF,K,50V 1C1365ECJ1VB1C103K C 0.01UF,K,16V 1C1366,67ECJ1VF1A105Z C 1UF,Z,10V 2C1368ECJ1VB1H103K C 0.01UF,K,50V 1C1369ECJ1VB0J105K C 1UF,K,16V 1C1370ECJ1VF1A105Z C 1UF,Z,10V 1C1371ECJ1VC1H150J C 15PF,J,50V 1C1375ECJ1VF1C104Z C 0.1UF,Z,16V 1C1378,79ECJ1VC1H680J C 68PF,J,50V 2C1382EEEHB0J470R C 47PF,J,6.3V 1C1383ECJ1VC1H150J C 15PF,J,50V 1C1386ECJ1VB1H102K C 1000PF,K,50V 1C1387,88ECJ1VC1H101J C 100PF,J,50V 2C1389,90ECJ1VC1H470J C 47PF,J,50V 2C1393,95ECJ1VC1H220J C 22PF,J,50V 2C1398ECJ1VF1C104Z C 0.1UF,Z,16V 1C1402,03ECJ1VF1A105Z C 1UF,Z,10V 2C1404,05ECJ1VB1C104K C 0.1UF,Z,16V 2C1408,09ECJ1VF1A105Z C 1UF,Z,10V 2C1410-13ECJ1VB0J225K C 2.2UF,K,6.3V4 C1416ECJ1VB1H103K C 0.01UF,K,50V1 C1417F1K0J3350002 C 33UF,J,25V1 C1418ECJ1VC1H680J C 68PF,J,50V1 C1419ECJ1VC1H100D C 10PF,D,50V1 C1420ECJ1VC1H050D C 5PF,D,50V1 C1421,22ECJ1VC1H180J C 18PF,J,50V2 C1424ECJ1VC1H330J C 33PF,J,50V1 C1425ECJ1VC1H101J C 100PF,J,50V1 C1426ECJ1VB1H103K C 0.01UF,K,50V1 C1427ECJ1VC1H101J C 100PF,J,50V1 C1428ECJ1VF1A105Z C 1UF,Z,10V1 C1429,30ECJ1VC1H180J C 18PF,J,50V2 C1431,32ECJ1VC1H101J C 100PF,J,50V2 C1433,34ECJ1VF1A105Z C 1UF,Z,10V2 C1437ECJ1VB1C104K C 0.1UF,Z,16V1 C1438-40ECJ1VF1A105Z C 1UF,Z,10V3 C1441ECJ1VB1C104K C 0.1UF,Z,16V1 C1442ECJ1VF1A105Z C 1UF,Z,10V1 C1444-49ECJ1VF1A105Z C 1UF,Z,10V6 C1452,53ECJ1VF1A105Z C 1UF,Z,10V2 C1454ECJ1VB1H103K C 0.01UF,K,50V1 C1457ECJ1VF1H103Z C 0.01UF,Z,50V1 C1464EEEHB1C470P C 47PF,J,16V1 C1466ECJ1VB1C104K C 0.1UF,Z,16V1 C1467ECJ1VC1H820J C 82PF,J,50V1 C1468ECJ1VB1C104K C 0.1UF,Z,16V1 C1471,76ECJ1VB1C104K C 0.1UF,Z,16V2 C1479ECJ1VF1A105Z C 1UF,Z,10V1 C1482,83ECJ1VF1A105Z C 1UF,Z,10V2 C1489,96ECJ1VF1A105Z C 1UF,Z,10V2 C1501ECJ1VC1H150J C 15PF,J,50V1 C1502ECJ1VF1A105Z C 1UF,Z,10V1 C1505ECJ1VC1H180J C 18PF,J,50V1 C1510ECJ1VC1H470J C 47PF,J,50V1 C1512ECJ1VF1A105Z C 1UF,Z,10V1 C1514-23ECJ1VF1A105Z C 1UF,Z,10V10 C1525-27ECJ1VF1A105Z C 1UF,Z,10V3 C1528,29ECJ1VB1C104K C 0.1UF,Z,16V2 C1530ECJ1VF1A105Z C 1UF,Z,10V1 C1531ECJ1VB1C104K C 0.1UF,Z,16V1 C1533,34ECJ1VF1A105Z C 1UF,Z,10V2 C1535ECJ1VC1H470J C 47PF,J,50V1 C1536ECJ1VB1C104K C 0.1UF,Z,16V1 C1537,38ECJ1VF1A105Z C 1UF,Z,10V2 C1539,40ECJ1VB1C104K C 0.1UF,Z,16V2 C1541ECJ1VF1A105Z C 1UF,Z,10V1 C1542ECJ1VB1C104K C 0.1UF,Z,16V1 C1543ECJ1VF1A105Z C 1UF,Z,10V1 C1545ECJ1VB1C104K C 0.1UF,Z,16V1 C1546,47ECJ1VF1A105Z C 1UF,Z,10V2 C1549-53ECJ1VF1A105Z C 1UF,Z,10V5 C1554ECJ1VB1C104K C 0.1UF,Z,16V1 C1555,57ECJ1VF1A105Z C 1UF,Z,10V2 C1559ECJ1VF1A105Z C 1UF,Z,10V1 C1561-63ECJ1VF1A105Z C 1UF,Z,10V3 C1565-70ECJ1VF1A105Z C 1UF,Z,10V6 C1572-74ECJ1VF1A105Z C 1UF,Z,10V3 C1581ECJ3YB0J335M C 3.3UF,6.3V1 C1583ECJ2YB0J106K C 10UF,Z,5V1 C1584EEEHB0G221P C 220PF,J,4V1 C1587,89ECJ1VF1A105Z C 1UF,Z,10V2 C1590,91ECJ1VC1H680J C 68PF,J,50V2 C1592ECJ1VB1C103K C 0.01UF,K,16V1 C1593,94ECJ1VC1H330J C 33PF,J,50V2 C1595ECJ1VF1A105Z C 1UF,Z,10V1 C1596ECJ1VC1H101J C 100PF,J,50V1 C1597ECJ1VB1C103K C 0.01UF,K,16V1 C1598,99ECJ1VB1H103K C 0.01UF,K,50V2 C1600ECJ1VB1H103K C 0.01UF,K,50V1 C1601ECJ1VF1A105Z C 1UF,Z,10V1 C1602ECJ1VC1H101J C 100PF,J,50V1 C1603ECJ1VF1A105Z C 1UF,Z,10V1 C1604ECJ1VB1H103K C 0.01UF,K,50V1 C1605EEEHB1C470P C 47PF,J,16V1 C1609ECJ1VF1A105Z C 1UF,Z,10V1 C1610ECJ1VB1C103K C 0.01UF,K,16V1C1611ECJ1VC1H101J C 100PF,J,50V1 C1613ECJ1VF1A105Z C 1UF,Z,10V1 C1614ECJ1VC1H680J C 68PF,J,50V1 C1615ECJ1VB1C104K C 0.1UF,Z,16V1 C1616ECJ1VF1A105Z C 1UF,Z,10V1 C1618-23ECJ1VF1A105Z C 1UF,Z,10V6 C1625ECJ1VC1H330J C 33PF,J,50V1 C1626EEEHB1H1R0R C 1.0PF,J,50V1 C1628-30ECJ1VF1A105Z C 1UF,Z,10V3 C1631ECJ1VF1H103Z C 0.01UF,Z,50V1 C1632,33ECJ1VF1A105Z C 1UF,Z,10V2 C1634,35ECJ1VF1H103Z C 0.01UF,Z,50V2 C1636-40ECJ1VF1A105Z C 1UF,Z,10V5 C1641ECJ1VB1C103K C 0.01UF,K,16V1 C1642-51ECJ1VF1A105Z C 1UF,Z,10V10 C1652ECJ1VB1H103K C 0.01UF,K,50V1 C1653ECJ1VF1A105Z C 1UF,Z,10V1 C1654ECJ1VB1C104K C 0.1UF,Z,16V1 C1655ECJ1VB1H103K C 0.01UF,K,50V1 C1656ECJ1VF1A105Z C 1UF,Z,10V1 C1657ECJ1VB1H103K C 0.01UF,K,50V1 C1658ECJ1VF1A105Z C 1UF,Z,10V1 C1659EEEHB1H1R0R C 1.0PF,J,50V1 C1660-74ECJ1VF1A105Z C 1UF,Z,10V15 C1675ECJ1VB1H103K C 0.01UF,K,50V1 C1677-79ECJ1VF1A105Z C 1UF,Z,10V3 C1680ECJ1VB1C103K C 0.01UF,K,16V1 C1681ECJ1VF1A105Z C 1UF,Z,10V1 C1682EEEHB0G101R C 100PF,J,4V1 C1683-90ECJ1VC1H101J C 100PF,J,50V8 C1691-99ECJ1VF1H103Z C 0.01UF,Z,50V9 C1700ECJ1VF1H103Z C 0.01UF,Z,50V1 C1705-11ECJ1VF1H103Z C 0.01UF,Z,50V7 C1712ECJ1VB1H103K C 0.01UF,K,50V1 C1713ECJ1VF1H103Z C 0.01UF,Z,50V1 C1717-19ECJ1VF1H103Z C 0.01UF,Z,50V3 C1725,27ECJ1VB0J105K C 1UF,K,16V2 C1728ECJ1VB1C104K C 0.1UF,Z,16V1 C1729EEEHP1C100R C 10PF,J,16V1 C1730ECJ1VF1C104Z C 0.1UF,Z,16V1 C1731,32ECJ1VB0J105K C 1UF,K,16V2 C1733ECJ1VF1C104Z C 0.1UF,Z,16V1 C1734ECJ1VF1A105Z C 1UF,Z,10V1 C1735EEEHP1C100R C 10PF,J,16V1 C1736ECJ1VB1C104K C 0.1UF,Z,16V1 C1737EEEHP1C100R C 10PF,J,16V1 C1738ECJ1VB0J105K C 1UF,K,16V1 C1739EEEHP1C100R C 10PF,J,16V1 C1741ECJ3YB0J685M C 6.8UF,6.3V1 C1742ECJ1VF1H103Z C 0.01UF,Z,50V1 C1743EEEHP1C100R C 10PF,J,16V1 C1744EEEHB1C470P C 47PF,J,16V1 C1745ECJ1VB0J105K C 1UF,K,16V1 C1747ECJ1VB1C104K C 0.1UF,Z,16V1 C1750ECJ1VF1A105Z C 1UF,Z,10V1 C1751ECJ1VC1H101J C 100PF,J,50V1 C1753ECJ1VC1H220J C 22PF,J,50V1 C1755ECJ1VC1H390J C 39PF,J,50V1 C1757ECJ1VC1H150J C 15PF,J,50V1 C1758ECJ1VC1H080C C 8PF,C,50V1 C1760ECJ1VF1A105Z C 1UF,Z,10V1 C1761ECJ1VC1H470J C 47PF,J,50V1 C1762,63ECJ1VB0J105K C 1UF,K,16V2 C1765ECJ1VC1H330J C 33PF,J,50V1 C1766ECJ1VC1H101J C 100PF,J,50V1 C1767ECJ1VC1H330J C 33PF,J,50V1 C1771ECJ1VF1C104Z C 0.1UF,Z,16V1 C1772ECJ1VC1H390J C 39PF,J,50V1 C1773ECJ1VC1H150J C 15PF,J,50V1 C1774ECJ3YB0J685M C 6.8UF,6.3V1 C1776,77ECJ1VB0J105K C 1UF,K,16V2 C1780ECJ1VF1A105Z C 1UF,Z,10V1 C1781EEEHB1C470P C 47PF,J,16V1 C1783-85ECJ1VB1C104K C 0.1UF,Z,16V3 C1786ECJ1VC1H101J C 100PF,J,50V1 C1807-14ECJ1VF1H103Z C 0.01UF,Z,50V8 C1816ECJ1VB1C104K C 0.1UF,Z,16V1C1817-20ECJ1VF1H103Z C 0.01UF,Z,50V4 C1827,28ECJ1VB1C104K C 0.1UF,Z,16V2 C1850ECJ1VB1C103K C 0.01UF,K,16V1 C1854EEEHB1C470P C 47PF,J,16V1 C1855ECJ1VF1H104Z C 0.1UF,Z,50V1 C1863ECJ1VB1C104K C 0.1UF,Z,16V1 C1865,66ECJ1VF1C104Z C 0.1UF,Z,16V2 C1867,68EEEHB0G101R C 100PF,J,4V2 C1869ECJ1VF1H104Z C 0.1UF,Z,50V1 C1870ECJ1VF1H103Z C 0.01UF,Z,50V1 C1872,73EEEHB0G101R C 100PF,J,4V2 C1874,75EEFCD0G560R 56UF,2 C1876ECJ1VC1H471J C 470PF,J,50V1 C1877ECJ1VF1C104Z C 0.1UF,Z,16V1 C1878ECJ3YB0J106M C 10UF,M,6.3V1 C1881,83ECJ1VF1C104Z C 0.1UF,Z,16V2 C1884ECJ2VF1C104Z C 0.1UF,Z,16V1 C1885ECJ1VF1A105Z C 1UF,Z,10V1 C1886ECJ3YB1C225K C 2.2UF,16V1 C1887ECJ3YB0J106M C 10UF,M,6.3V1 C1888F1K1C4750018 C 0.047UF,K,10V1 C1889ECJ3YB0J106M C 10UF,M,6.3V1 C1890ECJ2VB1H103K C 0.01UF,K,50V1 C1891ECJ1VF1A105Z C 1UF,Z,10V1 C1892ECJ3VB1C474K C 0.47UF,K,16V1 C1893,94ECJ2VB1H103K C 0.01UF,K,50V2 C1895-97ECJ1VF1H104Z C 0.1UF,Z,50V3 C1898EEEHB1C470P C 47PF,J,16V1 C1899ECJ1VF1H104Z C 0.1UF,Z,50V1 C1900ECJ1VF1H104Z C 0.1UF,Z,50V1 C1927ECJ2VC1H102J C 1000PF,J,50V1 C1928ECJ2VC1H101J C 100PF,J,50V1 C1929ECJ2VF1H103Z C 0.01UF,Z,50V1 C1930,31ECJ3YB0J106M C 10UF,M,6.3V2 C1932ECJ2VC1H102J C 1000PF,J,50V1 C1933ECJ1VF1A105Z C 1UF,Z,10V1 C1934EEEHB1C470P C 47PF,J,16V1 C1935ECJ1VF1A105Z C 1UF,Z,10V1 C1936ECJ2VF1C105Z C 6800PF,K,50V1 C1937-39EEEHB1A471P C 470PF,J,10V3 C1951-53ECJ3YB0J106M C 10UF,M,6.3V3 C2001ECJ2VB1H153K C 0.015UF,K,50V1 C2002ECJ2VF1C104Z C 0.1UF,Z,16V1 C2003,04ECJ2VB1H102K C 1000PF,K,50V2 C2006ECJ2VB1H103K C 0.01UF,K,50V1 C2007,08ECEA1HN100UB E 10UF,50V2 C2009ECJ2VB1H103K C 0.01UF,K,50V1 C2010ECJ2VF1C104Z C 0.1UF,Z,16V1 C2011ECA1EM471B E 470UF,25V1 C2012ECJ2VB1H103K C 0.01UF,K,50V1 C2013ECJ2VF1H102Z C 1000PF,Z,50V1 C2016ECA1HHG100B E 10UF,50V1 C2017ECJ2VF1C104Z C 0.1UF,Z,16V1 C2018ECA1HHG100B E 10UF,50V1 C2019ECJ2VB1H103K C 0.01UF,K,50V1 C2021ECA1HHG3R3B E 3.3UF,50V1 C2022,23ECJ2VF1C104Z C 0.1UF,Z,16V2 C2024ECA1HHG100B E 10UF,50V1 C2026,27ECJ2VF1C104Z C 0.1UF,Z,16V2 C2028ECJ2FF1C475Z C 0.047UF,Z,16V1 C2029,30ECJ2VC1H030C C 3PF,C,50V2 C2031ECA1CHG101B E 100UF,16V1 C2032ECA1CM101B E 100UF,16V1 C2033ECJ2VC1H470J C 47PF,J,50V1 C2034ECA1CM101B E 100UF,16V1 C2035ECJ2VF1C104Z C 0.1UF,Z,16V1 C2036ECJ2VC1H470J C 47PF,J,50V1 C2037ECJ2VC1H560J C 56PF,J,50V1 C2038ECJ2VC1H100C C 10PF,C,50V1 C2039ECJ2VC1H220J C 22UF,J,50V1 C2050ECJ2VF1C104Z C 0.1UF,Z,16V1 C2052ECJ2VF1C105Z C 6800PF,K,50V1 C2058,59ECJ1VC1H221J C 220PF,J,50V2 C2060,63ECJ2FF1C475Z C 0.047UF,Z,16V2 C2201,02ECA1HM100B E 10UF,50V2 C2203ECJ2VF1C105Z C 6800PF,K,50V1 C2204ECA1CEN100B E 10UF,16V1C2205ECA1CM101B E 100UF,16V1 C2207ECJ2YB1E224K C 0.22UF,K,25V1 C2212,13ECJ3YB1C225K C 2.2UF,16V2 C2214,15ECJ2VB1H102K C 1000PF,K,50V2 C2222ECJ2VF1H104Z C 0.1UF,Z,50V1 C2225,26ECJ2VF1H104Z C 0.1UF,Z,50V2 C2228ECJ2YB1A105K C 1UF,K,10V1 C2238,39ECJ2VF1C105Z C 6800PF,K,50V2 C2262ECJ2YB1A105K C 1UF,K,10V1 C2270ECA1CM101B E 100UF,16V1 C2271ECJ2VF1C104Z C 0.1UF,Z,16V1 C2272,73ECJ2YB1A105K C 1UF,K,10V2 C2274,75ECJ1VC1H470J C 47PF,J,50V2 C2276,86ECJ1VF1H103Z C 0.01UF,Z,50V2 C2287,88ECJ1VC1H470J C 47PF,J,50V2 C2289ECA1CM101B E 100UF,16V1 C2290ECJ2VF1C104Z C 0.1UF,Z,16V1 C2305,06ECA1VHG470B E 47UF,35V2 C2307,08ECA1HHG220B E 22UF,50V2 C2309,10ECA1HEN2R2B E 2.2UF,50V2 C2311,12ECJ2VB1H682K C 6800PF,K,50V2 C2313,14ECA1HHG2R2B E 2.2UF,50V2 C2317,18ECA1VHG221B E 220UF,35V2 C2321,22ECQV1H225JL3P 2.2UF,J,50V2 C2323,24ECJ2VC1H102J C 1000PF,J,50V2 C2325,26ECA1EHG471B E 470UF,25V2 C2327-30ECQV1H104JL3P 0.1UF,J,50V4 C2331,32ERJ6GEYJ104V M 100KOHM,J,1/10W2 C2333,34ECA1EHG471B E 470UF,25V2 C2339,42ECA1HHG100B E 10UF,50V2 C2345,46ECA1VHG470B E 47UF,35V2 C2347,48ECA1HHG220B E 22UF,50V2 C2349,55ECA1HEN2R2B E 2.2UF,50V2 C2381ECA1HHG100B E 10UF,50V1 C2382ECA1CHG101B E 100UF,16V1 C2383,84ECJ2VB1H682K C 6800PF,K,50V2 C2385,86ECA1HHG2R2B E 2.2UF,50V2 C2387,88ECA1VHG221B E 220UF,35V2 C2389,90ECA1EHG471B E 470UF,25V2 C2391,92ECQV1H225JL3P 2.2UF,J,50V2 C2393,94ECA1EHG471B E 470UF,25V2 C2395,96ECJ2VC1H102J C 1000PF,J,50V2 C2397-99ECQV1H104JL3P 0.1UF,J,50V3 C2400ECQV1H104JL3P 0.1UF,J,50V1 C2401,02ECJ1VB1H182K C 1800PF,K,50V2 C2403,04ECA1HEN4R7B E 4.7UF,50V2 C2407ECJ1VB1H562K C 5600PF,K,50V1 C2408ECA1HHG4R7B E 4.7UF,50V1 C2412ECJ1VB1H103K C 0.01UF,K,50V1 C2413ECA1HHG470B E 47UF,50V1 C2414EEEHB1C470P C 47PF,J,16V1 C2415ECA1HEN4R7B E 4.7UF,50V1 C2416ECJ1VC1H271J C 270PF,J,50V1 C2417ECJ1VB1E333K C 0.33UF,K,25V1 C2418ECJ1VC1H271J C 270PF,J,50V1 C2419ECJ1VB1E333K C 0.33UF,K,25V1 C2420ECJ1VC1H271J C 270PF,J,50V1 C2421ECJ1VB1E333K C 0.33UF,K,25V1 C2422ECJ1VC1H271J C 270PF,J,50V1 C2423ECJ1VB1E333K C 0.33UF,K,25V1 C2424-27ECJ1VB1H562K C 5600PF,K,50V4 C2428ECA1CHG101B E 100UF,16V1 C2429ECJ1VB1H103K C 0.01UF,K,50V1 C2430ECA1CHG101B E 100UF,16V1 C2431ECJ1VB1H103K C 0.01UF,K,50V1 C2432,36ECJ1VC1H271K C 270PF,J,50V2 C2440ECJ1VB1H103K C 0.01UF,K,50V1 C2441,42ECJ1VB1H123K C 0.12UF,K,50V2 C2443ECA1CHG101B E 100UF,16V1 C2444,45ECJ1VB1H123K C 0.12UF,K,50V2 C3108,09ECJ2VF1C104Z C 0.1UF,Z,16V2 C3112ECJ2VF1C105Z C 6800PF,K,50V1 C3113,14ECJ2VC1H561J C 560PF,J,50V2 C3115ECA1VM470B E 47UF,35V1 C3116ECA1HM100B E 10UF,50V1 C3117-20ECJ2VC1H561J C 560PF,J,50V4 C3121ECA1EM471B E 470UF,25V1C3122,23ECJ2VC1H561J C 560PF,J,50V2 C3126ECJ2VF1C104Z C 0.1UF,Z,16V1 C3132ECA1HM100B E 10UF,50V1 C3139ECJ2VF1C104Z C 0.1UF,Z,16V1 C3140ECA1EM471B E 470UF,25V1 C3141,42ECJ2VF1C105Z C 6800PF,K,50V2 C3170ECA1VM470B E 47UF,35V1 C3171,72ECA1HM100B E 10UF,50V2 C3174-76ECJ2VF1C104Z C 0.1UF,Z,16V3 C3177ECA1HM100B E 10UF,50V1 C3181,82ECJ1VC1H470J C 47PF,J,50V2 C3194ECJ2VF1C104Z C 0.1UF,Z,16V1 C3195ECJ2VB1H562K C 5600PF,K,50V1 C3196ECJ2VF1C104Z C 0.1UF,Z,16V1 C3197ECJ2VB1H562K C 5600PF,K,50V1 C3198,99ECJ2VF1C104Z C 0.1UF,Z,16V2 C3200ECJ2VF1H104Z C 0.1UF,Z,50V1 C3201,02ECJ2VF1C104Z C 0.1UF,Z,16V2 C3205,06ECJ3YB0J335M C 3.3UF,6.3V2 C3207ECA1CM101B E 100UF,16V1 C3209ECJ2VF1C105Z C 6800PF,K,50V1 C3214ECJ3YB0J335M C 3.3UF,6.3V1 C3215ECJ2YB1A105K C 1UF,K,10V1 C3216ECJ2VF1C104Z C 0.1UF,Z,16V1 C3217ECJ3YB0J335M C 3.3UF,6.3V1 C3218ECA1CM101B E 100UF,16V1 C3219,20ECJ2YB1A105K C 1UF,K,10V2 C3221ECJ3YB0J335M C 3.3UF,6.3V1 C3222ECJ2YB1A105K C 1UF,K,10V1 C3223ECJ3YB0J335M C 3.3UF,6.3V1 C3224,25ECJ2YB1A105K C 1UF,K,10V2 C3226ECJ3YB0J335M C 3.3UF,6.3V1 C3227ECJ2YB1A105K C 1UF,K,10V1 C3228,29ECJ3YB0J335M C 3.3UF,6.3V2 C3230,31ECJ2VF1C105Z C 6800PF,K,50V2 C3232,33ECJ2YB1A105K C 1UF,K,10V2 C3234ECJ2VF1C105Z C 6800PF,K,50V1 C3235ECJ2FF1C475Z C 0.047UF,Z,16V1 C3237-40ECJ3YB0J335M C 3.3UF,6.3V4 C3241ECJ2YB1A105K C 1UF,K,10V1 C3279,80ECJ2VF1C104Z C 0.1UF,Z,16V2 C3282ECJ2VF1H104Z C 0.1UF,Z,50V1 C3285ECJ2VF1C104Z C 0.1UF,Z,16V1 C3287ECJ2VF1H104Z C 0.1UF,Z,50V1 C3290ECJ2VF1C104Z C 0.1UF,Z,16V1 C3713,14ECJ2VB1H103K C 0.01UF,K,50V2 C3718,19ECJ2VC1H561J C 560PF,J,50V2 C6002,03ECJ1VF1C104Z C 0.1UF,Z,16V2 C6005,06ECJ3YB0J106M C 10UF,M,6.3V2 C6007-10ECJ1VF1C104Z C 0.1UF,Z,16V4 C6013EEEHB1A101P C 100PF,J,10V1 C6014ECJ1VF1C104Z C 0.1UF,Z,16V1 C6016ECJ2VF1C105Z C 6800PF,K,50V1 C6017ECJ1VF1C104Z C 0.1UF,Z,16V1 C6018EEFCD0J470R47UF1 C6019,20ECJ1VF1C104Z C 0.1UF,Z,16V2 C6021-24ECJ1VF1H103Z C 0.01UF,Z,50V4 C6026,27ECJ1VF1H103Z C 0.01UF,Z,50V2 C6028ECJ1VF1C104Z C 0.1UF,Z,16V1 C6030,31ECJ1VF1C104Z C 0.1UF,Z,16V2 C6032ECJ3YB0J106M C 10UF,M,6.3V1 C6034,35ECJ1VF1C104Z C 0.1UF,Z,16V2 C6039ECJ1VF1C104Z C 0.1UF,Z,16V1 C6040EEEHB0J221UP C 220PF,J,6.3V1 C6041,42ECJ1VB1C104K C 0.1UF,Z,16V2 C6043EEEHB0G101R C 100PF,J,4V1 C6044ECJ1VB1C104K C 0.1UF,Z,16V1 C6046-55ECJ1VF1C104Z C 0.1UF,Z,16V10 C6056ECJ1VF1H103Z C 0.01UF,Z,50V1 C6057ECJ1VF1H104Z C 0.1UF,Z,50V1 C6058-70ECJ1VF1C104Z C 0.1UF,Z,16V13 C6071ECJ1VF1C105Z C 1UF,Z,16V1 C6072ECJ1VF1C104Z C 0.1UF,Z,16V1 C6073ECJ3YB1A106M C 10UF,M,6.3V1 C6074ECJ1VF1C104Z C 0.1UF,Z,16V1 C6075ECJ1VC1H470J C 47PF,J,50V1 C6077ECJ1VF1C104Z C 0.1UF,Z,16V1C6078ECJ1VF1C105Z C 1UF,Z,16V1 C6080,81ECJ1VF1C104Z C 0.1UF,Z,16V2 C6082EEEHB0G101R C 100PF,J,4V1 C6083,84ECJ1VF1C104Z C 0.1UF,Z,16V2 C6086ECJ1VB1C103K C 0.01UF,K,16V1 C6087ECJ1VF1C104Z C 0.1UF,Z,16V1 C6088ECJ1VC1H470J C 47PF,J,50V1 C6089EEEHB1C100R C 10PF,J,16V1 C6090ECJ1VC1H270J C 27PF,J,50V1 C6091ECJ1VF1C104Z C 0.1UF,Z,16V1 C6092ECJ1VC1H151J C 150PF,J,50V1 C6093-96ECJ1VF1C104Z C 0.1UF,Z,16V4 C6097EEEHB0G101R C 100PF,J,4V1 C6100ECJ1VF1C105Z C 1UF,Z,16V1 C6101EEEHB0G101R C 100PF,J,4V1 C6102ECJ1VB1C103K C 0.01UF,K,16V1 C6103ECJ1VF1C104Z C 0.1UF,Z,16V1 C6104EEEHB0G221P C 220PF,J,4V1 C6105ECJ1VF1C104Z C 0.1UF,Z,16V1 C6106,07EEEHB0J221UP C 220PF,J,6.3V2 C6110EEEHB1A101P C 100PF,J,10V1 C6111,12ECJ1VF1C104Z C 0.1UF,Z,16V2 C6401-06F1J1C1050006 C 1UF,Z,16V6 C6407ECJ2VB1H222K C 2200PF,K,50V1 C6408ECJ2VB1H102K C 1000PF,K,50V1 C6417-20F1L2E1040002 E 1000UF,25V4 C6421-26F1J1C1050006 C 1UF,Z,16V6 C6427ECJ2VB1H222K C 2200PF,K,50V1 C6428ECJ2VB1H102K C 1000PF,K,50V1 C6432ECJ2VB1H472K C 4700PF,K,50V1 C6433F1J1C1050006 C 1UF,Z,16V1 C6434ECJ2VB1H103K C 0.01UF,K,50V1 C6435F2A1E221A089 E 220UF,25V1 C6436F2A1H221A115 E 220UF,50V1 C6437ECJ2VB1H104K C 0.1UF,K,50V1 C6438-40F1L2E1040002 E 1000UF,25V3 C6452ECJ2VB1H103K C 0.01UF,K,50V1 C6453F1J1C1050006 C 1UF,Z,16V1 C6454ECJ2VB1H103K C 0.01UF,K,50V1 C6455F2A1E221A089 E 220UF,25V1 C6456F2A2C1010008 E 100UF,160V1 C6458F1L1E4750004 C 4.7UF,25V1 C6459F2A1E470A089 E 47UF,25V1 C6461F2A1H101A128 E 100UF,50V1 C6462,63F1L1E4750004 C 4.7UF,25V2 C6465ECJ2YB1H104K C 0.1UF,K,50V1 C6466,67F1L1E4750004 C 4.7UF,25V2 C6472ECJ2VB1H103K C 0.01UF,K,50V1 C6473F1J1C1050006 C 1UF,Z,16V1 C6474ECJ2VB1H103K C 0.01UF,K,50V1 C6475F2A1E221A089 E 220UF,25V1 C6476F2A2C1010008 E 100UF,160V1 C6490F1K2J222A014 C 2200UF,K,6.3V1 C6492EEUED2V100B E 10PF,350V1 C6493ECJ3YB2J222K C 2200PF,K,630V1 C6501-08F1J1C1050006 C 1UF,Z,16V8 C6509ECJ2VC1H102J C 1000PF,J,50V1 C6510-12F1L1E4750004 C 4.7UF,25V3 C6513F2A2C101A022 E 100UF,160V1 C6514F1J1C1050006 C 1UF,Z,16V1 C6515,16F1L1E4750004 C 4.7UF,25V2 C6517F1J1C1050006 C 1UF,Z,16V1 C6521F1L1E4750004 C 4.7UF,25V1 C6522F2A1V470A085 E 47UF,35V1 C6524,25ECJ3FC2D102J C 1000PF,J,200V2 C6526ECA2EHG470B E 47UF,250V1 C6541,42F1L1E4750004 C 4.7UF,25V2 C6543-45ECJ3FC2D102J C 1000PF,J,200V3 C6546F1L1E4750004 C 4.7UF,25V1 C6550F2A2C1010008 E 100UF,160V1 C6571F1J1C1050006 C 1UF,Z,16V1 C6575-78F1J1C1050006 C 1UF,Z,16V4 C6580,81F1J1C1050006 C 1UF,Z,16V2 C6584ECJ3YB1E105K C 1UF,K,25V1 C6585F1J1C1050006 C 1UF,Z,16V1 C6598F2A2C101A022 E 100UF,160V1 C6600F1J1C1050006 C 1UF,Z,16V1。
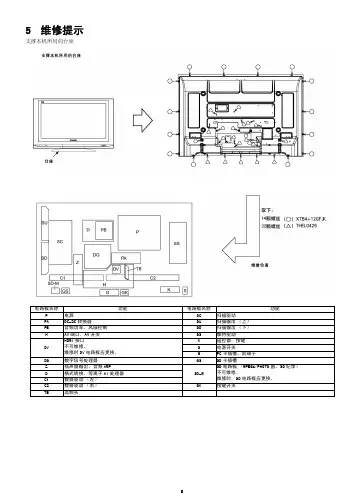
5维修提示 支撑本机所使用的台座取下后盖维修位置6等离子显示屏更换方式■ 更换等离子显示屏时,先将本机放在维修台上,取下前框,然后装上显示屏,注意不要刮伤显示屏表面。
1.取下后盖和AV 连接盖板。
2.取下P 板。
a.取下P 板的连接件 (P2, P5, P7, P9, P11, P12, P23,P25, P27, P30, P31, P32, P33)。
b.松开P 板的固定螺丝(×8),之后取下P 板。
3.取下PA 板。
a.取下PA 板的连接件(PA1, PA2, PA3, PA4, PA5, PA6,PA7, PA8, PA10A, PA11, PA12, PA13, PA14, PA15)。
b.松开PA 板的固定螺丝(×4),之后取下PA 板。
4.取下D 板。
a.取下D 板的连接件(D3, D4,D6, D12, D20, D25,D27), 松开与 D 板连接的柔性电缆(D31, D32, D33,D34)。
b.松开D 板的固定螺丝(×4),之后取下D 板。
5.取下DG板, H 板 和TA、TB板。
a.取下连接件(DG2, DG3, DG6, DG8, DG10, DG12, H6,DG18), 柔性电缆(DG7),固定螺丝(×6 )。
b.和支架一起取下DG 板,H 板和TA、TB 板。
c.取下连接件(DG1-H1,DG4-H4),并松开DG 板上的螺丝(×4 )。
d.取下DG 板。
e.松开H 板上的螺丝(×6 ),之后松开TA、TB 板支架上的螺丝(×4 )。
f.取下连接件(H10,H11)和天线线缆,之后和支架一起取下TA、TB 板。
g.取下H 板。
6.取下风扇。
松开风扇的固定螺丝(×12),之后取下风扇。
7.取下PF 板。
a.取下连接件(PF2, PF10)。
b.松开PF 板的固定螺丝(×4),之后和支架一起取下PF板。
⼩⼿⼯——松下电饭锅更换⾃带电池⼩⼿⼯——松下电饭锅更换⾃带电池据了解,不仅仅是松下电饭煲,⽇本出产的智能电饭煲都是有锂电池的。
锂电池的功能主要是承担计时器,功率很⼩,但是也存在⽼化和失效的问题。
有⼈说这电池是不是拿来控制煮饭,那就是笑话了,煮饭的功率是80⽡(多半是保温)到1000⽡(快速煮),电饭锅标配的CR2450电池是3V的,电池的容量⾄多520毫安时,额定电流值为0.2mA,⼀般均能提供0.001mA⾄5mA(3V)的输出电流,煮饭的电流有4A(220V)之多,能够提供的的功率不到这个最低需求的⼏⼗万到⼏百万分之⼀,搞⼏⼗万个这种电池在⼀起串并联理论功率是够,但是这种没有电池安全管理设计,那必然会有爆炸危险,⽤这种电池煮饭是天⽅夜谭了。
见过⽇系智能电饭煲的都知道,电饭锅正⾯都有⼀个液晶显⽰屏,接通外部电源煮饭的时候,会出现煮饭剩余时间。
当煮饭完毕关闭外部电源的时候,屏幕上会显⽰当前时间(前提是买回来之后接通外部电源,然后设置好当前时间,这个时钟还是⽐较准的,⼏年下来的误差可能是⼏⼗秒到⼏分钟)。
当这些智能电饭锅⽤的久了之后,⼀般在三到五年,这个屏幕可能会显⽰莫名其妙的代码,⽐如E04/F07/ERR这些故障代码,或者⼲脆什么都不显⽰。
这时候表明电饭锅存在⼀定的故障了。
⼀般情况下,电饭锅只要在三五年还没坏,多半电路也没问题,主要可能就是内部电池没电了。
如果没有电池电饭煲还能使⽤吗?答案是肯定的,煮饭完全可以,只不过和普通电饭煲没有什么区别了。
如果没有电池,主要影响两个⽅⾯。
⾸先会导致电饭煲⽆法选择煮饭⽅式和功能,因为看不到屏幕上的菜单选项,也就没办法选择了;其次⽆法使⽤预约功能,因为预约功能和时间是息息相关的,没有时间功能预约功能⾃然是摆设了。
⼭⼈家的电饭锅就是出现了预约失败的问题,才发现电池没电的,没办法只能更换电池了。
锂电池没了怎么换?⾸先要了解电池是焊接在电饭煲的主板上的,也就是显⽰屏的后⾯,需要把电饭煲拆开,取出旧电池,换上新的电池,焊接牢固。