电水壶中英文对照说明
- 格式:doc
- 大小:835.50 KB
- 文档页数:3
中文英文中文英文礼品袋Gift Bag 打火机Lighter购物袋Shopping Bag 浴室Bathroom 沙滩袋Beach Bag 浴缸Bathtub洗衣袋Laundry Bag 抽水马桶Toilet热水瓶Thermos 洗手盆Sink/ Basin 热水壶kettle 浴巾架Towel Rack 花瓶Vase 浴巾Bath Towel 多功能插座Adapter 中巾Hand Towel 充电器Charger 方巾Face Towel 吹风机Hair Dryer 地巾Floor Mat 指甲剪Nail Scissors 浴帽Shower Cap 镜子Mirror 浴袍Bath Rode 服务指南Service Direct 皂碟Soap Dish 网线Internet Cable 香皂Soap尺子Ruler 洗发水Shampoo胶水Glue 沐浴露Bath Foam/gel 橡皮Eraser 润肤露Body Lotion 烫斗,烫板Iron & Iron Board 漱口水Mouth Wash 订书机Stapler 牙膏Tooth Paste 檀香Incense Stick 剃须套装Shave Kit订书钉Staple 牙刷Tooth Brush 地磅Weight Scale 水龙头Tap/Faucet 透明胶Tape 浴帘Shower Curtain 剃须刀Razor 卷纸Tissue Paper 贵妃椅Ladies Sofa 防毒面具Fire Escape Mask 灭火器Extinguisher 搅拌棒Stir文件夹Stationery Folder 明信片Post Card地灯Floor Lamp 开关Switch拖鞋Slipper 鞋拔Shoe Horn 擦鞋纸Shoeshine Paper 衣架Hanger床头柜Bedside Table 床垫Mattress折叠床Folding Bed/ Rollaway 婴儿床Cot床罩Bedspread 枕头Pillow枕套Pillow Case 被子Quilt/Duvet 被单Sheet 毯子Blanket地毯Carpet 闹钟Clock茶几Tea Table 保险箱Safety Box 冰桶Ice Bucket 火柴Matches烟灰缸Ashtray 针线包Sewing Kit 卫生袋Vanity Bag电视柜TV Cabinet 遥控器Remote Control 空调Air-Conditioner 壁厨Closet冰箱Refrigerator 微波炉Microwave 抽屉Drawer 下水道Drainage垃圾桶Garbage Can/Rubbish Bin 防滑垫Anti-slip mat 浴帽Shower cap 灯罩Lamp Shade 穿衣镜Full Length Mirror 化妆镜Beauty Mirror 写字台Writing Desk 走火图Escape-Plan 窥视镜Spy-Hole 烟感器Smoke Detector 棉签Cotton Bal 喷头Shower Head 梳子Comb 护发素Hair Conditioner 行李架Luggage Rack 擦鞋油Shoe Polish客房服务术语中文英文中文英文开夜床Turn Down Service 托婴服务Baby Sitting Service 擦鞋服务Shoeshine Service 打扫房间Make-up Service打扫房间Clean-up Service 失物招领Lost & Found送餐服务Room Service 叫醒服务Wake-up Call Service。
![Japan_电水壶防溢标准2013[中英文版]](https://uimg.taocdn.com/2bdb87761ed9ad51f01df2fb.webp)
March 22, 2013New requirement for Japan Safety Certification (S-mark)日本安全认证的新要求Operational procedure for the prevention of water discharge due to the overturn of an electric water heater (electric kettle and electric pot)电热水器具(电热水壶和电热水瓶)倾倒防漏水操作程序●New requirement 新的要求For a portable electric water heater (so-called electric kettle Note 1 and electric pot Note 2), the rate of discharge of water shall be 50 mL or less in all directions when the following overturn and water discharge test is conducted.对于便携式电热水器具(电热水壶Note 1和电热水瓶Note 2),任意方向倾倒及漏水试验时10秒内漏水的速度应不大于50毫升●Test method 测试方法1. For a product with a water supply locking mechanism, enable the mechanism to close the valve before testing.对于有供水锁定机构的产品,使机构在测试之前关闭阀门2. Fill the product with water to its rated capacity and boil water by applying the rated voltage. Measure the productweight after boiling (after a current flow is stopped). (For an electric pot, measure the weight when its watertemperature is almost stabilized after applying the rated voltage.)注入器具额定容量的水并用额定电压煲水.沸腾跳挚后(无电流)测量器具总重量(对于电热水瓶,为额定电压下水温稳定后)3. In 15 seconds after boiling (after a current flow is stopped) (for an electric pot, when its water temperature is almoststabilized after applying the rated voltage), place the product on a horizontal plane with an anti-slip surface such as rubber as shown in the figure below. (If the product is equipped with a removable power cord or dedicated stand (power plate), remove it.) Slowly incline the plane to overturn the product onto a lauan board with a thickness of 30 mm.在沸腾跳挚(无电流)15秒后(对于电热水瓶,为额定电压下水温稳定后),将器具置于如下图所示的防滑橡胶水平面。
酒店用品的中英文对照酒店客房用品Curtains 窗帘Clothes—hanger 衣架Pillow 枕头Pillow case 枕袋Quilt 被子Blanket 毛毯Extra bed 加床Mattress:床垫Hard mattress 硬床垫Soft mattress 软床垫Laundry list 洗衣单Laundry bag 洗衣袋Laundry 洗衣店Sewing kit 针线包Towel 毛巾Shampoo 洗发水Conditioner 护发素Toothbrush 牙刷Toothpaste 牙膏Soap 香皂Tissues 面巾纸Toilet paper 卫生纸Comb 梳子Bath tub 浴缸Bath towel 浴巾Face towel 小方巾Bath mat 地巾Shower cap 浴帽Bath robe浴袍Hairdryer 吹风机Tap 水龙头Coffee table 茶几Bed-head 床头Electric kettle 电热水壶Chips 薯片Slippers 拖鞋Folder 文具盒Writing paper 信纸Envelope 信封Wardrobe 衣柜Drawer 抽屉Vanity/dressing table 梳妆台Bed cover 床罩Sheet 床单Luggage 行李Do not disturb 请勿打扰Light bulb 电灯泡Breakfast card 早餐卡Ashtray 烟灰缸Matches 火柴Tea 茶Coffee 咖啡Shoes board 鞋拔子Iron 熨斗Ironing board 熨衣板Floor lamp 落地灯Table light 台灯Adapter 插头Extension code 接线板Transformer 变压器Chair 椅子Trolley 工作车Mineral water 矿泉水Switch 开关Switch board 控制板Safety box 保险箱Bedside table 床头柜Door bell 门铃Living room 客厅TV remote control电视遥控器King size bed 双人床Rubbish bin 垃圾桶Flash light 手电筒Key hole 取电器Wall lamp 壁灯Bed room 卧室Twin beds 成对单人床Data line 数据线Peep hole 门镜猫眼Lamp shade 灯杆Quilt cover 被罩No smoking card 请勿吸烟卡Bed skirting床裙Fax form 传真纸Scissors 剪刀Shoe basket 鞋筐Door stopper 门堵Ceiling 天花板Toilet bowl 马桶Alarm clock 闹钟Wall picture 挂画Ball pen 圆珠笔Shoe shine mitt/paper 擦鞋布Razor /Shaver 剃须刀Candy bottle 糖果盅Safety chain 安全链Bathroom scale 体重秤Tray 托盘TelephoneMini bar 小酒吧Cotton ball 棉球Carpet 地毯Door handle 门把手Sanitary bag 卫生袋Air-conditioner空调Refrigerator /Icebox 冰箱Plant 植物Rubber mat 防滑垫Hook 挂衣钩Vase花瓶Shower 淋浴Shower cap 浴帽Shower curtains 浴帘Wash Basin 面盆Basin 水池,盆子Bed pad 褥子,床垫子Bed head board 床头板Shopping bag 购物袋Sheer curtain 纱帘Key insert 取电器Lock 门锁Sill 窗台Ice pot 冷水壶Soap 香皂Soap dish 皂碟Clothes brush 衣刷Towel rail 毛巾架Wall paper 墙纸Arm chair 扶手椅Mug 口杯Cup 茶杯Mirror镜子Washer 洗衣机Gloves 手套Spoon 勺子Recorder 录音机Shower head 喷头Tissue paper box面布纸盒Note pad 记事本,便条;Computer 电脑酒店餐饮食物水果类fruits:西红柿tomato菠萝pineapple西瓜watermelon香蕉banana柚子shaddockpomelo橙子orange苹果apple柠檬lemon樱桃cherry桃子peach梨pear枣Chinese date去核枣pitted date椰子coconut草莓strawberry 树莓raspberry蓝莓blueberry黑莓blackberry葡萄grape甘蔗sugar cane芒果mango木瓜pawpaw/papaya杏子apricot油桃nectarine柿子persimmon石榴pomegranate榴莲jackfruit槟榔果areca nut西班牙产苦橙bitter orange猕猴桃kiwi fruit or Chinese gooseberry金橘cumquat蟠桃flat peach荔枝litchi青梅greengage山楂果haw水蜜桃honey peach香瓜、甜瓜musk melon 李子plum杨梅waxberry red bayberry 桂圆longan沙果crab apple杨桃starfruit枇杷loquat柑橘tangerine莲雾wax-apple番石榴guava肉、蔬菜类livestock家畜:南瓜倭瓜pumpkin cushaw 甜玉米Sweet corn牛肉beef猪肉pork羊肉mutton羔羊肉lamb鸡肉chicken生菜、莴苣lettuce 白菜Chinese cabbagecelery cabbage甘蓝、卷心菜cabbage萝卜radish胡萝卜carrot韭菜leek木耳agarics豌豆pea马铃薯土豆potato黄瓜cucumber苦瓜balsam pear秋葵okra洋葱onion芹菜celery芹菜杆celery sticks地瓜sweet potato蘑菇mushroom橄榄olive菠菜spinach冬瓜Chinesewax gourd莲藕lotus root紫菜laver油菜cole rape茄子eggplant香菜caraway枇杷loquat青椒green pepper四季豆、青刀豆garden bean 银耳silvery fungi腱子肉tendon肘子pork joint茴香fennel茴香油fennel oil 药用鲤鱼carp咸猪肉bacon金针蘑needle mushroom扁豆lentil牛蒡great burdock水萝卜summer radish竹笋bamboo shoot艾蒿Chinese mugwort绿豆mung bean毛豆green soy bean瘦肉lean meat肥肉speck黄花菜day lilyday lily bud豆芽菜bean sprout丝瓜towel gourd 咸菜泡菜pickle 香肠sausage茶叶蛋Tea eggs 火腿ham芋头Taro山药yam 鱼翅shark fin黄花daylily松花蛋皮蛋preserved eggs 开胃菜appetizer牛排steak里脊肉fillet燕窝bird's nest肉丸子meat balls海鲜类sea food:虾仁Peeled Prawns 龙虾lobster小龙虾crayfish蟹crab蟹足crab claws小虾shrimp对虾、大虾prawn 鱿鱼squid 海参sea cucumber扇贝scallop鲍鱼sea-ear abalone 小贝肉cockles牡蛎oyster鱼鳞scale海蜇jellyfish鳖、海龟turtle蚬、蛤clam鲅鱼culter鲳鱼butterfish 虾籽shrimp egg鲢鱼、银鲤鱼chub silver carp 黄花鱼yellow croaker调料类seasonings:醋vinegar酱油soy盐salt加碘盐iodized salt 糖sugar白糖refined sugar 酱soy sauce沙拉salad 辣椒hotredpepper胡椒blackpepper花椒Chinese prickly ash色拉油salad oil调料fixing sauce seasoning 砂糖granulated sugar红糖brown sugar冰糖Rock Sugar芝麻Sesame芝麻酱Sesame paste芝麻油Sesame oil咖喱粉curry番茄酱汁ketchup redeye辣根horseradish葱shallot Spring onions 姜ginger蒜garlic 料酒cooking wine蚝油oyster sauce枸杞枇杷,欧查果medlar 八角aniseed酵母粉yeast barm黄椒Yellow pepper肉桂cinnamon黄油butter香草精vanilla extract 面粉flour洋葱onion主食类staple food:三明治sandwich米饭rice粥congee rice soup 汤soup饺子dumpling面条noodle比萨饼pizza方便面instant noodle 面包bread黄油白塔油butter油菜rape 饼干cookies馒头steamed bread饼蛋糕cake汉堡hamburger奶酪cheese馄饨皮wonton skin高筋面粉Strong flour 小麦wheat大麦barley青稞highland barley高粱broomcorn kaoliang春卷Spring roll肉馅饼minced pie 糙米Brown rice 玉米corn馅儿stuffing面粉flour燕麦oat 白薯甘薯sweet potato 凉粉bean jelly糯米江米sticky rice粟Chinese corn枳橙citrange淀粉starch蛋挞egg tart干果类dry fruits:腰果Cashew nuts花生peanut 无花果fig 榛子filbert hazel 栗子chestnut核桃walnut杏仁almond果脯preserved fruit 芋头taro 葡萄干raisin cordial开心果pistachion巴西果brazil nut菱角,荸荠water chestnut 和国内食用法不同,做坚果食用酒水类beverage:红酒red wine白酒white wine 白兰地brandy葡萄酒sherry汽水软饮料 soda 盐汽水sparkling water 果汁juice冰棒Ice-lolly啤酒beer酸奶yoghurt伏特加酒vodka鸡尾酒cocktail豆奶soy milk豆浆soybean milk七喜7 UP凉开水cold boiled water汉斯啤酒Hans beer浓缩果汁concentrated juice 冰镇啤酒icedchilled beer 札幌日本啤酒Sapporo爱尔啤酒美国aleA级牛奶grand A milk班图酒bantu beer半干雪利dry sark参水牛奶blue milk日本粗茶bancha生啤酒draft beer白啤酒white beer<苏格兰>大麦酒barley-bree 咖啡伴侣coffee mate零食类snack:薄荷糖mint饼干biscuit /cracker棒棒糖bonbon茶tea 沏茶make the tea 话梅prune candied plum锅巴rice crust瓜子melon seed 冰棒冰果icefrozensucker冰淇凌ice cream防腐剂preservative圣代冰淇淋sundae巧克力豆marble chocolate barley 布丁pudding中式早点dim sum:烧饼Clay oven rolls油条Fried bread stick韭菜盒Fried leek dumplings 水饺Boiled dumplings 蒸饺Steamed dumplings 馒头Steamed buns割包Steamed sandwich饭团Rice and vegetable roll 蛋饼Egg cakes 皮蛋100-year egg咸鸭蛋Salted duck egg 豆浆Soybean milk饭面类:noodles rice稀饭 Rice porridge白饭Plain white rice油饭Glutinous oil rice糯米饭Glutinous rice卤肉饭Braised pork rice 蛋炒饭Fried rice with egg 地瓜粥Sweet potato congee馄饨面Wonton & noodles刀削面Sliced noodles麻辣面Spicy hot noodles麻酱面Sesame paste noodles鸭肉面Duck with noodles鳝鱼面Eel noodles乌龙面Seafood noodles榨菜肉丝面Pork , pickled mustard green noodles 牡蛎细面Oyster thin noodles 板条Flat noodles米粉Rice noodles炒米粉Fried rice noodles冬粉Green bean noodle汤类:soup鱼丸汤Fish ball soup贡丸汤Meat ball soup蛋花汤Egg & vegetable soup 蛤蜊汤Clams soup牡蛎汤Oyster soup 紫菜汤Seaweed soup酸辣汤Sweet & sour soup 馄饨汤Wonton soup猪肠汤Pork intestine soup 肉羹汤Pork thick soup鱿鱼汤Squid soup花枝羹Squid thick soup 中餐:chinases cuisine熊掌bear's paw鹿脯of deer海参sea cucumber海鳝beche-de-mer;sea sturgeon 海蜇皮salted jelly fish海带kelp,seaweed鲍鱼鱼翅abalone shark fin干贝scallops龙虾lobster燕窝bird's nest烤乳猪roast suckling pig 猪脚 pig's knuckle盐水鸭boiled salted duck叉烧preserved arbecued pork 香肠sausage肉松fried pork flakes烤肉b arbecue荤菜meat diet素菜vegetables肉羹meat broth地方菜local dish广东菜Cantonese cuisine客饭set meal咖喱饭curry rice炒饭 fried rice白饭plain rice锅巴crispy rice粥gruel, soft rice , porridge 打卤面noodles with gravy阳春面plain noodle砂锅casserole 火锅chafing dish,fire pot 肉包子meat bun烧麦shao-mai腐乳preserved bean curd 豆腐bean curd /tofu豆豉 fermented blank bean 酱瓜pickled cucumbers皮蛋preserved egg咸鸭蛋salted duck egg 萝卜干dried turnip西餐与日本料理:menu 菜单French cuisine法国菜today's special 今日特餐chef's special 主厨特餐buffet 自助餐fast food 快餐specialty 招牌菜continental cuisine 欧式西餐aperitif 饭前酒dim sum 点心French fires炸薯条baked potato烘马铃薯mashed potatoes马铃薯泥omelette 简蛋卷pudding 布丁pastries 甜点kimchi 韩国泡菜prawn 明虾conch 海螺escargots 田螺braised beef 炖牛肉bacon 熏肉poached egg 荷包蛋sunny side up 煎一面荷包蛋over 煎两面荷包蛋fried egg 煎蛋over easy 煎半熟蛋over hard 煎全熟蛋scramble eggs 炒蛋boiled egg 煮蛋stone fire pot 石头火锅sashi 日本竹筷sake 日本米酒miso shiru 味噌汤roast meat 铁板烤肉sashimi 生鱼片。
电水壶说明文英语作文400字英文回答:An electric kettle is a small, portable appliance thatis used to boil water for drinking, cooking, or other purposes. It typically consists of a heating element, a reservoir for water, and a spout for pouring. Electric kettles are often used in homes, offices, and othersettings where hot water is needed quickly and conveniently.Electric kettles work by heating water using anelectrical heating element. The heating element is usually located at the bottom of the kettle, and it is made of a material that conducts heat well. When the kettle is turned on, the heating element heats up and transfers heat to the water. The water gradually heats up until it reachesboiling point, which is typically around 100 degreesCelsius (212 degrees Fahrenheit).Once the water reaches boiling point, the kettle willautomatically shut off. This is to prevent the water from boiling over and making a mess. Some electric kettles also have a feature that allows you to set a specific temperature for the water, so that you can heat it to the desired temperature for your specific needs.Electric kettles are a convenient and efficient way to boil water. They are relatively inexpensive, and they are easy to use and maintain. Electric kettles are also energy-efficient, as they only use energy when they are actually heating water.中文回答:电水壶是一种小型便携式电器,用于煮沸饮用水、烹饪用水或其他用途。
Accessories 配件English ChineseLid assy壶盖配件Lid top cover壶盖上盖Lid rim壶盖边缘Lid lower cover壶盖下盖Lid release button盖子按钮Lid lock壶盖锁扣Handle assy手柄配件Handle 手柄Handle cover手柄盖Handle fasten blacket手柄固定架Steam tube蒸汽管Steam box蒸汽盒Steam pipe蒸汽导管口Housing assy壶身配件Inner body内壶Outer body外壶Stainless steel body不锈钢煲身Spout壶嘴Sub-base壶身底盖Filter过滤器Visible Water Gauge透明水尺360base360度分离式底座Capacity容量Controller assy控制器On/off switch dolly开关按钮Pilot lamp指示灯Switch dolly lever开关按钮连杆On/Off pilot light开关指示灯Heating plate assy加热盘配件Heating element加热盘Heating tube加热管Thermostatic/strix controller温控器Shrinkage tube热缩管Power base assy电源底座配件Base upper底座上盖Base lower底座下盖Power cord 电源线Cord storage储线槽Cordless无线的Voltage电压Power功率Socket插座connector连接器Packing包装User manual使用手册Guanrantee/Warranty leaflet保修单carton卡纸Type plate铭牌Polybag/Plastic bag塑料袋Buble bay泡泡袋Fancy box彩盒Sticker标签Card insert/paperboard卡纸Corrugated cardboard瓦楞纸箱Printing印刷Varnish涂料Pulp tray纸浆盘1-color black单黑印刷Palletization托盘运输Container集装箱。

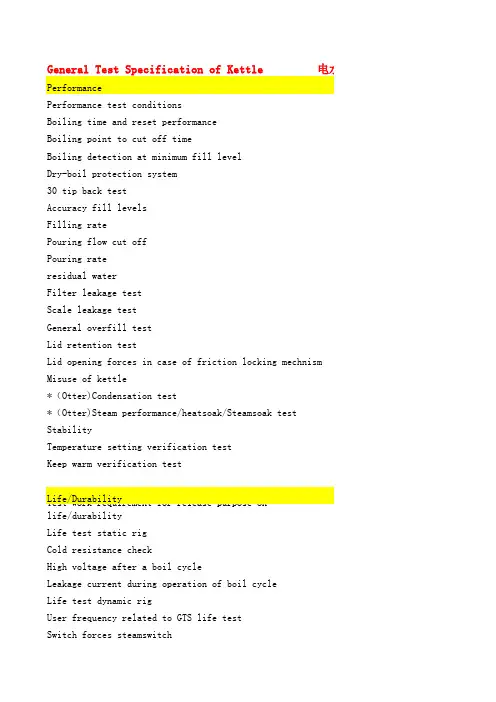
General Test Specification of Kettle 电水壶PerformancePerformance test conditionsBoiling time and reset performanceBoiling point to cut off timeBoiling detection at minimum fill levelDry-boil protection system30 tip back testAccuracy fill levelsFilling ratePouring flow cut offPouring rateresidual waterFilter leakage testScale leakage testGeneral overfill testLid retention testLid opening forces in case of friction locking mechnism Misuse of kettle*(Otter)Condensation test*(Otter)Steam performance/heatsoak/Steamsoak testStabilityTemperature setting verification testKeep warm verification testLife/DurabilityTest work requirement for release purpose onlife/durabilityLife test static rigCold resistance checkHigh voltage after a boil cycleLeakage current during operation of boil cycleLife test dynamic rigUser frequency related to GTS life testSwitch forces steamswitchLife test static rig for kettles with keep warm and temp.set function6,000 cycles of open & close of the lid50 cycles of taking in and out of the filterSafetySteamscape handleBase water ingress testVerification test for protection against water ingress in control panelDry boil detectionClimate TestCyclic humidity testCyclic temperature testConstant heat testFreeze testUV testWear test for printing and laqueringDishwasher testChmemical TestCyclic humidity testCyclic temperature testConstant heat test电水壶通用测试标准性能性能测试条件煮水时间和性能重置沸腾点时至断电时的时间最小注水量的煮水观察干煲保护系统30度倾斜测试精确注水等级注水速度倒水分流倒水速度残留的水过滤器泄露测试水垢泄露测试通用溢出测试提盖测试克服机械锁住装置所用的开盖力度电水壶使用不当*(Otter温控器)冷凝测试*(Otter温控器)蒸汽性能/热渗透/蒸汽渗透测试稳定性温度设定功能检查测试保温功能检查测试测试寿命/耐久性的工作要求静态寿命测试装置抗寒冷检测煮水周期结束后进入高压状态煮水循环操作过程中的电流泄露动态寿命测试装置与通用寿命测试检测项目有关的使用频率蒸汽开关的开启/关闭的力度具有保温和温度设定功能的电水壶静态寿命测试装置壶盖6000次循环开与关50次循环过滤器拆与装安全蒸汽阀柄/提手底座水渗透测试防止水渗入控制面板保护证明检测干烧测试气候测试循环式湿度测试循环式温度测试恒热测试冰点测试紫外线测试印刷和喷涂附着力测试洗碗机测试化学测试循环式湿度测试循环式温度测试恒热测试。
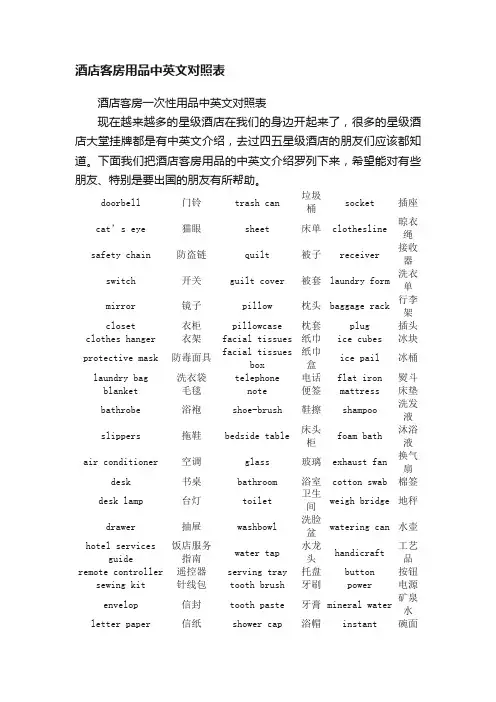
酒店客房用品中英文对照表酒店客房一次性用品中英文对照表现在越来越多的星级酒店在我们的身边开起来了,很多的星级酒店大堂挂牌都是有中英文介绍,去过四五星级酒店的朋友们应该都知道。
下面我们把酒店客房用品的中英文介绍罗列下来,希望能对有些朋友、特别是要出国的朋友有所帮助。
doorbell 门铃trash can 垃圾桶socket 插座cat’s eye猫眼sheet 床单clothesline 晾衣绳safety chain 防盗链quilt 被子receiver 接收器switch 开关guilt cover 被套laundry form 洗衣单mirror 镜子pillow 枕头baggage rack 行李架closet 衣柜pillowcase 枕套plug 插头clothes hanger 衣架facial tissues 纸巾ice cubes 冰块protective mask 防毒面具facial tissuesbox纸巾盒ice pail 冰桶laundry bag 洗衣袋telephone 电话flat iron 熨斗blanket 毛毯note 便签mattress 床垫bathrobe 浴袍shoe-brush 鞋擦shampoo 洗发液slippers 拖鞋bedside table 床头柜foam bath沐浴液air conditioner 空调glass 玻璃exhaust fan 换气扇desk 书桌bathroom 浴室cotton swab 棉签desk lamp 台灯toilet 卫生间weigh bridge 地秤drawer 抽屉washbowl 洗脸盆watering can 水壶hotel servicesguide 饭店服务指南water tap水龙头handicraft工艺品remote controller 遥控器serving tray 托盘button 按钮sewing kit 针线包tooth brush 牙刷power 电源envelop 信封tooth paste 牙膏 mineral water 矿泉水letter paper 信纸shower cap 浴帽instant 碗面doorbell 门铃trash can 垃圾桶socket 插座noodleshair dryer 吹风机soap 香皂curtain 窗帘yellow page 黄页comb 梳子window 窗户magazine 杂志soap dish 皂托tea table 茶几network cable 网线glass cup 玻璃杯ashtray 烟缸mouse pad 鼠标垫razor 剃须刀match 火柴wall lamp 壁灯stool 马桶carpet 地毯TV 电视toilet paper 手纸light bulb 电灯泡chair 椅子towel 毛巾refrigerator 冰箱bath towel 浴巾beer 啤酒bathtub 浴缸coke cola 可口可乐bath mat 防滑垫seven-up 七喜flower vase 花瓶■ 客房设备、用品pouring cup 口杯toilet mirror 梳妆镜music stool 琴凳electric kettle 电热水壶floor lamp 落地灯TV turntable 电视机转盘armchair 圈椅Toilet Paper Carton厕纸盒door key 门钥匙door chain 防盗链bathroom cabinet 卫生间镜箱lobby carpet 走廊地毯woollen carpet 纯毛提花毯synthetic fibre carpet化纤地毯Wardrobe 衣橱Shoes shine 鞋油Cloth Brush 衣刷Adjust handler 调节器Stirrer 搅拌棒Ventilator 通风口Key insert 钥匙缝Outlet 电源插座Closet 壁橱Transformer 变压器Switch 开关Adaptor 插座Ceiling 凳子Lamp shade 灯罩Waste bin 垃圾桶Scissors 剪刀Slipper 拖鞋Shoes horn 鞋拔Hanger 衣架Pajama 睡衣Hair drier 吹风机Scent, Perfume 香水Shaver, Razor 剃须刀,剃刀Cotton Swob 棉花棒Bath foam 沐浴液Facial tissue 面巾纸Napkin 餐巾纸Scale 秤Blade 刀片Detergent 洗衣粉Lotion 润肤露Faush 水箱Plug 橡皮塞Spray 喷头Faucet tap 水龙头Shower cap 浴帽Sponger 海绵刷Toothpaste 牙膏Sanitary 卫生袋Towel rail 毛巾架Floor towel 脚巾Body towel 浴巾Soap dish 皂缸Bath mat 垫巾Bath tub 浴缸Monitor 监控器Distilled water 蒸馏水Mineral water 矿泉水Tariff 价目表Toilet bowl 马桶detector 烟雾报警器Leaking 漏水Bed side table 床头柜Head board 床头板Bed cover 床罩Pillow (case) 枕头 (套) Blanket 羊毛毯Mattress 床垫Foundation 床垫架Quilt 被子Feather quilt 鸭绒被Rug 小地毯Spring 弹簧床Fabric sofa 布沙发Desk lamp 台灯Floor lamp 落地灯Carpet 地毯Remote control 遥控器Freezer 冰箱Door latch 门闩Knob 门把手Fire escapes 逃生图Peep hole 猫眼Dressing table 梳妆台Curtain 窗帘Stationery 文具Cushion 椅垫Screen 屏风Hot water flask 热水瓶Comb 梳子venetian blind 百叶窗帘curtain 窗帘wastebasket 字纸篓tea trolley 活动茶几night table 床头柜hanger 挂钩plug 插头wall_plate 壁上挂盘Chinese painting 国画drawer 抽屉cushion 靠垫,垫子socket 插座,插口voltage 电压floor 楼层,地板carpentry (总称)木器tea table 茶几bedclothes 床上用品quilt 被子mattress 床垫thermos 热水瓶transformer 变压器以上就是盈佳酒店用品厂为大家整理的酒店客房用品中英文对照表,希望对您能有所帮助。

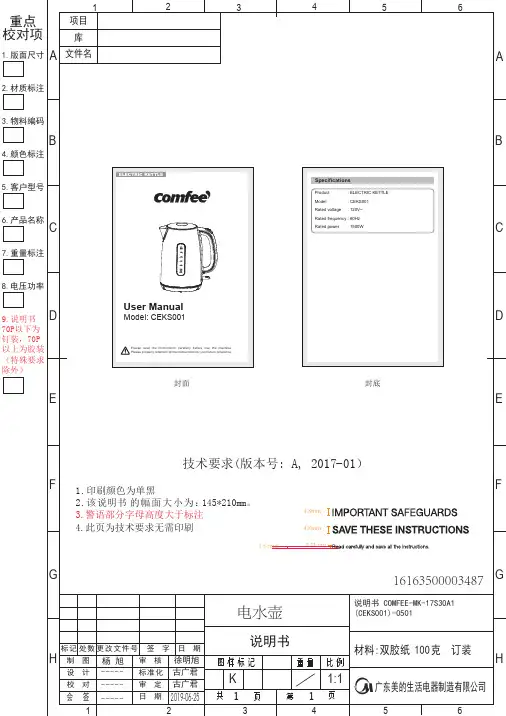
Electric Kettle (For Household Use Only)K02H Series Instruction Manual Limited Warranty Thank you for purchasing BALMUDA The Kettle.Important FOR USE IN U.S. ONLY WARRANTY VOID IF USED OUTSIDE U.S.Be sure to read this manual before use. Keep in a safe place for future reference.For information on warranty policy, please refer to the BALMUDA website (https://).K02H SeriesContentsIMPORTANT SAFEGUARDS ...............1SHORT CORD INSTRUCTIONS ............2Safety Precautions ...........................3Contents of the package .....................7Names of parts .................................7Before using the appliance ..................8Using the appliance ...........................8Precautions for use ...........................9Using the power cord holder ...............10Cleaning the appliance .....................10Frequently Asked Questions ...............11Warranty Policy and Privacy Policy ......11Product Specifications (11)1. Read all instructions carefully and thoroughly.2. Do not touch hot surfaces. Always hold the handle or knob.3. To protect against fire, electric shock and injury to persons, do not immerse thecord, plug, kettle itself or power base in water or other liquids.4. Close supervision is necessary when the appliance is used by or near children.5. Unplug the appliance from the outlet when not in use and before cleaning. Let it cooldown before putting on or taking off parts, and before cleaning the appliance.6. Do not operate the appliance with a damaged cord or plug or after the appliancemalfunctions, or has been damaged in any manner. Send the appliance to theBALMUDA Support Center for examination, repair or adjustment.7. The use of accessory attachments not recommended by BALMUDA may result infire, electric shock or injury to persons.8. Do not use outdoors.9. Do not let the cord hang over the edge of a table or counter, or touch hot surfaces.10. Do not place the appliance on or near hot gas or an electric burner, or in a heatedoven.11. Do not use the appliance for anything other than its intended use.12. Close the lid firmly until it clicks or the automatic OFF function may not work.13. Hold the handle when removing the lid. Be careful not to touch the hot surface of thekettle body or the nozzle after boiling water.14. Do not remove the lid during the boiling cycle. Doing so may result in scalding (orburns).15. Before unplugging the appliance, always turn off the switch.16. When unplugging the appliance, hold the power plug itself. Do not pull the powercord.17. Do not fill the appliance with water while it is on the power base. Before placing itonto the power base, dry the bottom of the kettle.18. To prevent the risk of scalding (or burns), close the lid firmly.19. Take care not to scald yourself.• Steam is emitted from the steam vent or the spout during or after boiling.• Steam is emitted when opening the lid.20. Use the appliance on a flat and heat-resistant surface. Do not use it on top of otherelectrical products.21. Do not wash the appliance or the power base in a dishwasher. Never use detergent.22. Do not insert any foreign objects in slots or gaps of the appliance.23. Do not try to disassemble or repair the appliance, or try to replace the power cordyourself.24. The appliance is for household use only.SAVE THESE INSTRUCTIONS.• A short power-supply cord is provided to reduce risks resulting from becoming entangled in or tripping over a longer cord.• Extension cords may be used if care is exercised in their use.• I f an extension cord is used:1) The marked electrical rating of the extension cord should be at least as high as theelectrical rating of the appliance.2) This appliance is equipped with a grounded plug. The extension cord should be agrounding type 3-wire cord.3) The extension cord should be arranged so that it does not drape over the counter top or table top where it can be pulled on bychildren or tripped over. About the plug• This appliance has a grounded type plug for safety purposes. This plug is only compatible with 3-pin outlets.• In order to avoid disabling this safety function, connect it to correctly grounded outlets only.• Do not remove the grounding prong.• Failing to connect the grounding conductor correctly may cause electric shock. If itis unclear whether the outlet is correctly grounded, consult a qualified electrician.Safety PrecautionsRead the Safety Precautions carefully before use to ensure correct operation. The precautions described in this manual must be followed to ensure safe use of this appliance and prevent hazards to you and other people, as well as damage to the appliance and your home or property.● These symbols indicate the degree of harm or damage that may be caused by improper use.● These symbols indicate requirements during use of this appliance.Using the applianceWARNINGThose in the following categories should not use the appliance withoutsupervision and guidance from others: Individuals with physical disabilitiesor handicaps; Individuals with mental disabilities; Individuals who lack theappropriate experience and knowledge; Children.Doing so may cause scalding (or burns), injury, or electric shock.Do not spray water onto or submerge the appliance.Doing so may cause fire, electric shock, or malfunction.Do not touch the metal part of the kettle connector or the power baseconnector, and do not insert pins or other metal objects into the hole.Doing so may cause scalding (or burns) or electric shock.Do not look directly into the spout or turn the spout towards others.Doing so may cause scalding (or burns) or injury.Do not disassemble or modify the appliance.Doing so may cause fire or electric shock.Do not use in other countries than the U.S.This may cause fire or malfunction.Do not use anything other than the dedicated power base.Doing so may cause fire, scalding (or burns), or electric shock.Do not drop or subject the appliance to impacts.Doing so may cause fire, scalding (or burns), electric shock, injury, or malfunction. Do not use the appliance for any purpose other than those recommended in this instruction manual and by BALMUDA.Doing so may cause accidents such as fire or electric shock. BALMUDA accepts no responsibility in case of improper use or failure to follow these instructions.Close the lid tightly.Failure to do so may cause the automatic OFF function not to work properly. This prevents the power from turning off automatically after boiling, and will cause fire. Failing to close the lid may also cause the lid to come off, hot water to leak, and scalding (or burns).Keep the appliance out of reach of infants and children.Failure to do so may cause fire, scalding (or burns), electric shock, or injury.Use only the repair services offered through the BALMUDA Support Center (P.11).Failure to do so may cause fire, scalding (or burns), electric shock, injury, or malfunction.Stop using the appliance if cracks appear on it, or if the handle becomes loose. Failure to do so may cause damage to the appliance, resulting in water leakage, causing scalding (or burns) or electric shock.CAUTIONDo not touch any surface other than the handle (including the outer surface, lid, and nozzle) when boiling water or for some time after boiling water. Doing so may cause scalding and burns.Do not place your face or hands near the steam vent or spout when boiling water or for some time after boiling.The escaping steam may cause scalding.Do not move the appliance holding any part (lid, nozzle, etc.) other than the handle.Doing so may cause the appliance to fall, resulting in scalding (or burns), injury, or malfunction.Do not hit or subject the nozzle to any form of impact.Doing so may cause hot water to leak from the joint of the nozzle, resulting in scalding (or burns).Do not put any substance other than water inside.Doing so may cause the fluid to spew out, resulting in scalding (or burns).Do not tilt the appliance at an extreme angle, and do not tilt in the oppositedirection of the spout.Doing so may cause hot water to leak from the steam vent or the bottom of theappliance, resulting in scalding (or burns).Do not block the steam vent when boiling water.Doing so may cause hot water to spew out from the spout, resulting in scalding (orburns).Fill the appliance with the appropriate amount of water paying close attentionto the rated capacity (up to 0.6 L).Using too little water may cause the appliance to dry out, resulting in malfunction.Using too much water may cause hot water to overflow, resulting in scalding (orburns).Stop using the appliance if the nozzle becomes loose.Failing to do so may cause water to leak, resulting in scalding (or burns) or electricshock.Place the appliance in a location which is not accessible to pets or nearcurtains.Failure to do so may cause the appliance to fall over, resulting in scalding (or burns) or injury.Power supply and power cordWARNINGDo not replace the power cord yourself. Doing so may cause fire or electric shock.Please contact the BALMUDA Support Center if the power cord is damaged.Do not sharply bend, wind, pull, or pinch the power cord.Doing so may cause fire, burns, or electric shock.Do not insert or remove the power plug with wet hands.Doing so may cause electric shock.Do not leave the power plug in the outlet for extended periods.Doing so may cause fire due to accumulation of dust.Do not touch the metal parts of the power plug or the power base with wethands.Doing so may cause electric shock.Never use a damaged power plug/cord.Doing so may result in a fire or electric shock.Use an outlet that meets the appliance rating (10 A /1200 W). Do not plug other electrical devices into the outlet when using the appliance.Using the appliance with an outlet that does not meet the appliance rating, or on ashared outlet with other devices, may cause overheating, resulting in fire.Installing the applianceWARNINGDo not place the appliance close to any high-temperature objects such asstoves or toasters.Doing so may cause electric shock due to deformation or breakage.Do not place the appliance on any kind of range, stove, cooktop or any sort of heater.Doing so may cause fire or malfunction.Do not heat the kettle over an open flame.Doing so may cause fire or malfunction.Do not use the appliance outside or in humid environments.Doing so may cause condensation and other circumstances which lead to electrical shock.CAUTIONDo not place the appliance in an unstable location.Doing so may cause the appliance to fall over, resulting in scalding (or burns) or injury.■Contents of the packageKettle Lid Power base Instruction manual ■Names of parts■Before using the appliance Perform the following procedure more than twice to clean the appliance before using.1. Remove the cap on the spout and rinse out the inside of the appliance.2. Fill the appliance with 0.6 L of water (to the MAX level). 3. Boil the water.4. Discard the boiled water.■Using the applianceWhile or shortly after using the appliance, its surface, the spout, the area around the steam vent of the lid and the power base is hot. Do not touch these parts. Doing so may cause scalding (or burns). Hold the handle when using the appliance.Remove the lid and fill the appliance with water (up to 0.6 L).Max fill line0.6 L = 20 fl ozDo not fill the appliance with anything other than water.Doing so may cause the substance to spurt out, causing scalding (or burns).Do not overfill.Do not boil more than 0.6 L of water.Filling above the max fill line may cause boiling water to overflow and spurt out of the spout and cause scalding (or burns).Close the lid firmly, place the appliance onto the power base, and insert thepower plug into the outlet.Close the lid firmly.When the lid is not properly closed, the automatic OFF function may not work and cause the water to dry out. This may cause the appliance to emit smoke and catch fire.Place the power base on a flat and secure surface.Failure to do so may cause scalding (or burns) or injury.Lower the switch to turn on the power. (The boiling lamp lights up and boiling starts.)When water has boiled, the power automatically turns off and the boiling lamp goes off. To turn off the power midway, raise the switch or remove the appliance from the power base.Click!Do not open the lid while boiling. Hot water may spurt out and cause scalding (or burns) or injury.Do not place your face or hand near the steam vent while boiling. Doing so may cause scalding (or burns).Do not leave the applianceunattended while boiling.If someone touches the appliancewithout realizing that it is in use, theymay scald themselves.Pouring hot water.Do not over-tilt the appliance while pouring.Hot water may leak out of the steam vent, causing scalding (or burns).After use, unplug and empty the appliance.Failure to do so may cause discoloring and corrosion inside the appliance.■Do not over-tilt the appliance.Doing so may cause scalding (or burns) dueto hot water leaking out of the switch areaor steam vent.Condensation may appear around theswitch area. This is not a defect. Theappliance will automatically turn offwhen it detects steam from the switcharea.– 10 – ■Using the power cord holderAdjust the cord to a suitable length and store the rest of the cord in the bottom of the power base.Be sure to line the cord so that it emerges from the indent of the power base and ensure that the power base is used on a flat surface.■Cleaning the applianceCleaning each partKettle (outside) Wipe the kettle with a tightly wrung soft cloth.Kettle (inside) Rinse the inside of the kettle with water only.Power supply baseWipe the power base with a tightly wrung soft cloth.Be sure to unplug the power cord.Failure to do so may cause electric shock.Cool and unplug the appliance before cleaning.Failure to do so may cause electric shock or scalding (or burns).Do not submerge the kettle, power base, power cord or power plug in water.Doing so may cause electric shock or the appliance to emit smoke or catch fire.Do not use detergent to clean the appliance.Residue from detergent may lead to malfunction or overflow and cause scalding (or burns) or injuries.When cleaning the appliance, do not use abrasive detergent, polishing pad or metal brush.Doing so may peel the surface coating or deteriorate the resin, resulting in smoke emission or fire.Doing so may scratch or deform the appliance.• Do not wash the whole appliance.Doing so may cause malfunction.• Clean and dry all parts before storing the appliance.Store the appliance in a box or in a clean and dry place.Store the power cord in the cord holder. Do not wrap the cord around the kettle or the power base.Descaling To clean off stains inside of the kettle, follow the procedure below.– 11 –Warranty Policy and Privacy PolicyFor information on warranty and privacy policies, please refer to the BALMUDA website (https://).Product Specifications Model K02H Series Power supply AC 120 V 60 Hz Rated power consumption 1200 W Unit weight Approx. 2 lb Unit dimensions W 10.6 in. × D 5.6 in. × H 7.6 in. Rated capacity 0.6 L (20 fl oz)Length of power cord Approx. 2.5ft Purpose Household use, indoor use833-333-1033https://TMS-P801-D10。
ElectricJ ugK ettleMK-17S26-RMK-17S26-W MK-17S26-BK1、 Read carefully and save all the instructions.2、 For additional protection, we recommend the use of a power outlet with a rated current of 13A. To avoid circuit overload, do not operate another high wattage appliance on the same circuit.3 4、 5 6 Electric kettle must be operated on a flat surface. Do not place this appliance on or near a hot gas or electric burner or on the top of other electricappliances7、 8、 9、 of the base unit.10、11、Do not fill kettle when positioned on base,Do not use the kettle to heat anything other than water. Do not fill above the "max" indication. Do not operate kettle if water is below minimum.Do not immerse any part of the appliance in water or other liquid. Do not use your appliance with an extension cord unless this cord has been checked and tested by a qualified technician or service person. Always use your appliance from a power outlet of the voltage(A.C. only)marked on the appliance.If the power cord is damaged, it must be changed by manufacturer or autho rized persons.Dry the wateron the bottom of the body before place it onto power base.Never leave the appliance unattended when in use.Close supervision is necessary when your appliance isbeing used near children or infirm persons.Do not touch hot surfaces, use the handle. Be aware of steam being emitted from spout or lid especially during refilling. Do not remove lid during boiling cycle.Do not let the power cord hang over the edge of the table or touch hotsurfaces. Always store excess portion of the power cord in the compartment 1212、13、14、1516、 Always unplug from the plug socket when in following conditions:No water in kettle Filling water Not in use Before cleaning ormoving kettle.Do not use a base unit other than the one supplied. The use of accessory attachments not recommended by the manufucturer may result in fireelectrical shock or personal injury.Call our free customer assistance number for information or return to Midea Customer Sevice Department for examination and repair.Never repair the appliance by yourself.WARNING:To reduce the risk of fire or electric shock , do not removethe bottom cover of the body or the power base by yourself.Do not insert any object into slots or holes of the kettle.This appliance is for household use only.Do not use outdoors.This appliance can be used by children aged from 8 years and above ifthey have been given supervision or instruction concerning use of theappliance in a safe way and if they understand the hazards involved.Cleaning and user maintenance shall not be made by children unless theyare aged from 8 years and above and supervised. Keep the appliance andits cord out of reach of children aged less than 8 years.Appliances can be used by persons with reduced physical, sensory or mentalcapabilities or lack of experience and knowledge if they have been givensupervision or instruction concerning use of the appliance in a safe way and if they understand the hazards involved.Children shall not play with the appliance.If the supply cord is damaged, it must be replaced by the manufacturer, itsservice agent or similarly qualified persons in order to avoid a hazardOnly the appropriate connector must be used.This appliance is intended to be used in household and similar applications such as:– staff kitchen areas in shops, offices and other working environments;– farm houses;– by clients in hotels, motels and other residential type environments;– bed and breakfast type environments.Please follow the above safety precautions17、18、19、20、21、22、3Rational design,bring convenience and enjoyment to your lifeRapid boiling , save time and energy for youAutomatically cut off for dry boil protection.Steam control to switch the kettle off after boiling.Easy read water gauge.Thermostat of high quality.This appliance is not intended for use by persons (including children) with reduced physical, sensory or mental capabilities, or lack of experience and knowledge, unless they have been given supervision or instruction concerning use of the appliance by a person responsible for their safety.Children should be supervised to ensure that they do not play with theappliance.If the supply cord is damaged, it must be replaced by the manufacturer, itsservice agent or similarly qualified persons in order to avoid a hazardElectrical and electronic devices may not be disposed of with domestic waste. Consumers are obliged by law to return electrical and electronic devices at the end of their service lives to the public collecting points set up for this purpose or point of sale. Details to this are defined by the national law of the respective country. This symbol on the product, the instruction manual or the package indicates that a product is subject to these regulations. By recycling, reusing the materials or other forms of tilizing old devices, you are making an important contribution to protecting our environment.41. Lid2.Spout 5. Water gauge 4.HandleSwitch 3.6. Power basePress the lid release button, and the lid can open automatically.56MANUAL PENGGUNA JagCerekElectrikSila baca manual dengan teliti sebelum menggunakan produk kami.Kekalkannya untuk rujukan pada masa akan datang.MK-17S26-RMK-17S26-W MK-17S26-BK1. Baca dengan teliti dan simpan kesemua arahan.2. Untuk perlindungan tambahan, kami mengesyorkan penggunaan alur keluar kuasa dengan kadar arus 13A. Untuk mengelakkan beban lebih pada litar, jangan kendalikan bersama perkakas berwatt tinggi pada litar yang sama.3. Jangan isikan cerek apabila diletakkan pada tapak, Keringkan air pada bahagian bawah badan sebelum meletakkannya ke tapak kuasa.4. Sentiasa awasi perkakas ketika sedang digunakan.5. Pemerhatian rapi diperlukan ketika perkakas sedang digunakan berhampiran kanak-kanak atau orang yang uzur.6. Cerek elektrik mesti dikendalikan pada permukaan yang rata. Jangan letakkan perkakas ini pada atau berhampiran dengan gas panas atau pembakar atau di atas perkakas elektrik lain.7. Jangan sentuh permukaan panas, gunakan pemegang. Berhati-hati dengan wap yang dikeluarkan dari muncung atau penutup terutamanya ketika mengisi semula. Jangan buka penutup ketika kitaran pendidihan.8. Jangan gunakan cerek untuk memanaskan apa-apa selain dari air. Jangan isikan melebihi penunjuk “maks”. Jangan kendalikan cerek jika air di bawah tahap minimum.9. Jangan biarkan kord kuasa tergantung pada hujung meja atau menyentuhpermukaan yang panas. Sentiasa simpan bahagian lebihan kord kuasa di dalam ruang tapak unit.10. Jangan rendamkan mana-mana bahagian perkakas di dalam air atau cecair lain. Jangan gunakan perkakas anda dengan kord sambungan melainkan kord ini telah diperiksa dan diuji oleh juruteknik atau pekerja perkhidmatan yang berkelayakan. Sentiasa gunakan perkakas anda dari salur keluar kuasa voltan (A.C sahaja) yang ditandakan pada perkakas.11. Jika kord kuasa rosak, ia mesti digantikan oleh pengilang atau individu yang mempunyai kebenaran.1NOTA: Jika terlebih mengisi air di dalam cerek, air yang mendidih mungkin dipancutkan.Cerek hanya boleh digunakan dengan tapak yang disediakan.12. Sentiasa buka palam daripada soket palam ketika dalam keadaan berikut:Tiada air di dalam cerek, Mengisi air, Tidak digunakan, Sebelum membersihkan atau mengalihkan cerek.13. Hubungi nombor bantuan pelanggan percuma kami untuk maklumat ataukembalikan kepada Jabatan Perkhidmatan Pelanggan Midea untuk pemeriksaan atau dibaiki. Jangan sesekali membaiki perkakas anda sendiri.AMARAN: Untuk mengurangkan risiko kebakaran atau kejutan elektrik, jangan keluarkan penutup bahagian bawah badan atau tapak kuasa anda sendiri.14. Jangan gunakan tapak unit selain dari yang telah dibekalkan. Penggunaanaksesori aksesori pemasangan tidak disyorkan oleh pengilang boleh menyebabkan kebakaran, kejutan elektrik atau kecederaan peribadi.15. Jangan masukkan sebarang objek di dalam slot atau lubang cerek.16. Perkakas ini hanya untuk kegunaan rumah sahaja. Jangan gunakan di luar.17. Perkakas ini boleh digunakan oleh kanak-kanak yang berumur dari 8 tahun keatas jika mereka telah diberikan pemerhatian atau arahan mengenai carapenggunaan perkakas secara selamat dan jika mereka memahami tentangbahaya yang terlibat.18. Pembersihan dan penyelenggaraan pengguna tidak boleh dibuat oleh kanak-kanak melainkan mereka telah berumur 8 tahun ke atas dan diawasi. Simpanperkakas dan.19. kordnya jauh dari capaian kanak-kanak yang berumur kurang dari 8 tahun.20.Perkakas boleh digunakan oleh orang yang kurang upaya fizikal, kekuranganderia atau kurang upaya mental atau kekurangan pengalaman dan pengetahuanjika mereka telah diberikan pengawasan atau arahan mengenai penggunaanperkakas secara selamat dan jika mereka memahami bahaya yang terlibat.21. Kanak-kanak tidak boleh bermain dengan perkakas tersebut.Jika kord bekalan rosak, ia mesti digantikan oleh pengilang, ejen perkhidmatannya atau orang berkelayakan yang serupa untuk mengelakkan bahaya.Hanya penyambung yang sesuai mesti digunakan.22. Perkakas ini bertujuan untuk digunakan dalam rumah dan aplikasi serupa seperti:–kawasan dapur kakitangan dalam kedai, pejabat dan persekitaran bekerja lain;–rumah ladang;–oleh pelanggan dalam hotel, motel dan persekitaran jenis;persekitaran jenis sarapan dan katil.–Sila ikut langkah-langkah keselamatan di atasRekaan nisbah,membawa kemudahan dan keceriaan kepada hidup andaPendidihan pantas, menjimatkan masa dan tenaga untuk andaKawalan wap untuk mematikan cerek selepas air mendidih.Pemotongan untuk perlindungan didihan kering secara automatik.Tolok air senang dibaca.Termostat berkualiti tinggi.Perkakas ini bukan bertujuan untuk penggunaan oleh orang (termasuk kanak-kanak) yang kurang upaya fizikal, kekurangan deria atau kurang upaya mental atau kurang pengalaman dan pengetahuan, melainkan mereka telah diberikan pengawasan atau arahan mengenai penggunaan perkakas tersebut oleh orang yang bertanggungjawab untuk keselamatan mereka.Kanak-kanak perlu di awasi untuk memastikan mereka tidak bermain dengan perkakas tersebut.Jika kord bekalan rosak, ia mesti digantikan oleh pengilang, ejen perkhidmatannya atau orang berkelayakan yang serupa untuk mengelakkan bahayaPelupusan perkakas dan bateriSelepas pelaksanaan Arahan Eropah 2002/96/EU dalam sistemundang-undang kebangsaan, perkara berikut digunakan:Peranti elektrikal dan elektronik tidak boleh dilupuskan bersama sisa buangan domestik. Pengguna mesti mematuhi undang-undang untuk mengembalikan peranti elektrikal dan elektronik pada penghujung perkhidmatan mereka ke titik pengumpulan umum yang ditubuhkan bagi tujuan ini atau titik jualan. Butiran ini ditentukan oleh undang-undang kebangsaan bagi negara masing-masing.Simbol pada produk, manual arahan atau bungkusan ini menunjukkan bahawa produk ini tertakluk kepada peraturan ini. Dengan mengitar semula,menggunakan semula bahan atau bentuk lain bagi menggunakan peranti lama, anda membuat sumbangan penting untuk melindungi alam sekitar.41. Penutup2.Muncung 5. Tolok air 4.PemegangSuis 3.6. Tapak kuasa220-240V~50/60Hz 1.3 kg275*210*236mm 1.7L 1850-2200W No. Model Voltan terkadar Kuasa terkadar Kapasiti Dimensi Berat MK-17S26-RMK-17S26-W MK-17S26-BKUntuk penggunaan pada pertama kali atau tidak digunakan pada jangka masa yang lama, disyorkan untuk anda mengisi air sehingga ke tanda tahap maksimum dengan air paip, didihkan dan kosongkan cerek untuk sekurang-kurangnya 2 kali untuk mengosongkan cerek dari sebarang habuk kecil. Jangan minum air tersebut.1. Tekan butang penutup dan penutup boleh dibuka secara automatik.2. Alihkan cerek dari tapak ke tempat pengisian air. Isikan air ke dalamcerek dengan jumlah yang dikehendaki (tidak kurang dari minimumdan tidak lebih dari maksimum).)Tutupkan penutup, letakkan cerek kembali pada unit tapak.3. Sambungkan palam ke salur keluar kuasa (220~240V, AC) hidupkancerek dengan menekan suis. Cahaya akan menyala untuk menunjukkan cerek sedang dipanaskan.4. Cerek akan mati secara automatik sebaik sahaja air telah mendidihdan lampu neon mati.5. Angkat cerek dari tapak dan anda boleh menuangkan air keluar kedalam bekas.5ContentsUntuk memanjangkan jangka hayat cerek, sila bersihkan sisamineral dalam cerek secara kerap.Sentiasa buka palam dari soket palam dan benarkannya untuksejuk sebelum membersihkannya.Jangan gunakan bahan kimia, wul besi atau pembersih lelas untukmembersihkan bahagian luar cerek, kerana ini akan mencalarkanpermukaan dan memudarkan warna luaran.Kaedah pembersihan:1. Isikan cerek dengan cuka putih sebanyak 0.5L dan isikan air selebihnya sertabenarkan ia berdiri selama lebih dari 1 jam;2. Kosongkan larutan dari cerek. Lapkan sisa yang tinggal menggunakan kainlembap;3. Isikan cerek dengan air bersih, didihkannya dan kemudian buang air tersebut.Ulang semula dan cerek sedia untuk digunakan;4. Jika perlu, ulang semula pengendalian di atas selama beberapa kali;5. Bahagian permukaan cerek boleh dilap menggunakan kain lembap dandikilatkan dengan kain kering yang lembut;6. Genggam bahagian atas penapis skala dan tarik ke atas untuk mengeluarkannya. Basuh menggunakan air yang bersih dan keringkan dengan teliti sebelummeletakkan cerek.6用户手册使用本产品前,请仔细阅读本手册。
Chinese Hot Tea UrnsCH75N, CH100N SeriesOperator ManualGrindmaster-Cecilware4003 Collins Lane, Louisville, KY 40245 USA Phone: 502.425.4776 Toll F ree: 800.695.4500Fax: 502.425.4664Web:Email:*************)Safety Information.................2Rough-In Drawings.................3Installation...............................4Electrical Specifications...........4Priming....................................5Adjustments. (6)Cleaning...................................6Maintenance...........................8Parts Diagram........................11Parts List.................................14Wiring Diagram (15)Thank you for purchasing this quality urn. For your safety and the safety of others, read all warnings and the operator manual before installing or using the product. Properly instruct all operators. Keep training records. For future reference, record serial number here:Table of Contents©2016 Grindmaster-CecilwarePrinted in USA0516 Form #CW-327-01Part # 390-00071Grindmaster-Cecilware provides the industry’s BEST warranty. Visit for warranty terms and conditions.Model CH100NGB Series Cecilware ®2CAUTIONWARNINGSafety Information2Cecilware ®Chinese Hot Tea UrnsImportant Safety InformationThis is the safety alert symbol. It is used to alert you to potential personal injury hazards. Obey all safety messages that follow this symbol to avoid possible injury or death.For your safety and the safety of others, read all warnings and the operator manual before installing or using the product.DANGER:This term warns the user of imminent hazard that will result in serious injury or death.WARNING:This term refers to a potential hazard or unsafe practice, which could result in serious injury or death.CAUTION:This term refers to a potential hazard or unsafe practice, which could result in minor or moderate injury.NOTICE:This term refers to information that needs special attention or must be fully understood.Chinese Hot Tea Urns Cecilware ®3Rough-In DrawingsCH75N Single 3 Gallon Urn, Adjustable By-pass, and Electro-Mechanical Timer19.34.029.1 3.52.510NN10A14.016.0 5.410.129.14.019.328.010NN 105.43.52.514.010.1CL100N Twin 3 Gallon Urn, Adjustable By-pass, and Electro-Mechanical Timer4Cecilware ®Chinese Hot Tea UrnsElectrical SpecificationsInformation below provided for US models only. Check rating marking on urn nameplate. Consult factory for export model information.InstallationUnpacking InstructionsCarefully unpack the machine and inspect immediately for shipping damage. The packaging may contain unattached parts. Your machine was shipped in a carton designed to give it maximum protection in normal handling. It was thoroughly inspected before leaving the factory. In case of damage, contact the shipper, not Grindmaster-Cecilware.NOTICE:The person installing this appliance isresponsible for ensuring that electric and water connections meet the requirements of the national electric code, national plumbing code, and any local ordinances.See Rough-in Drawings for approximate dimensions and locations of electric and water input.Mechanical InstallationNOTICE:Do not turn thermostat on until allinstallation instructions have been followed.1.Inspect unit to see if any damage occurred inshipment.2.Remove the urn from the packing material. Thefour legs, faucets, and vent cap drain are packed separately with urn.3.Install legs by tilting urn on its side and screwinglegs into urn leg supports until hand tight.4.Carefully right unit and install in its permanentlocation, being sure to leave at least 6" on right side of urn for access to controls. Position urn so that the faucets drip into a drip trough or drain receptacle of some type.5.Level urn by adjusting legs. Then attach faucets andinstall vent cap drain.6.Cover(s) are shipped with knob(s) on inside toprevent damage. Simply unscrew and reverse.WARNING: ELECTRIC SHOCK HAZARD!Installation of this appliance should be performed by CAUTIONThese urns are heavy pieces of equipment. It is Neutral and Ground Wires # 14 AWG min.Note: Field wiring must be suitable for 75° C. Use copper wire only for power supply connections.GROUNDING: ON ALL URNS, CONNECT A GROUND WIRE TO GROUNDING LUG TO COMPLY WITH LOCAL ELECTRICAL CODES (14 AWG MIN. 75° C)Recommended Wire Size For Field-Wiring Urns US models only. Consult factory for export model information..Chinese Hot Tea Urns Cecilware®5Water Hook-upNOTICE: This equipment must be installed in compliance with applicable Federal, State and/or Local plumbing codes having jurisdiction. This product requires an approved back flow prevention water device, such as a double check valve, to be installed between the machine and the water supply. Incoming pressure should be greater than 30 psi and not more than 70 psi.Urn should be connected to cold water supply1.The automatic urn is equipped with a ¼" F larewater inlet fitting which is located on the back of the unit.2.Provide shut-off valve and union in supply line nearurn.3.Minimum inlet pressure at urn should be 30 PSI.4. Maximum inlet pressure recommended at 70 PSI.5. Copper flex tubing should be used for valveconnections.6. To ensure pressure at the urn of at least 30 PSI, use3/8" OD tubing for short runs, 1/2" OD tubing for longer runs, and larger size tubing for unusually long runs. Be sure other appliances will not reduce water pressure excessively.7. Turn on the water supply line and check for leaks. NOTE:For the best tasting tea, add a filtering system to the water supply line to eliminate any taste and/or odor from the water.NOTE:In areas with extremely hard water, a water softener must be installed in order to prevent mineral deposits that could result in malfunctioning of the equipment and in order not to void the warranty. Electrical Hook-upNOTICE:This equipment must be installed in compliance with applicable Federal, State and/or Local electrical codes having jurisdiction. Do not use extension cords. Make sure that the outlet the urn plugs into is grounded.1. Check rating marking on urn nameplate to be sureelectric lines match voltage, phase, and amperage requirements of urn. Select the proper cord and cord grip for electrical rating of the urn.2. Urn body MUST be grounded. A groundingterminal is provided for this purpose.3. Use only copper wire to connect this urn.NOTE: THERMOSTAT MUST BE IN THE "OFF" POSITION.1. Open water supply line valve to urn.2.Turn on or plug in the power supply to the urn.Water compartment will begin to fill automatically.Do not power up the urn when the water line is off.3. Wait until water is visible in center gauge glass (left-hand gauge glass on 3-gallon single urns). Then turn thermostat knob to 10; thermostat pilot light shows heater is on. Urn jacket will continue to fill automatically until water reaches the proper level.4.When indicator on dial thermometer approachesthe "W" in BREW zone, 200° - 205°F (93° - 96°C), urn is ready to brew tea.5.In high altitude locations (over 5000 ft. above sealevel), thermostat may have to be lowered to prevent boiling.6. Brew and discard at least one batch of water intoeach liner. Check that the fill level is correct. See the Adjustments section if changes are needed.WARNING: ELECTRIC SHOCK HAZARD!Installation of this appliance should be performed byInstallation (continued)PrimingWARNING: ELECTROCUTION HAZARD!Never use the ground conductor as a neutral. ThisCAUTION: BURN HAZARD6Cecilware ®Chinese Hot Tea UrnsCleaningAll sanitizing agents in the food zone mustcomply with 21 CF R 178.1010. Sanitize all food dispensing units periodically. All parts to be sanitized must be cleaned first. Cleaning and sanitizing frequency must follow state and local health department regulations.NOTICE:Do not use cleansers, bleach liquids,powders, or any other substance containing chlorine.These products promote corrosion and will pit the stainless steel. USE OF THESE PRODUCTS WILL VOID THE WARRANTY .After Each Brew:1.Dispose of tea leaves and rinse brew basket.Every Day:1.Drain the urn; then run a brew cycle of hot water.After spraying hot water into the liner, thoroughly brush the liner with a long handled brush.2. Drain the water and repeat step one. Run anotherbrew cycle. Brush the liner and drain.3.Wash the wire brew baskets with urn cleaner andrinse thoroughly.Weekly or Bi-Weekly, Depending on Use:1.Fill the urn liners with several gallons of hot water.2.Pour into the liner the recommended concentration of urn cleaning compound. Set the thermostat to high (NO. 10) and then run a brew cycle of hot water.3. Allow solution to remain in the liner for approximately 30 minutes.4. Scrub the inside of both the liner and the cover witha long handled brush.5. Drain the cleaning solution from the liner. Rinse byrunning several brew cycles with the sprayhead centered over the liner. Be sure to drain the rinsewater between cycles.6.Thoroughly clean the faucets.e a long, thin gauge glass brush to clean the teagauge glass. Use the same brush to clean the fitting at the bottom of the liner and the pipe connected to the faucet.8. Reassemble faucets. Fill the liners with hot waterand drain until the liner and all parts are completely rinsed.AdjustmentsThermostat AdjustmentThe Thermostat is factory set for proper dispense temperature of 200°F ± 3°F with the control knob set to the maximum clockwise position. If field adjustments are needed proceed as follows:• To DECREASE temperature, turn the control knob slightly in the COUNTERCLOCKWISE direction. • To INCREASE the water temperature -1.With the Thermostat Knob to its maximum clockwise position, remove the knob and locate the slotted adjustment screw inside the hollow thermostat shaft.ing a narrow-bladed screwdriver, engage slottedadjustment screw and turn it 1/4 turn slowly counter-clockwise. (continued next page)WARNING: SHOCK AND BURN HAZARDThermostat AdjustmentCAUTION: BURN HAZARDThe urn surfaces and water inside jacket are very hot.CAUTION: BURN HAZARDNever remove the faucet when the liner has water orFaucet BodySeat CupX014ABonnetFaucet HandleFaucet Assembly (D017A )Chinese Hot Tea Urns Cecilware ®7Thermostat Adjustment (continued)3.Allow a few minutes for the temperature to reachset level. The Heater Light will go ON, indicating the heating element is activated, wait for it to go OFF,indicating that the water has reached new set temperature.4.Take a temperature reading and repeat if necessary.Mechanical Timer AdjustmentThe factory pre-set mechanical timer can be adjusted for more or less water by following these instructions:1.Remove timer knob and loosen lock nut holdingstop pin.2.To increase volume of water, rotate stop pinclockwise.3.To decrease, rotate counterclockwise. Tighten locknut and replace knob.WARNING: SHOCK HAZARDThermostat BulbCouplingNut CCW - Decrease TemperatureWARNING: SHOCK AND BURN HAZARDTo prevent electric shock and burn hazard all tasks Adjustments (continued)Manual TimerThermostat Assy(L780A )8Cecilware ®Chinese Hot Tea UrnsMaintenanceThe rest of this manual contains information to aid the service technician who is maintaining this equipment.This section has information on performing common service tasks.If you still need help after reading this section, call Grindmaster-Cecilware Technical Service Department,(502) 425-4776 or (800) 695-4500 (USA & Canada only)(Monday through Friday 8 AM - 6 PM EST). Please have the model and serial number ready so that accurate information can be given.Prior authorization must be obtained from Grindmaster-Cecilware for all warranty claims.Grindmaster-Cecilware provides the industry’s BEST warranty. Visit our website at for warranty terms and conditions.To Move the UrnThe urn must be completely drained (jacket and liners)and allowed to cool prior to moving this urn.Spray Arm AssemblyThe new improved spray head system was designed to facilitate easier cleaning and maintenance. The swivel valve has a larger flow opening and the spray head cap is equipped with a stainless steel disc, used to control the flow of water.When ordering replacement parts, be sure to order the correct disc and spray cap for each urn, as shown in Parts Diagram Illustration.• To prevent lime buildup, especially in hard water areas, remove and clean spray head cap and spray head disc frequently.• To clean swivel valve loosen nut and remove spray arm assembly from urn.• Remove sediment by inserting a pipe cleaner through small hole in valve.• If maximum setting of timer fails to deliver enough water, check water pump.If Water Fails To Heat1. Check line fuse or circuit breaker. Replace or resetif necessary.2. Make sure thermostat is in ON position. Ifthermostat pilot light does not come on, replace thermostat. (Refer to instructions below.) If pilot light is on, measure continuity between terminals l and 2 of thermostat, and between terminals 3 and 4. If a resistance is measured, replace thermostat.3. If thermostat is okay, check wiring and repair ifnecessary: if wiring is okay, check heater resistance;if high or infinite, replace as follows:Replacing Heater1. Shut off power and disconnect water supply atelbow. Drain urn.2. Remove one tea gauge glass, faucet, shank, andliner.3. Tilt urn and disconnect wires to heater.4. Remove socket head screw and heater flange andlift heater out.5. Install new heater and reassemble urn.6. Repeat Priming instructions on page 5. NOTE: DONOT TUR N ON THER MOSTAT UNTIL UR N IS PRIMED.Replacing ThermostatThermostat is located in side box of urn. Lift off side box door to gain access to thermostat; then follow instructions below.1. Shut off power, disconnect water supply, and drainurn by opening hot water faucet. When faucet stops running you are ready to remove the thermostat bulb.2. Remove thermostat knob and two screws holdingthermostat in place.3. Disconnect wires from thermostat.4. Pull out thermostat bulb.5. Install new thermostat, push in the new thermostatbulb. Tighten compression nut on thermostat fitting to prevent leaking. 6. Repeat Priming instructions on page 5. NOTE: DONOT TUR N ON THER MOSTAT UNTIL UR N IS PRIMED.If Water from Cold Water Supply Line Does Not Enter Urn1. Check water supply to external shut-off valve.2. Check fuse on rear of side box and replace ifnecessary.3. If water supply and fuse are okay, remove fuse andlift off side box door exposing terminal block and electrical wiring.4. Check dual probe liquid level controller. (SeeComponent Tests )WARNING: SHOCK AND BURN HAZARDWARNING: SHOCK HAZARDWARNING: SHOCK AND BURN HAZARDWARNING: SHOCK HAZARDChinese Hot Tea Urns Cecilware ®9If Water Runs Out At Overflow Drain1. Make sure urn is level and overflow tube is vertical.2. Remove fuse from rear of side box.3. If water continues to flow, solenoid valve is dirty ornot seating properly. Replace solenoid as described below.Replacing Solenoid1. Shut off water supply, remove fuse, and lift off sidebox door.2. Disconnect wires from solenoid: then remove flarenut and unscrew solenoid valve from bracket.3. Install new solenoid and reinstall fuse and side boxdoor.4. If necessary, follow Priming instructions on page5.No Water from Spray Head 1. Check fuse first.2. F or CH urns: Turn brew timer knob clockwise.Replace timer if it does not go on. If timer goes on but pump doesn't, replace pump.Replacing Water Pump1. Shut off water supply and remove fuse. Drain urnto level of water faucet.2. Lift off side box door and disconnect the two pumpwires.3. Loosen union fittings on pump and remove pumpfrom urn. NOTICE: If your urn has older style pump with copper connections, it is imperative that you use a counter wrench when removing and installing pump to avoid damaging copper tubing. DO NOT OVERTIGHTEN.4. Replace pump and follow Priming instructions onpage 5.Component Tests Water Inlet Valve Test1.Turn power OF F. If the water level rises inside apartially filled tank, the Water Inlet Valve is leaking. 2.Disconnect wires from the Water Inlet Valve coil andconnect a 2 wire line cord to the terminals. Plug it into a 115V outlet. If water flows in and stops when you pull it out, the Valve is working fine. Repeat this test a few times. The problem may be in the Probe or Water Level Control Board.3.If the water does not flow in when the cord isplugged into an electrical outlet, the Solenoid coil may be damaged, opened or the valve may have an obstruction preventing the water from flowing in. 4.Clean or replace it.WARNING: SHOCK AND BURN HAZARDTo prevent electric shock and burn hazard, all tasks WARNING: SHOCK HAZARDMaintenance (continued)Hose Nut AssemblyComponent Tests Dual Probe TestIf lack of water persists, check the probe as follows:1.Turn on the power and water supply. Check insidethe tank to make sure the water is below the Probe.Pull the BLUE wire and terminal OFF the Probe rod. 2.If water still does not flow after the wire isdisconnected from the Probe, the problem may be in the Solid State Dual Level Control Board.3.If water starts flowing into the tank, the Probe maybe grounded, due to excessive liming. Check with Ohm meter.4.Clean or replace probe.Dual Probe Liquid Level Controller Test Check the Controller as follows:1.Make sure there is power input to the Controller atthe terminals AC1 & AC2. Your voltmeter should read 115 Volts. It should read the same at terminals AC1 & FILL when the water level is low. This is the output power to actuate the coil of the Solenoid Valve to open it.2.The lack of voltage at terminals AC1 & L-LEVEL orH-LEVEL indicates that the Controller is not working properly.3.Make sure all wire connections are tight, includingground.4.If after this, the Controller is still failing to open theWater Inlet Valve, replace it.10Cecilware ®Chinese Hot Tea UrnsMaintenance (continued)BlueWARNING: SHOCK AND BURN HAZARDTo prevent electric shock and burn hazard, all tasks WARNING: SHOCK HAZARDDisconnect power before attempting any electrical179 Chinese Hot Tea Urns Cecilware®1112Cecilware ®Chinese Hot Tea UrnsParts Diagram (continued)AUTOMATIC COFFEE URNSFAUCET, COFFEE FAUCET, HOT WATERSPRAY ARM ASSEMBLY FE200N, CL200N FE300-NTo p re v ent l ime bui l du p , es p ecia ll y in hard water areas, remo v e and c l ean s p rayhead ca p and s p ray head disc f re q uent l y . To c l ean swi v e l v a lv e, l oosen nut and remo v e s p ray arm assemb l y f rom urn .R emo v e sediment by inserting a p i p e c l eaner through sma ll ho l e in v a lv e .If ma x imum setting o f timer f ai l s to de l i v er enough water, chec k water p um p.TEA CHChinese Hot Tea Urns Cecilware®13Parts Diagram (continued)I dd d thi t l i th f t bl t14Cecilware ®Chinese Hot Tea UrnsParts ListChinese Hot Tea Urns Cecilware®15Wiring DiagramGrindmaster-Cecilware4003 Collins Lane, Louisville, KY 40245 USA Phone: 502.425.4776 Toll F ree: 800.695.4500 Fax: 502.425.4664Web:Email:*************©2016 Grindmaster-Cecilware Printed in USA 0516 Form #CW-327-01Part # 390-00071。
It’s normal if situations as below happen during operating:1.Slightly noise from the heating tube when heating.2.It takes a little bit longer time when it’s under low temperature.3.Slightly water drops on the spout.4.Bubbles on the tank when the water is about to run out.DO NOT ALLOWED CHILDREN USE THIS PRODUCTDO NOT ALLOWED SOAK THIS PRODUCT IN THE WATER OR BEING WASHED BY WATER 1.Wash1)Take the inner base, pour water in the kettle to wash it2)Empty the kettle after washing3)Install the inner base after washing2.Fill in waterOpen the top cover to fill in water.3.Boil waterTurn off the kettle 2 seconds in advanced, let the boil water completely come out.4.Spout comes out steam1)If the large amount of steam comes out2)Then please fill water in as arrows indicate5.Poor water quality, impurities1)Poke the silicone under the base2)Fill water in as arrows indicate, after that then put the silicone onInstruction1.Installed, fixed, and disassembled by professional technical staff only.2.DO NOT plug/unplug the power to make the machine work/stop.3.DO NOT place the machine upside down. Do not in touch of water in case of leakage orshort-circuit.4.Cut off the power and empty the tank if not using the machine for long time.5.When power on, it may take 2-5 seconds before water coming out, DO NOT touch the spoutin case being scalded.6.When turn it off, the hot water still comes out for 1-2 seconds, take the cup after the hotwater completely coming out.Product use1.WashTake out the inner base before washing or cleaning the kettle body, after washing or cleaning the kettle body, install the inner base.2.Fill in waterDO NOT remove the inner base to fill in water. Open the kettle top cover then fill water in the inner base. Water filled in must under the gage.3.Power onConnect the plug to the socket and the kettle body, turn the power on, then it will work.4.Boil waterPress the button switch, 2-5 seconds hot water comes out; press the button switch again, 1-2 seconds hot water stop coming out.5.Dry-burnt protectionWhen the water runs out, it will automatically power off to protect the kettle. Meanwhile, the indicator’s on, after filling in water it will back to normal.Dear users:Thank you very much for choosing our Instant Hot Water Kettle, it’s designed for house-hold and office use, very fast, very convenient and very healthy. This Instruction can help you to master the product use. If you have any problems during the product use, please feel free to contact our after-sales center, we will offer best service for you.Product features1.Instant Hot WaterNonmetal separation of water and electricity technology, 2-5 seconds hot water. No waiting, instant hot water anytime.2.Advanced technologyAdvanced technology, kill the bacterial completely. Overcame the traditional problems “Low temperature”“Furring”“Heavy metal pollution” etc.3.Health & SafetyAll the materials that in contact with water, are under the Water Safety approvals. Separated the water and the electricity, Anti Dry-burnt and leakage protection, ensure your safety. The electric conversion efficiency is over 98%, safe 50% more energy than the traditional kettles, environmental friendly.User service manualThank you for choosing our product, if you have any question when using our product, please feel free to contact us, we will offer you the best service, thank you. For better use this product, please note as below:1.We offer 1 year warranty for DEME product. Any DEME product users, for product qualityproblem, please go our maintenance department with your purchase invoice.2.For any quality problem, please contact the maintenance department, please do notdisassemble, or the users will lose the maintenance rights of this product, and our company will not take any responsibility for that.3.The product maintenance proved by warranty card and purchase invoice.4.The situations below are not covered under warranty:(1)Product damage due to improper use.(2)Users disassemble the product.(3)Damage due to force majeure.(4)Warranty period expired.5.For product maintenance, please keep this product cartons over 6 months.Thank you!。
电水壶使用说明
一.使用说明
1.将水壶移离电源基座。
2.按下开盖按钮,打开壶盖,向水壶灌入清水,注意不要超过其最大水位。
3.盖好壶盖,将水壶放在电源基座上。
4.按下电源开关按钮,电源指示灯亮,水壶开始加热。
5.水开后,开关自动断电,电源指示灯灭。
打开保温开关,保温指示灯亮,水
壶开始保温,不要保温时,再次按保温开关,水壶停止保温,保温指示灯灭。
6.将水壶提升离开基座即可倒水饮用。
二.安全须知
1.本产品只能用来烧水,千万不要用来煮牛奶,咖啡或茶等,不能用来蒸煮食
物。
2.不要将水壶的壶身和电源基座放在潮湿的地方或浸入水中;手湿时,不要操
作本产品。
3.请把水壶放置在平坦的桌面,不要将电热水壶靠近热源放置,也不可靠近或
置于任何电器之上。
4.向水壶加水时不能低于最低水位线,不能超过其最大水位。
5.水壶放置到电源基座上的时候必须擦干水壶底部水迹。
6.操作时,请使用安全手柄,不要接触不锈钢壶体以免烫伤。
7.煮水时,防止干烧。
8.当水烧沸时,酷热的水蒸汽会引起烫伤,水壶正在烧水时,不要打开壶盖。
Instructions Of Kettle
One. Instructions for use
1、Make the kettle away from the power base.
2、Press the button of the lid,open the lid,poure water into the kettle, and be careful not to exceed the maximum level .
3、Close the lid , and put the kettle on the power base.
4、Press the button of power ,then the power indicator will light, and the water in the kettle begins to be heated.
5、After the water is boiling ,switch off automatically, and the power indicator is off . When open thermal switch, the thermal indicator will light , the kettle begins to insulation, once you do not want to insulation water , Press again to switch insulation , water will not insulation , the insulation indicator lights.
6、Lift the kettle from the base and you can drink the warer at once.
Two . Safety Tips
1 、This product can only be used to boil water ,do not use it to boiled milk, coffee or tea etc , can not be used for cooking food.
2、 Do not put the expensive of the kettle and the power base on a wet or immersed in water ;when your hands are wet, do not operate the product.
3 、Pease put the kettle on a flat desktop, and do not be put near a heat source, and do not close or placed on any appliances.
4、when water is added to the kettle,not less than the minimum water level and can not exceed the maximum level.
5、Before the kettle is placed on the power base , the water stains under the bottom of the kettle must be dried;
6、When you operate it ,please use the safety handle ,do not touch the stainless steel body to avoid burns.
7、To prevent dry when boil water.
8、When boiling water, hot water steam can cause burns,when the water is boiling,do not open the lid.。