3dsMax9概述3dsMax9的操作界面
- 格式:ppt
- 大小:1.26 MB
- 文档页数:27
3dsmax9中文版实用教程教学设计
简介
3dsmax是一款三维建模、动画、渲染软件,拥有强大的制作能力和广泛的应用领域。
3dsmax9是早期的版本,虽然现在已有更新的版本,但它仍然被很多用户所使用。
针对3dsmax9中文版的实用教程教学设计,可以帮助初学者快速掌握软件的基本操作。
教学设计
目标学习群体
•想要学习3dsmax9的初学者和入门者
•对三维建模、动画、渲染有一定兴趣和基础知识的人群教学内容
第一章:简介及软件环境搭建
1.1 了解3dsmax9软件及其功能特点
1.2 下载安装3dsmax9中文版软件
1.3 了解软件界面及其常用工具
第二章:基础建模技巧
2.1 常用建模工具及其操作方法
2.2 单个物体建模技巧
2.3 多个物体建模技巧
1。
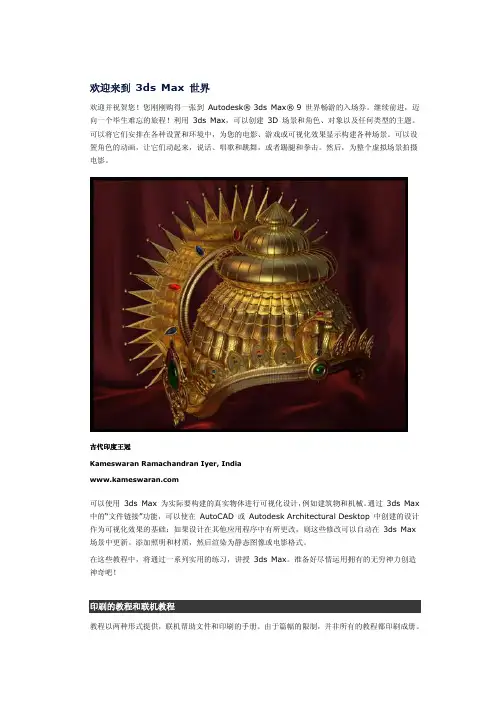
欢迎来到3ds Max 世界Autodesk® 3ds Max® 9 世界畅游的入场券。
继续前进,迈欢迎并祝贺您!您刚刚购得一张到向一个毕生难忘的旅程!利用3ds Max,可以创建 3D 场景和角色、对象以及任何类型的主题。
可以将它们安排在各种设置和环境中,为您的电影、游戏或可视化效果显示构建各种场景。
可以设置角色的动画,让它们动起来,说话、唱歌和跳舞,或者踢腿和拳击。
然后,为整个虚拟场景拍摄电影。
古代印度王冠Kameswaran Ramachandran Iyer, India3ds Max 3ds Max 为实际要构建的真实物体进行可视化设计,例如建筑物和机械。
通过可以使用中的“文件链接”功能,可以使在 AutoCAD 或 Autodesk Architectural Desktop 中创建的设计作为可视化效果的基础:如果设计在其他应用程序中有所更改,则这些修改可以自动在3ds Max 场景中更新。
添加照明和材质,然后渲染为静态图像或电影格式。
在这些教程中,将通过一系列实用的练习,讲授3ds Max。
准备好尽情运用拥有的无穷神力创造神奇吧!教程以两种形式提供,联机帮助文件和印刷的手册。
由于篇幅的限制,并非所有的教程都印刷成册。
联机教程与“用户参考”之间的链接在印刷的手册中以带有下划线文字的形式出现。
手册中的插图是黑白打印的,而联机系统中的插图是彩色的。
若要学习联机教程,请从3ds Max 的“帮助”菜单中选择“教程”,以显示联机教程。
本套教程的编制归功于许多人士的辛勤劳动和聪明才智,在此表示特别感谢。
要特别感谢的有:•Jean-Yves Arboit、Jaykar Arudra、Alessandro Baldasseroni、Beans Magic Co. Ltd、Martin Coven、Frances Gainer Davey、Joana Garrido、Tommy Hjalmarsson、Kameswaran R. Iyer、Michael Koch、James Ku、Sören Larsson、Daniel Martínez Lara、Casey McGovern、Eni Oken、Ponsonnet Olivier、Ben Paine、Herman Saksono、Johannes Schlörb、Pradipta Seth、Metin Seven、和Marc Tan - 使用3ds Max 创建了美丽的图像,而且允许在本套联机教程中使用这些图像。
3ds Max 9Introduction to 3ds Max 93ds Max 9 is a professional 3D computer graphics software developed by Autodesk. It is widely used in architecture, interior design, video game development, and film production. In this document, we will explore the various features and functionalities of 3ds Max 9.Interface and WorkflowOne of the first things you will notice when opening 3ds Max 9 is its user-friendly interface. The software provides a customizable workspace with various panels and toolbars. It’s designed to enhance the user’s workflow and efficiency.The interface consists of several key components, including:1.Menu Bar: The menu bar at the top of the window provides access tovarious commands and features.2.Toolbars: 3ds Max 9 includes multiple toolbars that containfrequently used tools and options.3.Viewports: The viewports display different views of the 3D scene,such as a perspective view, top view, left view, etc. Users can navigate andmanipulate the scene directly in the viewports.mand Panel: The command panel contains various tabs,including Create, Modify, and Display, allowing users to create, edit, andmanipulate objects in the scene.5.Status Bar: The status bar at the bottom of the window providesimportant information about the current scene, such as the number of polygons, vertices, and objects.Modeling Tools3ds Max 9 offers a wide range of powerful modeling tools that enable users to create complex 3D objects. Some of the key modeling tools include:1.Polygon Modeling: Users can create polygons and manipulate themto form various shapes and objects. 3ds Max 9 provides tools like extrude, bevel, chamfer, and more to modify the polygons.2.NURBS Modeling: Non-Uniform Rational B-Splines (NURBS)modeling allows users to create smooth and organic shapes. 3ds Max 9provides NURBS tools like loft, revolve, and patch to create complex curvedsurfaces.3.ProBoolean: ProBoolean is a powerful tool that allows users toperform boolean operations on 3D objects. It can be used to combine, subtract, or intersect objects to create more complex shapes.4.Modifiers: 3ds Max 9 includes a wide range of modifiers that can beapplied to objects to achieve various effects. Modifiers can be used to deform, smooth, or animate objects.Texturing and MaterialsIn addition to modeling tools, 3ds Max 9 provides a comprehensive set of texturing and material creation options. Users can apply textures and materials toobjects in the scene to add realism and detail. Some of the key texturing and material features include:1.UV Mapping: UV mapping allows users to specify how textures areapplied to 3D objects. 3ds Max 9 provides various UV mapping tools andoptions to achieve precise texture placement.2.Material Editor: The Material Editor allows users to create andcustomize materials. It provides a node-based workflow, allowing users toconnect different material components to create complex materials.3.Texture Mapping: 3ds Max 9 supports various texture mappingmethods, including procedural textures, bitmap textures, and more. Users can control the tiling, rotation, and placement of textures on objects.4.Shading: Users can control how light interacts with materials usingshading options. 3ds Max 9 provides options like specular highlights,reflections, and refractions to create realistic materials.Animation and Rigging3ds Max 9 is widely used in the animation industry due to its powerful animation and rigging tools. Users can create complex character animations and realistic simulations using these tools. Some of the key animation and rigging features include:1.Keyframe Animation: Users can set keyframes to define the position,rotation, and scale of objects over time. 3ds Max 9 provides a robust timeline and animation curve editor to control the animation.2.Character Animation: The biped system in 3ds Max 9 allows users toanimate humanoid characters efficiently. Users can create and manipulatebiped skeletons, apply motion capture data, and add muscle deformations for realistic character animations.3.Particle Systems: 3ds Max 9 includes particle systems that allowusers to create realistic effects like fire, smoke, and rain. Users can control the behavior and appearance of particles using different parameters.4.Physics Simulations: The MassFX physics engine in 3ds Max 9enables users to create realistic simulations of objects and their interactions.Users can simulate rigid bodies, cloth, and fluids to create dynamic scenes.Rendering and OutputOnce the 3D scene is created and animated, users can render it to create final output in various formats. 3ds Max 9 provides powerful rendering options that allow users to control the quality and appearance of the final output. Some of the key rendering and output features include:1.Scanline Renderer: The Scanline renderer in 3ds Max 9 is a fast andefficient rendering engine that produces high-quality images. It supportsadvanced lighting and shading techniques to create realistic renders.2.Mental Ray: 3ds Max 9 includes the Mental Ray renderer, whichoffers advanced global illumination, caustics, and ray tracing capabilities. Itproduces high-quality photorealistic renders.3.Render Elements: Render elements allow users to separate differentcomponents of the scene, such as shadows, reflections, and specular highlights.Users can later composite these elements in post-production for greater control over the final image.4.Output Formats: 3ds Max 9 supports various output formats,including image formats like JPEG, PNG, and TIFF, as well as animation formats like AVI and QuickTime. Users can specify the resolution and frame rate of the output.Conclusion3ds Max 9 is a powerful and versatile software for 3D modeling, animation, and rendering. Its extensive set of tools and features make it a popular choice among professionals in the architectural, gaming, and film industries. Whether you are creating complex 3D scenes, character animations, or realistic simulations, 3ds Max 9 provides the necessary tools to bring your ideas to life.。

3dsMax9中文版基础教程詹翔王海英课程设计一、课程设计目的本课程旨在让学生掌握3dsMax9这一三维建模软件的基础操作和技能,能够熟练运用软件完成一定的三维建模任务。
同时,通过本课程的学习,还能够培养学生的空间想象和美术审美能力,为日后从事设计行业打下坚实的基础。
二、课程设计内容1. 3dsMax9的基本操作本部分主要介绍3dsMax9软件的界面和视窗布局,以及基础的操作方法。
包括:•软件的安装与注册•界面线条的区分•三视图与视窗切换•视窗的缩放和平移等2. 基础建模技能本部分主要介绍3dsMax9中常用的基础建模技能,包括:•建立基本几何体•编辑拓扑结构•模拟实物表面纹理3. 材质贴图技术本部分将介绍如何使用材质编辑器,创建具有真实感的材质纹理。
包括:•材质库的选择和应用•材质编辑器的使用方法•合成不同的材质4. 灯光处理技术本部分将介绍如何科学合理地添加灯光,展示模型的形态和材质,包括:•不同类型灯光的使用方法•环境灯光的添加•光影效果的调整5. 相机调整技术本部分将介绍通过调整相机角度和视角展示出不同的画面效果,包括:•相机区域的设定•焦距、物体距离、光圈等参数设定•视角设置和动画过渡6. 动画制作技术本部分将介绍如何使用3dsMax9制作简单的动画,包括:•关键帧动画•路径编辑器•动画效果的导出和渲染方法三、考核与评价本课程的成绩由平时作业(50%)和期末考试(50%)组成。
考核方式包括作业提交、机房实习和课堂问答等。
对于学生每堂课的学习情况,将进行记录。
对每份作业将进行详尽的点评和修改建议,以便学生有力地调整和提高学习成效。
四、课程资源本课程所需的教材为《3dsMax9中文版基础教程》一书。
另外,学生可以在网络上寻找相关的教学视频和教程,进一步增强学习效果。
五、结语3dsMax9中文版基础教程是一门基础的三维建模课程,对于初学者来说,课程内容十分重要,涉及到了建模、材质贴图、灯光调整、相机调整和动画制作等方面。
第一章 3ds max 9.0入门第一节任务题目本例所要制作的是合并场景模型,使大家对合并场景有个初步的认识。
第二节任务导入3DS MAX 9.0是基于Windows 2000和Windows XP等操作平台的软件。
本例主要是利用一个新的场景文件,使用“合并”进行模型的的组合,生成新的场景文件。
第三节任务目标一、目的了解3ds MAX 9的工作界面,学习3ds MAX 9的工作过程。
二、重点1.掌握启动和关闭软件程序。
2.熟悉3ds max 9的工作界面。
3.掌握学习3ds max 9的技巧。
三、难点3ds max 9的安装以及破解过程。
第四节核心技能根据任务要求,利用文件基本操作合并场景文件。
第五节任务讲析一、综合实例——创建小屋模型1.启动软件单击,选择程序,如图1-5-1所示,启动3Ds max 9.0软件。
图1-5-1 启动软件2.打开场景文件(1)单击菜单【文件】>【打开】,弹出【打开文件】对话框,如图1-5-2所示。
图1-5-2 【打开文件】对话框(2)单击“查找范围”右面的,找到第一章素材,如图1-5-3所示,选择“动手做-创建场景.max”文件。
图1-5-3 打开素材文件(3)单击按钮,打开场景文件,如图1-5-4所示。
图1-5-4 打开场景文件(4)单击视图控制区的按钮,将所有视图最大化显示。
3.合并场景文件(1)单击【文件】>【合并】命令,弹出合并文件对话框,如图1-5-5所示。
图1-5-5 合并文件对话框(2)单击“查找范围”右面的,找到第一章素材,如图1-5-6所示,选择“床.max”文件。
图1-5-6 找到床场景素材(3)单击按钮,弹出合并床场景对话框,如图1-5-7所示,选择[床],单击按钮,场景如图1-5-8所示。
(4)单击“床”模型,使用移动按钮,调整坐标,移动到合适的位置,如图1-5-9所示。
(5)同样的方法,合并吊灯,如图1-5-10所示。
(6)同样的方法,合并地灯,如图1-5-11所示。

3dsmax9中文版实用教程教学设计概述3dsmax9是一款功能强大的三维建模软件,具有广泛的应用领域,如游戏、影视、产品设计等。
本教程旨在为初学者提供基础的操作技能,以及在实际应用中的经验总结,帮助读者快速掌握软件的使用方法,提高软件操作效率。
教学设计教学目标•掌握3dsmax9软件的界面布局及基本操作方法;•熟悉基本建模工具的使用;•理解光照设置和材质贴图等概念;•了解动画制作的基础流程。
教学内容第一章软件基础1.1 介绍3dsmax9软件的使用范围和应用领域。
1.2 界面布局及窗口交互操作方法。
1.3 视角和视图切换。
1.4 常用快捷键的使用方法。
1.5 文件格式及保存方式。
第二章建模工具使用2.1 建模工具的分类及基础操作方法。
2.2 常用建模工具的使用示例。
2.3 复制、缩放、旋转等工具的应用。
2.4 条件变形的使用方法。
2.5 连接和合并操作。
第三章光照和渲染3.1 光线追踪的原理及应用趋势。
3.2 光源类型及材质设置。
3.3 环境光和全局光照的应用。
3.4 贴图的应用方法和质量控制。
3.5 渲染设置和输出。
第四章动画制作4.1 动画基础流程及概念解释。
4.2 关键帧和时间线的操作。
4.3 动作和轨迹的编辑工具。
4.4 物理模拟和特效生成。
4.5 动画返回和导出。
教学方法本教程采用全程实例教学法,通过简单易懂的例子,辅以详细的操作步骤和说明,巩固知识点,并且将理论内容和实际操作相结合,加深学生的印象。
教学媒介本教程使用文字和图片相结合的方式进行教学,示例图片和代码均经过处理,符合语言文字规范,不包含真实姓名和敏感信息。
教学评价本教程采用小组合作学习评价和个人作业评价相结合的教学评价体系。
小组合作学习评价侧重于学生在团队中的协作能力和课堂表现;个人作业评价侧重于学生个人操作技能和专业知识掌握程度。
总结3dsmax9是一款功能强大的三维建模软件,为学生的学习和未来的职业发展提供了重要的帮助。
CAD 模型材质灯光PS 材料3ds max 9大风暴一、认识操作界面1.屏幕布局:菜单栏、主工具行(可在上面点右键)、左边竖行工具行(主要是动力学)、中间的四个窗口(比例可调节)、右边是命令面板(创建、修改、层次、运动、显示、工具面板)、3DS脚本语言、动画时间轴(选择与锁定的切换、自动关键帧)、曲线编辑器(关键点的调节)、关键点过滤器、时间配置面板、右下边的视窗操作工具。
2.菜单栏:重置、合并、归档、自定义(单位设置)。
3.主工具行:撤销、重做、连接、断开、空间扭曲、交叉选择、移动、旋转、缩放、坐标系统(视图)、轴心点(轴点中心、物体中心、变化坐标中心)、2.5维捕捉—右键(捕捉、选项)、镜像、对齐4.命令面板:创建(几何、图形、灯光、摄像机、空间扭曲、系统)、修改(修改器)、层次(调节物体轴的位置)、运动、显示、工具。
5.动画控制区:时间配置6.视图区:4个视图(3个正视图和一个透视图快捷键:T F L)材质编辑器=将材质指定给选择的对象,视图-右键-配置-视口配置(强制双面)。
7.视图控制区:缩放工具(CTRL+ALT)放大工具视图最大化视野变换(框选)平移工具(鼠标中键)旋转(视图、物体、物体的子对象及点边等旋转)最大化8.快速对齐(主工具栏)与克隆对齐(工具菜单里)9.阵列预览(工具菜单栏里)与显示消隐(工具—更多—对象显示消隐)10.快捷键‘X’:激活动态坐标(开关)。
11.运动摄影机:自动关键帧——拖动时间滑块——移动摄影机(穿行工具:可用摄影机记录动画)12.mental ray模拟真实天光:F10调出渲染面板——制定渲染器mental ray(可创建出Mr-sky和Mr-sun)(渲染——环境——曝光控制——对数曝光控制和室外日光)(渲染设置——间接照明——最终焦距)13.系统日光:(创建——系统——创建日光系统)在修改面板里的太阳光选择MRSUN天光选择MRSKY同时选择对视曝光控制和室外日光和最终聚集。