易用系统使用说明书
- 格式:doc
- 大小:135.50 KB
- 文档页数:20

目录通用组态式工业自动化监控系统易控(INSPEC)入门一、简介1.1易控是什么易控是一套通用的监控和数据采集(SCADA)软件,亦称人机界面(HMI/MMI)软件,俗称组态软件。
易控以通信的方式和控制系统相连,能读写控制系统内部的信息,并以图形和动画等直观形象的方式呈现这些信息,以方便对控制流程的监视。
也可以通过易控直接对控制系统发出指令、设置参数干预控制流程。
易控能对控制系统的数据进行运算处理,将结果返回给控制系统,协助控制系统完成复杂的控制功能。
易控还能对从控制系统得到的以及自己产生的数据进行存储、报表等等其它功能,从而延伸控制系统的能力和弥补控制系统的不足。
比如易控可以作为中间桥梁,将控制系统和工厂的企业管理信息系统联结起来, 将多个控制系统联结起来,使它们之间能交换数据、共享资源,协调和管理曾经是各自孤立的控制系统。
从而在更大范围内优化了控制结构,提高综合自动化效率。
易控可以应用于机械制造、化工、电力、冶金等任何涉及自动化控制的领域,它本身没有行业的限制,只要它和控制系统之间能进行数据交换即可。
易控内置了对常见PLC、DCS、PC板卡、智能仪表等设备的通信支持。
易控系统典型的使用情况如下图所示:易控可以下挂多个控制系统,同时和多个系统连接,并在它们之间转发数据,如下图所示:易控可以连接企业的管理信息系统,将实时系统中的数据上传,也可以连接其它应用程序,向它们提供实时数据,如下图所示:易控提供了丰富的对控制系统的监视、控制和管理功能,但在用户的实际应用中,使用什么功能和达到什么效果都是由用户自己来决定的。
易控系统带有一个功能强大的二次开发平台,用户通过使用该开发环境,来确定自己的最终监控功能和效果。
1.2易控主要特点易控吸取了国内外组态软件的优点,以功能强大、性能稳定、图形精美、易学易用、开发高效、扩展容易等优点为自动化系统的监控提供了理想的解决方案。
技术领先、面向未来:易控是第一套基于Microsoft的最新DOTNET平台的同类软件,还采用了大量像XML、Remoting、设计时支持架构、基于组件、及时消息等一系列最新的软件技术,结合最新的通信和控制科技,具有更多的技术优势和面向未来的发展潜力,引领了组态软件未来的发展方向。
系统功能说明书模板一、概述本系统功能说明书旨在为使用者提供关于系统的详细说明,包括系统的功能、特点、操作方式、维护方法等。
本说明书将帮助使用者更好地理解、使用和维护该系统。
二、系统功能说明1、功能介绍本系统的主要功能是,通过使用先进的技术,实现功能,提高效率。
2、功能特点本系统具有以下特点:(1)易于操作:界面友好,操作简单,用户只需经过简单的培训即可熟练使用。
(2)高效稳定:采用先进的技术,确保系统运行稳定,提高数据处理效率。
(3)安全可靠:数据传输和存储均采用加密技术,确保用户信息安全。
(4)智能提示:系统具备智能提示功能,帮助用户快速解决问题,提高工作效率。
三、操作说明1、登录与退出用户通过输入用户名和密码进行登录,登录成功后即可进入系统主界面。
如需退出系统,请点击主界面右上角的“退出”按钮。
2、主要功能操作本系统主要功能包括等,下面分别进行说明:(1)操作:进入界面,输入相关参数,然后点击“确定”按钮即可完成操作。
(2)操作:进入界面,选择要操作的数据项,然后点击“编辑”按钮进行修改。
修改完成后,点击“保存”按钮即可完成操作。
四、维护说明为确保系统的正常运行,请定期进行以下维护操作:(1)定期备份数据:建议每周对系统数据进行备份,以防止意外情况造成的数据丢失。
(2)更新程序:请定期检查并更新系统的最新版本,以确保系统的稳定性和安全性。
(3)清理缓存:定期清理系统缓存,以提高系统运行速度和稳定性。
(4)检查硬件设备:定期检查硬件设备是否正常运行,如有问题请及时报修。
五、常见问题及解决方案在使用本系统的过程中,可能会遇到一些常见问题,下面列出并给出相应的解决方案:(1)问题一:无法登录系统。
解决方案:检查用户名和密码是否正确,确认无误后再次尝试登录。
如仍有问题,请技术支持人员。
(2)问题二:无法完成某项功能。
解决方案:请检查系统是否正常运行,如有异常情况,请技术支持人员进行处理。
如因用户操作不当导致的问题,请参考操作说明进行修正。
硬件使用说明书—TC1026版本:V1.10|中文文档修订历史:版权信息上海同星智能科技有限公司上海市嘉定区曹安公路4801号6/8层本着为用户提供更好服务的原则,上海同星智能科技有限公司(下称“同星智能”)在本手册中将尽可能地为用户呈现详实、准确的产品信息。
但介于本手册的内容具有一定的时效性,同星智能不能完全保证该文档在任何时段的时效性与适用性。
本用户手册中的信息和数据如有更改,恕不另行通知。
为了得到最新版本的信息,请您访问同星智能官方网站或者与同星智能工作人员联系。
感谢您的包容与支持!未经同星智能书面许可,不得以任何形式或任何方式复制本手册的任何部分。
@版权所有2023,上海同星智能科技有限公司。
保留所有权利。
目录1.产品简介 (1)1.1产品概述 (1)1.2典型应用 (1)1.3功能和参数 (1)1.3.1功能特征 (1)1.3.2技术参数 (2)1.3.3电气参数 (2)1.4发货清单 (3)2.硬件接口说明 (4)2.1硬件接口说明 (4)2.2LED指示灯说明 (5)3.快速使用 (6)3.1下载安装TSMaster上位机 (6)3.2连接设备,配置通道 (8)3.3报文发送 (9)3.4帮助文档及视频教学 (10)3.5TSMaster API二次开发 (11)3.5.1Python调用动态库 (11)3.5.2C调用动态库 (11)3.5.3调用接口示例 (12)3.6示例工程 (14)4.检查和维护 (15)5.常见问题及解答 (16)5.1线路连接正确但无法正常通信: (16)5.2报文观察不便以及信号过滤: (17)5.3如何加载数据库: (18)5.4如何自动记录报文: (18)5.5如何回放报文(离线回放和在线回放): (19)6.附录CAN2.0B协议帧格式 (20)6.1CAN2.0标准帧: (20)6.2CAN2.0扩展帧: (21)7.免责声明 (21)关于同星........................................................................................................................................汽车电子工具链国产领导品牌1.产品简介1.1产品概述TC1026是同星智能推出的一款多通道CANFD和LIN总线接口设备,CANFD总线速率最高支持8M bps,LIN支持速率0~20K bps,产品采用高速USB2.0接口与PC连接,Windows系统免驱设计使得设备具备极佳的系统兼容性。

Dell Lifecycle Controller USC/USC-LCE 1.4 版 用户指南概览USC 或 USC-LCEUSC 和 USC-LCE 的功能USC 和 USC-LCE 操作故障排除和常见问题架构易用系统组件名称注和小心本说明文件中的信息如有更改,恕不另行通知。
© 2010 Dell Inc. 版权所有,翻印必究。
未经 Dell Inc. 书面许可,严禁以任何形式复制这些材料。
本文中使用的商标:Dell™、DELL 徽标、OpenManage™ 、PowerEdge™ 和 PowerVault™ 是 Dell Inc. 的商标。
Intel ® 是 Intel Corporation 在美国和其他国家或地区的商标或注册商标。
Boradcom ® 是 Broadcom Corporation 在美国和/或其他国家或地区的商标或注册商标。
Microsoft ® 、Windows ® 和 Windows Server ® 是 Microsoft Corporation 在美国和/或其他国家或地区的商标或注册商标。
VMware ® 和 ESX™ 是 VMware, Inc. 在美国和/或其他司法管辖区的注册商标或商标。
Novell ® 和 SUSE ® 是 Novell Inc. 在美国和其他国家或地区的注册商标。
R e d Hat ® 是 Red Hat, Inc 在美国和其他国家或地区的注册商标。
Citrix™ 是 Citrix Systems, Inc. 和/或其一个或多个子公司的商标,并可能已在美国专利商标局以及其他国家或地区注册。
Linux ® 是 Linus Torvalds (Linux 内核的原始作者)的注册商标。
本说明文件中述及的其他商标和商品名称是指拥有相应商标和商品名称的公司或其产品。

1.系统登录a.账户登录输入用户名和密码,点击【登录】即可登录系统。
系统部署安装成功后,使用默认用户(admin)密码(1111)登录系统进行系统配置。
图3.1b.指纹登录注意:使用指纹登录需要技术人员进行采集指纹和系统配置。
登录界面显示“指纹登录已启动,请录入指纹”,将设置时录入相应手指放在指纹机上,即可自动验证指纹账户登录到系统。
如果没有连接指纹设备,界面上显示“未检测到指纹设备”。
图3.2进入系统后,首先看到门户界面,用户根据实际使用需要,进入相应的模块。
图3.32.远程提讯第一步:单击门户界面的远程提讯按钮,进入远程提讯界面。
第二步,单击远程提讯按钮,在弹出的界面上选择远程提审室,确定后,进入开始办案界面。
第三步:填写案件办案信息并设置刻录后,单击确定按钮,即可开始审讯,并进入办案现场界面。
第四步,在办案现场界面,可以实现录入笔录并添加重点标记等操作,查看提讯嫌疑人视频,控制提审终端显示信息等操作。
同时也可以在办案过程中,根据实际情况修改办案信息,在结束审讯前可以在扩展功能中打印工作说明文档。
3.指挥参审进入远程提讯模式后,单击远程指挥按钮,进入指挥参审界面。
参审指挥有两种方式:1)单击打开地图图标,在电子地图界面,找到相应的办案室,在办案室图标上右键,在右键菜单中选择指挥参审。
2)在办案室列表中,找到相应办案室,单击指挥参审按钮,进入指挥参审界面。
在指挥参审界面,用户可以查看实时笔录更新,查看案件信息和涉案人员具体信息,同时也可以预览办案室视频,控制办案室特写球机转动。
如果需要跟办案人员进行交流,可以单击通信标签,展开列表,找到办案用户名字,双击即可进行文字、语音等通信交流。
4.本地审讯第一步:单击门户界面上的本地办案按钮,进入本地办案界面。
第二步:单击一键审讯按钮,在弹出的一键审讯界面中,填写办案信息,并根据实际情况选择响应模板,设置刻录方式后,单击开始办案即可进行本地审讯。
第三步:在办案现场界面,可以实现录入笔录,并添加重点标记等操作,同时也可以在办案过程中,根据实际情况修改办案信息,在结束审讯前可以在扩展功能中打印工作说明文档。

ma目录1、文档说明 (7)2、产品功能 (7)3、登录/退出 (7)3.1功能点简介 (8)3.2入口路径 (8)3.3使用说明 (8)3.3.1登录 (8)3.3.2通讯设置 (10)3.3.3退出 (13)4、K线 (13)4.1功能点简介 (13)4.2入口路径 (14)4.3使用说明 (15)5、系统 (16)5.1功能点简介 (16)5.2入口路径 (16)5.3使用说明 (16)5.3.1查询历史结算单 (16)5.3.2查询资金 (17)5.3.3退出 (18)6、报表 (19)6.1功能点简介 (19)6.2入口路径 (19)6.3使用说明 (19)7、套利 (20)7.1功能点简介 (20)7.2入口路径 (20)7.3使用说明 (20)8、配置 (21)8.1功能点简介 (21)8.2入口路径 (21)8.3.1选项 (22)8.3.2界面锁定 (33)8.3.3合约快捷键 (34)8.3.4界面风格及配置项切换 (34)8.3.5分组设置 (37)8.3.6资金使用比例设置 (40)9、帮助 (40)9.1功能点简介 (40)9.2入口路径 (40)9.3使用说明 (40)10、账户管理面板 (41)10.1功能点简介 (41)10.2入口路径 (42)10.3使用说明 (43)10.3.1“有效”勾选 (43)10.3.2“选择”勾选 (44)10.3.3添加账户(NEW) (45)10.3.4同步账户持仓 (47)10.3.5分组设置 (52)11、行情面板 (52)11.1功能点简介 (52)11.2入口路径 (53)11.3使用说明 (53)11.3.1普通行情 (53)11.3.2套利行情 (55)11.3.3篮子行情 (57)11.3.4期权行情 (58)12、策略面板 (59)12.1.1网格策略 (59)13、下单板 (59)13.1功能点简介 (59)13.3使用说明 (60)13.3.1【标准】下单板 (60)13.3.2【两键】下单板 (64)13.3.3【三键】下单板 (65)13.3.4【六键】下单板 (65)13.3.5【预埋单】下单板 (67)13.3.6【条件单】下单板 (68)13.3.7【本地套利】下单板 (68)13.3.8【标准套利】下单板 (69)13.3.9【篮子下单】下单板 (70)13.3.10【闪电点价】下单板(NEW) (74)13.3.11【组合报单】下单板 (84)14、信息类面板 (85)14.1功能点简介 (85)14.2入口路径 (85)14.3使用说明 (85)14.3.1信息类面板-【所有委托】 (86)14.3.2信息类面板-【成交记录】 (87)14.3.3信息类面板-【持仓信息】 (88)14.3.4信息类面板-【未成交记录】 (93)14.3.5信息类面板-【本地套利】(NEW) (94)14.3.6信息类面板-【预埋单】 (98)14.3.7信息类面板-【止盈止损】 (101)14.3.8信息类面板-【平仓信息】 (101)14.3.9信息类面板-【条件单】 (102)14.3.10信息类面板-【盈亏分析】 (105)14.3.11信息类面板-【Delta】 (105)14.3.12信息类面板-【篮子下单信息】 (105)14.3.13信息类面板-【网格下单信息】 (106)14.3.14信息类面板-【算法列表】 (106)15、状态栏 (107)15.2入口路径 (107)15.3使用说明 (107)16、【本地套利】策略下单整体流程(NEW) (108)16.1功能点简介 (108)16.2入口路径 (108)16.3使用说明 (108)16.3.1本地套利添加策略 (108)16.3.2本地套利复制策略 (111)16.3.3本地套利修改策略 (111)16.3.4套利行情面板 (112)16.3.5【本地套利】下单板 (112)16.3.6【本地套利】信息面板 (113)16.3.7套利报单实例(NEW&HOT) (114)16.3.8移仓换月使用方法(NEW&HOT) (118)17、【篮子下单】策略下单整体流程 (119)17.1功能点简介 (119)17.2入口路径 (120)17.3使用说明 (120)17.3.1篮子下单添加策略 (120)17.3.2篮子下单复制策略 (123)17.3.3篮子下单修改策略 (123)17.3.4【篮子下单】下单板 (124)17.3.5【篮子下单信息】 (125)18、【网格策略】策略下单整体流程(HOT) (126)18.1功能点简介 (126)18.2入口路径 (128)18.3使用说明 (129)18.3.1添加策略 (130)18.3.2修改策略 (137)18.3.3删除策略 (138)18.3.4什么是网格策略 (139)18.3.5网格策略报单实例(普通合约、标准套利合约): (139)18.3.6网格策略报单实例(本地套利合约): (143)18.3.7网格策略异常状态: (145)19、【智能算法】算法下单整体流程 (145)19.1功能点简介 (145)19.2入口路径 (145)19.3使用说明 (147)19.3.1智能算法-冰山指令 (147)19.3.2智能算法-TWAP (149)19.3.3智能算法-VWAP (151)19.3.4智能算法-算法列表 (153)20、附录 (155)21、备注 (156)21.1指定资金账户 (156)21.1.1功能点简介 (156)21.1.2入口路径 (156)21.1.3使用说明 (156)22、修订记录 (160)1、文档说明本文档作为随心易PC客户端的产品说明书,以图文结合的方式描述了PC客户端的核心功能点,旨在帮助投资者更好的使用随心易PC客户端。

D3715-US REV AApril 14, 2008EZ3600Operators ManualFt. Atkinson, Wisconsin USAPanningen, The Netherlands HELLOEZ3600TABLE OF CONTENTSTABLE OF CONTENTS (2)FEED MANAGEMENT SOFTWARE (4)CAB CONTROL (WIRELESS) (5)BEFORE CHARGING BATTERY OR WELDING (6)INDICATOR OVERVIEW (7)OPERATION (9)TURN ON INDICATOR (9)DATA TRANSFER (10)DATAKEY MODE (10)RF DATALINK MODES (10)INDICATOR DATA FORMATS (11)LOADING AND FEEDING (11)COMPLETE LOADS MODE (11)STARTING A RECIPE (11)LOADING RECIPE (13)UNLOADING TO PENS (13)RECIPE AND PEN LIST MODE (14)STARTING A RECIPE (14)RESIZE RECIPE WEIGHT (14)LOADING RECIPE (15)UNLOADING TO PENS (15)ADVANCED COMMANDS (16)UNLOAD PARTIAL PENS (16)GO BACK TO SKIPPED INGREDIENT (16)CHANGE FEEDING NUMBER (17)CLEAR INDICATOR MEMORY (17)RE-USE RECIPE/PEN DATA (18)ADD A PEN TO PEN LIST (19)HOLD (20)PRINTING (20)BACKLIGHT INTENSITY (20)COMMONLY USED DIRECT ACCESS NUMBERS (21)PRE-ALARM (21)AUTO INGREDIENT / MANUAL PEN ADVANCE (21)AUTO ADVANCE (22)TOLERANCE (22)PEN TOLERANCE (22)DELAY TIME (22)DRIVE RATIO (23)SCALE ID OR TRUCK ID (23)RADIO NUMBER (24)RESIZE OPTION (24)CHANGE TIME (25)CHANGE DATE (25)2 D3715Operators ManualD3715 3DIRECT ACCESS NUMBERS LIST (26)MENU 1. BASIC FEATURES IN MOST INDICATORS (26)MENU 2. CLOCK, PRINTER, COMM. & WEIGHT FEATURES (26)MENU 3. SCALE CALIBRATION SETTINGS (27)MENU 4. PRESET, BATCHING & COUNTER FEATURES (27)CALIBRATION (28)TROUBLESHOOTING (29)INSTALLATION (31)INDICATOR MOUNTING (31)LOAD CELL DIRECTION (31)CONNECT LOAD CELLS TO J-BOX (33)CHANGE SETUP AND CALIBRATION NUMBERS (33)OPTIONAL EQUIPMENT (34)ROTATION COUNTER SENSOR (34)TRANSMITTER/RECEIVER (34)REMOTE INDICATORS (34)EZ36004 D3715FEED MANAGEMENT SOFTWAREFor additional information go to A full featured Windows R based system that offers powerful features that are easy to use.Entry level system easily upgraded. Based on features of TMR TrackerRemote site monitoring software.Works with email service to connect Tracker to remote locationFront-end tool for beef feeding customersto enter ingredient, recipes, corral andwagon information.Operators ManualD3715 5CAB CONTROL (WIRELESS)Features• Wireless remote with full key control of indicator on mixer• Mount remote in easy view of loading• Improves loading accuracyFunctions• Communicates with multiple mixers• Easily call-up recipes without leaving loaderSpecification• Internally mounted 2.4 GHz radios• Up to 1000 foot range• 24 channels• 12 or 24 volt DC systemFor additional information go to EZ3600 6 D3715BEFORE CHARGING BATTERY ORWELDINGImportant PrecautionDisconnect all indicator leads before charging battery or welding.Damage may occur to indicator and load cells.Disconnectall cordsRemote IndicatorOptional J-BoxScale IndicatorOperators Manual D3715 7 INDICATOR OVERVIEW1 – press and hold for 3 seconds to zero balance.2 Pre-Alarm Light – flashes and alarm sounds when weight is withinpreset limit.3 – holds displayed weight when moving machine.4 – not used.5 – turns indicator on. Press while on to run self test.6 – turns indicator off.7 Display Window – Displays current actions.8 – temporary zero (Net Mode).1234567Note: See pages 31-33 forinstallation instructions11891012141516171819201321EZ3600 8 D37159– records to memory or prints displayed weight. 10 – toggles between Net and Gross weights. 11 – selects recipes in memory. 12 – enters user number and feeding number. Any number can beused for user until number assigned by management software.13 – clear (backspace).14 – press in List Mode to begin pen unloading. See page 15.15 – accepts change or proceeds to next item.16 Directional Arrows - moves through list of information.17 Keypad – inputs numbers or letters.18 – performs task displayed by select.19 – displays additional tasks.20 – press for additional information.21 DataKey –transfers data between computer and indicator.Serial/Printer Port – optional, communicate with computer and otherdigital input/output devices.Remote Port - optional remote display.Load Cell Port – for J-Box cord.Power Port– for Power Cord.DataKey Port– for DataKey insertion. Turn DataKey toupload/download data.Serial Number Plate – Serial Number of indicator.Operators ManualD3715 9See pages 31-33 for installation instructions.OPERATIONTurn on indicator1. Press .1. E nter user number if required.2. P ress .1. Press and hold for 3seconds to zero balance indicator.HELLO ENTER userEZ360010 D3715 DATA TRANSFERDataKey Mode1. I nsert DataKey into indicator.2. P ress to upload data. Note: If indicator displays uncompleted data in memory, press to overwrite data. Remove DataKey when transfer complete.To download complete data:Insert DataKey, indicator automatically sends data toDataKey. Remove DataKey.RF DataLink ModesOperation MessageDataLink connects with indicator ←PC →DataLink sends data to indicator DL ←INIndicator receives data ALL FEED LINES RECIVED -PRESS RECIPE KEY TO CONTINUEData compete, indicator sends data to DataLink←PC → Data sending DL →OUTTo send data to PC if operator doesnot complete all feeding at end offeeding schedule. Press untildisplay shows message (right column),press to selectEZ →PCThe indicator marks uncompleted data as completed and sendsfeeding data to DataLink.Note: After sending, uncompleted data erased.21Indicator Data FormatsData sent to indicator sent in two formats:Complete Loads Mode: Each load built by PC software. It assigns pens to recipe and builds exact load for pens.Recipe and Pen List Mode: PC software sends recipe data and pen data in two different fields. Operator selects recipe to build and pen deliveries.LOADING AND FEEDINGCOMPLETE LOADS MODEStarting A Recipe1. Press .1. I ndicator scrolls feeding number, first recipe and pen number.2. P ress and to finddesired recipe.3. Press to select recipeshown.PEN-1 FEEDFeeding1Note:Press to resize by number of head in pen.Note: Press to accept pen values without resizing.Note: If indicator gives warning resized amount is over capacity, press to override.Indicator gives option to resize pen weight.1. E nter new weight or keep original weight.2. P ress .2300Loading RecipeUnloading to PensNote:Do not press .Note:If different pen needed press or to find desired pen. Press for pen delivery.1. F irst ingredient weight flashes in display. Load ingredient.2. W eight approaches zero, alarm will flash and sound.3. a . Manual Advance: Weight reached, press to accept. Press again to start next ingredient. 3. b. Auto Advance: When preset weight reached, indicator advances to next ingredient.Ingredients loaded, indicator displays first pen to unload. 1. a . Manually Advance: Press to go to pen. When weightreached, press to accept. Press again to start next pen. or 1. b. Auto Advance: When preset weight reached, indicator advances to next pen.Last pen complete, indicator displays “Recipe Complete ”.Dry hay12Start delive1RECIPE AND PEN LIST MODEStarting a RecipeResize Recipe WeightNote:Indicator warns resizedamount over capacity, press to override.1. P ress .2. D isplay reads:Example:RECIPE DRYCOW TOT- 25003. Press and to select recipe, to start.Indicator will display: resize , then the resize weight.1. E nter desired recipe weight.2. Press , indicator resizes ingredients to recipe’s total weight and displays first ingredient to load.RECIPE dry2Loading RecipeUnloading To Pens1. F irst ingredient and weight flash in upper display. Begin loading ingredient.2. W eight reached, alarm will flash and sound.3. a. Manual Advance: Weight reached, press . Press to start next ingredient. or3. b. Auto Advance: When preset weight reached, indicator advances to next ingredient.1. W hen ingredient loadingcomplete, display reads “Recipe Complete ”. Press . Indicator displays unloading pens. 2. Press or to select desired pen. 3. P ress .4. P en and weight displayed, begin unloading to pen.5. a. Manual Advance: Weight reached, press to accept. Press again to start next pen. or5. b. Auto Advance: When preset weight reached, indicator advances to next pen.6. When unloading is complete press to start next recipe.DRYHAY124Pen 1ADVANCED COMMANDSUnload Partial PensGo Back to SkippedIngredient1. Press to advance to next pen without finishing current pen.Note: If pen tolerance is set and feeding stopped before preset weight reached, alarm sounds, indicator displays:Pen Underfed – Press Print To remove pen from list-Press on to keep penSee page 22 for Pen Tolerance set-up.1. P ress or to move back.2. P ress .Note: Ingredient weight changed more than 4 display counts cannot restart that ingredient.Example: If minimum display change is 10 lbs/kgs, more than 40 lbs/kgs, cannot restart that ingredient.Change Feeding NumberClear Indicator Memory1. Press . 2. E nter user number.3. P ress .4. E nter feeding number (1-9).5.P ress .1. Press .2. P ress and hold .3. P ress while holding indicator scrolls:On=Clear Clear=Reuse Net=exit.Release . 4. Press .On clear1. I ndicator .2. P ress and hold .3. Press , while holding indicator scrolls:On=Clear Clear=Reuse Net=exit .Release .4. P ress again to re-use recipe and pen data.Note : Re-use data stored in indicator, takes recipe and pen information and removes completed weights loaded or unloaded and marks them undone. Won’t accumulate data day to day. Download data to DataKey before re-using recipe and pen data stored.Note: For continuous re-use, set D.A.N. 466 to on. See page 28.Clear reuseAdd a Pen to Pen ListEnter pen name or number.1. P ress .2. P ress to add pen.1. P ress or to find desired recipe.2. P ress .1.E nter amount to unload to pen. 2. Press .1. E nter number of animals / pen.2. P ress .1. I f zones are active display reads:“Enter Zone 0-9”2. P ress .calfRecipe calf30001Enter zoneHoldHold mode prevents displayed1.P ress holds displayed weight. 2. P ress returns indicator to normal.If weight is added while in hold mode, press to cancel hold.PRINTINGNote: Optional serial port must be installed for printing.Backlight Intensity1. R eference technical manual D3648 at .1. P ress until dimmer is displayed.2. P ress . reduces backlight intensity by 60%. Press again for full intensity.holdD3715 21COMMONLY USED DIRECT ACCESSNUMBERSPre-AlarmEarly warning, weight reaching amount.Auto Ingredient / Manual Pen AdvanceIngredients automatically advance,Pens manually advance.1. Enter 401 and press . 2. Press again to change between WEIGHT and PERCENT. 3. Press .4. Enter Pre-Alarm value. Press .1. E nter 461 and press .2. Press choose on/off.3. Press .401461322 D3715Auto AdvanceAllows hands free operation of programmed recipes. When auto advance feature activated, indicator automatically advances to next ingredient once tolerance, and delay time requirements met.ToleranceSets weight “window” to acceptloaded weight before auto advance.1. Enter 442 and press .Press again choose percentage settings:OFF, 0.5, 1 - 5, 7, or 10.2. P ress .Pen ToleranceAvailable in List Mode Only1. E nter 462 and press . Press again to chooseweight or percent.2. Press , screen will display “pentol ”.3. Enter weight or percentage desired.4. Press . Delay TimeChanges time indicator, waits before automatically advancing tonext ingredient.5. E nter 443 and press . Press for delay time (Inseconds: Manual, 1, 2, 3, 5, 7, 10, 20, 30, or 60). 6. P ress .Note: Set to Manual prevents automatic advance. 4422443462D3715 23Drive RatioDrive ratio is number of turns seen by sensor divided by number ofmixer rotations.Scale ID or Truck ID1. E nter 422 and press to enter drive ratio value.2. P ress .1. E nter 108 and press .2. P ress to erase old ID, enter the new ID.3. P ress .Note: TMR Tracker or DietManager, software ID must match.42210824 D3715Radio NumberResize OptionMake weight changes to pensunload weight or recipe load size.1. E nter 231 and press .2. P ress to erase number, enter new number.3. P ress .Note:Do not use same number for two different indicators.1. E nter 448 and press .Press again, change On/Off. 2. P ress .231448112D3715 25Change TimeChange Date1. Enter 202 and press .2. P ress arrow to move cursor.3. Press to set time. 4. P ress .1. E nter 204 and press .2. P ress arrow to move cursor. Format ddmmyy. Press arrow to set date.3. P ress .080807126 D3715DIRECT ACCESS NUMBERS LISTEnter D.A.N. press displays setting name, allows value change. Press saves setting.SETTING/ DISPLAYD.A.N NO.OPTIONS(BOLD=DEFAULT)DESCRIPTIONMENU 1. BASIC FEATURES IN MOST INDICATORSLANGUAGE {langag}101 English(ENGLSH ) (NEDERL ) French (FRANCS ) Dutch(DEUTSH ) Italian (ITAL ) Portuguese (PORT ) Spanish (ESPAN ) Danish (DANSK ) (MAGYAR ) (VESTA )Select language to be displayed.TR HOLD { tr hld}107ON/OFF Display gross weight if TR key is held for 3 seconds. SCALE ID SETUP {scalid}108 NEW EZIdentity of scale location (truck id or Mixer number). MENU 2. CLOCK, PRINTER, COMM. & WEIGHTFEATURESTIME FORMAT{time f}20124 HR AM/PMSelect time format -AM/PM or 24 hour1 TIME{time)202 XX:XX:XXSelect key changes time,function key chooses hh:mm:ss.DATE FORMAT{date f}203 1-mm-dd 2-mm/dd/yy 3-mm/dd/yyyy 4-dd-mm 5-dd/mm/yy 6-dd/mm/yyyy 7-ddmoyy 8-ddmoyyyy.Select date formatDATE{date}204 Enter XXXXXXSelect key changes date -function key chooses mm/dd/yy .SCALE NUMBER SCL NO 231Select scale number for cabcontrol communicationD3715 27SETTING/ DISPLAY D.A.N NO. OPTIONS(BOLD=DEFAULT)DESCRIPTIONREMOTEDISPLAY RMDISP234Select type of remote displayMENU 3. SCALE CALIBRATION SETTINGSDISPLAY UNIT{lb-kg}303 LB /KGDisplay pounds -lb or kilograms -kgMIMIC TYREL{tc1300}321 OFF /ONIf ON -records preset weights like a TYREL TCX-1300 indicator. Indicator Tracks gross weight while batching.MENU 4. PRESET, BATCHING & COUNTERFEATURESPRE ALARM{p mthd} & {p-alm} ..401WEIGHT PERCNTSelect weight or percentage method, then enter a value to activate an early warning that indicator is reaching the preset. BUZZER buzzer 404 1-4, ON /OFF ALARM BUZZER -allows user to turn off alarm horn.TIMER/ COUNTER{tmrctr)421 REV TIME Select time or mixer revolutions to decrement mix timer/counter. DRIVE RATIO{dratio}4220001.00 Enter the number of input pulses that equal 1 mixer revolution. ENTRY METHOD E MTHD4411,2,3Select batch 1-amount/animal 2-percent/load 3- amount/load TOLERANCE{toler)442OFF ,.5,1-5,7,10Select tolerance weightpercentage to accept ingredient.INGR. ADVANCEDELAY {delay)443MANUAL , 1-3,5,7, 10,20,30,60 Select seconds to delay beforeadvancing to next ingredient. FORCE USER ID {userid} 446ON/OFF If ON -operator must enter user ID to use indicator.RESIZE RECIPE {resize}448 ON /OFF If ON -operator can change recipe size.RECIPE TOTAL{rectot}451ON/OFFSelects total amount to bedisplayed when starting recipe.TOLER OVER LOCK{overlk}453 ON/OFFIf ON -prevents auto-advancing if preset exceeds tolerance28 D3715SETTING/ DISPLAY D.A.N NO. OPTIONS(BOLD=DEFAULT)DESCRIPTIONFEED ZONE{fdzone}454ALL , 1-9Select feed zone for recipe deliveries.UNDONE RECIPES{undn 1}455 ON/OFFIf ON -displays all incomplete recipes or enable if indicator is stationary mixer/batch when using Datalink.AUTO START PENS{autpen)458 ON/OFF If ON -starts pens list after recipe is loaded in list mode format. MANUAL PENADVANCE {manpen) 461ON /OFF If ON -overrides automatic advance for pens.PEN TOL{t mthd} & {pentol}462WEIGHT PERCNT Select weight or percentage method, then enter pen tolerance.PEN WEIGHT {pen wt}463LOAD GROSS NET Select method for displaying pen Weight -net, load, or gross. DOUBLE KEYPRESS PREV{dbkey}.465 ON/OFF Select method ignores double pressing of keys when advancing ingr. while loading mixer. RECIPE REMAINACTIVE (RE-USE)466ON /OFFSelect ON to reuse recipes.CALIBRATIONSETUP NUMBER SETUP871 Quick entry method selects weigh method 1-4lbs, 5-8 kg, gain 1-9, display counts 1-9 and capacity *1000CALIBRATION NUMBERCAL872Weight displayed at 0.4mV/V for these load cellsD3715 29TROUBLESHOOTING30 D3715INSTALLATIONIndicator MountingIndicator MountingRail Mount (Standard) and Wing Mount w/ hardware included. RAM Mount Optional Kit, hardware included w/ kit.Load Cell DirectionObserve direction of arrow when installing load cell.Rail Mounting IncludedWing Mount IncludedRAM Mount OptionalIndicator Connection DiagramFigure 1 Bottom Panel Cable ConnectionsRemote Indicator(Optional)SeeFigure 2 J-BoxPower CordSee Figure 1Digital Input/OutputConnection OptionalRemote IndicatorConnection OptionalPower Cord ConnectionJ-Box ConnectionDataKey InsertionPin To 12VDC Power Supply 1Red +Terminal 2Black -Terminal 3Orange Alarm Out 4Blue Remote InputConnect Load Cells To J-BoxFigure 2 J-Box ConnectionsChange setup andcalibration numbers1. E nter 871 and press .2. I ndicator shows SETUP briefly thenshows a 6 digit number. Enter new number. 3. P ress .Follow same procedure changes calibration number except use 872.Connect load cell wires to terminal blocks. See Wire Color KeyTighten nutsLoad cell cableJ-Box CableWire Color Key Color Description 1 White Signal + 2 Green Signal - 3 Red Excitation +4 Black Excitation - 5 Shield ShieldConnect to Indicator bottompanel. See Figure 1.J-Box Illustrated for 4 Load Cell Installationsetup2OPTIONAL EQUIPMENTRotation Counter SensorTransmitter/ReceiverRemote IndicatorsUse with EZ3600 or EZ4600 indicators equipped with rotation counter port. Sensor allows operator to program indicator to count auger or PTO rotations for accurate mix.Transmitter (shown) with factorinstalled receiver in indicator. Use to zero indicator from remote location. Operating range about 90 feet.RD440 small remote display with 1” high numbersRD2400V backlit remote display with 1.7” high numbersRD4000 LED remote display with 4” high numbers。


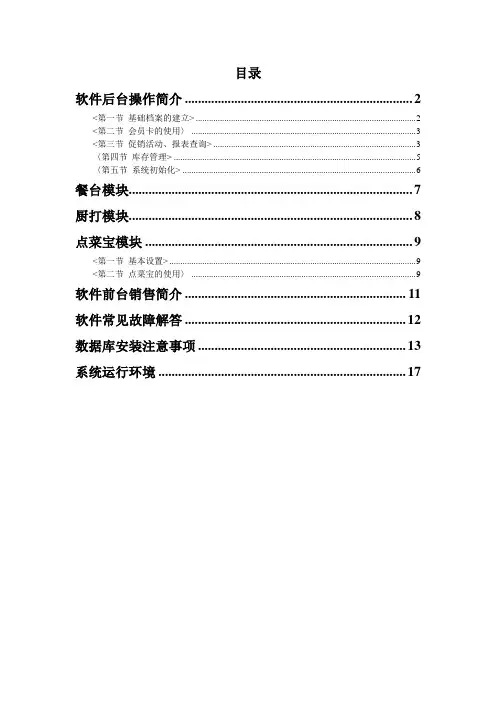
目录软件后台操作简介 (2)<第一节基础档案的建立> (2)<第二节会员卡的使用〉 (3)<第三节促销活动、报表查询> (3)〈第四节库存管理> (5)〈第五节系统初始化> (6)餐台模块 (7)厨打模块 (8)点菜宝模块 (9)<第一节基本设置> (9)<第二节点菜宝的使用〉 (9)软件前台销售简介 (11)软件常见故障解答 (12)数据库安装注意事项 (13)系统运行环境 (17)软件后台操作简介〈第一节基础档案的建立>一、商品分类的建立位置:基础档案-——商品分类1、大类的建立操作:点击右上角[增加],输入大类名称,点击[保存]按钮.备注:一般店铺使用默认大类即可,不用再单独建立大类。
2、小类的建立操作:点击右下角[增加],输入序号、小类名称,其他情况根据个人需求来输入完成,全部输完后点击[保存]按钮。
备注:如有后厨打印机需选择厨房打印机/备餐屏,如该分类产品不在前台销售,只作为后台原材料管理,则需要在原材料上打‘√’;菜品等不记库存的分类把记库存的‘√'取消。
二、商品档案的建立位置:基础档案--—商品管理操作:先选择商品分类,然后点击[增加]输入商品的名称、单位、零售价、指定成本价(要管理毛利时必须输入)等,输入完成后点击[保存]。
备注:如果使用点菜宝,需输入不超过5位的点菜宝编码;有后厨打印机的送厨选项不能取消;称重或不定价商品可以再时价选项打‘√’,在销售时临时输入销售价。
三、套餐档案的建立位置:基础档案——-套餐管理操作:先选择套餐分类,然后点击[增加]输入套餐的名称、单位、零售价、指定成本价(要管理毛利时必须输入)等,输入完成后点击[保存];然后点击下面的套餐管理,点击[增加],双击选择套餐包含的产品,点击[确定],输入数量等,输入完成后点击[保存]。
备注:如果使用点菜宝,需输入不超过5位的点菜宝编码;有后厨打印机的送厨选项不能取消。
金蝶KIS迷你版V11.0使用说明书金蝶KIS迷你版V11.0使用说明书系统特点一、简单易用财会人员只要输入原始业务资料,期末调汇、结转汇兑损益等都可由系统自动完成。
系统提供了完整的账证表一体化查询功能,您可以根据总账直接查到它所辖的明细分类账,再从明细分类账一直查到记账凭证二、操作方便本软件是在Microsoft Windows操作环境下开发的,采用了图形界面显示和鼠标的操作方式,非常直观方便,并保留了键盘操作快捷的特点。
三、安全可靠具备强大的权限控制机制,可实现操作权限的集中化管理,强化了系统管理员对软件各模块操作的统一授权,严密的密码设定机制确保数据更具安全可靠。
四、多账套管理系统提供的多账套管理功能,使您能建立和管理多个账套及时了解各子公司或独立核算部门的财务状况。
五、数据实时云备份结合金蝶云账号体系,系统提供自动备份及同步云盘备份功能。
一个金蝶云账号最多可以云盘存储备份账套文件300个。
让数据实时备份,安全更有保障。
功能模块一、账务处理账务处理包括三大块:凭证的处理、账簿报表的查询以及期末处理。
凭证处理中可直接处理外币业务、数量金额核算业务;凭证处理中会计科目可直接从科目表中获取,引出标准格式凭证具有多核算项目信息,凭证处理中自动校验各种平衡关系,保证录入数据的正确性;可录入并产生表外科目凭证,表外科目凭证不校验各种平衡关系。
账簿报表的查询中快而准的提供了多种账务处理查询筛选功能,总账可按科目级别、币别、科目范围等查询;明细账可按期间范围、币别、科目范围查询;还提供了多栏式明细账、数量金额明细账、核算项目总账、试算平衡表、科目余额表、核算项目明细表等,账簿输出格式优化美观。
期末处理是系统总结了某一会计期间的经营活动情况后,转至下一期的必做事项。
同时该模块在结账前,按企业财务管理和成本计算的要求,必须进行制造费用、产成品成本的结转、期末调汇及损益结转等工作。
二、发票管理发票管理需要与税控系统和开票软件结合使用。
易企用车使用手册
易企用车是一款便捷的车辆全生命周期数智管理平台,可以帮助企业管理用车更简易。
以下是易企用车的使用手册:
1. 注册和登录:首先需要在易企用车官网上注册账号并完成认证,然后使用注册的账号登录易企用车平台。
2. 车辆管理:在车辆管理页面,可以查看企业所有车辆的信息,包括车辆的基本信息、位置、状态等。
同时,还可以对车辆进行智能硬件适配,实现车辆的定位、监控和管理。
3. 调度管理:通过手机端可以方便地进行车辆调度,包括派车、接驳、调换等操作,同时还可以查看车辆的位置和状态,提高调度的效率和准确性。
4. 用车流程管理:易企用车提供了灵活的用车流程管理功能,企业可以根据实际需求自定义用车流程,包括审批流程、用车申请、派车确认等。
同时,易企用车还支持多种审批方式,如线上审批、纸质审批等。
5. 车务管理:易企用车提供了全面的车务管理功能,包括保险、保养、维修等,帮助企业全面掌握车辆的各项信息。
同时,易企用车还支持车务信息的汇总和统计分析,方便企业进行车务管理和决策。
6. 费用管理:易企用车可以自动统计企业的用车费用,包括油费、过路费、停车费等,同时还可以自定义费用台账,方便企业对用车费用进行管理和分析。
以上是易企用车的使用手册,在使用过程中如有任何问题或疑问,可以联系易企用车的客服人员或查看易企用车的官方网站。
OneNote 2010使用说明书什么是OneNote?Microsoft OneNote 2010 是一种数字笔记本,它为您提供了一个收集所有笔记和信息的位置,并提供了强大的搜索功能和易用的共享笔记本的额外优势:搜索功能使您可以迅速找到所需内容,共享笔记本使您可以管理信息过载和更加有效地与他人协同工作。
与基于书面的系统、文字处理程序、电子邮件系统或其他生产程序不同,OneNote 提供一种灵活的方式,将文本、图片、数字手写、录音和录像等信息全部收集并组织到计算机上的一个数字笔记本中。
OneNote 可将所需信息放在您触手可及的位置,并可减少在电子邮件、书面笔记本、文件夹和打印输出中搜索信息的时间,从而有助于您提高工作效率。
OneNote 2010 是Microsoft Office 2010 的集成部件,使您可以更加经济有效地收集、组织、查找和共享您的笔记和信息。
它具有强大的搜索功能,可帮助您在图片的文本或录音和录像的有声内容中查找信息。
此外,它还提供了易用的协作工具,可以帮助工作组通过共享笔记本(无论脱机还是联机)中的所有信息协同工作。
通过将所有信息放在您触手可及的位置,OneNote 为您提供了一种针对信息过载的解决方案,它使您可以与他人更有效地协同工作,并帮助您掌握任务、日程表和工作组信息。
Microsoft Office system 的熟悉外观使您可以轻松地立即开始使用该程序,从而最大程度地节省时间和培训成本。
查找并应用模板OneNote 2010 允许应用内置模板,应用您自己的自定义模板,以及在 上浏览各种模板(包括笔记本、页和分区模板)。
若要在OneNote 2010 中查找模板并将它应用到一个新页,请执行下列操作:1.打开要在其中添加页的笔记本或分区。
2.在页选项卡列表中,单击“新建页”按钮旁的箭头。
3.在“模板”任务窗格中,执行下列操作之一:若要使用某一内置的页模板,请展开所需的模板类型,然后单击所需的模板。
用户操作手册2020·10·13无限易,让交易更简单下载与登录快速入门窗口布局如何下单自定义套利策略S ma r t O r d e r0307222736404204/ 无限易下载05/ 无限易登录06/ 无限易云登录08/ 呼出/布局窗口09/ 交易设置10/ 技术线图11/ 实时资金12/ 实时持仓/实时回报/算法列表13/ 账号、账号组管理14/ 实时行情15/ 自选行情16/ 无限下单(上)17/ 无限下单(下)18/ 网格策略19/ 短线精灵20/ 扫盘委托21/ 交易术语解释23/ 保存/加载布局24/ 新增版面(多显示屏)25/ 窗口联动26/ 栏位设置28/ 快捷下单29/ 五档下单30/ 画线下单31/ 对价下单32/ 魔方下单33/ 对冲下单34/ 任务下单35/ 文件下单37/ 自定义套利38/ 套利猎人39/ 无限下单(自定义)41/ 移仓护卫43/ S ma r t O r d e r 总览44/ 价格触发45/ 二择一46/ 止盈止损47/ 开盘抢单/时间预约48/ 定时拆单49/ 经典冰山50/ 随机冰山51/ 高效冰山52/ 幽灵53/ T WAP下载与登录无限易下载无限易登录无限易云登录操作系统:仅支持W i n d o w s操作系统版本要求:个人商用版本需要 W i n d o w s S e r v e r2008R2及以上版本。
如果您使用的是 W i n d o w s S e r v e r2008R2S e r v i c e P a c k1的版本,可能需要手动安装 V C2008的运行库 ,地址:h t t p s://w w w.mi c r o s o f t.c o m/z h c n/d o w n l o a d/d e t a i l s.a s p x?i d=558204Q u a n t F a i rh t t p s://i n f i n i t r a d e r.q u a n t d o.c o m.c n /可选站点:Q u a n t F a i r-1G T S (盘中可用 |国内期货 +商品期权实时实盘行情)S i m N o wh t t p://w w w.s i m n o w.c o m.c n /可选站点:s i m n o w C T P(盘中可用 |国内期货实时实盘行情) s i m n o w7*24C T P(非盘中可用 |国内期货复盘行情)账号密码站点无限易云/代理设置/中英切换模拟账号申请入口05注册登录无限易云可将账户配置云储存,包括软件基本设置、自定义套利组合、窗口布局等信息,更换设备登录,账户信息不丢失。
pse0400使用手册PSE0400是一款高品质的电子产品,为用户提供了方便实用的功能和操作方式。
本使用手册将详细介绍如何正确操作、维护和解决常见问题,以确保您能充分利用PSE0400的全部功能。
1. 基本操作:- 打开/关闭电源:按下电源按钮(位于设备的顶部/后侧)可打开或关闭电源。
- 屏幕:通过触摸屏幕上的图标来选择和操作各个功能。
- 音量调节:通过侧面的音量按钮或设置菜单中的音量选项,可调整设备的音量。
- 菜单导航:使用设备上的导航按钮或滑动屏幕,可浏览和选择不同的菜单选项。
2. 功能特点:- 多媒体播放:PSE0400支持多种音频和视频格式的播放,可通过USB接口或无线连接进行文件传输。
- 网络连接:通过Wi-Fi或移动数据网络,PSE0400可以上网浏览、下载和共享文件。
- 蓝牙连接:可以通过蓝牙与其他设备进行无线连接,如音箱、耳机、键盘等。
- 摄像功能:PSE0400内置摄像头,可拍摄照片和录制视频,并支持后期编辑和分享。
3. 维护与保养:- 清洁:定期使用干净、柔软的布将设备擦拭干净,避免使用化学溶剂。
- 保护:使用保护套和屏幕保护膜,可有效防止意外划痕和碰撞损坏。
- 更新:及时下载并安装PSE0400的软件更新,以获得最新的功能和修复错误。
4. 常见问题与故障解决:- 电池寿命较短:尝试降低屏幕亮度、关闭不必要的背景应用,以延长电池寿命。
- 触控无效:重启设备或校准屏幕触控功能。
- 无法连接到网络:检查网络设置、重新启动路由器或联系网络服务提供商等。
请按照以上内容操作和使用PSE0400,以获取最佳的使用体验。
如有更多问题或需进一步的技术支持,请参阅随附的使用手册或联系我们的客户服务部门。
祝您使用愉快!。
目录一、简介............................................................1.1易控是什么.........................................................1.2易控主要特点.......................................................1.3基本概念...........................................................二、易控的安装......................................................2.1易控系统要求.......................................................2.2易控系统软件的安装.................................................三、示例工程总体描述................................................四、新建工程........................................................4.1启动开发环境.......................................................4.2开发环境界面.......................................................4.3新建工程...........................................................五、配置I/O通信....................................................5.1相关概念...........................................................5.2三菱FX系列PLC编程口通讯..........................................5.3配置模拟设备.......................................................六、新建数据库变量..................................................6.1相关概念...........................................................6.2变量建立...........................................................6.3I/O变量-数据库变量..................................................七、建立画面........................................................7.1相关概念...........................................................7.2画面的新建.........................................................7.3图形元素的添加.....................................................7.3.1文字...........................................................7.3.2数值显示工具...................................................7.3.3功能按钮.......................................................7.3.4滑块...........................................................7.3.5储料罐.........................................................7.3.6管道...........................................................7.3.7阀门...........................................................7.3.8流动块.........................................................7.3.9边框...........................................................试一试........................................................八、工程运行........................................................8.1概念...............................................................8.2设置启动画面.......................................................8.3工程运行...........................................................九、画面图形动画配置................................................9.1动画流程...........................................................9.1.1罐体百分比填充动画:...........................................9.1.2线条流动块动画.................................................9.1.3阀门开关动画...................................................9.1.4组合图形动画...................................................9.1.5数据显示.......................................................9.1.6按钮赋值.......................................................9.1.7滑块配置.......................................................9.2逻辑控制...........................................................9.2.1画面程序配置...................................................9.2.2用户程序补充...................................................十、报警............................................................10.1报警区增加.........................................................10.2变量的报警设置.....................................................10.3报警信息...........................................................10.3.1报警信息保存..................................................10.3.2报警显示...................................................... 十一、实时曲线........................................................11.1实时趋势曲线的绘制.................................................11.2实时趋势曲线属性设置...............................................11.3实时趋势曲线的动画连接。
联想家庭娱乐K歌系统UC30使用手册V1.2使用本产品前请仔细阅读使用手册目录一.产品简介 (4)二.包装清单 (4)三.系统需求 (4)四.产品结构 (5)五.应用场景 (6)联机使用 (6)脱机使用 (6)六.驱动安装 (7)七.软件卸载 (9)八.控制面板 (10)九.硬(KX)机架使用 (12)十.软(VST)机架使用 (14)十一.规格说明 (16)十二.特色卖点 (16)十三.常见故障排除 (17)声卡连上电脑,控制面板没识别 (17)声卡播放音乐无声音 (17)使用话筒时无声音 (17)特别声明 (17)一.产品简介联想UC30定位中高端客户群体,支持软机架搭建和硬机架搭建,内含专业音频DSP处理芯片,提供给网络主播、播音员、发烧友等资深玩家极大的自由度来编辑自己期望的音效。
联想UC30在力求专业的同时仍兼顾美观和易用,MicroUSB接口即插即用,脱机仍可运行完美的音效算法,无需繁琐复杂的操作配置,是普通K歌爱好者、入门尝鲜者、家庭K 歌、聚会K歌等用户的不二选择。
二.包装清单部件名称数量联想UC30声卡主机一台Micro USB数据连接线一条产品数据光盘一片产品使用说明书一本产品保修证书一本音频转接头一个三.系统需求●Intel Core2或AMD同等速度的处理器,建议使用2.0GHz或更快处理器●Windows1032/64、Windows832/64、Windows732/64、WindowsXP.●至少2GB内存●>300MB可用硬盘空间●CD-ROM或DVD-ROM驱动器,用于软件安装●任意空闲USB1.1/USB2.0/USB3.0端口四.产品结构前面板①电源指示灯:当正常运行时,LED灯为呼吸灯状态;当按键按下时,LED灯快速闪烁1秒。
②耳机输出1:连接6.35mm大三芯插头的耳机使用。
③耳机输出2:连接3.5mm小三芯插头的耳机使用。
④旋钮/按键1:左旋降低麦克风音量,右旋增大麦克风音量。