
Hadoop安装手册
- 格式:doc
- 大小:422.00 KB
- 文档页数:53
Hadoop
目 录
1 Centos ··········································· 错误!未定义书签。
1.1 安装环境 ··················································· 3
1.2 初始环境配置 ················································ 3
1.2.1 设置centos开机自启动网络 ······························· 3
1.2.2 关闭防火墙 ············································ 4
1.2.3 关闭selinux ·········································· 5
1.2.4 修改hosts ············································ 5
1.3 安装JDK ··················································· 6
1.3.1 安装 ················································· 6
1.3.2 设置环境变量 ··········································· 7
1.4 添加用户 ··················································· 8
1.5 复制虚拟机 ·················································· 8
Hadoop安装文档
第3页/共53页
1 Hadoop1.1.2安装
1.1 安装环境
操作系统:Centos6.5 64位
Hadoop:hadoop-1.1.2
Jdk:jdk-7u51
1.2 初始环境配置
1.2.1 设置centos开机自启动网络
[root@localhost network-scripts]# cd /etc/sysconfig/network-scripts
[root@localhost network-scripts]# ls
ifcfg-eth0 ifdown-bnep ifdown-ipv6 ifdown-ppp ifdown-tunnel ifup-bnep ifup-ipv6 ifup-plusb ifup-routes ifup-wireless
network-functions
ifcfg-lo ifdown-eth ifdown-isdn ifdown-routes ifup ifup-eth ifup-isdn ifup-post ifup-sit init.ipv6-global
network-functions-ipv6
ifdown ifdown-ippp ifdown-post ifdown-sit ifup-aliases ifup-ippp ifup-plip ifup-ppp ifup-tunnel net.hotplug Hadoop安装文档
第4页/共53页 [root@localhost network-scripts]# vi ifcfg-eth0
DEVICE=eth0
HWADDR=00:0C:29:09:8B:B0
TYPE=Ethernet
UUID=3192d1fe-8ff3-411f-81b7-8270e86f5959
ONBOOT=yes
NM_CONTROLLED=yes
BOOTPROTO=dhcp
1.2.2 关闭防火墙
关闭防火墙
[root@master01 /]# service iptables stop
iptables:将链设置为政策 ACCEPT:filter [确定]
iptables:清除防火墙规则: [确定]
iptables:正在卸载模块: [确定]
设置开机不启用
[root@master01 /]# chkconfig iptables off Hadoop安装文档
第5页/共53页 1.2.3 关闭selinux
[root@master01 /]# vi /etc/selinux/config
# This file controls the state of SELinux on the system.
# SELINUX= can take one of these three values:
# enforcing - SELinux security policy is enforced.
# permissive - SELinux prints warnings instead of enforcing.
# disabled - No SELinux policy is loaded.
SELINUX=disabled
# SELINUXTYPE= can take one of these two values:
# targeted - Targeted processes are protected,
# mls - Multi Level Security protection.
#SELINUXTYPE=targeted
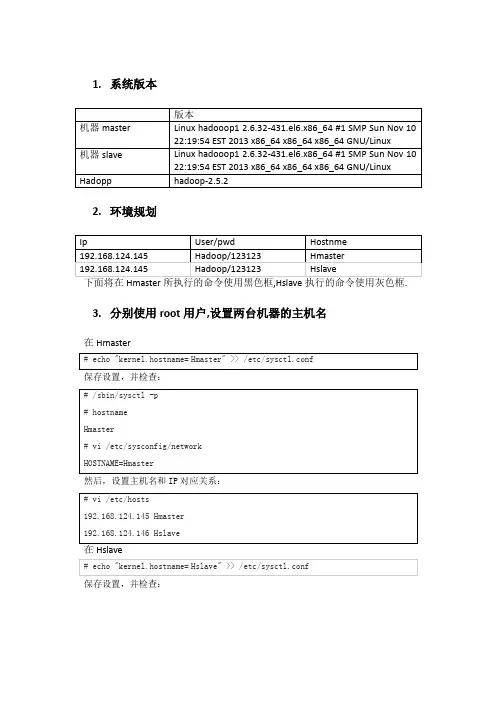
1.2.4 修改hosts
[root@master01 etc]# vi /etc/hosts
127.0.0.1 localhost localhost.localdomain localhost4 localhost4.localdomain4
::1 localhost localhost.localdomain localhost6 localhost6.localdomain6
192.168.239.100 master01 Hadoop安装文档
第6页/共53页 192.168.239.101 slave01
192.168.239.102 slave02
1.3 安装JDK
1.3.1 安装
cd /home/nunchakus
[root@localhost nunchakus]# ls
jdk-7u51-linux-x64.rpm
[root@localhost nunchakus]# rpm -ivh jdk-7u51-linux-x64.rpm
Preparing... ########################################### [100%]
1:jdk ########################################### [100%]
Unpacking JAR files...
rt.jar...
jsse.jar...
charsets.jar...
tools.jar...
localedata.jar...
jfxrt.jar...
[root@localhost nunchakus]# ls
jdk-7u51-linux-x64.rpm
[root@localhost nunchakus]# cd /usr
[root@localhost usr]# ls
bin etc games include java lib lib64 libexec local sbin share src tmp
[root@localhost usr]# cd java
[root@localhost java]# ls
default jdk1.7.0_51 latest Hadoop安装文档
第7页/共53页
1.3.2 设置环境变量
[root@localhost ~]# vi /etc/profile
末尾加入
export JAVA_HOME=/usr/java/jdk1.7.0_51
export JAVA_BIN=/usr/java/jdk1.7.0_51/bin
export PATH=$PATH:$JAVA_HOME/bin
export CLASSPATH=.:$JAVA_HOME/lib/dt.jar:$JAVA_HOME/lib/tools.jar
export JAVA_HOME JAVA_BIN PATH CLASSPATH
让/etc/profile文件修改后立即生效 ,可以使用如下命令:
# . /etc/profile
注意: . 和 /etc/profile 有空格.
重启测试
[root@localhost ~]# java -version Hadoop安装文档
第8页/共53页 java version "1.7.0_45"
OpenJDK Runtime Environment (rhel-2.4.3.3.el6-x86_64 u45-b15)
OpenJDK 64-Bit Server VM (build 24.45-b08, mixed mode)
1.4 添加用户
[root@master01 /]# useradd hadoop
[root@master01 /]# passwd hadoop
更改用户 hadoop 的密码 。
新的 密码:
无效的密码: 它没有包含足够的不同字符
无效的密码: 是回文
重新输入新的 密码:
passwd: 所有的身份验证令牌已经成功更新。
1.5 复制虚拟机
从master01分别复制出slave01和slave02
1.6 修改复制虚拟机的主机名
[root@master01 ~]# vi /etc/sysconfig/network

](https://imgs-1438308264.cos.ap-hongkong.myqcloud.com/018a3b205b8102d276a20029bd64783e09127dae.webp)
