PHP使用imagick读取PDF生成png缩略图的两种方法
- 格式:doc
- 大小:17.00 KB
- 文档页数:2
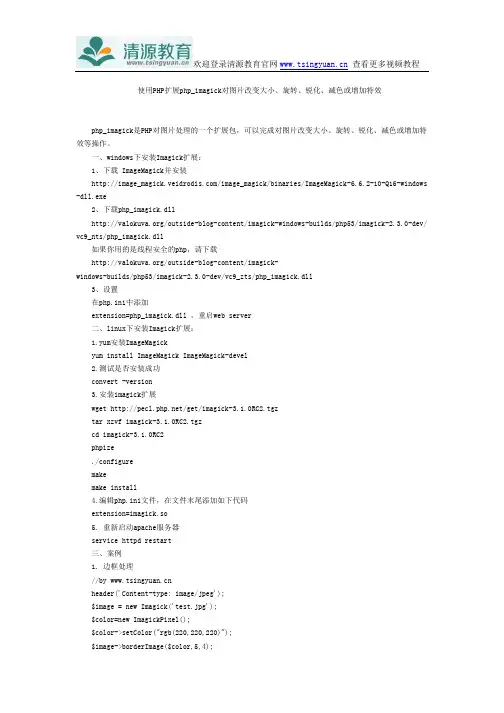
使用PHP扩展php_imagick对图片改变大小、旋转、锐化、减色或增加特效php_imagick是PHP对图片处理的一个扩展包,可以完成对图片改变大小、旋转、锐化、减色或增加特效等操作。
一、windows下安装Imagick扩展:1、下载 ImageMagick并安装http://image_/image_magick/binaries/ImageMagick-6.6.2-10-Q16-windows -dll.exe2、下载php_imagick.dll/outside-blog-content/imagick-windows-builds/php53/imagick-2.3.0-dev/ vc9_nts/php_imagick.dll如果你用的是线程安全的php,请下载/outside-blog-content/imagick-windows-builds/php53/imagick-2.3.0-dev/vc9_zts/php_imagick.dll3、设置在php.ini中添加extension=php_imagick.dll ,重启web server二、linux下安装Imagick扩展:1.yum安装ImageMagickyum install ImageMagick ImageMagick-devel2.测试是否安装成功convert -version3.安装imagick扩展wget /get/imagick-3.1.0RC2.tgztar xzvf imagick-3.1.0RC2.tgzcd imagick-3.1.0RC2phpize./configuremakemake install4.编辑php.ini文件,在文件末尾添加如下代码extension=imagick.so5. 重新启动apache服务器service httpd restart三、案例1. 边框处理//by header('Content-type: image/jpeg');$image = new Imagick('test.jpg');$color=new ImagickPixel();$color->setColor("rgb(220,220,220)");$image->borderImage($color,5,4);$image->blurImage(5,5,imagick::CHANNEL_GREEN);echo $image;(PS:php Q扣峮:276167802,验证:wk)2.生成缩略图//by header('Content-type: image/jpeg');$image = new Imagick('test.jpg');$image->thumbnailImage(50, 0);echo $image;来源:清源教育。
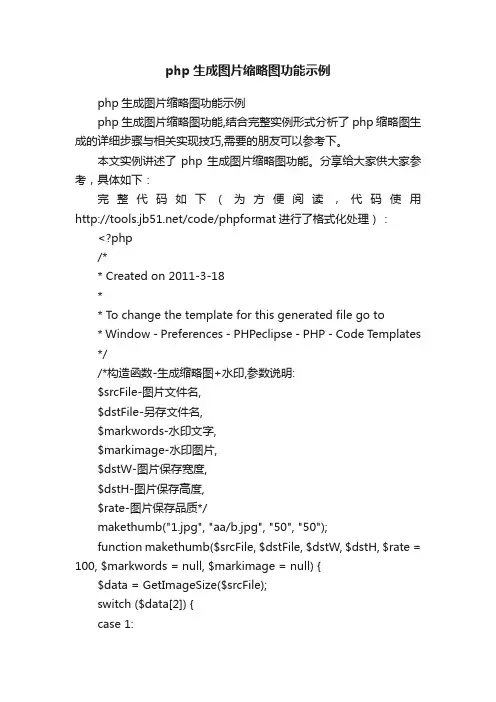
php生成图片缩略图功能示例php生成图片缩略图功能示例php生成图片缩略图功能,结合完整实例形式分析了php缩略图生成的详细步骤与相关实现技巧,需要的朋友可以参考下。
本文实例讲述了php生成图片缩略图功能。
分享给大家供大家参考,具体如下:完整代码如下(为方便阅读,代码使用/code/phpformat进行了格式化处理):<?php/** Created on 2011-3-18** To change the template for this generated file go to* Window - Preferences - PHPeclipse - PHP - Code Templates *//*构造函数-生成缩略图+水印,参数说明:$srcFile-图片文件名,$dstFile-另存文件名,$markwords-水印文字,$markimage-水印图片,$dstW-图片保存宽度,$dstH-图片保存高度,$rate-图片保存品质*/makethumb("1.jpg", "aa/b.jpg", "50", "50");function makethumb($srcFile, $dstFile, $dstW, $dstH, $rate = 100, $markwords = null, $markimage = null) {$data = GetImageSize($srcFile);switch ($data[2]) {case 1:$im = @ImageCreateFromGIF($srcFile); break;case 2:$im = @ImageCreateFromJPEG($srcFile); break;case 3:$im = @ImageCreateFromPNG($srcFile); break;}if (!$im) return False;$srcW = ImageSX($im);$srcH = ImageSY($im);。
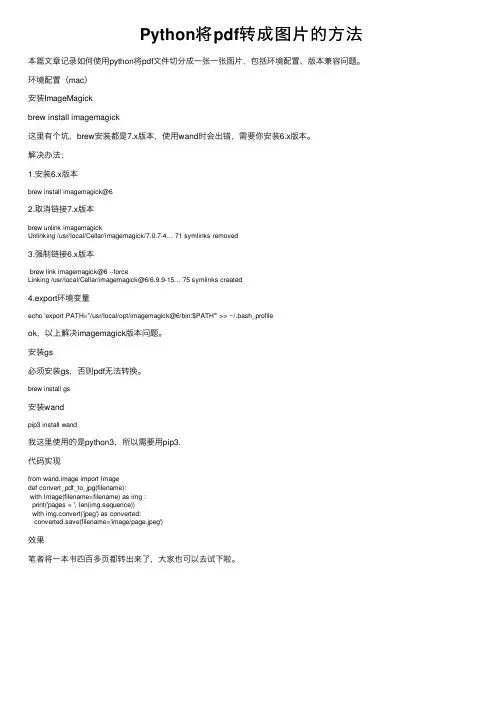
Python将pdf转成图⽚的⽅法本篇⽂章记录如何使⽤python将pdf⽂件切分成⼀张⼀张图⽚,包括环境配置、版本兼容问题。
环境配置(mac)安装ImageMagickbrew install imagemagick这⾥有个坑,brew安装都是7.x版本,使⽤wand时会出错,需要你安装6.x版本。
解决办法:1.安装6.x版本brew install imagemagick@62.取消链接7.x版本brew unlink imagemagickUnlinking /usr/local/Cellar/imagemagick/7.0.7-4… 71 symlinks removed3.强制链接6.x版本brew link imagemagick@6 --forceLinking /usr/local/Cellar/imagemagick@6/6.9.9-15… 75 symlinks created4.export环境变量echo 'export PATH="/usr/local/opt/imagemagick@6/bin:$PATH"' >> ~/.bash_profileok,以上解决imagemagick版本问题。
安装gs必须安装gs,否则pdf⽆法转换。
brew install gs安装wandpip3 install wand我这⾥使⽤的是python3,所以需要⽤pip3.代码实现from wand.image import Imagedef convert_pdf_to_jpg(filename):with Image(filename=filename) as img :print('pages = ', len(img.sequence))with img.convert('jpeg') as converted:converted.save(filename='image/page.jpeg')效果笔者将⼀本书四百多页都转出来了,⼤家也可以去试下啦。
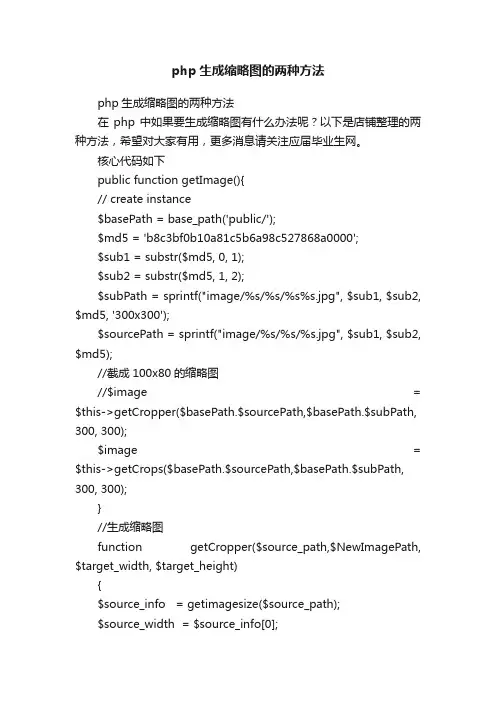
php生成缩略图的两种方法php生成缩略图的两种方法在php中如果要生成缩略图有什么办法呢?以下是店铺整理的两种方法,希望对大家有用,更多消息请关注应届毕业生网。
核心代码如下public function getImage(){// create instance$basePath = base_path('public/');$md5 = 'b8c3bf0b10a81c5b6a98c527868a0000';$sub1 = substr($md5, 0, 1);$sub2 = substr($md5, 1, 2);$subPath = sprintf("image/%s/%s/%s%s.jpg", $sub1, $sub2, $md5, '300x300');$sourcePath = sprintf("image/%s/%s/%s.jpg", $sub1, $sub2, $md5);//截成100x80的缩略图//$image = $this->getCropper($basePath.$sourcePath,$basePath.$subPath, 300, 300);$image = $this->getCrops($basePath.$sourcePath,$basePath.$subPath, 300, 300);}//生成缩略图function getCropper($source_path,$NewImagePath, $target_width, $target_height){$source_info = getimagesize($source_path);$source_width = $source_info[0];$source_height = $source_info[1];$source_mime = $source_info['mime'];$source_ratio = $source_height / $source_width; $target_ratio = $target_height / $target_width;// 源图过高if ($source_ratio > $target_ratio){$cropped_width = $source_width;$cropped_height = $source_width * $target_ratio; $source_x = 0;$source_y = ($source_height - $cropped_height) / 2; }// 源图过宽elseif ($source_ratio < $target_ratio){$cropped_width = $source_height / $target_ratio; $cropped_height = $source_height;$source_x = ($source_width - $cropped_width) / 2; $source_y = 0;}// 源图适中else{$cropped_width = $source_width;$cropped_height = $source_height;$source_x = 0;$source_y = 0;}switch ($source_mime){case 'image/gif':$source_image = imagecreatefromgif($source_path);break;case 'image/jpeg':$source_image = imagecreatefromjpeg($source_path);break;case 'image/png':$source_image = imagecreatefrompng($source_path);break;default:return false;break;}$target_image = imagecreatetruecolor($target_width, $target_height);$cropped_image = imagecreatetruecolor($cropped_width, $cropped_height);// 图片裁剪imagecopy($cropped_image, $source_image, 0, 0, $source_x, $source_y, $cropped_width, $cropped_height);// 图片缩放imagecopyresampled($target_image, $cropped_image, 0, 0, 0, 0, $target_width, $target_height, $cropped_width, $cropped_height);header('Content-Type: image/jpeg');imagejpeg($target_image,$NewImagePath,100);imagedestroy($source_image);imagedestroy($target_image);imagedestroy($cropped_image);}//生成缩略图,填充白边functiongetCrops($src_path,$NewImagePath,$width,$height){ //源图对象$src_image = imagecreatefromstring(file_get_contents($src_path));$source_info = getimagesize($src_path);$source_mime = $source_info['mime'];$src_width = imagesx($src_image);$src_height = imagesy($src_image);switch ($source_mime){case 'image/gif':$src_image = imagecreatefromgif($src_path);break;case 'image/jpeg':$src_image = imagecreatefromjpeg($src_path);break;case 'image/png':$src_image = imagecreatefrompng($src_path);break;default:return false;break;}//生成等比例的缩略图//$tmp_image_width = 0;//$tmp_image_height = 0;if ($src_width / $src_height >= $width / $height) {$tmp_image_width = $width;$tmp_image_height = round($tmp_image_width * $src_height / $src_width);} else {$tmp_image_height = $height;$tmp_image_width = round($tmp_image_height * $src_width / $src_height);}$tmpImage = imagecreatetruecolor($tmp_image_width, $tmp_image_height);imagecopyresampled($tmpImage, $src_image, 0, 0, 0, 0, $tmp_image_width, $tmp_image_height, $src_width, $src_height);//添加白边$final_image = imagecreatetruecolor($width, $height);$color = imagecolorallocate($final_image, 255, 255, 255);imagefill($final_image, 0, 0, $color);$x = round(($width - $tmp_image_width) / 2);$y = round(($height - $tmp_image_height) / 2);imagecopy($final_image, $tmpImage, $x, $y, 0, 0, $tmp_image_width, $tmp_image_height);//输出图片header('Content-Type: image/jpeg');imagejpeg($final_image,$NewImagePath,100);imagedestroy($src_image);imagedestroy($final_image);}。
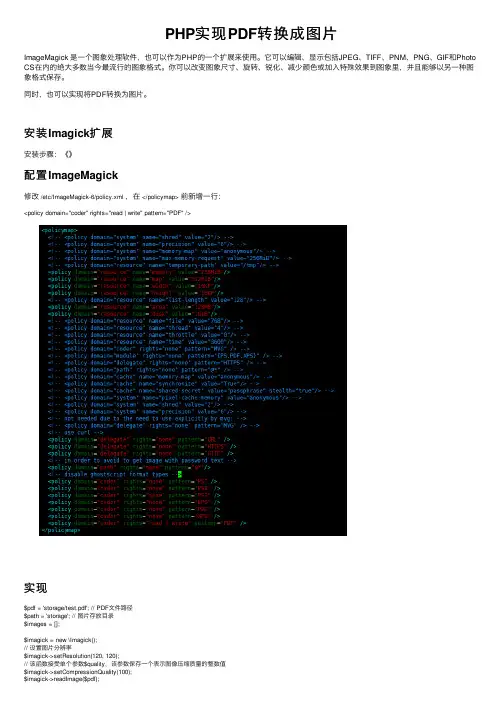
PHP实现PDF转换成图⽚ImageMagick 是⼀个图象处理软件,也可以作为PHP的⼀个扩展来使⽤。
它可以编辑、显⽰包括JPEG、TIFF、PNM、PNG、GIF和Photo CS在内的绝⼤多数当今最流⾏的图象格式。
你可以改变图象尺⼨、旋转、锐化、减少颜⾊或加⼊特殊效果到图象⾥,并且能够以另⼀种图象格式保存。
同时,也可以实现将PDF转换为图⽚。
安装Imagick扩展安装步骤:《》配置ImageMagick修改/etc/ImageMagick-6/policy.xml,在</policymap>前新增⼀⾏:<policy domain="coder" rights="read | write" pattern="PDF" />实现$pdf = 'storage/test.pdf'; // PDF⽂件路径$path = 'storage'; // 图⽚存放⽬录$images = [];$imagick = new \Imagick();// 设置图⽚分辨率$imagick->setResolution(120, 120);// 该函数接受单个参数$quality,该参数保存⼀个表⽰图像压缩质量的整数值$imagick->setCompressionQuality(100);$imagick->readImage($pdf);foreach ($imagick as $key => $val) {// 设置图⽚格式并⽣成png图⽚$val->setImageFormat('png');$file = $path . DIRECTORY_SEPARATOR . md5($key.time()) . '.png'; if ($val->writeImage($file) === true) {$images[] = $file;}}。

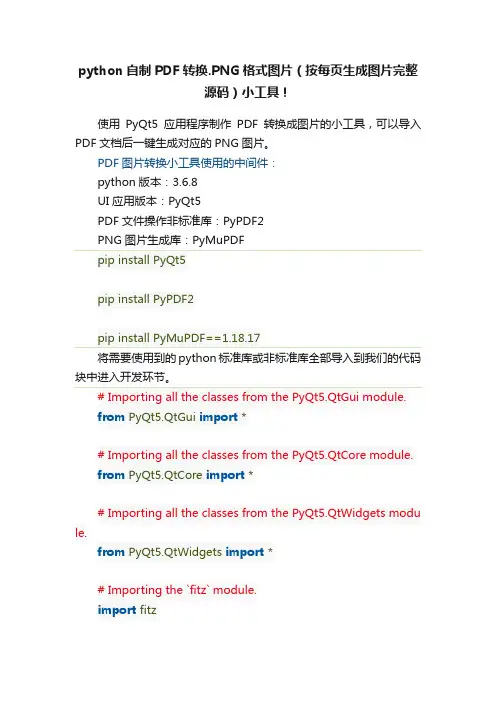
python自制PDF转换.PNG格式图片(按每页生成图片完整源码)小工具!使用PyQt5应用程序制作PDF转换成图片的小工具,可以导入PDF文档后一键生成对应的PNG图片。
PDF图片转换小工具使用的中间件:python版本:3.6.8UI应用版本:PyQt5PDF文件操作非标准库:PyPDF2PNG图片生成库:PyMuPDFpip install PyPDF2将需要使用到的python标准库或非标准库全部导入到我们的代码块中进入开发环节。
# Importing all the classes from the PyQt5.QtGui module.from PyQt5.QtGui import *# Importing all the classes from the PyQt5.QtCore module.from PyQt5.QtCore import *# Importing all the classes from the PyQt5.QtWidgets modu le.from PyQt5.QtWidgets import *# Importing the `fitz` module.import fitz# Importing the PyPDF2 module.import PyPDF2# Importing the `sys` module.import sys# Importing the os module.import os# Importing the traceback module.import traceback接下来直接进入正题,首先创建名称为PdfToPngUI的python类,将UI组件及布局和相关的槽函数都写入到这个类中。
# This class is a widget that contains a button and a text bo x. When the button is clicked, the text box is populated with # the path to the converted fileclass PdfToPngUI(QWidget):def__init__(self):"""A constructor. It is called when an object is created from a cl ass and it allows the class to initialize theattributes of a class."""super(PdfT oPngUI, self).__init__()self.init_ui()def init_ui(self):"""This function initializes the UI."""self.setWindowTitle('PDF图片转换工具公众号:Python 集中营')self.setWindowIcon(QIcon('analysis.ico'))self.resize(600, 400)self.source_pdf_path = QLineEdit()self.source_pdf_path.setPlaceholderText('PDF文件路径')self.source_pdf_path.setReadOnly(True)self.source_pdf_btn = QPushButton()self.source_pdf_btn.setText('导入')self.source_pdf_btn.clicked.connect(self.source_pdf_btn_click)self.target_png_path = QLineEdit()self.target_png_path.setPlaceholderText('目标图片存储路径') self.target_png_path.setReadOnly(True)self.target_png_btn = QPushButton()self.target_png_btn.setText('路径')self.target_png_btn.clicked.connect(self.target_png_btn_click)self.start_btn = QPushButton()self.start_btn.setText('PDF一键生成PNG图片')self.start_btn.clicked.connect(self.start_btn_click)self.brower = QTextBrowser()self.brower.setReadOnly(True)self.brower.setFont(QFont('宋体', 8))self.brower.setPlaceholderText('日志处理过程区域...')self.brower.ensureCursorVisible()grid = QGridLayout()grid.addWidget(self.source_pdf_path, 0, 0, 1, 2) grid.addWidget(self.source_pdf_btn, 0, 2, 1, 1) grid.addWidget(self.target_png_path, 1, 0, 1, 2) grid.addWidget(self.target_png_btn, 1, 2, 1, 1) grid.addWidget(self.start_btn, 2, 0, 1, 3)grid.addWidget(self.brower, 3, 0, 1, 3)self.pdf_thread = WorkThread(self)self.pdf_thread.message.connect(self.show_message) self.pdf_thread.finished.connect(self.finished)self.setLayout(grid)def show_message(self, text):"""It shows a message:param text: The text to be displayed"""cursor = self.brower.textCursor()cursor.movePosition(QTextCursor.End)self.brower.append(text)self.brower.setTextCursor(cursor)self.brower.ensureCursorVisible()def source_pdf_btn_click(self):"""It opens a file dialog box to select the source PDF file."""source_pdf_path = QFileDialog.getOpenFileName(self, "选取文件", os.getcwd(), "PDF File (*.pdf)")self.source_pdf_path.setText(source_pdf_path[0])def target_png_btn_click(self):"""A function that is called when the target_png_btn is clicked."""target_png_path = QFileDialog.getExistingDirectory(self, '选择文件夹', os.getcwd())self.target_png_path.setText(target_png_path)def start_btn_click(self):"""A function that is called when the start button is clicked."""self.pdf_thread.start()self.start_btn.setEnabled(False)def finished(self, finished):"""A function that is called when the target_png_btn is clicked"""if finished is True:self.start_btn.setEnabled(True)通过上面的PdfToPngUI类处理,这个时候UI组件及布局和槽函数已经开发完成了,应用的页面效果如下。
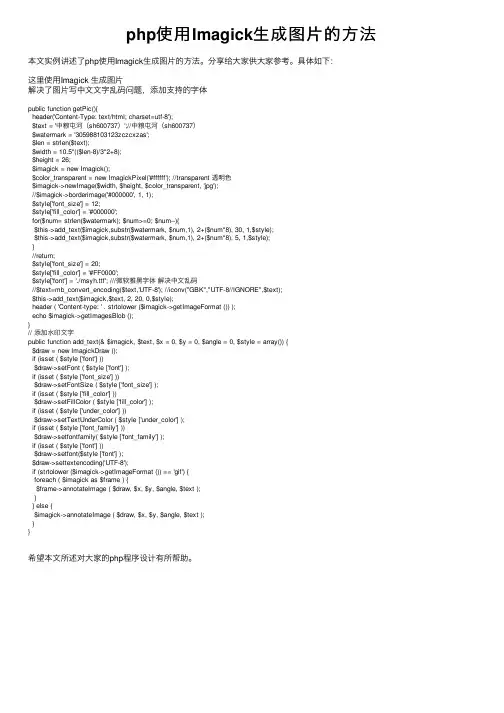
php使⽤Imagick⽣成图⽚的⽅法本⽂实例讲述了php使⽤Imagick⽣成图⽚的⽅法。
分享给⼤家供⼤家参考。
具体如下:这⾥使⽤Imagick ⽣成图⽚解决了图⽚写中⽂⽂字乱码问题,添加⽀持的字体public function getPic(){header('Content-Type: text/html; charset=utf-8');$text = '中粮屯河(sh600737)';//中粮屯河(sh600737)$watermark = '305988103123zczcxzas';$len = strlen($text);$width = 10.5*(($len-8)/3*2+8);$height = 26;$imagick = new Imagick();$color_transparent = new ImagickPixel('#ffffff'); //transparent 透明⾊$imagick->newImage($width, $height, $color_transparent, 'jpg');//$imagick->borderimage('#000000', 1, 1);$style['font_size'] = 12;$style['fill_color'] = '#000000';for($num= strlen($watermark); $num>=0; $num--){$this->add_text($imagick,substr($watermark, $num,1), 2+($num*8), 30, 1,$style);$this->add_text($imagick,substr($watermark, $num,1), 2+($num*8), 5, 1,$style);}//return;$style['font_size'] = 20;$style['fill_color'] = '#FF0000';$style['font'] = './msyh.ttf'; ///微软雅⿊字体解决中⽂乱码//$text=mb_convert_encoding($text,'UTF-8'); //iconv("GBK","UTF-8//IGNORE",$text);$this->add_text($imagick,$text, 2, 20, 0,$style);header ( 'Content-type: ' . strtolower ($imagick->getImageFormat ()) );echo $imagick->getImagesBlob ();}// 添加⽔印⽂字public function add_text(& $imagick, $text, $x = 0, $y = 0, $angle = 0, $style = array()) {$draw = new ImagickDraw ();if (isset ( $style ['font'] ))$draw->setFont ( $style ['font'] );if (isset ( $style ['font_size'] ))$draw->setFontSize ( $style ['font_size'] );if (isset ( $style ['fill_color'] ))$draw->setFillColor ( $style ['fill_color'] );if (isset ( $style ['under_color'] ))$draw->setTextUnderColor ( $style ['under_color'] );if (isset ( $style ['font_family'] ))$draw->setfontfamily( $style ['font_family'] );if (isset ( $style ['font'] ))$draw->setfont($style ['font'] );$draw->settextencoding('UTF-8');if (strtolower ($imagick->getImageFormat ()) == 'gif') {foreach ( $imagick as $frame ) {$frame->annotateImage ( $draw, $x, $y, $angle, $text );}} else {$imagick->annotateImage ( $draw, $x, $y, $angle, $text );}}希望本⽂所述对⼤家的php程序设计有所帮助。
php imagick用法
PHPImagick是一种用于操作图像的扩展,可以在PHP中使用。
它提供了一套强大的API,可以用于对图像进行处理、变换、合成等操作。
使用PHP Imagick可以轻松地实现图像处理的功能,例如缩放、裁剪、旋转、添加水印等。
PHP Imagick的使用非常简单,只需要在PHP代码中引入Imagick 扩展,然后就可以使用它提供的方法对图像进行处理了。
下面是PHP Imagick的一些常用方法:
1. 打开图片
使用Imagick::readImage方法可以打开一张图片。
可以打开本地图片,也可以打开远程图片。
2. 缩放图片
使用Imagick::resizeImage方法可以缩放图片。
可以按照指定的宽度或高度缩放图片,也可以按比例缩放。
3. 裁剪图片
使用Imagick::cropImage方法可以裁剪图片。
可以指定裁剪的位置和大小。
4. 旋转图片
使用Imagick::rotateImage方法可以旋转图片。
可以指定旋转的角度。
5. 添加水印
使用Imagick::compositeImage方法可以添加水印。
可以指定水
印的位置和透明度。
PHP Imagick还提供了很多其他的方法,可以根据实际需求进行选择。
使用PHP Imagick可以轻松地实现各种图像处理功能,让我们的网站更加丰富多彩。
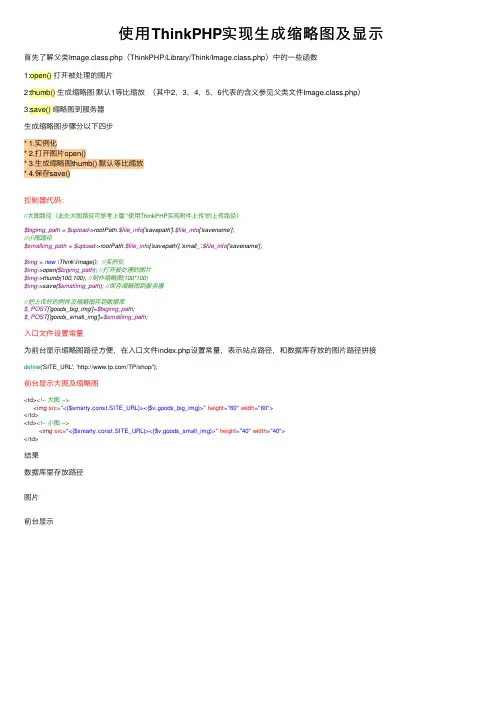
使⽤ThinkPHP实现⽣成缩略图及显⽰⾸先了解⽗类Image.class.php(ThinkPHP/Library/Think/Image.class.php)中的⼀些函数1:open() 打开被处理的图⽚2:thumb() ⽣成缩略图默认1等⽐缩放(其中2,3,4,5,6代表的含义参见⽗类⽂件Image.class.php)3:save() 缩略图到服务器⽣成缩略图步骤分以下四步* 1.实例化* 2.打开图⽚open()* 3.⽣成缩略图thumb() 默认等⽐缩放* 4.保存save()控制器代码://⼤图路径(此处⼤图路径可参考上篇 “使⽤ThinkPHP实现附件上传”的上传路径)$bigimg_path = $upload->rootPath.$file_info['savepath'].$file_info['savename'];//⼩图路径$smallimg_path = $upload->rootPath.$file_info['savepath'].'small_'.$file_info['savename'];$img = new \Think\Image(); //实例化$img->open($bigimg_path); //打开被处理的图⽚$img->thumb(100,100); //制作缩略图(100*100)$img->save($smallimg_path); //保存缩略图到服务器//把上传好的附件及缩略图存到数据库$_POST['goods_big_img']=$bigimg_path;$_POST['goods_small_img']=$smallimg_path;⼊⼝⽂件设置常量为前台显⽰缩略图路径⽅便,在⼊⼝⽂件index.php设置常量,表⽰站点路径,和数据库存放的图⽚路径拼接define('SITE_URL', '/TP/shop/');前台显⽰⼤图及缩略图<td><!-- ⼤图 --><img src="<{$smarty.const.SITE_URL}><{$v.goods_big_img}>" height="60" width="60"></td><td><!-- ⼩图 --><img src="<{$smarty.const.SITE_URL}><{$v.goods_small_img}>" height="40" width="40"></td>结果数据库⾥存放路径图⽚前台显⽰。
PHP生成图片缩略图类示例代码PHP生成图片缩略图类示例代码导语:PHP如何生成图片缩略图类?下面是店铺给大家提供的代码示例,大家可以参考阅读,更多详情请关注店铺。
class App_image_helper {protected $imgFileName;protected $imgWidth;protected $imgHeight;protected $imgMime;protected $imgResource;static $imgMineList= array('jpeg' => 'image/jpeg','gif' => 'image/gif','png' => 'image/png','wbmp' => 'image/wbmp',);/*** 根据文件名,初始化图片,* 计算出给定图片的'宽、高、图片类型,并获取图片的资源保存到内存,便于下次使用* App_image_helper constructor.** @param $fileName*/public function __construct($fileName) {$this->imgFileName = $fileName;list($this->imgWidth, $this->imgHeight, $this->imgMime) = $this->getImageInfo($this->imgFileName);$this->imgResource = $this->getImageResource($this->imgFileName);}/*** 根据图片路径获取相关宽、高、MIME类型信息** @param $fileName** @return array|null*/protected function getImageInfo($fileName) {$result = null;if ( is_file($fileName) ) {$tmpImageInfo = getimagesize($fileName);if ( $tmpImageInfo ) {$result = array($tmpImageInfo[0], $tmpImageInfo[1], $tmpImageInfo['mime']);}}return $result;}/*** 将图片文件转为资源类类型** @param $fileName** @return null|resource*/protected function getImageResource($fileName) {$image = null;if ( is_file($fileName) ) {switch ($this->imgMime) {case self::$imgMineList['jpeg']:$image = imagecreatefromjpeg($fileName);break;case self::$imgMineList['gif']:$image = imagecreatefromgif($fileName);break;case self::$imgMineList['png']:$image = imagecreatefrompng($fileName);break;case self::$imgMineList['wbmp']:$image = imagecreatefromwbmp($fileName);break;default:break;}}return $image;}/*** 可根据固定宽,等比缩放图片;或根据百分比,等比缩放图片** @param int $width* @param int $percent** @return array|null*/protected function getSizeByScale($width = 360, $percent = 1) {$result = null;if ( $this->imgWidth && $this->imgHeight ) {if ( $width ) {$result = array($width, intval($width * $this->imgHeight / $this->imgWidth));} elseif ( $percent ) {$result = array(intval($this->imgWidth * $percent), intval($this->imgHeight * $percent));}}return $result;}/*** 外调** @param int $percentOrWidth int整数表示图片缩放为固定宽度,0.0~0.99999表示缩放百分比* @param null $fileName* @param int $quality* @param bool $reSample 重新采样图片,默认是** @return bool*/public function createImage($percentOrWidth = 1, $fileName = null, $quality = 75, $reSample = true) {$result = false;$fileName ? header('Content-Type: ' . $this->imgMime) : false;$size = $this->getSizeByScale(($percentOrWidth <= 1) ? null : $percentOrWidth, $percentOrWidth);if ( $size ) {$thumb = imagecreatetruecolor($size[0], $size[1]);if ( $reSample ) {imagecopyresampled($thumb, $this->imgResource, 0, 0, 0, 0, $size[0], $size[1], $this->imgWidth, $this->imgHeight);} else {imagecopyresized($thumb, $this->imgResource, 0, 0, 0, 0, $size[0], $size[1], $this->imgWidth, $this->imgHeight);}$result = imagejpeg($thumb, $fileName, $quality);}return $result;}}。
PHP中使⽤imagick实现把PDF转成图⽚PHP Manual⾥,对imagick的描述,真的是简洁,每个成员函数,点击打开就看到如下⽂本:复制代码代码如下:WarningThis function is currently not documented; only its argument list is available.刚才解决了PHP加载问题后,对图⽚的处理相当⽅便,⽹上随便找了⼀段:复制代码代码如下:<?phpHeader("Content-type: image/jpeg");/*** 缩⼩图⽚尺⼨.** @param $image 待处理的⼆进制图⽚* @param $width 处理后图⽚尺⼨的宽度(px)* @param $height 处理后图⽚尺⼨的⾼度(px)* @param $crop 是否裁剪图⽚** @return 处理好的⼆进制图⽚*/function resize($image, $width, $height, $crop){$imagick = new Imagick($image);$w = $imagick->getImageWidth();$h = $imagick->getImageHeight();if ($w > $width || $h > $height){if ($crop){$imagick->cropThumbnailImage($width, $height);}else{$imagick->resizeImage($width, $height, Imagick::FILTER_LANCZOS, 1, true);}}$processed_image = $imagick->getImageBlob();return $processed_image;}$s=resize("123.jpg", 60, 40, 1);echo $s;>但我要⽤这个扩展做的,是将PDF转成PNG。
pdf导png不会失真的方法(二)PDF转PNG不会失真的方法在数字化时代,PDF(Portable Document Format)文件成为了常见的文档格式。
然而,有时我们需要将PDF转换为图片格式,如PNG (Portable Network Graphics),以便于在网页、移动设备等平台上展示。
本文将介绍几种不会造成图片失真的PDF转PNG方法。
方法一:使用Adobe Acrobat1.安装Adobe Acrobat软件。
2.打开要转换的PDF文件。
3.在菜单栏中选择“文件”>“导出为”>“图片”>“PNG”。
4.设置输出选项,如分辨率、颜色模式等。
5.点击“导出”,选择保存位置并命名文件。
6.点击“保存”以开始转换过程。
方法二:使用在线转换工具1.打开任意一款在线PDF转PNG转换工具,如SmallPDF、Online-Convert等。
2.上传要转换的PDF文件。
3.设置输出选项,如分辨率、图像质量等。
4.点击“开始转换”或类似按钮以开始转换过程。
5.下载转换后的PNG文件。
方法三:使用Ghostscript命令行工具1.下载并安装Ghostscript命令行工具。
2.打开命令行界面。
3.执行以下命令:gs -dNOPAUSE -sDEVICE=png16m -r<分辨率>-sOutputFile=<输出文件名>% <输入文件名>.pdf。
–替换<分辨率>为所需的分辨率值,如300、600等。
–替换<输出文件名>和<输入文件名>为实际的文件名。
–%表示输出多个PNG文件,文件名以从001开始的三位数字编号。
4.执行命令后,等待转换完成。
方法四:使用开源软件ImageMagick1.下载并安装ImageMagick软件。
2.打开命令行界面。
3.执行以下命令:convert -density <分辨率> <输入文件名>.pdf -quality 100 <输出文件名>.png。
使⽤Python直接把PDF转成图⽚Python中把PDF转成单个或多个图⽚现在有很多在线的pdf转图⽚⼯具,但是有些数据是不想联⽹,更不想把数据上传到别⼈的服务器进⾏转换,那么怎么办呢?正常的Java编写⼀个耗费时间;现在不是有Python吗,⼈家有库,⽤起来快有⽅便,那我们就直接拿来⽤就好了,多舒服;版权声明:本⽂为原创⽂章,遵循 CC 4.0 BY-SA 版权协议,转载请附上原⽂出处链接及本声明。
⽬录⼀、安装Python环境这⼀步不想说了,这个⽐较简单。
记得配置⼀下环境变量。
不然运⾏脚本⽐较费劲!⼆、Python的PDF转PNG代码注意:第⼀步要安装库:pip install pymupdf#安装库 pip install pymupdfimport osimport fitzpdf_dir=[]def get_file():docunames = os.listdir()for docuname in docunames:if os.path.splitext(docuname)[1]=='.pdf': #⽬录下包含.pdf的⽂件pdf_dir.append(docuname)def conver_img():for pdf in pdf_dir:doc = fitz.open(pdf)#pdf_name = os.path.splitext(pdf)[0]pdf_name = os.path.splitext(pdf)[0]print("====================================")print("开始转换%s.PDF⽂档"%pdf_name)print("====================================")print("共",doc.pageCount,"页")for pg in range(0,doc.pageCount):print("\r转换为图⽚",pg+1,"/",doc.pageCount,end=";")page=doc[pg]rotate = int(0) #旋转⾓度# 每个尺⼨的缩放系数为2,这将为我们⽣成分辨率提⾼四倍的图像zoom_x=2.0zoom_y=2.0print("")trans = fitz.Matrix(zoom_x, zoom_y).preRotate(rotate)pm= page.getPixmap(matrix=trans, alpha=False)pm.writePNG(r'./tu'+str(pdf_name)+'-'+'{:02}.png'.format(pg))if __name__=='__main__':get_file()conver_img()脚本和PDF要在同⼀个⽂件夹下。
php实现图⽚缩略图的⽅法本段代码实现功能有这些:⽀持jpg,jpeg,gif,png,bmp图⽚格式,⽀持按原图⽚的⽐例进⾏缩放,可以选择在图⽚缩放的过程中是否需要对图⽚进⾏裁切,加⼊了图⽚质量控制,可以实现缩略图⽚质量最⾼化。
完整类的代码如下:<?php/*** 功能:php⽣成缩略图⽚的类*/class ResizeImage{public $type;//图⽚类型public $width;//实际宽度public $height;//实际⾼度public $resize_width;//改变后的宽度public $resize_height;//改变后的⾼度public $cut;//是否裁图public $srcimg;//源图象public $dstimg;//⽬标图象地址public $im;//临时创建的图象public $quality;//图⽚质量function resizeimage($img,$wid,$hei,$c,$dstpath,$quality=100){$this->srcimg=$img;$this->resize_width=$wid;$this->resize_height=$hei;$this->cut=$c;$this->quality=$quality;$this->type=strtolower(substr(strrchr($this->srcimg,'.'),1));//图⽚的类型$this->initi_img();//初始化图象$this -> dst_img($dstpath);//⽬标图象地址@$this->width=imagesx($this->im);@$this->height=imagesy($this->im);$this->newimg();//⽣成图象@ImageDestroy($this->im);}function newimg(){$resize_ratio=($this->resize_width)/($this->resize_height);//改变后的图象的⽐例@$ratio=($this->width)/($this->height);//实际图象的⽐例if(($this->cut)=='1'){//裁图if($img_func==='imagepng'&&(str_replace('.','',PHP_VERSION)>=512)){ //针对php版本⼤于5.12参数变化后的处理情况$quality=9;}if($ratio>=$resize_ratio){//⾼度优先$newimg=imagecreatetruecolor($this->resize_width,$this->resize_height);imagecopyresampled($newimg,$this->im,0,0,0,0,$this->resize_width,$this->resize_height,(($this->height)*$resize_ratio),$this->height);imagejpeg($newimg,$this->dstimg,$this->quality);}if($ratio<$resize_ratio){//宽度优先$newimg=imagecreatetruecolor($this->resize_width,$this->resize_height);imagecopyresampled($newimg,$this->im,0,0,0,0,$this->resize_width,$this->resize_height,$this->width,(($this->width)/$resize_ratio));imagejpeg($newimg,$this->dstimg,$this->quality);}}else{//不裁图if($ratio>=$resize_ratio){$newimg=imagecreatetruecolor($this->resize_width,($this->resize_width)/$ratio);imagecopyresampled($newimg,$this->im,0,0,0,0,$this->resize_width,($this->resize_width)/$ratio,$this->width,$this->height);imagejpeg($newimg,$this->dstimg,$this->quality);}if($ratio<$resize_ratio){@$newimg=imagecreatetruecolor(($this->resize_height)*$ratio,$this->resize_height);@imagecopyresampled($newimg,$this->im,0,0,0,0,($this->resize_height)*$ratio,$this->resize_height,$this->width,$this->height);@imagejpeg($newimg,$this->dstimg,$this->quality);}}}function initi_img(){//初始化图象if($this->type=='jpg' || $this->type=='jpeg'){$this->im=imagecreatefromjpeg($this->srcimg);}if($this->type=='gif'){$this->im=imagecreatefromgif($this->srcimg);}if($this->type=='png'){$this->im=imagecreatefrompng($this->srcimg);}if($this->type=='wbm'){@$this->im=imagecreatefromwbmp($this->srcimg);}if($this->type=='bmp'){$this->im=$this->ImageCreateFromBMP($this->srcimg);}}function dst_img($dstpath){//图象⽬标地址$full_length=strlen($this->srcimg);$type_length=strlen($this->type);$name_length=$full_length-$type_length;$name=substr($this->srcimg,0,$name_length-1);$this->dstimg=$dstpath;//echo $this->dstimg;}function ImageCreateFromBMP($filename){ //⾃定义函数处理bmp图⽚if(!$f1=fopen($filename,"rb"))returnFALSE;$FILE=unpack("vfile_type/Vfile_size/Vreserved/Vbitmap_offset",fread($f1,14));if($FILE['file_type']!=19778)returnFALSE;$BMP=unpack('Vheader_size/Vwidth/Vheight/vplanes/vbits_per_pixel'.'/Vcompression/Vsize_bitmap/Vhoriz_resolution'.'/Vvert_resolution/Vcolors_used/Vcolors_important',fread($f1,40));$BMP['colors']=pow(2,$BMP['bits_per_pixel']);if($BMP['size_bitmap']==0)$BMP['size_bitmap']=$FILE['file_size']-$FILE['bitmap_offset']; $BMP['bytes_per_pixel']=$BMP['bits_per_pixel']/8;$BMP['bytes_per_pixel2']=ceil($BMP['bytes_per_pixel']);$BMP['decal']=($BMP['width']*$BMP['bytes_per_pixel']/4);$BMP['decal']-=floor($BMP['width']*$BMP['bytes_per_pixel']/4);$BMP['decal']=4-(4*$BMP['decal']);if($BMP['decal']==4)$BMP['decal']=0;$PALETTE=array();if($BMP['colors']<16777216){$PALETTE=unpack('V'.$BMP['colors'],fread($f1,$BMP['colors']*4));}$IMG=fread($f1,$BMP['size_bitmap']);$VIDE=chr(0);$res=imagecreatetruecolor($BMP['width'],$BMP['height']);$P=0;$Y=$BMP['height']-1;while($Y>=0){$X=0;while($X<$BMP['width']){if($BMP['bits_per_pixel']==24)$COLOR=unpack("V",substr($IMG,$P,3).$VIDE);elseif($BMP['bits_per_pixel']==16){$COLOR=unpack("n",substr($IMG,$P,2));$COLOR[1]=$PALETTE[$COLOR[1]+1];}elseif($BMP['bits_per_pixel']==8){$COLOR=unpack("n",$VIDE.substr($IMG,$P,1));$COLOR[1]=$PALETTE[$COLOR[1]+1];}elseif($BMP['bits_per_pixel']==4){$COLOR=unpack("n",$VIDE.substr($IMG,floor($P),1));if(($P*2)%2==0)$COLOR[1]=($COLOR[1]>>4);else$COLOR[1]=($COLOR[1]&0x0F); $COLOR[1]=$PALETTE[$COLOR[1]+1];}elseif($BMP['bits_per_pixel']==1){$COLOR=unpack("n",$VIDE.substr($IMG,floor($P),1));if(($P*8)%8==0)$COLOR[1]=$COLOR[1]>>7;elseif(($P*8)%8==1)$COLOR[1]=($COLOR[1]&0x40)>>6;elseif(($P*8)%8==2)$COLOR[1]=($COLOR[1]&0x20)>>5;elseif(($P*8)%8==3)$COLOR[1]=($COLOR[1]&0x10)>>4;elseif(($P*8)%8==4)$COLOR[1]=($COLOR[1]&0x8)>>3;elseif(($P*8)%8==5)$COLOR[1]=($COLOR[1]&0x4)>>2;elseif(($P*8)%8==6)$COLOR[1]=($COLOR[1]&0x2)>>1;elseif(($P*8)%8==7)$COLOR[1]=($COLOR[1]&0x1);$COLOR[1]=$PALETTE[$COLOR[1]+1];}elsereturnFALSE;imagesetpixel($res,$X,$Y,$COLOR[1]);$X++;$P+=$BMP['bytes_per_pixel'];}$Y--;$P+=$BMP['decal'];}fclose($f1);return$res;}}>使⽤⽅法很简单代码如下:$resizeimage=new ResizeImage('upload/abc.bmp', '120', '90', '0', 'upload/xabc.bmp');以上代码是⼩编给⼤家分享的php实现图⽚缩略图的⽅法,希望对⼤家有所帮助!。
这篇文章主要介绍了PHP使用imagick读取PDF第一页生成png缩略图的两种方法,使用了PHP扩展php_imagick,需要的朋友可以参考下
一、ImageMagick是什么
ImageMagick是一套功能强大、稳定而且免费的工具集和开发包,可以用来读、写和处理超过185种基本格式的图片文件,包括流行的TIFF, JPEG, GIF, PNG, PDF以及PhotoCD 等格式。
利用ImageMagick,你可以根据web应用程序的需要动态生成图片, 还可以对一个(或一组)图片进行改变大小、旋转、锐化、减色或增加特效等操作,并将操作的结果以相同格式或其它格式保存。
二、php_imagick什么
一个可以供PHP调用ImageMagick功能的PHP扩展。
使用这个扩展可以使PHP具备和ImageMagick相同的功能。
三、PDF生成png缩略图的两种方法
第一种:
代码如下:/**
* PDF2PNG
* @param $pdf 待处理的PDF文件
* @param $path 待保存的图片路径
* @param $page 待导出的页面-1为全部0为第一页1为第二页
* @return 保存好的图片路径和文件名
*/
function pdf2png($pdf,$path,$page=0)
{
if(!is_dir($path))
{
mkdir($path,true);
}
if(!extension_loaded('imagick'))
{
echo '没有找到imagick!' ;
return false;
}
if(!file_exists($pdf))
{
echo '没有找到pdf' ;
return false;
}
$im = new Imagick();
$im->setResolution(120,120); //设置图像分辨率
$im->setCompressionQuality(80); //压缩比
$im->readImage($pdf."[".$page."]"); //设置读取pdf的第一页
//$im->thumbnailImage(200, 100, true); // 改变图像的大小
$im->scaleImage(200,100,true); //缩放大小图像
$filename = $path."/". time().'.png';
if($im->writeImage($filename) == true)
{
$Return = $filename;
}
return $Return;
}
$s = pdf2png('file/1371273225-ceshi_ppt.pdf','images');
echo '<div align="center"><img src="'.$s.'"></div>'; 第二种:
代码如下:function pdf2png($PDF,$Path){
if(!extension_loaded('imagick')){
return false;
}
if(!file_exists($PDF)){
return false;
}
$IM = new imagick();
$IM->setResolution(120,120);
$IM->setCompressionQuality(100);
$IM->readImage($PDF);
foreach ($IM as $Key => $Var){
$Var->setImageFormat('png');
$Filename = $Path.'/'.md5($Key.time()).'.png';
if($Var->writeImage($Filename) == true){
$Return[] = $Filename;
}
}
return $Return;
}
更多信息请查看IT技术专栏。