K3 Surfaces, Igusa Cusp Form and String Theory
- 格式:pdf
- 大小:293.89 KB
- 文档页数:32

python 光谱角sam分类English Answer:Spectral Angle Mapper (SAM) is a spectralclassification algorithm that measures the similarity between two spectra by calculating the angle between them. It is a widely used technique for classifying remotely sensed data, such as satellite imagery, and is particularly useful for identifying and discriminating different materials based on their spectral signatures.The SAM algorithm is based on the concept thatdifferent materials have unique spectral signatures that can be used to identify and classify them. A spectral signature is a graph of the reflectance of a material at different wavelengths. When two spectra are compared, the smaller the angle between them, the more similar the two materials are.The SAM algorithm is implemented by first calculatingthe cosine of the angle between two spectra. The cosine of the angle is a measure of the similarity between the two spectra, ranging from -1 to 1. A cosine of 1 indicates that the two spectra are identical, while a cosine of -1indicates that the two spectra are completely different.Once the cosine of the angle between two spectra has been calculated, it is used to classify the pixels in the image. The pixels are assigned to the class that has the smallest angle between its spectral signature and the spectral signature of the pixel being classified.The SAM algorithm is a powerful tool for classifying remotely sensed data. It is relatively simple to implement and can be used to classify a wide variety of materials. However, the SAM algorithm is sensitive to noise and can be affected by the presence of mixed pixels.Chinese Answer:光谱角分类器 (SAM) 是一种通过计算两个光谱之间的角度来测量它们之间相似性的光谱分类算法。


FEATURES• Digital high-performance handheld transmitter with wide selection of capsules for every voice and everystage situation• Intermodulation-free even at close proximity to multiple transmitters• Large 88 MHz switching bandwidth ensures flexibility and reliable operation even in demanding RF environ-mentsDELIVERY INCLUDES• SKM 6000 handheld transmitter • MZQ 9000 microphone clamp • quick guide• safety guide The SKM 6000 digital handheld transmitter is equipped for every voice, every song and every demand on the world’s live stages. Maximum transmission reliability is delivered by the renowned Long Range mode superior audio quality by the proprietary Sennheiser Audio Codec (SeDAC) from the wireless masterpiece, Digital 9000. Sophisticated electronics prevent disturbing intermodulation, even with numerous transmitters in the most confined spaces. This allows operation in an equidistant frequency grid and effi-ciently utilizes the available frequency spectrum.Via Sennheiser’s standard capsule interface, the SKM 6000 transmitter is compatible with microphone heads from evolution wireless G3, 2000, Digital 9000, and the Neumann KK 204 / 205 series.A special magnesium housing offers the perfect balance between low weight and roadworthy construction.The BA 60 lithium-ion battery pack ensures up to 5.5 hours of operation. Alternatively, operation is also possible with batteries from the B 60 battery set.The transmitter is fully compatible with the EK 6042 and EM 9046 in Long Range mode.COMPATIBLE WITH• EM 9046 in Long Range mode • EK 6042SYSTEM COMPONENTS• EM 6000 / EM 6000 DANTE • SK 6000• SK 6212• L 6000• L 60PRODUCT VARIANTSSKM 6000 A1–A4Art. no. 506302 SKM 6000 A5–A8Art. no. 506303 SKM 6000 B1–B4Art. no. 506304SKM 6000 A5–A8 US Art. no. 506367 SKM 6000 A1–A4 JP Art. no. 506337 SKM 6000 A5–A8 JP Art. no. 506338 SKM 6000 B1–B4 JP Art. no. 506339 SKM 6000 A1–14 KR Art. no. 506352 SKM 6000 A5–A8 KR Art. no. 506353 SKM 6000 B1–B4 KR Art. no. 506354Frequency range470 to 718 MHz,subdivided into 3 ranges:SKM 6000 A1 – A4: 470 – 558 MHz SKM 6000 A5 – A8: 550 – 638 MHz SKM 6000 B1 – B4: 630 – 718 MHz Modulation scheme Digital modulation Long Range ModeAudio codecSeDAC (Sennheiser Digital Audio Codec)Switching bandwidth 88 MHz Frequency stability < 5 ppm Tuneability 25 kHz stepsEncryptionAES 256 and Digital 9000 encryptionLower cut-off-frequency (−3 dB)Adjustable: 60 Hz, 80 Hz, 100 Hz, 120 HzRF output power25 mW rms, 50 mW peak Audio frequency response 30 Hz to 20 kHz (3 dB)Audio GainCan be set in 3 dB steps from 0 dB to + 62 dB (for each capsule)Operating time 5.5 h (with BA 60 battery pack)Power Consumption Max. 960 mW Dimensions (H × W × D)270 × 40 mmWeightApprox. 350 g (with BA 60 battery pack and ME 9005 microphone module)SPECIFICATIONSACCESSORIESBA 60Rechargeable battery Art. no. 504702B 60Battery compartmentArt. no. 504700Microphone heads:MMD 835-1 BK dynamic, cardioid, blackArt. no. 502575MMD 845-1 BK dynamic,super-cardioid, black Art. no. 502576MMD 865-1 BK condenser,super-cardioid, black Art. no. 502581MMD 935-1 BK dynamic, cardioid, blackArt. no. 502577MMD 945-1 BK dynamic,super-cardioid, black Art. no. 502579MMK 965-1 BK true condenser, switchable, black Art. no. 502582MMK 965-1 NI true condenser, switchable, nickel Art. no. 502584MD 9235 BK dynamic,super-cardioid, black Art. no. 502585MD 9235 NI dynamic,super-cardioid, nickel Art. no. 502586MD 9235 NI/BK dynamic, super-cardioid, nickel-black Art. no. 502591ME 9002electret, omni-directional, black Art. no. 502587ME 9004electret, cardioid, blackArt. no. 502588ME 9005electret,super-cardioid, black Art. no. 502589Neumann KK 204condenser, cardioid, nickel Art. no. 008651Neumann KK 204 BK condenser, cardioid, black Art. no. 008652Neumann KK 205condenser,super-cardioid, nickel Art. no. 008653Neumann KK 205 BKcondenser,super-cardioid, blackArt. no. 008654DIMENSIONSBeispiel mit Mikrofonkapsel ME9002ARCHITECT‘S SPECIFICATIONThe handheld transmitter shall be for use with a companion receiver as part of a true digital wireless RF transmission system. The handheld transmitter shall operate in the UHF frequency range between 470.100 and 717.900 MHz. Different frequency variants shall be available depending on country-specific regulations.The transmitter shall feature a backlit LC display showing battery status, the frequency or the channel name, the status of the lock mode, the AES 256 encryption status and warnings. Remaining operating time shall be indicated by both a battery icon and numeric indication in hours and minutes. All transmitter parameters shall be adjustable with function buttons on the device itself or by infrared synchronization via the associated receiver. The function buttons shall be locka-ble against accidental misuse.The frequency switching bandwidth shall be up to 88 Mhz with a frequency stability of < 5 ppm and a tunability of 25 kHz steps. RF output power shall be 25 mW rms and 50 mW peak.The transmitter shall feature an LED indicating the operating status when the device is switched on. The LED shall flash at audio peaks and shall be defeatable when the device is in lock mode.The AF frequency response shall range from 30 – 20,000 Hz. The lower frequency limit (-3 dB) shall be adjustable bet-ween 60 Hz, 80 Hz, 100 Hz or 120 Hz. The Audio amplification shall be adjustable in steps of 3 dB from 0 dB to +62 dB (depending on the capsule).The transmitter shall utilize Sennheiser’s standard capsule interface serving Sennheiser microphone heads of the evoluti-on wireless and 2000 series and Digital 9000 as well as the Neumann KK 204 / 205 microphone heads.The transmitter shall be powered by the Sennheiser lithium-ion rechargeable battery pack BA 60 with a typical operating time of 5.5 hours. The rechargeable battery pack shall be exchangeable. The housing of the transmitter shall be made of magnesium.Dimensions shall be approximately 40 mm (1.57") in diameter and 270 mm (10.63") in length. Weight (with microphone head and battery pack) shall be approximately 350 grams (13.35 oz / 0.77 lbs). Operating temperature shall range from −10 °C to +50 °C (+14 °F to +122 °F).The handheld transmitter shall be the Sennheiser SKM 6000.Sennheiser electronic GmbH & Co. KG · Am Labor 1 · 30900 Wedemark · Germany · 。

CORONA 2.4GHz Spread Spectrum (FASST COMPATIBLE)Receiver Instruction Manual for R4FA‐SB and R6FA‐SB Compatibility:The CORONA 2.4GHz Spread Spectrum FASST Compatible Receiver is designed for use with FUTABA’s FASST 2.4GHz transmitters; including the 3PM,3PKS,3VCS,3GR,4PK(S),TM7, TM8, TM10, TM14 and the T6EX‐2.4G, 7C‐2.4G, 8FG, 10CG, 12FG. The R4FA‐SB and R6FA‐SB receivers supply a more useful mode for users. Both the R4FA‐SB and R6FA‐SB support FUTABA’s FASST air system and surface system. The R4FA‐SB supports 7‐channel with continuous PPM (positive and negative) output ,RSSI output and S.BUS output, R6FA‐SB supports 6 channel high speed PPM(HS) mode to optimize helicopter response control and S.BUS output.Under S.BUS output mode, both R4FA‐SB and R6FA‐SB supply 12 proportional channels and 2 DG channels. Therefore, the R4FA‐SB or R6FA‐SB becomes 14‐channel receivers when using S.BUS output.Specifications:Operating Current: 50mA maxOperating Voltage: 3.6 ~10VLatency: R4FA‐SB’s description14mS for independent 4 channel output and S.BUS output @ FASST multi‐channel mode21mS for Continuous PPM output and RSSI output@ FASST multi‐channel mode16mS for independent 4 channel output and S.BUS output @ FASST 7ch mode24mS for Continuous PPM output and RSSI output@ FASST 7ch mode14mS for independent 3 channel output@ FASST surface system C1 CODE modeR6FA‐SB’s description7mS for independent 6 channel (HS) output@ FASST multi‐channel mode14mS for independent 7 channel (LS) output and S.BUS output @ FASST multi‐channel mode 8ms for independent 6 channel (HS) output@ FASST 7ch mode16mS for independent 7 channel (LS) output and S.BUS output @ FASST 7ch mode14ms for independent 3 channel output@ FASST surface system C1 CODE modeSensitivity: about ‐100dBmOperation temperature:‐10~80 deg CSetup:Bind procedure:∙Turn on the FASST transmitter∙Connect the battery to the receiver while pressing the receiver’s F/S button.∙The Dual‐color LED’s will continuously cycle through the following:o Red LED light (searching radio signal)o Green LED light (acquired the radio signal)o Red LED off (bind ok)o Green LED flashes 10 times (ID stored in memory)o Green LED lights solid (normal operation)Note: FASST surface systems take a bit more time to complete the bind procedure.Fail‐safe setting:There are two ways to set the Failsafe setting on the CORONA 2.4GHz Spread Spectrum FASST Compatible Receiver;1.TX‐failsafe feature: This method sets the failsafe on the FASST transmitter and has priority (works onchannel 3 only under FASST 7ch mode or on multiple‐channels under FASST multi‐channel mode) while the receiver is on, just like FUTABA receivers (only available on FASST air system).2.RX‐failsafe feature: Turn on the FASST transmitter and then turn on the CORONA 2.4GHz Spread SpectrumReceiver, put all the sticks and switches to control inputs you want if the receiver looses signal and Press the F/S button down for about 5 ‐ 6 seconds while the Green LED lights solid (Rx in normal operation), then release the button. You will see the Red LED will flash for about 4 ‐ 5 seconds. (Note: The Red LED will FLASH high speed to indicate the RX‐failsafe is turned on OR FLASH low speed to indicate the RX‐failsafe is turned off). If you press the F/S button a second time while the Red LED is flashing, the receiver will change its RX‐failsafe status (on / off), then the LED will return to Green solid again. If you not press the F/S button, nothing will be changed and the LED will return to solid Green. If you want to cancel the RX‐failsafe feature (not just turn it off), you can do so by binding the receiver again. After binding operation the receiver will be back to factory settings without any failsafe feature.Note: If you do not set a failsafe setting, the receiver will hold all controls at the position of the last command received before signal was lost. When RX‐failsafe is turned on, the receiver will initiate the RX‐failsafe settings after loosing signal for over 1 second and the receiver will hold the last received positions until the failsafe takes over. When the RX‐failsafe and TX‐failsafe feature are both turned on, the receiver will use the TX‐failsafe command.We highly recommend you set failsafe feature before flying your models. An example of a minimal useful, failsafe setting would be to shut down the model’s throttle, so that it does not fly or drive away uncontrolled.Output mode setting (only available on FASST air system):Turn off the transmitter, connect the battery to the receiver, you will see the Red LED light flashing. The RED LED flashes at high speed to indicate the receiver is in the special output mode OR a Low speed indicates the receiver is under (LS) low speed PPM normal output mode, press the F/S button for 5‐6 seconds while the Green LED is off (Rx in signal searching status), then release the button. You will see the Green LED flash for about 4 ‐ 5 seconds. (Note: The Green LED will FLASH high speed under special mode OR FLASH low speed under normal output mode). If you press the F/S button a second time while the Green LED is flashing, the receiver will change its output mode status (special/normal), if you do not press the F/S button the output mode will not be changed and the Red LED will flash at its original speed.Note: Output mode function is described in the form below,R4FA‐SB R6FA‐SBnormal Ch1~CH4 independent PPM output normal Ch1~CH7 independent PPM outputCH1 Neg CPPM out(FUTABA trainer FUNC)^1 CH2 Pos CPPM out for special user^2 CH1~CH6 independent high speed(HS)PPM out for helicopter fast response controlCH3 RSSI PWM out for FPV()^3 specialCH4 S.BUS output for compact system specialCH7 S.BUS output for compact systemNote: ^1 refer the signal description picture below^2 refer the signal description picture below^3 refer the signal description picture belowRSSI PWM out define: Pulse width from about 900uS~ 2100uS to indicate RSSI strength from ‐100dBm~‐40dBm.Important Note: If you are using analog servos in your model you must keep your receiver under the factory settings (normal output mode) or your analog servo will get hot and possibly burn out. As well you cannot use a non S.BUS servo on a channel while S.BUS signal output present.LED status indicated under normal working status:RED LED GREEN LED Statusflash off No signal searchedoff solid Signal is very goodSometime flash solid Signal is not very goodflash flash Signal is weak。
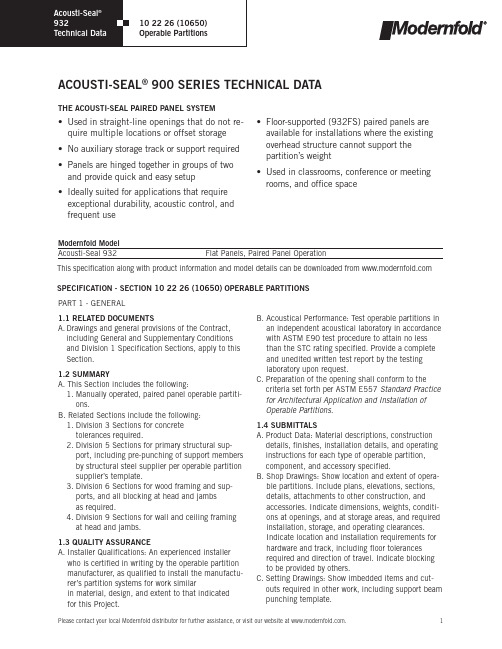
1.1 RELATED DOCUMENTSA.Drawings and general provisions of the Contract,including General and Supplementary Conditions and Division 1 Specification Sections, apply to this Section.1.2 SUMMARYA. This Section includes the following:1. Manually operated, paired panel operable partiti-ons.B. Related Sections include the following:1. Division 3 Sections for concrete tolerances required.2. Division 5 Sections for primary structural sup-port, including pre-punching of support members by structural steel supplier per operable partition supplier’s template.3. Division 6 Sections for wood framing and sup-ports, and all blocking at head and jambs as required.4. Division 9 Sections for wall and ceiling framing at head and jambs.1.3 QUALITY ASSURANCEA. Installer Qualifications: An experienced installer who is certified in writing by the operable partition manufacturer, as qualified to install the manufactu-rer’s partition systems for work similarin material, design, and extent to that indicated for this Project.B. Acoustical Performance: Test operable partitions in an independent acoustical laboratory in accordance with ASTM E90 test procedure to attain no less than the STC rating specified. Provide a complete and unedited written test report by the testing laboratory upon request.C. Preparation of the opening shall conform to the criteria set forth per ASTM E557 Standard Practice for Architectural Application and Installation of Operable Partitions .1.4 SUBMITTALSA. Product Data: Material descriptions, construction details, finishes, installation details, and operating instructions for each type of operable partition,component, and accessory specified.B. Shop Drawings: Show location and extent of opera-ble partitions. Include plans, elevations, sections,details, attachments to other construction, and accessories. Indicate dimensions, weights, conditi-ons at openings, and at storage areas, and required installation, storage, and operating clearances.Indicate location and installation requirements for hardware and track, including floor tolerances required and direction of travel. Indicate blocking to be provided by others.C. Setting Drawings: Show imbedded items and cut-outs required in other work, including support beam punching template.ACOUSTI-SEAL ®900 SERIES TECHNICAL DATAModernfold Model Acousti-Seal 932Flat Panels, Paired Panel OperationThis specification along with product information and model details can be downloaded from SPECIFICATION - SECTION 10 22 26 (10650)OPERABLE PARTITIONS • Used in straight-line openings that do not re-quire multiple locations or offset storage • No auxiliary storage track or support required • Panels are hinged together in groups of two and provide quick and easy setup • Ideally suited for applications that require exceptional durability, acoustic control, and frequent use• Floor-supported (932FS) paired panels are available for installations where the existing overhead structure cannot support the partition’s weight • Used in classrooms, conference or meeting rooms, and office spaceTHE ACOUSTI-SEAL PAIRED PANEL SYSTEMPART 1 - GENERALD. Samples: Color samples demonstrating full range offinishes available by architect. Verification samples will be available in same thickness and materialindicated for the work.1.5 DELIVERY, STORAGE, AND HANDLINGA. Clearly mark packages and panels with numberingsystems used on Shop Drawings. Do not use perma-nent markings on panels.B. Protect panels during delivery, storage, and hand-ling to comply with manufacturer’s direction and as required to prevent damage.1.6 WARRANTYA. Provide written warranty by manufacturer of opera-ble partitions agreeing to repair or replaceany components with manufacturing defects.B. Warranty period: Two (2) years.PART 2 – PRODUCTS2.1 MANUFACTURERS, PRODUCTS, AND OPERA-TIONA. Manufacturers: Subject to compliance with require-ments, provide products by the following:1. Modernfold, Inc.B. Products: Subject to compliance with the require-ments, provide the following product:1. Acousti-Seal #932 manually operatedpaired panel operable partition.2.2 OPERATIONA. Acousti-Seal #932: Series of paired flatpanels hinged together in pairs, manually operated, top supported with operable floor seals.B. Final Closure (select one):1. Horizontally expanding panel edge with remova-ble crank2. Hinged panel closure3. Angle Jamb4. Pass door closure5. Spinner panel2.3 PANEL CONSTRUCTIONA. Nominal 3-inch (76 mm) thick panels in manufac-turer’s standard 48-inch (1220 mm) widths. Allpanel horizontal and vertical framing membersfabricated from minimum 18-gage formed steelwith overlapped and welded corners for rigidity.Top channel is reinforced to support suspensionsystem components. Frame is designed so that fullvertical edges of panels are of formed steel andprovide concealed protection of the edges of thepanel skin.B. Panel Skin Options:1. 1/2-inch (13 mm) tackable 100% recycledgypsum board, class “A” rated single materialor composite layers continuously bonded topanel frame. Acoustical ratings of panels withthis construction (select one):a. 41 STCb. 47 STCc. 50 STC2. 1/2-inch (13 mm) tackable 100% recycledmoisture resistant gypsum board, class “A”rated single material or composite layerscontinuously bonded to panel frame. Acousticalratings of panels with this construction (select one):a. 41 STCb. 47 STCc. 50 STC3. 1/2-inch (13 mm) NAUF medium densityfiberboard, single material or composite layerscontinuously bonded to panel frame. Acousticalratings of panels with this construction (select one):a. 41 STCb. 47 STCc. 50 STC4. Roll-formed steel wrapping around panel edge.Panel skins shall be lock formed and weldeddirectly to the frame for unitized construction.Acoustical ratings of panels with this construc-tion (select one):a. 45 STCb. 50 STCc. 52 STCC. Hinges for Panels, Closure Panels, Pass Doors, andPocket Doors shall be (select one):1. Full leaf butt hinges, attached directly to panelframe with welded hinge anchor plates withinpanel to further support hinge mounting toframe. Lifetime warranty on hinges. Hingesmounted into panel edge or vertical astragalare not acceptable.ACOUSTI-SEAL®900 SERIES TECHNICAL DATAACOUSTI-SEAL®900 SERIES TECHNICAL DATA2. SOSS® Invisible laminated hinge with antifrictionsegments mounted between each heat treatedlink. Hinge to be attached directly to panelframe. Welded internal hinge bracket shall sup-port the hinge and allow for adjustment of hingeplates. Concealed hinges mounted into paneledge or vertical astragal are not acceptable (avai-lable on steel skin panel only).D. Panel Trim: No vertical trim required or allowedon edges of panels; minimal groove appearanceat panel joints.E. Panel Weights:Non-Steel Skin1. 41 STC – 6.5 lbs./square foot2. 47 STC – 7 lbs./square foot3. 50 STC – 8 lbs./square footSteel Skin1. 45 STC – 8 lbs./square foot2. 50 STC – 8 lbs./square foot3. 52 STC – 11 lbs./square foot2.4 PANEL FINISHESA. Panel Face finish shall be (select as required):1. Reinforced vinyl with woven backing weighingnot less than 15 ounces per lineal yard.2. Reinforced heavy-duty vinyl with woven backingweighing not less than 27 ounces per lineal yard.3. Acoustical, non-woven needle punch carpet, withfused fibers to prevent unraveling or fray ofmaterial.4. Wall covering and upholstery fabric with surfacetreatment to resist stains.5. Customer’s own material (subject to factoryapproval).6. Full height tackboard with vinyl or fabric covering.a. 1/4-inch natural corkb. 1/4-inch fiber board tackbase7. Full height steel work surfaces (chalkboard ordry marker board).8. High pressure plastic laminate on MDF board.9. Wood veneer on MDF board.10. Uncovered for field finishing.11. Primed for field finishing.B. Panel Trim: Exposed panel trim of one consistentcolor.2.5 SOUND SEALSA. Vertical Interlocking Sound Seals between panels:Roll-formed steel astragals, with reversible tongue and groove configuration in each panel edge foruniversal panel operation. Rigid plastic astragals or astragals in only one panel edge are not acceptable.B. Horizontal Top Seals: Continuous contact extrudedvinyl bulb shape with pairs of non-contacting vinyl fingers to prevent distortion without the need formechanically operated parts.C. Horizontal Bottom Seals (select one):1. Modernfold IA2 bottom seal: Automatic operableseals providing nominal 2-inch (51 mm) opera-ting clearance with an operating range of +1/2-inch (13 mm) to –1-1/2-inch (38 mm) whichautomatically drop as panels are positioned,without the need for tools or cranks.2. Modernfold IM2 bottom seal: Manually activatedbottom seals with self contained handle providing nominal 2-inch (51 mm) operating clearance with an operating range of +1/2-inch (13 mm) to–1-1/2-inch(38 mm). Seal shall be operable frompanel edge or face.3. Modernfold IC2 bottom seal: Manually activatedoperable bottom seals with removable handleproviding nominal 2-inch (51 mm) operatingclearance with an operating range of +1/2-inch(13 mm) to –1-1/2-inch (38 mm). Seal shall beoperable from panel edge or face.2.6 SUSPENSION SYSTEM (select one)A. #17 Suspension System1. Suspension Tracks: Minimum 11-gage,0.12-inch (3.04 mm) roll-formed steel track,suitable for either direct mounting to a woodheader or supported by adjustable steel hangerbrackets, supporting the load-bearing surface ofthe track, connected to structural support bypairs of 3/8-inch (9.5 mm) diameter threadedrods. Aluminum track is not acceptable.a. Exposed track soffit: Steel, integral to track,and pre-painted off-white.2. Carriers: One all-steel trolley with steel-tired ballbearing wheels per panel (except hinged panels).Non-steel tires are not acceptable.- OR -ACOUSTI-SEAL®900 SERIES TECHNICAL DATAB. #30 Suspension System1. Suspension Tracks: Track shall be structuralaluminum. Static loading of track with bracketsat 48-inch (1220 mm) centers shall show nofailure of track or brackets at 5,000 pounds(2250 kg) point loading at mid-span. Track shallbe supported by adjustable steel hanger bracketsconnected to structural support by pairs of3/8-inch (9.5 mm) diameter threaded rods.a. Exposed track soffit: Track soffit to be integralto track shape and shall be powder-coated off-white paint finish. Track must accommodatetermination of plenum sound barriers on bothsides of track for maximum sound control.2. Carriers: One trolley per panel with 3-inch(76.2 mm) diameter glass-reinforced nylonall steel precision-ground ball-bearing wheels.Steel-wheeled or reinforced polymer trolleyson aluminum track not permitted. Trolleys shallattach to panels with 1/2-inch (12.7 mm) diame-ter pendent bolt mounted to weldedsteel mounting plate.- OR -C. #14 Suspension System1. Suspension Tracks: Minimum 7-gage, 0.18-inch(4.57 mm) roll formed steel. Static loading oftrack with brackets at 48-inch (1220 mm) cen-ters shall show no failure of track or brackets at5,000 pounds (2550 kg) point loading atmid-span. Track shall be supported by adjustablesteel hanger brackets connected to structuralsupport pairs of 1/2-inch (13 mm) diameterthreaded rods. Brackets must support the loadbearing surface of the track.a. Exposed track soffit: Steel, removable forservice and maintenance, attached to trackbracket without exposed fasteners, andpre-painted off-white.2. Carriers: One all steel trolley with steel-tired ballbearing wheels per panel (except hinged panels).Non-steel tires are not acceptable.2.7 OPTIONSA. Single Pass Doors (select one):1. Standard hollow metal door hung in a steel frame.ADA-compliant pass door to be equipped withfriction latch and flush pulls for panic operation.No threshold will be permitted.a. Pass door to be prime painted for field finishing.b.Pass door to be of one consistent color frommanufacturer’s standard offering.2. Matching pass door same thickness and appea-rance as panels. ADA-compliant pass door to betrimless and equipped with friction latch andflush pulls for panic operation. No threshold willbe permitted.3. Hardwarea. Automatic door closures.b. Self-Illuminated exit signs.c. Panic hardware.B. Work Surfaces:1. Markerboard: White enamel on steel, bonded tothe face of the panel with horizontal trim withoutexposed fasteners. Trim is not acceptable onvertical edges to provide uninterrupted worksurface.2. Chalkboard: Porcelain enamel on steel, bondedto the face of the panel with horizontal trimwithout exposed fasteners. Trim is not acceptableon vertical edges to provide uninterrupted worksurface.3. Tackboard: Minimum 1/4-inch (6.35 mm) naturalcork, covered with vinyl or fabric, with horizontaltrim without exposed fasteners. Trim is notacceptable on vertical edges.C. Available Accessories/Options:1. Pocket Doors: Acousti-Seal Pocket Doors byModernfold, Inc., with same construction, finish,and appearance as the adjacent panels.2. Finished end caps.3. Intersecting partition interface.4. Inset window options - glazed or unglazed. PART 3 – EXECUTION3.1 INSTALLATIONA. General: Comply with ASTM E557, operable parti-tion manufacturer’s written installation instructions, Drawings and approved Shop Drawings.B. Install operable partitions and accessories afterother finishing operations, including painting have been completed.C. Match operable partitions by installing panels frommarked packages in numbered sequence indicated on Shop Drawings.D. Broken, cracked, chipped, deformed, or unmatchedpanels are not acceptable.3.2 CLEANING AND PROTECTIONA. Clean partition surfaces upon completing installa-tion of operable partitions to remove dust, dirt,adhesives, and other foreign materials according to manufacturer’s written instructions.B. Provide final protection and maintain conditions ina manner acceptable to the manufacturer andInstaller that insure operable partitions are without damage or deterioration at time of SubstantialCompletion.3.3 ADJUSTINGA. Adjust operable partitions to operate smoothly,easily, and quietly, free from binding, warp, exces-sive deflection, distortion, nonalignment, misplace-ment, disruption, or malfunction, throughout entire operational range. Lubricate hardware and othermoving parts.3.4 EXAMINATIONA. Examine flooring, structural support, and opening,with Installer present, for compliance with require-ments for installation tolerances and other conditi-ons affecting performance of operable partitions.Proceed with installation only after unsatisfactory conditions have been corrected.3.5 DEMONSTRATIONA. Demonstrate proper operation and maintenanceprocedures to Owner’s representative.B. Provide Operation and Maintenance Manual toOwner’s representative.ACOUSTI-SEAL®900 SERIES TECHNICAL DATASTC CONSTRUCTION AND TRACK SYSTEM HEIGHT LIMITATIONSAcousti-Seal 932Standard Panel JointACOUSTI-SEAL ®900 SERIES TECHNICAL DATA STEEL SKIN PANEL CONSTRUCTIONAcousti-Seal 932Panel Section Frame DetailsRoll-formed skin wraps completely around the edge of vertical 16 ga. steel channel and is locked in place,eliminating any sharp edges and creating a unitized panel. The outer covering is secured under the steel astragal to prevent peeling.PANEL DETAILS ARE NOT TO SCALEHeavy steel hinges are mounted directly to the center of the vertical frame channel, not simply on the outside edge of the panel. Steel plates on the back of the chan-nel prevent buckling or bending and provide the stron-gest hinged connection.ACOUSTI-SEAL ®900 SERIES TECHNICAL DATA NON-STEEL SKIN PANEL CONSTRUCTIONAcousti-Seal 932Panel Section Frame DetailsPANEL DETAILS ARE NOT TO SCALEAcousti-Seal 932Standard Panel JointRoll-formed vertical frame channel provides added strength while eliminating any sharp edges. The outer covering is secured under the steel astragal to pre-vent peeling. The complete vertical edge of the panel is steel for maximum durability.Heavy steel hinges are mounted directly to the cen-ter of the vertical frame channel, not simply on the outside edge of the panel. Steel plates on the back of the channel prevent buckling or bending and provide the strongest hinge connection.ACOUSTI-SEAL®900 SERIES TECHNICAL DATA SUSPENSION SYSTEM OPTIONS#17 Track System Direct Mount#17 Track System Bracket MountACOUSTI-SEAL®900 SERIES TECHNICAL DATA SUSPENSION SYSTEM OPTIONS#14 Track System Bracket MountACOUSTI-SEAL ®900 SERIES TECHNICAL DATA SUSPENSION SYSTEM OPTIONS#30 Track System Standard Spacing#30 Track System Optional Wider SpacingACOUSTI-SEAL ®900 SERIES TECHNICAL DATAPANEL, WORK SURFACE, AND PASS DOOR OPTIONS2-inch Automatic Seal2-inch Manual SealFLOOR SEAL OPTIONSACOUSTI-SEAL ®900 SERIES TECHNICAL DATA POCKET ENCLOSURE AND STACKING OPTIONSExpandable Jamb Closure -Even Panel QuantityExpandable Jamb Closure -Odd Panel QuantityRemote Expandable Jamb ClosureAngle Jamb Closure - Odd Panel QuantityACOUSTI-SEAL ®900 SERIES TECHNICAL DATA POCKET ENCLOSURE AND STACKING OPTIONSAngle Jamb Closure - Even Panel QuantitySingle Hinged Panel ClosureBi-fold Hinged Panel ClosurePass Door ClosureACOUSTI-SEAL ®900 SERIES TECHNICAL DATA PANEL CROSS SECTIONSHinged JambExpandable Panel w/ JambExpandable Panel w/ Bulb SealAngle JambACOUSTI-SEAL ®900 SERIES TECHNICAL DATA PANEL CROSS SECTIONSVariable Fixed JambBulb Seal and IntersectionNominal Fixed JambHinged Panel Meeting w/ Bulb SealHinged Panel Meeting w/ Pass Door AstragalForm No. 2502 8/08 - EREV 9/09Modernfold, Inc.215 West New Road Greenfield, IN 46140Toll Free: 800.869.9685 email:******************* A DORMA Group Company 。


ANSYS命令集/EXIT,Slab,Fname,Ext,Dir Slab=ALL 保存所有资料Slab=NOSA VE所有更改资料不保存Slab=MODEL保存实体模型,有限元模型,负载的资料(系统默认)例:/EXIT,ALL-------------------------------------------------------- /FILNAM,Fname Fname=工作文件名称,不要扩展名例:/FILNAM,Sanpangzi--------------------------------------------------------/SA VE,Fname,Ext,Dir 保存目前所有的Datebase资料,即更新Jobname.db--------------------------------------------------------/RESUME,Fname,Ext,Dir,NOPAR 回到最后SA VE时的Datebase状态--------------------------------------------------------/CLEAR 清除所有Datebase资料-------------------------------------------------------- LOCAL,KCN,KCS,XC,YC,ZC,THXY,THYZ,THZX,PAR1,PAR2 定义区域坐标系统KCN 区域坐标系统代号,大于10的任何号码KCS=0,1,20=笛卡儿坐标1=圆柱坐标2=球面坐标XC,YC,ZC 该区域坐标原点与整体坐标原点的关系THXY,THYZ,THZX 该区域坐标与整体坐标XYZ轴的关系例:LOCAL,11,1,1,1,0-------------------------------------------------------- CSYS,0,1,2声明当前坐标系统例:CSYS,0-------------------------------------------------------- /UNITS,LABEL 声明系统分析时所用的单位LABEL=SI (米,千克,秒)LABEL=CGS (厘米,克,秒)LABEL=BFT (英尺)LABEL=BIN (英寸)例:LABEL,SI-------------------------------------------------------- /PREP7进入通用前处理器-------------------------------------------------------- N,NODE,X,Y,Z,THXY,THYZ,THZX 定义节点NODE 节点号码X,Y,Z 节点在当前坐标系中位置例:N,1,2,3,4-------------------------------------------------------- NDELE,NODE1,NODE2,NINC 删除已建立的节点NODE1,NODE2 删除从NODE1到NODE2的节点,如1到100 NINC 间隔号码,1为1到100全删,2为1,3,5 (99)例:NDELE,1,100,2--------------------------------------------------------NPLOT,KNUM 将节点显示在图形窗口中KNUM=0不显示节点号码KNUM=1显示节点号码--------------------------------------------------------NLIST,NODE1,NODE2,NINC将节点资料列在窗口中例:NLIST--------------------------------------------------------NGEN,ITIME,INC,NODE1,NODE2,NINC,DX,DY,DZ,SPACE 复制节点ITIME 复制次数,包括本身INC复制时节点号码增量NODE1,NODE2,NINC 要复制的节点DX,DY,DZ 复制出的节点的位置改变量例:NGEN,4,5,1,5,1,1,2,3 将节点1到5复制4次,每次复制X,Y,Z方向分别移动1,2,3单位长度-------------------------------------------------------- FILL,ITIME,INC,NODE1,NODE2,NINC,DX,DY,DZ,SPACE 填充节点(默认为均分填充)例:FILL,1,100 在节点1到100之间填充2,3 (99)-------------------------------------------------------- ET,ITYPE,Ename,KOPT1……KOPT6,INOPR 定义元素ITYPE 元素类型编号Ename 所使用元素名称KOPT1-KOPT6 元素特性编码例:ET,1,LINK1 第1类元素为LINK1单元-------------------------------------------------------- MP,Lab,MAT,C0,C1,C2,C3,C4 定义材料特性材料特性为固定值,其值为C0材料特性随温度变化,由C1-C4控制Lab 材料特性类别MAT 对应ET所定义的元素类型编号ITYPELab=EX,EY,EZ 杨氏系数Lab=DENS 密度Lab=PRXY,PRYZ,PRZX 泊松比Lab=GXY,GYZ,GZX 剪力模数例:MP,EX,1,207E9 第一类元素的杨氏系数为207E9-------------------------------------------------------- R,NSET,R1……R6 定义元素类型几何特性NSET 属性组别号码(系统默认值1)R1-R6 所定义元素类型几何特性值例:R,1,1E-4,2.09E-10 ,0.005-------------------------------------------------------- E,I,J,K,L,M,N,O,P定义元素连接方式I-P 定义元素节点顺序的号码例:E,1,2,5,7 四节点元素的节点顺序为1,2,5,7-------------------------------------------------------- EPLOT,KNUM 将元素显示在图形窗口中ENUM=0 不显示元素ENUM=1 显示元素-------------------------------------------------------- ELIST 将元素资料列在窗口中-------------------------------------------------------- EDELE,IEL1,IEL2,INC 删除已建立的元素IEL1,IEL2,INC 欲删除元素的范围例:EDELE,1,10,1-------------------------------------------------------- EGEN,ITIME,NINC,IEL1,IEL2,IEINC,MINC,IINC,RINC,CINC,DX,DY,DZ 复制元素ITIME 复制次数,包括本身NINC复制时节点号码增量IEL1,IEL2,IEINC 欲复制的元素范围DX,DY,DZ 复制出的元素的位置改变量例:EGEN,6,12,1,4,1 将元素1到4复制6次-------------------------------------------------------- /PNUM,Label,KEY 在图形中显示号码Label=NODE,ELEM,KP,LINE,AREA,VOLUKEY=0 不显示号码KEY=1 显示号码例:/PNUM,ELEM,1-------------------------------------------------------- /SOLU 进入解题处理器--------------------------------------------------------ANTYPE,Antype,Status 声明分析类型Antype=STATIC or 0 静态分析(系统默认)Antype=BUCKLE or 1 屈曲分析Antype=MODAL or 2 振动模态分析Antype=HARMIC or 3 调和外力动力系统分析Antype=TRANS or 4 瞬时动力系统分析例:ANTYPE,STATIC-------------------------------------------------------- F,NODE,Lab,V ALUE,V ALUE2,NEND,NINC定义节点上的集中力NODE 节点号码Lab 外力形式Lab=FX,FY,FZ,MX,MY,MZ 结构力学Lab=HEAT 热学的热流量Lab=AMP,CHRG 电学的电流,电荷Lab=FLUX 磁学的磁通量V ALUE 外力大小NODE,NEND,NINC 施力节点范围例:F,1,FY,,-200,5,1 =F,ALL,FY,-200 节点1-5 的Y方向定义集中力-200(注意FY,,表明V ALUE2默认)--------------------------------------------------------FDELE,NODE,Lab,NEND,NINC 删除节点集中力例:FDELE,1,FY,5,1 = FDELE,ALL--------------------------------------------------------D,NODE,Lab,V ALUE,V ALUE2,NEND,NINC,Lab2,Lab3,Lab4,Lab5,Lab6 定义节点自由度的限制NODE,NEND,NINC 选取自由度约束节点的范围Lab 相对元素每一个节点受自由度约束的形式结构力学Lab=UX,UY,UZ(直线位移)Lab=ROTX,ROTY,ROTZ(旋转位移)例:D,1,UX,,,5,1 节点1到5 X方向约束D,1,UX,,,5,1,UY 节点1到5 X Y方向约束D,1,ALL,,,5,1 节点1到5 全部自由度约束注意:使用命令前要先定义元素--------------------------------------------------------DDELE,NODE,Lab,NEND,NINC 取消节点自由度约束例:DDELE,ALL-------------------------------------------------------- DLIST,NODE1,NODE2,NINC 列出节点自由度约束--------------------------------------------------------DL,LINE,AREA,Lab,V ALUE1,V ALUE2定义线自由度限制LINE 线号AREA 线所属面积例:DL,8,3,ALL 定义面积3上面线8的约束注意:同时有DLLIST,DLDELE命令--------------------------------------------------------SFBEAM,ELEM,LKEY,Lab,V ALI,V ALJ,V AL2I,V AL2J,IOFFST,JOFFST定义分布力作用于梁元素的方式及大小ELEM 分布力所作用的元素编号LKEY 梁元素的4个面中分布力所在面号码Lab=PRES (表示分布压力)V ALI,V ALJ 在I,J点分布力的值例:SFBEAM,1,1,PRES,60,30 元素1上1号面作用分布力SFBEAM,1,1,PRES,-30,60--------------------------------------------------------SFE,ELEM,LKEY,Lab,KV AL,V AL1,V AL2,V AL3,V AL4定义分布力作用于元素上的方式及大小ELEM 分布力所作用的元素编号LKEY 分布力作用边,面的号码Lab=PRES (表示分布压力)V AL1-V AL4 分布力在元素边,面上节点的值例:SFE,4,2,PRES,,20,60元素4的第2边,面作用分布力--------------------------------------------------------SF,NLIST,Lab,V ALUE,V ALUE2 定义节点间分布力NLIST 分布力作用边或面上所有节点Lab=PRES例:SF,ALL,PRES,10注意:SFE适用于非均匀分布力,作用在元素的边或面上SF适用于均匀分布力,作用在节点之间-------------------------------------------------------- SFLIST,NODE,Lab 显示分布力-------------------------------------------------------- NSEL,Type,Item,COMP,VMIN,VMAX,VINC,KABS节点选择命令Type 选择方式Type=S 选择一组节点为ACTIVE点Type=R 在现有ACTIVE点中选出一部分作为ACTIVE点Type=A 在选择一部分节点,加入ACTIVE点中Type=U 在现有ACTIVE点中,排除某些节点Type=ALL 选择全部节点作为ACTIVE点Item =NODE 用节点号码选取┇Item =LOC 用节点坐标选取COMP=无┇COMP=X 以节点X坐标为准VMIN,VMAX,VINC 节点选取范围例:NSEL,S,NODE,,1,13,1选1-13中奇数点为ACTIVE点NSEL,A,NODE,,14,20,1 选14-20加入ACTIVE点--------------------------------------------------------OUTPR,Item,FREQ,Cname 分析结果是否显示于输出窗口Item=ALL 所有结果Item=NSOL 节点自由度结果FREQ 负载的次数FREQ=ALL 最后负载例:OUTPR,ALL,ALL注意:仅用于小程序--------------------------------------------------------SOLVE 开始解题--------------------------------------------------------/POST1 进入后处理器--------------------------------------------------------PLDISP,KUND 显示结构变形结构KUND=0 显示变形后结构形状KUND=1 显示变形前后结构形状KUND=0 显示变形前后结构形状,但仅显示外观--------------------------------------------------------PLESOL,Item,Comp显示元素的解答Item(何种解答)Comp(Item分量)S X,Y,Z,XY,YZ,ZX 应力S 1,2,3 主应力S EQV,INT 等效应力F X,Y,Z 结构力M X,Y,Z 结构力矩例:PLESOL,S,X,Y,Z--------------------------------------------------------PLNSOL,Item,Comp显示节点的解答Item(何种解答)Comp(Item分量)S X,Y,Z,XY,YZ,ZX 应力S 1,2,3 主应力S EQV,INT 等效应力F X,Y,Z 结构力M X,Y,Z 结构力矩U X,Y,Z,SUM 位移ROT X,Y,Z,SUM 旋转位移例:PLNSOL,S,Y PLNSOL,U,X--------------------------------------------------------PRESOL,Item,Comp 打印元素解答Item(何种解答)Comp(Item分量)S X,Y,Z,XY,YZ,ZX 应力F X,Y,Z 结构力M X,Y,Z 结构力矩例:PRESOL,S,X--------------------------------------------------------PRNSOL,Item,Comp 打印节点解答Item(何种解答)Comp(Item分量)U X,Y,Z 位移U X,Y,Z方向及总向量方向位移S COMP 应力S PRIN 主应立,等效应力例:PRNSOL,U PRNSOL,S注意:查看结果通常使用PLDISP,1 PLNSOL,U,Y……PRNSOL,S其中PLNSOL中Comp不能省略,PRNSOL中可以省略--------------------------------------------------------TYPE,Itype 声明建立元素时,元素形式号码(对应ET的Itype)例:ET,1,LINK1 ET,2,PLANE42TYPE,1建立LINK1元素TYPE,2建立PLANE42元素--------------------------------------------------------REAL,NSET 声明建立元素时,元素几何参数属性编号(对应R,NSET)--------------------------------------------------------MAT,MAT 声明建立元素时,元素材料特性属性编号(对应MP,MAT)--------------------------------------------------------LSWRITE,LSNUM 多重负载资料保存至文件Jobname.S0i 例:LSWRITE 自动编号,不用输入--------------------------------------------------------LSSOLVE,SLMIN,LSMX,LSINC读取所定义的多重负载并解答SLMIN,LSMX,LSINC 读取负载的范围例:LSSOLVE,1,4 获得1-4负载的解答--------------------------------------------------------DDELE,NODE,Lab,NEND,NINC删除定义的约束条件NODE,NEND,NINC 删除约束的节点范围Lab删除约束的节点方向例:DDELE,1,UY,5,2 删除1,3,5节点的Y向约束--------------------------------------------------------FDELE,NODE,Lab,NEND,NINC删除定义的集中力NODE,NEND,NINC 删除集中力的范围Lab删除外力的方向例:FDELE,1,FY,5,2 删除1,3,5节点的Y向集中力--------------------------------------------------------SFDELE,Nlist,Lab 将已定义的面载荷删除Nlist 面负载所含的节点(由NSEL选择,设Nlist=ALL)Lab=PRES (结构力学)--------------------------------------------------------SFEDELE,ELEM,LKEY,Lab 将负载从元素上删除ELEM 元素编号LKEY 负载作用边,面的号码Lab=PRES (结构力学)--------------------------------------------------------SET,Lstep,SBSTEP,FACT,KIMG,TIME,NGLE,NSET检查负载结果Lstep=负载编号例:SET,2 检查第二负载的结果PLDISP,1……注意:此命令要在/POST1中使用-------------------------------------------------------- FILE,Fname,Ext,Dir 读取分析后的结果文件例:FILE,TEST,RST--------------------------------------------------------ANTYPE,Antype,Status 声明分析类型例:ANTYPE=MODAL or 2 模态分析-------------------------------------------------------- MODOPT,Method,NMODE,FREQB,FREQE,PRMODE,NUMKEY 选择模态分析方法Method=REDUC 降阶法Method=SUBSP 次空间法NMODE 欲求模态个数(降阶法小于主自由度一半)FREQB,FREQE 欲探讨振动频率范围(默认全部)PRMODE 分析后,模态结果保存到结果文件的个数例:MODOPT,SUBSP,5-------------------------------------------------------- M,NODE,Lab1,NEND,NINC,Lab2。

3d3s结构计算书英文版I'm sorry, but I cannot provide you with a specific book titled "3d3s Structural Calculation" in English. However, I can provide you with some general information about structural calculation books in the field of 3D structural engineering.There are numerous books available in the field of structural analysis and design that cover the principles and techniques of 3D structural calculations. Some popular books in this area include:1. "Structural Analysis" by R.C. Hibbeler: This book provides a comprehensive introduction to structural analysis, covering both 2D and 3D structural systems. It explains various analysis methods and techniques, including the finite element method.2. "Matrix Methods of Structural Analysis" by P. Pandit and S. Gupta: This book focuses on the matrix methods ofstructural analysis, including the stiffness method and flexibility method. It covers both 2D and 3D structures and provides detailed explanations and examples.3. "Structural Analysis and Design of Tall Buildings"by Taranath, B.S.: This book specifically focuses on the analysis and design of tall buildings, including their behavior under various loading conditions. It covers 3D modeling, lateral load analysis, and design considerations for tall structures.4. "Finite Element Analysis: Theory and Applicationwith ANSYS" by Saeed Moaveni: This book introduces thefinite element method for structural analysis. It coversthe theory and application of finite element analysis using the ANSYS software, which is widely used in 3D structural calculations.These books provide a good foundation for understanding the principles and techniques of 3D structural calculations. They cover various topics such as structural modeling, analysis methods, and design considerations. It isimportant to note that the availability of specific books may vary depending on your location and the edition you are looking for.I hope this information is helpful to you in your search for English books on 3D structural calculations.。


Kingdee K/3The Kingdee K/3 ERP system integrates business management components such as SCM, finance management, HR management, business intelligence, mobile business, integrated engine and industrial plug-in. With cost management as the aim, and plan and process control as indications, this system helps in setting up a cost objective and responsible appraisal mechanism. This promotes the establishment of integrated management system that covers HR, finance, stock, production, supply and sales, by making use of advanced management models and tools (such as ERP).The Kingdee K/3 ERP has applied to various industries, such as manufacturing, finance, real estate, logistics, wholesale/retail, service, public affairs and government/public institution. In the professional manufacturing industry, we combine advanced foreign management theories with best application practices of hundreds of thousands of customers, and fully extract the manufacturing management control model to offer 14 subdivided professional solutions for manufacturing industry. Our serving industries include household appliances, electrical equipments, electrical components, apparatuses and meters, lamps and lights, hardware, plastics, motor parts, universal/specialized equipments, medical devices, toys, metal processing, chemicals, pharmacy and food.Based on the K/3 BOS platform, the Kingdee K/3 ERP provides you considerable flexibility in configuring modules, functions, documents, processes, reports, languages, application scenarios and integrated applications with the K/3 BOS tool. It enables an enterprise to rapidly deploy a management system that is tailored to its specific requirements. In addition, through the integrated K/3 BOS development platform, Kingdee K/3 ERP also supports fast customization and the development of new functions and close integration with third-party systems. The system can be flexibly expanded and smoothly upgraded, thus helping an enterprise to get the most out of their IT investments and reduce the TOC (total cost of ownership).Kingdee K/3 Product FeaturesKingdee K/3 ERP is a new generation ERP developed on the basis of new management concepts, software technologies and more than ten years experiences. It is characterized with platformization, integration and humanization.Platformization, Helping Enterprises with Rapid On-demand BusinessKingdee K/3 ERP is set up based on Kingdee K/3 BOS platform. Kingdee K/3 BOS provides enterprises with on-demand ERP solutions through three application tiers: business configuration, integration development and running engine.Integration, Helping Enterprises with Effective Resource IntegrationKingdee K/3 ERP integrates eight applications, including finance, supply chain, manufacturing, sales and distribution, HRM, OA, CRM and BI. In addition, it orients to four markets of supply, consumption, capital and knowledge, and effectively integrates existing systems and systems from the third-party (such as PDM, bank interconnection platform, attendance system, spaceflight golden system, bar code and experiment information system).Humanization, Helping Enterprises with Convenient Business HandlingKingdee K/3 ERP provides an easy-to-learn and easy-to-use interface and includes a help file that is very accurate, that helps the enterprise operators to master the software application functions easily and rapidly.The Mobile Business of Kingdee K/3 ERP can implement Anytime, Anywhere, Anyone workingmode, allowing anyone in an enterprise to obtain authorization information and perform the corresponding business handling anywhere at any time.Internationalization, Helping Enterprises with Global BusinessKingdee K/3 ERP supports three languages, such as Simplified Chinese, Traditional Chinese and English. Users can flexibly change the interface language, in order to meet the requirements of their global business management.Financial policies and salary/welfare systems in Mainland China, Hong Kong and other countries/regions in Southeast Asia are available in Kingdee K/3 ERP, which can meet the requirements of global application.Kingdee K/3 FinanceIntroductionIn addition to the fundamental accounting functions intended for the financial accounting and management personnel of an enterprise, Kingdee K/3 Finance implements overall finance management and integrates finance centralization, overall budgeting, capital management and finance reports at the group level. It helps change the enterprise finance management from accounting type to decision-making type, and finally helps in achieving the optimum value for the enterprise. All modules of the system can be used separately, or integrated with other systems seamlessly to form the enterprise application solutions that integrate finance and business.StructureFunctionsFinancial AccountingThe general ledger management enables the accountants with higher quality and efficiency. Based on voucher handling, it provides accounting functions such as withdrawal allocation, auto account transfer, EoP exchange adjustment, and carrying over of profit and loss. It also provides finance management functions, such as account budgeting, account interest calculation, accounting, and cash flow report. It enables associated query from general ledgers to vouchers, and enables multi-dimensional subsidiary accounting.The report management enables quick formulation of various reports. It enables report formulation, query, check, print, related query and analysis, as well as flexible and many access formulas and powerful related query of account.The cash management enables the cashiers to overall manage the cash and bank account. It provides bank notes, cash journal, bank deposit journal, bank deposit reconciliation statement and reconciliation. It provides multiple capital analysis reports based on above functions.The fixed assets management helps the managers strengthen the assets management and improve assets utilization. With fixed assets cards as the core, it provides comprehensive assets management over assets adding, changing, clearing, and depreciating, and various assets analysis reports. The module pre-defines multiple depreciation methods and flexible depreciation customization. The vouchers can be generated automatically.The transaction management consists of A/R and A/P management. It helps the manager strengthen A/R and A/P management. It provides the management over the whole business process, such as contract management, and invoice, collection, payment, notes, settlement, reconciliation, doubtful debt handling. The vouchers can be generated automatically. The due debt can be alarmed. Automatic reconciliation is performed between the general ledger and business partners.Management AccountingThe budget management enables the accountants to overall and effectively manage the budget of a single enterprise or a group enterprise. It also provides the functions like budget preparation, adjustment, execution, control, analysis and appraisal.The capital management assists the accountant in overall management and allocation of enterprise capital. It offers an overall, uniform cash management system for the group enterprise. Focusing on business and taking finance as its core, this module uniformly manages cash plan and control, cash settlement, financing, deposit, interest calculation, cash report and cash analysis.The consolidated report management enables the accountants to quickly collect management information from subordinate companies of a group. It offers a uniform group report platform,based on which to establish a standard finance report system. In addition, this module provides financial analysis data.The cost management enables the accountants to overall and reasonably manage the cost. Guided by the idea of cost object, it can integrate with other modules. The actual cost is processed through cost collection, allocation, and accounting, based on which, a system of cost forecast, control, analysis and appraisal is established.Kingdee K/3 SCMIntroductionKingdee K/3 ERP SCM is intended for the purchase, sales, warehouse and quality management personnel of an enterprise. The system offers functions such as purchase management, sales management, warehouse management, quality management, inventory accounting, import management and export management to completely manage the business supply chain of the enterprise. The system can either run independently, or work with the Manufacturing and Finance systems, to form more complete and overall enterprise solutions.StructureFunctionsPurchase ManagementIt enables the purchase personnel higher working quality and efficiency. It offers business management functions from purchase request, order, receipt, goods returning to payment, and supports multiple purchase operations related to vendor, price and lot No. It helps the enterprise to effectively manage and control the supply chain, cash flow, and data flow during the whole purchase process.Sales ManagementIt helps the sales representatives formulate correct marketing strategies and improve market response. It offers business management functions from order, delivery, goods returning, and invoice to payment, and supports multiple sales operations related to credit account sales, price, discount and promotion.Warehouse ManagementIt helps the logistic personnel strengthen material management and supports smooth operation of manufacturing system. It offers receipt/delivery, inventory transfer, inventory adjustment and phantom warehouse, and supports lot, material correspondence, counting and real-time stock verification functions.Inventory AccountingIt enables accurate accounting of inventory receipt/delivery cost and warehouse balance. It provides multiple warehouse accounting methods. The accounting is based on both the center warehouse and warehouse. The voucher template enables flexible settings.Import ManagementIt enables overall management and flexible processing of import business. It manages import purchase orders and import documents (vendor invoices, customs declaration and import tax).Export ManagementIt enables overall management and flexible processing of export business. It offers export orders, export transport management, packing management, delivery management, export customer management and export document (form invoices and customs declaration).Quality ControlIt helps to improve quality management efficiency and reduce quality failures caused by materials, workshop manufacturing, and quality of inventory materials. It offers management functions such as, vendor appraisal, purchase inspection, operation inspection, outsourcing inspection, productinspection, outsourcing receipt inspection, delivery inspection and return goods inspection. Kingdee K/3 ManufacturingIntroductionIntended for the planning and manufacturing management personnel, the Kingdee K/3 ERP Manufacturing implements overall management over BOM (Bill of Material), manufacturing planning, capacity planning and SFC (Shop Floor Control). It enables the enterprise to establish and change BOM, manufacturing planning of multiple solutions, and limited SFC. This system can be used together with the SCM and Finance systems, to form more complete and overall enterprise application solutions.StructureFunctionsPDM (Production Data Management)It helps the process personnel regulate the basic management over manufacturing data. It manages manufacturing master data, such as BOM, product settings, ECN (engineer change notice), routing, and alternative material processing.Manufacturing PlanningIt helps the planning personnel work out the reasonable manufacturing planning, and offers the MPS and MRP that supports multiple manufacturing modes, RCCP and CRP, manufacturing forecast management, planning strategy based on personnel and material, alternative material strategy and other business management functions.MO (Manufacturing Order)It helps the manufacturing management personnel effectively manage and control the supply chain and data flow in the manufacturing process, provides management of manufacturing business processes such as MO, material staging/picking, manufacturing inspection/reporting, product stock-in and MO settlement, and offers simulated material issue/picking, receipt quantity control and other business management functions.SFC (Shop Floor Control)It helps the manufacturing management personnel implement limited management of the workshop, offers the functions of confirming, dispatching, executing and changing the workshop operation scheduling and manufacturing order, and provides business management on thetime/piece wage, configured product, by-product and grade product.Capacity PlanningIt helps the planning personnel efficiently appraise the feasibility of the MPS and MRP from the capacity point of view, and offers RCCP calculation, RCCP query, CRP calculation, CRP query and adjustment.Equipment ManagementIt helps the equipment management personnel efficiently maintain and repair the equipment, and offers equipment records, running, failure, maintenance, lubrication and repair functions.Kingdee K/3 Sales and Distribution IntroductionIntended for the enterprise distribution channel, Kingdee K/3 ERP Sales and Distribution takes the sales plan as source, the data aggregation as base, the centralized control as measure to establish the ERP system based on sales network, and achieve the distribution core competitive capability through efficient operations of distribution management, retails management, and foreground management. The system cannot run independently, but integrates with K/3 ERP SCM and Finance systems to form more complete and overall enterprise application solutions.StructureFunctionsDistribution BackgroundIt helps the channel personnel effectively manage and serve the distribution channel, creates the price policy and distribution sales plans, and manages orders, replacements and operations.Retails ManagementIt helps the retails management personnel effectively manage the commodities, handles the daily retail inventory transactions which include order, receipt, gift and physical counting, and manages the bar code and SKU (stock keeping unit).Foreground ManagementIt helps the foreground sales personnel effectively process relevant transactions and manage customers, offers daily management of retail operations which includes subscribing document, returning goods, suspending document, hand-over shift and daily closing, and provides management on VIP customers.Data TransmissionIt helps the enterprise uniformly manage and control its master data and business data, and offers centralized deployment, distributed deployment and data transmission.Kingdee K/3 OAIntroductionKingdee K/3 ERP OA is a knowledge office system that is used for implementing the enterprise basic management platform. Oriented at non-profit organizations, public service institutions, groups and individuals, it allows transactions, processes and information to coordinate suitably and orderly with business handling in an effective and controlled manner. It creates an electronic working environment for enterprises, and sets up enterprise knowledge portals through visual workflows and knowledge accessible mechanisms. This system can run separately or seamlessly integrate with other K/3 ERP systems, providing more integrated and complete application solutions.StructureFunctionsPublic InformationIt helps the employee acquire a range of shared information conveniently and accurately, provides the enterprise information release platform that includes public information like internal announcements, archives, BBS, and knowledge center, and processes different information in multiple modes (query, subscription and release).AdministrationIt helps the employee improve the efficiency of handling and managing administrative transactions, provides business management functions like conference management, activity arrangement, information feedback, and staff suggestion based on the traditional administrative management of enterprises, and makes use of the time-saving and labor-saving Internet in the implementation and management of meeting rooms.Personal InformationIt helps the employee implement prefect, effective management of personal transactions, and provides personal transaction management that includes individual E-mails, schedules, matters to be solved, and address lists. It also provides a strong communication platform, by which the user can communicate with others through E-mails, real-time desktop messages and short messages, which facilitates cooperation among several employees.Cooperative OfficeIt helps the employee regulate and implement effective process operation, provides document reception, release management, and routine transaction processes inside the enterprise, and supports customized enterprise workflows, and process modes like nesting, parallel, branch and cycle. It also provides functions like strict authority control, process log, and suggestion browse.Cooperative PortalIt helps employees implement effective cooperation, provides modules like the individual homepage, department transaction, and system homepage on the basis of process core, and satisfies internal real-time communication demands of staff members, leaders and departments.Kingdee K/3 HRIntroductionKingdee K/3 ERP HRM is designed and developed based on the strategic HRM philosophy. It is applicable to small, medium and large enterprises in China, and helps them implement basic personnel management, professional HRM, and employee self-service. This system has a WEB application framework; so that it can run separately or seamlessly integrate with other K/3 ERP systems, and provide more integrated and complete application solutions for enterprises.StructureFunctionsPersonnel ManagementIt helps the HR personnel implement standard, effective organization personnel management transactions, provides organization framework management, constructs a system of positions and duties, and offers personnel transaction processing (employment, dismissal and rotation), contract management and alarm.Salary ManagementIt helps the HR personnel implement effective, complete salary management and control, and provides business management functions like salary determination and adjustment based on a standard salary system. In addition, it supports salary accounting management in several modes, and offers salary distribution (including personal tax declaration and bank agent) and benefit.Attendance ManagementIt helps the HR personnel implement accurate attendance management and shift business, and provides attendance shift, attendance calculation, holiday management and overtime management applicable for various enterprises, and offers accurate attendance data for salary accounting.Performance ManagementIt helps the HR personnel implement strategic objectives in an apportioned way and establish a performance-salary associated incentive system. It provides several performance appraisal modes based on balanced score card, KPI and 360 degree, and supports qualitative objectives appraisal and quantitative objectives appraisal. In addition, it offers department performance appraisal and personal performance appraisal, and supports performance process management.Training ManagementIt helps the HR personnel implement standard training management, and provides business management functions like training demand collection, training plan formulation, training activity management, training record management and training summary.Recruitment ManagementIt helps the HR personnel regulate recruitment management, and provides a full range of recruitment business process management including HR planning, recruitment demand collection, department recruitment application, position vacancy management, recruitment plan formulation, recruitment activity arrangement (internal recruitment supported), resume selection, interview process management, employment management and recruitment summary.Working PlatformIt helps the CEO acquire decision-making information, helps the line manager participate in HR business, and helps the employees in HR service. It provides multi-role application service platforms such as CEO platform, manager platform and my platform.Kingdee K/3 CRMIntroductionKingdee K/3 ERP CRM is a system that comprises of the operation category followed by the analysis category. Oriented at marketing, sales, service and management personnel in enterprises, it helps the enterprises implement full life cycle management for customer resources, and supports various transaction modes like relation marketing and project process management. This system can run separately or be integrated with the K/3 ERP main systems, to provide highly integrated and complete application solutions.StructureFunctionsMarket ManagementIt helps the marketing personnel implement complete market management, and provides such business management functions as marketing battle, customer group, market plan, market information, marketing survey, sales survey and market expenses.Sales ManagementIt helps the sales representative manage pre-sales and in-sales processes as a whole, and provides business management functions like sales plans, tasks, clues, opportunities, quotations, contracts, orders, delivery, collection and commission.Service ManagementIt helps the customer service personnel implement integrated management of after-sales service, and provides business management functions like service requests, customer complaints, implementation, repair, defects and satisfaction survey.Sales Funnel ManagementIt helps the sales representative predict sales, and manage the overall opportunity abundance rate and project quality, and provide business management functions like sales plans/indices and methods.Kingdee K/3 BIIntroductionKingdee K/3 ERP BI aims at enterprise executives. It is based on information of K/3 ERP Finance, SCM and Manufacturing systems, and uses data warehouse technologies like cleaning and integration to quantify enterprise decision-making and management into a whole set of executable performance measurement standards and systems. It manages enterprise performance indices, queries information and reports, analyzes data, and supervises enterprise operation exception alarm through the enterprise management cockpit. In addition, it supports the integration with strong BI tools from the third-party, helps enterprise executives know enterprise operations in any place and at any time, and establishes a complete enterprise decision-making support system from execution and analysis to prediction.StructureFunctionsComplete Index Monitoring and AnalysisIt helps the enterprise executives make operation monitoring and analysis. It provides various standard indices (including financial states, operation states and development abilities) necessaryduring enterprise operation and allows you to customized key indices. It also supports flexible index analysis methods and such monitoring and alarm measures as meter panel display in real time and index red/green alarm.Query and Issue of Statements and ReportsIt helps the enterprise effectively improve the information circulation speed so that enterprise executive can get and feed back decision-making information in time, and adjust the enterprise strategy to adapt to various changes. Real time and shortcut cash statements, financial reports and transaction statements are provided and issued by various information methods, including WEB browse in real time, short messages, PDAs and E-mails.Multiple Analysis MethodsIt helps the executive probe into and analyze enterprise operation and management information. The module provides flexible diagram presentation (structure diagram, trend diagram, comparison diagram and decision-making tree) and supports multi-dimensional analysis and data mining from the viewpoint of product, region, customer, department or organization.Multiple Topics AnalysisIt helps the enterprise show and analyze enterprise operation and management information as a whole. The module provides accurate, timely, reasonable multi-topic analysis, such as, profit analysis, capital analysis, operation achievement analysis, sales revenue analysis, key project monitoring and analysis.Combined Application of BI ToolsIt helps the enterprise make sustained business improvement and increase operation benefits. The module supports BI tools from the third-party, and provides a more complete commercial model and prediction system for the enterprise.。


s32k3开发流程英文回答:The development process of the S32K3 platform involves several steps, from project planning to final product release. Here, I will outline the general flow of the S32K3 development process.1. Project Planning: Before starting the development process, it is essential to have a clear understanding of the project requirements and goals. This includes defining the target market, identifying the features and functionalities required, and setting project timelines and budgets.2. Hardware Design: The next step is to design the hardware architecture for the S32K3 platform. This involves selecting the appropriate microcontroller, peripherals, and other components required for the project. The hardware design should be optimized for performance, powerconsumption, and cost.3. Software Development: Once the hardware design is finalized, the software development process begins. This involves developing the firmware and software applications that will run on the S32K3 platform. The software development can be done using various programming languages such as C, C++, or assembly language.4. Testing and Debugging: After the software is developed, it is crucial to test and debug the system to ensure its functionality and reliability. This includesunit testing, integration testing, and system testing. Various tools and techniques can be used for testing and debugging, such as simulation, emulators, and hardware-in-the-loop testing.5. Validation and Verification: Once the system is tested and debugged, it is necessary to validate and verify its performance against the project requirements. This involves conducting various tests and evaluations to ensure that the system meets the specified criteria.6. Production and Manufacturing: After the S32K3 platform is validated and verified, it is ready for production and manufacturing. This includes mass production of the hardware, software installation, and quality control processes. The final product is then packaged and prepared for distribution.7. Deployment and Support: Once the S32K3 platform is manufactured, it is deployed to the target market. Ongoing support and maintenance are provided to ensure the smooth operation of the platform. This includes software updates, bug fixes, and customer support services.中文回答:S32K3平台的开发流程包括几个步骤,从项目规划到最终产品发布。
The information in this document is subject to change without notice and does not represent a commitment on the part of Native Instruments GmbH. The software described by this docu-ment is subject to a License Agreement and may not be copied to other media. No part of this publication may be copied, reproduced or otherwise transmitted or recorded, for any purpose, without prior written permission by Native Instruments GmbH, hereinafter referred to as Native Instruments.“Native Instruments”, “NI” and associated logos are (registered) trademarks of Native Instru-ments GmbH.ASIO, VST, HALion and Cubase are registered trademarks of Steinberg Media Technologies GmbH.All other product and company names are trademarks™ or registered® trademarks of their re-spective holders. Use of them does not imply any affiliation with or endorsement by them.Document authored by: David Gover and Nico Sidi.Software version: 2.8 (02/2019)Hardware version: MASCHINE MIKRO MK3Special thanks to the Beta Test Team, who were invaluable not just in tracking down bugs, but in making this a better product.NATIVE INSTRUMENTS GmbH Schlesische Str. 29-30D-10997 Berlin Germanywww.native-instruments.de NATIVE INSTRUMENTS North America, Inc. 6725 Sunset Boulevard5th FloorLos Angeles, CA 90028USANATIVE INSTRUMENTS K.K.YO Building 3FJingumae 6-7-15, Shibuya-ku, Tokyo 150-0001Japanwww.native-instruments.co.jp NATIVE INSTRUMENTS UK Limited 18 Phipp StreetLondon EC2A 4NUUKNATIVE INSTRUMENTS FRANCE SARL 113 Rue Saint-Maur75011 ParisFrance SHENZHEN NATIVE INSTRUMENTS COMPANY Limited 5F, Shenzhen Zimao Center111 Taizi Road, Nanshan District, Shenzhen, GuangdongChina© NATIVE INSTRUMENTS GmbH, 2019. All rights reserved.Table of Contents1Welcome to MASCHINE (23)1.1MASCHINE Documentation (24)1.2Document Conventions (25)1.3New Features in MASCHINE 2.8 (26)1.4New Features in MASCHINE 2.7.10 (28)1.5New Features in MASCHINE 2.7.8 (29)1.6New Features in MASCHINE 2.7.7 (29)1.7New Features in MASCHINE 2.7.4 (31)1.8New Features in MASCHINE 2.7.3 (33)2Quick Reference (35)2.1MASCHINE Project Overview (35)2.1.1Sound Content (35)2.1.2Arrangement (37)2.2MASCHINE Hardware Overview (40)2.2.1MASCHINE MIKRO Hardware Overview (40)2.2.1.1Browser Section (41)2.2.1.2Edit Section (42)2.2.1.3Performance Section (43)2.2.1.4Transport Section (45)2.2.1.5Pad Section (46)2.2.1.6Rear Panel (50)2.3MASCHINE Software Overview (51)2.3.1Header (52)2.3.2Browser (54)2.3.3Arranger (56)2.3.4Control Area (59)2.3.5Pattern Editor (60)3Basic Concepts (62)3.1Important Names and Concepts (62)3.2Adjusting the MASCHINE User Interface (65)3.2.1Adjusting the Size of the Interface (65)3.2.2Switching between Ideas View and Song View (66)3.2.3Showing/Hiding the Browser (67)3.2.4Showing/Hiding the Control Lane (67)3.3Common Operations (68)3.3.1Adjusting Volume, Swing, and Tempo (68)3.3.2Undo/Redo (71)3.3.3Focusing on a Group or a Sound (73)3.3.4Switching Between the Master, Group, and Sound Level (77)3.3.5Navigating Channel Properties, Plug-ins, and Parameter Pages in the Control Area.773.3.6Navigating the Software Using the Controller (82)3.3.7Using Two or More Hardware Controllers (82)3.3.8Loading a Recent Project from the Controller (84)3.4Native Kontrol Standard (85)3.5Stand-Alone and Plug-in Mode (86)3.5.1Differences between Stand-Alone and Plug-in Mode (86)3.5.2Switching Instances (88)3.6Preferences (88)3.6.1Preferences – General Page (89)3.6.2Preferences – Audio Page (93)3.6.3Preferences – MIDI Page (95)3.6.4Preferences – Default Page (97)3.6.5Preferences – Library Page (101)3.6.6Preferences – Plug-ins Page (109)3.6.7Preferences – Hardware Page (114)3.6.8Preferences – Colors Page (114)3.7Integrating MASCHINE into a MIDI Setup (117)3.7.1Connecting External MIDI Equipment (117)3.7.2Sync to External MIDI Clock (117)3.7.3Send MIDI Clock (118)3.7.4Using MIDI Mode (119)3.8Syncing MASCHINE using Ableton Link (120)3.8.1Connecting to a Network (121)3.8.2Joining and Leaving a Link Session (121)4Browser (123)4.1Browser Basics (123)4.1.1The MASCHINE Library (123)4.1.2Browsing the Library vs. Browsing Your Hard Disks (124)4.2Searching and Loading Files from the Library (125)4.2.1Overview of the Library Pane (125)4.2.2Selecting or Loading a Product and Selecting a Bank from the Browser (128)4.2.3Selecting a Product Category, a Product, a Bank, and a Sub-Bank (133)4.2.3.1Selecting a Product Category, a Product, a Bank, and a Sub-Bank on theController (137)4.2.4Selecting a File Type (137)4.2.5Choosing Between Factory and User Content (138)4.2.6Selecting Type and Character Tags (138)4.2.7Performing a Text Search (142)4.2.8Loading a File from the Result List (143)4.3Additional Browsing Tools (148)4.3.1Loading the Selected Files Automatically (148)4.3.2Auditioning Instrument Presets (149)4.3.3Auditioning Samples (150)4.3.4Loading Groups with Patterns (150)4.3.5Loading Groups with Routing (151)4.3.6Displaying File Information (151)4.4Using Favorites in the Browser (152)4.5Editing the Files’ Tags and Properties (155)4.5.1Attribute Editor Basics (155)4.5.2The Bank Page (157)4.5.3The Types and Characters Pages (157)4.5.4The Properties Page (160)4.6Loading and Importing Files from Your File System (161)4.6.1Overview of the FILES Pane (161)4.6.2Using Favorites (163)4.6.3Using the Location Bar (164)4.6.4Navigating to Recent Locations (165)4.6.5Using the Result List (166)4.6.6Importing Files to the MASCHINE Library (169)4.7Locating Missing Samples (171)4.8Using Quick Browse (173)5Managing Sounds, Groups, and Your Project (175)5.1Overview of the Sounds, Groups, and Master (175)5.1.1The Sound, Group, and Master Channels (176)5.1.2Similarities and Differences in Handling Sounds and Groups (177)5.1.3Selecting Multiple Sounds or Groups (178)5.2Managing Sounds (181)5.2.1Loading Sounds (183)5.2.2Pre-listening to Sounds (184)5.2.3Renaming Sound Slots (185)5.2.4Changing the Sound’s Color (186)5.2.5Saving Sounds (187)5.2.6Copying and Pasting Sounds (189)5.2.7Moving Sounds (192)5.2.8Resetting Sound Slots (193)5.3Managing Groups (194)5.3.1Creating Groups (196)5.3.2Loading Groups (197)5.3.3Renaming Groups (198)5.3.4Changing the Group’s Color (199)5.3.5Saving Groups (200)5.3.6Copying and Pasting Groups (202)5.3.7Reordering Groups (206)5.3.8Deleting Groups (207)5.4Exporting MASCHINE Objects and Audio (208)5.4.1Saving a Group with its Samples (208)5.4.2Saving a Project with its Samples (210)5.4.3Exporting Audio (212)5.5Importing Third-Party File Formats (218)5.5.1Loading REX Files into Sound Slots (218)5.5.2Importing MPC Programs to Groups (219)6Playing on the Controller (223)6.1Adjusting the Pads (223)6.1.1The Pad View in the Software (223)6.1.2Choosing a Pad Input Mode (225)6.1.3Adjusting the Base Key (226)6.2Adjusting the Key, Choke, and Link Parameters for Multiple Sounds (227)6.3Playing Tools (229)6.3.1Mute and Solo (229)6.3.2Choke All Notes (233)6.3.3Groove (233)6.3.4Level, Tempo, Tune, and Groove Shortcuts on Your Controller (235)6.3.5Tap Tempo (235)6.4Performance Features (236)6.4.1Overview of the Perform Features (236)6.4.2Selecting a Scale and Creating Chords (239)6.4.3Scale and Chord Parameters (240)6.4.4Creating Arpeggios and Repeated Notes (253)6.4.5Swing on Note Repeat / Arp Output (257)6.5Using Lock Snapshots (257)6.5.1Creating a Lock Snapshot (257)7Working with Plug-ins (259)7.1Plug-in Overview (259)7.1.1Plug-in Basics (259)7.1.2First Plug-in Slot of Sounds: Choosing the Sound’s Role (263)7.1.3Loading, Removing, and Replacing a Plug-in (264)7.1.4Adjusting the Plug-in Parameters (270)7.1.5Bypassing Plug-in Slots (270)7.1.6Using Side-Chain (272)7.1.7Moving Plug-ins (272)7.1.8Alternative: the Plug-in Strip (273)7.1.9Saving and Recalling Plug-in Presets (273)7.1.9.1Saving Plug-in Presets (274)7.1.9.2Recalling Plug-in Presets (275)7.1.9.3Removing a Default Plug-in Preset (276)7.2The Sampler Plug-in (277)7.2.1Page 1: Voice Settings / Engine (279)7.2.2Page 2: Pitch / Envelope (281)7.2.3Page 3: FX / Filter (283)7.2.4Page 4: Modulation (285)7.2.5Page 5: LFO (286)7.2.6Page 6: Velocity / Modwheel (288)7.3Using Native Instruments and External Plug-ins (289)7.3.1Opening/Closing Plug-in Windows (289)7.3.2Using the VST/AU Plug-in Parameters (292)7.3.3Setting Up Your Own Parameter Pages (293)7.3.4Using VST/AU Plug-in Presets (298)7.3.5Multiple-Output Plug-ins and Multitimbral Plug-ins (300)8Using the Audio Plug-in (302)8.1Loading a Loop into the Audio Plug-in (306)8.2Editing Audio in the Audio Plug-in (307)8.3Using Loop Mode (308)8.4Using Gate Mode (310)9Using the Drumsynths (312)9.1Drumsynths – General Handling (313)9.1.1Engines: Many Different Drums per Drumsynth (313)9.1.2Common Parameter Organization (313)9.1.3Shared Parameters (316)9.1.4Various Velocity Responses (316)9.1.5Pitch Range, Tuning, and MIDI Notes (316)9.2The Kicks (317)9.2.1Kick – Sub (319)9.2.2Kick – Tronic (321)9.2.3Kick – Dusty (324)9.2.4Kick – Grit (325)9.2.5Kick – Rasper (328)9.2.6Kick – Snappy (329)9.2.7Kick – Bold (331)9.2.8Kick – Maple (333)9.2.9Kick – Push (334)9.3The Snares (336)9.3.1Snare – Volt (338)9.3.2Snare – Bit (340)9.3.3Snare – Pow (342)9.3.4Snare – Sharp (343)9.3.5Snare – Airy (345)9.3.6Snare – Vintage (347)9.3.7Snare – Chrome (349)9.3.8Snare – Iron (351)9.3.9Snare – Clap (353)9.3.10Snare – Breaker (355)9.4The Hi-hats (357)9.4.1Hi-hat – Silver (358)9.4.2Hi-hat – Circuit (360)9.4.3Hi-hat – Memory (362)9.4.4Hi-hat – Hybrid (364)9.4.5Creating a Pattern with Closed and Open Hi-hats (366)9.5The Toms (367)9.5.1Tom – Tronic (369)9.5.2Tom – Fractal (371)9.5.3Tom – Floor (375)9.5.4Tom – High (377)9.6The Percussions (378)9.6.1Percussion – Fractal (380)9.6.2Percussion – Kettle (383)9.6.3Percussion – Shaker (385)9.7The Cymbals (389)9.7.1Cymbal – Crash (391)9.7.2Cymbal – Ride (393)10Using the Bass Synth (396)10.1Bass Synth – General Handling (397)10.1.1Parameter Organization (397)10.1.2Bass Synth Parameters (399)11Working with Patterns (401)11.1Pattern Basics (401)11.1.1Pattern Editor Overview (402)11.1.2Navigating the Event Area (404)11.1.3Following the Playback Position in the Pattern (406)11.1.4Jumping to Another Playback Position in the Pattern (407)11.1.5Group View and Keyboard View (408)11.1.6Adjusting the Arrange Grid and the Pattern Length (410)11.1.7Adjusting the Step Grid and the Nudge Grid (413)11.2Recording Patterns in Real Time (416)11.2.1Recording Your Patterns Live (417)11.2.2Using the Metronome (419)11.2.3Recording with Count-in (420)11.3Recording Patterns with the Step Sequencer (422)11.3.1Step Mode Basics (422)11.3.2Editing Events in Step Mode (424)11.4Editing Events (425)11.4.1Editing Events with the Mouse: an Overview (425)11.4.2Creating Events/Notes (428)11.4.3Selecting Events/Notes (429)11.4.4Editing Selected Events/Notes (431)11.4.5Deleting Events/Notes (434)11.4.6Cut, Copy, and Paste Events/Notes (436)11.4.7Quantizing Events/Notes (439)11.4.8Quantization While Playing (441)11.4.9Doubling a Pattern (442)11.4.10Adding Variation to Patterns (442)11.5Recording and Editing Modulation (443)11.5.1Which Parameters Are Modulatable? (444)11.5.2Recording Modulation (446)11.5.3Creating and Editing Modulation in the Control Lane (447)11.6Creating MIDI Tracks from Scratch in MASCHINE (452)11.7Managing Patterns (454)11.7.1The Pattern Manager and Pattern Mode (455)11.7.2Selecting Patterns and Pattern Banks (456)11.7.3Creating Patterns (459)11.7.4Deleting Patterns (460)11.7.5Creating and Deleting Pattern Banks (461)11.7.6Naming Patterns (463)11.7.7Changing the Pattern’s Color (465)11.7.8Duplicating, Copying, and Pasting Patterns (466)11.7.9Moving Patterns (469)11.8Importing/Exporting Audio and MIDI to/from Patterns (470)11.8.1Exporting Audio from Patterns (470)11.8.2Exporting MIDI from Patterns (472)11.8.3Importing MIDI to Patterns (474)12Audio Routing, Remote Control, and Macro Controls (483)12.1Audio Routing in MASCHINE (484)12.1.1Sending External Audio to Sounds (485)12.1.2Configuring the Main Output of Sounds and Groups (489)12.1.3Setting Up Auxiliary Outputs for Sounds and Groups (494)12.1.4Configuring the Master and Cue Outputs of MASCHINE (497)12.1.5Mono Audio Inputs (502)12.1.5.1Configuring External Inputs for Sounds in Mix View (503)12.2Using MIDI Control and Host Automation (506)12.2.1Triggering Sounds via MIDI Notes (507)12.2.2Triggering Scenes via MIDI (513)12.2.3Controlling Parameters via MIDI and Host Automation (514)12.2.4Selecting VST/AU Plug-in Presets via MIDI Program Change (522)12.2.5Sending MIDI from Sounds (523)12.3Creating Custom Sets of Parameters with the Macro Controls (527)12.3.1Macro Control Overview (527)12.3.2Assigning Macro Controls Using the Software (528)13Controlling Your Mix (535)13.1Mix View Basics (535)13.1.1Switching between Arrange View and Mix View (535)13.1.2Mix View Elements (536)13.2The Mixer (537)13.2.1Displaying Groups vs. Displaying Sounds (539)13.2.2Adjusting the Mixer Layout (541)13.2.3Selecting Channel Strips (542)13.2.4Managing Your Channels in the Mixer (543)13.2.5Adjusting Settings in the Channel Strips (545)13.2.6Using the Cue Bus (549)13.3The Plug-in Chain (551)13.4The Plug-in Strip (552)13.4.1The Plug-in Header (554)13.4.2Panels for Drumsynths and Internal Effects (556)13.4.3Panel for the Sampler (557)13.4.4Custom Panels for Native Instruments Plug-ins (560)13.4.5Undocking a Plug-in Panel (Native Instruments and External Plug-ins Only) (564)14Using Effects (567)14.1Applying Effects to a Sound, a Group or the Master (567)14.1.1Adding an Effect (567)14.1.2Other Operations on Effects (574)14.1.3Using the Side-Chain Input (575)14.2Applying Effects to External Audio (578)14.2.1Step 1: Configure MASCHINE Audio Inputs (578)14.2.2Step 2: Set up a Sound to Receive the External Input (579)14.2.3Step 3: Load an Effect to Process an Input (579)14.3Creating a Send Effect (580)14.3.1Step 1: Set Up a Sound or Group as Send Effect (581)14.3.2Step 2: Route Audio to the Send Effect (583)14.3.3 A Few Notes on Send Effects (583)14.4Creating Multi-Effects (584)15Effect Reference (587)15.1Dynamics (588)15.1.1Compressor (588)15.1.2Gate (591)15.1.3Transient Master (594)15.1.4Limiter (596)15.1.5Maximizer (600)15.2Filtering Effects (603)15.2.1EQ (603)15.2.2Filter (605)15.2.3Cabinet (609)15.3Modulation Effects (611)15.3.1Chorus (611)15.3.2Flanger (612)15.3.3FM (613)15.3.4Freq Shifter (615)15.3.5Phaser (616)15.4Spatial and Reverb Effects (617)15.4.1Ice (617)15.4.2Metaverb (619)15.4.3Reflex (620)15.4.4Reverb (Legacy) (621)15.4.5Reverb (623)15.4.5.1Reverb Room (623)15.4.5.2Reverb Hall (626)15.4.5.3Plate Reverb (629)15.5Delays (630)15.5.1Beat Delay (630)15.5.2Grain Delay (632)15.5.3Grain Stretch (634)15.5.4Resochord (636)15.6Distortion Effects (638)15.6.1Distortion (638)15.6.2Lofi (640)15.6.3Saturator (641)15.7Perform FX (645)15.7.1Filter (646)15.7.2Flanger (648)15.7.3Burst Echo (650)15.7.4Reso Echo (653)15.7.5Ring (656)15.7.6Stutter (658)15.7.7Tremolo (661)15.7.8Scratcher (664)16Working with the Arranger (667)16.1Arranger Basics (667)16.1.1Navigating Song View (670)16.1.2Following the Playback Position in Your Project (672)16.1.3Performing with Scenes and Sections using the Pads (673)16.2Using Ideas View (677)16.2.1Scene Overview (677)16.2.2Creating Scenes (679)16.2.3Assigning and Removing Patterns (679)16.2.4Selecting Scenes (682)16.2.5Deleting Scenes (684)16.2.6Creating and Deleting Scene Banks (685)16.2.7Clearing Scenes (685)16.2.8Duplicating Scenes (685)16.2.9Reordering Scenes (687)16.2.10Making Scenes Unique (688)16.2.11Appending Scenes to Arrangement (689)16.2.12Naming Scenes (689)16.2.13Changing the Color of a Scene (690)16.3Using Song View (692)16.3.1Section Management Overview (692)16.3.2Creating Sections (694)16.3.3Assigning a Scene to a Section (695)16.3.4Selecting Sections and Section Banks (696)16.3.5Reorganizing Sections (700)16.3.6Adjusting the Length of a Section (702)16.3.6.1Adjusting the Length of a Section Using the Software (703)16.3.6.2Adjusting the Length of a Section Using the Controller (705)16.3.7Clearing a Pattern in Song View (705)16.3.8Duplicating Sections (705)16.3.8.1Making Sections Unique (707)16.3.9Removing Sections (707)16.3.10Renaming Scenes (708)16.3.11Clearing Sections (710)16.3.12Creating and Deleting Section Banks (710)16.3.13Working with Patterns in Song view (710)16.3.13.1Creating a Pattern in Song View (711)16.3.13.2Selecting a Pattern in Song View (711)16.3.13.3Clearing a Pattern in Song View (711)16.3.13.4Renaming a Pattern in Song View (711)16.3.13.5Coloring a Pattern in Song View (712)16.3.13.6Removing a Pattern in Song View (712)16.3.13.7Duplicating a Pattern in Song View (712)16.3.14Enabling Auto Length (713)16.3.15Looping (714)16.3.15.1Setting the Loop Range in the Software (714)16.3.15.2Activating or Deactivating a Loop Using the Controller (715)16.4Playing with Sections (715)16.4.1Jumping to another Playback Position in Your Project (716)16.5Triggering Sections or Scenes via MIDI (717)16.6The Arrange Grid (719)16.7Quick Grid (720)17Sampling and Sample Mapping (722)17.1Opening the Sample Editor (722)17.2Recording Audio (724)17.2.1Opening the Record Page (724)17.2.2Selecting the Source and the Recording Mode (725)17.2.3Arming, Starting, and Stopping the Recording (729)17.2.5Checking Your Recordings (731)17.2.6Location and Name of Your Recorded Samples (734)17.3Editing a Sample (735)17.3.1Using the Edit Page (735)17.3.2Audio Editing Functions (739)17.4Slicing a Sample (743)17.4.1Opening the Slice Page (743)17.4.2Adjusting the Slicing Settings (744)17.4.3Manually Adjusting Your Slices (746)17.4.4Applying the Slicing (750)17.5Mapping Samples to Zones (754)17.5.1Opening the Zone Page (754)17.5.2Zone Page Overview (755)17.5.3Selecting and Managing Zones in the Zone List (756)17.5.4Selecting and Editing Zones in the Map View (761)17.5.5Editing Zones in the Sample View (765)17.5.6Adjusting the Zone Settings (767)17.5.7Adding Samples to the Sample Map (770)18Appendix: Tips for Playing Live (772)18.1Preparations (772)18.1.1Focus on the Hardware (772)18.1.2Customize the Pads of the Hardware (772)18.1.3Check Your CPU Power Before Playing (772)18.1.4Name and Color Your Groups, Patterns, Sounds and Scenes (773)18.1.5Consider Using a Limiter on Your Master (773)18.1.6Hook Up Your Other Gear and Sync It with MIDI Clock (773)18.1.7Improvise (773)18.2Basic Techniques (773)18.2.1Use Mute and Solo (773)18.2.2Create Variations of Your Drum Patterns in the Step Sequencer (774)18.2.3Use Note Repeat (774)18.2.4Set Up Your Own Multi-effect Groups and Automate Them (774)18.3Special Tricks (774)18.3.1Changing Pattern Length for Variation (774)18.3.2Using Loops to Cycle Through Samples (775)18.3.3Load Long Audio Files and Play with the Start Point (775)19Troubleshooting (776)19.1Knowledge Base (776)19.2Technical Support (776)19.3Registration Support (777)19.4User Forum (777)20Glossary (778)Index (786)1Welcome to MASCHINEThank you for buying MASCHINE!MASCHINE is a groove production studio that implements the familiar working style of classi-cal groove boxes along with the advantages of a computer based system. MASCHINE is ideal for making music live, as well as in the studio. It’s the hands-on aspect of a dedicated instru-ment, the MASCHINE hardware controller, united with the advanced editing features of the MASCHINE software.Creating beats is often not very intuitive with a computer, but using the MASCHINE hardware controller to do it makes it easy and fun. You can tap in freely with the pads or use Note Re-peat to jam along. Alternatively, build your beats using the step sequencer just as in classic drum machines.Patterns can be intuitively combined and rearranged on the fly to form larger ideas. You can try out several different versions of a song without ever having to stop the music.Since you can integrate it into any sequencer that supports VST, AU, or AAX plug-ins, you can reap the benefits in almost any software setup, or use it as a stand-alone application. You can sample your own material, slice loops and rearrange them easily.However, MASCHINE is a lot more than an ordinary groovebox or sampler: it comes with an inspiring 7-gigabyte library, and a sophisticated, yet easy to use tag-based Browser to give you instant access to the sounds you are looking for.What’s more, MASCHINE provides lots of options for manipulating your sounds via internal ef-fects and other sound-shaping possibilities. You can also control external MIDI hardware and 3rd-party software with the MASCHINE hardware controller, while customizing the functions of the pads, knobs and buttons according to your needs utilizing the included Controller Editor application. We hope you enjoy this fantastic instrument as much as we do. Now let’s get go-ing!—The MASCHINE team at Native Instruments.MASCHINE Documentation1.1MASCHINE DocumentationNative Instruments provide many information sources regarding MASCHINE. The main docu-ments should be read in the following sequence:1.MASCHINE MIKRO Quick Start Guide: This animated online guide provides a practical ap-proach to help you learn the basic of MASCHINE MIKRO. The guide is available from theNative Instruments website: https:///maschine-mikro-quick-start/2.MASCHINE Manual (this document): The MASCHINE Manual provides you with a compre-hensive description of all MASCHINE software and hardware features.Additional documentation sources provide you with details on more specific topics:►Online Support Videos: You can find a number of support videos on The Official Native In-struments Support Channel under the following URL: https:///NIsupport-EN. We recommend that you follow along with these instructions while the respective ap-plication is running on your computer.Other Online Resources:If you are experiencing problems related to your Native Instruments product that the supplied documentation does not cover, there are several ways of getting help:▪Knowledge Base▪User Forum▪Technical Support▪Registration SupportYou will find more information on these subjects in the chapter Troubleshooting.Document Conventions1.2Document ConventionsThis section introduces you to the signage and text highlighting used in this manual. This man-ual uses particular formatting to point out special facts and to warn you of potential issues.The icons introducing these notes let you see what kind of information is to be expected:This document uses particular formatting to point out special facts and to warn you of poten-tial issues. The icons introducing the following notes let you see what kind of information canbe expected:Furthermore, the following formatting is used:▪Text appearing in (drop-down) menus (such as Open…, Save as… etc.) in the software andpaths to locations on your hard disk or other storage devices is printed in italics.▪Text appearing elsewhere (labels of buttons, controls, text next to checkboxes etc.) in thesoftware is printed in blue. Whenever you see this formatting applied, you will find thesame text appearing somewhere on the screen.▪Text appearing on the displays of the controller is printed in light grey. Whenever you seethis formatting applied, you will find the same text on a controller display.▪Text appearing on labels of the hardware controller is printed in orange. Whenever you seethis formatting applied, you will find the same text on the controller.▪Important names and concepts are printed in bold.▪References to keys on your computer’s keyboard you’ll find put in square brackets (e.g.,“Press [Shift] + [Enter]”).►Single instructions are introduced by this play button type arrow.→Results of actions are introduced by this smaller arrow.Naming ConventionThroughout the documentation we will refer to MASCHINE controller (or just controller) as the hardware controller and MASCHINE software as the software installed on your computer.The term “effect” will sometimes be abbreviated as “FX” when referring to elements in the MA-SCHINE software and hardware. These terms have the same meaning.Button Combinations and Shortcuts on Your ControllerMost instructions will use the “+” sign to indicate buttons (or buttons and pads) that must be pressed simultaneously, starting with the button indicated first. E.g., an instruction such as:“Press SHIFT + PLAY”means:1.Press and hold SHIFT.2.While holding SHIFT, press PLAY and release it.3.Release SHIFT.1.3New Features in MASCHINE2.8The following new features have been added to MASCHINE: Integration▪Browse on , create your own collections of loops and one-shots and send them directly to the MASCHINE browser.Improvements to the Browser▪Samples are now cataloged in separate Loops and One-shots tabs in the Browser.▪Previews of loops selected in the Browser will be played in sync with the current project.When a loop is selected with Prehear turned on, it will begin playing immediately in-sync with the project if transport is running. If a loop preview starts part-way through the loop, the loop will play once more for its full length to ensure you get to hear the entire loop once in context with your project.▪Filters and product selections will be remembered when switching between content types and Factory/User Libraries in the Browser.▪Browser content synchronization between multiple running instances. When running multi-ple instances of MASCHINE, either as Standalone and/or as a plug-in, updates to the Li-brary will be synced across the instances. For example, if you delete a sample from your User Library in one instance, the sample will no longer be present in the other instances.Similarly, if you save a preset in one instance, that preset will then be available in the oth-er instances, too.▪Edits made to samples in the Factory Libraries will be saved to the Standard User Directo-ry.For more information on these new features, refer to the following chapter ↑4, Browser. Improvements to the MASCHINE MIKRO MK3 Controller▪You can now set sample Start and End points using the controller. For more information refer to ↑17.3.1, Using the Edit Page.Improved Support for A-Series Keyboards▪When Browsing with A-Series keyboards, you can now jump quickly to the results list by holding SHIFT and pushing right on the 4D Encoder.▪When Browsing with A-Series keyboards, you can fast scroll through the Browser results list by holding SHIFT and twisting the 4D Encoder.▪Mute and Solo Sounds and Groups from A-Series keyboards. Sounds are muted in TRACK mode while Groups are muted in IDEAS.。
Project Summary G3 Genuine Guide Gear Inc. (G3) of North Vancouver, British Columbia, Canada, is a special-ized manufacturer of backcountry ski and safety equipment designed for guides and avalanche professionals. “If you’re a guide in the backcountry, other peoples’ lives can depend on the gear that you choose,” says Cameron Shute, G3 product devel-opment engineer. That’s why G3 uses Autodesk ® Algor ® Simulation software to help ensure the safety and effectiveness of its products, including skis, telemark bindings and accessories, climbing skins, avalanche probes, and backcountry shovels and saws.For one G3 product, the TARGA Ascent telemark ski binding, Shute performed linear static stress simula-tions to validate and optimize all of its components. “Autodesk Algor Simulation displacement and stress results gave us confidence that we were in the ball-park of a successful design before we actually fabri-cated and physically tested the binding,” says Shute. “We went through many iterations and tests on this product, but Autodesk simulation technologyhelped get it to market quickly.” The TARGA Ascenthas won multiple ski industry awards, including theprestigious ISPO Outdoor Award (presented at thelargest general sporting goods show in Europe) forbest outdoor innovation in the hardware category,Skiing Magazine ’s Best in Test, and POWDERMagazine ’s Skier’s Choice.The ChallengeFounded in 1995, G3 has earned a reputation for developing and manufacturing innovative, depend-able guide gear for the backcountry ski market. “Our product innovations are inspired by combin-ing many years of skiing experience and product design,” says Shute.G3 uses SolidWorks ® software for design in con-junction with Autodesk simulation technology for design validation and optimization. “I open the na-tive SolidWorks files in Autodesk Algor Simulation software and find that my data translates fine,” says Shute. “We then perform linear static stresssimulations on the structural components of everyproduct.”Shute explains his role: “I bring backcountry skiing products to market, from initial concepts to final manufactured products and all steps in between. Currently, I’m a project manager, but I’m still heavily involved in the technical aspects of design, includ-ing simulation, materials, and testing.”Safe gear for ski guides.North Vancouver–based G3 Genuine Guide Gear develops an award-winning ski binding with Autodesk ® Algor ®Simulation software.Image courtesy of G3 Genuine Guide Gear Inc.Shute’s experience in simulation includes college-level instruction. “I took a course at the Universityof Alberta on finite element analysis, but it wasa fundamental course on understanding how thefinite element method works rather than focusingon applications of simulation within the design pro-cess. I’ve also used simulation software from ANSYSand SolidWorks; however, I find Autodesk AlgorSimulation software to be much more intuitive andfeel like I have much more of an understanding ofeach step of the simulation workflow.”In addition, Shute has taken advantage of Autodeskeducation and training materials and services. “Iattended an Algor Simulation training course, whichfurther helped my understanding of simulationsoftware. But, mostly, I’ve learned what I need toknow to get my job done by working with the tutori-als, online documentation, and an occasional call toAutodesk technical support. Autodesk is there tosupport my learning—when and how I need it.”Shute describes the benefits of using AutodeskAlgor Simulation software: “For me, it’s the abilityto control my meshing with lots of options for fine-tuning and refinement of critical areas. We definitelysave time and money by being a step ahead whenwe digitally prototype concepts. Autodesk AlgorSimulation allows us to have a general sense of therelative strengths of parts in an assembly so we cando some initial optimization of part designs beforecommitting to physical prototyping. We often knowwhere parts are going to start breaking in tests likefatigue and can focus on those areas when inspect-ing tests. For the cost of the software, we receivegreat value.”Autodesk Algor Simulation Meets the Challenge Shute used Autodesk Algor Simulation software to validate and optimize all components of G3’s TARGA Ascent telemark ski binding. “Unlike alpine skiing equipment, the skis used for telemarking—or free-heel skiing—have a binding that only con-nects the boot to the ski at the toes, much like in cross-country skiing,” explains Shute. “However, cross-country products are lighter and used mainly for flatter terrain with little or no downhill perfor-mance. Telemark bindings are more heavy-duty to withstand the increased forces encountered in high-speed descents. They allow skiers to execute fluid turns and provide good performance for both touring and downhill skiing.”The TARGA Ascent provides a pole-activated free pivot system, easily switching the binding from tour to ski mode. In tour mode, the Ascent toeplate pivots unrestricted on a stainless steel axle, eliminating the burden of boot flex resistance for a natural feel and efficient stride. A flick of the switch easily converts the Ascent into ski mode where a stainless steel sliding retainer moves into place above a forged stainless steel retention bar, allowing outstanding downhill control.“Our design goals for the Ascent were that it must be strong, light, reliable, and functional,” says Shute. To help achieve those goals, Shute applied Autodesk simulation technology. “We used Autodesk Algor Simulation software extensively to optimize the weight and strength of structural plastic and metal components as well as elastomers for damping and spring force. This included the solving of many inter-esting design problems, like flexible tabs calcula-tions and spring force estimates.”Autodesk and Algor are registered trademarks or trademarks of Autodesk, Inc., and/or its subsidiaries and/or affiliates in the USA and/or other countries. All other brand names, product names, or trademarks belong to their respective holders. Autodesk reserves the right to alter product and services offerings, and specifications and pricing at any time without notice, and is not responsible for typographical or graphical errors that may ap-pear in this document. © 2011 Autodesk, Inc. All rights reserved.The Result The G3 TARGA Ascent is now in production and available at select retailers worldwide. “The Ascent is telemark’s lightest (1,400 grams or 49.4 ounces), high-performance touring binding,” says Shute. “Professional explorers and guides choose G3 TARGA Ascent bindings because they are built to stand up to today’s big boots and aggressive skiers.”For more information about Autodesk Algor Simulation software, visit /algorsimulation.—Cameron Shute Product Development Engineer G3 Genuine Guide Gear Inc.Image courtesy of G3 Genuine Guide Gear Inc.Image courtesy of G3 Genuine Guide Gear Inc.。

Coordinate Measuring MachinesBulletin No. 1810Crysta-Plus MManual Floating Type CMMLow-Cost!High-Accuracy!Compact!and Easy-to-Operate!Crysta-Plus M776/7106Crysta-Plus M544/574The Crysta-Plus M has been developed by Mitutoyo in its quest for low-cost,easy-to-use coordinate measuring machines without compromising measuring accuracy.Manual Floating T ypeCoordinate Measuring MachinesDesigned for high-accuracyThe Crysta-Plus M offers the highest measuring accuracy of E=(3.5+4.5L/1000)µm in this class.The Y -axis guide rail,which is a one-piece design with the granite plate,shows very little deterioration even over a long period of time,and thus promises to maintain stable accuracy for a long time.The high precision air bearings are employed on all axial guideways.Its smooth sliding results in fatigue-free 3-D measurements.One-T ouch Air ClampSimply flip the appropriate switch at the foot of the column to air-clamp an axis.This allows workpieces to be quickly and easily measured especially using a centering microscope.Constant measurementThe probe adapter with a constant grip is attached to the bottom of the Z-axis spindle to minimize a personal error in measurement.During measurement,this grip can reduce the influence of the fine swinging of the hand and improve a repeatability in measurement.T ouch Signal Disable SwitchA switch to disable touch signal input is incorporated into the probe adapter so input can be disabled/enabled easily without moving to the computer.Upgrading to CNCThe Crysta-Plus M can be upgraded to a CNC machine.Contact to Mitutoyo for details.Probe illumination (optional)The white LED probe illumination unit can be installed at the rear of the probe adapter to illuminate the area around the tip of the stylus.This is very useful for the deep hole measurement.The World’s First T emperature Compensation System for Manual CMM (optional)An optional temperature compensation system can be installed on the Crysta-Plus M.It guarantees the accuracy of the CMM main unit under temperature conditions of(front)(front)Crysta-Plus M544/574*ISO 10360-2;1994E: Error of indication of volumetric length measurement L: Measuring length (mm)R: Probing error**The distance between the bottom face of the Z spindle and the table top***0.5MPa to 0.9MPa at the air source****100 liters per minute (in normal state) at the air sourceExample of installationon surface plateSpecificationsModel Crysta-Plus M544*Crysta-Plus M574RangeX-axis 19.69" (500mm)19.69" (500mm)Y-axis 15.75" (400mm)27.56" (700mm)Z-axis15.75" (400mm)15.75" (400mm)Length standard Reflective linear encoder Resolution.00002" (0.0005mm)Accuracy (20°C) ISO 10360-2;1994 E = (3.5+4.5L/1000)µm R = 4.0µm (when using TP20)Guide method Air bearing for each axis Clamping method Quick air clamp for each axisMeasuring Material Granitetable Working area25.12" x 33.86" (638 x 860mm)25.12" x 45.67" (638 x 1160mm)Tapped insertM8x1.25 (for clamping workpiece)Maximum workpiece height**20.08" (510mm)Maximum workpiece weight 396 lbs. (180kg)Air pressure 0.4MPa (4kgf/cm 2)*** or 58 PSIAir consumption 50 liters per minute (in normal state)**** or 1.80 CFM Dimensions Width42.60" (1082mm)42.60" (1082mm)Depth 42.44" (1078mm)57.40" (1458mm)Height89.96" (2285mm)89.96" (2285mm)Mass (including the machine stand) 1089 lbs. (495kg)1353 lbs. (615kg)* Model M544 is a “special order”Crysta-PlusM544DimensionsCrysta-Plus M776/7106*ISO 10360-2;1994E: Error of indication of volumetric length measurement L: Measuring length (mm)R: Probing error**The distance between the bottom face of the Z spindle and the table top***0.5MPa to 0.9MPa at the air source****100 liters per minute (in normal state) at the air sourceSpecificationsModel Crysta-Plus M776*Crysta-Plus M7106RangeX-axis 27.56" (700mm)27.56" (700mm)Y-axis 27.56" (700mm)39.37" (1000mm)Z-axis 23.62" (600mm)23.62" (600mm)Length standard Reflective linear encoder Resolution .00002" (0.0005mm)Accuracy (20°C) ISO 10360-2;1994 E = (4.5+4.5L/1000)µm R = 5.0µm (when using TP20)Guide method Air bearing for each axis Clamping method Quick air clamp for each axis Measuring Material Granite table Working area 34.65" x 59.91" (880 x 1420mm)34.65" x 67.72" (880 x 1720mm)Tapped insert M8x1.25 (for clamping workpiece)Maximum workpiece height**31.50" (800mm)Maximum workpiece weight 1100 lbs. (500kg)1760 lbs. (800kg)Air pressure 0.4MPa (4kgf/cm 2)*** or 58 PSIAir consumption 50 liters per minute (in normal state)**** or 1.80 CFM Dimensions Width 57.87" (1470mm)57.87" (1470mm)Depth 64.96" (1650mm)76.77" (1950mm)Height 111.41" (2830mm)111.41" (2830mm)Mass (including the machine stand) 3058 lbs. (1390kg)3586 lbs. (1630kg)* Model M776 is a “special order”Crysta-PlusM7106(front)on surface plate M7106Geopak®General purpose program Geopak®is a new 3-D data analysis and CMM programming module that operates under MCOSMOS.This module includes all features of the geometric measuring program for CMMs.Its enhancedgraphic displays and thebuilt-in interactivity onscreen allow an inexpe-rienced operator tomeasure complex parts,while maintaining theflexibility demanded bypower users.ScanpakProfile data analysis program Scanpak allows the user to com-pare multi-point scanning data obtained from Geopak®to the nominal data generated by a CAD system.The result can be output as easy-to-look graphics.Scanpak can also process themeasured data to show“best-fit” conditionsand feed them back tothe manufacturingprocess.Scanpak Geopak®Machine position and temperatureBefore best fittingAfter best fit MCOSMOS3D-TOL3D-T ol allows you to make an immediate compensation ofactual part 3-D surface data obtained from Geopak®to thenominal data generated by a CAD system.MeasurLink ® – Designed for Coordinate Measuring Machines (CMMs) and Vision Measuring Machines (Quick Scope and Quick Vision machines).It is based on all the functionality of the latest data acquisition software and is fully integrated with the latest Mitutoyo CMM,Vision and Form Software,delivering process capability and part acceptability to operators at a glance.MeasurLink ®ST A TMeasure / ST A TMeasure PLUS MeasurLink ®ST A TMeasure / ST A TMeasure PLUS are Real-Time Data Acquisition modules for CMMs and Vision MeasuringMachines,and are the base modules for a T otal Quality Environment.MeasurLink ®Process ManagerThis module monitors all MeasurLink ®Real-Time activities on a computer network.It provides realtime feedback about the behavior and control state of all networked SPC Data Acquisition Stations across the shop-floor,giving theQC/Production Manager the perfect tool to organize and maintain a shop floor quality program at a glance.MeasurLink ®Process AnalyzerThe Process Analyzer module is an application that analyzes process performance and capability.It gives the ability to also identify problem areas in the manufacturing environment,allowing corrective action to be taken at an early stage,with statistical data easily manipulated and understood within an intuitive interface.MeasurLink ®Gage R&R and Gage Management also availableT ouch Signal Probes and Hard ProbesVarious high precision touch-signal probes and probe heads are available for the Crysta-Plus M CMMs as well as hard probes.[shank diameter:.55" (14mm).]CF10 and CF20 Centering MicroscopesThe Centering Microscopes are suitable for measuring small holes and elastic or soft workpieces that contact-type probes cannot measure.Optional accessories such as video moni-toring system,binocular eyepiece,template eyepieceare also available.MH20 probe head and TP20probeStylusCF20ProbesHard probesMeasurLink ®STATMeasure PLUS© 2004 Mitutoyo America Corporation, Aurora IL We reserve the right to change specifications and prices without notice.1004-06 • Printed in USA • October 2004。

Imagine... smooth frozen sections with optimal disinfection Tissue-Tek® Cryo3® Flex Microtome/CryostatEFFORTLESSLY OBTAIN FROZEN SECTIONS FASTER WITH THE NEW CRYO3® FLEXThe Tissue-Tek® Cryo3® Flex is the 3rd generation of the trustedCryo3platform for fast sectioning of frozen tissue specimens. This cryostat is equipped with new, innovative features designed to get complete sections faster and to preserve valuable tissue.All required configurationsThe Tissue-Tek Cryo3Flex is available in three configurations, to meet every laboratories needs and budget demands. The range starts with the Basic, the cryostat with manual microtome. The second model is equipped with automated disinfection and the third model offers a combination of automated sectioning and a motorised microtome. No matter which model you choose, you will benefit from time-tested methods, operator simplicity, minimal maintenance and of course renowned Sakura Tissue-Tek reliability.Faster sectioningOf the new features, the most important is the fine angle adjustment of the 3D Precision Chuck on all 3 axes. It uniquely ensures accurate alignment of the block face to the blade, reduces users’ trimming time and preserves patients’ specimens. Furthermore, the sturdy chuck retains its position when locked and unlocked, eliminating any time and effort spent realigning the cutting angle.Innovative ozone disinfectionProtect yourself from pathogens with an unprecedented disinfection. TheTissue-Tek Cryo3Flex D and DM-models are equipped with two ozone generating lamps, which significantly shorten the short disinfection cycle to 45 minutes only. Ozone engulfs the entire chamber, notonly light exposed areas. Precise adjustment of face angle.Precise and reliable performanceThe maintenance-free microtome is located outside the chamber. This provides space for 12 Cryobar® specimen positions, including 4 Cryo+® positions that enable rapid cooling up to -50°C.Menu-driven, user- friendly controls are available via the colour touch screen. It provides a clear view on settings like chamber temperature, specimen and trim thickness and speed.Adjustments can be made in an improved and more intuitive manner. Equipped with the new anti-roll rake and anti-roll plate, specimen transfer to the slide is further simplified, increasing ease of use, especially for the less experienced.Dynamic debris removal systemThis vacuum system offers practical and easy removal of excess debris and O.C.T.™ Compound shavings. Unwanted sections can be swept into the vacuum head during sectioning, keeping the chamber clean. The attachment hose vacuums away debris inside the chamber. Eventually debris is collected in a bacterial/viral filter located under the multipurposeutility tray.By offering a total solution for cryotomy, SakuraFinetek makes your laboratories ready to deliverstandardised, superior quality results.Sakura Finetek is the innovative company inhistopathology, continuously looking forpossibilities to improve laboratories andsucceeds to meet present and future standardsin the histopathology laboratories around theworld.New Anti-Roll Rake.Sakura Finetek Cryo programEnhance the cryotomy process with the new Cryo 3 Flex combined with accessories and consumables, providing a total solution to quickly create a diagnosable slide of the highest quality.With our complete line of accessories you are able to fine tune the Tissue-Tek Cryo 3 Flex to perfectly suit your needs.PRODUCT RANGEBR-EU Cryo3 Flex 2018 v1Item code 620362046205Item code 621162105807 - 5809581958206213 + 6214Related productsTissue-Tek ® O.C.T. Compound; 12/cs Low Profile Cryo Sectioning Blades AutoWrite ® Adhesive SlidesRound Cryomold ® Standard ø 23 mm Round Cryomold ® Biopsy ø 15 mm Cryomold ® Standard; 25 x 20x 5 mm Cryomold ® Biopsy; 15 mm Cryomold ® Biopsy; 15 mm Manual Slide Staining setVisionTek ® Digital MicroscopeDescriptionCryo 3® Flex Cryostat, Basic Cryo 3® Flex Cryostat, Disinfection Cryo 3® Flex Cryostat, D. MotorizedKey accessoiries Anti-Roll Rake Assembly Anti-Roll Plate AssemblySpecimen Holders, Small, Medium, Large Cryobar ® Insert, 4-CavityCryobar ® Insert, 4-Post Utility TraysPlease visit our website sakura.euSakura Finetek Europe B.V., Flemingweg 10a, 2408 AV Alphen aan den Rijn P.O. Box 362, 2400 AJ Alphen aan den Rijn, The NetherlandsConsumables and related productsTissue-Tek ® O.C.T.™ Compound cryo embedding medium provides the most convenient specimen matrix for cryostat sectioning at -5°C and below.Accu-Edge ® Low-Profile Cryo section blades are recommended for optimal section results. These are made of carbon steel, resistant to high humidity circumstances.Besides this, you can choose our slides andcryo-molds to help you obtain consistent sections in the most reliable way.Item code 4583481095974728473045574565456644519002。