Bootstrap实战教程
- 格式:pdf
- 大小:2.62 MB
- 文档页数:20
一、概述Bootstrap是一个用于快速开发响应式网页的前端框架,其具有易用性和功能丰富的特点,广泛应用于各种网页开发中。
本文将介绍Bootstrap的基础教程以及相关案例代码,帮助读者快速掌握Bootstrap的使用方法。
二、Bootstrap基础教程1. 栅格系统Bootstrap基于12列的栅格系统,可以轻松实现页面布局。
以下是一个简单的例子:```html<div class="cont本人ner"><div class="row"><div class="col-md-4">.col-md-4</div><div class="col-md-4">.col-md-4</div><div class="col-md-4">.col-md-4</div></div></div>```在这个例子中,页面被分成了三列,每一列占据了页面宽度的1/3。
2. 响应式工具类Bootstrap提供了一系列的响应式工具类,可以根据不同的屏幕尺寸来显示或隐藏元素。
要在小屏幕设备上隐藏一个元素,可以使用`d-none d-sm-block`类:```html<div class="d-none d-sm-block">在小屏幕设备上隐藏该元素</div>```3. 按钮Bootstrap提供了丰富的按钮样式,可以轻松地创建不同风格的按钮。
以下是一个简单的例子:```html<button type="button" class="btn btn-primary">Primary按钮</button><button type="button" class="btn btn-secondary">Secondary按钮</button>```4. 表格使用Bootstrap可以轻松创建各种样式的表格。
BootStrap⼊门教程(⼀)之可视化布局HTML模板:<!DOCTYPE html><html><head><title>Bootstrap 模板</title><meta name="viewport" content="width=device-width, initial-scale=1.0"><!-- 引⼊ Bootstrap --><link href="/libs/bootstrap/3.3.7/css/bootstrap.min.css" rel="stylesheet"><!-- HTML5 Shim 和 Respond.js ⽤于让 IE8 ⽀持 HTML5元素和媒体查询 --><!-- 注意:如果通过 file:// 引⼊ Respond.js ⽂件,则该⽂件⽆法起效果 --><!--[if lt IE 9]><script src="https:///libs/html5shiv/3.7.0/html5shiv.js"></script><script src="https:///libs/respond.js/1.3.0/respond.min.js"></script><![endif]--></head><body><h1>Hello, world!</h1><!-- jQuery (Bootstrap 的 JavaScript 插件需要引⼊ jQuery) --><script src="https:///jquery.js"></script><!-- 包括所有已编译的插件 --><script src="js/bootstrap.min.js"></script></body></html> 在这⾥,您可以看到包含了 jquery.js、bootstrap.min.js 和 bootstrap.min.css ⽂件,⽤于让⼀个常规的 HTML ⽂件变为使⽤了 Bootstrap 的模板。


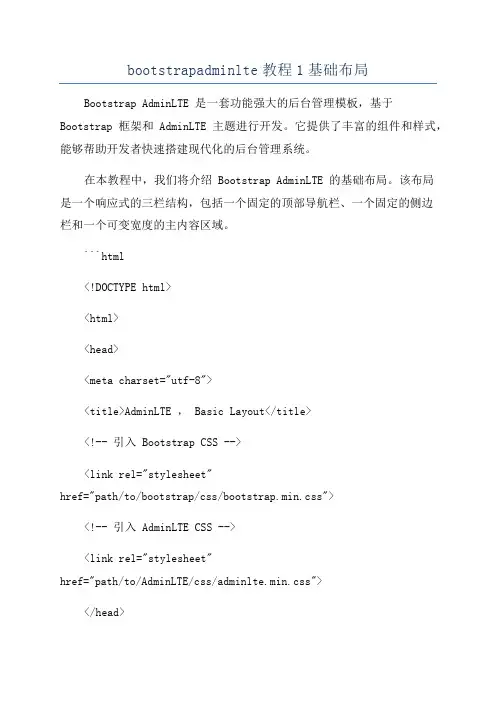
bootstrapadminlte教程1基础布局Bootstrap AdminLTE 是一套功能强大的后台管理模板,基于Bootstrap 框架和 AdminLTE 主题进行开发。
它提供了丰富的组件和样式,能够帮助开发者快速搭建现代化的后台管理系统。
在本教程中,我们将介绍 Bootstrap AdminLTE 的基础布局。
该布局是一个响应式的三栏结构,包括一个固定的顶部导航栏、一个固定的侧边栏和一个可变宽度的主内容区域。
```html<!DOCTYPE html><html><head><meta charset="utf-8"><title>AdminLTE , Basic Layout</title><!-- 引入 Bootstrap CSS --><link rel="stylesheet"href="path/to/bootstrap/css/bootstrap.min.css"><!-- 引入 AdminLTE CSS --><link rel="stylesheet"href="path/to/AdminLTE/css/adminlte.min.css"></head><!--你的页面内容--><!-- 引入 jQuery 和 Bootstrap JavaScript --><script src="path/to/jquery/jquery.min.js"></script><script src="path/to/bootstrap/js/bootstrap.min.js"></script> <!-- 引入 AdminLTE JavaScript --><script src="path/to/AdminLTE/js/adminlte.min.js"></script></body></html>```上面的代码中,我们引入了 Bootstrap CSS、AdminLTE CSS、jQuery、Bootstrap JavaScript 和 AdminLTE JavaScript。
bootstrapadminlte教程1:基础布局⼀、下载adminlte官⽹:https:///github:https:///almasaeed2010/AdminLTE/⼆、引⽤的基本解说1、meta没的说2、引⼊bootstrap3、引⼊字体库,肯定⽤得到,下载到本地放在plugins下也可以4、adminLTE⼦什么的⽂件肯定需要5、⽪肤skin,可以引⼊_all...,但是如果只需要⼀个⽪肤的话,⽐如只需要蓝⾊,直接引⼊skin-blue就⾏,毕竟越简越好6、兼容IE8的两个js⽂件7、jquery没的说8、fastclick,触摸设备快速点击体验,不想兼容⼿机可以去掉9、slimscroll,菜单和页⾯中的滚动条样式,放上去毕竟好看嘛。
(看⼀下不加的效果,不好看吧)下⾯是引⽤的原代码,可是⽤starter.htm中查看,对应上⾯的进⾏查看<head><meta charset="utf-8"><meta http-equiv="X-UA-Compatible" content="IE=edge"><title>AdminLTE 2 | Starter</title><!-- Tell the browser to be responsive to screen width --><meta content="width=device-width, initial-scale=1, maximum-scale=1, user-scalable=no" name="viewport"><!-- Bootstrap 3.3.6 --><link rel="stylesheet" href="bootstrap/css/bootstrap.min.css"><!-- Font Awesome --><link rel="stylesheet" href="https:///ajax/libs/font-awesome/4.5.0/css/font-awesome.min.css"><!-- Ionicons --><link rel="stylesheet" href="https:///ajax/libs/ionicons/2.0.1/css/ionicons.min.css"><!-- Theme style --><link rel="stylesheet" href="dist/css/AdminLTE.min.css"><!-- AdminLTE Skins. We have chosen the skin-blue for this starterpage. However, you can choose any other skin. Make sure youapply the skin class to the body tag so the changes take effect.--><link rel="stylesheet" href="dist/css/skins/skin-blue.min.css"><!-- HTML5 Shim and Respond.js IE8 support of HTML5 elements and media queries --><!-- WARNING: Respond.js doesn't work if you view the page via file:// --><!--[if lt IE 9]><script src="https:///html5shiv/3.7.3/html5shiv.min.js"></script><script src="https:///respond/1.4.2/respond.min.js"></script><![endif]--></head>⼆。
bootstrap代码实例Bootstrap是一款开源的前端框架,它能够帮助开发者快速构建网站和应用程序,提供了响应式布局、常用元素和组件等功能,使网页的开发变得更加简单、高效。
本文将介绍Bootstrap的一些常用代码示例,帮助读者更好地了解其用法和效果。
首先,我们来看一下如何创建一个基本的网页结构。
在HTML文件的头部引用Bootstrap的CSS文件和JavaScript文件,这样就可以使用Bootstrap的样式和功能了。
然后,在body部分编写网页的内容。
可以使用容器(container)来包裹内容,使用行(row)来创建一行,使用列(column)来分割一行。
例如,下面的代码将创建一个包含两列的网格布局:```<div class="container"><div class="row"><div class="col-md-6"><p>左侧列</p></div><div class="col-md-6"><p>右侧列</p></div></div></div>```接下来,我们可以使用Bootstrap的样式来美化表单元素。
Bootstrap提供了多种样式的表单控件,例如文本框、下拉菜单、单选框和复选框等。
只需要添加相应的class即可。
例如,下面的代码将创建一个带有文本框和按钮的搜索表单:```<form><div class="form-group"><input type="text" class="form-control" placeholder="搜索"></div><button type="submit" class="btn btn-primary">提交</button> </form>```除了表单元素,Bootstrap还提供了多种常用组件,例如导航栏、标签页和按钮组等。
Bootstrap Aboutthe T utorialTw i tter Bootstrap i s the most popu l ar front end framework i n the recent t i me. It i s s l eek,i ntu i t i ve, and powerfu l mob il e f i rst front-end framework for faster and eas i er web deve l opment. It uses HTML, CSS and Javascr i pt.Th i s tutor i a l w ill teach you the bas i cs of Bootstrap Framework us i ng wh i ch you can create web projects w i th ease. The tutor i a l i s d i v i ded i nto sect i ons such as BootstrapBas i c Structure, Bootstrap CSS, Bootstrap Layout Components and Bootstrap P l ug i ns. Each of these sect i ons conta i n re l ated top i cs w i th s i mp l e and usefu l examp l es.AudienceTh i s tutor i a l has been prepared for anyone who has a bas i c know l edge of HTML and CSSand has an urge to deve l op webs i tes. After comp l et i ng th i s tutor i a l you w ill f i nd yourse l fat a moderate l eve l of expert i se i n deve l op i ng web projects us i ng Tw i tter Bootstrap. PrerequisitesBefore you start proceed i ng w i th th i s tutor i a l, we are assum i ng that you are a l ready aware about the bas i cs of HTML and CSS. If you are not we ll aware of these concepts,then we w ill suggest you to go through our short tutor i a l on HTML Tutor i a l and CSS Tutor i a l.Copyright&DisclaimerCopyr i ght 2014 by Tutor i a l s Po i nt (I) Pvt. Ltd.A ll the content and graph i cs pub li shed i n th i s e-book are the property of Tutor i a l s Po i nt(I) Pvt. Ltd. The user of th i s e-book i s proh i b i ted to reuse, reta i n, copy, d i str i bute or repub li sh any contents or a part of contents of th i s e-book i n any manner w i thout wr i tten consent of the pub li sher.We str i ve to update the contents of our webs i te and tutor i a l s as t i me l y and as prec i se l yas poss i b l e, however, the contents may conta i n i naccurac i es or errors. Tutor i a l s Po i nt (I) Pvt. Ltd. prov i des no guarantee regard i ng the accuracy, t i me li ness or comp l eteness ofour webs i te or i ts contents i nc l ud i ng th i s tutor i a l. If you d i scover any errors on our webs i te or i n th i s tutor i a l, p l ease not i fy us at **************************iT able ofContentsAbout the Tuto r ial (i)Audien c e (i)P r e r equisites (i)Copy r ight&Dis c laime r (i)Table o f Contents (ii)1. BOOTSTRAP ─ OVERVIEW (1)2. BOOTSTRAP ─ ENVIRONMENT SETUP (3)Download Bootst r ap (3)File st r u c tu r e (3)HTML Template (4)3. BOOTSTRAP ─ GRID SYSTEM (6)What is a G r id? (6)What is Bootst r ap G r id System? (6)Wo r king o f Bootst r ap G r id System (6)Media Que r ies (7)G r id Options (8)Responsive Column Resets (14)O ff set Columns (15)Nesting Columns (16)Column O r de r ing (17)4. BOOTSTRAP ─ CSS OVERVIEW (19)HTML5do c type (19)Mobile Fi r st (19)Responsive Images (20)Typog r aphy and Links (20)No r mali z e (20)Containe r s (20)5. BOOTSTRAP ─ TYPOGRAPHY (22)Headings (22)Lead Body Copy (23)Emphasis (23)Abb r eviations (24)Add r esses (24)Blo c kquotes (25)Lists (26)6. BOOTSTRAP ─ CODE (29)7. BOOTSTRAP ─ TABLES (30)Basi c Table (30)Optional Table Classes (31)Conte x tual c lasses (35)Responsive tables (37)8. BOOTSTRAP ─ FORMS (39)Fo r m Layout (39)Suppo r ted Fo r m Cont r ols (42)Stati c Cont r ol (45)Fo r m Cont r ol States (46)Fo r m Cont r ol Si z ing (49)Help Te x t (50)iii9. BOOTSTRAP ─ BUTTONS (51)Button Si z e (52)Button State (54)Button Tags (57)10. BOOTSTRAP ─ IMAGES (58)11. BOOTSTRAP ─ HELPER CLASSES (59)Close i c on (59)Ca r ets (59)Qui c k Floats (59)Cente r Content Blo c ks (60)Clea rf i x (60)Showing and Hiding Content (61)S cr een Reade r Content (61)12. BOOTSTRAP ─ RESPONSIVE UTILITIES (62)P r int Classes (62)13. BOOTSTRAP ─ GLYPHICONS (64)What a r e Glyphi c ons? (64)Whe r e to f ind Glyphi c ons? (64)Usage (64)14. BOOTSTRAP ─ DROPDOWNS (66)Options (67)15. BOOTSTRAP ─ BUTTON GROUPS (70)Basi c Button G r oup (71)Button Toolba r (71)Button Si z e (72)Nesting (72)Ve r ti c al Buttong r oup (73)16. BOOTSTRAP ─ BUTTON DROPDOWNS (75)Split Button D r opdowns (76)Button D r opdown Si z e (77)D r opup Va r iation (78)17. BOOTSTRAP ─ INPUT GROUPS (80)Basi c Input G r oup (80)Input G r oup Si z ing (81)Che c kbo x es and Radio Addons (82)Button Addons (83)Buttons with D r opdowns (84)Segmented Buttons (85)18. BOOTSTRAP ─ NAVIGATION ELEMENTS (88)Tabula r Navigation o r Tabs (88)Pills Navigation (88)Justi f ied Nav (90)Disabled Links (90)D r opdowns (91)19. BOOTSTRAP ─ NAVBAR (94)De f ault Navba r (94)Responsive Navba r (95)Fo r ms in Navba r (96)Buttons in Navba r (97)Te x t in Navba r (98)Non-nav Links (98)vComponent Alignment (99)Fi x ed to Top (101)Fi x ed to Bottom (102)Stati c Top (103)Inve r ted Navba r (104)20. BOOTSTRAP ─ BREADCRUMB (106)21. BOOTSTRAP ─ PAGINATION (107)Pagination (107)Page r (110)22. BOOTSTRAP ─ LABELS (112)23. BOOTSTRAP ─ BADGES (113)A c tive Nav States (113)24. BOOTSTRAP ─ JUMBOTRON (115)25. BOOTSTRAP ─ PAGE HEADER (117)26. BOOTSTRAP ─ THUMBNAILS (118)Adding Custom Content (119)27. BOOTSTRAP ─ ALERTS (122)Dismissal Ale r ts (122)Links in Ale r ts (124)28. BOOTSTRAP ─ PROGRESS BARS (125)De f ault P r og r ess Ba r (125)Alte r nate P r og r ess Ba r (125)St r iped P r og r ess Ba r (127)Animated P r og r ess Ba r (128)Sta c ked P r og r ess Ba r (128)29. BOOTSTRAP ─ MEDIA OBJECT (130)30. BOOTSTRAP ─ LIST GROUP (135)Adding Badges to List G r oup (135)Linking List G r oup Items (136)Add Custom Content to List G r oup (137)31. BOOTSTRAP ─ PANELS (139)Panel with Heading (139)Panel with Foote r (140)Panel Conte x tual Alte r natives (141)Panel with Tables (142)Panel with Listg r oups (143)32. BOOTSTRAP ─ WELLS (145)Si z ing (145)33. BOOTSTRAP ─ PLUGINS OVERVIEW (146)Data Att r ibutes (146)P r og r ammati c API (146)No Con f li c t (147)Events (147)34. BOOTSTRAP ─ TRANSITION PLUGIN (148)Use Cases (148)35. BOOTSTRAP ─ MODAL PLUGIN (149)Usage (149)Options (151)Methods (152)Events (154)36. BOOTSTRAP ─ DROPDOWN PLUGIN (157)Usage (157)Options (159)Methods (160)37. BOOTSTRAP ─ SCROLLSPY PLUGIN (162)Usage (162)Options (164)Methods (165)Events (168)38. BOOTSTRAP ─ TAB PLUGIN (172)Usage (172)Fade E ff e c t (173)Methods (174)Events (177)39. BOOTSTRAP ─ TOOLTIP PLUGIN (180)Usage (180)Options (182)Methods (183)Events (185)40. BOOTSTRAP ─ POPOVER PLUGIN (187)Usage (187)Options (188)Methods (190)Events (192)41. BOOTSTRAP ─ ALERT PLUGIN (194)Usage (194)Options (195)Methods (195)Events (196)42. BOOTSTRAP ─ BUTTON PLUGIN (198)Loading State (198)Single Toggle (199)Che c kbo x (199)Radio (200)Usage (200)Options (200)Methods (200)43. BOOTSTRAP ─ COLLAPSE PLUGIN (204)Usage (206)Options (207)Methods (207)Events (210)44. BOOTSTRAP ─ CAROUSEL PLUGIN (213)Optional Captions (214)Usage (215)Options (216)Methods (216)Events (219)Bootstrap45. BOOTSTRAP ─ AFFIX PLUGIN (222)Usage (222)Positioning via CSS (228)Options (229)xWhat is Twitter Bootstrap?Bootstrap i s a s l eek, i ntu i t i ve, and powerfu l, mob il e f i rst front-end framework for fasterand eas i er web deve l opment. It uses HTML, CSS, and Javascr i pt.Bootstrap was deve l oped by Mark Otto and Jacob Thornton at Tw i tter. It was re l eased asan open source product i n August 2011 on G i tHub.Why Use Bootstrap?∙Mobile first approach: Bootstrap 3 framework cons i sts of Mob il e f i rst sty l es throughout the ent i re li brary i nstead of them i n separate f il es.∙Browser Support: It i s supported by a ll popu l ar browsers.∙Easy to get started: W i th just the know l edge of HTML and CSS anyone can get started w i th Bootstrap. A l so the Bootstrap off i c i a l s i te has a good documentat i on.∙Responsive design: Bootstrap's respons i ve CSS adjusts to Desktops, Tab l ets and Mob il es. More about the respons i ve des i gn i s i n the chapter BootstrapResponsive Design.∙Prov i des a c l ean and un i form so l ut i on for bu il d i ng an i nterface for deve l opers.∙It conta i ns beaut i fu l and funct i ona l bu il t-i n components wh i ch are easy to custom i ze.∙It a l so prov i des web-based custom i zat i on.∙And best of a ll i t i s an open source.1BootstrapWhat Bootstrap Package Includes?∙Scaffolding: Bootstrap prov i des a bas i c structure w i th Gr i d System, li nk sty l es, and background. Th i s i s covered i n deta il i n the sect i on BootstrapBasic Structure.∙CSS: Bootstrap comes w i th the feature of g l oba l CSS sett i ngs, fundamenta l HTML e l ements sty l ed and enhanced w i th extens i b l e c l asses, and anadvanced gr i d system. Th i s i s covered i n deta il i n the sect i on Bootstrap withCSS.∙Components: Bootstrap conta i ns over a dozen reusab l e components bu il t to prov i de i conography, dropdowns, nav i gat i on, a l erts, pop-overs, and muchmore. Th i s i s covered i n deta il i n the sect i on Layout Components.∙JavaScript Plugins: Bootstrap conta i ns over a dozen custom jQuery p l ug i ns.You can eas il y i nc l ude them a ll, or one by one. Th i s i s covered i n deta il s i n thesect i on Bootstrap Plugins.∙Customize: You can custom i ze Bootstrap's components, LESS var i ab l es, and jQuery p l ug i ns to get your very own vers i on.22.Bootstrap─Environment SetupIt i s very easy to setup and start us i ng Bootstrap. Th i s chapter w ill exp l a i n how to down l oad and setup Bootstrap. We w ill a l so d i scuss the Bootstrap f il e structure, and demonstrate i ts usage w i th an examp l e.DownloadBootstrapYou can down l oad the l atest vers i on of Bootstrap from /. Whenyou c li ck on th i s li nk, you w ill get to see a screen as be l ow:Here you can see two buttons:∙ Down l oad Bootstrap: C li ck i ng th i s, you can down l oad the precomp il edand m i n i f i ed vers i ons of Bootstrap CSS, JavaScr i pt, and fonts. No documentat i on oror i g i na l source code f il es are i nc l uded.∙ Down l oad Source: C li ck i ng th i s, you can get the l atest Bootstrap LESSand JavaScr i pt source code d i rect l y from G i tHub.If you work w i th Bootstrap's uncomp il ed source code, you need to comp il e the LESS f il esto produce usab l e CSS f il es. For comp ili ng LESS f il es i nto CSS, Bootstrap off i c i a ll y supports on l y Recess, wh i ch i s Tw i tter's CSS h i nter based on l ess.js.For better understand i ng and ease of use, we sha ll use precomp il ed vers i on of Bootstrap throughout the tutor i a l. As the f il es are comp li ed and m i n i f i ed, you don't have to bother every t i me i nc l ud i ng separate f il es for i nd i v i dua l funct i ona li ty. At the t i me of wr i t i ng th i stutor i a l the l atest vers i on (Bootstrap 3) was down l oaded.File structurePrecompiled BootstrapOnce the comp il ed vers i on Bootstrap i s down l oaded, extract the ZIP f il e, and you w ill seethe fo ll ow i ng f il e/d i rectory structure:3As you can see, there are comp il ed CSS and JS (bootstrap.*), as we ll as comp il ed and m i n i f i ed CSS and JS (bootstrap.m i n.*). Fonts from G l yph i cons are i nc l uded, as i t i s the opt i ona l Bootstrap theme.Bootstrap Source CodeIf you have down l oaded the Bootstrap source code then the f il e structure wou l d be as fo ll ows:∙The f il es under l ess/, js/, and fonts/ are the source code for Bootstrap CSS, JS, and i con fonts (respect i ve l y).∙The d i st/ fo l der i nc l udes everyth i ng li sted i n the precomp il ed down l oad sect i on above.∙docs-assets/, examp l es/, and a ll*.htm l f il es are Bootstrap documentat i on. HTMLT emplateA bas i c HTML temp l ate us i ng Bootstrap wou l d l ook li ke th i s:<!DOCTYPE html><html><head><title>Bootstrap 101 Template</title><meta name="viewport" content="width=device-width, initial-scale=1.0"><!-- Bootstrap --><link href="css/bootstrap.min.css" rel="stylesheet"><!-- HTML5 Shim and Respond.js IE8 support of HTML5 elements and media queries--><!-- WARNING: Respond.js doesn't work if you view the pagevia file:// --><!--[if lt IE 9]><script src="https:///libs/html5shiv/3.7.0/html5shiv.js"></script><script src="https:///libs/respond.js/1.3.0/respond.min.js"></script><![endif]--></head><body><h1>Hello, world!</h1><!-- jQuery (necessary for Bootstrap's JavaScript plugins) --><script src="https:///jquery.js"></script><!-- Include all compiled plugins (below), or include individual files as needed--><script src="js/bootstrap.min.js"></script></body></html>Here you can see the jquery.js,bootstrap.min.js and bootstrap.min.css f il es thatare i nc l uded to make a norma l HTM f il e to the Bootstrapped Temp l ate. Just make sure toi nc l ude jQuery li brary before you i nc l ude Bootstrap li brary.More deta il s about each of the e l ements i n th i s above p i ece of code w ill be d i scussed i nthe chapter Bootstrap CSS Overv i ew.Th i s temp l ate structure i s a l ready i nc l uded as part of the Try it(on li ne comp il er) too l. Hence i n a ll the examp l es (i n the fo ll ow i ng chapters) of th i s tutor i a l you w ill on l y see the contents of the <body> e l ement. Once you c li ck on the Try it opt i on ava il ab l e at the topr i ght corner of examp l e, and you w ill see the ent i re code.ExampleNow l et's try an examp l e us i ng the above temp l ate. Try the fo ll ow i ng examp l e us i ng Tryi t opt i on ava il ab l e at the top r i ght corner of the be l ow samp l e code box on our webs i te:<h1>Hello, world!</h1>In a ll the subsequent chapters we have used dummy text from the s i te http://www.li /.5In th i s chapter, we sha ll d i scuss the Bootstrap Gr i d System.Whatis a Grid?As put by W i kiped i a:In graph i c des i gn, a gr i d i s a structure (usua ll y two-d i mens i ona l) made up of a ser i es ofi ntersect i ng stra i ght (vert i ca l, hor i zonta l) li nes used to structure the content. It i s w i de l y used to des i gn l ayout and content structure i n pr i nt des i gn. In web des i gn, i t i s a very effect i ve method to create a cons i stent l ayout rap i d l y and effect i ve l y us i ng HTML and CSS.To put i n s i mp l e words, gr i ds i n web des i gn organ i ze and structure content, makes the webs i tes easy to scan and reduces the cogn i t i ve l oad on users.Whatis Bootstrap Grid System?As put by the off i c i a l documentat i on of Bootstrap for gr i d system:Bootstrap i nc l udes a respons i ve, mob il e f i rst f l u i d gr i d system that appropr i ate l y sca l esup to 12 co l umns as the dev i ce or v i ewport s i ze i ncreases. It i nc l udes predef i ned c l assesfor easy l ayout opt i ons, as we ll as powerfu l m i x i ns for generat i ng more semant i c l ayouts.Let us understand the above statement. Bootstrap 3 i s mob il e f i rst i n the sense that the code for Bootstrap now starts by target i ng sma ll er screens li ke mob il e dev i ces, tab l ets, and th en “expand s” components and gr i ds for l arger screens such as l aptops, desktops.Mobile First Strategy∙Contento Determ i ne what i s most i mportant.∙Layouto Des i gn to sma ll er w i dths f i rst.o Base CSS address mob il e dev i ce f i rst; med i a quer i es address for tab l et,desktops.∙Progressive Enhancemento Add e l ements as screen s i ze i ncreases.Working ofBootstrap GridSystemGr i d systems are used for creat i ng page l ayouts through a ser i es of rows and co l umns that house your content. Here's how the Bootstrap gr i d system works:∙ Rows must be p l aced w i th i n a .container c l ass for proper a li gnment and padd i ng.∙ Use rows to create hor i zonta l groups of co l umns. 6∙Content shou l d be p l aced w i th i n the co l umns, and on l y co l umns may be thei mmed i ate ch il dren of rows.∙Predef i ned gr i d c l asses li ke .row and.col-xs-4 are ava il ab l e for qu i ck l y mak i ng gr i d l ayouts. LESS m i x i ns can a l so be used for more semant i c l ayouts.∙Co l umns create gutters (gaps between co l umn content) v i a padd i ng. That padd i ng i s offset i n rows for the f i rst and the l ast co l umn v i a negat i ve marg i non .rows.∙Gr i d co l umns are created by spec i fy i ng the number of twe l ve ava il ab l e co l umns you w i sh to span. For examp l e, three equa l co l umns wou l d use three .col-xs-4.Media QueriesMed i a query i s a rea ll y fancy term for "cond i t i ona l CSS ru l e". It s i mp l y app li es some CSS, based on certa i n cond i t i ons set forth. If those cond i t i ons are met, the sty l e i sapp li ed.Med i a Quer i es i n Bootstrap a ll ow you to move, show and h i de content based on thev i ewport s i ze. Fo ll ow i ng med i a quer i es are used i n LESS f il es to create the key breakpo i nts i n the Bootstrap gr i d system./* Extra small devices (phones, less than 768px) *//* No media query since this is the default in Bootstrap *//* Small devices (tablets, 768px and up) */@media (min-width: @screen-sm-min) { ... }/* Medium devices (desktops, 992px and up) */@media (min-width: @screen-md-min) { ... }/* Large devices (large desktops, 1200px and up) */@media (min-width: @screen-lg-min) { ... }Occas i ona ll y these are expanded to i nc l ude a max-w i dth to li m i t CSS to a narrower setof dev i ces.@media (max-width: @screen-xs-max) { ... }@media (min-width: @screen-sm-min) and (max-width: @screen-sm-max) { ... }@media (min-width: @screen-md-min) and (max-width: @screen-md-max) { ... }@media (min-width: @screen-lg-min) { ... }Med i a quer i es have two parts, a dev i ce spec i f i cat i on and then a s i ze ru l e. In the above case, the fo ll ow i ng ru l e i s set:7Let us cons i der th i s li ne:@media (min-width: @screen-sm-min) and (max-width: @screen-sm-max) { ... }For a ll dev i ces no matter what k i nd w i th m i n-w i dth:@screen-sm-m i n,i f the w i dth of the screen gets sma ll er than @screen-sm-max, then do someth i ng.Grid OptionsThe fo ll ow i ng tab l e summar i zes aspects of how Bootstrap gr i d system works across mu l t i p l e dev i ces:Extra small devices Phones (<768px) Small devicesTablets(≥768px)MediumdevicesDesktops(≥992px)Large devicesDesktops(≥1200px)Gr i d behav i or Hor i zonta l ata ll t i mesCo ll apsed tostart, hor i zonta labovebreakpo i ntsCo ll apsed tostart, hor i zonta labovebreakpo i ntsCo ll apsed tostart, hor i zonta labovebreakpo i ntsMaxconta i nerw i dthNone (auto) 750px 970px 1170pxC l asspref i x .col-xs- .col-sm- .col-md- .col-lg-# ofco l umns 12 12 12 12Maxco l umnw i dthAuto 60px 78px 95pxGutter w i dth 30px(15px on eachs i de of aco l umn)30px(15px on eachs i de of aco l umn)30px(15px on eachs i de of aco l umn)30px(15px on each s i deof a co l umn)Nestab l e Yes Yes Yes YesOffsets Yes Yes Yes Yes8Bootstrap Co l umnorder i ng Yes Yes Yes YesBasic Grid StructureFo ll ow i ng i s bas i c structure of Bootstrap gr i d:<div class="container"><div class="row"><div class="col-*-*"></div><div class="col-*-*"></div></div><div class="row">...</div></div><div class="container">....Let us see some s i mp l e gr i d examp l es:Example:Stacked-to-horizontalLet us see a s i mp l e gr i d examp l e w i th s i mp l e l ayout: two co l umns, two paragraphs perco l umn. (Here sty li ng for each co l umn i s used. You can avo i d i t.)<div class="container"><h1>Hello, world!</h1><div class="row"><div class="col-md-6" style="background-color: #dedef8; box-shadow:inset 1px -1px 1px #444, inset -1px 1px 1px #444;"><p>Lorem ipsum dolor sit amet, consectetur adipisicing elit, sed doeiusmod tempor incididunt ut labore et dolore magna aliqua. Utenim ad minim veniam, quis nostrud exercitation ullamco laborisnisi ut aliquip ex ea commodo consequat.</p><p>Sed ut perspiciatis unde omnis iste natus error sit voluptatemaccusantium doloremque laudantium, totam rem aperiam, eaque ipsaquae ab illo inventore veritatis et quasi architecto beataevitae dicta sunt explicabo.</p>9</div><div class="col-md-6" style="background-color: #dedef8;box-shadow:inset 1px -1px 1px #444, inset -1px 1px 1px #444;"><p>Sed ut perspiciatis unde omnis iste natus error sit voluptatemaccusantium doloremque laudantium.</p><p> Neque porro quisquam est, qui dolorem ipsum quia dolor sitamet, consectetur, adipisci velit, sed quia non numquam eiusmodi tempora incidunt ut labore et dolore magnam aliquam quaeratvoluptatem.</p></div></div>Details∙<div class="container">...</div> e l ement i s added to ensure proper center i ng and max i mum w i dth for l ayout.∙Once conta i ner i s added, next you need to th i nk i n terms of rows. Add <div class="row">...</div> and co l umns <div class="col-md-6"></div>i ns i dethe rows.∙Every row i n the gr i d i s made up of 12 un i ts and you can def i ne the des i red s i ze of your co l umns us i ng those un i ts. In our examp l e we have two co l umns eachmade of 6 un i ts w i de i.e 6+6=12.You can try some more opt i ons li ke:<d i v c l ass="co l-md-3"></d i v> and <d i v c l ass="co l-md-9"></d i v>or <d i v c l ass="co l-md-7"></d i v> and <d i v c l ass="co l-md-5"></d i v>.Exper i ment and make sure that the sum a l ways needs to be 12.10Example:Medium and Large DeviceWe have seen the bas i c gr i d system i n ‘Examp l e: Stacked-to-hor i zonta l’. Here we have used 2 d i vs and gave them the 50%/50% sp li t at the med i um v i ewport w i dth:<div class="col-md-6">....</div><div class="col-md-6">....</div>But at l arge, your des i gn cou l d rea ll y be better as a 33%/66%. So what we’re go i ng todo i s, set i t up to change the co l umn w i dths at the breakpo i nt:<div class="col-md-6 col-lg-4">....</div><div class="col-md-6 col-lg-4">....</div>Now Bootstrap i s go i ng to say “at the med i um s i ze, I l ook at c l asses w i th md i n themand use those. At the l arge s i ze, I l ook at c l asses w i th the word lg i n them and use those. In th i s case, our 2 d i vs w ill go from a 50%/50% sp li t and then up to a 33%/66%. Check i t out i n the fo ll ow i ng examp l e. (Here sty li ng for each co l umn i s used. You canavo i d i t.)<div class="container"><h1>Hello, world!</h1><div class="row"><div class="col-md-6 col-lg-4" style="background-color: #dedef8;box-shadow: inset 1px -1px 1px #444, inset -1px 1px 1px #444;"><p>Lorem ipsum dolor sit amet, consectetur adipisicing elit, sed doeiusmod tempor incididunt ut labore et dolore magna aliqua. Utenim ad minim veniam, quis nostrud exercitation ullamco laborisnisi ut aliquip ex ea commodo consequat.</p><p>Sed ut perspiciatis unde omnis iste natus error sit voluptatemaccusantium doloremque laudantium, totam rem aperiam, eaque ipsaquae ab illo inventore veritatis et quasi architecto beataevitae dicta sunt explicabo.</p></div><div class="col-md-6 col-lg-8"" style="background-color: #dedef8;box-shadow: inset 1px -1px 1px #444, inset -1px 1px 1px #444;">11<p>Sed ut perspiciatis unde omnis iste natus error sit voluptatemaccusantium doloremque laudantium.</p><p> Neque porro quisquam est, qui dolorem ipsum quia dolor sitamet, consectetur, adipisci velit, sed quia non numquam eiusmodi tempora incidunt ut labore et dolore magnam aliquam quaeratvoluptatem.</p></div></div>Example:Mobile,tablet,desktopsWe have seen an examp l e for Med i um and Large Dev i ce. Now l et us take i t to anotherl eve l, where we wou l d want to change i t for the extra sma ll phone s i ze as we ll. Say wewant to add the opt i on for the co l umns to be sp li t 75%/25% for tab l ets, we go li ke th i s:<div class="col-sm-3 col-md-6 col-lg-4">....</div><div class="col-sm-9 col-md-6 col-lg-8">....</div>Now th i s g i ves us 3 d i fferent co l umn l ayouts at each po i nt. On a phone, i t w ill be 75% onthe l eft, and 25% on the r i ght. On a tab l et, i t w ill be 50%/50% aga i n, and on a l argev i ewport, i t w ill be 33%/66%. Three d i fferent l ayouts for each of the three respons i ves i zes. Check i t out i n the fo ll ow i ng examp l e. (Here sty li ng for each co l umn i s used. Youcan avo i d i t.)<div class="container"><h1>Hello, world!</h1><div class="row"><div class="col-sm-3 col-md-6 col-lg-8"style="background-color: #dedef8; box-shadow:inset 1px -1px 1px #444,12inset -1px 1px 1px #444;"><p>Lorem ipsum dolor sit amet, consectetur adipisicing elit, sed do eiusmodtempor incididunt ut labore et dolore magna aliqua. Ut enim ad minim veniam,quis nostrud exercitation ullamco laboris nisi ut aliquip ex ea commodoconsequat.</p><p>Sed ut perspiciatis unde omnis iste natus error sit voluptatemaccusantium doloremque laudantium, totam rem aperiam, eaque ipsaquae ab illo inventore veritatis et quasi architecto beatae vitae dictasunt explicabo.</p> </div><div class="col-sm-9 col-md-6 col-lg-4"style="background-color: #dedef8; box-shadow:inset 1px -1px 1px #444, inset -1px 1px 1px#444;"><p>Sed ut perspiciatis unde omnis iste natus error sit voluptatemaccusantium doloremque laudantium.</p><p> Neque porro quisquam est, qui dolorem ipsum quia dolor sitamet, consectetur, adipisci velit, sed quia non numquam eiusmodi tempora incidunt ut labore et dolore magnam aliquam quaeratvoluptatem.</p></div></div>13。
Bootstrap模态框(Modal)插件菜鸟教程Bootstrap 模态框(Modal)插件模态框(Modal)是覆盖在父窗体上的子窗体。
通常,目的是显示来自一个单独的源的内容,可以在不离开父窗体的情况下有一些互动。
子窗体可提供信息、交互等。
如果您想要单独引用该插件的功能,那么您需要引用modal.js。
或者,正如Bootstrap 插件概览一章中所提到,您可以引用bootstrap.js或压缩版的bootstrap.min.js。
用法您可以切换模态框(Modal)插件的隐藏内容:•通过data 属性:在控制器元素(比如按钮或者链接)上设置属性data-toggle="modal",同时设置data-target="#identifier"或href="#identifier"来指定要切换的特定的模态框(带有id="identifier")。
•通过JavaScript:使用这种技术,您可以通过简单的一行JavaScript 来调用带有 id="identifier" 的模态框:$('#identifier').modal(options)实例一个静态的模态窗口实例,如下面的实例所示:实例<h2>创建模态框(Modal)</h2> <!-- 按钮触发模态框--> <button class="btn btn-primary btn-lg" data-toggle="modal" data-target="#myModal">开始演示模态框</button> <!-- 模态框(Modal)--> <div class="modal fade" id="myModal"tabindex="-1" role="dialog" aria-labelledby="myModalLabel" aria-hidden="true"> <div class="modal-dialog"> <div class="modal-content"> <div class="modal-header"> <button type="button" class="close" data-dismiss="modal" aria-hidden="true">×</button> <h4 class="modal-title" id="myModalLabel">模态框(Modal)标题</h4> </div> <div class="modal-body">在这里添加一些文本</div> <div class="modal-footer"> <button type="button" class="btn btn-default" data-dismiss="modal">关闭</button> <button type="button" class="btn btn-primary">提交更改</button> </div> </div><!-- /.modal-content --> </div><!-- /.modal --> </div>尝试一下»结果如下所示:代码讲解:•使用模态窗口,您需要有某种触发器。
BootStrapFileinput的使⽤教程bootstrap-fileinput是基于bootstrap的上传控件,此控件⽹上有很多例⼦。
我照着例⼦做后发现请求⽆法提交到后台,反复测试后发现,不能禁⽌预览(showPreview要设置为true),禁⽌预览后fileuploaded则⽆法响应(实际情况是showPreview=false时, 即便是uploadAsync=true, 也是filebatchuploadsuccess响应返回结果。
如果showPreview=true, uploadAsync=true, 才是fileuploaded响应返回结果)。
注意:如果出现$("#xxxx").fileinput({}); 不⽣效的情况请将fileinput.js中最后⼏⾏注释掉:/* $(document).ready(function () {var $input = $('input.file[type=file]'), count = $input.attr('type') ? $input.length : 0;if (count > 0) {$input.fileinput();}}); */<link rel="stylesheet" href="css/bootstrapCSS/bootstrap.min.css"><link rel="stylesheet" href="css/bootstrapCSS/bootstrap-theme.min.css"><link rel="stylesheet" href="css/bootstrapCSS/fileinput.css" /><div><input type="file" name="uploadfile" id="uploadfile" multiple class="file-loading" /></div><script type="text/JavaScript" src="js/jQuery.min.js"></script><script type="text/javascript" src="js/bootstrap/fileinput.js"></script><script type="text/javascript" src="js/bootstrap/fileinput_locale_zh.js"></script><script type="text/javascript" src="js/bootstrap/bootstrap.min.js"></script><script type="text/javascript">$("#uploadfile").fileinput({language: 'zh', //设置语⾔uploadUrl: "http://127.0.0.1/testDemo/fileupload/upload.do", //上传的地址allowedFileExtensions: ['jpg', 'gif', 'png'],//接收的⽂件后缀//uploadExtraData:{"id": 1, "fileName":'123.mp3'},uploadAsync: true, //默认异步上传showUpload: true, //是否显⽰上传按钮showRemove : true, //显⽰移除按钮showPreview : true, //是否显⽰预览showCaption: false,//是否显⽰标题browseClass: "btn btn-primary", //按钮样式dropZoneEnabled: false,//是否显⽰拖拽区域//minImageWidth: 50, //图⽚的最⼩宽度//minImageHeight: 50,//图⽚的最⼩⾼度//maxImageWidth: 1000,//图⽚的最⼤宽度//maxImageHeight: 1000,//图⽚的最⼤⾼度//maxFileSize: 0,//单位为kb,如果为0表⽰不限制⽂件⼤⼩//minFileCount: 0,maxFileCount: 10, //表⽰允许同时上传的最⼤⽂件个数enctype: 'multipart/form-data',validateInitialCount:true,previewFileIcon: "<i class='glyphicon glyphicon-king'></i>",msgFilesTooMany: "选择上传的⽂件数量({n}) 超过允许的最⼤数值{m}!",});//异步上传返回结果处理$('#uploadfile').on('fileerror', function(event, data, msg) {console.log(data.id);console.log(data.index);console.log(data.file);console.log(data.reader);console.log(data.files);// get messagealert(msg);});//异步上传返回结果处理$("#uploadfile").on("fileuploaded", function (event, data, previewId, index) {console.log(data.id);console.log(data.index);console.log(data.file);console.log(data.reader);console.log(data.files);var obj = data.response;alert(JSON.stringify(data.success));});//同步上传错误处理$('#uploadfile').on('filebatchuploaderror', function(event, data, msg) {console.log(data.id);console.log(data.index);console.log(data.file);console.log(data.reader);console.log(data.files);// get messagealert(msg);});//同步上传返回结果处理$("#uploadfile").on("filebatchuploadsuccess", function (event, data, previewId, index) {console.log(data.id);console.log(data.index);console.log(data.file);console.log(data.reader);console.log(data.files);var obj = data.response;alert(JSON.stringify(data.success));});//上传前$('#uploadfile').on('filepreupload', function(event, data, previewId, index) {var form = data.form, files = data.files, extra = data.extra,response = data.response, reader = data.reader;console.log('File pre upload triggered');});</script>经查资料得知,异步上传处理错误和返回结果要处理fileerror和fileuploaded⽅法;同步上传处理错误和返回结果filebatchuploaderror和filebatchuploadsuccess⽅法以上所述是⼩编给⼤家介绍的BootStrap Fileinput的使⽤教程,希望对⼤家有所帮助,如果⼤家有任何疑问请给我留⾔,⼩编会及时回复⼤家的。
前端插件之BootstrapDualListbox使⽤教程对于很多⾮专业前端开发来说写页⾯是⾮常痛苦的,借助框架或插件往往能够达到事半功倍的效果,本系列⽂章会介绍我在运维系统开发过程中⽤到的那些顺⼿的前端插件,如果你是想写XX管理系统的学⽣、或是需要独⾃做Dashboard的后端⼯程师、亦或是像我这样半吊⼦的开发加运维,那么这个系列的⽂章你⼀定不要错过Bootstrap Dual Listbox是⼀款基于Bootstrap的双向select选择框控件,作为对multiple select的扩展,使⽤起来⾮常简单,功能也更强⼤基本使⽤需要⽤到的JS和CSS⽂件位于项⽬代码下的dist⽬录中,需要将这个⽬录中的对应⽂件放⼊你的项⽬⾥,这⼀步不赘述1.引⼊CSS/JS⽂件,由于bootstrap-duallistbox是基于bootstrap的,所以要先引⼊bootstrap相关的css和js<!-- 加载bootstrap --><script src="https:///jquery-3.2.1.slim.min.js"></script><script src="https:///bootstrap/4.0.0/js/bootstrap.min.js"></script><link rel="stylesheet" href="https:///bootstrap/4.0.0/css/bootstrap.min.css"><!-- 加载bootstrap-dualllistbox --><link rel="stylesheet" href="static/bootstrap-duallistbox/bootstrap-duallistbox.css" rel="external nofollow" ><script src="static/bootstrap-duallistbox/jquery.bootstrap-duallistbox.js"></script>1.加载duallistbox插件<select class="form-control" multiple="multiple" name="groups" size="10"><option value="1">GroupA</option><option selected value="2">GroupB</option><option value="3">GroupC</option><option value="4">GroupD</option><option selected value="5">GroupE</option><option value="6">GroupF</option><option value="7">GroupG</option></select><script>var selectorx = $('select[name="groups"]').bootstrapDualListbox();</script>1.完成以上两步可以看到页⾯效果如下⾮常简单,到这⾥已经可以正常使⽤这个控件了,更多的花样接着往下看配置说明整个界⾯为英⽂显⽰,有默认提⽰,如果你想将提⽰改为中⽂或添加⾃定义的提⽰内容,那么可以通过如下配置var selectorx = $('select[name="groups"]').bootstrapDualListbox({nonSelectedListLabel: '未选择的组',selectedListLabel: '已选择的组',filterTextClear: '展⽰所有',filterPlaceHolder: '过滤搜索',moveSelectedLabel: "添加",moveAllLabel: '添加所有',removeSelectedLabel: "移除",removeAllLabel: '移除所有',infoText: '共{0}个组',infoTextFiltered: '搜索到{0}个组 ,共{1}个组',infoTextEmpty: '列表为空',});以上配置都⽐较简单,对照中⽂就能知晓意思,不做过多解释,另外有⼏个⽀持的参数说明如下:infoText:除了设置字符串外还可设置为false,当设置为false时可隐藏这段信息showFilterInputs:默认为true,是否显⽰filter过滤框moveOnSelect:默认为true,点击便会变更选项到对应的选择框内,如果设置为false则会在出现moveSelected的箭头需要点击箭头或者双击选项后才能变更选项到对应的选择框nonSelectedFilter:未选中的默认过滤规则,可以配置为OPS-COFFEE-A则未选中的框内只会显⽰OPS-COFFEE-AselectedFilter:已选中的默认规则,与noSelectedFilter类似使⽤进阶获取已选择的值selectorx.val()获取select插件对象selectorx.bootstrapDualListbox('getContainer')刷新插件元素⽤户界⾯selectorx.bootstrapDualListbox('refresh');删除bootstrap-duallistbox插件,恢复select原样selectorx.bootstrapDualListbox('destroy');动态添加select的optionselectorx.append('<option value="9" selected></option>');selectorx.bootstrapDualListbox('refresh');注意:上⽂中的所有selectorx都为加载duallistbox时实例化的select对象完整Demo为了⽅便⼤家学习,我写了个完整的demo,你可以在线查看效果或下载代码应⽤到⾃⼰的项⽬中总结以上所述是⼩编给⼤家介绍的前端插件之Bootstrap Dual Listbox使⽤教程,希望对⼤家有所帮助,如果⼤家有任何疑问请给我留⾔,⼩编会及时回复⼤家的。