Android界面开发之常用系统控件界面大合集
- 格式:doc
- 大小:505.00 KB
- 文档页数:31
android studio 控件常用属性下面是RelativeLayout各个属性1.android:layout_above="@id/xxx" --将控件置于给定ID控件之上2.android:layout_below="@id/xxx" --将控件置于给定ID控件之下3. android:layout_toLeftOf="@id/xxx" --将控件的右边缘和给定ID控件的左边缘对齐4.android:layout_toRightOf="@id/xxx" --将控件的左边缘和给定ID控件的右边缘对齐5. android:layout_alignLeft="@id/xxx" --将控件的左边缘和给定ID控件的左边缘对齐6.android:layout_alignTop="@id/xxx" --将控件的上边缘和给定ID控件的上边缘对齐7.android:layout_alignRight="@id/xxx" --将控件的右边缘和给定ID控件的右边缘对齐8.android:layout_alignBottom="@id/xxx" --将控件的底边缘和给定ID控件的底边缘对齐9.android:layout_alignParentLeft="true" --将控件的左边缘和父控件的左边缘对齐10. android:layout_alignParentTop="true" --将控件的上边缘和父控件的上边缘对齐11. android:layout_alignParentRight="true" --将控件的右边缘和父控件的右边缘对齐12.android:layout_alignParentBottom="true" --将控件的底边缘和父控件的底边缘对齐13.android:layout_centerInParent="true" --将控件置于父控件的中心位置14.android:layout_centerHorizontal="true" --将控件置于水平方向的中心位置15.android:layout_centerVertical="true" --将控件置于垂直方向的中心位置android:layout_width 设置组件的宽度android:layout_height 设置组件的高度android:id 给组件定义一个id值,供后期使用android:background 设置组件的背景颜色或背景图片android:text 设置组件的显示文字android:textColor 设置组件的显示文字的颜色android:layout_below 组件在参考组件的下面android:alignTop 同指定组件的顶平行控件的可见度:(3种状态)android:visibility="visible"3. 控件的背景:(颜色图片)android:background="#F00"4. 盒子模型:android:layout_margin="10dp"android:padding="5dp"针对已存在的兄弟控件(在某个控件的上面/下面/左边/右边)android:layout_aboveandroid:layout_belowandroid:layout_toLeftOfandroid:layout_toRightOf相对兄弟控件的边对齐android:layout_alignTopandroid:layout_alignBottomandroid:layout_alignLeftandroid:layout_alignRightandroid:maxLength="6" 限制输入字数android:digits='012356789abcdefghijklmnopqrstuvwxyzABCDEFGHIJKLMNOPQRSTUVWXY Z'限制输入数字和大写小写字母1. 开发更简单,执行速度高效。
今天和大家一起了解一下OPhone的主要组件,和主要组件的使用方法。
OPhone的控件体系分为三个类别:1、基本控件;2、布局组件;3、容器组件;这三类控件主要分布在两个包中:1、android.view 提供抽象接口2、android.widget 提供系统内置的大部分控件整个系统得控件都继承自android.view.View ,而布局及容器类继承自android.view.ViewGroup。
二、基本控件主要包括ImageView、ProgressBar、SurfaceView、TextView、EditText等。
三、布局虽然布局跟容器均继承自android.view.ViewGroup,但并不像SWT那样提供了面板+布局的结构,而是每种Layout就是一种特殊的面板,包括AbsoluteLayout、FrameLayout、LinearLayout、TableLayout、RelativeLayout 等。
四、容器这里的容器是指采用了特定的布局并且提供了行为的控件,包含ListView、GridView、Gallery、Spinner等。
介绍完OPhone OS基础控件的大体结构和布局,下面就来详细的介绍一下它的具体控件:1基本组件:基本组件有很多,比如:Button,TextView,EditText,CheckBox,ImageButton,GridView,ProgressBar,RadioGroup 等,下面通过实例来给大家演示一下组件如何使用。
(1)Button的使用:public class ActivityButton extends Activity {OnClickListener listener1 = null;Button button1;public void onCreate(Bundle savedInstanceState) {super.onCreate(savedInstanceState);listener1 = new OnClickListener() {public void onClick(View v) {setTitle("button1 点击后不可见");button1.setVisibility(View.INVISIBLE);button2.setVisibility(View.VISIBLE);}};setContentView(yout.main);button1 = (Button) findViewById(R.id.button1);//根据ID来指定一个组件。
pythonGUI库图形界⾯开发之PyQt5树形结构控件QTreeWidget详细使⽤⽅法与实例PyQt5树形结构控件QTreeWidget简介QTreeWidget 类根据预设的模型提供树形显⽰控件。
QTreeWidget 使⽤类似于 QListView 类的⽅式提供⼀种典型的基于 item 的树形交互⽅法类,该类基于QT的“模型/视图”结构,提供了默认的模型来⽀撑 item 的显⽰,这些 item 类为 QTreeWidgetItem 类。
如果不需要灵活的“模型/视图”框架,可以使⽤QTreeWidget 来创建有层级关系的树形结构。
当把标准 item 模型结合QTreeView 使⽤时,可以得到更灵活的使⽤⽅法,从⽽把“数据”和“显⽰”分离开。
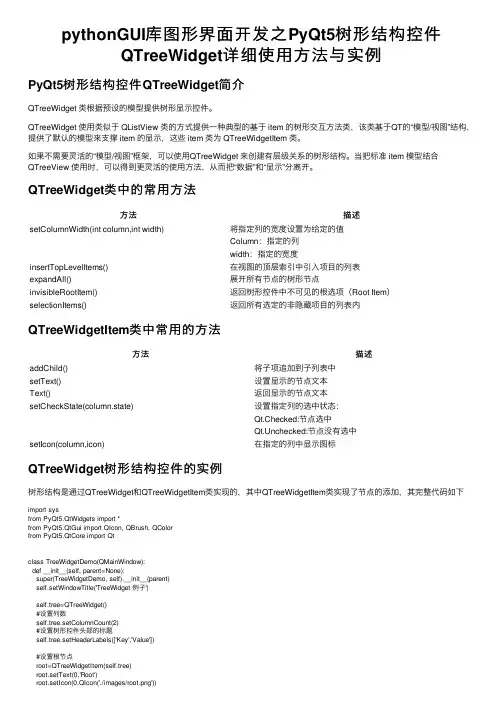
QTreeWidget类中的常⽤⽅法⽅法描述setColumnWidth(int column,int width)将指定列的宽度设置为给定的值Column:指定的列width:指定的宽度insertTopLevelItems()在视图的顶层索引中引⼊项⽬的列表expandAll()展开所有节点的树形节点invisibleRootItem()返回树形控件中不可见的根选项(Root Item)selectionItems()返回所有选定的⾮隐藏项⽬的列表内QTreeWidgetItem类中常⽤的⽅法⽅法描述addChild()将⼦项追加到⼦列表中setText()设置显⽰的节点⽂本Text()返回显⽰的节点⽂本setCheckState(column.state)设置指定列的选中状态:Qt.Checked:节点选中Qt.Unchecked:节点没有选中setIcon(column,icon)在指定的列中显⽰图标QTreeWidget树形结构控件的实例树形结构是通过QTreeWidget和QTreeWidgetItem类实现的,其中QTreeWidgetItem类实现了节点的添加,其完整代码如下import sysfrom PyQt5.QtWidgets import *from PyQt5.QtGui import QIcon, QBrush, QColorfrom PyQt5.QtCore import Qtclass TreeWidgetDemo(QMainWindow):def __init__(self, parent=None):super(TreeWidgetDemo, self).__init__(parent)self.setWindowTitle('TreeWidget 例⼦')self.tree=QTreeWidget()#设置列数self.tree.setColumnCount(2)#设置树形控件头部的标题self.tree.setHeaderLabels(['Key','Value'])#设置根节点root=QTreeWidgetItem(self.tree)root.setText(0,'Root')root.setIcon(0,QIcon('./images/root.png'))# todo 优化2 设置根节点的背景颜⾊brush_red=QBrush(Qt.red)root.setBackground(0,brush_red)brush_blue=QBrush(Qt.blue)root.setBackground(1,brush_blue)#设置树形控件的列的宽度self.tree.setColumnWidth(0,150)#设置⼦节点1child1=QTreeWidgetItem()child1.setText(0,'child1')child1.setText(1,'ios')child1.setIcon(0,QIcon('./images/IOS.png'))#todo 优化1 设置节点的状态child1.setCheckState(0,Qt.Checked)root.addChild(child1)#设置⼦节点2child2=QTreeWidgetItem(root)child2.setText(0,'child2')child2.setText(1,'')child2.setIcon(0,QIcon('./images/android.png'))#设置⼦节点3child3=QTreeWidgetItem(child2)child3.setText(0,'child3')child3.setText(1,'android')child3.setIcon(0,QIcon('./images/music.png'))#加载根节点的所有属性与⼦控件self.tree.addTopLevelItem(root)#TODO 优化3 给节点添加响应事件self.tree.clicked.connect(self.onClicked)#节点全部展开self.tree.expandAll()self.setCentralWidget(self.tree)def onClicked(self,qmodeLindex):item=self.tree.currentItem()print('Key=%s,value=%s'%(item.text(0),item.text(1))) if __name__ == '__main__':app = QApplication(sys.argv)tree = TreeWidgetDemo()tree.show()sys.exit(app.exec_())初始运⾏图如下优化⼀:设置节点的状态这⾥添加了child1的选中状态child1.setCheckState(0,Qt.Checked)优化⼆:设置节点的背景颜⾊这⾥设置了根节点的背景颜⾊brush_red=QBrush(Qt.red)root.setBackground(0,brush_red)brush_blue=QBrush(Qt.blue)root.setBackground(1,brush_blue)优化三:给节点添加响应事件点击,会在控制台输出当前地key值与value值self.tree.clicked.connect(self.onClicked)def onClicked(self,qmodeLindex):item=self.tree.currentItem()print('Key=%s,value=%s'%(item.text(0),item.text(1)))系统定制模式实例在上⾯的例⼦中,QTreeWidgetItem类的节点是⼀个个添加上去的,这样有时很不⽅便,特别是窗⼝产⽣⽐较复杂的树形结构时,⼀般都是通过QTreeView类来实现的,⽽不是QTreeWidget类,QTreeView和QTreeWidget类最⼤的区别就是,QTreeView类可以使⽤操作系统提供的定制模式,⽐如⽂件系统盘的树列表import sysfrom PyQt5.QtWidgets import *from PyQt5.QtGui import *if __name__ == '__main__':app=QApplication(sys.argv)#window系统提供的模式model=QDirModel()#创建⼀个QTreeView的控件tree=QTreeView()#为控件添加模式tree.setModel(model)tree.setWindowTitle('QTreeView例⼦')tree.resize(640,480)tree.show()sys.exit(app.exec_())本⽂主要讲解了PyQt5树形结构控件QTreeWidget详细使⽤⽅法与实例,更多关于PyQt5控件使⽤知识请查看下⾯的相关链接。
android界面框架-Window从纯sdk及framwork的角度看,android中界面框架相关的类型有:Window,WindowManager,View等。
下面就以这几个类为出发点来概览下安卓开发的“界面架构”。
Window该类接触不多,和它密切相关的View类就比较熟悉了。
Window和View的关系View是可视界面上的一个矩形区域,它显示内容并接收各种交互事件。
所有View形成一个ViewTree这样的结构,对应任何一个界面通过sdk自带的hierarchyviewer工具就可以看到所有View 对象形成的视图树的形象的结构图,相信都不会陌生。
一般的,开发工作主要是利用系统及自定义控件组合完成各种界面,所以理解View的使用和原理更重要些。
再进一步,以ViewTree为整体,再看它和window,系统服务之间的关系可以从整体上把握android中界面框架。
Window类的描述如下:Window: Abstract base class for a top-level window look and behavior policy. An instance of this class should be used as the top-level view added to the window manager. It provides standard UI policies such as a background, title area, default key processing, etc.Window表示“窗口”的概念,类似桌面OS中的窗口的概念,它是对用户界面的一个逻辑划分。
可以参考下Windows编程中对Window类的描述是:“The point of interaction between a user and a standalone application is a window.”。
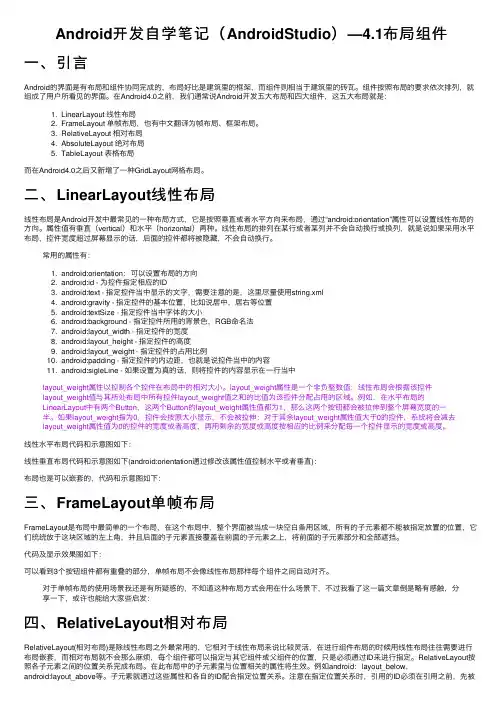
Android开发⾃学笔记(AndroidStudio)—4.1布局组件⼀、引⾔Android的界⾯是有布局和组件协同完成的,布局好⽐是建筑⾥的框架,⽽组件则相当于建筑⾥的砖⽡。
组件按照布局的要求依次排列,就组成了⽤户所看见的界⾯。
在Android4.0之前,我们通常说Android开发五⼤布局和四⼤组件,这五⼤布局就是:1. LinearLayout 线性布局2. FrameLayout 单帧布局,也有中⽂翻译为帧布局、框架布局。
3. RelativeLayout 相对布局4. AbsoluteLayout 绝对布局5. TableLayout 表格布局⽽在Android4.0之后⼜新增了⼀种GridLayout⽹格布局。
⼆、LinearLayout线性布局线性布局是Android开发中最常见的⼀种布局⽅式,它是按照垂直或者⽔平⽅向来布局,通过“android:orientation”属性可以设置线性布局的⽅向。
属性值有垂直(vertical)和⽔平(horizontal)两种。
线性布局的排列在某⾏或者某列并不会⾃动换⾏或换列,就是说如果采⽤⽔平布局,控件宽度超过屏幕显⽰的话,后⾯的控件都将被隐藏,不会⾃动换⾏。
常⽤的属性有:1. android:orientation:可以设置布局的⽅向2. android:id - 为控件指定相应的ID3. android:text - 指定控件当中显⽰的⽂字,需要注意的是,这⾥尽量使⽤string.xml4. android:gravity - 指定控件的基本位置,⽐如说居中,居右等位置5. android:textSize - 指定控件当中字体的⼤⼩6. android:background - 指定控件所⽤的背景⾊,RGB命名法7. android:layout_width - 指定控件的宽度8. android:layout_height - 指定控件的⾼度9. android:layout_weight - 指定控件的占⽤⽐例10. android:padding - 指定控件的内边距,也就是说控件当中的内容11. android:sigleLine - 如果设置为真的话,则将控件的内容显⽰在⼀⾏当中layout_weight属性以控制各个控件在布局中的相对⼤⼩。
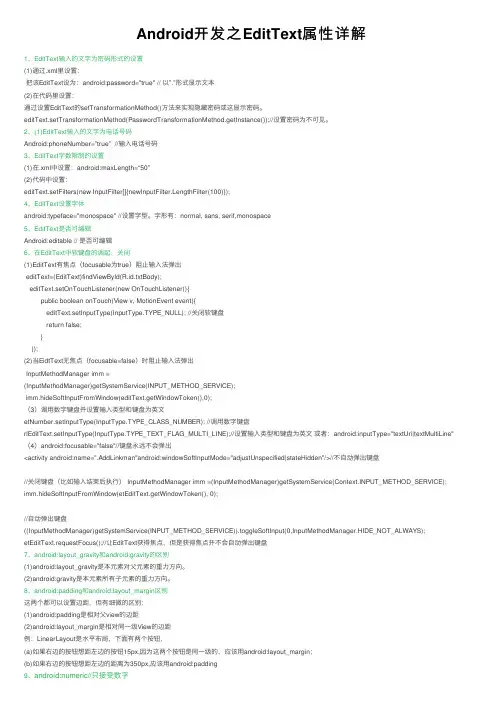
Android开发之EditText属性详解1、EditText输⼊的⽂字为密码形式的设置(1)通过.xml⾥设置:把该EditText设为:android:password="true" // 以”.”形式显⽰⽂本(2)在代码⾥设置:通过设置EditText的setTransformationMethod()⽅法来实现隐藏密码或这显⽰密码。
editText.setTransformationMethod(PasswordTransformationMethod.getInstance());//设置密码为不可见。
2、(1)EditText输⼊的⽂字为电话号码Android:phoneNumber=”true” //输⼊电话号码3、EditText字数限制的设置(1)在.xml中设置:android:maxLength=“50”(2)代码中设置:editText.setFilters(new InputFilter[]{newInputFilter.LengthFilter(100)});4、EditText设置字体android:typeface="monospace" //设置字型。
字形有:normal, sans, serif,monospace5、EditText是否可编辑Android:editable // 是否可编辑6、在EditText中软键盘的调起、关闭(1)EditText有焦点(focusable为true)阻⽌输⼊法弹出editText=(EditText)findViewById(R.id.txtBody);editText.setOnTouchListener(new OnTouchListener(){public boolean onTouch(View v, MotionEvent event){editText.setInputType(InputType.TYPE_NULL); //关闭软键盘return false;}});(2)当EidtText⽆焦点(focusable=false)时阻⽌输⼊法弹出InputMethodManager imm =(InputMethodManager)getSystemService(INPUT_METHOD_SERVICE);imm.hideSoftInputFromWindow(editText.getWindowToken(),0);(3)调⽤数字键盘并设置输⼊类型和键盘为英⽂etNumber.setInputType(InputType.TYPE_CLASS_NUMBER); //调⽤数字键盘rlEditText.setInputType(InputType.TYPE_TEXT_FLAG_MULTI_LINE);//设置输⼊类型和键盘为英⽂或者:android:inputType="textUri|textMultiLine"(4)android:focusable="false"//键盘永远不会弹出<activity android:name=".AddLinkman"android:windowSoftInputMode="adjustUnspecified|stateHidden"/>//不⾃动弹出键盘//关闭键盘(⽐如输⼊结束后执⾏) InputMethodManager imm =(InputMethodManager)getSystemService(Context.INPUT_METHOD_SERVICE); imm.hideSoftInputFromWindow(etEditText.getWindowToken(), 0);//⾃动弹出键盘((InputMethodManager)getSystemService(INPUT_METHOD_SERVICE)).toggleSoftInput(0,InputMethodManager.HIDE_NOT_ALWAYS); etEditText.requestFocus();//让EditText获得焦点,但是获得焦点并不会⾃动弹出键盘7、android:layout_gravity和android:gravity的区别(1)android:layout_gravity是本元素对⽗元素的重⼒⽅向。
android inerface的使用范例[Android Interface的使用范例]尽管最新的操作系统和设备不断涌现,但Android仍然是当今市场上最受欢迎的移动操作系统之一。
为了满足不同用户的需求,Android提供了灵活的用户界面(UI)框架,称为Android Interface,通过它可以打造令人难以置信的用户体验。
在本文中,我们将一步一步回答如何使用Android Interface的一些范例,以帮助开发人员更好地了解和应用这一强大的工具。
第一步:了解基本概念和术语在开始使用Android Interface之前,开发人员需要了解一些基本概念和术语。
首先是布局(Layout),它定义了UI组件在屏幕上的排列方式。
Android提供了一系列的布局类型,如线性布局(LinearLayout)、相对布局(RelativeLayout)和帧布局(FrameLayout)等。
其次是视图(View),它是用户界面的构建单元,如按钮(Button)、文本框(EditText)和图像(ImageView)等。
最后是活动(Activity),它是与用户进行交互的屏幕,并且包含了用户界面的逻辑和操作。
第二步:创建新项目并设置布局一旦熟悉了Android Interface的基本概念,接下来就是创建一个新的Android项目。
首先打开Android Studio,并创建一个新的工程。
在创建工程的过程中,可以选择需要的最低API级别和目标设备。
接下来,选择“Empty Activity”作为初始模板,并为活动命名。
创建完成后,在项目资源中找到“activity_main.xml”文件,这是我们要编辑的主要布局文件。
打开“activity_main.xml”文件后,可以看到默认的线性布局。
在布局文件中,开发人员可以添加和调整不同的UI组件,以构建所需的用户界面。
例如,可以在线性布局中添加一个按钮和一个文本框。
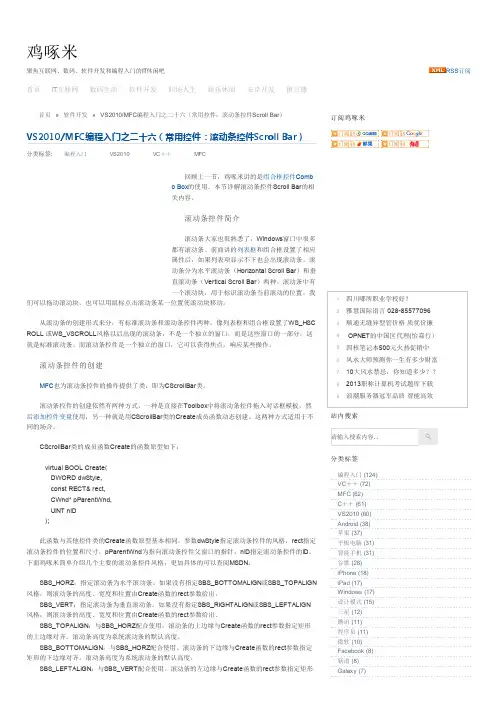
Android中使用Custom View实现自定义控件在Android开发中,自定义控件是一项非常重要的技能。
通过自定义控件,我们可以满足特定需求并提供独特的用户体验。
在本文中,我们将探讨如何使用Custom View来实现自定义控件。
一、什么是Custom ViewCustom View是Android中提供的一种机制,允许开发者根据自己的需求来创建独特的UI元素。
与普通的View不同,Custom View可以根据开发者的意愿进行布局、绘制和交互等操作。
二、创建Custom View创建Custom View有两种常见的方式:继承已有的View类或使用继承自ViewGroup的容器类。
下面以继承View类为例,介绍创建Custom View的步骤。
1. 创建一个新的Java类,例如CustomView。
2. 让CustomView类继承自View类。
3. 重写父类的构造方法和onDraw方法。
4. 在onDraw方法中编写自定义的绘制代码,例如绘制图形、文本等。
5. 在布局文件中添加CustomView元素,然后在Java代码中对其进行引用和使用。
三、自定义属性除了绘制外,Custom View还可以通过添加自定义属性来提供更多的功能。
下面以添加一个自定义颜色属性为例,介绍如何实现自定义属性。
1. 在res/values/文件夹下创建attrs.xml文件。
2. 在attrs.xml文件中添加自定义属性的定义,例如:```<resources><declare-styleable name="CustomView"><attr name="customColor" format="color" /></declare-styleable></resources>```3. 在CustomView类中添加获取和使用自定义属性的代码,例如:```TypedArray typedArray = context.obtainStyledAttributes(attrs,R.styleable.CustomView);int customColor =typedArray.getColor(R.styleable.CustomView_customColor,Color.BLACK);typedArray.recycle();```4. 在布局文件中使用自定义属性,例如:```<com.example.CustomViewandroid:layout_width="wrap_content"android:layout_height="wrap_content"app:customColor="#FF0000" />```四、事件处理Custom View也可以处理用户的输入事件,例如点击、滑动等。

第一章Android简介1.简述各种手机操作系统的特点.答案:目前,手机上的操作系统主要包括以下几种,分别是Android、iOS、Windows Mobile、Windows Phone 7、Symbian、黑莓、PalmOS和Linux。
(1)Android是谷歌发布的基于Linux的开源手机平台,该平台由操作系统、中间件、用户界面和应用软件组成,是第一个可以完全定制、免费、开放的手机平台。
Android底层使用开源的Linux操作系统,同时开放了应用程序开发工具,使所有程序开发人员都在统一、开放的开发平台上进行开发,保证了Android应用程序的可移植性。
(2)iOS是由苹果公司为iPhone、iPod touch、iPad以及Apple TV开发的操作系统,以开放源代码的操作系统Darwin为基础,提供了SDK,iOS操作系统具有多点触摸操作的特点,支持的控制方法包括滑动、轻按、挤压和旋转, 允许系统界面根据屏幕的方向而改变方向,自带大量的应用程序。
(3)Windows Mobile是微软推出的移动设备操作系统,对硬件配置要求较高,一般需要使用高主频的嵌入式处理器,从而产生了耗电量大、电池续航时间短和硬件成本高等缺点,Windows Mobile系列操作系统包括Smartphone、Pocket PC和Portable Media Center。
随着Windows Phone 7的出现,Windows Mobile 正逐渐走出历史舞台。
(4)Windows Phone 7具有独特的“方格子”用户界面,非常简洁,黑色背景下的亮蓝色方形图标,显得十分清晰醒目,集成了Xbox Live游戏和Zune音乐功能,可见Windows Phone 7对游戏功能和社交功能的重视。
(5)Symbian是为手机而设计的实时多任务32位操作系统,它的功效低,内存占用少,提供了开发使用的函数库、用户界面、通用工具和参考示例。
Python桌面应用程序开发的常用框架有哪些在当今的软件开发领域,Python 因其简洁易学、功能强大而备受开发者青睐。
当涉及到 Python 桌面应用程序的开发时,有一些常用的框架能够为开发者提供便利和高效的开发体验。
首先,不得不提到的是 Tkinter 框架。
Tkinter 是 Python 标准库中的一部分,这意味着无需额外安装即可使用。
它为创建基本的图形用户界面(GUI)提供了简单而直接的方法。
对于初学者来说,Tkinter 是一个很好的入门选择,因为其语法相对简单,容易理解和掌握。
通过Tkinter,我们可以创建窗口、按钮、文本框、菜单等常见的GUI 元素。
虽然它可能在功能和外观上相对较为基础,但对于一些小型的、功能不太复杂的桌面应用程序,Tkinter 足以胜任。
接下来是 PyQt 框架。
PyQt 是一个功能强大且成熟的框架,它基于著名的 Qt 库。
Qt 本身在跨平台应用开发中具有广泛的应用和良好的声誉。
PyQt 提供了丰富的控件和布局选项,能够创建出非常美观和复杂的用户界面。
它支持多种操作系统,包括 Windows、Mac 和 Linux,这使得开发的应用程序具有很好的跨平台性。
此外,PyQt 还提供了信号与槽机制,这是一种强大的通信方式,方便不同组件之间的交互。
WxPython 也是一个值得关注的框架。
它是一个开源的跨平台 GUI框架,提供了丰富的控件和功能。
WxPython 强调的是自然和直观的编程风格,其 API 设计相对较为简洁。
它在处理各种操作系统的外观和感觉方面表现出色,能够使开发的应用程序在不同平台上呈现出与本地应用相似的外观和行为。
Kivy 是一个用于创建多点触控应用程序的创新框架。
它不仅支持传统的桌面操作系统,还适用于移动平台,如 Android 和 iOS。
Kivy 采用了声明式的编程风格,通过使用 kv 语言来描述用户界面,这使得界面设计和逻辑分离,提高了代码的可读性和可维护性。
Android:UI界⾯设计基础知识总结(⼀)⼤年初⼀,这⾥有我。
寒假过的很快,转眼间已经荒废了两周的学习时间,现在想来仍然是惭愧不已。
但时间已经流逝,我能做的就是抓紧当下,真正地投⼊到学习,投⼊到Android的学习中去。
现在学习主要是跟着视频教程边看边学,现将学习到的零星知识点总结如下:Android 系统中的所有 UI 类都是建⽴在 View 和 ViewGroup 两个类的基础之上的,所有 View 的⼦类称为 Widget,所有 ViewGroup 的⼦类称为 Layout。
其中 ViewGroup 是 View 的⼦类。
View 是所有 UI 组件的基类,基本上所有的⾼级 UI 组件都是继承 View 类实现的,如 TextView(⽂本框)、Button、List、EditText(编辑框)、Checkbox 等。
⼀个 View 在屏幕占据⼀块矩形区域,负责渲染这块矩形区域,也可以处理这块矩形区域发⽣的事件,并可以设置该区域是否可见以及获取焦点等。
ViewGroup 是容纳这些组件的容器,其本⾝也是从 View 中派⽣出来的,它继承于 Android.view.View,功能就是装载和管理下⼀层的 View 对象或 ViewGroup 对象,也就是说它是⼀个容纳其他元素的容器,负责对添加进来的 View 和 ViewGroup 进⾏管理和布局。
Android常⽤的UI组件:⾸先有⼀些属性是通⽤的:id=”@+id/name”创建⼀个id,系统会在R.java⽂件⾥⽣成对应的int型变量(R.java⽤来定义所有类型资源的索引)。
引⽤时:”@id/name”orientation ⽔平⽅向或垂直⽅向margin:外边距padding:内边距gravity:位置管理⼀、布局管理SDK 定义了多种布局⽅式以⽅便⽤户设计 UI。
各种布局⽅式均为 ViewGroup 类的⼦类。
主要学习的是两种最常⽤的布局,是线性布局(LinearLayout)和相对布局(RelativeLayout)。
今天我用自己写的一个Demo 和大家详细介绍一个Android开发中遇到的一些常用系统控件的使用技巧。
1.文本框TextViewTextView的作用是用来显示一个文本框,下面我用两种方式为大家呈现TextView,第一种是通过xml布局文件呈现,第二种是通过代码来呈现,由此可见Android 的界面开发真的是非常灵活。
view plaincopy to clipboardprint?1. public class TextViewActivity extends Activity {2. @Override3. protected void onCreate(Bundle savedInstanceState) {4. setContentView(yout.textview);5.6. LinearLayout ll = (LinearLayout) findViewById(R.id.textviewll);7. TextView textView = new TextView(this);8. //设置显示文字9. textView.setText("从代码中添加一个TextView");10. //设置显示颜色11. textView.setTextColor(Color.WHITE);12. //设置显示字体大小13. textView.setTextSize(18);14. //设置显示背景颜色15. textView.setBackgroundColor(Color.BLUE);16. //设置锚点位置17. textView.setGravity(Gravity.CENTER_VERTICAL|Gravity.CENTER_HORIZONTAL);18. //把这个view加入到布局当中19. ll.addView(textView);20.21. super.onCreate(savedInstanceState);22. }23. }1. <?xml version="1.0"encoding="utf-8"?>2. <LinearLayout xmlns:android="/apk/res/android"3. android:id="@+id/textviewll"4. android:orientation="vertical"android:layout_width="fill_parent"5. android:layout_height="fill_parent">6. <TextView android:id="@+id/textView0"7. android:layout_width="fill_parent"8. android:layout_height="wrap_content"9. android:textColor="#000000"10. android:textSize="18dip"11. android:background="#00FF00"12. android:text="@string/textView"13. android:gravity="center_vertical|center_horizontal"14. />15. </LinearLayout>view plaincopy to clipboardprint?1. public class WebViewActivity extends Activity {2. WebView webView = null;3. static final String MIME_TYPE = "text/html";4. static final String ENCODING = "utf-8";5.6.7. @Override8. protected void onCreate(Bundle savedInstanceState) {9. setContentView(yout.webview);10.11. webView = (WebView) findViewById(R.id.webview);12. webView.loadDataWithBaseURL(null,"<a href='http://blog.csd/xys289187120'>欢迎访问雨松MOMO的博客</a>", MIME_TYPE, ENCODING, null);13. super.onCreate(savedInstanceState);14. }15. }1. <?xml version="1.0"encoding="utf-8"?>2. <LinearLayout xmlns:android="/apk/res/android"3. android:id="@+id/textviewll"4. android:orientation="vertical"android:layout_width="fill_parent"5. android:layout_height="fill_parent">6. <TextView android:layout_width="fill_parent"7. android:layout_height="wrap_content"8. android:textColor="#000000"9. android:textSize="18dip"10. android:background="#00FF00"11. android:text="网页框WebView测试"12. android:gravity="center_vertical|center_horizontal"13. />14. <WebView android:id="@+id/webview"15. android:layout_height="wrap_content"16. android:layout_width="fill_parent"/>17. </LinearLayout>view plaincopy to clipboardprint?1. public class MenuActivity extends Activity {2.3. @Override4. protected void onCreate(Bundle savedInstanceState) {5. setContentView(yout.menuview);6. super.onCreate(savedInstanceState);7. }8.9. @Override10. public boolean onCreateOptionsMenu(Menu menu) {11. menu.add(0, 0, Menu.NONE, "菜单1").setIcon(R.drawable.icon);12. menu.add(0, 1, Menu.NONE, "菜单2").setIcon(R.drawable.icon);13. menu.add(0, 2, Menu.NONE, "菜单3").setIcon(R.drawable.icon);14. menu.add(0, 3, Menu.NONE, "菜单4").setIcon(R.drawable.icon);15. menu.add(0, 4, Menu.NONE, "菜单5").setIcon(R.drawable.icon);16. menu.add(0, 5, Menu.NONE, "菜单6").setIcon(R.drawable.icon);17. return super.onCreateOptionsMenu(menu);18. }19.20. @Override21. public boolean onOptionsItemSelected(MenuItem item) {22. Dialog(item.getItemId());23. return super.onOptionsItemSelected(item);24. }25.26. private void Dialog(int message) {27. new AlertDialog.Builder(this).setMessage(28. "您单击第【" + message + "】项Menu菜单项.").show();29. }30. }1. <?xml version="1.0"encoding="utf-8"?>2. <LinearLayout xmlns:android="/apk/res/android"3. android:orientation="vertical"android:layout_width="fill_parent"4. android:layout_height="fill_parent">5. <TextView android:layout_width="fill_parent"6. android:layout_height="wrap_content"7. android:textColor="#000000"8. android:textSize="18dip"9. android:background="#00FF00"10. android:text="Menu菜单测试"11. android:gravity="center_vertical|center_horizontal"12. />13. </LinearLayout>view plaincopy to clipboardprint?1. public class ButtonActivity extends Activity {2.3. Context mContext = null;4. @Override5. protected void onCreate(Bundle savedInstanceState) {6. setContentView(yout.buttonview);7. mContext = this;8.9. //普通按钮10. Button button0 = (Button)findViewById(R.id.buttonview0);12. //设置按钮文字颜色13. button0.setTextColor(Color.BLUE);14. //设置按钮文字大小15. button0.setTextSize(30);16.17. //设置按钮监听点击事件18. button0.setOnClickListener(new OnClickListener() {19.20. @Override21. public void onClick(View arg0) {22. Toast.makeText(ButtonActivity.this, "您点击了‘这是一个按钮’", Toast.LENGTH_LONG).show();23.24. }25. });26.27. //带图片的按钮28. ImageButton button1 = (ImageButton)findViewById(R.id.buttonview1);29. //设置按钮监听点击事件30. button1.setOnClickListener(new OnClickListener() {31.32. @Override33. public void onClick(View arg0) {34. Toast.makeText(ButtonActivity.this, "您点击了一个带图片的按钮", Toast.LENGTH_LONG).show();35.36. }37. });38. super.onCreate(savedInstanceState);39. }1. <?xml version="1.0"encoding="utf-8"?>2. <LinearLayout xmlns:android="/apk/res/android"3. android:orientation="vertical"android:layout_width="fill_parent"4. android:layout_height="fill_parent">5. <TextView android:layout_width="fill_parent"6. android:layout_height="wrap_content"7. android:textColor="#000000"8. android:textSize="18dip"9. android:background="#00FF00"10. android:text="Button按钮测试"11. android:gravity="center_vertical|center_horizontal"12. />13. <Button14. android:id="@+id/buttonview0"15. android:layout_width="fill_parent"16. android:layout_height="wrap_content"17. android:text="这是一个按钮"18. />19. <ImageButton20. android:id="@+id/buttonview1"21. android:layout_width="fill_parent"22. android:layout_height="wrap_content"23. android:src="@drawable/icon"24. />25. </LinearLayout>view plaincopy to clipboardprint?1. public class EditTextActivity extends Activity {2.3. Context mContext = null;4. @Override5. protected void onCreate(Bundle savedInstanceState) {6. setContentView(yout.editview);7. mContext = this;8. //帐号9. final EditText editText0 = (EditText)findViewById(R.id.editview0);10. //密码11. final EditText editText1 = (EditText)findViewById(R.id.editview1);12.13. //确认按钮14. Button button = (Button)findViewById(R.id.editbutton0);15.16. button.setOnClickListener(new OnClickListener() {17.18. @Override19. public void onClick(View arg0) {20. String username = editText0.getText().toString();21. String password = editText1.getText().toString();22. Toast.makeText(EditTextActivity.this, "用户名:"+username +"密码:"+ password, Toast.LENGTH_LONG).show();23. }24. });25. super.onCreate(savedInstanceState);26. }27. }1. <?xml version="1.0"encoding="utf-8"?>2. <LinearLayout xmlns:android="/apk/res/android"3. android:orientation="vertical"android:layout_width="fill_parent"4. android:layout_height="fill_parent">5. <TextView android:layout_width="fill_parent"6. android:layout_height="wrap_content"7. android:textColor="#000000"8. android:textSize="18dip"9. android:background="#00FF00"10. android:text="EditText编辑框测试"11. android:gravity="center_vertical|center_horizontal"12. />13. <EditText14. android:id="@+id/editview0"15. android:layout_width="fill_parent"16. android:layout_height="wrap_content"17. android:hint="请输入帐号"18. android:phoneNumber="true"19. />20.21. <EditText22. android:id="@+id/editview1"23. android:layout_width="fill_parent"24. android:layout_height="wrap_content"25. android:hint="请输入密码"26. android:password="true"27. />28. <Button29. android:id="@+id/editbutton0"30. android:layout_width="fill_parent"31. android:layout_height="wrap_content"32. android:text="确定"33. />34. </LinearLayout>view plaincopy to clipboardprint?1. public class RadioActivity extends Activity {2.3. Context mContext = null;4. @Override5. protected void onCreate(Bundle savedInstanceState) {6. setContentView(yout.radioview);7. mContext = this;8. //单选组(只有在一个组中的按钮可以单选)9. RadioGroup radioGroup = (RadioGroup)findViewById(R.id.radion0);10.11. //单选按钮(第一组)12. final RadioButton radioButton0 = (RadioButton)findViewById(R.id.radionButton0);13. final RadioButton radioButton1 = (RadioButton)findViewById(R.id.radionButton1);14. final RadioButton radioButton2 = (RadioButton)findViewById(R.id.radionButton2);15.16. radioGroup.setOnCheckedChangeListener(new OnCheckedChangeListener() {17.18. @Override19. public void onCheckedChanged(RadioGroup arg0, int checkID) {20. if(radioButton0.getId() == checkID) {21. Toast.makeText(RadioActivity.this, "您选中了第一组" + radioButton0.getText(), Toast.LENGTH_LONG).show();22. }else if(radioButton1.getId() == checkID) {23. Toast.makeText(RadioActivity.this, "您选中了第一组" + radioButton1.getText(), Toast.LENGTH_LONG).show();24. }else if(radioButton2.getId() == checkID) {25. Toast.makeText(RadioActivity.this, "您选中了第一组" + radioButton2.getText(), Toast.LENGTH_LONG).show();26. }27. }28. });29.30. RadioGroup radioGroup0 = (RadioGroup)findViewById(R.id.radion1);31.32. //单选按钮(第二组)33. final RadioButton radioButton3 = (RadioButton)findViewById(R.id.radionButton3);34. final RadioButton radioButton4 = (RadioButton)findViewById(R.id.radionButton4);35. final RadioButton radioButton5 = (RadioButton)findViewById(R.id.radionButton5);36.37. radioGroup0.setOnCheckedChangeListener(new OnCheckedChangeListener() {38.39. @Override40. public void onCheckedChanged(RadioGroup arg0, int checkID) {41. if(radioButton3.getId() == checkID) {42. Toast.makeText(RadioActivity.this, "您选中了第二组" + radioButton3.getText(), Toast.LENGTH_LONG).show();43. }else if(radioButton4.getId() == checkID) {44. Toast.makeText(RadioActivity.this, "您选中了第二组" + radioButton4.getText(), Toast.LENGTH_LONG).show();45. }else if(radioButton5.getId() == checkID) {46. Toast.makeText(RadioActivity.this, "您选中了第二组" + radioButton5.getText(), Toast.LENGTH_LONG).show();47. }48. }49. });50. super.onCreate(savedInstanceState);51. }52. }1. <?xml version="1.0"encoding="utf-8"?>2. <LinearLayout xmlns:android="/apk/res/android"3. android:orientation="vertical"android:layout_width="fill_parent"4. android:layout_height="fill_parent">5. <TextView android:layout_width="fill_parent"6. android:layout_height="wrap_content"7. android:textColor="#000000"8. android:textSize="18dip"9. android:background="#00FF00"10. android:text="单项选择测试第一组"11. android:gravity="center_vertical|center_horizontal"12. />13. <RadioGroup14. android:id="@+id/radion0"15. android:layout_width="fill_parent"16. android:layout_height="wrap_content">17. <RadioButton18. android:id="@+id/radionButton0"19. android:layout_width="fill_parent"20. android:layout_height="wrap_content"21. android:text="item0"22. />23. <RadioButton24. android:id="@+id/radionButton1"26. android:layout_height="wrap_content"27. android:text="item1"28. />29. <RadioButton30. android:id="@+id/radionButton2"31. android:layout_width="fill_parent"32. android:layout_height="wrap_content"33. android:text="item2"34. />35. </RadioGroup>36.37. <TextView android:layout_width="fill_parent"38. android:layout_height="wrap_content"39. android:textColor="#000000"40. android:textSize="18dip"41. android:background="#00FF00"42. android:text="单项选择测试第二组"43. android:gravity="center_vertical|center_horizontal"44. />45. <RadioGroup46. android:id="@+id/radion1"47. android:layout_width="fill_parent"48. android:layout_height="wrap_content">49. <RadioButton50. android:id="@+id/radionButton3"51. android:layout_width="fill_parent"52. android:layout_height="wrap_content"53. android:text="item3"54. />55. <RadioButton56. android:id="@+id/radionButton4"58. android:layout_height="wrap_content"59. android:text="item4"60. />61. <RadioButton62. android:id="@+id/radionButton5"63. android:layout_width="fill_parent"64. android:layout_height="wrap_content"65. android:text="item5"66. />67. </RadioGroup>68. </LinearLayout>view plaincopy to clipboardprint?1. public class CheckboxActivity extends Activity {2.3. //用来储存选中的内容4. ArrayList <String>item = new ArrayList<String>();5.6. @Override7. protected void onCreate(Bundle savedInstanceState) {8. setContentView(yout.checkboxview);9.10. CheckBox checkbox0 = (CheckBox)findViewById(R.id.checkboxview0);11. CheckBox checkbox1 = (CheckBox)findViewById(R.id.checkboxview1);12. CheckBox checkbox2 = (CheckBox)findViewById(R.id.checkboxview2);13. CheckBox checkbox3 = (CheckBox)findViewById(R.id.checkboxview3);14. Button button = (Button)findViewById(R.id.checkboxbutton);15. //对checkbox进行监听16. checkbox0.setOnCheckedChangeListener(new OnCheckedChangeListener() {17.18. @Override19. public void onCheckedChanged(CompoundButton button, boolean arg1) {20. String str = button.getText().toString();21. if (button.isChecked()) {22. item.add(str);23. } else {24. item.remove(str);25. }26.27. }28. });29.30. checkbox1.setOnCheckedChangeListener(new OnCheckedChangeListener() {31.32. @Override33. public void onCheckedChanged(CompoundButton button, boolean arg1) {34. String str = button.getText().toString();35. if (button.isChecked()) {36. item.add(str);37. } else {38. item.remove(str);39. }40.41. }42. });43. checkbox2.setOnCheckedChangeListener(new OnCheckedChangeListener() {44.45. @Override46. public void onCheckedChanged(CompoundButton button, boolean arg1) {47. String str = button.getText().toString();48. if (button.isChecked()) {49. item.add(str);50. } else {51. item.remove(str);52. }53.54. }55. });56. checkbox3.setOnCheckedChangeListener(new OnCheckedChangeListener() {57.58. @Override59. public void onCheckedChanged(CompoundButton button, boolean arg1) {60. String str = button.getText().toString();61. if (button.isChecked()) {62. item.add(str);63. } else {64. item.remove(str);65. }66.67. }68. });69.70. button.setOnClickListener(new OnClickListener() {71.72. @Override73. public void onClick(View arg0) {74. String str = item.toString();75. Toast.makeText(CheckboxActivity.this, "您选中了" + str, Toast.LENGTH_LONG).show();76.77. }78. });79. super.onCreate(savedInstanceState);80. }81. }1. <?xml version="1.0"encoding="utf-8"?>2. <LinearLayout xmlns:android="/apk/res/android"3. android:orientation="vertical"android:layout_width="fill_parent"4. android:layout_height="fill_parent">5. <TextView android:layout_width="fill_parent"6. android:layout_height="wrap_content"7. android:textColor="#000000"8. android:textSize="18dip"9. android:background="#00FF00"10. android:text="多项选择测试"11. android:gravity="center_vertical|center_horizontal"12. />13. <CheckBox14. android:id="@+id/checkboxview0"15. android:layout_width="fill_parent"16. android:layout_height="wrap_content"17. android:text="item0"18. />19. <CheckBox20. android:id="@+id/checkboxview1"21. android:layout_width="fill_parent"22. android:layout_height="wrap_content"23. android:text="item1"24. />25. <CheckBox26. android:id="@+id/checkboxview2"27. android:layout_width="fill_parent"28. android:layout_height="wrap_content"29. android:text="item2"30. />31. <CheckBox32. android:id="@+id/checkboxview3"33. android:layout_width="fill_parent"34. android:layout_height="wrap_content"35. android:text="item3"36. />37. <Button38. android:id="@+id/checkboxbutton"39. android:layout_width="fill_parent"40. android:layout_height="wrap_content"41. android:text="确定"42. />43. </LinearLayout>。