Eclipse使用手册
- 格式:doc
- 大小:680.50 KB
- 文档页数:26
iAbout the T utorialEclipse is an integrated development environment (IDE) for Java and other programming languages like C, C++, PHP, and Ruby etc. Development environment provided by Eclipse includes the Eclipse Java development tools (JDT) for Java, Eclipse CDT for C/C++, and Eclipse PDT for PHP, among others.This tutorial will teach you how to use Eclipse in your day-2-day life while developing any software project using Eclipse IDE. We will give special emphasis on Java project. AudienceThis tutorial has been prepared for beginners to help them understand basic functionality of Eclipse tool. After completing this tutorial, you will find yourself at a moderate level of expertise in using Eclipse IDE from where you can take yourself to next levels. PrerequisitesWe assume you are going to use Eclipse IDE to handle all levels of Java projects development. So it will be good if you have knowledge of software development using any programming language specially Java programming.Copyright & Disclaimer© Copyright 2015 by Tutorials Point (I) Pvt. Ltd.All the content and graphics published in this e-book are the property of Tutorials Point (I) Pvt. Ltd. The user of this e-book can retain a copy for future reference but commercial use of this data is not allowed. Distribution or republishing any content or a part of the content of this e-book in any manner is also not allowed without written consent of the publisher. We strive to update the contents of our website and tutorials as timely and as precisely as possible, however, the contents may contain inaccuracies or errors. Tutorials Point (I) Pvt. Ltd. provides no guarantee regarding the accuracy, timeliness or completeness of our website or its contents including this tutorial. If you discover any errors on our website or inthistutorial,******************************************iT able of ContentsAbout the Tutorial (i)Audience (i)Prerequisites (i)Copyright & Disclaimer (i)Table of Contents .................................................................................................................................... i i 1.OVERVIEW (1)What is Eclipse? (1)Licensing (1)Eclipse Releases (1)2.INSTALLATION (3)Downloading Eclipse (3)Installing Eclipse (3)Launching Eclipse (4)3.EXPLORE WINDOWS (5)Parts of an Eclipse Window (5)Using Multiple Windows (6)4.EXPLORE MENUS (7)Typical Eclipse Menus (7)Brief Description of Menus (8)Customizing Menus (8)5.EXPLORE VIEWS (9)About Views (9)Organizing Views (9)Moving Views (9)Creating View Folders (10)Opening a view (10)6.PERSPECTIVES (13)What is a Perspective? (13)Opening a Perspective (13)Switching between Perspectives (13)Closing a Perspective (14)Customizing a Perspective (14)7.WORKSPACES (16)About Eclipse Workspace (16)UI Elements for Managing the Workspace (16)8.CREATE JAVA PROJECT (18)Opening the New Java Project wizard (18)Using the New Java Project wizard (18)Viewing the Newly Created Project (20)9.CREATE JAVA PACKAGE (21)Opening the New Java Package wizard (21)Using the New Java Package Wizard (21)Viewing the Newly Created Package (22)10.CREATE JAVA CLASS (23)Opening the New Java Class Wizard (23)Using the New Java Class Wizard (23)Viewing the Newly Created Java class (24)11.CREATE JAVA INTERFACE (25)Opening the New Java Interface Wizard (25)Using the New Java Interface Wizard (25)Viewing the Newly Created Java Interface (26)12.CREATE XML FILE (27)Opening the New XML File wizard (27)Using the New XML File wizard (28)Viewing the Newly Created XML File (29)13.JAVA BUILD PATH (30)Setting the Java Build Path (30)14.RUN CONFIGURATION (31)Creating and Using a Run Configuration (31)15.RUNNING A PROGRAM (33)Running a Java Program (33)16.CREATE JAR FILES (35)Opening the Jar File wizard (35)Using the Jar File wizard (35)17.CLOSE PROJECT (37)Why Close a Project? (37)How to Close a Project? (37)Closed Project in Package Explorer (38)18.REOPEN PROJECT (39)Reopening a Closed Project (39)19.BUILD PROJECT (40)Building a Java Project (40)20.DEBUG CONFIGURATION (42)Creating and Using a Debug Configuration (42)21.DEBUGGING A PROGRAM (44)Debugging a Java Program (44)22.PREFERENCES (48)Setting Preferences (48)23.CONTENT ASSIST (50)Using Content Assist (50)24.QUICK FIX (52)Using Quix Fix (52)25.HOVER HELP (54)Using Hover Help (54)26.SEARCH MENU (56)Searching the Workspace (56)27.NAVIGATION (58)Navigating the Eclipse Workspace (58)Open Type (58)Open Type in Hierarchy (60)Open Resource (61)28.REFACTORING (63)Refactoring using Eclipse (63)29.ADD BOOKMARKS (64)About Bookmarks (64)Adding a Bookmark (64)Opening the Bookmarks View (64)Using the Bookmarks View (65)30.TASK MANAGEMENT (66)Managing Tasks (66)Opening the Tasks View (67)Using the Tasks View (67)31.INSTALL PLUGINS (69)Locating and Installing Plug-ins (69)32.CODE TEMPLATES (73)Using Code Templates (73)Modifying/Adding code templates (74)33.SHORTCUTS (75)About Shortcuts (75)34.RESTART OPTION (78)Restarting Eclipse (78)35.TIPS & TRICKS (79)36.WEB BROWSERS (81)Internal Web Browser (81)Eclipse 7What is Eclipse?In the context of computing, Eclipse is an integrated development environment (IDE) for developing applications using the Java programming language and other programming languages such as C/C++, Python, PERL, Ruby etc.The Eclipse platform which provides the foundation for the Eclipse IDE is composed of plug-ins and is designed to be extensible using additional plug-ins. Developed using Java, the Eclipse platform can be used to develop rich client applications, integrated development environments, and other tools. Eclipse can be used as an IDE for any programming language for which a plug-in is available.The Java Development Tools (JDT) project provides a plug-in that allows Eclipse to be used as a Java IDE, PyDev is a plugin that allows Eclipse to be used as a Python IDE, C/C++ Development Tools (CDT) is a plug-in that allows Eclipse to be used for developing application using C/C++, the Eclipse Scala plug-in allows Eclipse to be used an IDE to develop Scala applications and PHPeclipse is a plug-in to eclipse that provides complete development tool for PHP.LicensingEclipse platform and other plug-ins from the Eclipse foundation is released under the Eclipse Public License (EPL). EPL ensures that Eclipse is free to download and install. It also allows Eclipse to be modified and distributed.Eclipse ReleasesEvery year, since 2006, the Eclipse foundation releases the Eclipse Platform and a number of other plug-ins in June.1.Eclipse8Eclipse 9Downloading EclipseYou can download eclipse from /downloads/. The download page lists a number of flavors of eclipse.The capabilities of each packaging of eclipse are different. Java developers typically use Eclipse Classic or Eclipse IDE for developing Java applications.The drop down box in the right corner of the download page allows you to set the operating system on which eclipse is to be installed. You can choose between Windows, Linux and Mac. Eclipse is packaged as a zip file.Installing EclipseTo install on windows, you need a tool that can extract the contents of a zip file. For example you can use:∙7-zip ∙PeaZip ∙ IZArcUsing any one of these tools, extract the contents of the eclipse zip file to any folder of your choice.2.Launching EclipseOn the windows platform, if you extracted the contents of the zip file to c:\, then you can start eclipse by using c:\eclipse\eclipse.exeWhen eclipse starts up for the first time it prompts you for the location of the workspace folder. All your data will be stored in the workspace folder. You can accept the default or choose a new location.1011If you select "Use this as the default and do not ask again", this dialog box will not come up again. You can change this preference using the Workspaces Preference Page. See the Preference tutorialpage for more details.Eclipse 12Parts of an Eclipse WindowThe major visible parts of an eclipse window are:∙Views ∙Editors (all appear in one editor area) ∙Menu Bar ∙ ToolbarAn eclipse perspective is the name given to an initial collection and arrangement of views and an editor area. The default perspective is called java. An eclipse window can have multiple perspectives open in it but only one perspective can be active at any point of time. A user can switch between open perspectives or open a new perspective. A perspective controls what appears in some menus and tool bars.3.EclipseA perspective has only one editor area in which multiple editors can be open. The editor area is usually surrounded by multiple views. In general, editors are used to edit the project data and views are used to view the project metadata. For example, the package explorer shows the java files in the project and the java editor is used to edit a java file.The eclipse window can contain multiple editors and views but only one of them is active at any given point of time. The title bar of the active editor or view looks different from all the others.The UI elements on the menu bar and tool bar represent commands that can be triggered by an end user.Using Multiple WindowsMultiple Eclipse Windows can be open at the same time. To open a new window, click on the Windows menu and select the New Window menu item.Each window can have a different perspective open in them. For example you could open two Eclipse windows one in the Java perspective and the other in the Debug perspective. The window showing the Java perspective can be used for editing the java code and the window showing the debug perspective can be used for debugging the application being developed.13Eclipse 14T ypical Eclipse MenusThe typical menus available on the menu bar of an Eclipse window are:∙File menu ∙Edit menu ∙Navigate menu ∙Search menu ∙Project menu ∙Run menu ∙Window menu ∙ Help menu4.Plug-ins can add new menus and menu items. For example when the java editor is open, you will see the Source menu and when the XML editor is open, you will see the Design menu. Brief Description of Menus15Customizing MenusThe visible menu items on a menu depend on the installed plug-ins and customization done using the Customize Perspective dialog box.16Eclipse 17About ViewsEclipse views allow users to see a graphical representation of project metadata. For example the project navigator view presents a graphical representation of the folders and files associated with a project and properties view presents a graphical representation of an element selected in another view or editor.An eclipse perspective can show any number of views and editors. All editor instances appear in a single editor area, whereas views are placed inside view folders. A workbench window can display any number of view folders. Each view folder can display one or more views. Organizing ViewsThe following picture shows four views arranged in a view folder.The picture given below shows the same four views arranged in two view folders.5.Moving ViewsTo move a view from one view folder to another, just click on the view title and drag to the title bar area of another view folder. The green line shown below is a result of dragging the title bar of the Properties view from one view folder to the title bar area of another view folder. The Properties view can be moved to where the green line is by releasing the mouse button and sending out a drop event.Creating View FoldersView folders can be dynamically created by dragging the title bar of a view to anywhere outside the editor area and title bar of another view folder. As you drag the title bar around, green lines will indicate where exactly the new view folder will be created.Moving the drag icon to the bottom of a window allows you to create a view folder that spans the entire width of the window. Moving the drag icon to the left or right edge of window allows you to create a view folder that spans the entire height of the window.18Opening a viewTo open a view, click on the Window menu and select the Show View menu item.19Clicking on the Other menu item brings up the Show View dialog box that allows you to locate and activate a view.20The views are organized by category. To quickly locate a view, just type the name of a view into the filter text box. To open a view, select it and click on the OK button. The subsequent pages of this tutorial introduce you to a number of useful views.21End of ebook previewIf you liked what you saw…Buy it from our store @ https://22。
Eclipse中文教程介绍Eclipse 是一款强大的集成开发环境(IDE),广泛用于Java开发和其他语言的开发。
它提供了丰富的功能和工具,可以帮助开发者更高效地编写、调试和测试代码。
本教程将介绍如何使用Eclipse进行Java开发,包括安装和配置Eclipse,项目管理,代码编辑,调试和测试等基本操作。
安装和配置Eclipse下载Eclipse首先,你需要从Eclipse官方网站上下载最新的Eclipse版本。
该网站提供了各种不同用途的Eclipse包,例如Java开发,C/C++开发和Web开发等。
选择适合你开发需求的版本,然后下载对应的压缩包文件。
解压缩Eclipse文件下载完成后,将压缩包解压缩到你喜欢的目录。
解压缩后,你将看到Eclipse的安装目录及其子目录。
启动Eclipse进入Eclipse的安装目录,找到eclipse.exe文件(在Windows系统中),双击运行。
如果是在Linux或Mac系统中,你需要在终端中导航到Eclipse目录,并运行./eclipse 命令启动Eclipse。
配置Eclipse在初始启动时,Eclipse会询问你要使用的工作空间目录。
工作空间是Eclipse用来存储项目和设置的目录。
你可以选择使用默认的工作空间目录,或者手动选择一个你喜欢的位置。
创建和管理项目创建新项目要创建新的Java项目,首先点击菜单栏上的“File”选项,然后选择“New” -> “Java Project”。
在弹出的对话框中输入项目的名称,并选择合适的JDK版本。
导入现有项目如果你已经有现有的Java项目,你可以将其导入到Eclipse 中。
点击菜单中的“File”选项,然后选择“Import” -> “ExistingProjects into Workspace”。
在弹出的对话框中选择项目所在的目录,并点击“Finish”按钮。
项目结构在Eclipse中,项目由源代码、配置文件和其他资源组成。

Eclipse完全手册Eclipse是一个开放源码的、可扩展的应用开发平台,该平台为编程人员提供了一流的Java 集成开发环境。
作为一套开源工具,可用于构建Web Services、J2EE等各种类型的应用,其所提供的功能不亚于、甚至要超过由专业的集成环境供应商所提供的商业化产品,如JBuilder。
Eclipse最有魅力的地方就在于它的插件体系结构。
在这个体系中重要的概念是扩展点(extension points),也就是为插件提供的接口。
每一个插件都是在现有的扩展点上开发的,并可能还留有自己的扩展点,以便在这个插件上继续开发。
由于有了插件,Eclipse系统的核心部分在启动的时候要完成的工作十分简单:启动平台的基础部分和查找系统的插件。
在Eclipse中实现的绝大部分功能是由相应的插件完成的,比如WrokBench UI插件完成界面的外观显示,Resource Management插件完成维护或生成项目或文件等资源管理工作,而Version and Configuration Management(VCM)插件则负责完成版本控制功能,等等。
虽然以上提到的每一个功能都是绝大多数IDE环境所必备的功能,Eclipse 却把它们都做成了插件模式,甚至用来开发Java程序的开发环境(Java development tooling,JDT),也只不过是Eclipse系统中的一个普通插件而已。
整个Eclipse体系结构就像一个大拼图,可以不断地向上加插件,同时,现有插件上还可以再加插件。
虽然大多数用户很乐于将Eclipse当做Java IDE来使用,但Eclipse的目标不仅限于此。
Eclipse平台为工具提供者(Tools Provider)提供一套使用机制和一组需要遵循的规则,从而使得开发出的工具之间可以实现无缝的集成。
这些机制通过定义良好的API接口、类和方法提供给用户使用,平台同样为新的工具的开发提供强有力的组件支持(如Plug-in Development Environment,PDE——插件开发环境)。
© 2015 GN Audio A/S (GN Netcom A/S). All rights reserved. Jabra®is a registered trademark of GN Audio A/S (GN Netcom A/S). The Bluetooth® word mark and logos are owned by the Bluetooth SIG, Inc. and any use of such marks by GN Audio A/S (GN Netcom A/S) is under license. All other trademarks included herein are the property of their respective owners.MAdE IN ChINAMOdEL: OTE251. wELCO ME (5)2. PROdUCT OVERVIEw (6)2.1 INCLUdEd ACCESSORIES3. hOw TO wEAR (8)3.1 SELECTING ThE CORRECT EARGELS3.2 GETTING ThE CORRECT FIT4. hOw TO ChARGE (10)4.1 ON-ThE-GO ChARGING4.2 USB ChARGING5. hOw TO CONNECT (14)5.1 TURNING ThE hEAdSET ON/OFF5.2 CONNECT USING ThE APP5.3 CONNECT VIA BLUETOOTh5.4 CONNECT wITh AN NFC-ENABLEd dEVICE6. JABRA ASSIST APP (17)7. hOw TO USE (18)7.1 CALLS7.2 hEAdSET VOICE CONTROLS7.3 hEAdSET VOICE GUIdANCE7.4 PhONE VOICE COMMANdS (SIRI®, GOOGLE NOw™,CORTANA™)7.5 CALLER Id7.6 MULTIPLE CALL hANdLING7.7 hOw TO ChANGE hEAdSET LANGUAGE7.8 hOw TO UPdATE hEAdSET FIRMwARE7.9 hOw TO RESET ThE hEAdSET8. SUPPO RT (25)8.1 FAq8.2 hOw TO CARE FOR yOUR hEAdSET9. TEChNICAL SPECIFICATIONS (26)1. wELCOMEThank you for using the Jabra Eclipse. We hope you will enjoy it!JABRA eClipse feAtuResButton-free headset - gently tap/double tap the headset*Up to 10 hours talk time (up to 3 hours in the headset and up to 7 hours in the charging case)**Power Nap for extended standby timeDual microphones for noise cancellationConnect with NFC**HD voice compatible**Headset voice guidance***Headset voice control***Phone voice commands - supports Siri®/Google Now™/Cortana™**Wireless freedom - Up to 30 meters/98 feet**Portable charging case includedComfortable EarGels in various sizes(XS, S, M and L) included*Tapping the headset too hard may create a sound that could damage your hearing**Phone/network dependent*** 11 language options available if using the Jabra Assist app2. PROdUCT OVERVIEw HeADsetLED indicatorCHARGiNG CAse (top view)Headset status LEDCharging casebattery status LEDsHeadsetdock USB charging portCHARGiNG CAse (BottoM view)Jabra button NFC zone2.1INCLUDED ACCESSoRIESUSB cable Large EarGel Medium EarGel Small EarGel Extra-small EarGel Note: You can purchase an additional charging case and accessories online at 3. hOw TO wEARThe headset is designed for right ear wearing. For the optimal sound quality and the most comfortable fit, select the correct EarGel size and ensure the headset is fitted correctly into your ear.3.1 SELECTING THE CoRRECT EARGELS The headset is supplied with four EarGel sizes: large, medium, small and extra small. The correct EarGel will feel tight and seal out backgroundFit the headset firmly inside your right ear, andangle the microphone down towards your mouth.4. hOw TO ChARGEIt is recommended to fully charge the headset and the charging case before first-time use.Fully charged the headset will have up to 3 hours of talk time, and the charging case will have up to 7 hours of battery.4.1 oN-THE-Go CHARGINGDock the headset in the charging case foron-the-go charging. It takes approx. 2 hours to fully charge the headset.4.2 USB CHARGINGPlug the charging case into a USB power supply using the supplied USB cable to charge the headset and/or the charging case. It takes approx.3 hours to charge the headset and the charging case together.4.3 BATTERY STATUSTo hear the current remaining talk time in your headset, gently tap the headset when it is in your ear and you are not on a call.To see the charging case battery status and/or the headset battery status (when docked), tap the Jabra button on the bottom of the charging case.20-100% battery0-20% battery20-100% battery0-20% battery66-100% battery33-66% battery0-33% battery4.4 PoWER NAPTo extend standby time the headset will automatically enter Power Nap mode when the headset is out of range of your connected mobile device for more than 15 minutes, or when the headset has not been moved for 1 hour. Power Nap provides up to 7 days of battery readiness/standby time.To exit Power Nap simply move the headset. Your mobile device must be switched on, within range, and have Bluetooth enabled.To answer an incoming call when the headset is in Power Nap mode, simply wear the headset and double-tap it to answer the call.5. hOw TO CONNECT5.1 TURNING THE HEADSET oN/oFFoN: Undock the headset from the charging case. off: Dock the headset in the charging case. The Headset status LED will briefly light up white when the headset is docked.5.2 CoNNECT USING THE APPThe easiest way to connect to your mobile device is to download and use the Jabra Assist app for ioS or Android devices.5.3 CoNNECT vIA BLUETooTH1. Dock the headset in the charging case, and ensure the headset is charged.2. Press and hold (3 secs) the Jabra button on the bottom of the charging case until the light3. Wear the headset and follow the voice-guided instructions.Note: Connecting via Bluetooth only needs to be completed the first time you are connecting to a new device.5.4 CoNNECT WITH AN NFC-ENABLEDDEvICEDock the headset in the charging case, and slide your NFC-enabled device against the NFC zone on the bottom of the charging case until a connection is confirmed on your mobile device.6. JABRA ASSIST APPThe Jabra Assist app is a free app for ioS or Android devices that enables you to:Customize your in-call audioChange headset languageAutomatic text message read-outUpdate headset firmwareEnable/disable headset voice guidanceAnd more..Jabra AssistAndroid download - Google playios download - App store7. hOw TO USELED indicatorNFC zone 7.1 CALLSTurn on headsetUndock the headset from the charging case End/reject call Dock the headset in the charging caseAnswer call Gently double-tap the headset,or say ‘ Answer’End call Gently double-tap the headset Reject call Say ‘Ignore’ActivateSiri®/GoogleNow™/Cortana™(phonedependent)Gently double-tap the headsetwhen not on a callHeadsetbattery statusGently tap the headset when noton a call7.2 HEADSET voICE CoNTRoLSH eadset voice controls are commands you can speak to control the headset.Answer Answer incoming callIgnore Reject incoming callvoice controls are available in the following languages: English (US), Chinese (Mandarin), Japanese, French, German, Russian, Polish, Dutch, Spanish, and Italian.Language packs can be downloaded using the Jabra Assist app. If the headset language is changed, please refer to that language’s user manual for the correct voice controls.7.3 HEADSET voICE GUIDANCEHeadset voice guidance are voice announcements intended to guide you or give headset status updates (e.g. connection and battery status). voice guidance is available in the following languages: English (US), Chinese (Mandarin), Japanese, French, German, Russian, Polish, Dutch, Spanish, Italian and Farsi.Language packs can be downloaded using the Jabra Assist app.7.4 PHoNE voICE CoMMANDS(SIRI®, GooGLE NoW™, CoRTANA™)Phone voice commands enable you to speak to Siri®/Cortana™/Google Now™ on your mobile phone using your headset. For more information on using Siri®, Google Now™, or Cortana™, please refer to your phone’s user manual.Activate Siri®/Google Now™/Cortana™(phone dependent)Gently double-tap the headset when not on a call7.5 CALLER IDCaller ID is the voice announcement of a contact name when there is an incoming call.The following requirements for Caller ID must be met:The mobile phone must support the Bluetooth Phone Book Access Profile (PBAP)The incoming call’s phone number must be associated with a stored contact in the phoneThe incoming call must not be from an unknown, unlisted, or blocked callerNote: Japanese Caller ID supports phone number readout only. Chinese Caller ID supports Chinese Simplified only.7.6 MULTIPLE CALL HANDLINGThe headset can answer or reject calls when you are already on a call.End current call andanswer incoming call Gently double-tap the headsetReject incoming call, when on a call Gently tap the headset7.7 HoW To CHANGE HEADSET LANGUAGE The headset language can be changed using the Jabra Assist app.The headset language can be changed to one of the following languages: English (US), Chinese (Mandarin), Japanese, French, German, Russian, Polish, Dutch, Spanish, Italian, and Farsi.7.8 HoW To UPDATE HEADSET FIRMWARE To update headset firmware to the latest version, download and use the Jabra Assist app for ioS or Android, or go to /eclipse for more help.7.9 HoW To RESET THE HEADSET Resetting the headset will clear the list of connected devices. You will need to reconnect to your mobile device/s.1. Dock the headset in the charging case, and connect the charging case to power using the USB cable.2. Press and hold (8 secs) the Jabra button on the bottom of the charging case until the light flashes purple rapidly. Release the button.8. SUPPORT8.1 FAqview the FAqs on /eclipse8.2 HoW To CARE FoR YoUR HEADSETAlways store the headset with the power off and safely protected.Avoid storage at extreme temperatures (above 70°C/158°F or below -20°C/-4°F). This can shorten battery life and may affect the headset.9. TEChNICALSPECIFICATIONS。

Cary Eclipse 中文操作手册美国瓦里安中国有限公司分析仪器服务部目录一、开机及基本操作步骤 (3)二、通用符号及工具条说明 (3)三、应用软件 (9)(一).简单读数定波长测定软件 (9)(二.)浓度测定软件 (13)(三).波长扫描软件 (18)(四)动力学软件 (24)(五)高级读数定波长测定软件 (29)(六)系统信息软件 (33)(七)灯的调整…………………………………………..…35.(八)仪器检定标准软件 (38)四、维护 (41)五、Glossary术语表 (42)1.一、开机及基本操作步骤2.开电脑进入Windows系统。
3.开Cary Eclipse主机(注:保证样品室内是空的)。
4.双击Cary Eclipse图标。
5.在Cary Eclipse主显示窗下,双击所选图标(Concentration为例)。
进入浓度主菜单(详见后面浓度软件中文说明)。
6.新编一个方法步骤。
1).单击Setup功能键,进入参数设置页面。
2).按Cary Control→Options→Accessories→Standards→Samples→Reports→Auto store顺序,设置好每页的参数。
然后按OK回到浓度主菜单。
3).单击View莱单,选择好需要显示的内容。
基本选顷Toolber;buttons;Graphics;Report。
4).单击Zero放空白到样品室内→按OK。
提示:Load blank press ok to read(放空白按ok读)。
5).单击Start.出现标准/样品选择页。
Solutions Available(溶液有效)。
此左框中的标准或样品为不需要重新测量的内容。
Selected for Analysis(选择分析的标准和样品)。
此右框的内容为准备分析的标准和样品。
6).按ok进入分析测试。
Present std1(1.0g/l)提示:放标准1然后按OK键进行读数。
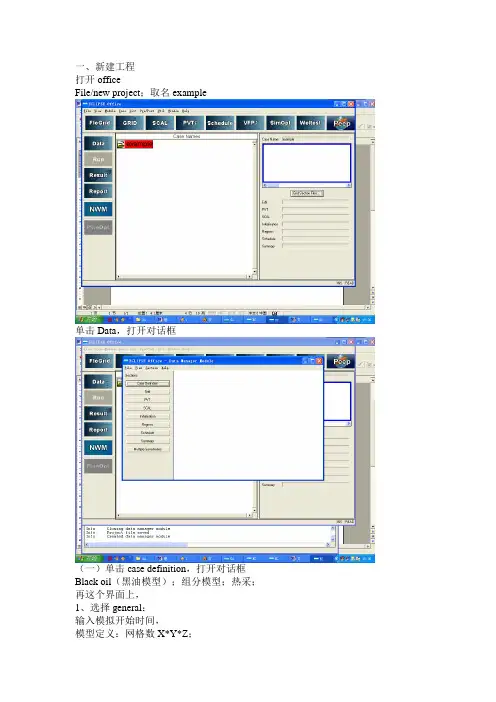
一、新建工程打开officeFile/new project;取名 example单击Data,打开对话框(一)单击 case definition,打开对话框Black oil(黑油模型);组分模型;热采;再这个界面上,1、选择general:输入模拟开始时间,模型定义:网格数X*Y*Z;单位(units):field,Metric,Lab2、选择reservoir定义Grid type:Cartesian;Radial定义geometry type:Block centered;Corner point选择流体类型:gas/oil/water点击OK,返回data模块(二)点击Grid,打开grid section如下对话框从菜单项中打开,subsection/grid keyword,打开grid keywords section1、选择keywords type: PropertiesInsert keyword:PERMX;PERMY;PERMZ;NTG;PORO;单击Apply2、选择keywords type: GeometryInsert keyword:DX;DY;DZ;TOPS3、选择keywords type: Operational keywordsInsert keyword:NORCHO;SAVE;RPTGRID;INIT4、可以选择水体等等。
5、单击close。
Grid View中Run Simulation运算后观看6、file/save file(四)打开PVT模块从这个模块中输入流体参数,组分模型应该再PVT模块下进行组分模拟。
输入 dead oil PVT PropertiesRock PropertiesFluid Dandifies at surface conditions流体、岩石等参数(五)打开SCAL模块。
从这个模块中输入相渗曲线(包括油水相渗和油气相渗)。
eclipse使用方法Eclipse是一个著名的Java开发IDE。
它为Java开发者提供了众多的功能和工具。
Eclipse不仅是一个Java开发IDE,还可以用来开发其他编程语言,例如:C ++,COBOL和PHP等。
在这篇文章中,我们将介绍如何使用Eclipse进行Java开发。
第一步:安装Eclipse首先你需要从官方网站下载Eclipse。
不同的操作系统需要下载不同版本的Eclipse。
在Eclipse官方网站上,你可以看到适合你所使用的操作系统的下载链接。
下载完成后,你可以将下载下来的压缩包解压缩到你所需要安装的文件夹中。
第二步:配置Java环境在使用Eclipse之前,你需要安装Java Runtime Environment(JRE)。
这是Java开发的运行环境,Eclipse将使用它来编译和运行Java代码。
如果你已经安装了Java环境,那么你可以跳过这个步骤。
要配置Java环境,请先下载Java并按照安装步骤进行安装。
安装完成之后,打开Eclipse,并单击“Window”菜单,从下拉列表中选择“Preference”。
选择Java选项,点击“Installed JREs”选项卡,单击“Add”按钮,打开“Add JRE”对话框。
选择“Standard VM”选项(不要选择“Execution Environment”),然后单击下一步。
在下一步中,单击“Directory”按钮并浏览到你所安装的Java文件夹。
选择文件夹,单击“Finish”按钮。
回到“Installed JREs”选项卡,确保你已选择了安装的Java版本,单击“OK”按钮即可。
第三步:创建一个新项目在Eclipse界面左侧有一个“Package explorer”视图,用于列出所有项目。
要创建新项目,选择“File”菜单,选择“New”选项,然后选择“Java Project”选项。
在创建新项目的对话框中,输入项目名称和位置,然后保留默认的选项,单击“Finish”按钮。

eclipse 教程Eclipse是一种常用的集成开发环境(IDE),由Eclipse基金会开发和维护。
它主要用于Java开发,但也支持其他编程语言,如C++、Python等。
在本教程中,我们将介绍Eclipse的基本使用方法和一些常见的功能。
无论你是初学者还是有一定经验的开发人员,本教程都会帮助你快速上手Eclipse并提高工作效率。
首先,你需要下载并安装Eclipse。
你可以从Eclipse官方网站上下载适合你操作系统的版本。
安装过程相对简单,按照提示进行即可。
安装完成后,启动Eclipse。
首次启动时,你会被要求选择一个工作空间(Workspace),这是你将存储项目和文件的地方。
你可以选择默认的工作空间,也可以自定义路径。
选择好工作空间后,你会进入到Eclipse的主界面。
在Eclipse中,你可以创建和管理项目。
点击菜单栏的"File",然后选择"New",接着选择"Project"。
这将打开一个新的窗口,列出了Eclipse支持的各种项目类型。
选择你想创建的项目类型,并按照提示进行操作。
一旦项目创建完成,你将看到它出现在Eclipse的“Package Explorer”视图中。
Eclipse还提供了强大的代码编辑和调试功能。
你可以打开一个源代码文件并开始编写代码。
Eclipse将自动对你输入的代码进行语法高亮和自动补全。
当你需要调试程序时,可以在代码中设置断点,然后使用Eclipse的调试功能逐行执行代码、查看变量的值等。
除了基本的编辑和调试功能,Eclipse还支持插件扩展,你可以根据自己的需求安装不同的插件。
比如,你可以安装Web 开发插件来开发Java Web应用,或者安装Git插件来管理代码的版本控制等。
总之,Eclipse是一个功能强大且灵活的集成开发环境,适用于各种类型的开发项目。
通过学习本教程,你将能够快速上手并充分发挥Eclipse的各种功能。

eclipse中文教程Eclipse是一个广泛使用的Java集成开发环境(IDE),被许多开发者用来编写Java应用程序。
本文将为您介绍Eclipse的基本功能以及如何使用它来进行Java开发。
首先,让我们来了解一下Eclipse的安装和配置。
您可以从Eclipse官方网站上下载Eclipse的最新版本。
安装完成后,您需要配置Java环境变量,以便Eclipse可以找到JDK并正常运行。
配置好环境变量后,您可以启动Eclipse。
一旦您启动了Eclipse,您将看到一个欢迎页面。
在这个页面上,您可以选择创建一个新的Java项目或导入现有的项目。
要创建一个新的Java项目,您需要选择“新建”按钮并选择“Java项目”。
在项目创建向导中,您需要输入项目的名称和存储位置。
一旦您完成了这些步骤,您的项目将会在Eclipse的项目资源管理器中显示出来。
在Eclipse中编写Java代码非常简单。
您只需双击项目资源管理器中的“src”文件夹,然后选择“新建Java类”来创建一个新的Java类。
在类编辑器中,您可以编写您的Java代码。
Eclipse提供了许多功能,如代码自动完成功能、错误检查和自动补全等,以帮助您更高效地编写代码。
除了编写Java代码外,Eclipse还提供了调试功能,可以帮助您定位和解决代码中的错误。
您可以设置断点并逐行执行代码,观察变量的值,以及查看代码的调用栈。
这些调试功能可以帮助您更好地理解代码的执行过程,并找到潜在的问题。
另一个强大的功能是Eclipse的插件系统。
通过安装插件,您可以将Eclipse扩展为适用于其他编程语言或框架的开发环境。
Eclipse插件社区很活跃,可以找到许多有用的插件,如用于Android开发的ADT插件、用于Web开发的WTP插件等。
除了Java开发外,Eclipse还支持其他编程语言的开发,如C/C++、Python和PHP等。
要使用Eclipse进行其他语言的开发,您需要安装相应的插件,并对项目进行适当的配置。

Eclipse MX Midnight 8C h a n n e l E x pa n d e r/C o n t r o l l e rU s e r s M a n u a lEclipse MX Midnight is a trademark of JLCooper Electronics. All other brand names are the property of their respective owners.Eclipse MX Midnight User’s Manual, First EditionPart Number 9321062009 JLCooper Electronics, 142 Arena Street, El Segundo, CA 90245 USA (310) 322-9990 ¬ (310) 335-0110 Table of Contents Introduction (4)Installation (5)Unpacking (5)Setup (5)Connecting the Eclipse MX Midnight (6)Configuring the Eclipse MX Midnight (6)Power (6)Using the Eclipse MX Midnight (7)Troubleshooting (7)Care and Service (7)IntroductionThe Eclipse MX Midnight is a tactile control surface intended for video editing applications such as Apple Color and Final Cut Studio.The Eclipse MX Midnight is intended to operate with the Eclipse CX Midnight or Eclipse SX Midnight to add audio control to the unit. The Eclipse MX Midnight adds the following enhancements to the Eclipse SX Midnight or Eclipse CX Midnight:• 8 Touch Sensitive Moterized Faders• 32 Illuminated Buttons for Channel Specific Functions The unit connects to a master unit such as the Eclipse CX Midnight or Eclipse SX Midnight via a four pin expander cable. The expander cable carries data to and from the Eclipse MX Midnight. Power is supplied by a separate power supply for the Eclipse MX Midnight.InstallationUnpackingWhen you receive your Eclipse MX Midnight, you should receive the following items:• Eclipse MX Midnight• Power Supply• Line Cord• This Users ManualPlease take a moment to register your product at:This will allow us to notify you of important updates and changes to software or features.SetupThe compact design of the Eclipse MX Midnight makes it easy to locate wherever you need it. The Eclipse MX Midnight must be setup up in a location that does not experience vibration, excessive humidity, dust or temperature extremes.Connecting the Eclipse MX MidnightThe Eclipse MX Midnight connects directly to a master unit with a four pin expander cable. Simply connect one end of the cable to the Eclipse MX Midnight and the other end to a master unit such as the Eclipse SX Midnight.Configuring the Eclipse MX MidnightThe Eclipse MX Midnight has DIP switches on the rear panel to configure its behavior. To use the Eclipse MX Midnight as an expander unit to an Eclipse CX Midnight or Eclipse SX Midnight, set all the DIP switches to the ‘UP’ or ‘OFF” position as shown the image below.PowerThe Eclipse MX Midnight receives its power from the power connector from the rear panel. The p itch switches t power to the unit.ower w he sUsing the Eclipse MX MidnightRefer to the user documentation of your host application for details on how to use the Eclipse MX Midnight with your application.TroubleshootingIf for some reason the Eclipse MX Midnight does not give you the expected results, take a moment to do some investigating. The most important concept is that you have your Eclipse MX Midnight connected properly as outlined in Installation and Use. Take a moment to double check your setup.A common problem is forgetting to turn the power switch on or turning the unit on after the software application has launched.In addition, the JLCooper website () will contain current information on drivers, applications and troubleshooting.Care and ServiceIf properly cared for, your Eclipse MX Midnight should provide years of troublefree performance. While the Eclipse MX Midnight is built in a rugged enclosure, please avoid dropping the Eclipse MX Midnight.Clean with a soft, damp cloth. Do not allow liquids, dust or other foreign matter to get inside the unit.There are no user-serviceable parts in the Eclipse MX Midnight. Please refer to the JLCooper Electronics Limited Factory Warranty on the following page for detailed warranty and service information.JLCooper Electronics Limited Factory Warranty JLCooper Electronics ("JLCooper") warrants this product to be free of defects in materials or workmanship for a period of 12 months from the date of purchase. This warranty is non-transferable and the benefits apply only to the original owner. Proof of purchase in the form of an itemized sales receipt is required for warranty coverage. To receive service under this warranty, customers in the United States should contact the JLCooper factory at (310) 322-9990 and talk to a service technician. If necessary, a Return Authorization number may be issued. For our customers outside the United States,it is recommended that you first contact your Dealer or Distributor, since they may offer their own service or support policy. If local support is not obtainable, please send a FAX to JLCooper's Service Department at +1 310 335 0110 with a detailed description of the service required. Upon issuance of return authorization, the product should be packed in the original shipping materials and shipped prepaid and insured to: Service Department, JLCooper Electronics, 142 Arena Street, El Segundo, CA 90245. Please include the following: copy of the sales receipt, your name and address (no P.O. Boxes, please), a brief description of the problem, and any other related items discussed with the service department and considered necessary to evaluate the product or effect a repair. The return authorization number must be clearly written on the outside of the package. JLCooper will at its option, without charge for parts or labor, either repair or replace the defective part(s) or unit. Shipping costs are not covered by this warranty. JLCooper's normal repair turn around time at the factory is approximately 15 business days from receipt of productto shipping. Your actual turn around time will include return shipping. Actual turn around time will vary depending upon many factors including the repeatability of the customer's reported complaint, the availability of parts required for repair, the availability of related products needed to evaluate the product if necessary. Priority services are available at additional cost. These should be discussed with the service technician at the time the return authorization is issued. This warranty provides only the benefits specified and does not cover defects or repairs needed as result of acts beyond the control of JLCooper including but not limited to: abuse, damage by accident/negligence, damage from using incorrect power supply, modification, alteration, improper use, unauthorized servicing, tampering, or failure to operate in accordance with the procedures outlined in the owner's manual; nor for natural or man-made events such as, but not limited to flooding, lightning, tornadoes, earthquake, fire, civil unrest, war, terrorism, etc.THE DURATION OF ANY OTHER WARRANTIES, WHETHER IMPLIED OR EXPRESS, INCLUDING BUT NOT LIMITED TO THE IMPLIED WARRANTY OF MERCHANTABILITY, IS LIMITED TO THE DURATION OF THE EXPRESS WARRANTY HEREIN. JLCOOPER HEREBY EXCLUDES INCIDENTAL AND CONSEQUENTIAL DAMAGES, INCLUDING BUT NOT LIMITED TO: LOSS OF TIME, INCONVENIENCE, DELAY IN PERFORMANCE OF THIS WARRANTY, THE LOSS OF USE OF THE PRODUCT OR COMMERCIAL LOSS, AND FOR BREACH OF ANY EXPRESS OR IMPLIED WARRANTY OF MERCHANT- ABILITY APPLICABLE TO THIS PRODUCT. JLCOOPER SHALL NOT BE LIABLE FOR DAMAGES OR LOSS RESULTING FROM THE NEGLIGENT OR INTENTIONAL ACTS OF THE SHIPPER OR HIS CONTRACT AFFILIATES. THE CUSTOMER SHOULD CONTACT THE SHIPPER FOR PROPER CLAIMS PROCEDURES IN THE EVENT OF DAMAGE OR LOSS RESULTING FROM SHIPMENT. THIS WARRANTY SHALL BE GOVERENED BY THE LAWS OF THE STATE OF CALIFORNIA.。
最常用快捷键快捷键功能备注eclipse常用快捷键在开发中,常用的eclipse快捷键:代码补全:alt + /添加和取消单行注释:ctrl + /添加多行注释:ctrl + shift + /取消多行注释:ctrl + shift + \快速复制所选择的代码:ctrl + shift + ↓或↑(注意:该快捷键和windows屏幕反转快捷键重合,需要禁用windows反转快捷键)移动所选择的代码向下或向下移动:alt + ↓或↑删除所选代码:ctrl + d修正代码:ctrl + 1 当书写的程序中出现小红X可以为错误的代码提供一些解决方案快速导入类所在的包:ctrl + shift + o代码格式化:ctrl + shift + fCtrl+1 快速修复最经典的Alt+/ 提供内容的帮助记不全方法类属性最常用输入try 按alt / 自动出现代码try catch 一般很容易出现异常的代码或者是很容易出错误的代码放在try...catch中Ctrl+O显示类中方法属性和大纲查找bug时非常有用(函数列表)多按一次Ctrl+O 列出更多的内部变量Ctrl+/为每行或者选择部分添加注释调试有用Ctrl+D删除当前行最喜欢的快捷键之一Ctrl+F6 界面切换程序名切换Ctrl+F 查找Ctrl+M窗口最大最小化方便进行代码的书写Ctrl+T 快速显示当前类的继承结构Ctrl+L 定位于某行Ctrl+Shift+R快速查找资源免得左边找Ctrl+F3 打开结构(跟Ctrl+O 类似)Ctrl+Q快速定位到最后一个编辑的地方F4 查看类结构Ctrl+F11 运行Ctrl+Shift+L显示所有的快捷键F11 调试最后一次运行的程序Ctrl+Shift+F最常用格式化某段代码不选择某段代码则格式化化整个Java文件Ctrl+Shift+S 保存所有save allCtrl+H全局搜索Ctrl+Alt+↓复制当前行到下一行Alt+↓当前行和下一行相互交换位置Alt+Enter 显示当前资源(工程或者文件)的属性Ctrl+W关闭当前编辑器Ctrl+E快速显示文件下拉列表Ctrl+/(小键盘)显示当前类的所有代码Ctrl+*(小键盘)关闭当前类的所有代码Ctrl+J 查找当前选中的文本块Ctrl+Shift+J 反向查找当前选中的文本块从后往前找Ctrl+Shift+P 定位到对于的匹配符(譬如{}) (从前面定位后面时,光标要在匹配符里面,后面到前面,则反之)上面是最常用的研读代码经常用的不用会很晕Crtl+O切换查看方法(当前查找类成员)Ctrl+T看继承关系重构最常用的快捷键:(注:一般重构的快捷键都是Alt+Shift开头的了)Alt+Shift+R重命名(是我自己最爱用的一个了,尤其是变量和类的Rename,比手工方法能节省很多劳动力)Alt+Shift+M 抽取方法(这是重构里面最常用的方法之一了,尤其是对一大堆泥团代码有用)Alt+Shift+C 修改函数结构(比较实用,有N个函数调用了这个方法,修改一次搞定)Alt+Shift+L 抽取本地变量( 可以直接把一些魔法数字和字符串抽取成一个变量,尤其是多处调用的时候)Alt+Shift+F 把Class中的local变量变为field变量(比较实用的功能) Alt+Shift+I 合并变量(可能这样说有点不妥Inline)Alt+Shift+V 移动函数和变量(不怎么常用)Alt+Shift+Z 重构的后悔药(Undo)正则表达式:其实就是定义一些规则来简化String字符串的操作通过一些特定的符号组成规则来限定字符串预定的规则正则表达式的书写:是由字母、数字等一些程序中经常使用的符号组合而成学习正则表达式其实就是学习正则中的各种符号(主要了解各种正则符号的含义)正则表达式的符号规则:一般规则:x 表示一个任意字母,字符串中当前某个位置必须包含所指定的x字符例:“abc” 正则:”a[a-z]”\\ 表示反斜线例:\t 表示制表符[abc] 表示当前字符串中某个字符必须是a或b或c []表示是一个范围[^abc] 表示不是[abc][a-zA-Z] 表示所有的大小写字母[a-d[f-h]] 表示字符的范围必须是a到d或f到h (并集)[a-d&&[d-f]] 表示字符的范围必须是d (交集)[a-z&&[^xm]] 表示字符的范围在a到z之间但是不包含x和m[a-d&&[^d-f]] 表示字符的范围必须是a或b或c预定义字符:. 表示任意字符\d 表示的就是数字可以代替[0-9]\D 表示[^0-9]\w 表示字母、数字、下划线可以代替[a-zA-Z_0-9]\W 表示[^a-zA-Z_0-9]\s 表示空白字符边界符:^ 表示行开始$ 表示行结束例:”helloworld” 正则:”^h 此处中间有正则d$数量词:x? 表示可以有0次或1次字符?表示前面的字符可以有0或1次x*表示可以有0次或多次字符*表示前面的字符可以有0或多次x+ 表示可以有1次或多次+表示前面的字符可以有1次或多次x{n}表示必须有n次{n}表示前面的字符只能有n次x{n,}表示至少有n次{n,}表示前面的字符必须有n次以上(不能少于n次) x{n,m} 表示从n到m次{n,m}表示前面的字符有n到m次正则表达式中只有4种功能:匹配、切割、替换、获取正则只属于字符串使用,而正则也是对字符串进行操作(匹配、切割、替换、获取)Eclipse界面简单设置1.重置为默认视图2.查看某一视图(恢复某一视图界面)3.代码模版(删除多余的或者自定义代码模版)4.配置快捷键window-preferences-General5.调整代码字体大小颜色6.显示代码行号7.导入包,资源,8.查看源代码光标选中单词,按住ctrl ,出现小手标识,单词出现超链接,点击弹出底层源代码9.改文件名称10.小光标放置ctrl+e或者双击11.Tab切换光标往前走,Shift+Table光标往回走12.ALT+CTRL+箭头上复制往上走13.ALT+箭头上往上走14.F4查找树15.查看代码的class文件16.Ctrl+f 查找替换某些内容17.Alt+shift+s???18.格式化代码Ctrl+Shift+f19.ctrl+shift+o代码中导入多个包20.Domain 域,主要描述某一领域的事物动物界等等21.Ctrl+/单行注释Ctrl+/取消单行注释Ctrl+shift+/多行注释Ctrl+shift+\取消多行注释22.Ctrl+A选中全部23.新建文件(.txt...)Eclipse快捷键使用1. 【ALT+/】此快捷键为用户编辑的好帮手,能为用户提供内容的辅助,不要为记不全方法和属性名称犯愁,当记不全类、方法和属性的名字时,多体验一下【ALT+/】快捷键带来的好处吧。
最常用快捷键快捷键功能备注eclipse常用快捷键在开发中,常用的eclipse快捷键:代码补全:alt + /添加和取消单行注释:ctrl + /添加多行注释:ctrl + shift + /取消多行注释:ctrl + shift + \快速复制所选择的代码:ctrl + shift + ↓或↑(注意:该快捷键和windows屏幕反转快捷键重合,需要禁用windows反转快捷键)移动所选择的代码向下或向下移动:alt + ↓或↑删除所选代码:ctrl + d修正代码:ctrl + 1 当书写的程序中出现小红X可以为错误的代码提供一些解决方案快速导入类所在的包:ctrl + shift + o代码格式化:ctrl + shift + fCtrl+1 快速修复最经典的Alt+/ 提供内容的帮助记不全方法类属性最常用输入try 按alt / 自动出现代码try catch 一般很容易出现异常的代码或者是很容易出错误的代码放在try...catch中Ctrl+O显示类中方法属性和大纲查找bug时非常有用(函数列表)多按一次Ctrl+O 列出更多的内部变量Ctrl+/为每行或者选择部分添加注释调试有用Ctrl+D删除当前行最喜欢的快捷键之一Ctrl+F6 界面切换程序名切换Ctrl+F 查找Ctrl+M窗口最大最小化方便进行代码的书写Ctrl+T 快速显示当前类的继承结构Ctrl+L 定位于某行Ctrl+Shift+R快速查找资源免得左边找Ctrl+F3 打开结构(跟Ctrl+O 类似)Ctrl+Q快速定位到最后一个编辑的地方F4 查看类结构Ctrl+F11 运行Ctrl+Shift+L显示所有的快捷键F11 调试最后一次运行的程序Ctrl+Shift+F最常用格式化某段代码不选择某段代码则格式化化整个Java文件Ctrl+Shift+S 保存所有save allCtrl+H全局搜索Ctrl+Alt+↓复制当前行到下一行Alt+↓当前行和下一行相互交换位置Alt+Enter 显示当前资源(工程或者文件)的属性Ctrl+W关闭当前编辑器Ctrl+E快速显示文件下拉列表Ctrl+/(小键盘)显示当前类的所有代码Ctrl+*(小键盘)关闭当前类的所有代码Ctrl+J 查找当前选中的文本块Ctrl+Shift+J 反向查找当前选中的文本块从后往前找Ctrl+Shift+P 定位到对于的匹配符(譬如{}) (从前面定位后面时,光标要在匹配符里面,后面到前面,则反之)上面是最常用的研读代码经常用的不用会很晕Crtl+O切换查看方法(当前查找类成员)Ctrl+T看继承关系重构最常用的快捷键:(注:一般重构的快捷键都是Alt+Shift开头的了)Alt+Shift+R重命名(是我自己最爱用的一个了,尤其是变量和类的Rename,比手工方法能节省很多劳动力)Alt+Shift+M 抽取方法(这是重构里面最常用的方法之一了,尤其是对一大堆泥团代码有用)Alt+Shift+C 修改函数结构(比较实用,有N个函数调用了这个方法,修改一次搞定)Alt+Shift+L 抽取本地变量( 可以直接把一些魔法数字和字符串抽取成一个变量,尤其是多处调用的时候)Alt+Shift+F 把Class中的local变量变为field变量(比较实用的功能) Alt+Shift+I 合并变量(可能这样说有点不妥Inline)Alt+Shift+V 移动函数和变量(不怎么常用)Alt+Shift+Z 重构的后悔药(Undo)正则表达式:其实就是定义一些规则来简化String字符串的操作通过一些特定的符号组成规则来限定字符串预定的规则正则表达式的书写:是由字母、数字等一些程序中经常使用的符号组合而成学习正则表达式其实就是学习正则中的各种符号(主要了解各种正则符号的含义)正则表达式的符号规则:一般规则:x 表示一个任意字母,字符串中当前某个位置必须包含所指定的x字符例:“abc” 正则:”a[a-z]”\\ 表示反斜线例:\t 表示制表符[abc] 表示当前字符串中某个字符必须是a或b或c []表示是一个范围[^abc] 表示不是[abc][a-zA-Z] 表示所有的大小写字母[a-d[f-h]] 表示字符的范围必须是a到d或f到h (并集)[a-d&&[d-f]] 表示字符的范围必须是d (交集)[a-z&&[^xm]] 表示字符的范围在a到z之间但是不包含x和m[a-d&&[^d-f]] 表示字符的范围必须是a或b或c预定义字符:. 表示任意字符\d 表示的就是数字可以代替[0-9]\D 表示[^0-9]\w 表示字母、数字、下划线可以代替[a-zA-Z_0-9]\W 表示[^a-zA-Z_0-9]\s 表示空白字符边界符:^ 表示行开始$ 表示行结束例:”helloworld” 正则:”^h 此处中间有正则d$数量词:x? 表示可以有0次或1次字符?表示前面的字符可以有0或1次x*表示可以有0次或多次字符*表示前面的字符可以有0或多次x+ 表示可以有1次或多次+表示前面的字符可以有1次或多次x{n}表示必须有n次{n}表示前面的字符只能有n次x{n,}表示至少有n次{n,}表示前面的字符必须有n次以上(不能少于n次) x{n,m} 表示从n到m次{n,m}表示前面的字符有n到m次正则表达式中只有4种功能:匹配、切割、替换、获取正则只属于字符串使用,而正则也是对字符串进行操作(匹配、切割、替换、获取)Eclipse界面简单设置1.重置为默认视图2.查看某一视图(恢复某一视图界面)3.代码模版(删除多余的或者自定义代码模版)4.配置快捷键window-preferences-General5.调整代码字体大小颜色6.显示代码行号7.导入包,资源,光标选中单词,按住ctrl,出现小手标识,单词出现超链接,点击弹出底层源代码9.改文件名称10.小光标放置ctrl+e或者双击11.Tab切换光标往前走,Shift+Table光标往回走12.ALT+CTRL+箭头上复制往上走13.ALT+箭头上往上走14.F4查找树15.查看代码的class文件16.Ctrl+f 查找替换某些内容17.Alt+shift+s???18.格式化代码Ctrl+Shift+f19.ctrl+shift+o代码中导入多个包20.Domain 域,主要描述某一领域的事物动物界等等21.Ctrl+/单行注释Ctrl+/取消单行注释Ctrl+shift+/多行注释Ctrl+shift+\取消多行注释22.Ctrl+A选中全部23.新建文件(.txt...)Eclipse快捷键使用1. 【ALT+/】此快捷键为用户编辑的好帮手,能为用户提供内容的辅助,不要为记不全方法和属性名称犯愁,当记不全类、方法和属性的名字时,多体验一下【ALT+/】快捷键带来的好处吧。
Eclipse手册1. File菜单操作1.1 导入工程1、点击File菜单选中“Import”2、在弹出的对话框选中“Existing Rrojects into Workspace”3、选择工程所在目录完成导入。
导入工程方便在于省去创建步骤;但如果工程不完整(比如无.project文件)则只能重新创建1.2 导出为JAR1.点击File菜单选中[Export]--< JAR file>点’Next’2.在源工程中选择要打进JAR包的文件3.选中‘Export .......’中的一种或多种,第一个表示对类文件.class打包,第二个表示将整个工程文件(无java文件),第三个表示将类.java文件打包。
4.在‘Select the export destination:’选择打包到哪个目录,点击‘Finish’即可1.3 导出工程1.选择工程项目右键执行Export。
弹出下图2.选择File System点击Next到下图,此举可以避免将svn之类文件导出2. Window菜单操作2.1 Show View项目显示的格式,Eclipse中项目树形显示常用形式如下:1、总树分支式使用[window]--<show view>--<Navigator>2、分支式使用[window]--<show view>--<Package Explorer>3、Declaration显示Windows --> Show View -- > Declaration:选中代码中的一个方法, 然后按这个按键,它会把整个方法在申明方框里显示出来。
如下选中了类中的execute方法,则下方的Declaration将这个方法显示出来2.2 Preferences2.2.1 高亮Windows->Preferences->Java-> Editor-> Mark Occurrences,勾选选项。
这时,当你单击一个元素的时候,代码中所有该元素存在的地方都会被高亮显示。
注意:太多的高亮显示会拖慢Eclipse代码高亮配置:选中行高亮配置:2.2.2 快捷键Windows-->Preferences-->General-->Editors-->Keys;在‘View’中列出了所有快捷键定义,要更改快捷键先选中,然后点击‘Editor’;在‘Key Sequence’中将Name删掉,用上自定义的快捷键并点击‘Add’,最后在‘Assignments’中删除原来的快捷键定义并保存即完成自定义快捷键附:代码提示的快捷键然后在使用中按快捷键就会出来相应的提示代码了。
如下图在页面中输入元素的属性提示2.2.3 Web BrowserWindows-->Preferences-->General-->Web Browser选中‘external Web browser’单选钮及‘Internet Explorer’复选框,采用IE浏览器形式2.2.4 显示行号[Window]—[Preferences]—[General]—[Editors]—[Text Editors]勾选上”Show line numbers”复选框2.2.5 代码宽度及显示[Window]—[Preferences]—[Java]—[Code Style]—[Formatter],‘Edit’里的<Line Wrapping>项Maximum line width:用来设置代码宽度[Window]—[Preferences]—[General]—[Editors]—[Text Editors]启用’Show print margin’,在‘Print margin column’设置显示宽度的竖线2.2.6 Ecipse字符集创建一个工程后,不论是new一个java、xml、jsp、properties或是其它类型文件,IDE都对应各类型文件有一个编码类型,当建立这些类型文件时,它们的编码就已经默认了。
假如java文件默认是ISO9558-1,会出现以下二种情况(以GBK举例):1、输入中文信息时无法保存,因为java文件是ISO9558-1编码而不是GBK编码2、从别处粘贴过来一个文件,这个文件在别处是GBK编码,而本地是ISO9558-1编码,那么这个文件有乱码显示处理办法有二种:1、IDE中选中乱码的文件,右键[Properties],在[Text file encoding]选中GBK编码,将文件强转成GBK编码,便能正常显示信息。
但其它文件还是默认的ISO9558-1编码2、[Window]—[Preferences]弹出对话框设置工程中java文件编码为GBK左侧选[Content Types],然后右侧选中类型文件,接下来在“Default encoding:”对应的文本框里更改编码类型,更改后点击“Update”完成设置经过设置所有的工程中java文件都是GBK编码了!建议:为了开发过程中编码的问题出现,注意以下几点:1、尽量使用UTF-8,创建工程,对工程指定为UTF-8编码。
选中工程右键[Preferences]-[Info]可以查看及修改工程编码。
2、对开发中所涉及使用的文件采用统一编码UTF-8。
操作如上图其它地方粘贴过来的文件如果不是UTF-8,尽量修改成UTF-8。
<%@page contentType="text/html;charset=UTF-8"language="java"%>否则IE每次总是自动使用某种编码来显示,无法彻底更改比较麻烦2.2.7 eclipse字体[Window]—[Preferences]—[General]—[Appearance]—[Colors and Fonts]Java文件字体:选中‘Java’目录的’Java Editor..’子目录,然后点击[Change]按钮,在弹出的对话框中设置字体Properties文件字体:选中‘Java’目录的’ Properties File..’子目录,然后点击[Change]按钮,在弹出的对话框中设置字体JSP等标签文件:选中‘Structured Text Editors’目录的子目录,然后点击[Change]按钮,在弹出的对话框中设置字体2.2.8 Template1、设置启用模板快捷键:[Window]—[Preferences]—[Keys],在'View'选项卡中查找Command栏名为‘Content Assist’项,此项是使用代码模板的快捷键设置项。
默认Shift+空格2、模板使用与创建:[Window]—[Preferences]—[Java]—[Edit]—[Templates],可以修改或创建新的模板。
每个模板对应模板名、内容、描述。
定义好模板后,在应用时,只需输入模板名称,然后按击模板快捷键,则模板对应的代码内容将被添加。
示例一:public Test{public void readLog(){Logger logger =Logger.getLogger(Test.class);("begin");}}创建模板模板名mytemplatepublic void readLog(){Logger logger = Logger.getLogger(${enclosing_type}.class);("begin");}编码public Test{mytemplate}在输入mytemplate后,按击模板应用快捷键即可完成所有代码示例二:public String name = "wbw";创建模板模板名mytemplatepublic String name = "${cursor}";编码mytemplate在输入mytemplate后,按击模板应用快捷键即可完成public String name="";,同时光标位于""中。
小结:在模板中一些变量符号的含义${enclosing_type}:将变量名替换为当前的类名${enclosing_method}:将变量名替换为当前的方法名${cursor}:将当前位置处于光标处2.2.9 Code Style进入[Window]—[Preferences]—[Java]—[Code Style]—[Formatter],选择要修改的模板,点击右侧【Edit】,如图代码格式设置操作:1、设置变量对齐对齐前如图对齐后如图配置,勾选上“Align fields in columns”即可2、设置花括号对齐有两种对齐,Same line为Next line为为了保证统一性,不管修改为哪种方式,最好把这个标签中的所有项都设置同一类值修改完输入新的模板名称,点击【ok】,这样就产生了一个新模板,原有模板是不能修改的然后选中代码执行Ctrl+Shift+F进行格式化为新形式2.2.10 Code TemplatesTemplate是将常用代码缩写为指定字符,通过模板快捷键指定模板以便生成所需代码来节省时间。
而Code Templates是用于文件产生时自动生成一些注释信息。
这个配置为[Window]—[Preferences]—[Java]—[Code Style]—[Code Templates]—[comments],配置类注释为Typss、配置方法注释为Methods、配置文件注释为Files等等如下图然后在创建类时指定勾选上Generate comments,如图方法则需要在创建方法后输入/** 然后回车即产生设定的注释格式了2.2.11 去除代码检验有时Jsp之类的页面文件标签总是识别不到,或一个页面include另一个页面时java代码不识别等情况总是编译不过,而实际上运行是正常的。
因此为了避免编译的麻烦可以取消。
[Window]—[Preferences]后按下图操作3. Project菜单操作3.1 编译1、Eclipse提供自动编译功能,当修改某个类并将其重新保存后,系统自动同步将其编译。
操作为:选中[Project]—[Build Automatically]2、如果需要将工程中所有文件重新编译,操作为:选中[Project]—[Clean..]3.2 Properties3.2.1 工程相互引用工程编译通过Java Build Path引用有两种方式。