Splunk-6.0.1-Updating
- 格式:pdf
- 大小:1.29 MB
- 文档页数:67
integrationVersion6.0FORTINET DOCUMENT LIBRARYhttps://FORTINET VIDEO GUIDEhttps://FORTINET BLOGhttps://CUSTOMER SERVICE & SUPPORThttps://FORTINET COOKBOOKhttps://FORTINET TRAINING & CERTIFICATION PROGRAM https:///support-and-training/training.htmlNSE INSTITUTEhttps://FORTIGUARD CENTERhttps:///END USER LICENSE AGREEMENThttps:///doc/legal/EULA.pdfFEEDBACKEmail:********************August20,2018FortiGate-VM6.0VMware-NSX Security Fabric integration 01-601-000000-20180820TABLE OF CONTENTSChange Log4 VMware-NSX Security Fabric integration5 Creating a VMware-NSX security group5 Creating the VMware-NSX fabric connector5 Viewing the VMware-NSX connector status6 Importing addresses from the VMware-NSX security group7 Viewing the status of the dynamic firewall address7 Crate a firewall policy to allow access to the VMware-NSX server7 Testing the configuration8Change Log2018-08-20Initial release.VMware-NSX Security Fabric integrationThis example configuration describes setting up secure dynamic communication between the upstream FortiGate in a Security Fabric-protected network and virtual machines on a VMware-NSX server.This fabric connector configuration allows traffic between virtual machines on the VMware-NSX server and the Security Fabric even if network addressing dynamically changes on the VMware-NSX server.The process requires four configuration steps:1.On your VMware-NSX server,create a security group to contain the addresses of virtual machines on the NSXserver to be accessed from the Security Fabric.2.On the upstream FortiGate,create a VMware-NSX fabric connector that supports dynamic communication with theVMware-NSX server.You can only create one VMware-NSX fabric connector.3.On the upstream FortiGate,create a dynamic firewall address and import addresses from the VMware-NSXsecurity group into it using the execute nsx group import root<security-group-name>command.After the initial import,the fabric connector keeps the dynamic firewall address in sync with the security group.4.On the upstream FortiGate,create a firewall policy that allows traffic between the upstream FortiGate and theVMware-NSX server.In this example,the firewall policy allows Security Fabric users to connect to virtual machines on the VMware-NSX server.Creating a VMware-NSX security groupA security group is a collection of assets or objects from your vSphere inventory.For VMware-NSX security fabricintegration,you can create a security group containing addresses of virtual machines in the VMware-NSX server that you want Security Fabric users to have access to.You create a security group at the NSX manager level using the vSphere web client.See VMware-NSX Create a Security Group for the complete procedure.Make sure to record the name of the security group,as you will need it to set up the dynamic firewall address later in this procedure.Creating the VMware-NSX fabric connectorUse the following steps to create a VMware-NSX connector that allows dynamic communication between the VMware-NSX server and your Security Fabric.1.Go to Security Fabric>Fabric Connectors and select Create New.2.Under SDN,select VMware NSX.3.Set a Name for the Fabric Connector.4.Set IP/Hostname,Username,and Password to the settings for your VMware-NSX server.IP/Hostname is the IP address or host name used to connect to the VMware-NSX server,and Username andPassword are the username and password of an account that has administrative access to the VMware-NSXserver.The username and password should also have access to the security group that you have added to theVMware-NSX server.5.Select OK.You can also add the connector from the CLI:config system sdn-connectoredit My-NSXset type nsxset server172.18.64.32set username adminset password<password>nextendViewing the VMware-NSX connector statusGo to Security Fabric>Fabric Connectors to view the status of the VMware-NSX connector(whether its enabled or disabled and whether it is connected to the VMware-NSX server).You can also refresh the status and enable or disable the connector.Importing addresses from the VMware-NSX security groupLog in to the upstream FortiGate CLI,and enter the following command to create a dynamic firewall address and import addresses from the VMware-NSX security group into it:execute nsx group import root<security-group-name>The command creates a dynamic firewall address with the same name as the VMware-NSX security group and imports the addresses from the security group into the firewall address.After you complete this step,the VMware-NSX fabric connector keeps the dynamic firewall address up to date when the security group changes on the VMware-NSX server.Viewing the status of the dynamic firewall addressOn the upstream FortiGate,to view the status of the dynamic firewall address,including the IP addresses that have been added to the address from the VMware-NSX security group,go to Policy&Objects>Addresses and hover over the firewall address to see its status information,including the IP addresses that it resolves.You can also use the following command:show firewall address"<security-group-name>"config firewall addressedit"<security-group-name>"set uuid c5fea93c-764a-51e8-3e58-734564e8bc26set type dynamicset obj-id"15"config listedit"10.1.100.136"nextedit"10.1.100.15"nextedit"10.1.100.16"nextedit"10.1.100.200"nextendset sdn nsxnextendCrate a firewall policy to allow access to the VMware-NSX serverOn the upstream FortiGate,use the following steps to add a firewall policy that allows users on the Security Fabric to access virtual machines on the VMware-NSX server.1.Go to Policy&Objects>IPv4Policy and select Create New.2.Set a Name for the policy.3.Set the appropriate Incoming Interface and Outgoing Interface.4.Set the Source address to all and the Destination address to<security-group-name>.(In the example below,thesecurity group name is nsxsecuritygroup20.)5.Set other policy settings,as required.6.Select OK.You can also add the firewall address from the CLI:config firewall policyedit0set name<name>set srcintf port17set dstintf port18set srcaddr allset dstaddr nsxsecuritygroupv20set action acceptset scheduleset servicenextendTesting the configurationWith this configuration in place,users on the network connected to the port17interface of the upstream FortiGate should be able to connect to virtual machines on the VMware-NSX server.You can verify this by attempting to ping any of the addresses dynamically added to the firewall address from a PC on the protected network.Copyright©2019Fortinet,Inc.All rights reserved.Fortinet®,FortiGate®,FortiCare®and FortiGuard®,and certain other marks are registered trademarks of Fortinet,Inc.,in the U.S.and other jurisdictions,and other Fortinet names herein may also be registered and/or common law trademarks of Fortinet.All other product or company names may be trademarks of their respective owners.Performance and other metrics contained herein were attained in internal lab tests under ideal conditions,and actual performance and other results may work variables,different network environments and other conditions may affect performance results.Nothing herein represents any binding commitment by Fortinet,and Fortinet disclaims all warranties,whether express or implied,except to the extent Fortinet enters a binding written contract,signed by Fortinet’s General Counsel,with a purchaser that expressly warrants that the identified product will perform according to certain expressly-identified performance metrics and,in suchevent,only the specific performance metrics expressly identified in such binding written contract shall be binding on Fortinet.For absolute clarity,any such warranty will be。

环境篇:DolphinScheduler-1.3.1安装部署及使⽤技巧环境篇:DolphinScheduler-1.3.1安装部署1 配置jdk#查看命令rpm -qa | grep java#删除命令rpm -e --nodeps xxx将oracle-j2sdk1.8-1.8.0+update181-1.x86_64.rpm上传⾄每个节点安装rpm -ivh oracle-j2sdk1.8-1.8.0+update181-1.x86_64.rpm修改配置⽂件vim /etc/profile#添加export JAVA_HOME=/usr/java/jdk1.8.0_181-clouderaexport PATH=$JAVA_HOME/bin:$PATHexport CLASSPATH=.:$JAVA_HOME/lib/dt.jar:$JAVA_HOME/lib/tools.jar刷新源source /etc/profile检验javajavac2 pip、kazoo 安装yum -y install epel-releaseyum -y install python-pipyum -y install pippip --versionpip install kazoo#使⽤python#import kazoo,不报错即可3 下载⼆进制tar.gz包请下载最新版本的后端安装包⾄服务器部署⽬录,⽐如创建 /opt/dolphinscheduler 做为安装部署⽬录# 创建部署⽬录,部署⽬录请不要创建在/root、/home等⾼权限⽬录mkdir -p /opt/dolphinschedulercd /opt/dolphinscheduler# 上传⽂件并解压缩tar -zxvf apache-dolphinscheduler-incubating-1.3.1-dolphinscheduler-bin.tar.gz -C /opt/dolphinscheduler#修改解压⽂件名字mv apache-dolphinscheduler-incubating-1.3.1-dolphinscheduler-bin dolphinscheduler-bin4 创建⽤户# 创建部署⽤户并赋予密码userdel -r dolphinscheduleruseradd dolphinscheduler && echo dolphinscheduler | passwd --stdin dolphinscheduler# 配置sudo免密sed -i '$adolphinscheduler ALL=(ALL) NOPASSWD: NOPASSWD: ALL' /etc/sudoerssed -i 's/Defaults requirett/#Defaults requirett/g' /etc/sudoers# 修改⽬录权限,使得部署⽤户对dolphinscheduler-bin⽬录有操作权限chown -R dolphinscheduler:dolphinscheduler dolphinscheduler-bin注意:因为任务执⾏服务是以 sudo -u {linux-user} 切换不同linux⽤户的⽅式来实现多租户运⾏作业,所以部署⽤户需要有 sudo 权限,⽽且是免密的。
Hadoop+Ubuntu 学习笔记——IT 进行时(zhengxianquan AT )环备一、境准Hadoop-0.20.1Ubuntu 9.10二、安装JDK6开终执打端,行以下命令:sudo apt-get install sun-java6-jdk按照提示做就是了。
配置JAVA 环变境量:sudo gedit /etc/environment在其中添加如下两行:CLASSPATH=.:/usr/lib/jvm/java-6-sun/libJAVA_HOME=/usr/lib/jvm/java-6-sun执行命令:sudo gedit /etc/jvm,在最前面加入:/usr/lib/jvm/java-6-sun三、配置SSH见方便起,新增hadoop 组户的及其同名用:zhengxq@zhengxq-desktop:~$ sudo addgroup hadoopzhengxq@zhengxq-desktop:~$ sudo adduser --ingroup hadoop hadoop 别则请接下来需要做些特的工作(否参考FAQ“xx is not in the sudoers file”): hadoop@zhengxq-desktop:~$ suroot@zhengxq-desktop:/home/hadoop# ls -l /etc/sudoers-r--r----- 1 root root 557 2009-11-10 22:01 /etc/sudoersroot@zhengxq-desktop:/home/hadoop# chmod u+w /etc/sudoersroot@zhengxq-desktop:/home/hadoop# ls -l /etc/sudoers-rw-r----- 1 root root 557 2009-11-10 22:01 /etc/sudoersroot@zhengxq-desktop:/home/hadoop# gedit /etc/sudoers在root ALL=(ALL) ALL后面添加:hadoop ALL=(ALL) ALLroot@zhengxq-desktop:/home/hadoop# chmod u-w /etc/sudoersroot@zhengxq-desktop:/home/hadoop# exit安装openssh-server:$ sudo apt-get install openssh-server建立SSH KEY:zhengxq@zhengxq-desktop:~$ su hadoophadoop@zhengxq-desktop:/home/zhengxq$ ssh-keygen -t rsa -P ""Generating public/private rsa key pair.Enter file in which to save the key (/home/hadoop/.ssh/id_rsa):Created directory '/home/hadoop/.ssh'.Your identification has been saved in /home/hadoop/.ssh/id_rsa.Your public key has been saved in /home/hadoop/.ssh/id_rsa.pub.The key fingerprint is:f4:5f:6a:f4:e5:bf:1d:c8:08:28:1c:88:b4:31:4a:a0 hadoop@zhengxq-desktop ……启用SSH KEY:hadoop@zhengxq-desktop:~$ cat $HOME/.ssh/id_rsa.pub >>$HOME/.ssh/authorized_keyshadoop@zhengxq-desktop:~$ sudo /etc/init.d/ssh reload* Reloading OpenBSD Secure Shell server's configuration sshd [ OK ]验证SSH的配置:hadoop@zhengxq-desktop:~$ ssh localhostThe authenticity of host 'localhost (::1)' can't be established.RSA key fingerprint is 52:9b:e2:62:93:01:88:e6:46:a8:16:68:52:91:8a:ea.Are you sure you want to continue connecting (yes/no)? yesWarning: Permanently added 'localhost' (RSA) to the list of known hosts.Linux zhengxq-desktop 2.6.31-14-generic #48-Ubuntu SMP Fri Oct 1614:04:26 UTC 2009 i686……四、安装配置hadoop下及安装4.1载下一个0.20.1版本;到/dyn/closer.cgi/hadoop/core/载下,并改所有者hadoop:tar压缩或者直接解到/usr/local/hadoop/变为zhengxq@zhengxq-desktop:/usr/local$ sudo chown -R hadoop:hadoop hadoop4.2配置4.2.1配置$HADOOP_HOME/conf/hadoop-env.shzhengxq@zhengxq-desktop:/usr/local/hadoop$ cd had*zhengxq@zhengxq-desktop:/usr/local/hadoop/hadoop-0.20.1$ gedit conf/hadoop-env.shzhengxq@zhengxq-desktop:/usr/local/hadoop/hadoop-0.20.1$ sudo geditconf/hadoop-env.sh修改点:为export JAVA_HOME=/usr/lib/jvm/java-6-sun4.2.2配置$HADOOP_HOME/conf/core-site.xmlzhengxq@zhengxq-desktop:/usr/local/hadoop/hadoop-0.20.1$ sudo geditconf/core-site.xml空的,内容加上:<property><name></name><value>hdfs://localhost:9000</value></property><property><name>dfs.replication</name><value>1</value></property><property><name>hadoop.tmp.dir</name><value>/home/hadoop/tmp</value></property></property>注:如没有配置hadoop.tmp.dir时统认临时录为参数,此系默的目:/tmp/hadoop-才行,否会出。
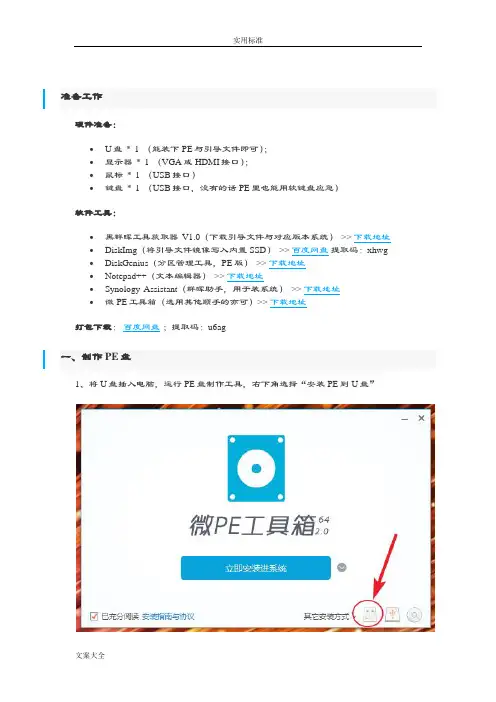
准备工作硬件准备:•U盘* 1 (能装下PE与引导文件即可);•显示器* 1 (VGA或HDMI接口);•鼠标* 1 (USB接口)•键盘* 1 (USB接口,没有的话PE里也能用软键盘应急)软件工具:•黑群晖工具获取器V1.0(下载引导文件与对应版本系统)>> 下载地址•DiskImg(将引导文件镜像写入内置SSD)>> 百度网盘提取码:xhwg •DiskGenius(分区管理工具,PE版)>> 下载地址•Notepad++(文本编辑器)>> 下载地址•Synology Assistant(群晖助手,用于装系统)>> 下载地址•微PE工具箱(选用其他顺手的亦可)>> 下载地址打包下载:百度网盘;提取码:u6ag一、制作PE盘1、将U盘插入电脑,运行PE盘制作工具,右下角选择“安装PE到U盘”2、如图设置,点击“立即安装进U盘”3、PE盘制作工具生成了两个分区,EFI为PE引导分区,“微PE工具箱”为文件区,将黑群晖引导镜像(img)、DiskImg、DiskGenius(PE版)放入U盘内。
二、引导文件写入SSD1、将制作好的PE U盘插入蜗牛星际背部USB接口,通电开机,并按F7选择PE U盘启动(BIOS LOGO画面按DEL进入BIOS设置,按F7选择启动设备)。
2、使用DiskGenius,将自带16G SSD内所有分区删除并保存。
3、启动DiskImg ,驱动器选择机器内置SSD,浏览选择镜像写入(路径、文件名不能有任何中文字符)。
4、写入完成后,使用DiskGenius(PE自带版本太旧了,一定要用复制进去的DiskGenius),浏览系统内置SSD引导分区文件(ESP),将grub.cfg文件复制到U盘(之后洗白要用)。
5、设备关机,拔出U盘。
三、安装DSM至NAS主机1、NAS主机安装储存盘,NAS主机连接网线并启动主机(成功的话屏幕会显示Happy Hacking)。
HPE VMware Upgrade Pack1.4.1.1 Release NotesJune 2021Legal and notice information© Copyright 2021 Hewlett Packard Enterprise Development LPDocument History:Released DescriptionJune 2021 VUP 1.4.1.1Table of ContentsOverview (4)Summary of Changes (4)Important Notes (4)Enhancements (5)Support Removed (5)Supported Operating Systems (5)Prerequisites (5)Component Prerequisites (5)SUM Prerequisites (5)Limitations (6)Known Limitations (6)Download & Deployment (6)HPE VUP Download Page (https:///global/swpublishing/MTX-64dd56ccb3ef4c8bbd5d51e62f) (7)Installation (7)Installation Instructions (7)Additional Information for using the HPE VUP on VMware Operating Systems (8)Additional Resources (8)Using a PXE Server to Deploy Components from the full HPE VUP ISO over a network (8)Prerequisites (8)Setup (9)Configuring GRUB2 (9)Configuring ELILO (9)Configuring PXELINUX (10)Supported network file system protocols (11)Common Abbreviations (12)OverviewThe HPE VMware Upgrade Pack (VUP) 1.4.1.1 is a subset of the Service Pack for ProLiant that only supports ESXi 7.0 U1 on Gen10 and newer servers.The HPE VMware Upgrade Pack (VUP) 1.4.1.1 is a comprehensive systems software and firmware update solution, which is delivered as a single ISO image. This solution uses Smart Update Manager (SUM) as the deployment tool and is tested on HPE ProLiant Gen10 and newer servers as defined in the Server Support Matrix.VUP 1.4.1.1 replaces VUP 1.4.1.The HPE VUP can be used as an SPP with HPE VMware Life Cycle Manager (vLCM) Plug-in Hardware Support Modules (HSM).•HPE iLO Amplifier Pack HSM•HPE OneView HSMFor a full list of HPE VUP Documentation, please review the HPE VUP Documentation. Documentation DescriptionRelease Notes Release notes for this HPE VUP, containing important notes and known issues.Component Release Notes Release Notes for each component contained in this HPE VUP, containing Fixes, Enhancements and important notes for each component contained in the HPE VUP.Server Support Matrix Matrix of HPE servers supported on each VMware OS release.Summary of ChangesImportant NotesIncludes updated bootloader to address the UEFI Secure Boot Evasion Vulnerabilities. For more information see: https:///us/en/services/security-vulnerability.html.The difference between 1.4.1.1 and 1.4.1 is the replacement of the offline version of the iLO firmware update component to match the firmware version of iLO firmware in the online firmware update component.When using HPE OneView prior to version 5.00.00 and the HPE VUP 1.1A or later, an error may be seen during FW update of iLO5. For additional information, please review CA a00094676en_us.The HPE VUP does not contain Synergy specific components. Information on the Synergy custom SPP is available at:•HPE Synergy Software Releases - Overview•VMware OS Support Tool for HPE SynergyHPE StoreOnce Customers – Installation of the HPE VUP can cause problems on StoreOnce systems. Please go to the HPE Support Center to find the appropriate StoreOnce update.NOTE: Products sold prior to the November 1, 2015 separation of Hewlett-Packard Company into Hewlett Packard Enterprise Company and HP Inc. may have older product names and model numbers that differ from current models.EnhancementsThe 2021.05.0 SPP Production release contains components supporting the ProLiant, Apollo and Blades Gen9, Gen10 and Gen10 Plus server platforms and options. This HPE VUP is a maintenance release based on the 2021.05.0 SPP and contains updated firmware, software and driver support for:•VMware ESXi 7.0 U1 for Gen10 and newer serversOnline firmware update for Marvell adapters supported by the qlfe3, qlfe3i, qcnic, qlfe3f, qedf and qedi drivers and Intel adapters supported by the igbn, ixgben and i40en drivers requires the drivers included in the VUP 1.4.1.1 and the May 2021 HPE Custom Image for ESXi 7.0 U1 (701.0.0.10.7.0) or newer.For a complete list of components on the ISO, see the HPE VUP Contents Report on the ISO or the HPE VUP Documentation.Support Removed•NoneSupported Operating SystemsThe following operating systems are supported for system software and firmware: •VMware ESXi 7.0 U1For more information on HPE Operating Systems and Virtualization Software Support for ProLiant Servers, please visit our OS Support Site.PrerequisitesComponent PrerequisitesTo determine prerequisite information, check the individual components.SUM PrerequisitesThe most current prerequisites for SUM can be found at the SUM documentation pagehttps:///servers/hpsum/documentation.LimitationsKnown LimitationsThe following is a select list of known issues and limitations relating to the smart components and SUM version delivered with this HPE VUP.Integrated Lights-Out (iLO) Repository update for components updateable by the Unified Extensible Firmware Interface (UEFI) do not install, if the "Reboot" Parameter in Smart Update Manager (SUM) is set to "Never." See this Customer Advisory for more details.While performing iLO5 updates on Linux OS, the user may see multiple Windows firmware components listed for installation. This is expected behavior.Drivers and/or enablement kits must be installed prior to detecting and updating some hardware and firmware - SUM may need to be run twice for all firmware components to be presented for an installation.Drivers and/or enablement kits must be installed prior to detecting and updating some hardware and firmware. There are several scenarios when SUM may need to be run twice for all firmware components to be presented for installation. This is due to a requirement that drivers are needed in order for SUM to discover some hardware and thus the needed firmware. After the drivers are installed for the first time and the system rebooted, SUM needs to be run again for all of the firmware components to be presented for installation.The following HPE Mellanox adapters support InfiniBand mode only:•HPE Apollo InfiniBand EDR 100Gb 2-port 840z Mezzanine FIO Adapter (HPE Part Number: 843400-B21)•HPE Apollo InfiniBand EDR 100Gb 2-port 841z Mezzanine Adapter (HPE Part Number: 872723-B21)•HPE InfiniBand EDR 100Gb 1-port 841QSFP28 Adapter (HPE Part Number: 872725-B21)Drivers supporting InfiniBand mode of operation are not distributed via the HPE VUP. Mellanox drivers included in HPE VUP support “Ethernet + RoCE” mode only and have to be used only with those adapters supporting Ethernet mode of operation.Download & DeploymentThe HPE VUP can be downloaded from the HPE VUP Download page, which requires HPE Passport login.To ensure the integrity of your download, HPE recommends verifying your results with the following SHA-256 Checksum values:ab860d5bc24ca3c6d51b48db34f00de1a5fad09c193d6525cba7351286102fef SPP-VUP1411.2021_0614.9.isoa2ba107c3e8da4ebfa2a8ddc820b4dbd94ca1e67228db80facf17ec6553720e2SPP-VUP1411.2021_0614.9.iso.sha2sumHPE VUP Download Page(https:///global/swpublishing/MTX-64dd56ccb3ef4c8bbd5d51e62f)The HPE VUP Download page enables downloading through the HPE My License Portal.InstallationThere are two methods for using the VMware Upgrade Pack to update your ProLiant servers: Online mode Remote Update and Offline mode.Online mode Remote Update- Runs on Windows or Linux hosted Operating System to remotely update client Operating system.•Interactive mode - Follow the onscreen steps to update firmware components.To initiate deployment in interactive mode, run the launch_sum.bat (windows) orlaunch_sum.sh (Linux) script which is found in the root of the .iso image through client. Offline mode - Server is booted to the .iso image•Interactive mode - Follow the onscreen steps to update firmware components.•Automatic mode - Firmware components will be updated without interaction. Automatic mode will by default run firmware update without any user interaction after sitting 10 seconds at the menu screen when an HPE VUP .iso image is used to boot the server.Installation InstructionsFollow these steps to install the components found on this HPE VUP:1. Download the HPE VUP 1.4.1.1 .iso file from the HPE VUP download page:https:///global/swpublishing/MTX-64dd56ccb3ef4c8bbd5d51e62f2. Determine how to access the data on the ISO – bootable USB key, mounted ISO, etc. Usethe appropriate tool to obtain the ISO in the desired format.3. Determine how to initiate deployment to the targets using the HPE VUP – Offline mode orOnline mode:a Online mode - Runs on a Windows® or Linux hosted operating systemb Offline mode - Server boots from the HPE VUP ISO (Bootable ISO only)i Automatic mode - Firmware components update without interactionii Interactive mode - Onscreen instructions guide the user to update firmwarecomponents4. Initiate deployment.To initiate deployment in online mode:•From the HPE VUP folder:o Windows: launch_sum.bato Linux: ./launch_sum•For VMware hosts, select the host to update as a remote target. Online firmware update on a Gen10 VMware host requires the iSUT for ESXi software to be installed on the VMware host.•To review the EULA, locate README.html which is found in the root of the ISO.For more information, see the SUM User Guide and HPE ProLiant Best Practices Implementation Guide. https:///servers/SUM/documentationTo initiate deployment in Offline mode:•Boot the server to the HPE VUP using one of the supported methods including mounting the ISO or using a bootable USB key.•Select either Automatic mode or Interactive mode.o If Automatic mode is selected, the firmware will be automatically updated on the server without any further interaction.o If Interactive mode is selected, follow the instructions on the screen.•Select the Firmware Update option on the screen to start SUMAdditional Information for using the HPE VUP on VMware Operating SystemsThe HPE VUP can deploy drivers and firmware to a Gen10 system running a supported VMware operating system in an online mode. Drivers are also available at Software Delivery Repository - vibsdepot.Additional ResourcesUsing a PXE Server to Deploy Components from the full HPE VUP ISO over a networkFollow these steps to use a PXE server to deploy components from the full HPE VUP ISO over a network.The files needed to configure the menu system for use with a ‘pxe’ server can be found in the PXE directory on the full HPE VUP ISO.PrerequisitesThe following is required before proceeding with the configuration:•The user must have a good working knowledge of PXE and TFTP.• A network with a DHCP server on it.• A TFTP server configured on the same network as the DHCP server.• A network file server hosting the ISO images that can be accessed by a PXE booted system.•Either PXELINUX (/wiki/index.php/PXELINUX) [For legacy boot mode] or GRUB2 (https:///software/grub/) [For UEFI and legacy boot mode]The use of a Linux TFTP server and the TFTP package/pub/software/network/tftp/is assumed. Other TFTP servers should work similarly.SetupBefore proceeding with the configuration, ensure that the TFTP server as well as the PXELINUX or GRUB2 configuration are setup and configured properly. ELILO(/projects/elilo/files/) may be used also. GRUB2 is recommended for UEFI boot mode, legacy boot mode, or mixed environments where both legacy and UEFI boot mode support are required.To set up PXE boot for the HPE VUP:1. Copy the HPE VUP ISO image to the network file system, and note its location. NFS andWindows® file shares as well as HTTP connections are supported.2. For this example, the NFS path to the ISO image used is192.168.0.99/path/to/VUP/image/(VUPfilename).iso. Test the network file system to ensure that it is accessible before proceeding.3. The /pxe directory of the ISO image will need to be accessed, either by burning the ISOimage, mounting the ISO image, or extracting it using a third-party tool.4. Copy all the files from the /pxe directory of the ISO image to the TFTP server so that they areaccessible by the TFTP software. See important instructions and information in the/pxe/README.txt file (for legacy boot mode PXELINUX configuration).Configuring GRUB2Follow these steps to configure GRUB2:1. Run the command grub2-mknetdir --net-directory=DIR where DIR is the root of the TFTPserver.2. Configure DHCP using the helpful output of the grub2-mknetdir command above (arch =00:07 for UEFI boot mode and arch = 00:00 for legacy boot mode).3. Edit the grub.cfg files on the TFTP server to set the appropriate paths to the kernel vmlinuzimage file and the initial ramdisk initrd.img image file which were copied to the TFTP server from the HPE VUP ISO /pxe directory.Configuring ELILOFollow these steps to configure ELILO:1. Add an EFI folder on the TFTP server which contains bootx64.efi, elilomenu.msg, andelilo.conf.2. Add details in elilo.conf as it is given for configuring pxelinux.cfg (see below).3. Change the DHCP configuration as given below:if option arch = 00:07 {filename "pxelinux/bootx64.efi";} else {filename "pxelinux.0";}Configuring PXELINUXFollow these steps to configure PXELINUX:1. Using the isolinux.cfg file from the /system/ directory of the ISO as a guide, copy the labeledtargets to the PXELINUX configuration file. The entire file does not need to be included:label sosMENU LABEL Automatic Firmware Update Version 2020.03.0kernel vmlinuzappend initrd=initrd.img media=cdrom root=/dev/ram0 splash quiet hp_fibre cdcacheshowopts TYPE=AUTOMATIC AUTOPOWEROFFONSUCCESS=noAUTOREBOOTONSUCCESS=yeslabel vsosMENU LABEL Interactive Firmware Update Version 2020.03.0kernel vmlinuzappend initrd=initrd.img media=cdrom root=/dev/ram0 splash quiet hp_fibre cdcacheshowopts TYPE=MANUAL AUTOPOWEROFFONSUCCESS=nolabel sos_poweroffMENU HIDE Automatic & POWEROFF Firmware Update Version 2020.03.0kernel vmlinuzappend initrd=initrd.img media=cdrom root=/dev/ram0 splash quiet hp_fibre cdcacheshowopts TYPE=AUTOMATIC hp_poweroffThe paths to files on the TFTP server are vmlinuz and initrd.img. They must be modified to include any directories or naming conventions that are on the TFTP server.2. Replace “media=cdrom” with “media=net” on the append line3. Specify the ISO image path. For the PXE booted server to find the ISO Image, add the ISOImage path to the append line in the PXELINUX configuration file. Add the followingarguments:iso1=nfs://192.168.0.99/path/to/VUP/image/(VUPfilename).isoiso1mnt=/mnt/bootdeviceThe iso1 parameter helps the PXE booted HPE VUP locate the ISO image. The iso1mnt parameter tells the PXE booted HPE VUP where the iso1 image must be mounted.The final configuration file must be similar to the following example:label sosMENU LABEL Automatic Firmware Update Version 2020.03.0kernel vmlinuzappend initrd=initrd.img media=net root=/dev/ram0 splash quiet hp_fibre showoptsTYPE=AUTOMATIC AUTOPOWEROFFONSUCCESS=noAUTOREBOOTONSUCCESS=yesiso1=nfs://192.168.0.99:/path/to/VUP/image/(VUPfilename).isoiso1mnt=/mnt/bootdevicelabel vsosMENU LABEL Interactive Firmware Update Version 2020.03.0kernel vmlinuzappend initrd=initrd.img media=net root=/dev/ram0 splash quiet hp_fibre showoptsTYPE=MANUAL AUTOPOWEROFFONSUCCESS=no iso1=nfs://192.168.0.99:/path/to/VUP/image/(VUPfilename).isoiso1mnt=/mnt/bootdevicelabel sos_poweroffMENU HIDE Automatic & POWEROFF Firmware Update Version 2020.03.0kernel vmlinuzappend initrd=initrd.img media=net root=/dev/ram0 splash quiet hp_fibre showoptsTYPE=AUTOMATIC hp_poweroffiso1=nfs://192.168.0.99:/path/to/VUP/image/(VUPfilename).isoiso1mnt=/mnt/bootdeviceAdditional ISO images can be added by specifying the additional iso# and iso#mnt arguments, for example, iso2=/path/to/iso2.iso iso2mnt=/mnt/iso2.Supported network file system protocolsThe following network file system protocols are supported for use with PXE booting:NFS:iso1=nfs://192.168.0.99/path/to/VUP/image/(VUPfilename).isoiso1mnt=/mnt/bootdeviceNFS volumes are mounted with the following options:o-o roo nolockThe mount options can be explicitly set with the iso#opts parameteriso1opts="rsize=32768,ro,nolock"Windows® operating systems:iso1=cifs://192.168.0.99/share/path/to/VUP/image/ (VUPfilename).isoiso1mnt=/mnt/bootdeviceWindows® operating systems with login credentials:iso1=cifs://user:****************.0.99/share/path/to/VUP/image/(VUPfilename).isoiso1mnt=/mnt/bootdeviceHTTP:iso1=http://192.168.0.99/path/to/VUP/image/(VUPfilename).isoiso1mnt=/mnt/bootdeviceOnce these steps have been completed, the HPE VUP components are ready to be deployed using the PXE boot functionality.Common Abbreviations。
91ri渗透笔记整理【渗透笔记】(壹)1.避免0day攻击的最好办法是实现启发式(Heuristic)或基于轮廓(Profile-based)的入侵检测系统。
2.常见的安全证书包括CCIE: Security、CEH、CISSP、CCSP、GIAC、OPSTA和Security+。
3.Nmap扫描主机开放端口,能够在运行IPSec的OpenBSD 2.7 系统上引发DOS攻击。
当使用-sO选项运行Nmap时,就会引起OpenBSD系统奔溃。
4.现在已知端口扫描能够在下述环境中引发DOS攻击:Efficient Networks Routers、pcAnywhere9.0、安装了Novell intraNetWare Client的Windows 95/98。
5.湿件(Wetware),湿件就是计算机中人类的因素。
6.被动侦查:用户组会议、Web网站上的信息、Edgars数据库、社工库、UUNet新闻组、商业伙伴、垃圾搜索、社会工程学;主动侦查:端口扫描、DNS查询、区域传输、ping 扫描、路由跟踪、OS特征检测.7.端口扫描的几种类型:TCP Connect()扫描、SYN扫描、NULL扫描、FIN扫描、ACK扫描、Xmas-Tree扫描、Dumb扫描、Reverse Ident扫描8.灰箱测试(Gray-Box):测试人员模拟内部雇员。
他们得到了一个内部网络的账号,并且拥有了访问网络的标准方法。
这项测试用于评估来自企业内部职员的攻击。
9.在netcat中,经常使用53端口监听的原因是:这个端口号是分配跟DNS使用的,通常防火墙开放这个端口。
如果选择其他不常用的端口,那么防火墙可能会阻断这些端口的流量。
10.盲注的核心语句:php?id=1 and (select ord(mid(group_concat(SCHEMA_NAME),20,1))from information_schema.schemata)>011.VLAN 跳跃攻击利用了DTP。
Easy7监控系统产品说明书目录1版权声明 (8)2概述 (8)2.1 软件用途 (8)2.2 软件运行 (8)2.3 系统配置 (9)2.4 注意事项 (9)3系统部署 (11)3.1 总控管理服务模块安装说明 (11)3.2 流媒体服务模块安装说明 (25)3.3 录像存储服务模块安装说明 (34)3.4 NVR存储服务模块安装说明 (43)3.5 GPS定位服务模块安装说明 (52)3.6 电视墙服务模块安装说明 (62)3.7 智能分析诊断系统安装说明 (85)3.8 人脸识别系统安装 (93)3.9 集群运维管理模块安装说明 (103)3.10 可视化运维模块安装说明........................................................................................................... 错误!未定义书签。
4视频预览 (153)4.1 中间件配置 (153)4.2 CMS配置 (159)4.3 智慧云服务器配置 (193)4.4 多级多域配置 (205)4.5 视频预览 (212)4.6 门禁服务器 (234)4.7 全景拼接 (237)5录像与回放 (246)5.1 录像模板的设置 (246)5.2 录像设置 (248)5.3 录像状态查询 (253)5.4 回放与下载 (255)5.5 智能语义 (272)6报警与预案 (277)6.1 报警输入/报警输出的设置 (277)6.2 布防设置 (282)6.3 平台警情处理 (287)6.4 事件预案 (294)6.5 预案设置 (327)6.6 预案管理 (329)7电视墙部署 (333)7.1 解码器设置 (333)7.2 电视墙布局设置 (339)7.3 切换设置 (352)7.4 视频预览电视墙操作 (356)8电子地图 (366)8.1 GIS服务器设置 (366)8.2 GPS服务器设置 (371)8.3 地图编辑 (373)8.4 地图使用 (381)9权限管理 (412)9.1 组织管理 (412)9.2 角色管理 (417)9.3 用户管理 (420)10智能服务器 (425)10.1 智能服务器的安装 (425)10.2 智能分析服务的添加 (428)10.3 智能分析参数设置 (436)10.4 智能分析参数设置下传应用 (462)10.5 平台分析诊断相关功能 (465)10.6 智能分析诊断系统客户端使用说明 (477)10.7 人脸智能识别系统使用说明 (485)11日志 (490)11.1 日志的查询 (490)11.2 日志信息相关的报警信息定位到地图功能 (492)11.3 按日志时间回放录像 (494)11.4 日志管理 (496)12收藏夹 (498)12.1 收藏夹添加 (498)12.2 收藏夹使用 (501)13键盘操作 (502)13.1 键盘基础知识介绍 (502)13.2 键盘的登录与设置 (505)13.3 键盘控制屏幕墙显示 (506)13.4 键盘实现对云台镜头的控制 (508)13.5 键盘实现对预置位的控制 (508)13.6 键盘实现对解码输出区域任一画面最大化 (509)13.7 键盘实现对前端设置几分屏 (510)13.8 键盘实现对录像的回放 (510)13.9 键盘调用CMS切换模板 (513)14域名解析和主动模式 (514)14.1 域名解析设置步骤 (514)14.2 主动模式设置步骤 (524)14.3 新主动模式设置步骤 (527)15管理员工具 (529)15.1 自定义设置 (529)15.2 批量删除设备 (530)15.3 系统配置设置 (531)15.4 系统设置 (534)15.5 邮件设置 (537)15.6 上级域管理 (537)15.7 事件分级 (541)15.8 事件联动管理 (549)15.9 录像计划 (561)15.10 高级网络设置 (567)15.11 警戒球联动设置 (570)16系统运维 (577)16.1 首页 (577)16.2 视频诊断 (579)16.3 录像巡检 (587)16.4 运维配置 (591)16.5 设备状态 (611)16.6 电子地图 (616)16.7 任务管理 (616)16.8 统计分析 (628)16.9 网络拓扑 (631)16.10 故障维修 (634)16.11 资产管理 (641)17集群运维管理服务器模块配置 (657)17.1 运维管理 (658)17.2 报警管理 (660)17.3 集群配置 (661)17.4 用户管理 (668)1 版权声明Easy7监控系统是由天津天地伟业数码科技有限公司自主开发的专用视频监控系统。
VPLEX SolVe GeneratorSolution for Validating your engagement生成: January 31, 2023 8:34 AM GMT报告问题如果您在此流程中发现任何错误或对此应用程序有相关意见,请发送电子邮件至版权所有 © 2020 Dell Inc. 或其子公司。
保留所有权利。
本出版物中的信息均“按原样”提供。
EMC CORPORATION(以下简称“EMC”)不对本出版物中的信息作出任何形式的陈述或担保,并特别声明拒绝以下担保:有关适销性、对特定用途的适用性、权利和无侵权的任何暗示担保,以及法规、法律实施、交易习惯、贸易履行过程或贸易惯例所引发的任何担保。
在任何情况下,EMC 均不会对任何损失承担责任,这些损失包括直接、间接、偶发、连带损失、业务利润损失或特殊的损失,即使事先已经通知 EMC 可能发生此类损失也是如此。
EMC 确信本出版物中所含信息截止至发布之日前均正确无误。
这些信息如有更改,恕不另行通知。
使用、复制及分发本出版物中描述的任何 EMC 软件需要相应的软件许可证。
Dell、EMC、Dell EMC 和其他商标均是 Dell Inc. 或其子公司的商标。
其他商标可能是其各自所有者的资产。
发布日期:January, 2023目录初步活动任务 (3)阅读、理解并执行以下任务 (3)Field-Replaceable Unit Procedure (4)VPLEX (4)Replacing a DIMM (Memory Module) (4)Before you begin the replacement procedure (4)Precautions when replacing a Dual Inline Memory Module (DIMM) (4)VS6 Engine Overview (5)Task 1:Performing preliminary steps (6)Connecting to VPLEX MMCS-A (7)Task 2:Connecting the service laptop to VPLEX (7)Task 3:Opening a web browser (8)Task 4:Starting a PuTTY (SSH) session and logging into VPLEX CLI (9)Replacing a DIMM (9)Start a new virtual terminal session (9)Task 5:Launching the FRU script (9)Task 6:Unloading the FRU script (13)Task 7:Ending a PuTTY (SSH) session (13)Task 8:Completing post-replacement tasks (13)Reference material (14)Handling replaceable units (14)Identifying VS6 Engine Information (17)初步活动任务此部分可能包含您在执行此流程之前必须完成的任务。
首先下载相关的gmt包/在此网站上下载ftp://anonymous:@:21/pub/gmt/GMT_src.tar.bz2/downloads/netcdf/ftp/netcdf-4.1.1.tar.gzftp://anonymous:@:21/gdal/gdal-1.7.2.tar.gzgoal的安装文档连接/blog/176382一安装netcdf包先解压缩#tar –zxvf netcdf-4.1.1.tar.gz#mv netcdf-4.1.1 netcdf#mv netcdf /usr/local/#chmod –R 775 /usr/local/netcdf#cd /usr/local/netcdf#./configure –prefix=/usr/local/netcdf 默认仪此安装目录#make && make install 如果不报错就表明成功安装二安装godal下解压缩#tar –zxvf gdal-1.7.2.tar.gz#mv gdal-1.7.2 gdal#mv gdal /usr/local/#chmod –R 775 /usr/local/gdal#./configure#make && make install完成安装还有就是在使用过程中可能会出项如下问题error while loading shared libraries: libgdal.so.1: cannot open shared object file: No such file or directory就是无法调用libgdal.so.1库,这是redhat的一个缺陷可以做如下修改#echo /usr/local/lib >/etc/ld.so.conf.d/local.conf#/sbin/ldconfig在使用就不会出现上面的俄库无法找到的问题或者使用如下方法设置环境变量LD_LIBRARY_PATH=/usr/local/lib:/usr/local/erlang/lib; export LD_LIBRA RY_PATH以root身份把库路径加入/etc/ld.so.conf文件#vi /etc/ld.so.config.d/gdal.conf/usr/local/gdal/.libs然后运行ldconfig更行/etc/ld.so.cache或者将gdal相关库拷贝到/usr/lib下共享库搜索顺序一般是$LDLIBRARY_PATH,/etc/ld.so.cache ,usr/lib ,/lib三、在6.0下默认的octave在/usr/share/swig/1.3.40/octave/ 但是悬着a安装会报错所以选择n不完全安装或者直接注释掉install_gm.sh的560-570行,1213-1231行四、安装gmt先下载所有相关的gmt包#chmod 775 install_gmt.sh#./install_gmt.sh进行安装[root@lvs02 gmt]# ./install_gmt.sh====>>>> Interactive installation of GMT <<<<====We first need a questions and answer session todetermine how and where GMT is to be installed.Then, when all parameters have been assembled,we will run the installation (unless you chose-n when starting this script).This script will install GMT version 4.5.3.==> Enter make utility to use [make]:If you are behind a firewall you will need to use a passive ftp session.Only if you have some very old ftp client, you may have to resort to active ftp (which involves the server connecting back to the client).==> Do you want passive ftp transmission (y/n) [y]: n==> Have you installed netcdf (version 3.6 or later)? (y/n) [y]: y==> Enter directory with netcdf lib and include [/usr/local/netcdf-3.6.3]: /usr/local/netcdfGMT offers experimental and optional support for other grid formats and plotting of geotiffs via GDAL. To use this option you must already have the GDAL library and include files installed.==> Use experimental GDAL grid input in GMT (y/n) [y]:If the dirs include and lib both reside in the same parent directory,you can specify that below. If not, leave blank and manually setthe two environmental parameters GDAL_INC and GDAL_LIB.==> Enter directory with GDAL lib and include [/usr/local/gdal]:==> Want to test GMT by running the examples? (y/n) [y]:==> Get any of the GMT version 4.5.3 archives via ftp? (y/n) [y]: nSince ftp mode is not selected, the install procedure willassume the compressed archives are in the current directory.GMT can use two different algorithms for Delauney triangulation.Shewchuk [1996]: Modern and very fast, copyrighted.Watson [1982] : Older and slower, public domain.Because of the copyright, GMT uses Watson's routine by default. However, most will want to use the optional Shewchuk routine.==> Use optional Shewchuk's triangulation routine (y/n)? [y]: yThe installation will install all GMT components in several subdirectories under one root directory. On most Unix systems this root directory will be something like /usr/local or /sw, under which the installation will addbin, lib, share, etc. Below you are asked to select to location of eachof the subdirectories.==> Directory for GMT executables? [/opt/gmt/GMT4.5.3/bin]:==> Directory for GMT linkable libraries? [/opt/gmt/GMT4.5.3/lib]:==> Directory for GMT include files? [/opt/gmt/GMT4.5.3/include]:==> Directory for GMT data resources? [/opt/gmt/GMT4.5.3/share]:Unix man pages are usually stored in /usr/man/manX, where X isthe relevant man section. Below, you will be asked for the /usr/man part; the /manX will be appended automatically, so do not answer /usr/man/man1.==> Directory for GMT man pages? [/opt/gmt/GMT4.5.3/man]:==> Directory for GMT doc pages? [/opt/gmt/GMT4.5.3/share]:At run-time GMT will look in the directory /opt/gmt/GMT4.5.3/share to find configurationand data files. That directory may appear with a different name to remote users if a different mount point or a symbolic link is set.GMT can use the environment variable $GMT_SHAREDIR to point to the right place. If users see a different location for the shared data files, specify it here.(It will be used only to remind you at the end of the installation to setthe enronment variable $GMT_SHAREDIR).==> Enter value of GMT_SHAREDIR selection [/opt/gmt/GMT4.5.3/share]:The answer to the following question will modify the GMT defaults.(You can always change your mind by editing share/gmt.conf)==> Do you prefer SI or US default values for GMT (s/u) [s]:The answer to the following question will modify the GMT defaults.(You can always change your mind later by using gmtset)PostScript (PS) files may contain commands to set ** size, picka specific ** tray, or ask for manual feed. Encapsulated PSfiles (EPS) are not intended for printers (but will print ok) andcan be included in other documents. Both formats will previewon most previwers (out-of-date Sun pageview is an exception).==> Do you prefer PS or EPS as default PostScript output (p/e) [p]:Building the GMT libraries as shared instead of static willreduce executable sizes considerably. GMT supports shared libraries under Linux, Mac OS X, SunOS, Solaris, IRIX, HPUX,and FreeBSD. Under other systems you may have to manually configure macros and determine what specific options to use with ld.==> Try to make and use shared libraries? (y/n) [n]:If you have more than one C compiler you need to specify which, otherwise just hit return to use the default compiler.==> Enter name of C compiler (include path if not in search path): GMT can be built as 32-bit or 64-bit. We do not recommend to explicitly choose 32-bit or 64-bit, as the netCDF install isnot set up to honor either of these settings. The default isto compile without sending any 32-bit or 64-bit options to the compiler, which generally create 32-bit versions on older systems, and 64-bit versions on newer systems, like OS X Snow Leopard.==> Explicitly select 32- or 64-bit executables? (y/n) [n]:==> Produce universal executables (OS X)? (y/n) [n]:GMT passes information about previous GMT commands onto laterGMT commands via a hidden file (.gmtcommands). To avoid thatthis file is updated by more than one program at the same time(e.g., when connecting two or more GMT programs with pipes) weuse POSIX advisory file locking on the file. Apparently, someversions of the Network File System (NFS) have not implementedfile locking properly. We know this is the case with Linuxpre-2.4 kernels when mounting NFS disks from a Unix server.If this is your case you should turn file locking OFF.==> Use POSIX Advisory File Locking in GMT (y/n) [y]:==> Want to test GMT by running the examples? (y/n) [y]:==> Delete all tar files after install? (y/n) [n]:Normally, all coastline files are installed in /opt/gmt/GMT4.5.3/share/coast. However, you can also place some of them in separate directories.These dirs must exist or you must have write permission to make them.If alternate directories are specified then a coastline.conf file willbe kept in /opt/gmt/GMT4.5.3/share/conf to contain the names of these directories. NOTE: Enter full pathname of directory were coastline files are to be stored.==> Directory for int, low, and crude coastline files?[/opt/gmt/GMT4.5.3/share/coast]:==> Directory for high coastline files? [/opt/gmt/GMT4.5.3/share/coast]:==> Directory for full coastline files? [/opt/gmt/GMT4.5.3/share/coast]:Several supplemental packages are available:------------------------------------------------------------------------------dbase: Extracting data from NGDC DEM and other gridsgshhs: Global Self-consistent Hierarchical High-resolution Shoreline extractor imgsrc: Extracting grids from global altimeter files (Sandwell/Smith)meca: Plotting special symbols in seismology and geodesymex: Inte**ce for reading/writing GMT grdfiles (REQUIRES MATLAB or OCTAVE)mgd77: Programs for handling MGD77 data filesmgg: Programs for **, managing, and plotting .gmt filesmisc: Digitize or stitch line segments, read netCDF 1-D tables, and more segyprogs: Plot SEGY seismic data filessph: Spherical triangulation, Voronoi construction and interpolation spotter: Plate tectonic backtracking and hotspottingx2sys: New (Generic) Track intersection (crossover) toolsx_system: Old (MGG-specific) Track intersection (crossover) toolsxgrid: An X11-based graphical editor for netCDF-based .nc files/usr/bin/install -c -m 644 backtracker.1 grdrotater.1 grdspotter.1 hotspotter.1 originator.1 rotconverter.1 /opt/gmt/GMT4.5.3/man/man1make[2]: Leaving directory `/opt/gmt/GMT4.5.3/src/spotter'** install-man in src/x2sysmake[2]: Entering directory `/opt/gmt/GMT4.5.3/src/x2sys'/usr/bin/install -c -m 644 x2sys_init.1 x2sys_put.1 x2sys_get.1 x2sys_binlist.1x2sys_datalist.1 x2sys_cross.1 x2sys_list.1 x2sys_report.1 x2sys_solve.1x2sys_merge.1 /opt/gmt/GMT4.5.3/man/man1make[2]: Leaving directory `/opt/gmt/GMT4.5.3/src/x2sys'** install-man in src/x_systemmake[2]: Entering directory `/opt/gmt/GMT4.5.3/src/x_system'/usr/bin/install -c -m 644 x_edit.1 x_init.1 x_list.1 x_report.1 x_remove.1x_solve_dc_drift.1 x_update.1 x_setup.1 x_over.1 x_system.1/opt/gmt/GMT4.5.3/man/man1make[2]: Leaving directory `/opt/gmt/GMT4.5.3/src/x_system'make[1]: Leaving directory `/opt/gmt/GMT4.5.3'All users must include /opt/gmt/GMT4.5.3/man in their MANPATHAll users should add /opt/gmt/GMT4.5.3/share/gmt/html/gmt_services.html to their browser bookmarksDoing example ex01/job01.sh ... doneDoing example ex02/job02.sh ... doneDoing example ex03/job03.sh ... doneDoing example ex04/job04.sh ... doneDoing example ex04/job04c.sh ... doneDoing example ex05/job05.sh ... doneDoing example ex06/job06.sh ... doneDoing example ex07/job07.sh ... doneDoing example ex08/job08.sh ... doneDoing example ex09/job09.sh ... doneDoing example ex10/job10.sh ... doneDoing example ex11/job11.sh ... doneDoing example ex12/job12.sh ... doneDoing example ex13/job13.sh ... doneDoing example ex14/job14.sh ... doneDoing example ex15/job15.sh ... doneDoing example ex16/job16.sh ... doneDoing example ex17/job17.sh ... doneDoing example ex18/job18.sh ... doneDoing example ex19/job19.sh ... doneDoing example ex20/job20.sh ... doneDoing example ex21/job21.sh ... doneDoing example ex22/job22.sh ... doneDoing example ex23/job23.sh ... doneDoing example ex24/job24.sh ... doneDoing example ex25/job25.sh ... doneDoing example ex26/job26.sh ... doneDoing example ex27/job27.sh ... doneDoing example ex28/job28.sh ... doneDoing example ex29/job29.sh ... doneDoing example ex30/job30.sh ... doneCompleted all examplesDoing animation anim01/anim_01.sh ... anim_01.sh: First frame plotted to anim_01.psdoneDoing animation anim02/anim_02.sh ... anim_02.sh: First frame plotted to anim_02.psdoneDoing animation anim03/anim_03.sh ... anim_03.sh: First frame plotted to anim_03.psdoneDoing animation anim04/anim_04.sh ... anim_04.sh: First frame plotted to anim_04.psdoneCompleted all animationsGMT installation complete. Remember to set these:-----------------------------------------------------------------------For csh or tcsh users:setenv NETCDFHOME /usr/local/netcdfset path=(/opt/gmt/GMT4.5.3/bin $path)For sh or bash users:export NETCDFHOME=/usr/local/netcdfexport PATH=/opt/gmt/GMT4.5.3/bin:$PATHNote: if you installed netCDF as a shared library you may have to addthe path to this library to LD_LIBRARY_PATH or place the library in a standard system path [see information on shared library for your OS].For all users:Add /opt/gmt/GMT4.5.3/man to MANPATHAdd /opt/gmt/GMT4.5.3/share/html/gmt_services.html as browser bookmark-----------------------------------------------------------------------[root@lvs02 gmt]#==> Install any of the supplemental programs? (y/n/a(ll))? [a]: n 选择不完全安装如果选择a标示完全安装,需要在当前主机上安装matlab或者octave五、设置环境变量[root@lvs02 gmt]# vi ~/.bashrc# .bashrc# User specific aliases and functionsalias rm='rm -i'alias cp='cp -i'alias mv='mv -i'# Source global definitionsif [ -f /etc/bashrc ]; then. /etc/bashrcfiexport NETCDFHOME=/usr/local/netcdfexport PATH=/opt/gmt/GMT4.5.3/bin:$PATH六、查看环境变量是否生效[root@lvs02 gmt]# envHOSTNAME=SELINUX_ROLE_REQUESTED=TERM=xtermSHELL=/bin/bashHISTSIZE=1000SSH_CLIENT=192.168.1.3 1972 22SELINUX_USE_CURRENT_RANGE=QTDIR=/usr/lib/qt-3.3OLDPWD=/opt/gmt/GMT4.5.3QTINC=/usr/lib/qt-3.3/includeSSH_TTY=/dev/pts/1USER=rootLS_COLORS=rs=0:di=01;34:ln=01;36:mh=00:pi=40;33:so=01;35:do=01;35:bd=40;33;0 1:cd=40;33;01:or=40;31;01:mi=01;05;37;41:su=37;41:sg=30;43:ca=30;41:tw=30;42:o w=34;42:st=37;44:ex=01;32:*.tar=01;31:*.tgz=01;31:*.arj=01;31:*.taz=01;31:*.lzh=0 1;31:*.lzma=01;31:*.tlz=01;31:*.txz=01;31:*.zip=01;31:*.z=01;31:*.Z=01;31:*.dz=01; 31:*.gz=01;31:*.lz=01;31:*.xz=01;31:*.bz2=01;31:*.tbz=01;31:*.tbz2=01;31:*.bz=01; 31:*.tz=01;31:*.deb=01;31:*.rpm=01;31:*.jar=01;31:*.rar=01;31:*.ace=01;31:*.zoo= 01;31:*.cpio=01;31:*.7z=01;31:*.rz=01;31:*.jpg=01;35:*.jpeg=01;35:*.gif=01;35:*.b mp=01;35:*.pbm=01;35:*.pgm=01;35:*.ppm=01;35:*.tga=01;35:*.xbm=01;35:*.xpm =01;35:*.tif=01;35:*.tiff=01;35:*.png=01;35:*.svg=01;35:*.svgz=01;35:*.mng=01;35: *.pcx=01;35:*.mov=01;35:*.mpg=01;35:*.mpeg=01;35:*.m2v=01;35:*.mkv=01;35:*.ogm=01;35:*.mp4=01;35:*.m4v=01;35:*.mp4v=01;35:*.vob=01;35:*.qt=01;35:*.nuv =01;35:*.wmv=01;35:*.asf=01;35:*.rm=01;35:*.rmvb=01;35:*.flc=01;35:*.avi=01;35: *.fli=01;35:*.flv=01;35:*.gl=01;35:*.dl=01;35:*.xcf=01;35:*.xwd=01;35:*.yuv=01;35: *.cgm=01;35:*.emf=01;35:*.axv=01;35:*.anx=01;35:*.ogv=01;35:*.ogx=01;35:*.aac= 01;36:*.au=01;36:*.flac=01;36:*.mid=01;36:*.midi=01;36:*.mka=01;36:*.mp3=01;36 :*.mpc=01;36:*.ogg=01;36:*.ra=01;36:*.wav=01;36:*.axa=01;36:*.oga=01;36:*.spx= 01;36:*.xspf=01;36:MAIL=/var/spool/mail/rootPATH=/opt/gmt/GMT4.5.3/bin:/usr/lib/qt-3.3/bin:/usr/kerberos/sbin:/usr/kerberos/ bin:/usr/local/sbin:/usr/local/bin:/sbin:/bin:/usr/sbin:/usr/bin:/root/binPWD=/opt/gmtNETCDFHOME=/usr/local/netcdfLANG=en_US.UTF-8KDE_IS_PRELINKED=1MODULEPATH=/usr/share/Modules/modulefiles:/etc/modulefiles LOADEDMODULES=KDEDIRS=/usrSELINUX_LEVEL_REQUESTED=SSH_ASKPASS=/usr/libexec/openssh/gnome-ssh-askpassHISTCONTROL=ignoredupsSHLVL=1HOME=/rootLOGNAME=rootQTLIB=/usr/lib/qt-3.3/libCVS_RSH=sshSSH_CONNECTION=192.168.1.3 1972 192.168.1.111 22 MODULESHOME=/usr/share/ModulesLESSOPEN=|/usr/bin/lesspipe.sh %sDISPLAY=localhost:11.0G_BROKEN_FILENAMES=1module=() { eval `/usr/bin/modulecmd bash $*`}_=/bin/env[root@lvs02 gmt]# vi ~/.bashrc[root@lvs02 gmt]#七、设置manpath的环境变量#vi /etc/man.configMANPATH /opt/gmt/GMT4.5.3/man to MANPATHMANPATH /opt/gmt/GMT4.5.3/share/html/gmt_services.html到此就正常安装完毕如果需要可以将gmt的环境变量设置好。
技术支持中心H3C iMC开局配置一指禅H3C官方网站: H3C知了社区:服务热线:400-810-0504目录一、iMC 产品简介 (3)二、iMC资料介绍 (4)1、官网资料 (4)2、大讲堂多媒体视频 (6)3、KMS案例库 (8)4、根叔的云图 (9)5、根叔的种子 (12)三、iMC安装注册升级三部曲 (14)1、iMC软件下载 (14)2、iMC安装 (16)3、License注册 (18)4、iMC升级 (19)四、iMC功能配置指导 (19)五、iMC通用故障信息收集方法 (22)六、iMC常见功能速查及故障排查 (29)1、Portal认证 (29)2、Dbman数据备份与恢复 (31)3、802.1x认证 (31)4、Portal无感知 (33)5、短信认证 (33)6、MAC地址认证 (33)7、WSM无法同步AC或AP (33)8、PLAT设备管理/SNMP (34)9、PLAT告警管理 (34)10、拓扑管理 (35)11、LDAP认证 (35)12、访客管理 (35)13、iNode (36)14、EAD (36)15、APM (36)16、NTA/UBA (37)一、iMC 产品简介二、iMC资料介绍iMC资料主要分为5部分:官网资料,大讲堂多媒体视频,KMS案例库,根叔的云图,根叔的种子1、官网资料官网地址:登录方式:使用自己注册的账号/密码登录路径:(1)、官网>服务>文档中心>管理软件/cn/Service/Document_Center/IP_Management/(2)、官网>服务>技术资料>业务软件/cn/Service/TechnicalInfo/PorductMaintanInfo/Softwa re/2、大讲堂多媒体视频地址:登录方式:使用代理商账号密码登录。
多媒体视频资料见下表:3、KMS案例库网址:登录方式:使用代理商账号密码登录。
网御星云安全网关PowerV 命令行操作手册VERSION 1.0明声♦本手册所含内容若有任何改动,恕不另行通知。
♦在法律法规的最大允许范围内,北京网御星云信息技术有限公司除就本手册和产品应负的瑕疵担保责任外,无论明示或默示,不作其它任何担保,包括(但不限于)本手册中推荐使用产品的适用性和安全性、产品的适销性和适合某特定用途的担保。
♦在法律法规的最大允许范围内,北京网御星云信息技术有限公司对于您的使用或不能使用本产品而发生的任何损坏(包括,但不限于直接或间接的个人损害、商业利润的损失、业务中断、商业信息的遗失或任何其它损失),不负任何赔偿责任。
♦本手册含受版权保护的信息,未经北京网御星云信息技术有限公司书面允许不得对本手册的任何部分进行影印、复制或翻译。
♦本手册使用于网御星云PowerV系列防火墙和VPN,在手册中称为安全网关。
文档少部分内容视产品具体型号略有不同,请以购买的实际产品为准。
♦网御星云不承担由于本资料中的任何不准确性引起的任何责任,网御星云保留不作另行通知的情况下对本资料进行变更、修改、转换或以其他方式修订的权利!北京网御星云信息技术有限公司号电8层中北京海淀中村南大街国区关6中信息大厦目 录目 录 (III)第1 章 前 言 (1)第2 章 命令行概述 (4)第3 章 快速入门 (25)第4 章 系统管理 (26)第5 章 网络管理 (76)第6 章 路由 (119)第7 章 防火墙 (135)第8 章 应用防护 (205)第9 章 用户认证 (287)第10 章 会话管理 (305)第11 章 VPN (308)第12 章 SSLVPN (327)第13 章 IPv6 (448)第14 章 漏洞扫描 (474)第15 章 状态监控 (477)第16 章 日志与报警 (480)第17 章 其他 (490)第1章 前 言1.1 导言员册该册绍过终《命令行操作手》是御册网安全网关Power V管理手中的一本。
安装CDH6.2.1时cloudera-scm-server启动失败安装CDH6.2.1,在使⽤systemctl start cloudera-scm-server启动,status查看时,启动失败。
查看/var/log/cloudera-scm-server 下没有⽇志再查看服务相关的⽇志: journalctl -xe报错为:May 3111:12:37 hadoop102 cm-server[4564]: | site: |May 3111:12:37 hadoop102 cm-server[4564]: | > /technetwork/java/javase/index.html < |May 3111:12:37 hadoop102 cm-server[4564]: | OR |May 3111:12:37 hadoop102 cm-server[4564]: | - a supported version of the OpenJDK from your OS vendor. Help for |May 3111:12:37 hadoop102 cm-server[4564]: | some OSes are available at: |May 3111:12:37 hadoop102 cm-server[4564]: | > /install/ < |May 3111:12:37 hadoop102 cm-server[4564]: | |May 3111:12:37 hadoop102 cm-server[4564]: | Cloudera Manager requires Oracle JDK or OpenJDK 1.8 or later. |May 3111:12:37 hadoop102 cm-server[4564]: | NOTE: Cloudera Manager will find the Oracle JDK when starting, |May 3111:12:37 hadoop102 cm-server[4564]: | regardless of whether you installed the JDK using a binary |May 3111:12:37 hadoop102 cm-server[4564]: | installer or the RPM-based installer. |May 3111:12:37 hadoop102 cm-server[4564]: +======================================================================+May 3111:12:37 hadoop102 systemd[1]: cloudera-scm-server.service: main process exited, code=exited, status=1/FAILUREMay 3111:12:37 hadoop102 systemd[1]: Unit cloudera-scm-server.service entered failed state.May 3111:12:37 hadoop102 systemd[1]: cloudera-scm-server.service failed.May 3111:12:37 hadoop102 systemd[1]: cloudera-scm-server.service holdoff time over, scheduling restart.May 3111:12:37 hadoop102 systemd[1]: Stopped Cloudera CM Server Service.-- Subject: Unit cloudera-scm-server.service has finished shutting down-- Defined-By: systemd-- Support: /mailman/listinfo/systemd-devel---- Unit cloudera-scm-server.service has finished shutting down.May 3111:12:37 hadoop102 systemd[1]: start request repeated too quickly for cloudera-scm-server.serviceMay 3111:12:37 hadoop102 systemd[1]: Failed to start Cloudera CM Server Service.-- Subject: Unit cloudera-scm-server.service has failed-- Defined-By: systemd-- Support: /mailman/listinfo/systemd-devel---- Unit cloudera-scm-server.service has failed.---- The result is failed.May 3111:12:37 hadoop102 systemd[1]: Unit cloudera-scm-server.service entered failed state.May 3111:12:37 hadoop102 systemd[1]: cloudera-scm-server.service failed.May 3111:12:51 hadoop102 polkitd[752]: Registered Authentication Agent for unix-process:4602:1046407 (system bus name :1.92 [/usr/bin/pkttyagent --not May 3111:12:51 hadoop102 polkitd[752]: Unregistered Authentication Agent for unix-process:4602:1046407 (system bus name :1.92, object path /org/freede 是因为jdk的版本不对,要下载cdh6.2.1⾃带的oracle-j2sdk1.8-1.8.0+update181-1.x86_64.rpm包。
Splunk Enterprise 6.0.1Updating Splunk Enterprise InstancesGenerated: 12/24/2013 12:54 pm
Copyright (c) 2013 Splunk Inc. All Rights ReservedTable of ContentsDeployment server and forwarder management..............................................1 About deployment server and forwarder management.............................1 Deployment server architecture................................................................3 How deployment updates happen.............................................................5 Forwarder management overview.............................................................6
Configure the deployment system.....................................................................9 Plan a deployment....................................................................................9 Configure deployment clients..................................................................12 Create deployment apps.........................................................................15 Create server classes.............................................................................18 Use forwarder management to define server classes.............................22 Set up client filters...................................................................................27
Deploy apps........................................................................................................36 Deploy apps to clients.............................................................................36View app deployment status....................................................................38
Manage the deployment server........................................................................40 Estimate deployment server performance..............................................40 Use forwarder management to manage apps.........................................41 Use forwarder management to manage clients......................................44
Advanced configuration....................................................................................46 Use serverclass.conf to define server classes........................................46 Compatibility and forwarder management..............................................49 Deploy in multi-tenant environments.......................................................52
Examples............................................................................................................54 Extended example: Deploy configurations to several forwarders...........54 Example: Add inputs to forwarders.........................................................64
iDeployment server and forwardermanagement
About deployment server and forwardermanagement
Important: Before reading this manual, you should be familiar with thefundamentals of Splunk Enterprise distributed deployment, as described in theDistributed Deployment Manual.
Splunk Enterprise provides the deployment server, with its forwardermanagement interface, to manage the update process across distributedinstances of Splunk Enterprise.
What is deployment server?The deployment server is the tool for distributing configurations, apps, andcontent updates to groups of Splunk Enterprise instances. You can use it todistribute updates to most types of Splunk Enterprise components: forwarders,non-clustered indexers, and search heads.
The deployment server is just a Splunk Enterprise instance that has beenconfigured to manage the update process across sets of other Splunk Enterpriseinstances. Depending on the number of instances it's deploying updates to, thedeployment server instance might need to be dedicated exclusively to managingupdates. For more information, read "Plan a deployment".
The deployment server handles configuration and content updates toexisting Splunk Enterprise installations. You cannot use it for initial orupgrade installations of Splunk Enterprise or the universal forwarder. To learnhow to install and deploy Splunk Enterprise, see "Step-by-step installationprocedures" for full Splunk Enterprise and "Universal forwarder deploymentoverview" for the Splunk Enterprise universal forwarder. To learn how toupgrade your deployment to a new version of Splunk Enterprise, see "Upgradeyour deployment".
1