latex表格制作详解
- 格式:pdf
- 大小:374.89 KB
- 文档页数:16
Latex中的tabular环境是非常常用的命令,它用于创建表格。
在Latex中,表格的创建是一项比较繁琐的任务,但是使用tabular环境可以让我们更加方便地创建出漂亮的表格。
在本文中,我们将深入探讨latex tabular用法,并且会按照从简到繁,由浅入深的方式来探讨这个主题。
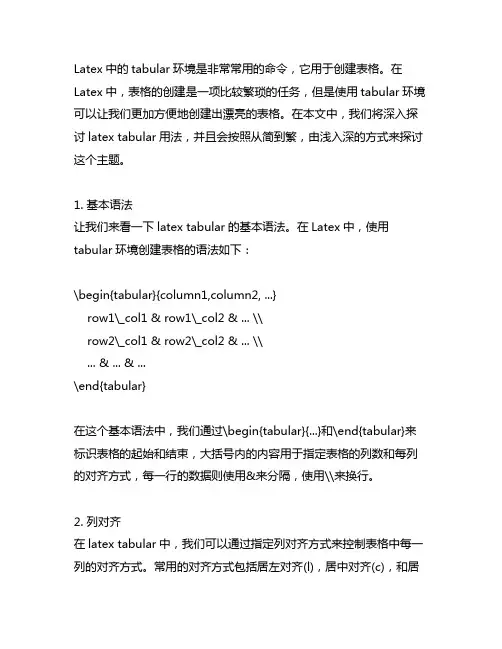
1. 基本语法让我们来看一下latex tabular的基本语法。
在Latex中,使用tabular环境创建表格的语法如下:\begin{tabular}{column1,column2, ...}row1\_col1 & row1\_col2 & ... \\row2\_col1 & row2\_col2 & ... \\... & ... & ...\end{tabular}在这个基本语法中,我们通过\begin{tabular}{...}和\end{tabular}来标识表格的起始和结束,大括号内的内容用于指定表格的列数和每列的对齐方式,每一行的数据则使用&来分隔,使用\\来换行。
2. 列对齐在latex tabular中,我们可以通过指定列对齐方式来控制表格中每一列的对齐方式。
常用的对齐方式包括居左对齐(l),居中对齐(c),和居右对齐(r)。
指定三列分别居左对齐、居中对齐和居右对齐的表格语法如下:\begin{tabular}{l c r}left aligned & center aligned & right aligned \\\end{tabular}3. 单元格合并有时候,我们需要在表格中合并多个单元格,latex tabular也提供了相应的命令来实现这一功能。
使用\multicolumn命令可以实现横向合并单元格,使用\multirow命令可以实现纵向合并单元格。
4. 边框线在latex tabular中,我们可以通过指定边框线的方式来控制表格的边框线显示。
Latex表格指定宽度百分比一、概述在科学研究和学术论文撰写过程中,经常会涉及到表格的使用。
而对于一些复杂的表格,我们常常需要指定表格的宽度百分比,以便更好地控制表格的布局。
对于latex用户来说,如何指定表格的宽度百分比是一个常见的问题。
本文将介绍latex中如何指定表格的宽度百分比,帮助读者更好地应用latex排版技术。
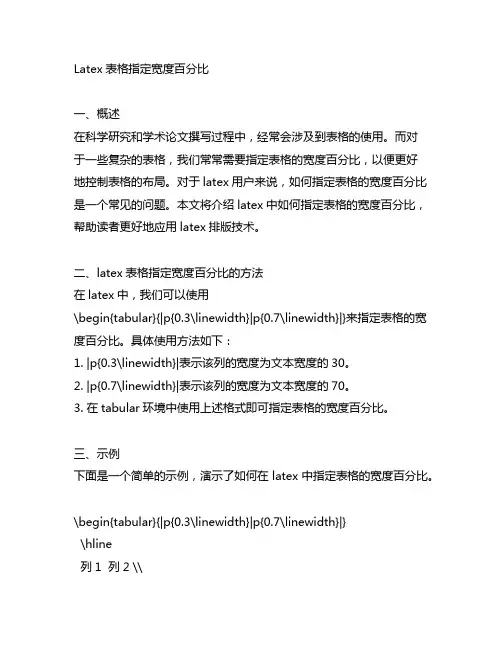
二、latex表格指定宽度百分比的方法在latex中,我们可以使用\begin{tabular}{|p{0.3\linewidth}|p{0.7\linewidth}|}来指定表格的宽度百分比。
具体使用方法如下:1. |p{0.3\linewidth}|表示该列的宽度为文本宽度的30。
2. |p{0.7\linewidth}|表示该列的宽度为文本宽度的70。
3. 在tabular环境中使用上述格式即可指定表格的宽度百分比。
三、示例下面是一个简单的示例,演示了如何在latex中指定表格的宽度百分比。
\begin{tabular}{|p{0.3\linewidth}|p{0.7\linewidth}|}\hline列1 列2 \\\hline内容1 内容2 \\\hline\end{tabular}通过上述示例,我们可以看到,表格的第一列宽度占整个表格宽度的30,而第二列宽度占整个表格宽度的70。
四、注意事项在使用latex指定表格宽度百分比时,需要注意以下几点:1. 指定的百分比总和应等于1,以确保表格宽度不会超出文本宽度。
2. 使用p{0.x\linewidth}来指定每一列的宽度百分比,其中x为所占百分比。
3. 在具体使用时,可以根据实际需要调整各列的百分比。
五、总结通过本文的介绍,我们了解了在latex中如何指定表格的宽度百分比,以及使用注意事项。
在科研和学术论文撰写中,掌握latex排版技术,能够更好地呈现数据和内容,提升论文质量。
希望本文能够帮助读者更好地应用latex排版技术,提升论文质量,促进学术交流。

竭诚为您提供优质文档/双击可除LaTeX画表格篇一:latex排版——表格插入latex排版——表格插入标签:分类:办公与排版latextabel杂谈%看以下代码:\documentclass{article}\begin{document}structuralhealthmonitoring(shm)isafast-developing,i nterdisciplinaryfieldofresearchduetothefactthatshmi sheavilystimulatedbytheengineeringproblemsofmainten anceandsafeoperationoftechnicalinfrastructure.$$\sum_{i=1}^{n}$$thecoreproblemofshmisthedamageidentification,whichc anbedividedintofivelevels%表格\begin{table}[tbp]\centering%表居中\begin{tabular}{lccc}%{lccc}表示各列元素对齐方式,left-l,right-r,center-c\hlineplayer2)localizationofdamage;3)identificationofdama getype;4)quantificationofdamageextent;and5)damagepr ognosis.\end{document}%编译后如下格式%将红色代码tbp改为htbp,编译后显示为篇二:latex制作复杂表格之multirow,multicolum和cline综合使用简介latex制作复杂表格之multirow,multicolum和cline 综合使用简介已有2283次阅读20xx-5-1817:04|个人分类:table|系统分类:科研笔记|关键词:latex,table,multirow,multicolum,cline在复杂表格制作中,有时候会遇到一列横跨多行,或者一行横跨多列的情况,那么这个时候就要分别用到\multirow,\multicolum的命令,标准语法如下:\multicolumn{num_cols}{alignment}{contents}.%%%%%%% %%%%%num_colsisthenumberofsub sequentcolumnstomerge;alignmentis,eitherl,c,rortoha vetextwrappingspecifiyawidthp{5.0cm}.andcontentsiss implytheactualdatayouwanttobecontainedwithinthatcel l.%%%%%%%%%%%%%%%%\multirow{num_rows}{width}{contents}.%%%%%%%%%%%%%% %%theargumentsareprettysimpletodeduce(*forthewidthm eansthecontentsnaturalwidth).%%%%%%%%%%%%%%(需要注意的是:这个命令需要在preamble中添加宏包\usepackage{multirow})另外,在复杂表格中,需要从某个某列开始画线,那么需要使用\cline命令,标准语法为:\cline{i-j}%%%%%%%%%%%partialhorizontallinebeginnin gincolumniandendingincolumnj%%%%%%%%%%%%%关于\multicolum和\multirow在做表时的一些细节问题表述,可以参考latex文档中的table部分。

以下是爱思唯尔表格格式的LaTeX代码示例:
latex复制代码
\documentclass{article}
\usepackage{multirow}
\usepackage{graphicx}
\begin{document}
\begin{table}[htbp]
\centering
\caption{这是一个示例表格}
\label{tab:example}
\begin{tabular}{|c|c|c|c|}
\hline
\multicolumn{4}{|c|}{标题1} \\\hline
\multicolumn{2}{|c|}{标题2} &\multicolumn{2}{c|}{标题3} \\\hline
\multicolumn{2}{|c|}{内容1} &\multicolumn{2}{c|}{内容2} \\\hline
\multicolumn{2}{|c|}{内容3} &\multicolumn{2}{c|}{内容4} \\\hline
\end{tabular}
\end{table}
\end{document}
在上面的代码中,tabular命令用于创建表格,|符号用于指定列的类型,c表示居中对齐,l表示左对齐,r表示右对齐。
\multicolumn命令用于合并单元格。
caption和label命令分别用于添加表格标题和标签。
table环境的可选参数htbp用于指定表格的位置,其中h表示当前位置,t表示顶部,b表示底部,p表示独立一页。

latex平移表题摘要:TeX 简介TeX 平移表题的原理3.使用LaTeX 制作平移表题的方法4.总结正文:LaTeX 是一种强大的排版系统,广泛应用于学术出版、报告和论文的撰写。
它基于TeX,提供了许多功能,使排版工作变得更简单、更高效。
在LaTeX 中,平移表题是一个常见的操作,可以使表格标题在表格上方或下方显示,提高表格的视觉效果。
LaTeX 平移表题的原理是利用captionof 命令和FloatBarrier 宏包。
captionof 命令可以给非表格环境添加标题,而FloatBarrier 宏包可以控制浮动元素的排列顺序。
通过这两个命令的组合,我们可以实现表题的平移。
下面是使用LaTeX 制作平移表题的方法:1.首先,确保已经加载了FloatBarrier 宏包。
在文档的导言区添加以下代码:```latexusepackage{float}```2.使用captionof 命令为表格添加标题。
在表格环境之前或之后(但要在FloatBarrier 宏包定义的浮动元素之前)添加以下代码:```latexcaptionof{table}{表格标题}```3.在表格上方或下方放置表题。
在表格环境上方或下方添加以下代码:```latexFloatBarrier```通过以上三步,我们就可以实现LaTeX 平移表题的效果。
需要注意的是,不同的文档类和期刊可能有不同的格式要求,因此,在实际应用中,请务必遵循相应的规定。
总之,LaTeX 提供了丰富的功能,使我们在排版时可以实现各种复杂的效果。

竭诚为您提供优质文档/双击可除latex,表格换页篇一:latex+表格的处理latex表格的处理latex表格处理概述一般三线表的处理带表格注释的三线表固定列宽和自动伸缩列宽固定列宽与对齐方式自动伸缩列宽跨页表格表格旋转和后置表格旋转表格后置辅助转换工具latex表格处理概述与word不同,latex通过一定的语法规则将表格写成纯文本形式。
基本规则包括:表格从上到下,每一行从左到右,单元格内容使用tlikehyphenationintablefootnotes.} }{\Flalignmentis,eitherl,c,rortohavetextwrappingspec ifiyawidthp{5.0cm}.andcontentsissimplytheactualdata youwanttobecontainedwithinthatcell.%%%%%%%%%%%%%%%%\multirow{num_rows}{width}{contents}.%%%%%%%%%%%%%% %%theargumentsareprettysimpletodeduce(*forthewidthm eansthecontentsnaturalwidth).%%%%%%%%%%%%%%(需要注意的是:这个命令需要在preamble中添加宏包\usepackage{multirow})另外,在复杂表格中,需要从某个某列开始画线,那么需要使用\cline命令,标准语法为:\cline{i-j}%%%%%%%%%%%partialhorizontallinebeginnin gincolumniandendingincolumnj%%%%%%%%%%%%%关于\multicolum和\multirow在做表时的一些细节问题表述,可以参考latex文档中的table部分。
这里,本博文给出一个更加复杂的表格制作,那就是表格中同时存在横跨多行和多列的情况,这个时候会出现\multicolum和\multirow混合使用的情况。
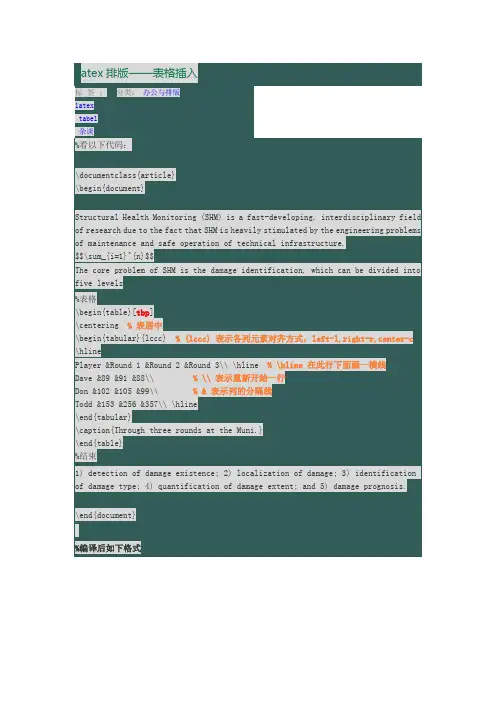
Latex排版——表格插入标签:分类:办公与排版latextabel杂谈%看以下代码:\documentclass{article}\begin{document}Structural Health Monitoring (SHM) is a fast-developing, interdisciplinary field of research due to the fact that SHM is heavily stimulated by the engineering problems of maintenance and safe operation of technical infrastructure.$$\sum_{i=1}^{n}$$The core problem of SHM is the damage identification, which can be divided into five levels%表格\begin{table}[tbp]\centering % 表居中\begin{tabular}{lccc} % {lccc} 表示各列元素对齐方式,left-l,right-r,center-c\hlinePlayer &Round 1 &Round 2 &Round 3\\ \hline % \hline 在此行下面画一横线Dave &89 &91 &88\\ % \\ 表示重新开始一行Don &102 &105 &99\\ % & 表示列的分隔线Todd &153 &256 &357\\ \hline\end{tabular}\caption{Through three rounds at the Muni.}\end{table}%结束1) detection of damage existence; 2) localization of damage; 3) identification of damage type; 4) quantification of damage extent; and 5) damage prognosis.\end{document}%编译后如下格式%将红色代码tbp改为htbp, 编译后显示为。
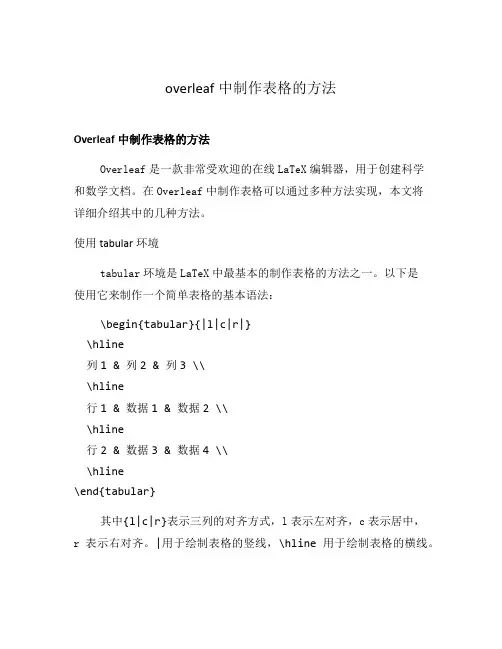
overleaf中制作表格的方法Overleaf中制作表格的方法Overleaf是一款非常受欢迎的在线LaTeX编辑器,用于创建科学和数学文档。
在Overleaf中制作表格可以通过多种方法实现,本文将详细介绍其中的几种方法。
使用tabular环境tabular环境是LaTeX中最基本的制作表格的方法之一。
以下是使用它来制作一个简单表格的基本语法:\begin{tabular}{|l|c|r|}\hline列1 & 列2 & 列3 \\\hline行1 & 数据1 & 数据2 \\\hline行2 & 数据3 & 数据4 \\\hline\end{tabular}其中{l|c|r}表示三列的对齐方式,l表示左对齐,c表示居中,r表示右对齐。
|用于绘制表格的竖线,\hline用于绘制表格的横线。
使用booktabs包booktabs包是一个提供了一些更好的水平线宽度和垂直间距的方法的LaTeX包。
以下是使用它制作表格的例子:\usepackage{booktabs}\begin{tabular}{llr}\toprule列1 & 列2 & 列3 \\\midrule行1 & 数据1 & 数据2 \\行2 & 数据3 & 数据4 \\\bottomrule\end{tabular}使用booktabs包的好处是能够生成更美观、更专业的表格。
使用multirow和multicolumn命令有时候,表格中会有跨行或跨列的单元格,可以使用multirow和multicolumn命令来实现。
以下是使用这两个命令的例子:\usepackage{multirow}\begin{tabular}{|c|c|c|}\hline\multirow{2}{*}{跨行内容} & 列2 & 列3 \\\cline{2-3}& 数据1 & 数据2 \\\hline行2 & 数据3 & 数据4 \\\hline\end{tabular}使用multirow命令可以实现单元格跨行,使用multicolumn命令可以实现单元格跨列。
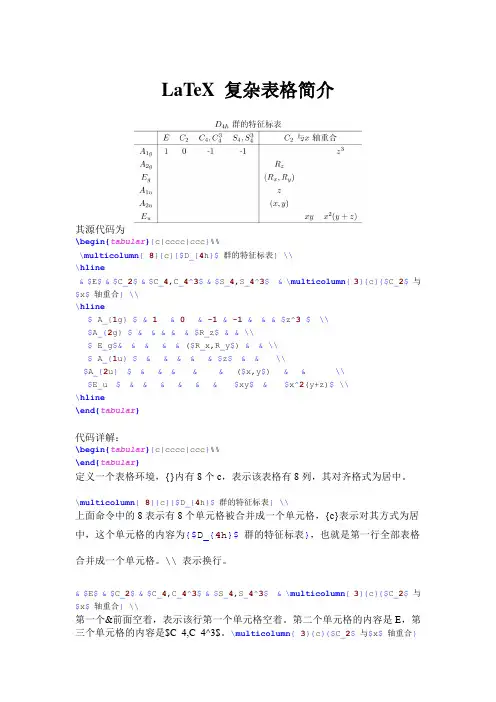
LaTeX 复杂表格简介其源代码为\begin{tabular}{c|cccc|ccc}%%\multicolumn{8}{c}{$D_{4h}$群的特征标表}\\\hline&$E$&$C_2$&$C_4,C_4^3$&$S_4,S_4^3$&\multicolumn{3}{c}{$C_2$与$x$轴重合}\\\hline$ A_{1g}$&1&0&-1&-1&&&$z^3$\\$A_{2g}$&&&&&$R_z$&&\\$ E_g$&&&&& ($R_x,R_y$) &&\\$ A_{1u}$&&&&&$z$&&\\$A_{2u}$&&&&& ($x,y$) &&\\$E_u $&&&&&&$xy$&$x^2(y+z)$\\\hline\end{tabular}代码详解:\begin{tabular}{c|cccc|ccc}%%\end{tabular}定义一个表格环境,{}内有8个c,表示该表格有8列,其对齐格式为居中。
\multicolumn{8}{c}{$D_{4h}$群的特征标表}\\上面命令中的8表示有8个单元格被合并成一个单元格,{c}表示对其方式为居中,这个单元格的内容为{$D_{4h}$群的特征标表},也就是第一行全部表格合并成一个单元格。
\\ 表示换行。
&$E$&$C_2$&$C_4,C_4^3$&$S_4,S_4^3$&\multicolumn{3}{c}{$C_2$与$x$轴重合}\\第一个&前面空着,表示该行第一个单元格空着。
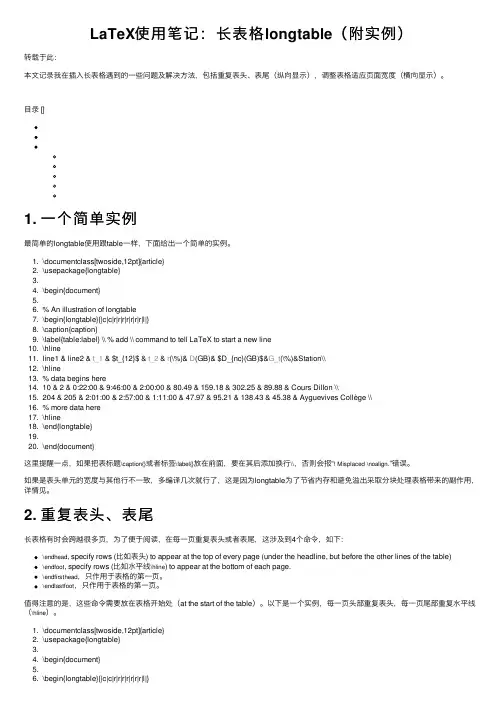
LaTeX使⽤笔记:长表格longtable(附实例)转载于此:本⽂记录我在插⼊长表格遇到的⼀些问题及解决⽅法,包括重复表头、表尾(纵向显⽰),调整表格适应页⾯宽度(横向显⽰)。
⽬录 []1. ⼀个简单实例最简单的longtable使⽤跟table⼀样,下⾯给出⼀个简单的实例。
1. \documentclass[twoside,12pt]{article}2. \usepackage{longtable}3.4. \begin{document}5.6. % An illustration of longtable7. \begin{longtable}{|c|c|r|r|r|r|r|r|r|l|}8. \caption{caption}9. \label{table:label} \\ % add \\ command to tell LaTeX to start a new line10. \hline11. line1 & line2 & t_1 & $t_{12}$ & t_2 & r(\%)& D(GB)& $D_{nc}(GB)$&G_t(\%)&Station\\12. \hline13. % data begins here14. 10 & 2 & 0:22:00 & 9:46:00 & 2:00:00 & 80.49 & 159.18 & 302.25 & 89.88 & Cours Dillon \\15. 204 & 205 & 2:01:00 & 2:57:00 & 1:11:00 & 47.97 & 95.21 & 138.43 & 45.38 & Ayguevives Collège \\16. % more data here17. \hline18. \end{longtable}19.20. \end{document}这⾥提醒⼀点,如果把表标题\caption{}或者标签\label{}放在前⾯,要在其后添加换⾏\\,否则会报“! Misplaced \noalign.”错误。
latex中给表格的长度在LaTeX中,你可以使用`tabular`环境来创建表格,并且可以设置表格的长度。
通常情况下,表格的长度是根据表格内容自动调整的,但是你也可以手动设置表格的长度。
要手动设置表格的长度,你可以使用`p{width}`参数来指定每一列的宽度,其中`width`是你想要设置的宽度。
例如,如果你想要创建一个包含三列的表格,其中第一列宽度为2厘米,第二列宽度为3厘米,第三列宽度为4厘米,你可以这样编写代码:\begin{tabular}{|p{2cm}|p{3cm}|p{4cm}|}。
\hline.第一列 & 第二列 & 第三列 \\。
\hline.内容 & 内容 & 内容 \\。
\hline.\end{tabular}。
在这个例子中,`p{2cm}`指定了第一列的宽度为2厘米,`p{3cm}`指定了第二列的宽度为3厘米,`p{4cm}`指定了第三列的宽度为4厘米。
另外,你也可以使用`tabularx`宏包来自动调整表格的宽度,以便表格占满整个页面或者指定的宽度。
使用`tabularx`宏包需要指定表格的总宽度,并且使用`X`参数来指定自动调整的列。
例如:\usepackage{tabularx}。
\begin{tabularx}{\textwidth}{|X|X|X|}。
\hline.第一列 & 第二列 & 第三列 \\。
\hline.内容 & 内容 & 内容 \\。
\hline.\end{tabularx}。
在这个例子中,`tabularx`环境的第一个参数指定了表格的总宽度为页面的宽度,`X`参数指定了三列都会自动调整宽度以填满剩余空间。
总之,你可以使用`p{width}`参数手动设置表格的列宽,也可以使用`tabularx`宏包来自动调整表格的宽度。
希望这些信息能够帮助到你。
LaTeX之表格绘制综合⽰例⼀LaTeX中绘制复杂表格有些⿇烦,这⾥记录下⼀些综合性的例⼦以备查询。
下⾯直接给出所举例⼦的完整源代码。
环境Ubuntu 20.04Visual Studio Code 1.62.3LuaLaTeX⽰例⼀:所绘表格选⾃裘巍⽼师所著《编译器设计之路》⼀书中的表2-5。
% 博客园,繁星间漫步,陆巍的博客\documentclass{article}% 注意宏包顺序,有可能会报错\usepackage{ctex}% 中⽂⽀持\usepackage{geometry}% ⽤于页⾯设置\usepackage[dvipsnames, svgnames, x11names]{xcolor}% 颜⾊⽀持\usepackage{tcolorbox}% ⽀持更好的⽂本框\tcbuselibrary{skins, breakable}% ⽀持⽂本框跨页\usepackage[english]{babel}% 载⼊美式英语断字模板\usepackage{colortbl}% 表格颜⾊\usepackage{longtable}% ⽀持长表格跨页\usepackage{multirow}% ⽀持表格的多⾏合并% 设置为A4纸,边距适中模式(参考永中office)\geometry{width = 210mm,height = 297mm,left = 19.1mm,right = 19.1mm,top = 25.4mm,bottom = 25.4mm}\hyphenpenalty = 1000% 断字设置,值越⼤,断字越少。
\setmainfont{Ubuntu Mono}% 设置全局英⽂字体\setlength{\parindent}{2em}% 缩进\setlength{\parskip}{1ex} % 段间距% 定义表格对齐⽅式\newcolumntype{C}[1]{>{\centering\arraybackslash}m{#1}}\begin{document}\section{表格绘制综合⽰例⼀}\begin{center}表2-5 Neo Pascal词法定义\begin{longtable}{m{6mm}|m{157mm}}\noalign{\hrule height 1pt}标识符 & 以字母形状,后跟字母与数字的任意组合的字符串。
竭诚为您提供优质文档/双击可除latex,横向表格篇一:latex表格排版——多行多列合并latex多列表格合并单元格排版效果如下图所示:复制下面代码直接可以运行\begin{table}[!h]\centering\caption{parametersofsRoi}\label{tab2}\begin{tabular}{cccccccc}\hline\multicolumn{1}{c}{\multirow{2}{1.2cm}{number}} "onclick="show_ajax(this)"class="keylink">table} 篇二:latex排版——复杂表格制作latex排版——复杂表格制作%多行或多列合并的情况%(1)多行合并代码如下\documentclass{article}\usepackage{multirow}%使用multirow必须加载该package\begin{document}\begin{table}[tbp]\centering\begin{tabular}{|ccccc|ccccc|}\hlinecaseb小空格a\,b没有空格ab紧贴a\!btex中插入数学公式两个m的宽度一个m的宽度1/3m宽度2/7m宽度1/6m宽度缩进1/6m宽度1.1公式带编号\begin{equation}w=2\times{{d}_{\min}}-1%\lable{eq:1}\end{equation}1.2公式不带编号独占一行\begin{equation*}w=2\times{{d}_{\min}}-1\end{equation*}$$w=2\times{{d}_{\min}}-1$$1.3文中的公式$w=2\times{{d}_{\min}}-1$tex中插入图片\begin{figure}[!h]\centering%居中\includegraphics[width=0.6\textwidth]{2.png}\caption{自动送药机的储药柜}\label{fig}\end{figure}tex插入编号begin{enumerate}[fullwidth,itemindent=2em,label=(\a rabic*)]%第二行不缩进,首行缩进两个字符,自动编号为(数字)样式\item在忽略储药槽横向和竖向隔板厚度的前提下,根据所给的药盒规格,设计出竖向隔板间距类型最少的储药柜方案,给出相应类型的数量和每种类型所对应的药盒规格。
latex cell用法在LaTeX中,cell是指表格中的一个单元格。
可以使用以下命令和环境来创建和处理表格的单元格。
1. 在表格环境中,使用 & 符号来分隔单元格。
例如:\begin{tabular}{|c|c|}\hlineCell 1 & Cell 2 \\\hlineCell 3 & Cell 4 \\\hline\end{tabular}这将创建一个包含两列的表格,并在每行中使用 & 来分隔单元格。
\hline 命令用于创建水平线。
2. 使用 multirow 和 multicolumn 命令可以合并多个单元格。
例如:\usepackage{multirow}\begin{tabular}{|c|c|}\hline\multirow{2}{*}{Cell 1} & Cell 2 \\\cline{2-2}& Cell 3 \\\hline\end{tabular}这将创建一个两行一列的表格,将第一行的两个单元格合并为一个单元格。
3. 使用数组环境可以在单元格中包含数学公式。
例如:\begin{tabular}{|c|c|}\hline$\sum_{n=1}^{\infty} \frac{1}{n^2}$ & $\int_{0}^{\pi} \sin(x) \, dx$ \\\hline\end{tabular}这将在单元格中显示数学公式的输出。
4. 使用其他样式和命令可以调整单元格的外观,如颜色、字体和对齐方式等。
例如:\begin{tabular}{|c|>{\centering\arraybackslash}m{3cm}|}\hline\textbf{Cell 1} & \textcolor{red}{\textit{Cell 2}} \\\hline\end{tabular}这将创建一个具有不同字体样式和颜色的表格。
latex跨栏表格插入方法在LaTeX中插入跨栏表格,可以使用`longtable`package。
以下是一个简单的示例,说明如何插入一个跨栏表格:1.首先,确保已安装了以下所需的包:```usepackage{longtable}usepackage{colortbl}usepackage{tabu}usepackage{mathpazo}usepackage{xcolor}```2.定义两种灰色:```definecolor{light-gray}{gray}{0.9}definecolor{light-gray0}{gray}{0.7}```3.插入跨栏表格:```latex\\begin{center}\\footnotesize%设置字体大小\\setlength{\\tabcolsep}{4pt}%控制文字与列边界的空隙\\begin{longtable}{ccccc c c cc c c cc}\\caption{样例长表格。
}\\label{tab:long}\\hlinerule{0pt}{8pt}Ref.&Time&Par.&Place&HHD&Desk.&Proj.&HMD&VO&AN&AC&MV& Area\\\\\\hline2012,cite{967}&Sync.&Mul.&Table&checkmark&checkmark&&checkmark& &checkmark&&Edu.\\\\2012,cite{953}&Sync.&Dou.&Indoor&&&checkmark&checkmark&checkmark &Int.\\\\\\hlineContinued on next page\\par\\end{longtable}\\end{center}```以上代码将创建一个跨栏表格,其中包含两个页面。
latex ruledtabular的意思摘要:TeX 简介2.表格制作方法3.ruledtabular 命令介绍4.实例演示5.总结与建议正文:latex ruledtabular 是一种在LaTeX 中创建规则表格的方法。
本文将介绍LaTeX 表格制作的基本方法,重点讲解ruledtabular 命令的使用,并通过实例演示其应用。
最后给出一些总结与建议,以帮助读者更好地掌握这一工具。
TeX 简介LaTeX 是一款强大的排版软件,广泛应用于学术论文、报告和文档等场景。
它具有自动化的表格处理、数学公式渲染等功能,可以极大地提高排版效率。
在LaTeX 中,可以使用各种命令和环境来实现不同的排版效果。
2.表格制作方法要在LaTeX 中创建表格,可以使用tabular 或者array 两类环境。
其中,tabular 环境适合制作简单的表格,而array 环境则具有更多的定制选项。
本文将重点介绍ruledtabular 命令,它属于tabular 环境。
3.ruledtabular 命令介绍ruledtabular 命令用于创建带有规则线的表格。
它的基本语法如下:```begin{ruledtabular}[options]列1内容列2内容...end{ruledtabular}```其中,[options] 参数可以根据需要调整表格的属性,如表头、间距等。
以下是一个简单的示例:```latexdocumentclass{article}begin{document}begin{ruledtabular}[htbp]centeringarraybackslash 列1&列2甲&10乙&15丙&20end{ruledtabular}end{document}```4.实例演示以下是一个更复杂的实例,展示了如何在LaTeX 中使用ruledtabular 命令创建带有表头、单位、备注等信息的表格:```latexdocumentclass{article}begin{document}begin{ruledtabular}[htbp]centeringarraybackslash列1&列2&列3&列4multicolumn{1}{c}{项目名称}&{multicolumn{1}{c}{投资金额(万元)}}&{multicolumn{1}{c}{建设周期(月)}}&{multicolumn{1}{c}{备注}} 甲&1000&6&本项目涉及环境评估乙&1200&8&需关注当地政策丙&800&4&已取得土地使用权end{ruledtabular}end{document}```5.总结与建议通过以上演示,我们可以发现latex ruledtabular 命令在制作规则表格方面具有较高的实用性。
L A T E X Table Hints and TipsAdrian P.Robsonadrian.robson@1st June,2013Contents1Introduction2 2Standard Tables2 3Spacing23.1Row Spacing (2)3.1.1Arraystretch (2)3.1.2Extrarowheight (3)3.1.3Bigstruts (3)3.1.4Comparison of Methods (4)3.2Column Spacing (4)4Decimal Point Alignment5 5Vertical Alignment and Text Wrapping6 6Ragged Right Alignment66.1Simple Command (6)6.2Column Types (7)6.3Tabulary (7)6.4Comparison of Methods (7)7Multiple Rows87.1Multiple Rows with Text Wrapping (9)7.2Over Sized Spanning Rows (10)8Table Headings118.1Heading Alignment (11)8.2Sideways Headings (11)9Specifying Table Width129.1Tabularx (12)9.2Tabulary (13)9.3Comparison of Methods (13)10Larger Tables1310.1Sideways (13)10.2Longtable (14)11Footnotes in Tables15 12Professional Layout1511IntroductionThis is a collection of various methods for laying out and formatting L A T E X tables.All of these examples work with pdfL A T E X[13],which is the author’s preferred tool.A more general discussion of L A T E X methods can be found in L A T E X Hints and Tips[12].2Standard TablesTables are made in L A T E X using the tabular environment like this \begin{tabular}{|l|l|l|}\hline\multicolumn{3}{|c|}{A Table}\\\hline \hline1,1&1,2&1,3\\\hline2,1&2,2&2,3\\\cline{1-2}3,1&3,2&\\\hline\end{tabular}A Table 1,11,21,3 2,12,22,3 3,13,2For more information on basic tables consult a good text like The Not So Short Introduction to L A T E X2ε[10].3Spacing3.1Row SpacingThe standard row height is too small when\hline is used.There are three ex-plicit ways of correcting this:modifying the arraystretch command,changing the extrarowheight length,or using the bigstrut command.Alternatively, the booktabs or ctable packages can be used as discuses in§12.3.1.1ArraystretchThe crudest way to increase row spacing,which works without any additional packages,is to increase the arraystretch ratio.This injects space above and below all of the rows’text.It is done like this:{\renewcommand{\arraystretch}{1.2}\begin{tabular}{|c|l|}\hlinea&Row1\\\hlineb&Row2\\\hlinec&Row2\\d&Row4\\\hline\end{tabular}}The renewcommand and the table are enclosed in braces to limit the scope of the redefinition.Its effect is to turn2a Row1b Row2c Row3d Row4intoa Row1b Row2c Row3d Row4and with abigger valuea Row1b Row2c Row3d Row43.1.2ExtrarowheightA more sophisticated approach is to used the array package[8]and change the length\extrarowheight as follows:\usepackage{array}...{\setlength{\extrarowheight}{1.5pt}\begin{tabular}{|l|l|}\hlinea&Row1\\\hlineb&Row2\\\hlinec&Row3\\d&Row4\\\hline\end{tabular}}This adds space only above the text.With the correct value,it compensates for the\hline command spacing.Its effect is to turna Row1b Row2c Row3d Row4intoa Row1b Row2c Row3d Row4and with abigger valuea Row1b Row2c Row3d Row43.1.3BigstrutsThe above methods apply the compensation to all rows,even if they do not have\hline commands.A subtler alternative is to use the bigstrut package [11]like this:\usepackage{bigstrut}...\begin{tabular}{|l|l|}\hlinea&Row1\bigstrut\\\hlineb&Row2\bigstrut\\\hlinec&Row2\bigstrut[t]\\d&Row4\bigstrut[b]\\\hline\end{tabular}3which changes the basic tablea Row1b Row2c Row3d Row4intoa Row1b Row2c Row2d Row4The\bigstrut command is used when there is are\hline above and below; \bigstrut[t]when there is an\hline only above;and\bigstrut[b]when there is only one below.The bigstrut package only works well with tables that have single line cells. It does not work with the text wrap column specifiers p{},m{}and b{}.(For more information on text wrap see§5).3.1.4Comparison of MethodsThe affect of the three methods is as follows:arraystretch{1.2}extrarowheight{1.5pt}bigstruta Row1b Row2c Row3d Row4a Row1b Row2c Row3d Row4a Row1b Row2c Row2d Row4For tables without text wrapping,the bigskip approach is definitely the best if the table has some rows without horizontal lines.Otherwise,extrarowheight is less verbose and gives a more compact e arraystretch if the table needs a large row height.For tables with text wrapping,extrarowheight is probably best.3.2Column SpacingColumn width can be modified by changing\tabcolsep like this:\setlength{\tabcolsep}{10pt}\begin{tabular}{|l|l|}\hlinea&Row1\\\hlineb&Row2\\\hlinec&Row3\\\hline\end{tabular}which changes the defaulta Row1b Row2c Row3intoa Row1b Row2c Row3There is a standard column specifier@{cmnd},which suppresses inter-column space and inserts cmnd instead.This can be used to insert or remove space into a particular column.For example:4\setlength{\extrarowheight}{1.5pt}\begin{tabular}{|@{\hspace{1cm}}l|@{}l|}\hlineAbcd&Abcd\\\hline Abcd&Abcd\\\hline\end{tabular}Abcd Abcd Abcd Abcd4Decimal Point AlignmentThe traditional method of aligning decimal points uses the@command.Two columns are used for a decimal number,and a multicolumn command is used in the heading,as the following shows:\begin{tabular}{|l|r@{.}l|l|}a&\multicolumn{2}{c|}{b}&c\\ test&2&8&test\\test&1&45&test\\test&0&5&test\end{tabular}a b c test 2.8test test 1.45test test0.5testA disadvantage of this method is that the numbers are expressed in the code without a decimal point.As an alternative,the dcolumn package[1]allows decimal numbers to be expressed naturally in a single column.The package defines a column specifier D{<sepcode>}{<sepout>}{<decimal places>}Thefirst argument is the decimal separator character used in the code,the second is the character in the output,and the last is the number of decimal places.Typically,a newcolumntype command is used in the preamble to make table declaration a little simpler.Even though there is just one column,A multicolumn command still has to be used to get the correct alignment and font style in the header,as the following example shows:\newcolumntype{d}[1]{D{.}{.}{#1}}...\begin{tabular}{|l|d{2}|l|}a&\multicolumn{1}{c|}{b}&c\\ test&2.8&test\\test&1.45&test\\test&0.5&test\end{tabular}a b c test2.8test test1.45test test0.5testAs the example shows,using an appropriate positive value for number of decimal places produces the same table layout as the traditional method.This aligns the decimal places,and minimises the column width.Alternatively,a negative value for decimal places will centre the decimal place in the column,but will not minimise the width.For number lists with reasonably balanced whole and decimal parts this looks good.However,for lists5with disproportionate whole and decimal parts,the columns can have too much empty space,as the following shows:a b c test208.6test test1.45test test0.532test a b c test2000008.6test test1.45test test0.5test5Vertical Alignment and Text WrappingVertical alignment can be controlled with the array package[8],which has additional text wrap formatting commands:p{width}Top align,the same as usual.m{width}Middle alignb{width}Bottom alignThese produce the following layouts:Column Formatp{}p{}l11 11 11222233Column Formatm{}m{}l111111222233Column Formatb{}b{}l111111222233Notice how the m{}or b{}alignment affects the whole table.In addition,p{} m{}and b{}formats cannot be successfully mixed in the same table.Occasionally the text wrap formats cause‘bad box’warnings,which can often be resolved by with\raggedright(see§6).6Ragged Right AlignmentFor narrow wrapped text blocks left justification often looks best,and can get rid of’bad box’warnings.There are three ways to achieve this:a simple command, column types,and the tabulary package.All of these methods support or can be adapted to provide alignments other than left justified.Thefirst two are very versatile and can be used to inject general formatting commands.6.1Simple CommandThe most verbose butflexible way to achieve left justification is just to use \raggedright in the cell:\newcommand{\rr}{\raggedright}\newcommand{\tn}{\tabularnewline} ...{\renewcommand{\arraystretch}{1.2} \begin{tabular}{|c|p{5cm}|}\hline1,1&\rr...text...\tn\hline 2,1&...text...\\\hline \end{tabular}}1,1Lorem ipsumdolor sit amet,consecteturadipiscing elit. 2,1Nullam rhon-cus,sem luctusultrices.6Using this method for left justification can be applied to individual cells. Note that\tabularnewline replaces\\in the row containing the\raggedright command.The definitions for\rr and\tn are just to make things a little more compact.6.2Column TypesAnother way of managing ragged right formatting is to define a new column type using the array package[8].Its>{decl}option inserts decl directly before the entry for the column;and<{decl}directly after.The following shows how it can be used:\usepackage{array}...\newcolumntype{x}[1]{>{\raggedright}p{#1}} \newcommand{\tn}{\tabularnewline} ...{\renewcommand{\arraystretch}{1.2} \begin{tabular}{|c|x{5cm}|}\hline1,1&...text...\tn\hline2,1&...text...\tn\hline\end{tabular}}1,1Lorem ipsumdolor sit amet,consecteturadipiscing elit. 2,1Nullam rhoncus,sem luctusultrices.With this method ragged right formatting is applied to a whole column.The newcolumntype command is used to define a column type that can be reused. However,the formatting could have been embedded in the tabular heading. Again\tabularnewline is needed when\raggedright is used.6.3TabularyAnother alternative is to use the tabulary package[4].With this method ragged right columns are simply declared with the L command.However,the total table width must be defined as a parameter,as shown below.See§9.2for more on this package.\usepackage{tabulary}...\renewcommand{\arraystretch}{1.2} \begin{tabulary}{6.5cm}{|c|L|}\hline1,1&...text...\\\hline2,1&...text...\\\hline\end{tabulary}1,1Lorem ipsum dolor sit amet,consecteturadipiscing elit.2,1Nullam rhoncus,sem luctus ultrices.6.4Comparison of MethodsSimple commands are useful for small tables or when the formatting does not apply to the whole column.The tabulary package is much simpler than column types,but requires the table width to be specified.Column types can be used for any appropriate formatting or space requirements.77Multiple RowsThe easiest way to have tables with spanning rows is to use the multirow package[11].In its simplest form,it can be used like this:\usepackage{multirow}...\begin{tabular}{|c|l|}\hlinea&Row1\\\hlineb&\multirow{2}{*}{Spanning rows}\\\cline{1-1}c&\\\hlined&Row4\\\hline\end{tabular}giving the following:a Row1bSpanning rowscd Row4The\multirow command declares the location of the spanning rows.Its first argument is the number of rows to span.The second,in this case,states that the text argument’s natural width should be used.The relevant columns in lower rows must be left blank.The full multirow command is more complicated: \multirow{nrows}[bigstruts]{width}[fixup]{text}If the bigstrut package is used,the number of struts in the spanned rows should be stated as the bigstruts parameter.Count2for every\bigstrut and1for a\bigstrut[t]or\bigstrut[b].The text width can be set with the width parameter,in which case the text will be wrapped and left justified.Line breaks can be forced with a\\ command.However,the text must have no more lines than the number of rows ing an*for the width,as in the example above,makes the column’s cells single line and as wide as necessary.If the vertical position of the text needsfine tuning,it can be moved up or down with the fixup optional parameter.To span rows and columns together,a\multirow should be nested in a \multicolumn.Matching but empty\multicolmn commands are needed for all of the lower spanned rows.All of these options are shown in the following example:\begin{tabular}{|c|c|l|l|}\hline1,1&1,2&1,3&1,4\bigstrut\\\hline2,1&\multirow{2}[4]{1.5cm}{Four bigstruts}&\multirow{3}[6]{*}{Six bigstruts}&\multirow{3}[6]{*}[1ex]{Six bigstruts and fixup}\bigstrut\\\cline{1-1}3,1&&&\bigstrut\\\cline{1-2}4,1&4,2&&\bigstrut\\\hline5,1&8\multirow{2}[2]{*}{Two bigstruts}&5,3&5,4\bigstrut[t]\\6,1&&6,3&6,4\bigstrut[b]\\\hline7,1&\multicolumn{2}{l|}{\multirow{2}[4]{*}{Four bigstruts}}&7,4\bigstrut\\\cline{1-1}\cline{4-4} 8,1&\multicolumn{2}{l|}{}&8,4\bigstrut\\\hline9,1&9,2&9,3&9,4\bigstrut\\\hline\end{tabular}1,11,21,31,42,1Fourbigstruts Six bigstruts Six bigstruts andfixup 3,14,14,25,1Two bigstruts 5,35,46,16,36,47,1Four bigstruts 7,48,18,49,19,29,39,47.1Multiple Rows with Text WrappingMultiple row and text wrap column specifiers(see§5)do not mix well because multirow is left justified,and the the p{},m{}and b{}formats are normally justified.This is shown in the following example,which generates two‘bad box’warnings:\setlength{\extrarowheight}{1.5pt} \begin{tabular}{|c|p{2cm}|}\hline1,1&**text**\\\hline2,1&\multirow{2}{2cm}{**text**}\\\cline{1-1} 3,1&\\\cline{1-1} 4,1&\\\cline{1-1} 5,1&\\\hline6,1&**text**\\\hline\end{tabular}1,1Lorem ipsumdolor sitamet.2,1Loremipsum dolorsit ametconsectetur. 3,14,15,16,1Lorem ipsumdolor sitamet.The easiest way to resolve this is to make everythingflush left by defining a ragged right column type as described in§6:\newcolumntype{P}[1]{>{\raggedright}p{#1}}\newcolumntype{M}[1]{>{\raggedright}m{#1}}\setlength{\extrarowheight}{1.5pt}\begin{tabular}{|c|P{2cm}|}%could be|c|M{2cm}|9\hline1,1&\muchlessText \tn\hline2,1&\multirow{2}{2cm}[-1.5pt]{\lessText }\tn\cline{1-1}3,1&\tn\cline{1-1}4,1&\tn\cline{1-1}5,1&\tn\hline 6,1&\muchlessText \tn\hline \end{tabular}which creates the following layouts:With P{}With M{}1,1Loremipsum dolor sit amet.2,1Loremipsum dolor sit amet consectetur.3,14,15,16,1Loremipsum dolor sit amet.1,1Loremipsum dolorsit amet.2,1Loremipsum dolor sit amet consectetur.3,14,15,16,1Loremipsum dolorsit amet.7.2Over Sized Spanning RowsHaving a \multirow that has more lines than the rows it spans is not so easy to layout well.Expanding the spanned rows with struts appears to be the only solution,but it requires a lot of trial-and-error adjustments.The following table shows the method:\newlength{\rowA}\setlength{\rowA}{8ex}%modify as needed \newcommand{\strutA}{%no space before strut\rule[-0.45\rowA]{0pt}{\rowA}%put text approx mid strut }...\begin{tabular}{|c|l|c|}\hline1,1&1,2&1,3\bigstrut \\\hline2,1&\multirow{2}{5cm}[1ex]{...lots of text ...}&2,3\strutA\\\cline{1-1}\cline{3-3}3,1&&3,3\strutA \\\hline 4,1&4,2&4,3\bigstrut \\\hline \end{tabular}101,11,21,32,1Lorem ipsum dolor sit amet, consectetur adipiscing elit.Curabitur id nisl nunc,nonadipiscing arcu.Morbi nec leosit amet.2,33,13,34,14,24,3A\rule of zero width is used for the strut.A negative raise height positions the text in the rows vertical centre.In the example,the strut is put in a centre aligned column.In this context it must be put next to the column’s text with no spaces,or the alignment will be disturbed.This is not normally an issue for other alignments.For convenience the strut is defined as a command called\strutA,which is used in the spanned rows2and3.The height of the strut is given by the length rowA.This is more complicated to write,but makes the trial-and-error layout process easier.Adjust rowA until there is room for the spanning row’s text.The fixup parameter in the\multirow command is used to correct the vertical position of its text as necessary.8Table Headings8.1Heading AlignmentIt is sometimes nice to have a column heading with a different alignment to its column.The standard multicolumn command can be used to do this:\begin{tabular}{|l|l|l|}\hline\multicolumn{1}{|c}{C1}&\multicolumn{1}{|c}{C2}&\multicolumn{1}{|c|}{C2}\\\hline aa&b&cccc\\\hlineaaa&bb&cccc\\\hlineaaaa&bbb&cccc\\\hlineaaaaa&bbbb&cccc\\\hlineaaaaaa&bbbb&cccc\\\hline\end{tabular}C1C2C2 aa b c aaa bb cc aaaa bbb ccc aaaaa bbbb cccc aaaaaa bbbb cccc8.2Sideways HeadingsHorizontal space can be saved by printing long column headings sideways.The rotating package[6]can be used to achieve this with its sideways environment:11\usepackage{rotating} ...\begin{tabular}{|l|l|l|} \hline\multicolumn{1}{|c|}{ \begin{sideways}Column1\,\end{sideways}}&\multicolumn{1}{c|}{\begin{sideways}Column22\,\end{sideways}}&\multicolumn{1}{c|}{\begin{sideways}Column333\,\end{sideways}}\\\hline aa&bbbb&cccc\\\hlineaaa&bbbb&cccc\\\hlineaaaa&bbbb&cccc\\\hlineaaaaa&bbbb&cccc\\\hlineaaaaaa&bbbb&cccc\\\hline\end{tabular}Column1Column22Column333aa bbbb cccc aaa bbbb cccc aaaa bbbb cccc aaaaa bbbb cccc aaaaaa bbbb ccccThe multicolumn method given in§8.1is used to centre the headings;and\, is used to add a little space at the top of the heading.9Specifying Table WidthThe tabularx[3]and tabulary[4]packages are much better than the standard tabular*for specifying table width.9.1TabularxThe tabularx environment expands specific columns to meet the table’s width requirement.The width of the table is given as a parameter,and the columns that can be expanded are denoted with the X alignment command,as the fol-lowing shows:\begin{center}\setlength{\extrarowheight}{1.5pt}\begin{tabularx}{0.75\textwidth}{|l|X|}\hline1,1&**some text**\\\hline2,1&**some text**\\\hline\end{tabularx}\end{center}1,1Lorem ipsum dolor sit amet,consectetur adipiscingelit.Curabitur id nisl nunc,non adipiscing arcu.Morbi nec leo sit amet.2,1Nullam rhoncus,sem luctus ultrices accumsan,urna enim fermentum.12There must be at least one X column.If there is more than one X column the necessary space is equally distributed.The columns are always padded to give the the table its specified width.Text is wrapped and justified if it does notfit into the column.Note the use of0.75\textwidth to specify the width as a proportion of page width.9.2TabularyThe tabulary environment expands specific columns to meet the table’s width requirement and allows alignment to be specified for these columns as follows: L\raggedrightC\centeringR\raggedleftJ normal justificationThe maximum width for the table is given as a parameter.However,unlike tabularx,columns are not padded if they are too narrow.\setlength{\extrarowheight}{1.5pt}\begin{tabulary}{4cm}{|l|L|}\hline1,1&**some text**\\\hline2,1&**some text**\\\hline\end{tabulary}full width...not full width...1,1Lorem ipsum dolor sit amet,consecteturadipiscing elit.2,1Curabitur id nisl nunc, non adipiscing arcu.1,1Lorem ipsum. 2,1Curabitur id.9.3Comparison of MethodsThe tabularx package is useful for absolute table widths,but it has limited alignment options.The tabulary package provides better alignment options;and its adaptive width behaviour does not normally cause problems.It is convenient to set its width at a suitable maximum,say0.75\textwidth,and let the package select appropriate column widths.10Larger TablesLarger tables can sometimes be handled by turning them sideways,or by letting them span pages.10.1SidewaysThe most versatile way to turn a table sideways is to use the sidways environ-ment from the rotate package[6].For example:13\usepackage{rotating} ...\begin{sideways}\begin{tabular}{|l|l|}\hline1,1&1,2\\\hline 2,1&2,2\\\hline \end{tabular}\end{sideways}1,11,22,12,2This method can be used in afloating table environment or just embedded in the text.10.2LongtableThe longtable package is designed to make tables that span page breaks.It is rather complicated to use,and its documentation[2]should be consulted for all of its features.It maintains column widths across page breaks,and centres the table.There are reports of incompatibility with many other packages,but for simple use it appears to be okay.Multiple compilation passes are normally needed to get the layout correct.Here is a very simple example:\usepackage{longtable}\usepackage{array}%for extrarowheight\setlength{\extrarowheight}{1.5pt}\begin{longtable}{|l|l|}%header------------------------\hlineHeading1&Heading2\\\hline\hline\endhead%header------------------------Lorem ipsum...&Consectetur...\\\hlineLorem ipsum...&Consectetur...\\\hline..\end{longtable}Heading1Heading2Lorem ipsum dolor sit amet.Consectetur adipiscing elit.Lorem ipsum dolor sit amet.Consectetur adipiscing elit.Lorem ipsum dolor sit amet.Consectetur adipiscing elit.--------Page break--------Heading1Heading2Lorem ipsum dolor sit amet.Consectetur adipiscing elit.Lorem ipsum dolor sit amet.Consectetur adipiscing elit.14In the example above,\extrarowheight is used to improve the table’s ver-tical spacing.Alternatively arraystretch could be use if space is needed below the lines.However,the normally useful bigstrut package does not work with longtable.See§3.1for more about these methods.11Footnotes in TablesA footnote in a non-floating longtable or tabulary table is put with any normal page footnotes at the end of the page containing the table.When a longtable breaks over a page,footnotes are placed on the correct page.Table and page footnotes have the same counter,and are numbered from the start of the document.Floating tables cannot have normal footnotes.Footnotes can be kept next to their table by using a minipage to hold the table.Each minipage has its own disjoint footnote counter,and uses alphabetic lower case footnote marks.This method does not work for tabulary,but it can be used withfloating tables.The following is a tabular example:\begin{minipage}{6cm}\begin{tabular}{|l|l|}\hline1,2&1,2\footnote{This is a footnote.}\\\hline2,1&2,2\\\hline3,1&3,2\\\hline\end{tabular}\end{minipage}1,21,2a2,12,23,13,2a This is a footnote.12Professional LayoutThe booktabs package[7]provides support for‘formal tables,’which the pack-age’s author promotes as a better way of presenting data.In particular,he derides the use of vertical rules and double rules.Here is an example taken from the package documentation:\begin{tabular}{llr}\toprule\multicolumn{2}{c}{Item}\\\cmidrule(r){1-2}Animal&Description&Price(\$)\\ \midruleGnat&per gram&13.65\\&each&0.01\\Gnu&stuffed&92.50\\Emu&stuffed&33.33\\ Armadillo&frozen&8.99\\\bottomrule\end{tabular}ItemAnimal Description Price($)Gnat per gram13.65each0.01 Gnu stuffed92.50 Emu stuffed33.33 Armadillo frozen8.99As this shows,the package provides better vertical spacing around horizontal rules.There is also the derived ctable package[5],which focuses on table and figurefloats,and provides facilities for making table po Mori’s article Tables in L A T E X2ε:Packages and Methods[9]has a detailed discussion of good table layout and the ctable and booktab packages.15References[1]David Carlisle,The dcolumn package.Download from /tex-archive/macros/latex/required/tools/dcolumn.pdf[2]David Carlisle,The longtable package.Download from /tex-archive/macros/latex/required/tools/longtable.pdf[3]David Carlisle,The tabularx package.Download from /tex-archive/macros/latex/required/tools/tabularx.pdf[4]David Carlisle,The tabulary package.Download from /tex-archive/macros/latex/contrib/tabulary/tabulary.pdf[5]Wybo Dekker,The ctable package.Downloadable from /tex-archive/macros/latex/contrib/ctable/ctable.pdf[6]Robin Fairbairns,Sebastian Rahtz and Leonor Barroca,A package forrotated objects in L A T E X.Downloadable from /tex-archive/macros/latex/contrib/rotating/rotating.pdf[7]Simon Fear,Publication quality tables in L A T E X.Download from www.ctan.org/tex-archive/macros/latex/contrib/booktabs/booktabs.pdf[8]Frank Mittelbach and David Carlisle,A new implementation of L A T E X’stabular and array environment.Downloadable from /tex-archive/macros/latex/required/tools/array.pdf[9]Lapo Filippo Mori,Tables in L A T E X2ε:Packages and Methods,ThePracT E X Journal,2007,No.1.Downloadable from /pracjourn/2007-1/mori/mori.pdf[10]Tobias Oetiker,The Not So Short Introduction to L A T E X2ε.Downloadablefrom /tex-archive/info/lshort/english/lshort.pdf[11]Piet van Oostrum,Øystein Bache and Jerry Leichter,The multirow,bigstrut and bigdelim packages.Downloadable from /tex-archive/macros/latex/contrib/multirow/doc/multirow.pdf[12]Adrian Robson,L A T E X Hints and Tips.Download from /docs/latexTricks.pdf[13]The TeX Users Group(TUG),The pdfT E X project page.Available at/applications/pdftex16[Version3.1,tableTricks.tex,11/03/15,13:49]。