Defensics_User_Guide
- 格式:pdf
- 大小:4.32 MB
- 文档页数:93
FlexNet Operations 2020 Release 2 SP1User GuideLegal InformationCopyright NoticeCopyright © 2020 Flexera SoftwareThis publication contains proprietary and confidential information and creative works owned by Flexera Software and its licensors, if any. Any use, copying, publication, distribution, display, modification, or transmission of such publication in whole or in part in any form or by any means without the prior express written permission of Flexera Software is strictly prohibited. Except where expressly provided by Flexera Software in writing, possession of this publication shall not be construed to confer any license or rights under any Flexera Software intellectual property rights, whether by estoppel, implication, or otherwise.All copies of the technology and related information, if allowed by Flexera Software, must display this notice of copyright and ownership in full.Intellectual PropertyFor a list of trademarks and patents that are owned by Flexera Software, see https:///legal/intellectual-property.html . All other brand and product names mentioned in Flexera Software products, product documentation, and marketing materials are the trademarks and registered trademarks of their respective owners.Restricted Rights LegendThe Software is commercial computer software. If the user or licensee of the Software is an agency, department, or other entity of the United States Government, the use, duplication, reproduction, release, modification, disclosure, or transfer of the Software, or any related documentation of any kind, including technical data and manuals, is restricted by a license agreement or by the terms of this Agreement in accordance with Federal Acquisition Regulation 12.212 for civilian purposes and Defense Federal Acquisition Regulation Supplement 227.7202 for military purposes. The Software was developed fully at private expense. All other use is prohibited.Book Name:FlexNet Operations User Guide Part Number:FNO-2020R2SP1-UG00Product Release Date:June 2020Last Modified Date 17 June 2020Contents1FlexNet Operations 2020 R2 SP1 User Guide . . . . . . . . . . . . . . . . . . . . . . . . . . . . . . . . . . . . . . . . . . . . . . . 25 Introduction to FlexNet Operations . . . . . . . . . . . . . . . . . . . . . . . . . . . . . . . . . . . . . . . . . . . . . . . . . . . . . . . . . . . . . . . . . . . . . . . . . . 26 FlexNet Operations Home Page. . . . . . . . . . . . . . . . . . . . . . . . . . . . . . . . . . . . . . . . . . . . . . . . . . . . . . . . . . . . . . . . . . . . . . . . . . . . . . 28 About Download Management and FlexNet Electronic Software Delivery . . . . . . . . . . . . . . . . . . . . . . . . . . . . . . . . . . . . . . . . . . 28 About FlexNet Usage Management . . . . . . . . . . . . . . . . . . . . . . . . . . . . . . . . . . . . . . . . . . . . . . . . . . . . . . . . . . . . . . . . . . . . . . . . . . . 30 Product Support Resources . . . . . . . . . . . . . . . . . . . . . . . . . . . . . . . . . . . . . . . . . . . . . . . . . . . . . . . . . . . . . . . . . . . . . . . . . . . . . . . . . 30 Contact Us. . . . . . . . . . . . . . . . . . . . . . . . . . . . . . . . . . . . . . . . . . . . . . . . . . . . . . . . . . . . . . . . . . . . . . . . . . . . . . . . . . . . . . . . . . . . . . . . 31Part 1: Using FlexNet Operations. . . . . . . . . . . . . . . . . . . . . . . . . . . . . . . . . . . . . . . 332Packaging Products. . . . . . . . . . . . . . . . . . . . . . . . . . . . . . . . . . . . . . . . . . . . . . . . . . . . . . . . . . . . . . . . . . . . 35 About Packaging Products . . . . . . . . . . . . . . . . . . . . . . . . . . . . . . . . . . . . . . . . . . . . . . . . . . . . . . . . . . . . . . . . . . . . . . . . . . . . . . . . . . 36 About Trial Products. . . . . . . . . . . . . . . . . . . . . . . . . . . . . . . . . . . . . . . . . . . . . . . . . . . . . . . . . . . . . . . . . . . . . . . . . . . . . . . . . . . . . . . . . . . . . . . . 39 About Download Management: FlexNet Electronic Software Delivery Components . . . . . . . . . . . . . . . . . . . . . . . . . . . . . . . . . . . . . . . 40 Working with Features . . . . . . . . . . . . . . . . . . . . . . . . . . . . . . . . . . . . . . . . . . . . . . . . . . . . . . . . . . . . . . . . . . . . . . . . . . . . . . . . . . . . . 40 About Features. . . . . . . . . . . . . . . . . . . . . . . . . . . . . . . . . . . . . . . . . . . . . . . . . . . . . . . . . . . . . . . . . . . . . . . . . . . . . . . . . . . . . . . . . . . . . . . . . . . . . 41 Viewing Features . . . . . . . . . . . . . . . . . . . . . . . . . . . . . . . . . . . . . . . . . . . . . . . . . . . . . . . . . . . . . . . . . . . . . . . . . . . . . . . . . . . . . . . . . . . . . . . . . . . 41 Creating a Feature . . . . . . . . . . . . . . . . . . . . . . . . . . . . . . . . . . . . . . . . . . . . . . . . . . . . . . . . . . . . . . . . . . . . . . . . . . . . . . . . . . . . . . . . . . . . . . . . . 42 Reviewing Features . . . . . . . . . . . . . . . . . . . . . . . . . . . . . . . . . . . . . . . . . . . . . . . . . . . . . . . . . . . . . . . . . . . . . . . . . . . . . . . . . . . . . . . . . . . . . . . . 46 Working with Feature Bundles. . . . . . . . . . . . . . . . . . . . . . . . . . . . . . . . . . . . . . . . . . . . . . . . . . . . . . . . . . . . . . . . . . . . . . . . . . . . . . . 46 About Feature Bundles. . . . . . . . . . . . . . . . . . . . . . . . . . . . . . . . . . . . . . . . . . . . . . . . . . . . . . . . . . . . . . . . . . . . . . . . . . . . . . . . . . . . . . . . . . . . . . 47 Viewing Feature Bundles . . . . . . . . . . . . . . . . . . . . . . . . . . . . . . . . . . . . . . . . . . . . . . . . . . . . . . . . . . . . . . . . . . . . . . . . . . . . . . . . . . . . . . . . . . . 47 Creating a Feature Bundle . . . . . . . . . . . . . . . . . . . . . . . . . . . . . . . . . . . . . . . . . . . . . . . . . . . . . . . . . . . . . . . . . . . . . . . . . . . . . . . . . . . . . . . . . . 48 Reviewing Feature Bundles . . . . . . . . . . . . . . . . . . . . . . . . . . . . . . . . . . . . . . . . . . . . . . . . . . . . . . . . . . . . . . . . . . . . . . . . . . . . . . . . . . . . . . . . . 49 Deploying a Feature Bundle . . . . . . . . . . . . . . . . . . . . . . . . . . . . . . . . . . . . . . . . . . . . . . . . . . . . . . . . . . . . . . . . . . . . . . . . . . . . . . . . . . . . . . . . . 49 Working with Products . . . . . . . . . . . . . . . . . . . . . . . . . . . . . . . . . . . . . . . . . . . . . . . . . . . . . . . . . . . . . . . . . . . . . . . . . . . . . . . . . . . . . 49 About Products . . . . . . . . . . . . . . . . . . . . . . . . . . . . . . . . . . . . . . . . . . . . . . . . . . . . . . . . . . . . . . . . . . . . . . . . . . . . . . . . . . . . . . . . . . . . . . . . . . . . 50 Viewing Products . . . . . . . . . . . . . . . . . . . . . . . . . . . . . . . . . . . . . . . . . . . . . . . . . . . . . . . . . . . . . . . . . . . . . . . . . . . . . . . . . . . . . . . . . . . . . . . . . . 52FlexNet Operations User Guide FNO-2020R2SP1-UG00Company Confidential3ContentsCreating a Product . . . . . . . . . . . . . . . . . . . . . . . . . . . . . . . . . . . . . . . . . . . . . . . . . . . . . . . . . . . . . . . . . . . . . . . . . . . . . . . . . . . . . . . . . . . . . . . . . 52 FlexNet Publisher Versions for Cross-Version Signature Support. . . . . . . . . . . . . . . . . . . . . . . . . . . . . . . . . . . . . . . . . . . . . . . . . . . . . 58 Adding Features or Feature Bundles to a Product . . . . . . . . . . . . . . . . . . . . . . . . . . . . . . . . . . . . . . . . . . . . . . . . . . . . . . . . . . . . . . . . . . . . . 60 Linking License Models to a Product . . . . . . . . . . . . . . . . . . . . . . . . . . . . . . . . . . . . . . . . . . . . . . . . . . . . . . . . . . . . . . . . . . . . . . . . . . . . . . . . . 60 Mapping a Product to a Part Number . . . . . . . . . . . . . . . . . . . . . . . . . . . . . . . . . . . . . . . . . . . . . . . . . . . . . . . . . . . . . . . . . . . . . . . . . . . . . . . . 61 Relating Products to Other Products . . . . . . . . . . . . . . . . . . . . . . . . . . . . . . . . . . . . . . . . . . . . . . . . . . . . . . . . . . . . . . . . . . . . . . . . . . . . . . . . 62 Mapping a Product to a Product Line . . . . . . . . . . . . . . . . . . . . . . . . . . . . . . . . . . . . . . . . . . . . . . . . . . . . . . . . . . . . . . . . . . . . . . . . . . . . . . . . . 64 Reviewing Products . . . . . . . . . . . . . . . . . . . . . . . . . . . . . . . . . . . . . . . . . . . . . . . . . . . . . . . . . . . . . . . . . . . . . . . . . . . . . . . . . . . . . . . . . . . . . . . . 65 Deploying a Product . . . . . . . . . . . . . . . . . . . . . . . . . . . . . . . . . . . . . . . . . . . . . . . . . . . . . . . . . . . . . . . . . . . . . . . . . . . . . . . . . . . . . . . . . . . . . . . 65 Reviewing New Product Hierarchy . . . . . . . . . . . . . . . . . . . . . . . . . . . . . . . . . . . . . . . . . . . . . . . . . . . . . . . . . . . . . . . . . . . . . . . . . . . . . . . . . . 66 Working with Suites. . . . . . . . . . . . . . . . . . . . . . . . . . . . . . . . . . . . . . . . . . . . . . . . . . . . . . . . . . . . . . . . . . . . . . . . . . . . . . . . . . . . . . . . 66 Viewing Suites . . . . . . . . . . . . . . . . . . . . . . . . . . . . . . . . . . . . . . . . . . . . . . . . . . . . . . . . . . . . . . . . . . . . . . . . . . . . . . . . . . . . . . . . . . . . . . . . . . . . . 66 Creating a Suite . . . . . . . . . . . . . . . . . . . . . . . . . . . . . . . . . . . . . . . . . . . . . . . . . . . . . . . . . . . . . . . . . . . . . . . . . . . . . . . . . . . . . . . . . . . . . . . . . . . 67 Adding Products to a Suite . . . . . . . . . . . . . . . . . . . . . . . . . . . . . . . . . . . . . . . . . . . . . . . . . . . . . . . . . . . . . . . . . . . . . . . . . . . . . . . . . . . . . . . . . 70 Linking License Models to a Suite . . . . . . . . . . . . . . . . . . . . . . . . . . . . . . . . . . . . . . . . . . . . . . . . . . . . . . . . . . . . . . . . . . . . . . . . . . . . . . . . . . . 71 Mapping a Suite to a Part Number . . . . . . . . . . . . . . . . . . . . . . . . . . . . . . . . . . . . . . . . . . . . . . . . . . . . . . . . . . . . . . . . . . . . . . . . . . . . . . . . . . . 72 Relating Suites to Other Products . . . . . . . . . . . . . . . . . . . . . . . . . . . . . . . . . . . . . . . . . . . . . . . . . . . . . . . . . . . . . . . . . . . . . . . . . . . . . . . . . . . . 73 Deploying a Suite . . . . . . . . . . . . . . . . . . . . . . . . . . . . . . . . . . . . . . . . . . . . . . . . . . . . . . . . . . . . . . . . . . . . . . . . . . . . . . . . . . . . . . . . . . . . . . . . . . 74 Working with Maintenances. . . . . . . . . . . . . . . . . . . . . . . . . . . . . . . . . . . . . . . . . . . . . . . . . . . . . . . . . . . . . . . . . . . . . . . . . . . . . . . . . 74 Creating a Maintenance . . . . . . . . . . . . . . . . . . . . . . . . . . . . . . . . . . . . . . . . . . . . . . . . . . . . . . . . . . . . . . . . . . . . . . . . . . . . . . . . . . . . . . . . . . . . 74 Mapping a Maintenance to a Part Number . . . . . . . . . . . . . . . . . . . . . . . . . . . . . . . . . . . . . . . . . . . . . . . . . . . . . . . . . . . . . . . . . . . . . . . . . . . 76 Relating Maintenance to Other Products. . . . . . . . . . . . . . . . . . . . . . . . . . . . . . . . . . . . . . . . . . . . . . . . . . . . . . . . . . . . . . . . . . . . . . . . . . . . . . 76 Managing Part Numbers . . . . . . . . . . . . . . . . . . . . . . . . . . . . . . . . . . . . . . . . . . . . . . . . . . . . . . . . . . . . . . . . . . . . . . . . . . . . . . . . . . . . 77 Adding Part Numbers . . . . . . . . . . . . . . . . . . . . . . . . . . . . . . . . . . . . . . . . . . . . . . . . . . . . . . . . . . . . . . . . . . . . . . . . . . . . . . . . . . . . . . . . . . . . . . . 78 Deleting Part Numbers. . . . . . . . . . . . . . . . . . . . . . . . . . . . . . . . . . . . . . . . . . . . . . . . . . . . . . . . . . . . . . . . . . . . . . . . . . . . . . . . . . . . . . . . . . . . . . 79 Mapping Part Numbers . . . . . . . . . . . . . . . . . . . . . . . . . . . . . . . . . . . . . . . . . . . . . . . . . . . . . . . . . . . . . . . . . . . . . . . . . . . . . . . . . . . . . . . . . . . . . 79 Importing Part Numbers . . . . . . . . . . . . . . . . . . . . . . . . . . . . . . . . . . . . . . . . . . . . . . . . . . . . . . . . . . . . . . . . . . . . . . . . . . . . . . . . . . . . . . . . . . . . 79 Managing Product Lines . . . . . . . . . . . . . . . . . . . . . . . . . . . . . . . . . . . . . . . . . . . . . . . . . . . . . . . . . . . . . . . . . . . . . . . . . . . . . . . . . . . . 79 Working with Updates. . . . . . . . . . . . . . . . . . . . . . . . . . . . . . . . . . . . . . . . . . . . . . . . . . . . . . . . . . . . . . . . . . . . . . . . . . . . . . . . . . . . . . 83 About Updates . . . . . . . . . . . . . . . . . . . . . . . . . . . . . . . . . . . . . . . . . . . . . . . . . . . . . . . . . . . . . . . . . . . . . . . . . . . . . . . . . . . . . . . . . . . . . . . . . . . . . 83 Updates and Security . . . . . . . . . . . . . . . . . . . . . . . . . . . . . . . . . . . . . . . . . . . . . . . . . . . . . . . . . . . . . . . . . . . . . . . . . . . . . . . . . . . . . . . . . . . . . . . 84 Viewing Updates . . . . . . . . . . . . . . . . . . . . . . . . . . . . . . . . . . . . . . . . . . . . . . . . . . . . . . . . . . . . . . . . . . . . . . . . . . . . . . . . . . . . . . . . . . . . . . . . . . . 84 Creating or Modifying an Update. . . . . . . . . . . . . . . . . . . . . . . . . . . . . . . . . . . . . . . . . . . . . . . . . . . . . . . . . . . . . . . . . . . . . . . . . . . . . . . . . . . . . 85 Update Overview . . . . . . . . . . . . . . . . . . . . . . . . . . . . . . . . . . . . . . . . . . . . . . . . . . . . . . . . . . . . . . . . . . . . . . . . . . . . . . . . . . . . . . . . . . . . . . . 86 Update Release From . . . . . . . . . . . . . . . . . . . . . . . . . . . . . . . . . . . . . . . . . . . . . . . . . . . . . . . . . . . . . . . . . . . . . . . . . . . . . . . . . . . . . . . . . . . 86 Update Release To. . . . . . . . . . . . . . . . . . . . . . . . . . . . . . . . . . . . . . . . . . . . . . . . . . . . . . . . . . . . . . . . . . . . . . . . . . . . . . . . . . . . . . . . . . . . . . 87 Update Languages. . . . . . . . . . . . . . . . . . . . . . . . . . . . . . . . . . . . . . . . . . . . . . . . . . . . . . . . . . . . . . . . . . . . . . . . . . . . . . . . . . . . . . . . . . . . . . 88 Managing Download Packages. . . . . . . . . . . . . . . . . . . . . . . . . . . . . . . . . . . . . . . . . . . . . . . . . . . . . . . . . . . . . . . . . . . . . . . . . . . . . . . 89 About Download Packages . . . . . . . . . . . . . . . . . . . . . . . . . . . . . . . . . . . . . . . . . . . . . . . . . . . . . . . . . . . . . . . . . . . . . . . . . . . . . . . . . . . . . . . . . . 90 About Download Package Attributes. . . . . . . . . . . . . . . . . . . . . . . . . . . . . . . . . . . . . . . . . . . . . . . . . . . . . . . . . . . . . . . . . . . . . . . . . . . . . . 92 About Download Package Restrictions. . . . . . . . . . . . . . . . . . . . . . . . . . . . . . . . . . . . . . . . . . . . . . . . . . . . . . . . . . . . . . . . . . . . . . . . . . . . 94 About Physical Distribution and Order Media Requests . . . . . . . . . . . . . . . . . . . . . . . . . . . . . . . . . . . . . . . . . . . . . . . . . . . . . . . . . . . . . 94 About Export Compliance. . . . . . . . . . . . . . . . . . . . . . . . . . . . . . . . . . . . . . . . . . . . . . . . . . . . . . . . . . . . . . . . . . . . . . . . . . . . . . . . . . . . . . . . 95 Creating a Download Package . . . . . . . . . . . . . . . . . . . . . . . . . . . . . . . . . . . . . . . . . . . . . . . . . . . . . . . . . . . . . . . . . . . . . . . . . . . . . . . . . . . . . . . 98 Searching for a Download Package. . . . . . . . . . . . . . . . . . . . . . . . . . . . . . . . . . . . . . . . . . . . . . . . . . . . . . . . . . . . . . . . . . . . . . . . . . . . . . . . . . 1004Company Confidential FNO-2020R2SP1-UG00FlexNet Operations User GuideContentsViewing Download Package Information. . . . . . . . . . . . . . . . . . . . . . . . . . . . . . . . . . . . . . . . . . . . . . . . . . . . . . . . . . . . . . . . . . . . . . . . . . . . . 100 Viewing this Download Package. . . . . . . . . . . . . . . . . . . . . . . . . . . . . . . . . . . . . . . . . . . . . . . . . . . . . . . . . . . . . . . . . . . . . . . . . . . . . . . . . 101 Viewing Where a Download Package Is Used. . . . . . . . . . . . . . . . . . . . . . . . . . . . . . . . . . . . . . . . . . . . . . . . . . . . . . . . . . . . . . . . . . . . . . 102 Viewing Download Package Restrictions . . . . . . . . . . . . . . . . . . . . . . . . . . . . . . . . . . . . . . . . . . . . . . . . . . . . . . . . . . . . . . . . . . . . . . . . . 102 Viewing Emails Related to a Download Package. . . . . . . . . . . . . . . . . . . . . . . . . . . . . . . . . . . . . . . . . . . . . . . . . . . . . . . . . . . . . . . . . . . 102 Viewing Download Package Transactions . . . . . . . . . . . . . . . . . . . . . . . . . . . . . . . . . . . . . . . . . . . . . . . . . . . . . . . . . . . . . . . . . . . . . . . . 103 Viewing Download Packages of a Product . . . . . . . . . . . . . . . . . . . . . . . . . . . . . . . . . . . . . . . . . . . . . . . . . . . . . . . . . . . . . . . . . . . . . . . . 103 Editing Download Package Information . . . . . . . . . . . . . . . . . . . . . . . . . . . . . . . . . . . . . . . . . . . . . . . . . . . . . . . . . . . . . . . . . . . . . . . . . . . . . 104 Editing a Download Package. . . . . . . . . . . . . . . . . . . . . . . . . . . . . . . . . . . . . . . . . . . . . . . . . . . . . . . . . . . . . . . . . . . . . . . . . . . . . . . . . . . . 104 Editing a Download Package File List . . . . . . . . . . . . . . . . . . . . . . . . . . . . . . . . . . . . . . . . . . . . . . . . . . . . . . . . . . . . . . . . . . . . . . . . . . . . 105 Reidentifying a Download Package . . . . . . . . . . . . . . . . . . . . . . . . . . . . . . . . . . . . . . . . . . . . . . . . . . . . . . . . . . . . . . . . . . . . . . . . . . . . . . 106 Restricting a Download Package . . . . . . . . . . . . . . . . . . . . . . . . . . . . . . . . . . . . . . . . . . . . . . . . . . . . . . . . . . . . . . . . . . . . . . . . . . . . . . . . 106 Creating an Email Notification for a Download Package. . . . . . . . . . . . . . . . . . . . . . . . . . . . . . . . . . . . . . . . . . . . . . . . . . . . . . . . . . . . 107 Copying Download Packages . . . . . . . . . . . . . . . . . . . . . . . . . . . . . . . . . . . . . . . . . . . . . . . . . . . . . . . . . . . . . . . . . . . . . . . . . . . . . . . . . . . . . . . 109 Copying a Download Package with Files. . . . . . . . . . . . . . . . . . . . . . . . . . . . . . . . . . . . . . . . . . . . . . . . . . . . . . . . . . . . . . . . . . . . . . . . . . 109 Copying a Download Package without Files . . . . . . . . . . . . . . . . . . . . . . . . . . . . . . . . . . . . . . . . . . . . . . . . . . . . . . . . . . . . . . . . . . . . . . 110 Managing Download Package Associations . . . . . . . . . . . . . . . . . . . . . . . . . . . . . . . . . . . . . . . . . . . . . . . . . . . . . . . . . . . . . . . . . . . . . . . . . . 110 About Download Package Associations . . . . . . . . . . . . . . . . . . . . . . . . . . . . . . . . . . . . . . . . . . . . . . . . . . . . . . . . . . . . . . . . . . . . . . . . . . 111 Associating a Download Package to a Product . . . . . . . . . . . . . . . . . . . . . . . . . . . . . . . . . . . . . . . . . . . . . . . . . . . . . . . . . . . . . . . . . . . . 111 Disassociating a Download Package from a Product. . . . . . . . . . . . . . . . . . . . . . . . . . . . . . . . . . . . . . . . . . . . . . . . . . . . . . . . . . . . . . . 113 Associating a Download Package to Files. . . . . . . . . . . . . . . . . . . . . . . . . . . . . . . . . . . . . . . . . . . . . . . . . . . . . . . . . . . . . . . . . . . . . . . . . 114 Disassociating a Download Package from Files . . . . . . . . . . . . . . . . . . . . . . . . . . . . . . . . . . . . . . . . . . . . . . . . . . . . . . . . . . . . . . . . . . . 114 Managing Download Files. . . . . . . . . . . . . . . . . . . . . . . . . . . . . . . . . . . . . . . . . . . . . . . . . . . . . . . . . . . . . . . . . . . . . . . . . . . . . . . . . . 115 About Files and File Images. . . . . . . . . . . . . . . . . . . . . . . . . . . . . . . . . . . . . . . . . . . . . . . . . . . . . . . . . . . . . . . . . . . . . . . . . . . . . . . . . . . . . . . . . 116 About File Attributes . . . . . . . . . . . . . . . . . . . . . . . . . . . . . . . . . . . . . . . . . . . . . . . . . . . . . . . . . . . . . . . . . . . . . . . . . . . . . . . . . . . . . . . . . . . 119 About Aliases. . . . . . . . . . . . . . . . . . . . . . . . . . . . . . . . . . . . . . . . . . . . . . . . . . . . . . . . . . . . . . . . . . . . . . . . . . . . . . . . . . . . . . . . . . . . . . . . . . 122 About File Restrictions . . . . . . . . . . . . . . . . . . . . . . . . . . . . . . . . . . . . . . . . . . . . . . . . . . . . . . . . . . . . . . . . . . . . . . . . . . . . . . . . . . . . . . . . . 123 Adding Files. . . . . . . . . . . . . . . . . . . . . . . . . . . . . . . . . . . . . . . . . . . . . . . . . . . . . . . . . . . . . . . . . . . . . . . . . . . . . . . . . . . . . . . . . . . . . . . . . . . . . . . 123 Searching for Files. . . . . . . . . . . . . . . . . . . . . . . . . . . . . . . . . . . . . . . . . . . . . . . . . . . . . . . . . . . . . . . . . . . . . . . . . . . . . . . . . . . . . . . . . . . . . . . . . 124 Viewing File Information . . . . . . . . . . . . . . . . . . . . . . . . . . . . . . . . . . . . . . . . . . . . . . . . . . . . . . . . . . . . . . . . . . . . . . . . . . . . . . . . . . . . . . . . . . . 126 Viewing this File . . . . . . . . . . . . . . . . . . . . . . . . . . . . . . . . . . . . . . . . . . . . . . . . . . . . . . . . . . . . . . . . . . . . . . . . . . . . . . . . . . . . . . . . . . . . . . . 126 Viewing Where a File Is Used . . . . . . . . . . . . . . . . . . . . . . . . . . . . . . . . . . . . . . . . . . . . . . . . . . . . . . . . . . . . . . . . . . . . . . . . . . . . . . . . . . . . 127 Viewing File Restrictions. . . . . . . . . . . . . . . . . . . . . . . . . . . . . . . . . . . . . . . . . . . . . . . . . . . . . . . . . . . . . . . . . . . . . . . . . . . . . . . . . . . . . . . . 127 Viewing Emails Related to a File . . . . . . . . . . . . . . . . . . . . . . . . . . . . . . . . . . . . . . . . . . . . . . . . . . . . . . . . . . . . . . . . . . . . . . . . . . . . . . . . . 127 Viewing File Transactions. . . . . . . . . . . . . . . . . . . . . . . . . . . . . . . . . . . . . . . . . . . . . . . . . . . . . . . . . . . . . . . . . . . . . . . . . . . . . . . . . . . . . . . 128 Viewing File Downloads . . . . . . . . . . . . . . . . . . . . . . . . . . . . . . . . . . . . . . . . . . . . . . . . . . . . . . . . . . . . . . . . . . . . . . . . . . . . . . . . . . . . . . . . 128 Editing File Information. . . . . . . . . . . . . . . . . . . . . . . . . . . . . . . . . . . . . . . . . . . . . . . . . . . . . . . . . . . . . . . . . . . . . . . . . . . . . . . . . . . . . . . . . . . . 129 Editing a File . . . . . . . . . . . . . . . . . . . . . . . . . . . . . . . . . . . . . . . . . . . . . . . . . . . . . . . . . . . . . . . . . . . . . . . . . . . . . . . . . . . . . . . . . . . . . . . . . . 129 Aliasing a File. . . . . . . . . . . . . . . . . . . . . . . . . . . . . . . . . . . . . . . . . . . . . . . . . . . . . . . . . . . . . . . . . . . . . . . . . . . . . . . . . . . . . . . . . . . . . . . . . . 131 Uploading a File Image . . . . . . . . . . . . . . . . . . . . . . . . . . . . . . . . . . . . . . . . . . . . . . . . . . . . . . . . . . . . . . . . . . . . . . . . . . . . . . . . . . . . . . . . . 131 Deleting a File Image . . . . . . . . . . . . . . . . . . . . . . . . . . . . . . . . . . . . . . . . . . . . . . . . . . . . . . . . . . . . . . . . . . . . . . . . . . . . . . . . . . . . . . . . . . . 133 Reidentifying a File. . . . . . . . . . . . . . . . . . . . . . . . . . . . . . . . . . . . . . . . . . . . . . . . . . . . . . . . . . . . . . . . . . . . . . . . . . . . . . . . . . . . . . . . . . . . . 133 Restricting a File. . . . . . . . . . . . . . . . . . . . . . . . . . . . . . . . . . . . . . . . . . . . . . . . . . . . . . . . . . . . . . . . . . . . . . . . . . . . . . . . . . . . . . . . . . . . . . . 134 Creating an Email Notification for a File . . . . . . . . . . . . . . . . . . . . . . . . . . . . . . . . . . . . . . . . . . . . . . . . . . . . . . . . . . . . . . . . . . . . . . . . . . 134 Managing File Associations. . . . . . . . . . . . . . . . . . . . . . . . . . . . . . . . . . . . . . . . . . . . . . . . . . . . . . . . . . . . . . . . . . . . . . . . . . . . . . . . . . . . . . . . . 136 About File Associations. . . . . . . . . . . . . . . . . . . . . . . . . . . . . . . . . . . . . . . . . . . . . . . . . . . . . . . . . . . . . . . . . . . . . . . . . . . . . . . . . . . . . . . . . 137FlexNet Operations User Guide FNO-2020R2SP1-UG00Company Confidential5ContentsAssociating a File to Download Packages. . . . . . . . . . . . . . . . . . . . . . . . . . . . . . . . . . . . . . . . . . . . . . . . . . . . . . . . . . . . . . . . . . . . . . . . . 137 Using Associate Where to Copy Associations from Another File . . . . . . . . . . . . . . . . . . . . . . . . . . . . . . . . . . . . . . . . . . . . . . . . . . . . . 138 Disassociating a File from a Download Package. . . . . . . . . . . . . . . . . . . . . . . . . . . . . . . . . . . . . . . . . . . . . . . . . . . . . . . . . . . . . . . . . . . 139 Managing License Agreements. . . . . . . . . . . . . . . . . . . . . . . . . . . . . . . . . . . . . . . . . . . . . . . . . . . . . . . . . . . . . . . . . . . . . . . . . . . . . . 140 About Agreements. . . . . . . . . . . . . . . . . . . . . . . . . . . . . . . . . . . . . . . . . . . . . . . . . . . . . . . . . . . . . . . . . . . . . . . . . . . . . . . . . . . . . . . . . . . . . . . . . 141 Listing Agreements . . . . . . . . . . . . . . . . . . . . . . . . . . . . . . . . . . . . . . . . . . . . . . . . . . . . . . . . . . . . . . . . . . . . . . . . . . . . . . . . . . . . . . . . . . . . . . . . 141 Creating an Agreement . . . . . . . . . . . . . . . . . . . . . . . . . . . . . . . . . . . . . . . . . . . . . . . . . . . . . . . . . . . . . . . . . . . . . . . . . . . . . . . . . . . . . . . . . . . . 141 Viewing an Agreement’s Transactions . . . . . . . . . . . . . . . . . . . . . . . . . . . . . . . . . . . . . . . . . . . . . . . . . . . . . . . . . . . . . . . . . . . . . . . . . . . . . . . 142 Editing an Agreement. . . . . . . . . . . . . . . . . . . . . . . . . . . . . . . . . . . . . . . . . . . . . . . . . . . . . . . . . . . . . . . . . . . . . . . . . . . . . . . . . . . . . . . . . . . . . . 142 Managing Producers . . . . . . . . . . . . . . . . . . . . . . . . . . . . . . . . . . . . . . . . . . . . . . . . . . . . . . . . . . . . . . . . . . . . . . . . . . . . . . . . . . . . . . 143 About Producers . . . . . . . . . . . . . . . . . . . . . . . . . . . . . . . . . . . . . . . . . . . . . . . . . . . . . . . . . . . . . . . . . . . . . . . . . . . . . . . . . . . . . . . . . . . . . . . . . . 143 Listing Producers. . . . . . . . . . . . . . . . . . . . . . . . . . . . . . . . . . . . . . . . . . . . . . . . . . . . . . . . . . . . . . . . . . . . . . . . . . . . . . . . . . . . . . . . . . . . . . . . . . 144 Creating a Producer . . . . . . . . . . . . . . . . . . . . . . . . . . . . . . . . . . . . . . . . . . . . . . . . . . . . . . . . . . . . . . . . . . . . . . . . . . . . . . . . . . . . . . . . . . . . . . . 144 Viewing a Producer’s Transactions . . . . . . . . . . . . . . . . . . . . . . . . . . . . . . . . . . . . . . . . . . . . . . . . . . . . . . . . . . . . . . . . . . . . . . . . . . . . . . . . . . 145 Editing a Producer. . . . . . . . . . . . . . . . . . . . . . . . . . . . . . . . . . . . . . . . . . . . . . . . . . . . . . . . . . . . . . . . . . . . . . . . . . . . . . . . . . . . . . . . . . . . . . . . . 145 Reidentifying a Producer. . . . . . . . . . . . . . . . . . . . . . . . . . . . . . . . . . . . . . . . . . . . . . . . . . . . . . . . . . . . . . . . . . . . . . . . . . . . . . . . . . . . . . . . . . . 145 Deactivating a Producer. . . . . . . . . . . . . . . . . . . . . . . . . . . . . . . . . . . . . . . . . . . . . . . . . . . . . . . . . . . . . . . . . . . . . . . . . . . . . . . . . . . . . . . . . . . . 146 Reactivating a Producer. . . . . . . . . . . . . . . . . . . . . . . . . . . . . . . . . . . . . . . . . . . . . . . . . . . . . . . . . . . . . . . . . . . . . . . . . . . . . . . . . . . . . . . . . . . . 1463Entitling Customers and Activating Licenses . . . . . . . . . . . . . . . . . . . . . . . . . . . . . . . . . . . . . . . . . . . . . 147 Entitling Customers to Licenses. . . . . . . . . . . . . . . . . . . . . . . . . . . . . . . . . . . . . . . . . . . . . . . . . . . . . . . . . . . . . . . . . . . . . . . . . . . . . 147 Entitlement Terms. . . . . . . . . . . . . . . . . . . . . . . . . . . . . . . . . . . . . . . . . . . . . . . . . . . . . . . . . . . . . . . . . . . . . . . . . . . . . . . . . . . . . . . . . . . . . . . . . 148 What is an Entitlement? . . . . . . . . . . . . . . . . . . . . . . . . . . . . . . . . . . . . . . . . . . . . . . . . . . . . . . . . . . . . . . . . . . . . . . . . . . . . . . . . . . . . . . . . 149 What is an Entitlement Line Item? . . . . . . . . . . . . . . . . . . . . . . . . . . . . . . . . . . . . . . . . . . . . . . . . . . . . . . . . . . . . . . . . . . . . . . . . . . . . . . . 149 What is a Bulk Entitlement?. . . . . . . . . . . . . . . . . . . . . . . . . . . . . . . . . . . . . . . . . . . . . . . . . . . . . . . . . . . . . . . . . . . . . . . . . . . . . . . . . . . . . 150 What is an Upgrade? . . . . . . . . . . . . . . . . . . . . . . . . . . . . . . . . . . . . . . . . . . . . . . . . . . . . . . . . . . . . . . . . . . . . . . . . . . . . . . . . . . . . . . . . . . . 150 What is a Test Upgrade? . . . . . . . . . . . . . . . . . . . . . . . . . . . . . . . . . . . . . . . . . . . . . . . . . . . . . . . . . . . . . . . . . . . . . . . . . . . . . . . . . . . . . . . . 151 What is an Upsell? . . . . . . . . . . . . . . . . . . . . . . . . . . . . . . . . . . . . . . . . . . . . . . . . . . . . . . . . . . . . . . . . . . . . . . . . . . . . . . . . . . . . . . . . . . . . . 151 What is a Test Upsell? . . . . . . . . . . . . . . . . . . . . . . . . . . . . . . . . . . . . . . . . . . . . . . . . . . . . . . . . . . . . . . . . . . . . . . . . . . . . . . . . . . . . . . . . . . 152 What is a Renewal? . . . . . . . . . . . . . . . . . . . . . . . . . . . . . . . . . . . . . . . . . . . . . . . . . . . . . . . . . . . . . . . . . . . . . . . . . . . . . . . . . . . . . . . . . . . . 152 What is a Test Renewal? . . . . . . . . . . . . . . . . . . . . . . . . . . . . . . . . . . . . . . . . . . . . . . . . . . . . . . . . . . . . . . . . . . . . . . . . . . . . . . . . . . . . . . . . 152 What is a Merge? . . . . . . . . . . . . . . . . . . . . . . . . . . . . . . . . . . . . . . . . . . . . . . . . . . . . . . . . . . . . . . . . . . . . . . . . . . . . . . . . . . . . . . . . . . . . . . 152 What is a Transfer? . . . . . . . . . . . . . . . . . . . . . . . . . . . . . . . . . . . . . . . . . . . . . . . . . . . . . . . . . . . . . . . . . . . . . . . . . . . . . . . . . . . . . . . . . . . . 153 Viewing Entitlements . . . . . . . . . . . . . . . . . . . . . . . . . . . . . . . . . . . . . . . . . . . . . . . . . . . . . . . . . . . . . . . . . . . . . . . . . . . . . . . . . . . . . . . . . . . . . . 153 Creating an Entitlement . . . . . . . . . . . . . . . . . . . . . . . . . . . . . . . . . . . . . . . . . . . . . . . . . . . . . . . . . . . . . . . . . . . . . . . . . . . . . . . . . . . . . . . . . . . 154 Configuring an Entitlement Line Item . . . . . . . . . . . . . . . . . . . . . . . . . . . . . . . . . . . . . . . . . . . . . . . . . . . . . . . . . . . . . . . . . . . . . . . . . . . . 156 Configuring a Maintenance Line Item . . . . . . . . . . . . . . . . . . . . . . . . . . . . . . . . . . . . . . . . . . . . . . . . . . . . . . . . . . . . . . . . . . . . . . . . . . . . 158 Changing the State of a Line Item. . . . . . . . . . . . . . . . . . . . . . . . . . . . . . . . . . . . . . . . . . . . . . . . . . . . . . . . . . . . . . . . . . . . . . . . . . . . . . . . 158 Creating a Bulk Entitlement . . . . . . . . . . . . . . . . . . . . . . . . . . . . . . . . . . . . . . . . . . . . . . . . . . . . . . . . . . . . . . . . . . . . . . . . . . . . . . . . . . . . . . . 159 Configuring a Bulk Entitlement. . . . . . . . . . . . . . . . . . . . . . . . . . . . . . . . . . . . . . . . . . . . . . . . . . . . . . . . . . . . . . . . . . . . . . . . . . . . . . . . . . 161 Loading Web Register Keys . . . . . . . . . . . . . . . . . . . . . . . . . . . . . . . . . . . . . . . . . . . . . . . . . . . . . . . . . . . . . . . . . . . . . . . . . . . . . . . . . . . . . 162 Adding a Web Register Key. . . . . . . . . . . . . . . . . . . . . . . . . . . . . . . . . . . . . . . . . . . . . . . . . . . . . . . . . . . . . . . . . . . . . . . . . . . . . . . . . . . . . . 163 Deleting a Web Register Key . . . . . . . . . . . . . . . . . . . . . . . . . . . . . . . . . . . . . . . . . . . . . . . . . . . . . . . . . . . . . . . . . . . . . . . . . . . . . . . . . . . . 163 Specifying User-Supplied Web Register Keys . . . . . . . . . . . . . . . . . . . . . . . . . . . . . . . . . . . . . . . . . . . . . . . . . . . . . . . . . . . . . . . . . . . . . 164 Bulk Operations: Upgrade, Upsell, or Renew a Product. . . . . . . . . . . . . . . . . . . . . . . . . . . . . . . . . . . . . . . . . . . . . . . . . . . . . . . . . . . . . . . . 164 Merging Entitlements . . . . . . . . . . . . . . . . . . . . . . . . . . . . . . . . . . . . . . . . . . . . . . . . . . . . . . . . . . . . . . . . . . . . . . . . . . . . . . . . . . . . . . . . . . . . . . 167 6Company Confidential FNO-2020R2SP1-UG00FlexNet Operations User Guide。


Brett’sX‐Ways Forensics (v15.4) QuickStart GuideThis is a quick guide to getting up and running using X‐Ways Forensics (XWF). There are many features documented in the manual, plus more that may not seem to be documented, but are there in more detail. I suggest signing up for the XWF Support Forum where you will have access for more help and be able to ask questions directly to the XWF community. I do not profess to be an XWF expert and hope that this guide does some justice to what XWF can do. If you truly only had one forensic tool to choose, X‐Ways Forensics would be that one tool.XWF is constantly updated. Each update is typically something that you will find to be a valuable new feature, not just bug fixes. I have not yet seen any forensic program so constantly updated, maintained, and supported directly by a developer that is quickly and personally responsive. There are few forensic software companies that will read your wishlist or request, consider it, and either tell you ‘no thank you’ or ‘implement it’ almost immediately.Some of the features that I find to be ‘neat’….XWF can run from an external device, such as a flashdrive or external drive. It requires the dongle to be plugged into the machine, but the dongle is recognized only as a HID (human interface device), so minimal walking over the system. Because XWF can run from an external device, it does not need to be installed to run. This makes it easy to take an image in an XWF folder that can be run on another machine without having to install XWF on every machine you may move your image for examinations. Simply, on an external drive, your image and complete XWF operating program files can be on the same drive and run on any of your forensic machines without installing XWF everywhere. This also makes it possible to work on a live machine, if need be. If there is cause to work on the live machine, using an external drive, with a XWF programs folder, you have full access to XWF on your live suspect machine and do to it as your wish (image it, examine it, export files, etc…).This QuickStart Guide does not do XWF justice in using the features or capability. However, this will show you how to start up XWF, acquire an image, and run the initial processes so you can begin your examination. It’s not quite ‘push button forensics’, but after a while, you will always find yourself going back to XWF and wondered why you did without it for so long. And yes, you can do an entire exam in XWF and validate findings with another tool.Some of the topics this QuickStart doesn’t go into are that of looking at the MFT, hex views of files, and some other intensive analysis that would not be adequately covered in a QuickStart Guide. XWF is much much more than a “hex editor” and has come a long way since when it was just that.For topics that I do brush upon, a search of that topic in the XWF manual will give more information. Sometimes all you need to know is that a feature exists, then you can figure it out or look it up. Not knowing will cause you to not use XWF for what it can do, because you just may not know. The XWF Manual, is in‐depth, detailed, and can be overwhelming if you skim it. But, it does cover every function you’ll come across.I would highly suggest, that the XWF user acquaint him/herself with the terminology as used by XWF to be better prepared to answer terms such as an “Existing File” as compared to a “Previously Existing File” in the manner that it is meant with XWF, among other terms.As side note to how well XWF works…I was at FLETC sitting between a FTK (v1.x) user and longtime Encase (v5) user. Data carving the same image, XWF (v13) came up with literally hundreds of additional images (photos) than did either FTK or Encase. I don’t know why that happened; only that no one else could explain how XWF could do what neither FTK nor Encase could, at least with those versions.The initial, no case, nothing started, XWF. From here, let’s see how one workflow option can work.Set up your Options‐General so XWF behaves like you want it to behave.Something I also do is to create folders for files I export for specific reasons. A folder for “Docs” or “User Files” and XWF can be directed to put your files in the folder of your choice. Not unlike any other program. XWF will by default export files to its respective case folder.When dealing with lots of various time zones, UTC/GMT can save you some headaches of figuring out what happened when and on which machine. Those are the basic settings, now for a real (test) case…Create a case (File‐Create New Case). This will automatically store in the folder you previously created above. In this example, it will be under my XWF Quick Start folder, Case sub‐folder.Most of these options are self‐explanatory. The logging includes screen captures of your dialog boxes, which is a nice feature to see exactly what your dialog box was set to, just when you hit ‘enter’.You can modify your report settings now, or you can do it later when you are ready to create a report. Simply, choose the fields you want displayed on the report and how you want it to look (3 files per line, more or less?, etc…).To add media or an image (or file), choose File – Add _ _ _.I’m going to add a small flashdrive and choose the Physical Media. Pretend this is a write blocked drive…Now we are getting into XWF. This is where some might get scared away to go back to the easy (and maybe not so detailed) other tools.The legend is very important to look at, especially if you don’t know what a particular color or symbol means.To create an image, XWF is as easy as any other forensic application, but it seems to run a bit faster than others. XWF is a very reliable forensic imager.Easy enough: File – Create Disk ImageSame settings as you see on most forensic tools, choose your format type, compression, hash, encryption, etc…The default location for the image is the sub‐folder you created in the beginning. This keeps it nice and neat to have everything in one place. Don’t forget, you can even have your XWF Program Folder in the same place and run XWF from that folder on an external drive.XWF spins away…Hashes…And is done…Now for the processing.The key factor in XWF is the Snapshot! This button is about the most powerful button in the entire program. If nothing else, remember the Refine Volume Snapshot.Indexing can be configured to what your needs are, which is different from other indexing engines where you may not have that much control. Some configurations will make indexing go faster, or take longer (such as choosing word lengths of 2 and 24).Ok, we let the Snapshot run….Most is done at this point, but if you choose indexing, it will continue some more as seen below.The Directory Browser (Options‐Directory Browser or F5) is another need to know feature of XWF. With this feature, you can control what you see as you examine your files. Some may be important in a case, but not in another, therefore, you can control how much and what you see. As you work in the case, you will be tagging files (responsive/evidence) or hiding others (irrelevant files). In this dialog box, you can choose whether to keep seeing files you tagged or you can choose that tagged files be hidden, at least for the time of the examination, but included in the report later.Oh yes, XWF will pull out eml files from your PST files. You can view the emails individually, but will need Outlook installed on your forensic machine.Ok, maybe the Snapshot and Directory Browser weren’t the only great features…XWF allows you to filter by most of the header columns. In this screenshot, choosing to filter by Type allows you to pick those files types of importance in your case. If you are only looking for Email, you can hide everything and XWF will only show you email files. If you want more specificity, you can even choose the individual file types listing under each Type Folder. This is very fast and very neat. As an example, when used in conjunction with the Directory Browser, you could choose to only look at MS Word documents that are previously existing and nothing else. That list can be quickly exported to a spreadsheet.If you are looking at a live machine, with XWF running on your external drive, you can quickly and easier filter files by file type and export them directly to a folder on your external along with an exported spreadsheet of your selected files and a log file of your actions. In a civil ediscovery case, where you may only need to grab user files on a machine that can’t be shutdown (or isn’t a need to be shut down or allowed to be imaged), you can use the filter feature, select those files of agreed upon relevance (docs, pdfs, email, etc…) and have them exported in mere minutes, logged, metadata intact. Who needs a super duper, fancy pancy, file copying utility when you already have the best thing in your kit?Filtering by Date includes any or all of the above, including Record Update and Initial Creation dates. Not all forensic tools give this ability to filter by every date field.Files can be tagged one at a time or in mass selections by using the Shift of Ctrl keys.“Edit Comment” adds your comment to a file or files of interest. This is very helpful as reminders to either reexamine a file or make notes of your thoughts for later reporting. The comments feature is also a header, so you can create specific comments in which you can sort your data later.As you go through and find files that need to go to your report, just add them using the Report Table Association (right click on the file).Another nice feature about the “right clicking” in XWF is that you can hide files you do not want to see again. Just right click, “Hide” and done. This doesn’t remove the files from the image, just hides them from your view until you want to see them again.If there are files of interest and you want to create a hash set of thesefiles…just “right click” again and Create Hash Set. Using files of interest in oneimage, a hash set can be created and run against a different image.With the “Right Click” of a mouse, you canexport selected files to your location and inthe manner you need.When exporting files, select your target folder (ifusing XWF default case settings, the location willbe in the case folder you created). You canchoose to recover the file(s) using any of theoptions seen. Copy logical or slack, or both, withdirectory structure or not. Extremely simple andquick.The Tools‐Hash Database function allows you to import other hash sets into XWF. This can be NSRL hash sets, or sets created with XWF or other tools (such as a FTK Imager exported hash set). After importing your hash set, such as a set of known files you are looking for, run the Snapshot again to check your files against your new hash set.Searching in XWF is straightforward. The options are simple and multiple terms can be entered for searching at the same time.The results are output in a dialog box.And the file hits are highlighted as surrounded by their context. Any of these can be “tagged” as previously mentioned, or viewed or exported.In this test case, I indexed the image, and therefore, I can search the index, which is much faster than searching the image without indexing. But of course, you have to choose to index first if you know you will be keyword searching, or you index later. Either way, your investigative plan will determine if you need to find specific data fast and first, to keyword search later, or if you can afford to have the image index while you wait.After the index is complete, you can also export your word list that was created.XWF can reconstruct RAIDS. I’ve had nearly 100% success with reconstructing RAIDs with XWF.Under the Options – Security, you have several choices to make. For one example, a Strict drive letter protection will not let you save case data outside of where you chose to store initially (at least not on another drive). If you want to be able to save data outside the defaults, uncheck the Strict drive letter protection box.So your case is done (well, they are never really ever done, but at some point, you need a report). From File‐Create Report, here you go. By this point, you should have been tagging and marking your evidence files to the report, or else, you need to go back and do that now or you won’t have anything in your report.Choose the metadata you want included,whether your want your logo, case log, andother details. Once you hit “Ok”, you’ll get aneditable html report (basic).Here is a report, with 3 files showing on each line. The metadata selected is below each file. Also, a link to the file exists to where the file can be opened if clicked. If the file was a graphic, the graphic would be seen. This entire report can beeasily edited to your liking for ease of review.The activity log, which you can choose to have included or not in your report, contains not only the date and time entries of your work, but also screen shots of every dialog box in which you clicked, “OK”. This is really nice to see just what your settings were when you submitted an action with XWF. In this screen shot above, you can see that I choose the Physical Media of RM4 and pushed “OK”.XWF can really dig into your data. From basic file recovery, data runs, MFT records, and flying from offset to offset, XWF can be used by beginners and the most advanced examiners. With RAM analysis being able to be examined, there really isn’t much that XWF can’t do. And when I thought XWF was at the limit of what was possible, when you throw a tool like F‐Response to work with XWF, you have so much more because you can then touch drives remotely for analysis with two tools to leave you wondering again, “why have I have gone so long without XWF…?” For any tip of the iceberg I touched upon, there are substantial details in the XWF Manual. Stefan does an excellent job at keeping the manual updated and XWF updated to the types of media and operating systems available.Two other fantastic features of XWF are the Registry Viewer and X‐Ways Trace. The Registry Viewer, along with its report, has been greatly enhanced over the past years as well as X‐Ways Trace. However, both of those would also be well fitted with their own “QuickStart Guides”…..And to Stefan, thanks for your forensic tool and also for giving the first U.S. class in Seattle ;)。

Simics InstallationGuideSimics Version 3.2Revision1543Date2007-12-13©1998–2007Virtutech ABDrottningholmsvägen14,SE-11242Stockholm,SwedenTrademarksVirtutech,the Virtutech logo,Simics,and Hindsight are trademarks or registered trademarks of Virtutech AB or Virtutech,Inc.in the United States and/or other countries.The contents herein are Documentation which are a subset of Licensed Software pursuant to the terms of the Virtutech Simics Software License Agreement(the“Agreement”),and are being distributed under the Agreement,and use of this Documentation is subject to the terms the Agreement.This Publication is provided“as is”without warranty of any kind,either express or implied, including,but not limited to,the implied warranties of merchantability,fitness for a particular purpose,or non-infringement.This Publication could include technical inaccuracies or typographical errors.Changes are periodically added to the information herein;these changes will be incorporated in new edi-tions of the Publication.Virtutech may make improvements and/or changes in the product(s) and/or the program(s)described in this Publication at any time.The proprietary information contained within this Publication must not be disclosed to others without the written consent of Virtutech.Contents1Introduction5 2Hardware and Software Requirements6 3Installation Overview8 4Linux/Solaris Installation104.1First Installation (10)4.2Academic Users:First Installation (14)4.3Installing License (17)4.4Installing More Packages (17)4.5Uninstalling Simics (17)4.6Installing the Network Interface Helper (17)5Windows Installation195.1First Installation (19)5.2Academic Users:First Installation (20)5.3Installing License (21)5.4Installing More Packages (21)5.5Uninstalling Simics (21)5.6Third-Party Products (22)6Upgrading Simics246.1Upgrading from Simics1.x or2.x (24)6.2Upgrading from Simics3.0 (24)6.3Upgrading between Minor3.2.x Releases (24)7Advanced Installation Options267.1Unix:Add-on Packages Management (26)7.2Windows:Add-on Packages Management (29)7.3Multi-user Installations (31)7.3.1Shared Installations (31)7.3.2Per-user Configuration (32)7.3.3Installation under Configuration Management Systems (32)7.3.4Multi-users Installation on Windows (33)7.4Unix:Installer Options (33)Usage (33)Arguments (33)Options (34)7.5Add-on Manager Options (34)Usage (35)Options (35)8FLEXnet Floating Licenses368.1Overriding License File Location (37)9Workspace Management39 Usage (40)Options (40)10Contact Technical Support42 11Overview of the Simics Directory Structure43Chapter1IntroductionThis document describes how to install and configure the Simics product.It identifies the hardware and software requirements for installing and running Simics and provides in-structions for installation and license configuration.This document should be read by users installing Simics themselves,and all administrators for the Simics product.Chapter2Hardware and Software RequirementsSimics can run on the following platforms:Linux(32-bit)•Host architecture:x86(Pentium II or higher)•OS Version:Red Hat Enterprise Linux WS3or later(1)•Memory:512MB(3)•Disk:Several GB(4)•Third-Party Software:NoneLinux(64-bit)•Host architecture:x86-64•OS Version:SuSE Linux9.3or later(2)•Memory:512MB(3)•Disk:Several GB(4)•Third-Party Software:NoneMicrosoft Windows(32-bit)•Host architecture:x86(Pentium II or higher)•OS Version:Windows2000or later•Memory:512MB(3)•Disk:Several GB(4)•Third-Party Software:WinPcap3.0,TAP-Win32(OpenVPN2.0),MinGW. Sun Solaris(64-bit)•Host architecture:SPARC•OS Version:Solaris8or later•Memory:512MB(3)•Disk:Several GB(4)•Third-Party Software:None(1)Should work also on any compatible Linux distribution.Minimal requirements are GNU libc2.3.x or newer with NPTL and GTK2.2for the GUI.Note that Simics does cur-rently not work with SELinux in enforcing mode.(2)Should work also on any compatible Linux distribution.Minimal requirements are GNU libc2.3.x or newer with NPTL and GTK2.6for the GUI.Note that Simics does cur-rently not work with SELinux in enforcing mode.(3)In general,it helps to have200to300MB plus at least as much memory as what is being used on the simulated machine,in order to avoid swapping.(4)The amount of necessary disk space highly depends on the amount of storage space that will be used in the simulated machine.Simics itself will take between200and300MB, depending on the installed add-on packages.Chapter3Installation OverviewSimics is provided in several packages:•A base package containing Simics Hindsight,i.e.,the Simics execution engine as well as the user interface and the standard models.It also contains Simics Ethernet Networks and Simics Serial Networks.•An add-on package with the Firststeps tutorial machine(a PowerPC-based card).•An add-on package for each simulated system(usually containing a CPU core and various devices).•Some add-on packages for additional functionality,like Simics Model Builder,which contains the DML compiler and relatedfiles.Virtutech customers are provided with encrypted packages,for which decryption keys are sent separately.To install Simics,do the following:1.Download the base package and the add-on packages for which you have a license.Ifsome third-party software is necessary,it will be documented later in this guide(refer to the Third Party Products sections).2.Install the packages.If a key is required,the installer will ask for it at the appropriatetime.3.Set up your license.4.Although it isn’t mandatory,it is usually a good idea to create a workspace whereyou will keep thefiles you are working with,while leaving the Simics installation read-only.It will make upgrading Simics much easier later on.Note:Contrary to the Simics3.0installation process,add-on packages are not installed on top of the Simics installation anymore.Each package stays in its own directory,and Simics is simply instructed to look for add-on packages in various places using the addon-manager program.When installing Simics in a corporate environment,several options are provided for multi-user installations.Refer to chapter7for a complete description.Chapter4Linux/Solaris Installation4.1First InstallationAs a Virtutech customer,you received a mail(or instructions)that describes which packages you should download and where tofind them.If this is not the case,contact Virtutech to obtain this information.1.Start by downloading the packages you want to install.In this example we will as-sume that we are interested in the packages1000(Simics itself)and4005(the Firststeps add-on).joe@computer:˜/simics-download/$lssimics-pkg-1000-3.2.0-linux.tarsimics-pkg-4005-3.2.0-linux.tarThese packages are.tarfiles:when uncompressed,they will create a simics-3.2-install directory with the relevant installationfiles:joe@computer:˜/simics-download/$tar xf simics-pkg-1000-3.2.0-linux.tarjoe@computer:˜/simics-download/$tar xf simics-pkg-4005-3.2.0-linux.tarjoe@computer:˜/simics-download/$ls simics-3.2-installsimics-installation-guide.pdfinstall_simics_common.pminstall-simics.plpackage-1000-3.2.0-linux.packageinfo.tfpackage-1000-3.2.0-linux.tar.gz.tfpackage-4005-3.2.0-linux.packageinfo.tfpackage-4005-3.2.0-linux.tar.gz.tftfdecode-linuxSLA-1.0Thefile simics-installation-guide.pdf is a copy of this manual.The packages themselves are encrypted in the tar.gz.tffiles.The installation program is the script install-simics.pl,which we’ll use in the next step of the installation.2.Run the installation script:joe@computer:˜/simics-download/simics-3.2-install$./install-simics.plFor thefirst installation,the script will start by asking you to read and accept the Simics Software License Agreement(SLA).If you or your company already signed a valid SLA for Simics3.2,you can say so immediately:Have you already signed a custom Simics Software License Agreementwith Virtutech?(y,n)[n]:<ENTER>If you have a valid SLA,the installation will start immediately and you can skip to the next step.If you do not have a valid SLA,you will be asked where your company is located:Is your company located in one of the following areas:USA,Canada,Japan,the European Union?(y,n):yIf your company is not located in any of those areas,you need to contact Virtutech to obtain a custom license agreement before continuing the installation.The installation script will then allow you to read the Simics SLA.It will also point you to afile that you can open and print with almost any text editor to read the SLA at your leisure.Once you read the SLA,you will be asked to accept(by typing“accept”) or decline it.Declining will interrupt the installation process.Accepting will get you to the next installation step.install-simics will now show you the Simics Software License Agreementfor Simics 3.2(revision 1.0).You can also read or print this agreement by opening the file’SLA-1.0’(in the current directory)in any text editor.To continue with the installation and review the terms of the SLA,enter’y’To abort the installation,enter’n’.(y,n)[y]:<ENTER>...Showing the SLA...Do you accept the terms of the SLA?(accept,decline)[decline]:accept3.At this point,you will be asked for the keys necessary to decrypt the packages.Keysare cached automatically once they have been found to be correct,so you should needto perform this step only once(for a given package):->Looking for Simics packages in current directory...Enter a decryption key for package-1000-3.2.0-linux.tar.gz.tf[Abort]:0123456789ABCDEF0123456789ABCDEFEnter a decryption key for package-4005-3.2.0-linux.tar.gz.tf[Abort]:0123456789ABCDEF0123456789ABCDEFNote:These are not the actual keys.4.The script will present a list of packages to install.Simply write the number listedin front of each package you wish to install.In our case,we assume that we want toinstall all packages(Simics and Firststeps):install-simics can install the following packages from the current directory: Number Name Type Version Host File1Simics-Base simics 3.2.0x86-linux package-1000-3.2.0-[...]2Firststeps addon 3.2.0x86-linux package-4005-3.2.0-[...]3All packagesPlease enter the numbers of the packages you want to install,as in"143"Package numbers,or Enter to[Abort]:35.You will be asked for a destination directory.We accept here the default proposition:Enter a destination directory for installation[/opt/virtutech/simics-3.2/]:<ENTER> 6.The script will show you a summary of the installation options before proceeding.Ifyou accept to continue,the installation will be performed:The following packages will be installed in/opt/virtutech/simics-3.2/: package-1000-3.2.0-linux.tar.gz.tf(Simics-Base 3.2.0)with key0123456789ABCDEF0123456789ABCDEFpackage-4005-3.2.0-linux.tar.gz.tf(Firststeps 3.2.0)with key0123456789ABCDEF0123456789ABCDEFDo you wish to perform the installation?(y,n)[y]:<ENTER>->Decrypting package-1000-3.2.0-linux.tar.gz.tf->Testing package-1000-3.2.0-linux.tar.gz->Installing package-1000-3.2.0-linux.tar.gz->Decrypting package-4005-3.2.0-linux.tar.gz.tf->Testing package-4005-3.2.0-linux.tar.gz->Installing package-4005-3.2.0-linux.tar.gz7.If everything was successful,you now have two directories in/opt/virtutech/simics-3.2/called simics-3.2.0and simics-firststeps-3.2.0.The installer will ask you whether you want to install a licensefile to run Simics.This file should have been provided to you by Virtutech.Note that if you havefloating licenses,the configuration is a bit more complex.In that case,refer to chapter8.If you wish to,Simics can automatically install a licensefile in your newly installed Simics.Enter a license file name or Enter to[Skip]:simics-license.lic->Copying simics-license.lic to/opt/virtutech/simics-3.2//simics-3.2.0/licenses 8.The installer will help youfinish the configuration of the packages you installed.Thedefault choice—to configure the Firststeps add-on with the newly installed Simics—is exactly what we want:install-simics has installed the following add-on package:Firststeps 3.2.0/opt/virtutech/simics-3.2//simics-firststeps-3.2.0Do you wish to make these add-on packages available inSimics-Base 3.2.0?(y,n)[y]:<ENTER>->Making add-on package available in Simics-Base 3.2.09.The installer should now summarize the installation and report that everything wassuccessful.You can run Simics directly with the following command:joe@computer:˜$/opt/virtutech/simics-3.2/simics-3.2.0/bin/simics-guiYou can also create a workspacefirst,where you will keep your own modified scripts and thefiles you are working with:joe@computer:˜$/opt/virtutech/simics-3.2/simics-3.2.0/bin/workspace-setupsimics-workspacejoe@computer:˜$cd simics-workspacejoe@computer:˜$./simics-guiIf you are new to Simics,it is probably time to open the Getting Started with Simics manual for some reading and tutorial.You willfind it in the doc/directory of your Simics installation or your workspace,as well as in the Simics on-line help.4.2Academic Users:First InstallationAs an academic user,you have access to a number of Simics packages in your download area.1.Start by downloading the packages you want to install.In this example we will as-sume that we are interested in the Simics-Base package(Simics itself)and the First-steps add-on.joe@computer:˜/simics-download/$lssimics-pkg-simics-base-3.2.0-linux.tarsimics-pkg-firststeps-3.2.0-linux.tarThese packages are.tarfiles:when uncompressed,they will create a simics-3.2-install directory with the relevant installationfiles:joe@computer:˜/simics-download/$tar xf simics-pkg-simics-base-3.2.0-linux.tar joe@computer:˜/simics-download/$tar xf simics-pkg-firststeps-3.2.0-linux.tar joe@computer:˜/simics-download/$ls simics-3.2-installsimics-installation-guide.pdfinstall_simics_common.pminstall-simics.plSLA-academic-1.0SLA-academic-1.0.rtfsimics-base-3.2.4-linux.packageinfosimics-base-3.2.4-linux.tar.gzfirststeps-3.2.2-linux.packageinfofirststeps-3.2.2-linux.tar.gzThefile simics-installation-guide.pdf is a copy of this manual.The pack-ages themselves are in the tar.gz.tffiles.The installation program is the script install-simics.pl,which we’ll use in the next step of the installation.2.Run the installation script:joe@computer:˜/simics-download/simics-3.2-install$./install-simics.plFor thefirst installation,the script will start by asking you to read and accept the Simics Software License Agreement(SLA).Besides showing you the SLA online,itwill point you to afile that you can open and print with almost any text editor to readthe SLA at your leisure.Once you read the SLA,you will be asked to accept(by typing“accept”)or decline it.Declining will interrupt the installation process.Accepting willget you to the next installation step.install-simics will now show you the Simics Software License Agreementfor Simics 3.2(revision 1.0).You can also read or print this agreementby opening the file’SLA-academic-1.0’(in the current directory)in any text editor.To continue with the installation and review the terms of the SLA,enter’y’To abort the installation,enter’n’.(y,n)[y]:...Showing the SLA...Do you accept the terms of the SLA?(accept,decline)[decline]:accept3.The script will present a list of packages to install.Simply write the number listedin front of each package you wish to install.In our case,we assume that we want toinstall all packages(Simics and Firststeps):install-simics can install the following packages from the current directory: Number Name Type Version Host File1Simics-Base simics 3.2.0x86-linux simics-base-3.2.0-linux.tar.gz 2Firststeps addon 3.2.0x86-linux firststeps-3.2.0-linux.tar.gz3All packagesPlease enter the numbers of the packages you want to install,as in"143"Package numbers,or Enter to[Abort]:34.You will be asked for a destination directory.We accept here the default proposition:Enter a destination directory for installation[/opt/virtutech/simics-3.2/]:<ENTER> 5.The script will show you a summary of the installation options before proceeding.Ifyou accept to continue,the installation will be performed:The following packages will be installed in/opt/virtutech/simics-3.2: simics-base-3.2.4-linux.tar.gz(Simics-Base 3.2.4)firststeps-3.2.2-linux.tar.gz(Firststeps 3.2.2)Do you wish to perform the installation?(y,n)[y]:y->Testing simics-base-3.2.4-linux.tar.gz->Installing simics-base-3.2.4-linux.tar.gz->Testing firststeps-3.2.2-linux.tar.gz->Installing firststeps-3.2.2-linux.tar.gz6.If everything was successful,you now have two directories in/opt/virtutech/simics-3.2/called simics-3.2.0and simics-firststeps-3.2.0.The installer will ask you whether you want to install a licensefile to run Simics.This file should have been provided to you by Virtutech.Note that if you havefloating licenses,the configuration is a bit more complex.In that case,refer to chapter8.If you wish to,Simics can automatically install a licensefile in your newly installed Simics.Enter a license file name or Enter to[Skip]:simics-license.lic->Copying simics-license.lic to/opt/virtutech/simics-3.2//simics-3.2.0/licenses 7.The installer will help youfinish the configuration of the packages you installed.Thedefault choice—to configure the Firststeps add-on with the newly installed Simics—is exactly what we want:install-simics has installed the following add-on package:Firststeps 3.2.0/opt/virtutech/simics-3.2//simics-firststeps-3.2.0Do you wish to make these add-on packages available inSimics-Base 3.2.0?(y,n)[y]:<ENTER>->Making add-on package available in Simics-Base 3.2.08.The installer should now summarize the installation and report that everything wassuccessful.You can run Simics directly with the following command:joe@computer:˜$/opt/virtutech/simics-3.2/simics-3.2.0/bin/simics-guiYou can also create a workspacefirst,where you will keep your own modified scripts and thefiles you are working with:joe@computer:˜$/opt/virtutech/simics-3.2/simics-3.2.0/bin/workspace-setupsimics-workspacejoe@computer:˜$cd simics-workspacejoe@computer:˜$./simics-guiIf you are new to Simics,it is probably time to open the Getting Started with Simics manual for some reading and tutorial.You willfind it in the doc/directory of your Simics installation or your workspace,as well as in the Simics on-line help.4.3.Installing License 4.3Installing LicenseIf you skipped the installation of the licensefile during the installation phase,you can install it manually.You should have received a licensefile from Virtutech to be able to use Simics. The licensefile is shipped separately by e-mail and not included in any package.Copy the licensefile to[simics]/licenses and Simics will automatically detect it on start-up.If you have anyfloating licenses you must also start a license server.This is described in section8.4.4Installing More PackagesYou can install more packages at any time using the same steps as above.The easiest way is to install all packages,whenever possible,in the same directory(like/opt/virtutech/ simics-3.2above).The installer will propose a default configuration that should always work with the latest installed version of Simics.If you want to handle the installation differently,you should read the next sections about add-on package management,the installer command-line switches and the addon-manager options.4.5Uninstalling SimicsUninstalling Simics is very simple:you just need to remove the directories that were created for each package during installation.Note the following:•If you delete an add-on package that is still referenced in the add-on packages list of a Simics installation,the add-on package will simply be considered invalid and ignored.The workspace-setup program will however suggest that you update workspaces that were using that add-on package.•If you delete a Simics installation,you will need to reconfigure the workspaces that depended on it by running the workspace-setup program from another Simics in-stallation.4.6Installing the Network Interface HelperSimics provides many ways to connect the simulated network to the real network.They are listed in the Connecting to a Real Network chapter of Ethernet Networks in Simics.For some of them a small helper program,openif,needs to be installed.openif must run with super-user privileges.There are several ways of accomplishing this:•Install openif as setuid root.In the simplest case,it is just a matter of running these shell commands,replacing host with the host type you are running Simics on,for ex-ample,x86-linux:#cd simics-directory4.6.Installing the Network Interface Helper#chown root host/bin/openif#chmod u+s host/bin/openifIf thefile system where Simics is installed does not allow setuid binaries,you can move openif to some location which allows setuid binaries and create a symbolic link which points to the movedfile.To verify that openif has been installed properly,try executing it directly from the shell as an ordinary user.If it complains about root privileges,it does not have the correct permissionflags set and you may need to move it,perhaps to a directory on a local(not networked)file system.Since the openif program allows an unprivileged program to read and send raw pack-ets from the network interface,you may want to restrict access to it.In this case,it can be put in a directory to which access is restricted using the standard Unix mechanisms.Its location then has to be indicated with a symbolic link as above.•If you have the common Unix utility sudo installed,it can be used to run openif from Simics by the means of a small wrapper script.This script would look like:#!/bin/shexec sudo/path/to/openif$*Then use a symbolic link to tell Simics where tofind the script.Note that sudo must be configured to allow the user to run openif as root,without giving a password.•You can also run the entire Simics process connected to a real network as root.This alternative is not recommended,and may cause problems depending on the license model chosen.The source code of openif is available as part of the Simics distribution,open to inspec-tion and modification as needed.Note that allowing unprivileged users to access the raw network device may cause se-curity problems.Therefore it is not recommended to use the real-network connection in an untrusted network environment.A safer solution is to use the port forwarding feature in Simics instead.Chapter5Windows Installation5.1First InstallationAs a Virtutech customer,you received a mail(or instructions)that describes which packages you should download and where tofind them.If this is not the case,contact Virtutech to obtain this information.1.Start by downloading the packages you want to install.In this example we will as-sume that we are interested in the packages1000(Simics itself)and4005(the Firststeps add-on).These packages are.exe installers.2.Run the installer for package1000.You willfirst need to provide a decryption key forthe package.Keys are cached automatically once they have been found to be correct, so you should need to perform this step only once(for a given package).If you provide an incorrect key,or if the package itself was damaged during the down-load process,the installer will warn you at the end of the decryption phase that some-thing went wrong.Check carefully the key you entered and ensure that the download process wasfinished correctly(check thefile size for example).If this doesn’t solve the problem,contact Virtutech on the support forum.3.Once the installer was decrypted successfully,it will simply run through a number ofstandard steps before installing the product itself:•Indicate whether you already signed a custom SLA for Simics3.2or not.If youhave,the installation will directly go two steps further.•If you haven’t signed any custom agreement,the installer will ask you whereyour company is located,in order to check if it is covered by our standard Soft-ware License Agreement(SLA).If the standard agreement does not apply,youwill need to contact Virtutech to obtain a custom SLA.•Read and accept the SLA if you agree with the terms.•Choose an installation directory.•Tell the installer where it canfind the licensefile you received to run Simics.5.2.Academic Users:First Installation4.If you are usingfloating licenses,license installation may be more complex and isexplained in chapter8.5.Once package1000is installed,Simics is ready to run on your computer.However,no simulated architecture is installed,so it will be of limited use.Let us now install package4005.The installation is fairly similar to the previous one:•Enter the correct decryption key.•The Software License Agreement part should be skipped,as the installer knowsthat you already accepted a SLA before.•Choose an installation directory.•Pick-up a Simics installation for registering this add-on package.As you justinstalled Simics before,it should be the only proposition available and you cansimply press Next to continue.6.Simics and the Firststeps packages are now installed on your computer.You can startSimics by simply going to the Start Menu and clicking on Simics.When Simics starts,it will suggest that you create a workspace,to keep your own modified scripts and thefiles you are working with.This is probably a good idea unless you know exactly what you are doing.If you are new to Simics,it is probably time to open the Getting Started with Simics manual for some reading and tutorial.You willfind it in the Start Menu under the Documentation folder,or in the Simics on-line help.5.2Academic Users:First InstallationAs an academic user,you have access to a number of Simics packages in your download area.1.Start by downloading the packages you want to install.In this example we will as-sume that we are interested in the Simics-Base package(Simics itself)and the First-steps add-on.These packages are straight.msi installers.2.Double-click on the installer for the Simics-Base package.It will simply run through anumber of standard steps before installing the product itself:•If you haven’t done so already,read and accept the Simics Software LicenseAgreement.•Choose an installation directory.•Tell the installer where it canfind the licensefile you received to run Simics.3.If you are usingfloating licenses,license installation may be more complex and isexplained in chapter8.5.3.Installing License4.Once the Simics-Base package is installed,Simics is ready to run on your computer.However,no simulated architecture is installed,so it will be of limited use.Let us now install the Firststeps package.The installation is fairly similar to the previous one:•The Software License Agreement part should be skipped,as the installer knowsthat you already accepted a SLA before.•Choose an installation directory.•Pick-up a Simics installation for registering this add-on package.As you justinstalled Simics before,it should be the only proposition available and you cansimply press Next to continue.5.Simics and the Firststeps packages are now installed on your computer.You can startSimics by simply going to the Start Menu and clicking on Simics.When Simics starts,it will suggest that you create a workspace,to keep your own modified scripts and thefiles you are working with.This is probably a good idea unless you know exactly what you are doing.If you are new to Simics,it is probably time to open the Getting Started with Simics manual for some reading and tutorial.You willfind it in the Start Menu under the Documentation folder,or in the Simics on-line help.5.3Installing LicenseYou should have received a licensefile from Virtutech to be able to use Simics.The license file is shipped separately by e-mail and not included in any package.Copy the licensefile to[simics]\licenses and Simics will automatically detect it on start-up.If you have anyfloating licenses you must also start a license server.This is described in section8.5.4Installing More PackagesYou can install more packages at any time using the same steps as above.The installer will suggest a default configuration that should always work with the latest installed version of Simics.If you want to handle the installation differently,you should read the next sections about add-on package management and the addon-manager options.5.5Uninstalling SimicsTo uninstall Simics,just use the Add/Remove Programs control panel.Note the following:•If you delete an add-on package that is still referenced in the add-on packages list of a Simics installation,the add-on package will simply be considered invalid and ignored.The workspace-setup program will however suggest that you update workspaces that were using that add-on.。
Cloud Perimeter Scans User GuideApril 14, 2022Copyright 2018-2022 by Qualys, Inc. All Rights Reserved.Qualys and the Qualys logo are registered trademarks of Qualys, Inc. All other trademarks are the property of their respective owners.Qualys, Inc.919 E Hillsdale Blvd4th FloorFoster City, CA 944041 (650) 801 6100Table of ContentsAbout this Guide (4)About Qualys (4)Qualys Support (4)Configuring Cloud Perimeter Scanning for EC2 Connectors (5)What you’ll need (5)EC2 Scan Checklist (5)Configure Your New Cloud Perimeter Scan (6)View Scan Results (10)Run Scan Reports (11)Configuring Cloud Perimeter Scanning for Azure Connectors (13)What you’ll need (13)Configure Cloud Perimeter Scan (13)View Azure VM Tracked Host Assets in Host Assets (17)Qualys API support (18)About this GuideAbout Qualys About this GuideThank you for your interest in the Qualys Cloud Platform! This guide tells you how to configure and launch cloud perimeter scans using the UI and API.About QualysQualys, Inc. (NASDAQ: QLYS) is a pioneer and leading provider of cloud-based security and compliance solutions. The Qualys Cloud Platform and its integrated apps help businesses simplify security operations and lower the cost of compliance by delivering critical security intelligence on demand and automating the full spectrum of auditing, compliance and protection for IT systems and web applications.Founded in 1999, Qualys has established strategic partnerships with leading managed service providers and consulting organizations including Accenture, BT, Cognizant Technology Solutions, Deutsche Telekom, Fujitsu, HCL, HP Enterprise, IBM, Infosys, NTT, Optiv, SecureWorks, Tata Communications, Verizon and Wipro. The company is also a founding member of the Cloud Security Alliance (CSA). For more information, please visit Qualys SupportQualys is committed to providing you with the most thorough support. Through online documentation, telephone help, and direct email support, Qualys ensures that your questions will be answered in the fastest time possible. We support you 7 days a week, 24hours a day. Access support information at /support/Configuring Cloud Perimeter Scanning for EC2 ConnectorsWhat you’ll need Configuring Cloud Perimeter Scanning for EC2 ConnectorsWhat you’ll needCloud Perimeter Scanning must be enabledYou’ll need to have these features enabled to run perimeter scans on your cloud environment: 1) Cloud Perimeter Scanning, 2) EC2 Scanning and 3) Scan by Hostname. Please contact your Technical Account Manager or Qualys Support to have features enabled. (Not available to Express Lite.)Manager or Unit Manager privilegesYour account must have a Manager or Unit Manager role.EC2 connector is requiredIf this is your first EC2 scan then we recommend you start by creating an EC2 connector. You’ll do this within the Connector application. A wizard will walk you through the steps.Want to learn more about setting upconnectors? Check out Connector OnlineHelp.Note: Ensure your existing service control policies do not block the required permissions for EC2 connector runs.Configuring Cloud Perimeter Scanning for EC2 ConnectorsEC2 Scan Checklist EC2 Scan ChecklistWe recommend a few steps before scanning.Check EC2 Assets are activatedCheck that your EC2 hosts are activated and have the EC2 tracking method. You can see this in VM on the Host Assets tab and also in AssetView on the Assets tab.Configure Your New Cloud Perimeter ScanGood to Know- Cloud perimeter scans use Qualys External Scanners (Internet Remote Scanners), located at the Qualys Cloud Platform. For accounts on Private Cloud Platforms, your account may be configured to allow internal scanners to be used.- These are DNS or IP -based scans launched using the public DNS or Public IP of the target EC2 instances. If both public DNS and public IP address exist for your EC2 assets, then we will launch a scan on public DNS.- All cloud perimeter scans are scheduled - either for “now” (essentially a one-time scan) or “recurring”. Once saved, you’ll see the scan job on the Schedules list. When the scan starts it will appear on your Scans list.Get StartedGo to Scans > Scans > New > Cloud Perimeter Scan (also on the Schedules tab).Select the EC2 connector you’ve configured.Give your scan a title and select an option profile. Note that cloud perimeter scans typically do not use authentication.Now it’s time to pick your target hosts. Selecting target hosts is an optional step. If you do not specify the platform, region code, vpc id or asset tags, we will create the new cloud perimeter scan job using only the connector.1) Choose a platform option: EC2 Classic, EC2 VPC (All VPCs in region) or EC2 VPC (Selected VPC). Based on your selection you’ll select region(s).2) Select asset tags - these are assets activated for your connector.3) Enter the DNS names for your load balancers to include them in the scan.Note that if no assets are resolved from the connector and for the optional "platform" and "asset tags" selections, the scan is launched on the load balancer DNS names. If no load balancer DNS names are specified, then the scan will fail and get terminated.By default cloud perimeter scans use Qualys External Scanners.For Private Cloud Platforms - Your account may be configured to allow scanner appliances to be used. In this case, choose one or more scanner appliances from the list (use the Build my list option).Tell us when you want the scan to run - Now or Recurring.Note that when you choose Now your scan may not start immediately. We’ll check for new scan requests every few minutes. If a scanner is available and you haven’t reached your concurrent scan limit then we’ll launch the scan. If scanners are not available or you have reached your limit then the scan will be launched at the next opportunity.When you choose Recurring you’ll also set scheduling and notification options. These are the same settings as other scan schedules so they should look familiar.We’ll identify the assets to scan based on your settings.You’ll see these asset counts:Assets Identified / Synced - The number of assets discovered by the connector.Assets Qualified for scan - The number of assets discovered by the connector that also match the selected platform, region, asset tags. We’ll take out the Terminated instances. Assets Submitted to scan - The number of assets that we’ll submit in the scan job. We start with the qualified assets (previous count) and filter out assets that are not activated for VM (for vulnerability scan) or not activated for PC (for compliance scan).When you’re ready, click Submit Scan Job.What happens nextYour new scan will appear on the Schedules list (even if you started it from the Scans tab).When your scan starts it will appear on the Scans list. Like with other scans you can take actions like cancel or pause the scan, view the scan status and download the results. Want to run the scan again? Choose New Scan Job from the Quick Actions menu. We’ll retain certain scan settings from the original scan job and schedule the scan to run Now.Choose View from the Quick Actions menu for any finished scan in your list to see the scan results. You’ll notice the scan type is “Cloud Perimeter - A WS EC2”, you’ll see that Qualys External Scanners were used for the scan, and you’ll see the target DNS names for the assets submitted in the scan job.The Detailed Results and Appendix sections of your scan results show the public DNS name for each scanned asset since cloud perimeter scans are DNS-based.In your scan report template select the EC2 Related Information option on the Display tab. This lets you see EC2 details for each asset in your report, including the public DNS name.Check out this sample report with EC2 related information.Configuring Cloud Perimeter Scanning for Azure ConnectorsWhat you’ll need Configuring Cloud Perimeter Scanning for Azure ConnectorsWe provide the ability to scan public facing virtual machines in your Azure cloud environment using Cloud Perimeter Scanning for VM and PC.Qualys External Scanners (Internet Remote Scanners), located at the Qualys Cloud Platform are used for Perimeter Scanning of Azure virtual machines. For subscriptions on Private Cloud Platforms, your account may be configured to allow internal scanners to be used.These are DNS or IP -based scans launched using the public DNS or Public IP of the target virtual machines. If both public DNS and public IP address exist for your virtual machines, then we will launch a scan on public DNS.What you’ll need- The “Cloud Perimeter Azure VM Scan” feature must be enabled for your subscription. Please reach out to your Technical Account Manager or Qualys Support to enable this feature. You’ll also need these features enabled: Cloud Perimeter Scanning, EC2 Scanning, Scan by Hostname.- Cloud perimeter scans are available for VM and PC modules. Only Managers and Unit Managers have permission to configure cloud perimeter scans.- We allow you to create/update a cloud perimeter scan job through Cloud Perimeter Scan API even if no scan targets are resolved from the provided details. At the time of scan, if no scan targets are resolved from the provided details, the scan will not be launched, and we add the error in the Activity log and Run history of the schedule scan job.Configure Cloud Perimeter ScanAll cloud perimeter scans are scheduled - either for “now” (a one-time scan job) or “recurring”. Once saved, you’ll see the scan job on the Schedules list. When the scan job starts it will appear on your Scans list.1) Create a dynamic tag with Cloud Asset Search filters under “AssetView” app based on your requirements.For example:All running public VMs in your Qualys Subscription: not azure.vm.publicIpAddress is null and azure.vm.state:"RUNNING"All running public VMs in your Azure Subscription: not azure.vm.publicIpAddress is null and azure.vm.subscriptionId: and azure.vm.state:"RUNNING"All running public VMs in a location: not azure.vm.publicIpAddress is null and azure.vm.state:"RUNNING" and azure.vm.location:westusAll running public VMs in a resource group: not azure.vm.publicIpAddress is null and azure.vm.state:"RUNNING" and azure.vm.resourceGroupName:testRG2) Now, lets start scanning. Go to VM/VMDR for a vulnerability scan (or PC for a compliance scan) and choose New > Cloud Perimeter Scan. You'll also see this option on the Schedules tab.3) In the Cloud Information tab, select the Azure icon to scan the Azure VM machines and click Continue.Note: While updating the scan, you cannot change the Provider. We populate the values you selected at the time of creating the scan in Scan option profile settings.4) Go to the Scan Details tab and give the scan a name and select the option profile and priority.5) Go to the Target Hosts tab to select the public facing Azure VM machines on which you want to run the Cloud Perimeter scan. From the Connectors drop-down, select an Azure connector.The Connector drop-down lists the connectors that you have configured in Connectors Application. Select asset tags to further filter the Azure VM assets fetched from the Azure connector.Note: The selected asset tag will scope the selected connectors assets and will not scan assets from under other connectors or non-connector based assets.For load balancers, manually add the DNS names of internet facing load balancers. For Azure VM scan, we do not support pulling load balancer DNS names from the CloudView module.6) Go to the Scanner and Schedule & Notification tabs to select the External/Internal scanner and schedule the scans.Note: By default, the external scanner appliance is selected. If internal scanner is enabled for cloud perimeter scan in your subscription, only then we allow you to select an internal scanner for the scan.7) Go to the Review tab. In the Target Hosts section, we will show you:- how many public facing Azure VM assets are fetched from the connector,- assets that are qualified for the scan and- out of the qualified assets, how many assets are activated in VM on which the scan will be launched.8) Finally, submit the scan job.The VM assessment results from Azure perimeter scans will be tracked to the virtual machine ID tracked asset. As a part of the scan option profile, the scanner tries to reach out the IPs and try to get to the virtual machines.Configuring Cloud Perimeter Scanning for Azure ConnectorsView Azure VM T racked Host Assets in Host Assets View Azure VM Tracked Host Assets in Host AssetsGo to Assets > Host Assets > Filters to search for the Azure VM tracked assets.Click the info button to view the cloud provider name (which is Azure for Azure VM assets), cloud service name (VM for Azure VM assets), and resource ID for the Azure Virtual Machine in the Host Information screen. The Cloud Asset Metadata tab shows the metadata information for the host.Qualys API SupportQualys API SupportThe Qualys API provides support for cloud perimeter scan jobs in these ways:- Use the Cloud Perimeter Scans API (/api/2.0/fo/scan/cloud/perimeter/job) to create and update scan perimeter scan jobs. You can schedule a scan for now or schedule it to start at a later time or on a recurring basis. Cloud perimeter scans are available for VM and PC modules. Only Managers and Unit Managers have permission to configure cloud perimeter scans.- Use the Schedule Scan List API (/api/2.0/fo/schedule/scan/?action=list) to show cloud perimeter scan jobs. When you include cloud details in the XML output, the cloud details will show scan type "Cloud Perimeter" for cloud perimeter scans.- Use the Fetch Scan Results API (/api/2.0/fo/scan/?action=fetch) to fetch scan results for cloud perimeter scan jobs using the API.Refer to the Qualys API (VM, PC) User Guide to learn more about these APIs, including available input parameters and API samples.。

Capacity Market Platform (CMP):CMP Access User Guide - Symantec Endpoint Protection Troubleshooting forGoogle ChromeDate30/11/2018Version 0.1DisclaimerWhilst every effort is made to provide information that is useful and care has been taken in the preparation of the information, EirGrid and SONI give no warranties or representations, expressed or implied, of any kind, with respect to the contents of this guide, including without limitation, its quality, accuracy and completeness.Copyright NoticeCopyright EirGrid plc 2018, all rights reserved. The entire publication is subject to the laws of copyright. No part of this publication may be reproduced or transmitted in any form or by any means, electronic or manual, including photocopying without the prior written permission of EirGrid plc.The Oval160 Shelbourne RoadBallsbridgeDublin 4D04 FW28IrelandCapacity Market Contact DetailsIf you have any questions in relation to this document please contact us using the details below:Email Correspondence:************************Phone Correspondence:1800 726772 (ROI) or 0800 0726772 (NI)+353 (1) 2370584 (International)CMP –CMP Access User Guide –Symantec Endpoint Protection Troubleshooting for Page 2Table of ContentsDisclaimer (2)Copyright Notice (2)Capacity Market Contact Details (2)Purpose of this Document (4)Accessing CMP INT for the 2019/2020 T-1 Mock Auction using Google Chrome (5)Accessing CMP for 2019/2020 T-1 Capacity Auction using Google Chrome (8)CMP –CMP Access User Guide –Symantec Endpoint Protection Troubleshooting for Page 3Purpose of this DocumentThe purpose of this document is to provide troubleshooting information to participants who may experience issues when accessing the Capacity Market Platform (CMP) via Google Chrome due to the use of Symantec Endpoint Protection. The guide provides step by step guidance which should enable participants to access both CMP environments for both the Mock 2019/2020 T-1 Capacity Auction as well as the 2019/2020 T-1 Capacity Auction.CMP –CMP Access User Guide –Symantec Endpoint Protection Troubleshooting for Page 4Accessing CMP INT for the 2019/2020 T-1 Mock Auction using Google Chrome1.Type the CMP INT environment URL https:// in your browser:2.Click on “Advanced”:CMP –CMP Access User Guide –Symantec Endpoint Protection Troubleshooting for Page 53.Click on “Proceed to (unsafe)”:4.Select your Digital Certificate:CMP –CMP Access User Guide –Symantec Endpoint Protection Troubleshooting for Page 65.CMP will open the login page and you should be able to log in as usual:CMP –CMP Access User Guide –Symantec Endpoint Protection Troubleshooting for Page 7Accessing CMP for 2019/2020 T-1 Capacity Auction using Google Chrome The following steps should be used when you see the following screen when opening CMP via https:///Please follow the steps below:1.Close all windows and restart Google Chrome:CMP –CMP Access User Guide –Symantec Endpoint Protection Troubleshooting for Page 82.Open Google Chrome again and click on the three dots that are in the uper right side ofthe page:3.Click on “New incognito window”:CMP –CMP Access User Guide –Symantec Endpoint Protection Troubleshooting for Page 94.Google Chrome will open a new incognito window :5.Type CMP URL and select your Digital Certificate:CMP –CMP Access User Guide –Symantec Endpoint Protection Troubleshooting for Page 106.Google will open again the page below:7.Click on “Advanced”:CMP –CMP Access User Guide –Symantec Endpoint Protection Troubleshooting for Page 118.Then click on “Proceed to ”:9.CMP will open the login page and you should be able to log in as usual:CMP –CMP Access User Guide –Symantec Endpoint Protection Troubleshooting for Page 12。

AXIS Perimeter Defender Requirements User ManualThis document explains the prerequisites and guidelines for implementation of the AXIS Perimeter Defender automated intrusion detection system.Scenario requirementsAXIS Perimeter Defender is suitable for detecting humans or vehicles intruding a sterile zone.A sterile zone is an area where humans or vehicles are not expected.AXIS Perimeter Defender is intended for the following scenarios:•Perimeter protection of industrial sites or critical infrastructures•Zone protection of sensitive facilities,storage sites,recycling sites,or any outdoor private areas•Peripheral protection of stores,warehouses,company buildings or private housesPrerequisites for effective implementationFor AXIS Perimeter Defender to perform most effectively,the following prerequisites are needed:•Humans or vehicles to be detected are fully visible(from feet to head)in the image during at least2seconds and are not obscured by other fixed or moving objects.•Humans or vehicles to be detected are moving on a horizontal plane or a slight slope.•The camera has a fixed field of view.•The level of illumination and camera settings should be sufficient to provide enough contrast between humans or vehicles and the background.We recommend at least50lux in the whole detection area when using an Axis day-and-nightcamera with artificial lighting.-When using external IR spots,the recommended Maximum Detection Distance is80m(260ft).The IR spot should have a maximum distance greater than twice the Maximum Detection Distance.-When using built-in IR light,the Maximum Detection Distance is limited to maximum20m(66ft)depending on the camera and the environment.•To avoid interference from insects,we do not recommend using the camera’s built-in IR light(especially cameras with sunshield).•Small camera vibrations are tolerated but maximum performances are reached for cameras which are not subject to vibrations.•The minimum frame rate is8fps(note that simultaneous views of the camera video stream through the Axis web server can reduce the frame rate to below8fps).•For physical installation requirements,we recommend using the AXIS Perimeter Defender Camera Placement Tool.The tool takes into account both Axis cameras and AXIS Perimeter Defender requirements.Supported devices•For a list of compatible Axis devices,go to /products/axis-perimeter-defender/download•To download Design tool for AXIS Perimeter Defender,which includes technical features of supported devices,go to /products/axis-perimeter-defender/downloadSupported VMS and3rd party systems•AXIS Perimeter Defender is compatible with all VMS and3rd party systems that support native AXIS output interfaces •AXIS Perimeter Defender is fully integrated with Genetec,Milestone and Eboo•AXIS Perimeter Defender generates an XML data stream providing alarms and metadata(for example a2D bounding box surrounding the detected objects).A fully documented protocol allows3rd party systems to seamlessly integrate with this XML data stream.Do you want more information?Go to /products/axis-perimeter-defender/downloadNetwork and system requirements•Cameras running AXIS Perimeter Defender must be reachable from the computer running the AXIS Perimeter Defender Setup Interface through HTTP.•Bandwidth of the connection to the camera must be sufficient.A good3G connection should be sufficient.•AXIS Perimeter Defender Setup Interface(only required during the setup phase)requires:-Windows®7or Windows®8-Intel®Core TM2Duo processor or better-at least2GB RAM of memory-at least1024x768screen resolutionHow to mount the cameraCamera setup overview1Tilt2Field of view3Distance4Maximum detection distance5Minimum detection distance6Camera height7Detection zoneMinimum pixel sizeThe Maximum Detection Distance is the maximum distance from where the application can detect a human or a vehicle.It corresponds to the maximum distance from which the pixel size in the image of a standing person(1.7m height)is less than a certain pixel size value,called Minimum Pixel Size.The Minimum Pixel Size is a percentage of the image height and depends on the camera type and the AXIS Perimeter Defender functions.Visible light cameras-The Minimum Pixel Size is10%of the image height(*).For example,if the height of the visualized image is576pixels,a human or a vehicle will be correctly detected up to a distance from which the height of a standing person becomes less than57pixels.Thermal cameras-The Minimum Pixel Size is7%of the image height(*).When the Long Range function is enabled,the Minimum Pixel Size is4%of the image height.When using corridor format,the indicated percentages are related to the width of the image rather than the height. Maximum pixel size•The height of a human must be at maximum60%of the image height.•The pixel surface of a vehicle must be at maximum35%of the image surface.Tilt and roll angle•The camera must be sufficiently oriented towards the ground so that the center of the image is under the horizon line.The side view of a person to be detected must be sufficient:Minimum Detection Distance>camera height/2.For thermal images,the camera must be significantly tilted towards the ground to minimize the amount of sky appearing in the image.•The roll angle of the camera must be nearly equal to zero.1Object height,tilt angle,and roll angle are suitable.2The human height is less than10%of the image height(7%for thermal cameras).3The center of the image is above the horizon line.4The camera’s roll angle is too big.Mounting heightTo reach certain detection distances,besides the requirement of a minimum pixel size,the camera must be placed at a minimum height.There is no maximum camera height as long as other requirements,especially the tilt angle,are met.Camera Height Maximum Detection Distance2m(6.6ft)110m(33ft)2.5m(8ft)220m(66ft)3m(10ft)100m(330ft)4m(13ft)200m(650ft)5m(16ft)300m(1000ft)6m(20ft)500m(1600ft)1.Minimum mounting height for indoor cameras.2.Minimum mounting height for outdoor cameras.User Manual Ver.M3.4 AXIS Perimeter Defender Requirements Date:October2017©Axis Communications AB,2016-2017Part No.T10094240。
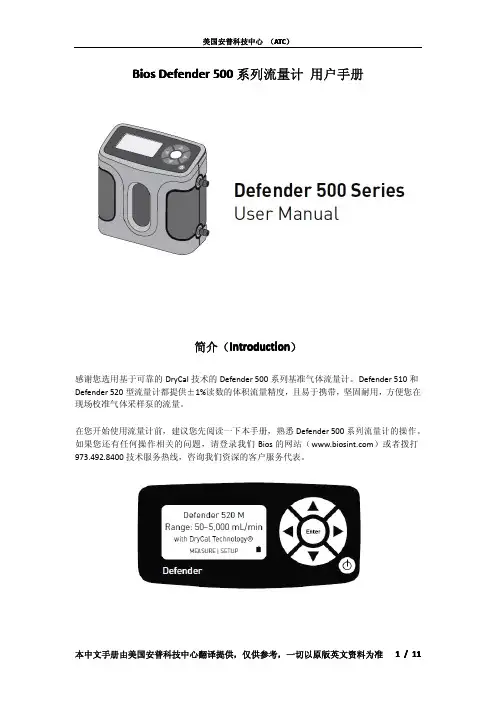
Bios Defender500系列流量计用户手册简介(Introduction)感谢您选用基于可靠的DryCal技术的Defender500系列基准气体流量计。
Defender510和Defender520型流量计都提供±1%读数的体积流量精度,且易于携带,坚固耐用,方便您在现场校准气体采样泵的流量。
在您开始使用流量计前,建议您先阅读一下本手册,熟悉Defender500系列流量计的操作。
如果您还有任何操作相关的问题,请登录我们Bios的网站()或者拨打973.492.8400技术服务热线,咨询我们资深的客户服务代表。
关于您的Defender(About Your Defender)Defender流量计是真正的实时的体积流量基准,测量精度为读数的±1%。
由于本仪器的高精度和高速的运行效率,使得它成为快速和精确设定气体采样泵的流量的最佳工具,当然您完全可以根据具体情况来选择利用本仪器的进气口还是出气口连接待测设备。
Defender520型流量计则更进一步利用了内置的温度压力传感器测量及记录在校准过程中流经气体的环境参数。
从而成为一个理想的针对体积流量、气温、气压的“三合一”气流校准设备,用户无需再配备额外的设备。
本仪器由一个内置的无记忆效应的铅酸电池供电。
可以连续的充放电,且在使用过程中也可充电。
Defender的面板上有一个“On/Off”开关控制键,一个液晶显示屏,以及由微动开关按钮组成的上下左右导航键及确认键。
通过这些按键可以方便的完成各项操作。
您的Defender随机包含如下部分:直流充电适配器,Bios Optimizer软件光盘,电脑串口线,塑料的检漏盖2个,标定证书,用户手册。
操作指南(Operating Your Defender)开始(Getting Started)虽然Defender的电池在出厂时已完全充电,我们仍然建议您在使用前再进行一次完全的初始化充电。
Dell Data Protection 控制台用户指南加密状态身份验证注册Password Manager版本 1.10© 2016 Dell Inc.Dell Data Protection | Encryption、Dell Data Protection | Endpoint Security Suite、Dell Data Protection | Endpoint Security Suite Enterprise、Dell Data Protection | Security Tools 和 Dell Data Protection | Cloud Edition 整套文件中使用的注册商标和商标:Dell™ 和 Dell 徽标、Dell Precision™、OptiPlex™、ControlVault™、Latitude™、XPS®和 KACE™ 是 Dell Inc.的商标。
Cylance®和 Cylance 徽标是 Cylance, Inc.在美国和其他国家/地区的注册商标。
McAfee®和 McAfee 徽标是 McAfee, Inc.在美国和其他国家/地区的商标或注册商标。
Intel®、Pentium®、Intel Core Inside Duo®、Itanium®和 Xeon®是 Intel Corporation 在美国和其他国家/地区的注册商标。
Adobe®、Acrobat®和 Flash®是 Adobe Systems Incorporated 的注册商标。
Authen Tec®和 Eikon®是 Authen Tec 的注册商标。
AMD®是 Advanced Micro Devices, Inc.的注册商标。
Microsoft®、Windows®和 Windows Server®、Internet Explorer®、MS-DOS®、Windows Vista®、MSN®、ActiveX®、Active Directory®、Access®、ActiveSync®、BitLocker®、BitLocker To Go®、Excel®、Hyper-V®、Silverlight®、Outlook®、PowerPoint®、OneDrive®、SQL Server®和 Visual C++®是 Microsoft Corporation 在美国和/或其他国家/地区的商标或注册商标。
目录第一部分运行FDS (1)第一章绪论 (1)1.1 FDS的特征 (1)1.2 FDS5中增加的内容 (3)第二章开始 (4)第三章运行FDS (5)3。
1 开始一个FDS计算 (5)3。
1.1 开始一个FDS运算(单个处理器版本) (6)3.2 模拟过程 (7)4.1 版本编号 (8)第二部分 (9)第五章一个输入文件夹的基本结构 (9)5.1 为任务命名 (9)5。
2 命名格式 (9)5。
3 输入文件夹的结构 (11)第六章设置时间和空间界限 (14)6.1 为任务命名:HEAD名称列表组(表13.6) (14)6.2 模拟时间:TIME命名列表组(表13。
24) (14)6。
3 计算的网格:MESH名称组(表13.11) (16)6.4 混杂参数 MISC名称列表组(13。
12表) (17)1第七章建立模型 (18)7。
1 创造障碍:OBST名称系列组(表13。
13) (18)7.2 创建空间:HOLE命名系列组(表13.7) (21)7。
3 应用表面性质:VENT组(表13。
27) (23)第八章边界条件 (23)8。
1 基础 (23)8.2 描述边界曲面:SURF名称组(表格13。
22) (24)8.2.1 用一个已知的热量释放率来指定一个火灾 (25)8.2.2 简单的热力学边界条件 (25)8。
4 描述真实的材料:MATL名称组 (26)8.4.1 热力学性质 (27)8.4。
2 高温分解模型 (28)8.4。
5特殊专题:使燃料消失(BURN_AWAY) (35)8.5 用户指定的功能:RAMP和TABL名称组 (36)第九章燃烧与辐射 (38)9。
1 混合分数燃烧:REAC名称系列组 (38)9.1.2特殊专题:Heat of Combustion (40)9。
1.4特殊专题:CO产量 (40)9。
2额外气体类别:SPEC组 (41)第十章粒子和小滴:PART名称系列组 (43)10.1 基础 (44)10.2 控制微粒和液滴 (44)210.3 微粒和液滴性质 (46)10。
Design Tool for AXIS Perimeter Defender User ManualAbout this DocumentThis manual is intended for administrators and users of Design Tool for AXIS Perimeter Defender.It includes instructions for using and managing the product on your network.Previous experience of networking will be of use when using this ter versions of this document will be posted at .See also the product’s online help,available through the web-based interface.Legal considerationsLiabilityEvery care has been taken in the preparation of this document.Please inform your local Axis office of any inaccuracies or omissions.Axis Communications AB cannot be held responsible for any technical or typographical errors and reserves the right to make changes to the product and manuals without prior notice.Axis Communications AB makes no warranty of any kind with regard to the material contained within this document,including,but not limited to,the implied warranties of merchantability and fitness for a particular purpose.Axis Communications AB shall not be liable nor responsible for incidental or consequential damages in connection with the furnishing,performance or use of this material.This product is only to be used for its intended purpose.Intellectual property rightsAxis AB has intellectual property rights relating to technology embodied in the product described in this document.In particular,and without limitation,these intellectual property rights may include one or more of the patents listed at /patent and one or more additional patents or pending patent applications in the US and other countries. Trademark acknowledgementsAXIS COMMUNICATIONS,AXIS and VAPIX are registered trademarks or trademark applications of Axis AB in various jurisdictions.All other company names and products are trademarks or registered trademarks of their respective companies.Microsoft,Windows,WWW,Internet Explorer,DirectX,Intel,Intel Core, Pentium and Xeon are registered trademarks of the respective holders. SupportShould you require any technical assistance,please contact your Axis reseller.If your questions cannot be answered immediately,your reseller will forward your queries through the appropriate channels to ensure a rapid response.If you are connected to the Internet,you can:•visit /manuals for a complete set of product specific user manuals and system installation guides •download user documentation and software updates•find answers to resolved problems in the FAQ database,search by product,category,or phrase•report problems to Axis support staff by logging in to your private support area•chat with Axis support staff•visit Axis Support at /supportLearn more!Visit Axis learning center /academy for useful trainings, webinars,tutorials and guides.Table of ContentsAbout the Design Tool for AXIS Perimeter Defender (4)Terminology (5)How to (6)Add a map (6)Add a camera (6)Remove a camera (6)Pair cameras for PTZ Autotracking (6)Change or move the camera's ID number (6)Measure (7)Adjust the camera settings (7)Hide areas from the camera's field of view (8)Export a project (9)Save or load a project (9)Find help (9)About the Design Tool for AXIS Perimeter DefenderAbout the Design Tool for AXIS Perimeter DefenderThe design tool for AXIS Perimeter Defender is a self-contained application that can run on any Windows machine.The tool allows you to place cameras compatible with AXIS Perimeter Defender on a map.The tool then provides information on detection ranges, blind spots and camera placement when designing a perimeter protection system.The tool takes into account camera features,like focal range,as well as the requirements from AXIS Perimeter Defender.If you use AXIS Perimeter Defender PTZ Autotracking,the tool can help you with the placement of the paired cameras.1List of cameras added to the map2Settings3Map4Cameras on map5AXIS Perimeter Defender PTZ Autotracking settings6Field of view distance for PTZ cameraAbout the Design Tool for AXIS Perimeter Defender Terminology1Tilt2Field of view elevation3Field of view distance4Maximum detection distance5Minimum detection distance6Camera height7Detection zoneHow to...How to...This chapter explains how to use the Design Tool for AXIS Perimeter Defender.Add a map1.Click.2.Browse to find your map and click Open.3.Set the scale of the map:3.1Click.3.2Draw a line on the map.3.3Enter the number of meters or yards that the line corresponds to.3.4Click OK.Add a camera1.Click.2.Choose a camera from the menu and click OK.If you have added one camera and want to add an identical one with the same settings,click.Remove a camera1.Choose a camera in the list of cameras.2.Click.Pair cameras for PTZ AutotrackingTo pair a PTZ camera with a fixed camera for AXIS Perimeter Defender PTZ Autotracking:1.Add one PTZ camera and one fixed or thermal camera.2.Select the PTZ camera in the list of cameras.3.In PTZ video verification,select the desired level.4.In PTZ application,select PTZ Tracking5.In Associated fixed cam,select the fixed or thermal camera to pair with.Change or move the camera's ID numberEvery camera placed on the map gets an ID number.To change the start number for the ID number sequence:How to...1.Click.2.Enter the desired sequence start number.3.Click the1,2,3...button.To move the ID number of a camera on the map:1.Click.2.Choose a camera in the list of cameras.3.Drag-and-drop the ID number to the desired location.MeasureTo measure the distance between two points on the map:1.Click.2.Draw a line that covers the distance you want to measure.3.The distance appears in the Ruler Tool pop-up.To measure the size(in percentage of the image height)of a person in the camera’s field of view:1.Click.2.Choose a camera in the list of cameras.3.Hover the map to see the size of a person in the Human Size Measure Tool pop-up.Adjust the camera settingsTo change the location of the camera on the map,click it and drag.Under Settings,you can make adjustments for each camera.Pan-Adjust the direction of the camera.Focal-Adjust the focal length of the camera.Camera height-Adjust the mounting height of the camera.See Terminology on page5.Field of view distance-Adjust the field of view distance of the camera.See Terminology on page5.NoteIf the installation of the camera does not meet the requirements of AXIS Perimeter Defender,information is shown in theRequirements field.About maximum detection distanceThe maximum detection distance for a camera depends on several factors,such as camera type,maximum image resolution,and focal length.Also,some environmental factors can degrade the detection performance and reduce the maximum detection distance.Examples of such factors are:the level of illumination in the scene,the use of infrared lights,or the presence of fog.To adjust the maximum detection distance to different conditions,select one or more of the following:How to...•For scenes with low illumination(less than50lux).•For scenes with good illumination(more than50lux).•For cameras using built-in IR illumination.•For cameras using external IR spot illumination.The selected IR spot illumination must reach at least twice the maximum detection distance and cover the camera’sfield of view.For example,if the expected maximum detection distance is50m(54yards)and the horizontal field of view of the camerais30degrees,the IR spot illumination used must be able to reach at least100m(109yards)and cover30degrees.•For conditions with medium-density fog.•For conditions with high-density fog.Maximum possible detection distance in different conditionsThermal Camera Optical CameraGood illumination at night(>50lux),no IR usedOptical CameraLow illumination at night(<50lux),suitable externalIR spot usedOptical CameraLow illumination at night(<50lux),built-in IR used(only for–L cameras)No fog600m300m80m20m Medium-density fog400m100m50m0mHigh-density fog200m50m0m0m Hide areas from the camera's field of viewTo activate or deactivate the tool to hide areas from the field of view:•Click.To hide an area:1.Click to start a line.2.Click to end the line.3.Create more lines until the area is surrounded by lines.To move a line’s endpoint:1.Hover the endpoint of a line.2.When the end of the line is highlighted in yellow,drag-and-drop it to a new location.3.Click again to release the endpoint in its new location.How to...To delete a line:1.Hover the line.2.When the line is highlighted in yellow,press DELETE.Export a projectTo export the project to a pdf:•Click File>Export Report(PDF)This generates a report of two pages.One page has a picture of the map and cameras,and the other one has a table with the details.To export an image of the map and cameras:•Click File>Export Image(JPG)Save or load a projectTo save the project:1.Click File>Save Project2.Give the file a name and click Save.To load an existing project:1.Click File>Load ProjectFind helpFor more help on how to place the cameras,clickUser Manual Ver.M3.2 Design Tool for AXIS Perimeter Defender Date:December2018©Axis Communications AB,2016-2018Part No.T10071035。
Dell 生命周期控制器 USC/USC-LCE 1.6.5 版用户指南注和小心注: “注”表示可以帮助您更好地使用计算机的重要信息。
小心: “注意”表示如果不遵循说明,就有可能损坏硬件或导致数据丢失。
____________________本说明文件中的信息如有更改,恕不另行通知。
© 2014 Dell Inc. 版权所有,翻印必究。
未经 Dell Inc. 书面许可,严禁以任何形式复制这些材料。
本文中使用的商标:Dell™、DELL 徽标、OpenManage™、PowerEdge™和 PowerVault™是Dell Inc. 的商标。
Intel®是 Intel Corporation 在美国和其他国家/地区的注册商标。
Boradcom®是 Broadcom Corporation 在美国和/或其他国家或地区的商标或注册商标。
Microsoft®、Windows®和 Windows Server®是 Microsoft Corporation 在美国和/或其他国家或地区的商标或注册商标。
VMware®和 ESX™是 VMware, Inc. 在美国和/或其他司法管辖区的注册商标或商标。
Novell®和 SUSE®是 Novell Inc. 在美国和其他国家和地区的注册商标。
Red Hat®是 Red Hat, Inc 在美国和其他国家或地区的注册商标。
Citrix™是 Citrix Systems, Inc. 和/或其一个或多个子公司的商标,并可能已在美国专利商标局以及其他国家或地区注册。
Linux®是 Linus Torvalds(Linux 内核的原始作者)的注册商标。
本说明文件中述及的其它商标和产品名称是指拥有相应商标和产品名称的公司或其制造的产品。
Dell Inc. 对其它公司的商标和产品名称不拥有任何所有权。
Copyright 2015, Synopsys, Inc. All rights reserved worldwide.Table of Contents1. Introduction (1)1.1. Prerequisites (1)1.2. Requirements (1)1.3. How to Use This Guide (2)1.4. A Wealth of Reference Information (2)1.5. The Pirate Code of Fuzzing (2)1.5.1. Don’t fuzz production targets. (2)1.5.2. Don’t fuzz targets that will be in production. (2)1.5.3. Get physically close to your target. (2)1.5.4. Get logically close to your target. (3)1.6. Attack Surface Analysis (3)1.7. Getting Help (4)2. Running Defensics for the First Time (5)2.1. Configuring the Suite Directory (5)2.2. Connect to the License Server (6)2.3. Connect to the Arena (8)3. Quick Start (11)3.1. Choose a Target (11)3.2. Load a Test Suite (11)3.3. Learn One, Learn Them All (11)3.4. Basic Configuration (12)3.5. Interoperability (13)3.6. Test Run (15)3.7. Using Testplans and Settings (16)3.8. About Benchmark (16)3.9. Congratulations! (17)4. Interoperability (18)4.1. Check the Defensics Main Log (18)4.2. Connectivity Problems (20)4.3. Configuration Problems (20)5. Results (22)5.1. Overview (22)5.2. Top Level Actions (23)5.3. Statistics (23)5.4. The Main Log (25)5.5. Viewing Live Results (27)5.6. Where Are the Files? (27)5.7. Results Notes (27)5.8. Notes Templates (29)6. Test Cases (30)6.1. Test Case Selection (30)6.1.1. The Tree View (31)6.2. The List View (32)6.3. The Test Case Selection Field (33)6.4. The Test Cases Button (33)6.4.1. Controlling Test Case Generation (33)ii6.4.2. Limited Test Case Selection Modes (34)6.5. Looping and Repeating (34)6.6. About Test Case Indexes (34)7. Instrumentation (36)7.1. What is Failure? (36)7.2. Valid Case Instrumention (37)7.2.1. Enabling Valid Case Instrumentation (37)7.2.2. Adjusting the Timeout (38)7.2.3. Multiple Rounds of Instrumentation (38)7.2.4. Instrumentation Fail Limit (38)7.3. TCP Instrumentation (38)7.4. Syslog Instrumentation (39)7.5. SNMP Trap Instrumentation (40)7.6. SNMP Query Instrumentation (40)7.6.1. Understanding SNMP Query Instrumentation (40)7.6.2. Using the SNMP Scanner (41)7.6.3. Setting up SNMP Instrumentation (43)7.6.4. Examining SNMP Instrumentation Results (45)7.7. External Instrumentation (47)7.7.1. Ping Example (47)7.7.2. What Can Defensics Call? (48)7.7.3. Other Hooks (48)7.8. Eyeballs (48)8. Remediation and Reports (50)8.1. Reliable Failure (50)8.2. Remediation Workflow (50)8.3. Creating a Remediation Package (50)8.4. How a Developer Uses a Remediation Package (53)8.5. It Works Even When It’s Not Your Software (54)8.6. Generating Reports (55)9. Bug Hunting (57)9.1. Did I Find a Bug? (57)9.2. Boom! (57)9.3. That’s Nice, But Can You Do It Again? (59)9.4. Dig Deeper (60)9.5. Steppin' Out With My Test Cases (61)9.6. Looping and Repeating (62)10. Attack Surface Analysis (64)10.1. Common Attack Vectors (64)10.2. Make a List, Check it Twice (64)10.3. Detective Work (65)11. Automated Fuzzing (67)11.1. First Things First (67)11.2. The Simplest Method: Use the Command Line (67)11.3. If You Prefer, Use the HTTP API Instead (68)11.4. Now That You Got Your Feet Wet, RTFM (69)12. Working with Message Sequences (70)12.1. Tour of Message Sequences in SIP UAS (70)iii12.2. Editing Message Sequences (71)12.3. Editing Message Content (72)12.4. With Great Power Comes Great Responsibility (76)13. Performance (77)13.1. Optimizing the Response Timeout (77)13.2. Tuning Instrumentation Settings (79)13.2.1. Choose the Valid Case Wisely (79)13.2.2. Tuning the Valid Case Instrumentation Frequency (80)13.2.3. Optimize External Instrumentation (80)13.3. Specific Settings for Windows (81)13.3.1. Source Port Ranges (81)13.3.2. TCP Wait Timeout (81)14. Parallelization (82)14.1. Chaos Parallelization (82)14.2. Dandelion Parallelization (82)14.3. Using Test Suite Settings (82)14.4. Using Testplans (83)14.5. Fuzzing Farms (83)15. Client and Passthrough Fuzzing (84)15.1. Client Testing (84)15.1.1. You’re Going to Need Automation (84)15.1.2. An Example Based on curl (84)15.2. Passthrough Testing (85)16. File Fuzzing (87)16.1. Selecting a Delivery Option (87)16.2. Export Test Cases as Files (87)16.3. Execute Command (88)16.4. TCP Connection (88)16.5. UDP Datagram (88)16.6. HTTP Server (88)ivChapter 1. IntroductionThis document describes how to use Defensics for fuzz testing and some general guidelines for safe testing.1.1. PrerequisitesIf you don’t already understand fuzz testing, or if you want to refresh your memory, try these resources:•Read: What is Fuzzing? The Poet, the Courier, and the Oracle (PDF, 11 pages)•/resources/white-paper/2015/01/20/what-is-fuzzing.html•Read: Make Software Better with Fuzzing (PDF, 5 pages)•https:///file/d/0B5kHdWiepFoIYkdOeE0zbUdxd28/view?usp=sharing•Watch: Training videos•Unknown Vulnerability Management and Discovery Using Fuzzing•https:///album/2805910/video/88662183•Part 1: What are unknown vulnerabilities and why should I care•Part 2: What is fuzz testing, and where does it fit in the world of software?•https:///album/2805910/video/89234167•Part 3: How and why fuzz testing, and managing your unknown vulnerabilities saves money•https:///album/2805910/video/89974203•Part 4: Fuzz testing techniques: unfuzzing the fuzzing•https:///album/2805910/video/900742701.2. RequirementsYou’ll learn best if you work with Defensics as you’re reading this guide. Try things as you go along! Practice with Defensics to improve your skills.Before you start reading the rest of this guide, make sure you have Defensics installed. Consult the Defensics Installation Guide for details. Setup steps for running Defensics for the first time are in the next chapter.Remember, software testing is a noble pursuit. You are finding bugs so that they can be fixed, making the world safer, more robust, and more secure. Keep honing your skills to find as many bugs as you can. It’s your job to break things!11.3. How to Use This GuideYou should read straight from the beginning of this guide to the chapter on remediation. This will give you the full life cycle of using Defensics to locate and fix bugs in software.The rest of the chapters are recommended, but you can choose topics as necessary if you’re short on time. Not everyone, for example, will have to tackle file testing. Feel free to read chapters as you need them, and in any order.This chapter describes the larger picture of fuzz testing. You’ll read about general guidelines for fuzz testing as well as how to approach testing a specific target.1.4. A Wealth of Reference InformationDefensics contains copious help text inside the application itself. Click on any field for context-sensitive help in the right pane.For more general information, choose GUI Help or Suite Help in the right pane.The purpose of this document is to supplement the reference information available in Defensics with clear explanations of the process of fuzzing with Defensics.1.5. The Pirate Code of FuzzingA good fuzzer is dangerous. Defensics is very dangerous. The whole point of fuzz testing is to break things—this is how you locate vulnerabilities so that they can be fixed.With this in mind, a few simple guidelines will keep you from getting in serious trouble. These are general guidelines rather than strict rules.1.5.1. Don’t fuzz production targets.Fuzzing is destructive testing and will be perceived as an act of aggression. Don’t test anything that anyone is using.1.5.2. Don’t fuzz targets that will be in production.Fuzz testing can leave targets in unusual internal states. For example, a device that still appears to respond normally after testing might have a severely damaged internal database.If you were a patient in a hospital, would you want to use that infusion pump that had previously been fuzz tested?If you are confident that the tested device can be returned to its factory state, you might be able to use it after fuzz testing. Use your common sense.1.5.3. Get physically close to your target.Any devices or equipment between Defensics and the test target can cause three kinds of trouble.21.The testing speed you are able to achieve will be lower if the test cases have farther to travel.2.Devices between Defensics and the target might modify or discard test cases before they reach thetarget.3.Test cases sent by Defensics to the target might end up causing a failure in one of the intermediaryhops. For example, a firewall that parses and examines protocol messages as they pass through might get broken by a test case from Defensics.Let’s say, for example, that you are fuzzing SIP (Session Initiation Protocol) on a piece of VoIP (Voice over IP) equipment.Wrong: Install Defensics on your desktop computer in your cubicle. Point the SIP fuzzer at the target in the lab and fire away!This is a bad idea. Let’s say your desktop computer is connected to a switch, which connects througha firewall to the lab switch, which is connected to the target device. If either of switches examines SIP messages (perhaps for optimization), or the firewall examines SIP messages, you might end up breaking one of the switches or the firewall instead of your target.Even if the switches and the firewall don’t fail, they might modify or discard test cases before they reach the target.Even if none of that happens, you’ll be flooding the office and lab network with traffic from Defensics. Somebody will be angry about it.Much better: Install Defensics on a machine in the lab and connect through the lab switch to the target. Alternately, install Defensics on a laptop and connect through the lab switch to the target.Best: Plug your Defensics machine directly into the target device.1.5.4. Get logically close to your target.Some targets have built-in security countermeasures, such as firewalls and connection throttling.Our recommendation is to disable those features to make the target as vulnerable as possible. The point of fuzzing is to find and fix vulnerabilities. Disabling security countermeasures means you will find the maximum number of bugs given the tools and time you have available.On the other hand, disabling these features means that you are testing a target that is not in its eventual production configuration. You’ll have to decide what’s most important to you. Perhaps you can perform most of your testing with security features disabled. After fixing all the bugs you find, re-enable the security features and re-test. If you’re short on time, the second set of testing could be a shorter test run.1.6. Attack Surface AnalysisYou need to understand a target’s attack surface to do meaningful security testing. The attack surface is a collection of attack vectors, where an attack vector is a place that the target takes any form of input. Attack surface analysis is described more fully elsewhere, including the Fuzz Testing Maturity Model. For now, think of it as a list of protocols that are supported by the target.3Based on your list of attack vectors, you can plan the fuzz testing that you intend to do. Which test suites will you use? What configurations? How much testing will you do? Again, the Fuzz Testing Maturity Model can help you answer these questions.1.7. Getting HelpDefensics is supported by a global team of security engineers. Ask for help in any of the following situations:•You need help installing Defensics or installing a license server.•You are having trouble with interoperability.•You’ve located a bug in Defensics or a test suite.•You want to request an enhancement to Defensics or a test suite.Contact Defensics support by sending an email to support@, and cc anyone you might know, such as a local engineer.For the quickest and best response, provide the following information with your question:•Test results as needed•Packet captures as needed•Configuration files•Anything else that might helpDefensics helps you package information for support. Use one of the following choices from the Defensics menu:•Help > Report Defensics issue > A bug in test suite or user interface•Help > Report Defensics issue > Test suite valid case problem45Chapter 2. Running Defensics for the First TimeThe first time you run Defensics, you need to configure a few things:1.Tell Defensics where to store test suites.2.Connect to the license server.3.Connect to the Arena and install one or more test suites.There are three prerequisites:1.You should already have installed Defensics. Consult the Defensics Installation Guide for instructions.2.You need to know the IP address and port number for the license server. Consult the license server administrator at your organization to get this information.3.You should have a set of Arena credentials. You can request credentials from support@ .2.1. Configuring the Suite DirectoryWhen you first run Defensics, it looks like this:Running Defensics for the First Time 6The left side of the window shows recently opened test suites and test plans. It’s empty right now. If your test machine is connected to the Internet, the right side shows the latest Defensics news, including recent releases.To get started, open the test suite browser by clicking the big Open suite browser button.Defensics will prompt you to choose an installation directory for test suites. It gives you a default value which is the same as the location where the Defensics application is installed. I like to choose a suitessubdirectory, but you can choose any location you wish.Click OK .2.2. Connect to the License ServerNext, Defensics notices that it is not hooked up to a license server.Click Yes . Defensics opens the License Manager , which has an empty list of licenses.7Click Set server address , then choose the appropriate option. For example, if you are connecting to a license server elsewhere in your organization, chooose the third option and fill in the IP address and port number of the license server. Here is an example for a license server located at 10.0.1.199 on the defaultport (27000):Click OK . The License Manager now shows a list of licenses retrieved from the server.That’s all you need to do. Next time you run Defensics, it will remember the location of your license server and connect automatically.When you click Close in the License Manager, Defensics presents you with an End User License Agreement. Read it carefully and click I accept if you are satisfied with the terms.2.3. Connect to the ArenaDefensics remembers that you were originally trying to load a test suite and automatically opens the Suite Browser. Because you’ve just installed Defensics, there are no test suites available to load.8To install one or more test suites, click Download. Defensics shows you a list of the test suites for which you have licenses.Check off one or more suites in the list. Defensics prompts you for your Arena credentials. Enter yourcredentials, check off Save Arena password, and click Login.9Now click Download and install. Defensics retrieves the selected test suites from the Arena and installs them. Click Close to dismiss the download window.The Suite browser now shows the test suites you just installed.You have now completed the first-time setup of Defensics. Next time you run Defensics, you’ll be able tosimply load a test suite and start testing.10Chapter 3. Quick StartOne of Defensics' strengths is its user interface. Like any good user interface, it makes easy tasks easy and difficult tasks possible. All test suites share a common user interface, so once you’ve learned how to use one, you can use them all.In this chapter you’ll learn how to configure Defensics and start testing. Many of the details will be explained fully later.3.1. Choose a TargetIf you want to work through the examples in this document as you’re reading (which is highly recommended), you’ll need a test target. Make sure you pick something that is not in production, that nobody cares about.A virtual machine is an excellent choice for target practice. I suggest starting with some kind of HTTP server, because the HTTP protocol is relatively simple, human-readable, and easy to verify with a web browser. You might, for example, create a Linux virtual machine and run Apache or nginx as an HTTP server.Discarded Wifi access points, printers, or other office equipment often includes a web interface, so you could use actual physical old equipment for HTTP target practice as well.Use your imagination, but be careful about what you’re testing and the network upon which you test. A direct connection from your test machine to the target is safest.3.2. Load a Test SuiteTo load a test suite, open the Suite browser. There are actually four ways to get there:1.Click on the big Open suite browser button. Note that this button is not always visible.2.Click on the suite browser button in the toolbar.3.Choose File > Open suite browser from the menu.4.Choose Suites > Load suite from the menu.Choose the suite you want (HTTP Server in our example) and click Load.Note that the newly loaded test suite is in its own tab. You can load multiple test suites, each of which operates independently. Don’t get carried away, though, because the number of test suite instances you can comfortably run depends on your available memory.3.3. Learn One, Learn Them AllDefensics lays out the workflow of finding and reporting bugs in eight steps, which you can see in the left side of the suite window. You can click on each step and see its details in the middle pane. You can click on any field in the middle pane to see help text in the right pane.1112In the example here, you are looking at 4) Instrumentation and the right pane is showing help about the Instrumentation fail limit.One of the strengths of Defensics is that this same user interface is used for every test suite. Once you learn how to use one test suite, you know how to use them all.In this chapter, you’ll really only worry about steps 1, 2, and 6.3.4. Basic ConfigurationThe first step in any fuzz testing is to aim the test suite at the target. For many protocols, you just specify an IP address and a port number.In this HTTP Server test suite, you’ll use a URI to tell Defensics where to find the target. This is just like what you would need to type into your browser to load a page.Click on 1) Basic configuration to enter the URI.In my test lab, I am running a web server on port 80 at IP address 192.168.56.102, which looks like this:As you can see, 1) Basic configuration contains a handful of substeps, such as HTTP authentication, Proxy, and so forth. The exact details depend on the protocol being tested—the IPsec test suite, for instance, will have options that pertain to the IPsec protocol.Fill these in if necessary. For example, if you are trying to access an authenticated web page, fill in the credentials in the HTTP authentication substep.Many times, the default values are sufficient.3.5. InteroperabilityThe second step is always interoperability testing. Again, this applies no matter which test suite you are using.Click on 2) Interoperability and click Test. Defensics doesn’t do any fuzzing, but instead exchanges valid messages with the target. This serves two purposes.1.Defensics is checking to make sure everything is hooked up correctly. It sends valid messages to thetarget (in this case, a valid HTTP request) and looks for valid responses (an HTTP response from the target).2.Defensics is figuring out which protocol features are supported by the target. Many protocols haveoptional components, such as messages that the target might or might not recognize. It doesn’t make sense to fuzz test features that aren’t supported, so Defensics uses a series of valid cases to test for various features.HTTP does not have this kind of structure, so there is just one valid case that gets tested for interoperability.If everything works according to plan, the valid case turns green, indicating that Defensics was able to successfully exchange valid messages with the target.13If the valid case turns red instead, try clicking on Log to see the error Defensics is producing. Double-check your configuration. You can use a web browser to try to pull up the target web page as well.Be aware that some protocols will have multiple valid cases, and your target might simply not supoprt them all.Some protocols have optional parts, and part of the purpose of Defensics' interoperability testing is to determine which parts of the protocol are supported by the target. There is no point in fuzzing message types that aren’t understood by the target anyhow.Aside from green and red, you might see yellow during interoperability testing. This is an indication that Defensics was unable to determine the success or failure of the valid messaging.For example, if Defensics sends a valid message but the protocol being tested does not dictate a mandatory response, Defensics has no way of determining if the target recognized the message. In this case, the valid case will turn yellow.For more details on getting interoperability to succeed, consult the next chapter.Blue check marks on the valid cases indicate which are supported by the target. The test cases corresponding to the check marks will be generated. By default, Defensics puts a blue check mark on each green and yellow valid case. You can adjust this configuration manually if you wish, enabling ordisabling corresponding groups of test cases.14153.6. Test RunOnce interoperability succeeds, you can begin testing. Click on 6) Test runand click on the "play" button.Defensics begins delivering test cases to the target. The heartbeat display shows a spike every time a test case is delivered to the target. Spend some time looking at this window while the testing is running.Defensics shows you a variety of interesting information:•The current test case•The total number of test cases in this test run•The average speed of delivering test cases to the target, both for the last minute and for the entire test run•The elapsed time of this test run•An estimate of the remaining amount of time for this test runThe estimate of remaining time is just a guess based on the performance of Defensics and the target.Many factors affect testing speed; the target could slow down over time, or later test cases might take longer than earlier ones (especially for multi-message sequences), so don’t be surprised if the testing actually takes longer than the estimated time.3.7. Using Testplans and SettingsOnce you get things configured just right, you can save your work with a Defensics testplan. The best way to understand this is to try it.Stop your test run first by clicking on the stop button in 6) Test runor the stop button in thetoolbar.Choose File > Save testplan. Enter a name, then click Save.Now quit Defensics and start it again. Choose File > Open testplan and select the testplan you just saved.Defensics loads the same test suite (or suites) you were using and configures everything in exactly the same way.Defensics testplans are extremely useful for repeatable testing. In addition, running a testplan automatically is easy.In certain situations, it is also useful to save just the settings for a test suite. You can do this with File > Save settings. Similarly, you can load a set of settings with File > Load settings. Most of the time, a testplan does what you want, but settings files are occasionally useful.3.8. About BenchmarkIf you click on the triangle next to Benchmark, it expands and shows another set of statistics.This feature helps you compare the fuzzing that you’re doing with the rest of the Defensics community. You can see the number of test cases you’ve run, the time you’ve spent testing, and other statistics about your current test run, compared with the same statistics averaged from other Defensics users worldwide. Each time you finish a test run, Defensics carefully anonymizes these statistics about your test run and sends them to the Defensics cloud service. There, the statistics are decoupled from the originatingIP address before being stored. At no time does any information about your target or your found vulnerabilities leave your test machine.16Quick StartIf you’d like to opt out of this feature, choose File > Properties from the menu, click on the Benchmark tab, uncheck the box, and press Ok.3.9. Congratulations!You’re fuzzing! You are officially dangerous. In this chapter, you learned how to load a test suite, configure it to point at a target, test interoperability, and start testing.In later chapters we’ll fill in the gaps to give you a comprehensive understanding of how to use Defensics for fuzz testing.1718Chapter 4. InteroperabilitySometimes it’s challenging to get Defensics to talk to your target. This chapter has suggestions for debugging interoperability.There are two fundamental types of problems:1.A connectivity problem means Defensics and the target are not communicating at all.2.When Defensics can communicate with the target, but interoperability is failing, the configuration of Defensics or the target (or both) must be adjusted.4.1. Check the Defensics Main LogThe main log in Defensics is one of your best friends in debugging interoperability problems. It is a detailed record, from Defensics' point of view, of everything that happened during testing. Browsing the main log is similar to looking at Wireshark captures but better focused. The main log will be fully described in a later chapter .When you run 2) Interoperbility in Defensics, you can click on the Log link next to any valid test case tosee a portion of the main log reproduced on the right side of the window, as shown:19While this valid case view of the main log can be useful, seeing the whole log together is also convenient.Defensics saves the results of interoperability testing as a set of test results.Click on 7) Resultsand click on the main log for the interoperability run you’ve just performed.Here, you can click on messages sent and received to see the field values.If messages from the target exist, that’s exceptionally good news, as it indicates you have a configuration problem rather than a connectivity problem. In the example above, you can see that Defensics issuccessful in making a TCP connection to the target and sending a valid HTTP request. The response is received, but it is not quite what Defensics was expecting. In this case you probably need to adjust the configuration on the target or in the test suite.4.2. Connectivity ProblemsIf the log indicates that Defensics cannot reach the target, try the following steps:1.Can you ping the target from your test machine?2.Double check that your test machine and target have the addresses you think they should have.3.Are messages sent by Defensics seen at the target? If the target has a log file that shows incomingmessages, follow it (tail -f logfile on Linux systems) and look for messages sent by Defensics. If not, use tcpdump or Wireshark on the target to look for incoming messages.4.Is the target configured to recognize your test machine’s address? Some targets will only respond tomessages from whitelisted addresses.4.3. Configuration ProblemsIf Defensics and the target are able to communicate, but are not agreeing about the details, then you’ll need to adjust the configuration of Defensics, your target, or both.Read the error message in the Defensics main log! It often tells you exactly what went wrong. In the example above, Defensics and the target are clearly able to exchange HTTP messages, but the error is "HTTP Status does not match to 1xx 2xx 3xx". In this case, the test suite is examining the HTTP status code in the response. The response from the target is 404 Not Found. There are at least three ways to resolve this:1.Change Defensics' configuration (the URI in 1) Basic configuration) to request an existing resourcefrom the target.2.Change the configuration of the target so the requested resource can be returned.3.Change Defensics' configuration so that the 404 status code is considered a successful response. Thisis in 1) Basic configuration > HTTP options > Filter for accepted HTTP status codes. You could simply add 404 to the field.20。