
实验目标:
使用SSH2框架完成用户注册功能。(添加功能)
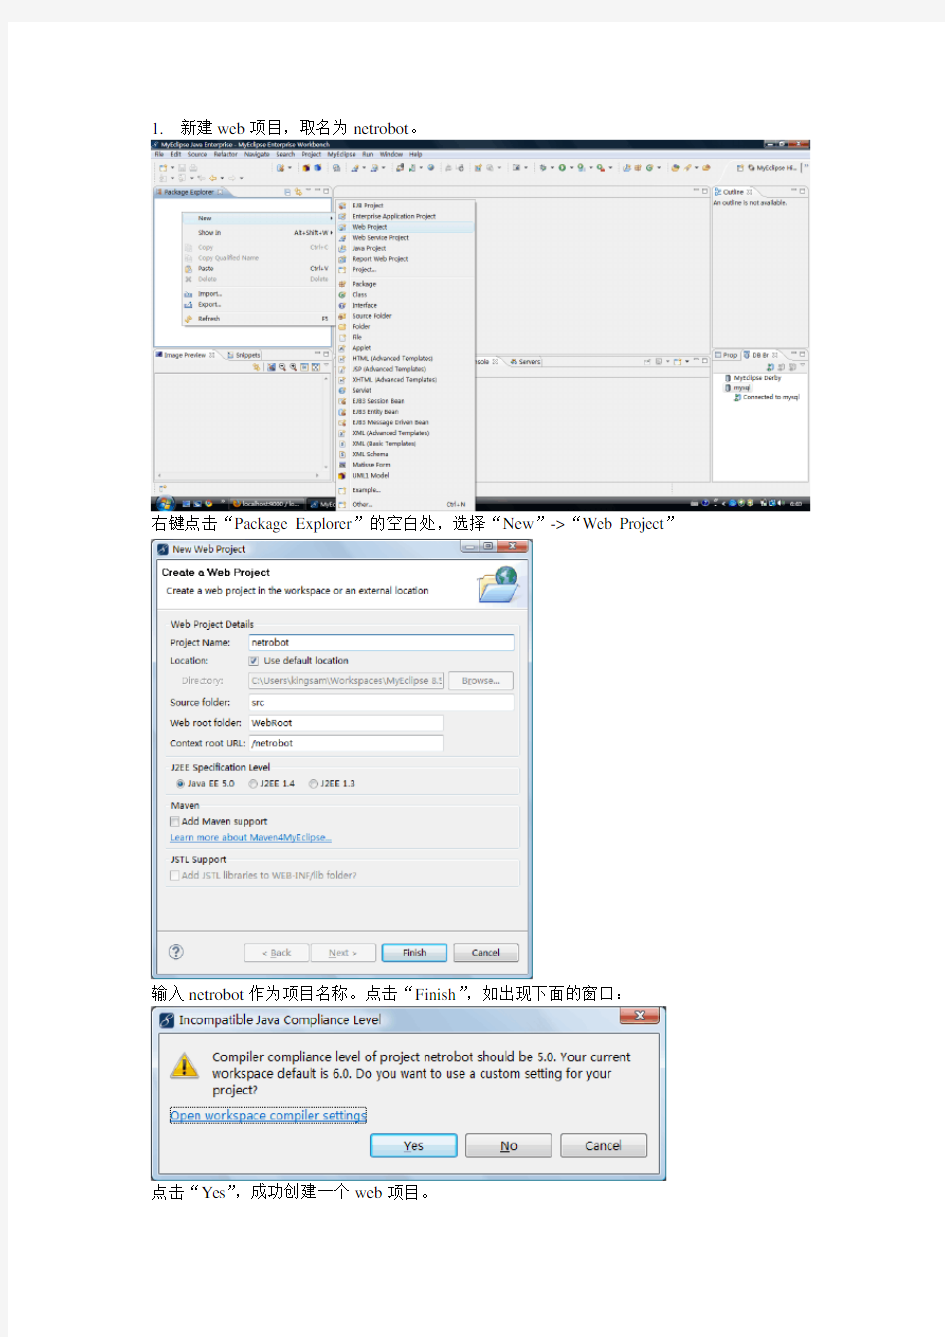
1.新建web项目,取名为netrobot。
右键点击“Package Explorer”的空白处,选择“New”->“Web Project”
输入netrobot作为项目名称。点击“Finish”,如出现下面的窗口:
点击“Yes”,成功创建一个web项目。
2.添加Struts支持:
右键点击项目名称,出现菜单:
选择“Myeclipse”->“Add Struts Capabilities ”出现下面窗口:
选择“struts 2.1”点击“Next”
出现下面窗口,同时选择
Struts 2 Core Libraries 和Struts 2 Spring Libraries
点击“Finish”即可。
3.添加Spring支持
右键点击项目名称,出现菜单:
选择“Myeclipse”->“Add Spring Capabilities ”出现下面窗口:
A.选择Spring 2.5 version,
B.在下面的Myeclipse Libraries 选择
“Spring 2.5 AOP Libraries”
“Spring 2.5 Core Libraries”
“Spring 2.5 Persistence Core Libraries”
“Spring 2.5 Persistence JDBC Libraries”
“Spring 2.5 Web Libraries”
C.在JAR Libraray Installation 选择“Copy checked Library contents to project floder(TLDs
always copied)”该选项将上面的lib jar复制到项目文件夹中,以后发布项目会自动添加这些lib
点击“Next”出现:
在点击“Finish”,完成Spring支持的添加。
4.添加Hibernate支持
右键点击项目名称,出现菜单:
选择“Myeclipse”->“Add Hibernate Capabilities ”出现下面窗口:
A.选择“Hibernate Specification”为“Hibernate 3.1”
B.在“MyEclipse Libraries”中选择“Hibernate 3.1 Core Libraries”和“Hibernate 3.1 Advanced
Support Libraries”
C.在JAR Libraray Installation 选择“Copy checked Library Jars to project floder and add to
build-path”该选项将上面的lib jar复制到项目文件夹中,以后发布项目会自动添加这些lib
点击“Next”出现:
选择“Spring Configuration file(applicationContext.xml)”
点击“Next”出现:
选择“Existing Spring Configuration File”,该文件已经创建,不用再创建了。点击“Next”出现:
在“DB Driver”选择之前创建的mysql连接,如果没有,重新创建一个(参考mysql的实验手册)。选择后自动填写好其他信息。
点击“Next”出现:
不用选择“Create SessionFactory class”该类我们使用默认的,不需要创建。
完成后点击“Finish”。完成项目配置。
5.修改web.xml配置文件:
在项目路径找到“Web Root”->“WEB-INF”->web.xml文件,双击打开:
在打开的文件中添加下面红色部分的配置信息:
xmlns="https://www.doczj.com/doc/d718982768.html,/xml/ns/javaee" xmlns:xsi="https://www.doczj.com/doc/d718982768.html,/2001/XMLSchema-instance" xsi:schemaLocation="https://www.doczj.com/doc/d718982768.html,/xml/ns/javaee https://www.doczj.com/doc/d718982768.html,/xml/ns/javaee/web-app_2_5.xsd"> org.apache.struts2.dispatcher.ng.filter.StrutsPrepareAndExecuteFi lter
6.修改struts.xml配置文件:
添加红色部分的配置信息:
7.修改applicationContext.xml配置文件:
添加红色部分的配置信息:
xmlns="https://www.doczj.com/doc/d718982768.html,/schema/beans" xmlns:xsi="https://www.doczj.com/doc/d718982768.html,/2001/XMLSchema-instance" xmlns:p="https://www.doczj.com/doc/d718982768.html,/schema/p" xsi:schemaLocation="https://www.doczj.com/doc/d718982768.html,/schema/beans https://www.doczj.com/doc/d718982768.html,/schema/beans/spring-beans-2.5.xsd"> class="https://www.doczj.com/doc/d718982768.html,mons.dbcp.BasicDataSource"> value="com.mysql.jdbc.Driver"> value="jdbc:mysql://localhost:3306/test"> class="org.springframework.orm.hibernate3.LocalSessionFactoryBean "> org.hibernate.dialect.MySQLDialect
至此,Struts2 + Spring +Hibernate框架完成配置。
8.建立Hibernate映射文件:
找到“DB Browser”:
右键点击“knowledge”和“users”表格。
选择“Hibernate Reverse Engineering”:
点击“Java src floder”的“Browser”,找到项目“src”文件夹点击“OK”
按照上面进行配置。
点击“Next”,在Id generator选择“increment”
点击“Next”
直接点击“Finish”,
选择“No”不改变视图。
项目多了”https://www.doczj.com/doc/d718982768.html,robot.hibernate”包:
里面有下面几个文件:
/netrobot/src/com/neusoft/netrobot/hibernate/Knowledge.java
/netrobot/src/com/neusoft/netrobot/hibernate/KnowledgeDAO.java /netrobot/src/com/neusoft/netrobot/hibernate/Users.java
/netrobot/src/com/neusoft/netrobot/hibernate/UsersDAO.java
/netrobot/src/com/neusoft/netrobot/hibernate/Knowledge.hbm.xml /netrobot/src/com/neusoft/netrobot/hibernate/Users.hbm.xml
9.新建注册JSP页面:
点击项目的“Web Root”文件夹,选择“New”->“JSP”
出现窗口:
点击“Finish”自动打开JSP编辑器:
修改jsp页面代码:主要为红色部分代码
<%@page language="java"import="java.util.*"pageEncoding="utf-8"%> <%@ taglib prefix="s" uri="/struts-tags"%>
10.新建Java类处理Struts页面请求:类名”Reg”, 包“https://www.doczj.com/doc/d718982768.html,robot.view”
编写代码如下:
package https://www.doczj.com/doc/d718982768.html,robot.view;
import https://www.doczj.com/doc/d718982768.html,ersDAO; import com.opensymphony.xwork2.ActionSupport;
public class Reg extends ActionSupport{
private String username;
private String password1;
private String password2;
private UsersDAO udao;
public UsersDAO getUdao() {
return udao;
}
public void setUdao(UsersDAO udao) {
this.udao = udao;
}
public String getUsername() {
return username;
}
public void setUsername(String username) { https://www.doczj.com/doc/d718982768.html,ername = username;
}
public String getPassword1() {
return password1;
}
public void setPassword1(String password1) { this.password1 = password1;
}
public String getPassword2() {
return password2;
}
public void setPassword2(String password2) { this.password2 = password2;
}
//执行注册的方法
public String execute() throws Exception{ String uname=this.getUsername();
String pass1=this.getPassword1();
String pass2=this.getPassword2();
if(uname==null||pass1==null||pass2==null){ return"error";
}
if(pass1.equals(pass2)){
Users newuser=new Users();
newuser.setUName(uname);
newuser.setUPass(pass1);
newuser.setUFlag(0);
udao.save(newuser);
return"success";
}else{
return"error";
}
}
}
灵活使用工具导入外部类和生成get/set方法。
11.修改Struts.xml: 添加红色部分代码
12.修改applicationContext.xml: 添加红色部分代码
xmlns="https://www.doczj.com/doc/d718982768.html,/schema/beans" xmlns:xsi="https://www.doczj.com/doc/d718982768.html,/2001/XMLSchema-instance" xmlns:p="https://www.doczj.com/doc/d718982768.html,/schema/p" xsi:schemaLocation="https://www.doczj.com/doc/d718982768.html,/schema/beans https://www.doczj.com/doc/d718982768.html,/schema/beans/spring-beans-2.5.xsd"> class="https://www.doczj.com/doc/d718982768.html,mons.dbcp.BasicDataSource"> value="com.mysql.jdbc.Driver"> value="jdbc:mysql://localhost:3306/test">
相关主题
文本预览