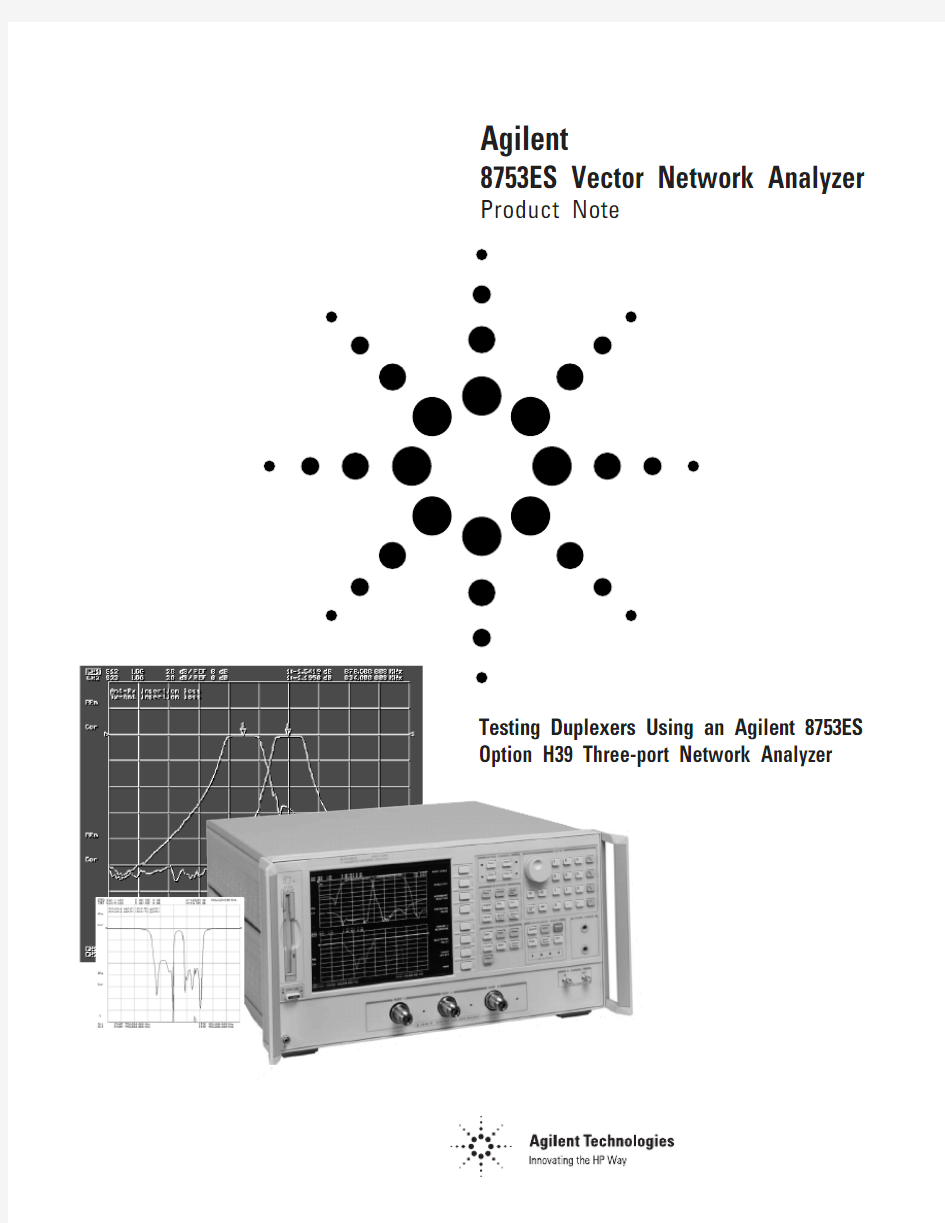

Product Note
8753ES Vector Network Analyzer Agilent
Testing Duplexers Using an Agilent 8753ES
Option H39 Three-port Network Analyzer
Table of Contents
Introduction . . . . . . . . . . . . . . . . . . . . . . . . . . . . . . . . . . . . . . . . . . . . .3
Equipment required . . . . . . . . . . . . . . . . . . . . . . . . . . . . . . . . . . . . . . . .4
Duplexer connection diagram . . . . . . . . . . . . . . . . . . . . . . . . . . . . . . .5
Section A.
Measure antenna-to-receiver and transmitter-to-antenna
insertion loss . . . . . . . . . . . . . . . . . . . . . . . . . . . . . . . . . . . . . . . . . . .6
Section B.
Measure antenna match . . . . . . . . . . . . . . . . . . . . . . . . . . . . . . . . .11
Section C.
Measure receiver-to-transmitter isolation and receiver
and transmitter match . . . . . . . . . . . . . . . . . . . . . . . . . . . . . . . . . . .16
Accuracy considerations of a three-port measurement . . . . . . .18
Example: Receiver-to-transmitter isolation . . . . . . . . . . . . . . . .19
Example: Coupler isolation . . . . . . . . . . . . . . . . . . . . . . . . . . . . .21
8753ES Option H39 specifications . . . . . . . . . . . . . . . . . . . . . . . . . . . .22
Questions and answers . . . . . . . . . . . . . . . . . . . . . . . . . . . . . . . . . . . .23
Duplexers are three-port filters that are used in many communication sys-Introduction
tems. They allow a single antenna to be shared between separate transmit
and receive signal paths. Since duplexers are three-port devices, they
provide measurement challenges to traditional network analyzers with only
two ports. During alignment, it is essential to see both the transmitter-to-
antenna (Tx–Ant) and antenna-to-receiver (Ant–Rx) paths, since tuning
the response of one path can affect the response of the other path.
Option H39 adds a third test port to a standard 8753ES network analyzer
to allow for single-connection measurements of duplexers. With Option
H39, you can simultaneously measure the insertion loss from Tx–Ant and
from Ant–Rx. Simultaneous measurement of the insertion loss allows
observation of path interactions. This eliminates retest and rework that
occurs when only measuring one path at a time. In addition, isolation
between the transmitter port and receiver port (Tx–Rx) and match of all
three ports can be measured.
This product note describes the measurement process and accuracy con-
siderations of testing a duplexer with high dynamic range using an 8753ES
with Option H39. The product note examines Ant–Rx, Tx–Ant and Tx–Rx
insertion loss and Ant, Rx, and Tx match measurements. Since the duplex-
er has high dynamic range, swept-list frequency mode is used to optimize
measurement speed. In addition, the challenges of testing three-port
devices such as couplers are discussed.
The information in this product note is tailored to an 8753ES network
analyzer with Option H39. However, most of the information is applicable
to 8753ES with Z5621A H39 external three-port test set. To a lesser
extent, the information is applicable to 8753ES with Z5621A H36 external
duplexer test set. For further differentiation of these options, refer to the
questions and answers section of this document.
Figure 1. 8753ES Option H39 block diagram.Measurement paths Port 1 to port 2S 11, S 21, S 12, S 22Port 1 to port 3S 11, S 31, S 13, S 33Port 2 to port 3S 22, S 32, S 23, S 33The following equipment is required for the measurements described in
this note.
?8753ES Option H39 (or 8753ES with Z5621A H39)
?85033D calibration kit or appropriate calibration kit
?Cables
?Duplexer or three-port device under test
All measurements described in this note use the 8753ES Option H39 net-
work analyzer. The reader should be familiar with general network analyzer
operation. Refer to the 8753ES User’s Guide (part number 08753-90007)
for a complete description of instrument operation.
In the following measurement procedures, the 8753 front panel hard keys
appear in brackets with bold type (for example [Display]). The “softkeys,”
displayed on the screen, appear in italic type (for example, LOG MAG ).
Block Diagram
Equipment required
Connect the network analyzer’s port 1 to the duplexer receiver port (Rx),
the analyzer’s port 2 to the antenna port (Ant), and the analyzer’s port 3 to
the transmitter port (Tx).
Figure 2. Duplexer connection diagram.
During the following sections, this product note provides detailed instruc-
tions for testing an 800 MHz duplexer. Section A covers antenna-to-receiv-
er and transmitter-to-antenna insertion loss measurements. Section B
describes antenna match measurement. Section C covers receiver-to-
transmitter isolation, and receiver and transmitter match measurements.
In each section, the network analyzer stimulus is initially setup and then a
calibration is performed. The product note provides the step-by-step list of
keystrokes required for configuring the stimulus.
Duplexer connection diagram
Configure the network analyzer to measure S 12and S 23on channels 1 and 2 respectively, as shown in Table 2. Channels 1 and 2 must be uncoupled,because each path requires a different calibration. In dual- or quad-channel mode, uncoupling the channels uncouples channels 1 and 3 from channels
2 and 4.
Table 2. Duplexer configuration for insertion loss measurement.Channel 1Channel 2
S 12S 23
Path 1–2 (Ant–Rx)Path 2–3 (Tx–Ant)
Two-port calibration Two-port calibration
The following keystrokes provide instructions for setting up the
measurements shown in Table 2. for a duplexer in the frequency range of
700–1000 MHz.
[Preset]
If you are using the Z5621A H39external test set, configure the net-
work analyzer initially using [System], CONFIGURE MENU, USER
SETTINGS, K39 MODE ON off . With an Option H39, the analyzer is auto-
matically configured as a three-port test set.
[Start]
[700 M/μ]
[Stop]
[1000 M/μ]
[Sweep Setup]
COUPLED CH on OFF
[Display]
DUAL|QUAD SETUP
DUAL CHAN ON off
SPLIT DISPLAY 1X
[Meas]
[Chan 1]
SELECT PORTS [1-2]
Trans: REV S 12(A/R) {Ant–Rx insertion loss}
[Chan 2]
SELECT PORTS [2-3]
Trans: REV S 23(A/R) {Tx–Ant insertion loss}
Title the channels. [Chan 1][Display]
MORE
TITLE
ERASE TITLE
“Ant –Rx insertion loss”
[Chan 2]
TITLE
ERASE TITLE
“Tx –Ant insertion loss”
Section A.Measure antenna-to-receiver and transmitter-to-antenna insertion loss
Auto scale all channels. At this point, you should see the common duplexer response shown in Figure 3.
Figure 3. Measurement of Ant–Rx and Tx–Ant insertion loss.
Next set up the power level and IF bandwidth and number of points.
The default power level, IF bandwidth, and number of points are 0 dBm, 3700 Hz, and 201 points.
In this example, the duplexer has over 100 dB of dynamic range, so you need to use a narrow IF bandwidth in the stopband for accurate transmis-sion measurements. If you use a narrow IF bandwidth (for example 30 Hz) during the entire frequency sweep, the measurement time will be very long. Instead, use swept-list frequency mode to optimize speed and accura-cy. With swept-list mode, you divide the frequency span into multiple seg-ments. You can independently set the IF bandwidth in each segment. So in the stopband, use narrow bandwidths (slow sweep), and in the passband, use wide bandwidths (fast sweep). The swept-list mode setup for this measurement is shown in Table 3.
If you are testing a combination of an amplifier and filter, you can also set the power level in each frequency segment independently to maximize dynamic range. For example, in the passband you can set the power level low (for example –30 dBm), and in the stopband, use maximum power (for example +10 dBm).
[Chan 1]
[Sweep Setup]
SWEEP TYPE MENU
EDIT LIST
ADD
SEGMENT: START
[700 M/μ]
SEGMENT: STOP
[850 M/μ]
STEP SIZE
[2 M/μ] #You can either configure
the step size or the
number of points. MORE
LIST IF BW ON off
SEGMENT IF BW
[30 x 1]
RETURN
DONE
ADD
SEGMENT: START
[850 M/μ]
SEGMENT: STOP
[910 M/μ]
STEP SIZE
[0.5 M/μ]
MORE
SEGMENT IF BW
[3700 x 1]
RETURN
DONE
ADD
SEGMENT: START
[910 M/μ]
SEGMENT: STOP
[1000 M/μ]
STEP SIZE
[2 M/μ]
MORE
SEGMENT IF BW
[30 x 1]
RETURN
DONE
DONE
LIST FREQ [SWEPT]
RETURN [Chan 2]
[Sweep Setup] SWEEP TYPE MENU EDIT LIST
ADD
SEGMENT: START [700 M/μ] SEGMENT: STOP [770 M/μ]
STEP SIZE
[2 M/μ]
MORE
LIST IF BW ON off SEGMENT IF BW [30 x 1]
RETURN
DONE
ADD
SEGMENT: START [770 M/μ] SEGMENT: STOP [910 M/μ]
STEP SIZE
[0.5 M/μ]
MORE
SEGMENT IF BW [3700 x 1] RETURN
DONE
ADD
SEGMENT: START [910 M/μ] SEGMENT: STOP [1000 M/μ]
STEP SIZE
[2 M/μ]
SEGMENT IF BW [30 x 1]
RETURN
DONE
DONE
LIST FREQ [SWEPT] RETURN
Table 3. Swept-list frequency mode setup for duplexer
Segment Frequency range IF bandwidth Number Step size
(MHz)(Hz)of points(MHz) Port 1-2, 1700–850 30 76 2
Ant–Rx,2850–910 3700 121 0.5 Channel 13910–100030 462
Port 2-3,1700–770 30 36 2
Ant–Tx, 2770–910 3700 281 0.5 Channel 23910–100020 46 2
Figure 4. Network analyzer set up for swept-list frequency mode (notice the underlined softkey).
Now the stimulus setup is complete. Make any other stimulus changes, such as power level or number of points before performing the calibration.
Calibrate the port 1 to port 2 and port 2 to port 3 paths. Perform a two-port calibration on each path for maximum accuracy and flexibility. Refer to the 8753ES User’s Guide for calibration procedures.
You can choose to use enhanced response calibration for faster measurement speed during tuning. If you choose to use enhanced response calibration, pay special attention to the port selection during the calibration process. The submenus under calibration display forward and reverse terminology instead of port 1, 2, or 3. Therefore, it is easy to con-nect the standards to the wrong port. You can reduce the chance of error by looking at the active channel on the analyzer screen and noting which parameter is actually measured. If you have made a mistake, simply re-measure that calibration standard.
After you have completed the calibration of your choice, save the instrument state to internal memory.
[Save/Recall]
SAVE STATE
The network analyzer display will show you the following information regarding your instrument state.
register name ch 1 cal, ch 2 cal ch 1 points, ch 2 points date time register REG1FULL/FULL243/36320-OCT-9910:01:341
At this point, your measurement setup is complete. Optionally, you can add markers, limit lines, or other functions to your measurement.
Figure 5. Duplexer setup with calibration completed. Notice the “Cor” annunciators on the left side of the screen, indicating that both channels have error correction turned on.
This section first explains the steps necessary in measuring antenna match (S 22) and then discusses some of the difficulties of measuring S 22with the
8753ES Option H39.
Start by configuring the network analyzer to measure S 22on both channels
1 and 2. Channels 1 and
2 must be uncoupled, because each path requires
a different calibration. Calibrate channel 1 for the Ant–Rx path (port 2 to
port 1), and channel 2 for the Tx–Ant path (port 3 to port 2).
If you just completed Section A , you may notice that the channel configu-
ration for measuring S 22is similar to the configuration for measuring S 21and S 32. The difference is that the S 22measurement does not require a nar-
row IF bandwidth so there is no advantage to using swept-list frequency
mode. Instead, use the default linear frequency sweep. Table 4. Duplexer configuration for antenna match measurement
Channel 1Channel 2
S 22S 22
Path 1–2 (Ant–Rx)Path 2–3 (Ant–Tx)
Two-port calibration Two-port calibration
[Preset]
If you are using the Z5621A H39external test set, configure the network
analyzer initially using [System], CONFIGURE MENU, USER SETTINGS,
K39 MODE ON off . When configured with Option H39, the analyzer is auto-
matically configured as a three-port test set.
Section B. Measure the antenna match
Perform a two-port calibration for each channel and save the instrument state. Scale all channels. At this point, you should see a reflection response similar to Figure 6. The next paragraphs discuss the problem with the reflection response in Figure 6 and the issue related to measuring S22.
Figure 6. Antenna port-match measurement.
Examine the marker values on Figure 6. Even though both channels (upper and lower graticules) are measuring S22, the response is not exactly the same. Channel 1 marker reads –17.8 dB, while channel 2 marker reads –19.5 dB. The problem with measuring S22or antenna match is that two ports can be considered load ports. One is the network analyzer port connected to the Rx port of the duplexer (port 1), and the second one is the network ana-lyzer port connected to the Tx port of the duplexer (port 3). During a reflection measurement, the reflection from the uncorrected load port will cause errors in the measurement of antenna match, as shown in Figure 7.
Figure 7. Each load port causes an error signal that interferes with the desired reflection signal from the antenna port. Using two-port calibration, one of these error signals can be significantly reduced. However, the other error signal remains present.
When sweeping the antenna port with frequencies covering both the Tx and Rx bands, the antenna port will first see the load on the Tx port (824 to 849 MHz) and then the load on the Rx port (849 to 869 MHz). See Figure 8.
Since the analyzer can only correct for two ports at a time, only one of the load ports can be corrected. The other load port will present its uncorrect-ed value to the measurement. Consequently, one half of the trace of the antenna match will be accurate (due to the error-corrected load match), and one half of the trace will be inaccurate (due to the uncorrected load match).
In this case, you have performed a two-port calibration on the Ant–Rx path (channel 1) so the portion of the trace corresponding to the Ant–Rx path (higher frequency) will be accurate, and the Tx–Ant path (lower frequency) will be inaccurate (upper graticule of Figure 8).
Similarly on channel 2, you have performed a two-port calibration on the Tx–Ant path so the portion of the trace corresponding to the Ant–Rx path (higher frequency) will be inaccurate, and the Tx–Ant path (lower frequency) will be accurate (lower graticule of Figure 8).
Figure 8. Duplexer antenna match measurements.
Since we can sweep both paths and display the data in one window, we have information that is accurate across the full frequency sweep. However, if we superimpose the two traces, you cannot easily distinguish between the accurate and inaccurate data for each path, as shown in Figure 9.
[Display]
DUAL|QUAD SETUP
1X
Figure 9. Without masking, the accurate and inaccurate portions of each trace cannot be distinguished.
By using the “memory” channel as a “mask” to remove the unwanted half of each trace, we can superimpose the two traces and see error-corrected accuracy across the full sweep. Note that we must display data divided by memory for the mask to have effect (Figure 10).
Figure 10. With masking, only accurate data is display. Notice that you are viewing DATA/MEM. The memory trace used to “mask” half the trace was created in Agilent VEE. The program creates a memory trace with half 1, and half 100,000s. As a result if you are looking data divided by memory, the portion of the trace that is divided by 1 remains the same and the portion that is divided by 100,000 is essentially zero.
Figure 11. Agilent VEE program.
The Agilent VEE program is available via the web at:
https://www.doczj.com/doc/d617677624.html,/find/8753_demo
If you do not have Agilent VEE or a measurement automation program, an assortment of masks has been supplied as instrument states on the web. You can download them from: https://www.doczj.com/doc/d617677624.html,/find/8753_demo Figure 12 shows an example of the masks available on the web.
101 points, 20% overlap between
201 points, 50% overlap between
Figure 12. Example of masks available as memory traces.
If you decide to use the masks available on the web, first recall the instru-ment state that has the desired mask. The masks vary based on number of points and percentage of overlap between the two traces. You would recall the instrument state at the same location (time) as the [Preset] key in the instructions in this product note. You cannot change the number of points once you have recalled the mask. The memory trace will be erased if you change the number of points. However, you can set the other stimulus parameters such as frequency and power level, and the memory trace will not be affected. If you are using swept-list frequency mode and your total number of points is different from the standard 101, 201, etc., you must use a program to generate the memory trace.
Configure the network analyzer to measure S 11and S 33on channels 1 and 3, and S 31on channel 2. Calibrate the channels for port 1-3 path (Rx–Tx).Table 5. Duplexer configuration for receiver and transmitter measurements.
Channel 1Channel 3Channel 2
S 11S 33S 31
Path 1–3 (Rx–Tx)
Two-port calibration
[Preset]
If you are using the Z5621A H39 external test set, configure the network
analyzer initially using [System], CONFIGURE MENU, USER SETTINGS,
K39 MODE ON off . With Option H39 installed, the analyzer is automatically
configured as a three-port test set.
Section C.Measure receiver-to-
transmitter isolation, receiver
match, and transmitter match
Perform a two-port calibration on the port 1 to 3 path. If necessary, reduce the IF bandwidth on channel 2 for an accurate Rx–Tx isolation measurement.
Figure 13. Receiver and transmitter match, and Rx–Tx isolation.
The accuracy of measuring a three-port device while applying a two-port
calibration is dependent on the uncorrected match and isolation of the
third port. The following graphs show typical measurement uncertainties
of a three-port device after two-port error correction. The curves utilize a
root-sum-square model for the contribution of residual systematic errors,
dynamic accuracy, and switch repeatability. The isolation values on the
curves represent the isolation that the device presents to the uncorrected
port outside of the measurement path.
Figure 14. S 11measurement uncertainty.
Figure 15. S
21measurement uncertainty.
Accuracy considerations of a three-port measurement
This section describes the measurement uncertainty associated with the
uncorrected port mismatch. This section does not discuss the common sys-
tematic errors that are removed with a two-port calibration. The common
systematic errors are documented in the 8753ES User’s Guide.
Figure 16. Flow diagram of a duplexer.
The flow diagram above represents a duplexer, with port 1 connected to
the receiver, port 2 connected to the antenna, and port 3 connected to the
transmitter.
The dark trace shows the Rx–Tx isolation (S 31) measurement. This signal
starts at port 1 (Rx) and travels the dark path to port 3 (Tx). A closer look
at the flow graph shows us another possible signal path from port 1 to port
3. The second (error) path is shown in a lighter color. The signal flows
from the port 1 to port 2, is reflected off the network analyzer port 2, and
flows from port 2 to port 3, where it is received.
The mismatch error vector is S 21x Γ2x S 32. The unwanted signal from
the light colored path adds to the signal from the dark path, resulting in
measurement error. In order to determine the maximum uncertainty,
determine the worst case (maximum) value of the mismatch error term:
S 21x Γ2x S 32.
For Γ2, use the uncorrected port match value given in the specifications,
which is 18 dB. For S 21and S 32, you have to determine the maximum of
S 21x S 32. Using the maximum value of S 21and S 32individually is not
appropriate since it is not possible for both traces to have their maximum
values at the same frequency. So you have to determine the maximum
value of S 21x S 32(see Figure 7).
Intuitively you would expect the maximum to occur at the crossover point
(~28 dB loss on each trace). However, actual multiplication of the traces
shows the maximum of 49 dB. The linear data for both S 21and S 31 were
read into Excel 97 and multiplied. Figure 7 shows the results. The
maximum value of S 21x S 32occurs at the 866 MHz where S 21and S 32are
4 and 4
5 dB.
Example:
Receiver-to-transmitter isolation
Figure 17. The maximum mismatch uncertainty occurs at 866 MHz. This is the maximum point for the S21x S32trace.
Table 6 shows the uncertainties associated with the isolation measurement that are due to the uncorrected port match. The nominal or worst case values are given in parentheses. The mismatch error calculation for the
Rx–Tx isolation is shown below.
A note on usage of linear versus logarithmic values:
By definition, S-parameters are linear terms, and linear terms are often used in uncertainty calculations. However, most users view the logarithmic equivalent of S-parameters on network analyzers (insertion loss and return loss). During calculations, using either linear or logarithmic values is cor-rect. Just make sure you multiply linear S-parameters or add the logarith-mic values. In this section, logarithmic S-parameters are shown in Italics. Mismatch error using linear values = [S21x Γ2x S32]
Mismatch error using log values = 20 x log {1 ±10 ^ [S21+ Γ2+ S32– S31] / 20} Using log values:
Mismatch error = 20 x log {1 ±10 ^[–4 + –18 + –45 – (–49)] / 20}
= 20 x log {1 ±10 ^ [–18/20]} = 1.03 / 1.17 dB
Table 6. Duplexer measurement uncertainty due to uncorrected port match.
Measure S-parameter Mismatch error terms (log values) Mismatch error Rx–Tx S31(–49 dB)S21 + Γ2+ S32(–4 dB + –18 dB + –45 dB) 1.17 dB
Table 7 shows the uncertainties associated with measuring Ant–Rx and
Tx–Ant insertion loss. As you can see, the uncertainty due to the uncor-rected port match is minimal.
Table 7. Duplexer measurement uncertainty due to uncorrected port match.
Measure S-parameter Mismatch error terms Mismatch error Ant–Rx S12 (–3 dB)S32+ Γ3+ S13(–47 dB + –18 dB + –49 dB)0.00002 dB
Tx–Ant S23(–2 dB)S13 + Γ1 + S21(–60 dB + –18 dB + –57 dB)0.000002 dB
"E5071C网络分析仪测试方法一.面板上常使用按键功能大概介绍如下: Meas打开后显示有:S11S21S12S22(S11S22为反射,S21S12为传输)注意:驻波比和回波损耗在反射功能测试,也就是说在 S11或者S22里面测试。 Format打开后显示有:LogMa -------- SW—----- 里面有很多测试功能,如上这两种是我们 常用到的,LogMag为回波损耗测试,SW为驻波比测试。 Display 打开后显示有 :NumofTraces(此功能可以打开多条测试线进行同时测试多项指标,每一条测试线可以跟据自己的需求选择相对应的指标,也就是说一个产品我们可以同时测试驻波比和插入损耗或者更多的指标) AllocateTraces(打开此功能里面有窗口显示选择,我们可以跟据自己的需求选择两个窗口以上的显示方式) Cal 此功能为仪器校准功能:我们常用到的是打开后在显示选择: Calibrate (校准端口选择,我们可以选择单端口校准,也可以选择双端口校准) TracePrev 此功能为测试线的更换设置 Scale 此功能为测试放大的功能,打开后常用到的有: Scale/Div 10DB/Div为每格测试10DB我们可以跟据自己的产品更改每格测量的大小,方便我们看测试结果 ReferenceValue 这项功能可以改变测试线的高低,也是方便我们测试时能清楚的看到产品测试出来的波型。 Save/Recall 此功能为保存功能,我们可以把产品设置好的测试结果保存在这个里面进去以后按下此菜单 SaveState 我们可以保存到自己想保存的地方,如:保存在仪器里面请按 Recallstate 里面会有相对应的01到08,我们也可以按 SaveTraceData保存在外接的U盘里面,方便的把我们产品的测试结果给客户看。 二.仪器测试的设置方法 1.频率设置:在仪器面板按键打开 Start 为开始频率, Stop 为终止频率。如我们要测量 2.4G 到5.8G,我们先按Start设置为2.4G,再按Stop设置为5.8G 2.传输与反射测试功能设置:在仪器面板按键打开Meas 打开后显示菜单里面会有 S11S21S12S2(S11S22为反射,S21S12为传输)注意:驻波比和回波损耗在反射功能测试,也就是说在S11或者S22里面测试,S11和S21为第一个测试端口测试,S22和S12为第二个端口测试。 3.驻波比和插入损耗测试设置:面板选择按键 Format 打开后显示屏菜单里面有好多个测试 产品的指标,我们可以跟据自己产品所需要的测试指标选择,如比较常用的SWR驻波比),Logmag(插入损耗) 4.多窗口和多条测试线设置:面板选择按键 Display 打开后显示屏菜单里面会有很多功能,我们用到的是NumofTraces设置为2,此时显示屏里面会出现两条测试线,一条为黄色,另一条为蓝色,但是现在两条测试线都在一个测试窗口,我们也可以把两条测试线分开在两个测试窗口进行测试;我们可以在 Allocate 里面进行选择窗口的显示方式。 Traces 5.改变两条测试设置:在面板上用 Trace 键来切换黄线与蓝线的设置。 Prev 如:看显示屏 Tr1S11 黄线设置,在面板上选择, Format 里面选择 SW(R 驻波比测试)此时黄线就是测试驻波比,我们按一下 Trace 键来设置蓝线测试 Tr2S21Prev 按下 Format 选择 Logmag插入损耗测试)此时我们现在就可以同时测量出我们产品的驻波比和插入损耗啦。 6.仪器校准方法:面板按键选择 Cal 显示屏里面选择; Calibrate 下一步按 2-PortCal (双 端口校准);下一步按Reflection 进去后接上相对应的校准件,如 Open (开路)Short(短路)Load (负载)注意PORT一口和PORT2T 口要确认校完,如果校完显示会有打勾;下一步按再按显示屏菜单 Return下一步按 Transmission 下一步接上测试线把 PORT1 一口和 PORT2X 口连接起来;下一步按 Thru ;下一步按Return :下一步按Isolation ;把PORT一口和
ENA射频网络分析仪 Agilent E5071C 9 KHz至8.5 GHz 详细说明: Agilent E5071C ENA系列网络分析仪 频率范围: 频率范围端口选件 E5071C 9KHz-4.5GHz 2/4 240/440 9KHz-8.5GHz 2/4 280/480 100KHz-4.5GHz 2/4 245/445 100KHz-8.5GHz 2/4 285/485 系统动态范围: 频率IF 带宽技术指标 SPD
主要特性: ?宽动态范围:在测试端口上的动态范围> 123 dB(典型值) ?极快的测量速度:39 ms(进行完全双端口校准,扫描1601点时) ?低迹线噪声:0.004 dB rms(70 kHz IFBW时) ?集成的2和4端口,带有平衡测量能力 选件: E5071C—008 频率偏置模式 E5071C—010 时域分析能力 E5071C—790 测量向导助手软件 E5071C—1E5 高稳定度时基 E5071C—240 双端口测试仪9KHz-4.5GHz 不带偏置T型接头 E5071C—245 双端口测试仪100KHz-4.5GHz 带偏置T型接头 E5071C—440 4端口测试仪9KHz-4.5GHz 不带偏置T型接头 E5071C—445 4端口测试仪100KHz-4.5GHz 带偏置T型接头 E5071C—280 双端口测试仪9KHz-8.5GHz 不带偏置T型接头 E5071C—285 双端口测试仪100KHz-8.5GHz 带偏置T型接头 E5071C—480 4端口测试仪9KHz-8.5GHz 不带偏置T型接头 E5071C—485 4端口测试仪100KHz-8.5GHz 带偏置T型接头 附件: 校准件 HP85033D/E (3.5mm) 校准件HP85032B (N型) ?宽动态范围:在测试端口上的动态范围> 123 dB(典型值) ?极快的测量速度:39 ms(进行完全双端口校准,扫描1601点时) ?低迹线噪声:0.004 dB rms(70 kHz IFBW时) ?集成的2和4端口,带有平衡测量能力 ?提供频率选件:从9 kHz/100 kHz(带有偏置T型接头)到4.5 GHz/8.5 GHz E5071C网络分析仪具有广泛的频率范围和众多功能,在同类产品中具有最高的射频性能和最快的测试速度。它是制造工程师和研发工程师测量9 kHz至8.5 GHz射频元器件和电路的最佳工具。
文件编号: 文件版本: A ZVB矢量网络分析仪操作指导书 V 1.0 拟制 _____________ 日期_______________ 审核 _____________ 日期_______________ 会审 _____________ 日期_______________ 批准 _____________ 日期______________ 生效日期:2006.10
操作规范: 使用者要爱护仪器,确保文明使用。 1、开机前确保稳压电源及仪器地线的正确连接。 2、使用中要求必须佩戴防静电手镯。 3、使用中不得接触仪器接头内芯(含连接电缆) 4、使用时不允许工作台有较大振动。 5、使用中不能随意切断电源,造成不正常关机。不能频繁开关机。 6、使用射频电缆时不要用力大,确保电缆保持较大的弧度。用毕电缆接头上加接头盖。 7、旋接接头时,要旋接头的螺套,尽量确保内芯不旋转。 8、尽量协调、少用校准件。校准件用毕必须加盖放回器件盒。 9、转接件用毕应加盖后放回盒中。 10、停用时必须关机,关闭稳压电源。方可打扫卫生。 11、无源器件调试必须佩戴干净的手套。 ______________________________________________________________________________
概述:1、本说明书主要为无源器件调试而做,涵盖了无源器件调试所需的矢量网络分析仪基本能,关于矢量网络分析仪的其它更进一步的使用,请参照仪器所附的使用说明书。 2、本说明书仅以ZVB4矢量网络分析仪为例,对其它型号矢量网络分析仪,操作步骤基本相 同,只是按键和菜单稍有差别。 3、仪器使用的一般要求仪器操作使用规范。 4、方框内带单引号的键为软菜单(soft menu), 5、本仪器几乎所有操作都可以通过鼠标进行。
g l e n网络分析仪测试方 法 HEN system office room 【HEN16H-HENS2AHENS8Q8-HENH1688】
Agilent E5071C网络分析仪测试方法-李S 买卖仪器没找到联系方式?请搜索《欧诺谊-李海凤》进入查看联系方式,谢谢! E5071C网络分析仪测试方法 一.面板上常使用按键功能大概介绍如下: Meas 打开后显示有:S11 S21 S12 S22 (S11 S22为反射,S21 S12 为传输)注意:驻波比和回波损耗在反射功能测试,也就是说在S11或者S22里面测试。 Format 打开后显示有:Log Mag———SWR———-里面有很多测试功能,如上这两种是我们常用到的,Log Mag为回波损耗测试,SWR 为驻波比测试。 Display打开后显示有:Num of Traces (此功能可以打开多条测试线进行同时测试多项指标,每一条测试线可以跟据自己的需求选择相对应的指标,也就是说一个产品我们可以同时测试驻波比和插入损耗或者更多的指标) Allocate Traces (打开此功能里面有窗口显示选择,我们可以跟据自己的需求选择两个窗口以上的显示方式) Cal 此功能为仪器校准功能:我们常用到的是打开后在显示选择:Calibrate(校准端口选择,我们可以选择单端口校准,也可以选择双端口校准) Trace Prev 此功能为测试线的更换设置 Scale 此功能为测试放大的功能,打开后常用到的有:Scale/Div 10DB/Div 为每格测试10DB,我们可以跟据自己的产品更改每格测量的大小,方便我们看测试结果 Reference Value 这项功能可以改变测试线的高低,也是方便我们测试时能清楚的看到产品测试出来的波型。 Save/Recall 此功能为保存功能,我们可以把产品设置好的测试结果保存在这个里面进去以后按下此菜单Save State 我们可以保存到自己想保存的地方,如:保存在仪器里面请按 Recall State 里面会有相对应的01到08,我们也可以按SaveTrace Data 保存在外接的U盘里面,方便的把我们产品的测试结果给客户看。 二.仪器测试的设置方法 1.频率设置:在仪器面板按键打开 Start 为开始频率,Stop 为终止频率。如我们要测量到,我们先按 Start 设置为,再按 Stop 设置为 2.传输与反射测试功能设置:在仪器面板按键打开Meas 打开后显示菜单里面会有S11 S21 S12 S22 (S11 S22为反射,S21 S12 为传输)注意:驻波比和回波损耗在反射功能测试,也就是说在S11或者S22 里面测试,S11和S21为第一个测试端口测试,S22和S12为第二个端口测试。 3.驻波比和插入损耗测试设置:面板选择按键 Format 打开后显示屏菜单里面有好多个测试产品的指标,我们可以跟据自己产品所需要的测试指标选择,如比较常用的SWR(驻波比),Log mag(插入损耗)
i l e n t E B网络分析仪使 用方法 公司内部编号:(GOOD-TMMT-MMUT-UUPTY-UUYY-DTTI-
前面板:部件的名称和功能 按键 工作通道/迹线区 用于选择工作通道和迹线的一组按键。 输入区 E5061B 的前面板上提供了用于输入数字数据的一组按键。
仪器状态区 与宏程序功能、存储和调用功能、控制/管理功能以及预设 E5061B(将其返回到预设状态)相关的一组按键。
标记/分析区 用于通过使用标记等来分析测量结果的一组按键。
最小值、峰值和带有目标值的点)。还可以查找带宽参数(最多六个)并显示它们。 Marker Fctn 在中显示“Marker Fctn”菜单。通过操纵“Marker Function”菜单,不仅可以指定通道中的标记扫描范围和标记耦合,还可以显示迹线上的统计数据。 Analysis在中显示“Analysis”菜单。通过操纵“Analysis”菜单,可以使用故障定位、SRL 和每个极限测试的分析功能。 浏览区(前面板上没有标签) 浏览区中的按键和旋钮用于在功能键菜单、表格(极限表、分段表等)或对话框中的选定(高亮显示的)区域中进行浏览,以及通过增加或减少来更改数据输入区域中的数值。当使用屏幕上显示的浏览区按键,从两个或多个对象(功能键菜单、数据输入区域等)中选择一个要操纵对象的时,首先按中的 Foc(聚焦)键,以选择要操纵的对象(将焦点置于该对象上),然后操纵浏览区按键(旋钮),在选定(高亮显示)的对象之间移动或更改数值。 下面的描述说明了当焦点在功能键菜单上时和当焦点在数据输入区域中时浏览区按键的作用。有关操纵表和对话框的更多信息,请参考所有这些功能的操纵步骤。 按键名称说明 旋钮 (顺时针旋转 或逆时针转 上下移动对功能键的选择(高亮显示)。
网络分析仪工作原理及使用要点 本文简要介绍41所生产的AV362O矢量网络分析的测量基本工作原理以及正确使用矢量网络分析测量电缆传输及反射性能的注意事项。 1.DUT对射频信号的响应 矢量网络分析仪信号源产生一测试信号,当测试信号通过待测件时,一部分信号被反射,另一部分则被传输。图1说明了测试信号通过被测器件(DUT)后的响应。 图1DUT 对信号的响应 2.整机原理: 矢量网络分析仪用于测量器件和网络的反射特性和传输特性,主要包括合成信号源、S 参数测试装置、幅相接收机和显示部分。合成信号源产生30k~6GHz的信号,此信号与幅相接收机中心频率实现同步扫描;S参数测试装置用于分离被测件的入射信号R、反射信号A 和传输信号B;幅相接收机将射频信号转换成频率固定的中频信号,为了真实测量出被测网络的幅度特性、相位特性,要求在频率变换过程中,被测信号幅度信息和相位信息都不能丢失,因此必须采用系统锁相技术;显示部分将测量结果以各种形式显示出来。其原理框图如图2所示: 图2矢量网络分析仪整机原理框图 矢量网络分析内置合成信号源产生30k~6GHz的信号,经过S参数测试装置分成两路,一路作为参考信号R,另一路作为激励信号,激励信号经过被测件后产生反射信号A和传输信号B,由S参数测试装置进行分离,R、A、B三路射频信号在幅相接收机中进行下变频,产生4kHz的中频信号,由于采用系统锁相技术,合成扫频信号源和幅相接收机同在一个锁相环路中,共用同一时基,因此被测网络的幅度信息和相位信息包含在4kHz的中频信号中,此中频信号经过A/D模拟数字变换器转换为数字信号,嵌入式计算机和数字信号处理器
前面板:部件的名称和功能
按键 工作通道/迹线区 用于选择工作通道和迹线的一组按键。 输入区 E5061B 的前面板上提供了用于输入数字数据的一组按键。
仪器状态区 与宏程序功能、存储和调用功能、控制/管理功能以及预设 E5061B(将其返回到预设状态)相关的一组按键。
标记/分析区 用于通过使用标记等来分析测量结果的一组按键。 浏览区(前面板上没有标签) 浏览区中的按键和旋钮用于在功能键菜单、表格(极限表、分段表等)或对话框中的选定(高亮显示的)区域中进行浏览,以及通过增加或减少来更改数据输入区域中的数值。当使用屏幕上显示的浏览区按键,从两个或多个对象(功能键菜单、数据输入区域等)中选择一个要操纵对象的时,首先按输入区中的 Foc(聚焦)键,以选择要操纵的对象(将焦点置于该对象上),然后操纵浏览区按键(旋钮),在选定(高亮显示)的对象之间移动或更改数值。
下面的描述说明了当焦点在功能键菜单上时和当焦点在数据输入区域中时浏览区按键的作用。有关操纵表和对话框的更多信息,请参考所有这些功能的操纵步骤。 ?焦点位于功能键菜单上时(已选择功能键菜单) 旋钮 (顺时针旋转或 逆时针转动) 上下移动对功能键的选择(高亮显示)。 上/下 箭头键 上下移动对功能键的选择(高亮显示)。 右箭头键 显示上一层功能键菜单。 左箭头键 显示下一层功能键菜单。 Enter或 旋钮(按下) 执行选定功能键的功能。 ?焦点位于数据输入区域中时(已选择数据输入区域) 旋钮 (顺时针旋 转或逆时针 转动) 以小步长增加或减少数据输入区域中的数值。 上/ 下箭头键 以大步长增加或减少数据输入区域中的数值。 左/右箭在数据输入区域来回横向移动光标 键一起使用,以一次更改一个字符的方式更改数据。
旧站入口 ·教程列表·网站导航·设为首页·加入收藏·购买联系· 发货查询 您现在的位置: 微波EDA网 >> 矢量网络分析仪 >> 技术文章 >> 正文 是不是每次测量一个新的项目前都必须做校准? 这个是不一定需要的,尽量将每次校准的state 存入VNA ,名字最好为校准状态,例如频率范围,输入激励功率等。如果有新的测试项目,但是它的测试条件和已有状态相似,且load state 后,检查校准状态良好,就可用使用以前的校准状态,而不需要重新校准。 将校准state 保存并调用的好处在于:Calibration Kit 也是有使用寿命的,多次的校准,会是的校准件多次和校准电缆接触,可能污染校准件,使得校准件特性发生改变,影响下一次校准。 尽量养成如下习惯:将网络分析仪的port 不用的时候加上防尘套;对测试电缆进行标号,使得VN A 每个port 尽可能固定连接某个电缆;对测试电缆不用时,也需要加上防尘套;尽量不用很脏的测试电缆等。 VNA 的校准是精确测量前必要的准备。 以单端口DUT 测量为例,测试模型参考one port error model , 由于VNA 的输出和DUT 的待测输入一般都存在中间过渡件/连接件,使得理想网络分析仪的测试平面和DUT 的待测平面间出现了一个误差网络。对于单端口误差模型,有三个误差项。为了求解三个误差项,由线性矩阵理论,需要建立三个不相关的方程来求解。校准的原理就是建立这三个方程。 通过在测试面加入三个已知特性的校准件,例如开路件,反射系数理论上为1,短路件,反射系数理论上为-1,负载件反射系数理论上为0。通过VNA 测量这三个校准件,得到实际测量结果。也就得到包含三个误差模型的线性方程,通过求解就能得到三个误差项。在后续的测量中,在直接获得的测试结果中,先通过数学运算,消除三个误差项带来的影响,显示给用户的就是校准后DUT 的特性。 当然两端口误差模型更加复杂,分为正向和反向,正向具有6个误差项,反向也有6个误差项,总共有12个误差项需要求解,求解方法可用参考“RF Measurement of Die and Packages” 当然一般网络分析仪提供的二端口矢量校准方法为SOLT ,通过单端口的分析,其实校准件的本质是建立误差模型方程,选择不同已知反射系数的校准件,就得到了很多不同的校准方法,例如LR M ,LRRM ,TRL 等等。 当然校准的本质也是去嵌入(De-embedding)的过程,去嵌入的本质得到误差网络的S 参数,通过转换到T 参数,运用级联运算进行消除。去嵌入还能够消除非传输线网络的S 参数,应用也比校准广泛。 实际校准的方法: 尽管一般VNA 的User Guider 上都有仪器校准的方法,但是还有很多细节需要注意的: 1.设定测试参数 选择测试频率范围:一般的频率范围要稍微大于测试指标规定的范围,选择VNA Port 激励功率,对于无源器件,可以选择稍微大的激励功率,例如0dBm ,但是对于测试Amplifier 等小信号器件,一般激励信号要小于器件的1dB 压缩点,对于Power Amplifier 等大功率器件,需要减小VNA 的输入信号功率,同时要在PA 的输出和VNA 的输入间加入衰减器。但是过分减小VNA 的输入信号功率,可能会使得S11和S22测量误差增大。如果对于多端口VNA ,还需要选择测试port 2.选择校准件,选择校准方法,通过仪器校准的Guide 完成校准 每个公司都有不同的规格的校准件,例如N 型的,SMA 型的,这个在校准之前一定要选择好,这个是因为厂家提供的校准件,开路短路负载等也不是理想的反射系数分别为1,-1和0。同公司的VNA 中会定义校准件,将校准件的特性预先存入VNA ,以便校准时求解误差方程。因此,如果校 VNA 使用方法:矢量网络分析仪校准和测试方法 矢量网络分析仪学习套装 矢量网络分析仪是射频工程师最基本的测试仪器,对于各种微波射频电路和器件的特性分析具有至关重要的作用。本站现提供全套矢网学习培训教程,帮助微波射频工程最迅速、全面地熟悉掌握矢量网络分析仪使用...【详细介绍】 矢量网络分析仪使用培训中文视频教程 --¥99 射频网络分析仪测试基础中文视频讲座 --¥45 ENA系列矢量网络分析仪的使用培训视频 --¥45 8753系列矢量网络分析仪操作培训视频 --¥30 清华大学射频电路测试原理课程全套讲义 --¥30安捷伦矢量网络分析仪中文应用指南 --¥20 PNA系列矢量网络分析仪中文操作指南 --¥20 8753 ET/ES网络分析仪中文操作指南 --¥10 【购买联系】 【发货查询】 【微波测量全套】 矢量网络分析仪栏目导航 矢网相关技术文章 ·面向非射频测试工程师的射频测量技术基础 ·Agilent微波射频网络分析产品介绍 ·网络分析仪的校准流程和S参数测量 ·R&S ZVB矢量网络分析仪使用操作说明 ·针对手机RF电路设计的差分散射参数测试方法 面向非射频测… Agilent微波射… 安捷伦PNA系列… 矢网相关资源下载 ·R&S网络分析仪基础 ·安捷伦网络分析仪培训课件 ·使用网络分析仪测量外部品质因子 ·浅析矢量网络分析仪测量误差和误差修正 ·双口网络S参数测量误差校正分析及应用 微波仿真 ADS2008 | HFSS | Microwave Office | Ansoft Designer | CST | Ansoft全集 | IE3D 高校课程 台湾中华大学 | 大陆高校视频 | 美国大学课程 PCB设计 PADS2007 | Cadence Allegro | Mentor Board Station | Mentor Expedition | Protel 微波测量 矢网 | 频谱仪 | 信号源 | 示波器 首 页微波仿真PCB设计高校视频课程微波测量仪器微波器件设计在线工具免费资源购买联系
矢量网络分析仪的误差分析和处理 一、矢量网络分析仪的误差来源 矢量网络分析仪的测量的误差主要有漂移误差、随机误差、系统误差这三大种类。 1、漂移误差 漂移误差是由于进行校准之后仪器或测试系统性能发生变化所引起,主要由测试装置内部互连电缆的热膨胀特性以及微波变频器的变换稳定性引起,且可以通过重新校准来消除。校准维持精确的时间范围取决于在测试环境下测试系统所经受到的漂移速率。通常,提供稳定的环境温度便能将漂移减至最小。 2、随机误差 随机误差是不可预测的且不能通过误差予以消除,然而,有若干可以将其对测量精度的影响减至最小的方法,以下是随机误差的三个主要来源: (1)仪器噪声误差 噪声是分析仪元件中产生的不希望的电扰动。这些扰动包括:接收机的宽带本底噪声引起的低电平噪声;测试装置内部本振源的本底噪声和相位噪声引起的高电平噪声或迹线数据抖动。 可以通过采取以下一种或多种措施来减小噪声误差:提高馈至被测装置的源功率;减小中频带宽;应用多次测量扫描平均。
(2)开关重复性误差 分析仪中使用了用来转换源衰减器设置的机械射频开关。有时,机械射频开关动作时,触点的闭合不同于其上次动作的闭合。在分析仪内部出现这种情况时,便会严重影响测量的精度。 在关键性测量期间,避免转换衰减器设置,可以减小开关重复性误差的影响。 (3)连接器重复性误差 连接器的磨损会改变电性能。可以通过实施良好的连接器维护方法来减小连接器的重复性误差。 3、系统误差 系统误差是由分析仪和测试装置中的不完善性所引起。系统误差是重复误差(因而可预测),且假定不随时间变化,可以在校准过程中加以确定,且可以在测量期间用数学方法减小。系统误差决不能完全消除,由于校准过程的局限性而总是存在某些残余误差,残余(测量校准后的)系统误差来自下列因素:校准标准的不完善性、连接器界面、互连电缆、仪表。 反射测量产生下列三项系统误差:方向性、源匹配、频率响应反射跟踪。 传输测量产生下列三项系统误差:隔离、负载匹配、频率响应传输跟踪。 下面分别介绍这六项系统误差,其中提到的通道A为反射接收机,通道B为传输接收机,通道R为参考接收机。 (1)方向性误差 所有网络分析仪都利用定向耦合器或电桥来进行反射测量。对理想的耦合器,只有来自被测件(DUT)的反射信号出现在通道A上。实际上,有少量入射信号经耦合器的正向路径泄漏并进入通道A(如
i l e n t E C网络分析仪测 试方法 集团标准化办公室:[VV986T-J682P28-JP266L8-68PNN]
Agilent E5071C网络分析仪测试方法-李S 买卖仪器没找到联系方式请搜索《欧诺谊-李海凤》进入查看联系方式,谢谢! E5071C网络分析仪测试方法 一.面板上常使用按键功能大概介绍如下: Meas 打开后显示有:S11 S21 S12 S22 (S11 S22为反射,S21 S12 为传输)注意:驻波比和回波损耗在反射功能测试,也就是说在S11或者S22里面测试。 Format 打开后显示有:Log Mag———SWR———-里面有很多测试功能,如上这两种是我们常用到的,Log Mag为回波损耗测试,SWR 为驻波比测试。 Display打开后显示有:Num of Traces (此功能可以打开多条测试线进行同时测试多项指标,每一条测试线可以跟据自己的需求选择相对应的指标,也就是说一个产品我们可以同时测试驻波比和插入损耗或者更多的指标) Allocate Traces (打开此功能里面有窗口显示选择,我们可以跟据自己的需求选择两个窗口以上的显示方式) Cal 此功能为仪器校准功能:我们常用到的是打开后在显示选择:Calibrate (校准端口选择,我们可以选择单端口校准,也可以选择双端口校准) Trace Prev 此功能为测试线的更换设置 Scale 此功能为测试放大的功能,打开后常用到的有:Scale/Div 10DB/Div 为每格测试10DB,我们可以跟据自己的产品更改每格测量的大小,方便我们看测试结果 Reference Value 这项功能可以改变测试线的高低,也是方便我们测试时能清楚的看到产品测试出来的波型。 Save/Recall 此功能为保存功能,我们可以把产品设置好的测试结果保存在这个里面进去以后按下此菜单Save State 我们可以保存到自己想保存的地方,如:保存在仪器里面请按 Recall State 里面会有相对应的01到08,我们也可以按SaveTrace Data 保存在外接的U盘里面,方便的把我们产品的测试结果给客户看。 二.仪器测试的设置方法 1.频率设置:在仪器面板按键打开 Start 为开始频率,Stop 为终止频率。如我们要测量到,我们先按 Start 设置为,再按 Stop 设置为 2.传输与反射测试功能设置:在仪器面板按键打开Meas 打开后显示菜单里面会有 S11 S21 S12 S22 (S11 S22为反射,S21 S12 为传输)注意:驻波比和回波损耗在反射功能测试,也就是说在S11或者S22 里面测试,S11和S21为第一个测试端口测试,S22和S12为第二个端口测试。
矢量网络分析仪基础知识及S参数测量 §1 基本知识 1.1 射频网络 这里所指的网络是指一个盒子,不管大小如何,中间装的什么,我们并不一定知道,它只要是对外接有一个同轴连接器,我们就称其为单端口网络,它上面若装有两个同轴连接器则称为两端口网络。注意:这儿的网络与计算机网络并不是一回事,计算机网络是比较复杂的多端(口)网络,这儿主要是指各种各样简单的射频器件(射频网络),而不是互连成网的网络。 1.单端口网络习惯上又叫负载Z L。因为只有一个口,总是接在最后又称终端负载。最常见的有负载、短路器等,复杂一点的有滑动负载、滑动短路器等。 2单端口网络的电参数通常用阻抗或导纳表示,在射频范畴用反射系数Γ(回损、驻波比、S11)更方便些。 2.两端口网络最常见、最简单的两端口网络就是一根两端装有连接器的射频电缆。 2匹配特性两端口网络一端接精密负载(标阻)后,在另一端测得的反射系数,可用来表征匹配特性。 2传输系数与插损对于一个两端口网络除匹配特性(反射系数)外, 还有一个传输特性,即经过网络与不经过网络的电压之比叫作传输系数T。 插损(IL)= 20Log│T│dB ,一般为负值,但有时也不记负号,Φ即相移。
2两端口的四个散射参量测量两端口网络的电参数,一般用上述的插损与回损已足,但对考究的场合会用到散射参量。两端口网络的散射参量有4个,即S11、S21、S12、S22。这里仅简单的(但不严格)带上一笔。 S11与网络输出端接上匹配负载后的输入反射系数Г相当。注意:它是网络的失配,不是负载的失配。负载不好测出的Γ,要经过修正才能得到S11。 S21与网络输出端匹配时的电压和输入端电压比值相当,对于无源网络即传输系数T或插损,对放大器即增益。上述两项是最常用的。 S12即网络输出端对输入端的影响,对不可逆器件常称隔离度。 S22即由输出端向网络看的网络本身引入的反射系数。 中高档矢网可以交替或同时显示经过全端口校正的四个参数,普及型矢网不具备这种能力,只有插头重新连接才能测得4个参数,而且没有作全端口校正。 1.2 传输线 传输射频信号的线缆泛称传输线。常用的有两种:双线与同轴线,频率更高则会用到微带线与波导,虽然结构不同,用途各异,但其基本特性都可由传输线公式所表征。 2特性阻抗Z0它是一种由结构尺寸决定的电参数,对于同轴线: 式中εr为相对介电系数,D为同轴线外导体内径,d为内导体外径。 2反射系数、返回损失、驻波比这三个参数采用了不同术语来描述匹配特性,人们希望传输线上只有入射电压, 没有反射电压, 这时线上各处电
1230B网络分析仪使用步骤 一.设备连接 1.1 MD 1230B主机及测试板卡: 1230B包含5个槽位,如图1-1所示: 图1-1 本测试环境包括4块测试卡。一块MU120112A Giga Ethernet Module,如图1-2。三块MU120111A10/100M Ethernet Module,如图1-3。 MU120112A Giga Ethernet Module包含8个百兆端口。 MU120111A10/100M Ethernet Module包含2个千兆端口。 命名方式如下:单元号:槽位编号:端口号。例如:Unit 1:1:1。
图1-2 图1-3
1.2 连接 1.2.1 本机连接 打开1230B之后,在桌面打开Selector程序,会有Main Application,Self test, Setup utility, MS DOS prompt, Shut down 5个选项。 Main Application是主应用程序,测试时需打开; Self test是用于检测各个模块; Setup utility是用于设置本机的信息,如系统IP地址及测试单元模块的IP地址; MS DOS prompt提供了一个DOS窗口; Shut down是关闭系统,关机时则需要再次按下开关以切断电源。 1.2.2 远端PC连接 (1)启动安装光盘安装应用程序。 SN码:S9Y3MTX2-Q6VU64SN-YR4ARN8X。 (2) 用反向线连接PC网卡和1230B主机后面的网卡接口。并设置PC的IP地址。由于1230B的默认设置Windows IP址为192.168.25.1,1230B的测试单元IP地址为:192.168.25.2。通过远程控制时,必须将远端计算机的IP地址和上述两个地址在同一网段才可以登陆,如:192.168.25.3。设置本地PC的IP地址如图1-4所示:
矢量网络分析仪 使用说明书 版 次 V1.0 页 次 1/16 1 目的 本使用说明书为规矢量网络分析仪的操作,避免操作不当引起的仪器损坏;作为培训文件使公司技术人员了解本仪器的使用。 2 适用围 本使用说明书适用于公司围的所有Anglent E50系列矢量网络分析仪的使用(其他型号具有一定的实用价值,但最大区别在于按键位置以及功能方面有细小区别)。 3 主要职责 3.1 各部门设备使用者负责实施设备一级保养工作。 3.2 各部门安排专人负责实施设备的定期保养管理,监督日常保养工作之实施。 3.3 对新进员工有必要学习此文件时进行培训学习。 4 仪器操作注意事项 4.1 测试产品时,不能直接加电测试。 4.2 测试功放前,必须在频谱仪上检测过没有自激,才能用网络仪测其它指标。 4.3 防止有大的直流电加入,网络仪最大能承受10V 的直流电。 4.4 防止过信号的输入。 4.4.1 网络分析仪的最大允许输入信号为20dBm 。 4.4.2 输入信号大于10dBm 时,应加相应的衰减器。 4.5 仪器使用前确保已接地。 5 仪器面板介绍 5.1 按键区域 1·ACTIVE CH/TRACE :活动通道区; 2·软驱; 3·RESPONSE :响应区; 4·NAVIGATION :导航区; 5·ENTRY :输入区; 6·STIMULVS :激励区; 7·MKR/ANALYIS :标定点/分析; 8·INSTRSTATE :设备状态区。 注:见“11 按键翻译”。 1 2 3 6 4 5 7 8 软菜单 USB 接口
矢量网络分析仪使用说明书版次V1.0 页次2/16 5.2 1 2 3 4 5 Tr1 S11 SWR 1.000/Ref 1.0000 Tr2 S21 Logmag 10dB/Ref 0.00dB Tr3 S22 SWR 1.000/Ref 1.0000 1.表示通道编号; 2.表示通道类型; 3.表示通道的格式; 4.表示通道在显示屏上每格所表示的数值; 5.表示通道在显示屏上参考线所在的格子数值。 6 仪器的基本常用功能介绍 6.1 测量回波损耗(电压驻波比) 通道选择S11或S22,S11时,用电缆PORT1;S22时,用电缆PORT2。 测量单通道时,所测器件终端应加负载;测双通道时,器件输出与输入均应接电缆。器件为有源器件时,详见“4 仪器操作注意事项”。 6.2 测量插入损耗 通道选择S12(Port2接收Port1发射)或S21(Port1接收Port2发射)测量时,所测器件输出、输入应接电缆;测量有源器件时,S12、S21不能选错,其余详见“4 仪器操作注意事项”。 6.3 测量时延 所测器件端口接上仪器,通道选择视具体情况,仪器按键Format→GroupDelay,详见“4 仪器操作注意事项”。 6.4 测量史密斯圆图 通道选择S11或S22时,终端应加负载,所测端接电缆。双通道时,输出、输入应同时接电缆,仪器按键Format→Smith,详见“4 仪器操作注意事项”。 7 仪器校准按键介绍 7.1 手动校准(以下介绍了双通道的校准方法) 按Cal*键,选择Cal kit ,选择ⅹⅹⅹ(具体见校准件型号,一般仪器厂商有配置),再选择Calibrate,选择2-Port Cal(双通道校准),选择Reflection,再对应相应的通道及校准件进行校准(电缆接什么标准件并在仪器上具体按何键见按件翻译,这里用到的标准键有3种分别是,开路Open、短路Short和负载Load),结束后,选择Return返回
网络分析仪使用手册 目录 ACTIVE CH/TRACE Block: Channel Prev:选择上一个通道 Channel Next:选择下一个通道 Trace Prev:选择上一个轨迹 Trace Next:选择下一个轨迹RESPONSE Block: Channel Max: 通道最大化 Trace Max: 轨迹最大化 Meas: 设置S参数 Format: 设置格式 Scale: 设置比例尺 Display: 设置显示参数 Avg: 波形平整 Cal: 校准 STIMULUS Block: Start: 设置频段起始位置 Stop: 设置频段截止位置 Center: 设置频段中心位置 Span: 设置频段范围 Sweep Setup: 扫描设置 Trigger: 触发 NAVIGATION Block: Enter: 确定 ENTRY Block: Entry off: 取消当前窗口 Back space: 退格键 Focus: 窗口切换键 +/-: 正负切换键 G/n, M/,k/m: 单位输入 INSTR STATE Block: Macro Setup: Macro Run: Macro Break: Save/Recall: 程序载入载出键 System: 系统功能键 Preset: 预设置键 MKR/ANALYSIS Block: Marker: 标记键 Marker Search: 标记设置键 Marker Fctn: 标记功能 Analysis: 分析 部分按键详细功能: ------------------------------------------------------------ System: (系统功能设定) Print: 将显示屏画面打印出来 Abort printing: 终止打印 Printer setup: 配置打印机 Invert image: 颠倒图象颜色 Dump screen image: 将显示屏画面保存到硬盘中 E5091A setup: 略 Misc setup: 混杂功能 Beeper: 发声控制 Beeper complete: 开/关提示音 Test beeper complete: 测试开/关提示音 Beep warning: 开/关警告音 Test beep warning: 测试开/关警告音 Return: 返回 GPIB setup: 略 Network setup: 略 Clock setup: 时钟设定 Set date and time: 设置日期和时间 Show clock: 开/关时间显示 Return: 返回 Key lock: 锁定功能 Front panel & keyboard lock: 锁定前端面板和键盘 Touch screen & mouse lock: 锁定触摸屏和鼠标
8712ET简介 8712E是Agilent公司生产的系列经济型射频网络分析仪,其中ET型是传输/反射分析仪。 1.18712ET基本原理 8712ET是在一台射频网络分析仪的基础上增加了若干硬件、软件构成。图1是射频网络分析仪的原理方框图,它由扫频信号发生器(通常内置)、用于分离前向和后向测试信号的测试部分、一个多波段相位相干高灵敏度的接收器、信号处理和显示等部分组成。 图1原理方框图 在进行测量时,仪器发出扫频信号,信号通过输出口送到待测设备,信号通过设备后送回网络分析仪。由于待测设备接口的输入阻抗与网络分析仪输出阻抗不可能理想匹配,必然会反射一部分信号。网络分析仪对输出和输入信号进行比较可得出待测设备的传输指标,如增益、插入损失、分配损失等;对输出和反射信号进行比较可得出待测设备的反射指标,如反射损耗等。 1.28712ET主要参数和特点 8712ET的频率范围是300kHz~1.3GHz,频率分辨率是1Hz,频率精度<5×10⁻⁶;不配置衰减器输出功率范围为0~+16dBm,配置衰减器后可达-60~+15dBm;系统阻抗有50Ω和75Ω两种,在CATV系统中使用阻抗为75Ω的;既可进行窄带检测,又可进行宽带检测,100dB的动态范围,扫描速度快(50ms完成一次扫描);具有各种接口,通过标准LAN(局域网)接口数据能直接通过网络共享,用PC应用软件分析、处理或发送到联网打印机上。 1.38712ET仪器面板 8712ET的面板左边是显示屏,其用于显示测量图形和数值。屏幕右边有8个软键,分别对应屏幕右边排列的菜单。右上是软盘驱动器,它下面左下框的数字键、旋钮、上下键等用于数字输入和修改。软盘驱动器右下框的4个按键是系统键,用于存储、调用系统配置或测量数据等操作。再下面的3个框分别是测量曲线选择部分(对曲线1和2进行选择)、信号源设置部分(包括频率特性、扫频特性、输出功率和菜单,用于对选择信号源各种参数进行设置)、配置部分(包括刻度键、显示键、校正键、光标键、格式键和平均键,用于选择各种配置进行设置)。右下是两个N型接头,左边的是输出接口,右边的是输入接口。 28712ET的基本操作 2.1测量前的工作 (1)仪器的各种软、硬件是在购买时确定的,需要根据有线电视系统测量的特点正确配置。如系统阻抗必须是75Ω,输出功率范围、动态范围等都要满足系统要求。 (2)设备加电前注意电源输入选择是否正确,特别是第一次开机时。和许多进口仪器相同,8712ET的电源输入可以是交流110V或220V,使用前必须确保输入选择拨到220V位置,否则会烧毁仪器电源模块。 (3)仪器校正8712ET在第一次使用、经过一段时间使用或更换了测试线缆后,需要进行校正,其步骤为:开机预热30min,按下面板上校正键(CAL),按软键选择屏幕上选项进入自动校正,按照屏幕上的提示,依次将开路接头、短路接头接到输出口,再按提示将输出口和输入口直通,依次操作并确认后校正就完成了。注意在校正时最好使用测量时使用的电缆,否则在后面测量的结果中将包括与原用电缆不同的测试电缆的相关因素,造成测试结果的误差。
操作规范 变更记录表
操作规范 1.目的: 明确网络分析仪的操作方法及注意事项确保产品测量的准确性及有效性。 2.范围: 适用于本公司所有产品的导电性能测量与分析。 3.职责: .本文制订/修改权责部门属品质部。 .使用部门负责设备的一级保养工作和日常维护工作。 4.内容: 仪器结构与各配套设备名称: 待系统跳到指定界面后选择“Calibrate”键一次如下图所示:
待系统跳到指定界面后选择“1+port cal ”键一次如下图所示: 操作规范 然后将校正接口 3个连接端分别从“ Open ” 、“Short ”、“Load ”连接于仪器 PORT1接口进行校正(在按装时注意用力均匀确保顺畅)如图:先选择校正接口“O ”接在测试端口后,按“Open ”键,如下图:依次校正“S ”及“L ”接口接在测试端口。 上述校正完成后选择“Done ”键一次系统跳到以下界面: 100K ”修改: 操作规范 4. 输入数据“1800MHZ ”后,界面如下图所示: 设置终值,按“Stop ”键一次系统跳到以下界面,输入数据“2500MHZ ”。终值设置完毕如图: 操作规范 设置迹线刻度,按输入数据 “5dB ”后再按“Divisions ” 键一次将其值修改为15,页面显示为:
设置测量端口,按“Meas”键,系统进入界面如图,将Measurenment菜单选择“S11”: 操作规范 设置迹线格式,按“Format”键,系统进入界面如图,将菜单选择“Log Mag”: 网络分析仪天线的设置 将天线连接在端口port1,设置Mark值;按“MARK”键,系统进入界面如图,将菜单选择“Mark1”: 操作规范 将上图中MARK1的值定在Log Mag迹线最低峰值;即将“光标1”移到低峰如图所示,屏幕上端会显示低峰值,如:“”;再按“Mark1”确定。 然后选择“Marker2”键一次并将光标‘2’移到距离光标1相差200MHZ的位置系统显视以下界面: 操作规范 保存天线设置值,按“Save/Recall”键,选择“Save State”键将其保存为“State1”保存设置系统如图所示: 操作规范 产品测量: 先将上述天线的设置保存值呼出后进行产品测量:按“Save/Recall”键,选择“Recall State”