magento教程第四章——模型与ORM基础
- 格式:doc
- 大小:55.50 KB
- 文档页数:18
Magento(麦进斗)是这个星球上最强大的购物车网店平台。
当然,你应该已经对此毫无疑问了。
不过,你可能还不知道,Magento(麦进斗)同样是一个面向对象的PHP框架。
你可以配合Magento(麦进斗)购物车程序强大的功能,开发动态WEB应用程序。
采用高端Magento(麦进斗)电子商务系统可订制对接企业ERP、CRM如:SAP NAV Salesforce Odoo 用友金蝶等,Magento(麦进斗)可对接淘宝、京东、Amazon、eBay、Wish、速卖通等电子商务销售平台,Magento(麦进斗)还可订制对接开发微信商城、移动电商APP。
相较于老的ecshop构架,Magento(麦进斗)作为全球第一电商平台可提供完整核心源代码的电商解决方案,适合品牌企业、跨国企业、跨境电商企业。
麦进斗科技提供上诉完整电商解决方案,欢迎咨询联系麦进斗这是Magento中文开发手册的开篇,我们会在整个手册中介绍绝大部分Magento的开发框架特性。
不要想在这片文章中立刻掌握所有的特性。
这仅仅是个开始,但是足够让你在同行中鹤立鸡群了。
在这片文章中,你将了解到:Magento模块(Magento Modules)代码组织形式配置型MVC架构Magento控制器(Magento Controllers)基于URI的模型实例化(Context-based URI Model Loading)Magento模型(Magento Models)Magento助手(Magento Helpers)Magento布局(Magento Layouts)事件监听(Observers)Magento类重写(Class Overrides)总结开始之前,你可以试着看下Magento MVC模式的一个图形化直观体现。
Magento_MVC.pdfMagento模块中的代码组织形式Magento通过将代码放入独立的模块进行组织。
在一个典型的PHP MVC应用中,所有的控制器会被放在一个文件夹中,所有的模型会被放在另外一个文件夹里,等等。
1引言目前大多数项目或产品都使用关系型数据库实现业务数据的存储,这样在开发过程中,常常有一些业务逻辑需要直接用写SQL语句实现,但这样开发的结果是:遍地布满SQL语句。
这些藕合较高的SQL语句给系统的改造和升级带来很多无法预计的障碍。
也许说可以使用服务端数据库存储子程序实现,这样只是将这种耦合搬迁到后端,问题依然没有根本解决,服务端驻留过多的存储子程序也消耗着服务器的性能并给多人合作维护和更新部署带来许多障碍。
为了提高项目的灵活性,特别是快速开发,ORM是一个不错的选择。
举个简单的例子:在使用ORM 的系统中,当数据库模型改变时,不再需要理会逻辑代码和SQL语句中涉及到该模型的所有改动,只需要将该模型映射的对象稍作改动,甚至不做改动就可以满足要求。
ORM的全称是Object Relational Mapping,即对象关系映射。
它的实质就是将关系数据(库)中的业务数据用对象的形式表示出来,并通过面向对象(Object-Oriented)的方式将这些对象组织起来,实现系统业务逻辑的过程。
在ORM过程中最重要的概念是映射(Mapping),通过这种映射可以使业务对象与数据库分离。
从面向对象来说,数据库不应该和业务逻辑绑定到一起,ORM则起到这样的分离作用,使数据库层透明,开发人员真正的面向对象。
下图简单说明了ORM在多层系统架构中的这个作用。
图1ORM在多层系统架构中的作用诚然ORM并非是万能的,面对纷繁复杂的业务逻辑,当遇到特别复杂的数据处理及海量数据运算或弥补设计的不足时还应归结到SQL或存储过程来实现才是好的选择,但它却很好地体现了“80/20(或90/10)法则”(也被称为“帕累托法则”),也就是说:花比较少(10%-20%)的力气就可以解决大部分(80%-90%)的问题,这样通过利用ORM框架,我们就仅需要付出极少数时间和精力来解决剩下的少部分问题了,这无疑缩短了整个项目开发的周期,因此快速开发、面向对象和性能优化等必须灵活兼顾才好。
技术指南总览本文档列出了指导Magento 2开发人员团队的基本编码和应用程序设计原则。
Magento核心开发人员在代码审查期间将本文档用作参考;有些规则在Magento静态测试中具有相应的代码检查。
这些准则来自多年的辛勤工作,经验和讨论。
我们坚信,新的技术倡议应遵循这些建议,并且应改进现有的规范以符合这些建议。
文本约定使用RFC2119来解释关键字,如:•MUST and MUST NOT•REQUIRED•SHALL and SHALL NOT•SHOULD and SHOULD NOT•RECOMMENDED•MAY•OPTIONAL1.基本编程原则1.1。
函数参数不应该被修改。
1.2。
显式返回类型必须在函数上声明。
1.3。
应该使用标量参数的类型提示。
1.3.1。
所有新的PHP文件都必须以declare(strict_types=1)开头启用严格类型模式。
所有更新的PHP文件都应该启用严格类型模式。
PHP接口可能有这样的声明。
2.类的设计2.1。
对象分解必须遵循SOLID原则。
2.2。
对象实例化2.2.1。
对象必须在实例化后准备好使用。
不允许使用其他公共初始化方法。
2.2.2。
Factories应该用于对象实例化而不是new关键字。
为了测试或可扩展性,对象应该是可替换的。
例外:DTO。
DTO中没有任何行为,因此没有理由可替换。
测试可以为存根创建真正的DTO。
数据接口,异常和Zend_Db_Expr是DTO 的示例。
2.3。
类构造函数只能具有依赖项分配操作和/或参数验证操作。
不允许其他操作。
2.3.1。
当参数验证失败时,构造方法应该抛出异常。
2.3.2。
不得在构造函数中触发事件。
2.4。
所有依赖项必须由client对象所需的最通用类型请求。
2.5。
绝对不能在构造函数中明确请求代理和拦截器。
2.6。
不应使用继承。
组合应该用于代码重用。
2.7。
所有非公共属性和方法都应该是私有的。
2.8。
抽象类不得标记为public @api。
深入理解Magento作者:Alan Storm翻译:Hailong Zhang第六章–高级Magento模型我们讲过Magento有两种模型,简单模型和EAV(Entity Attribute Value)模型。
上一章我们讲过所有的Magento模型都是继承自Mage_Core_Model_Abstract / Varien_Object。
简单模型和EAV模型的区别在于资源模型(Model Resource)。
虽然所有的资源模型都最终继承“Mage_Core_Model_Resrouce_Abstract”,但是简单模型是直接继承“Mage_Core_Model_Mysql4_Abstract”,而EAV模型是直接继承“Mage_Eav_Model_Entity_Abstract”。
Magento这么做是由它的道理的。
对于大部分开发人员或者用户来说,他们只需要知道一系列的方法能够操作模型,获得数据,数据到底是如何存储的并不是很重要。
什么是EAV模型Wikipedia是这么定义的:EAV(Entity-Attribute-Value)模型,也作Object-Attribute-Value模型或者开放模型是一种数据模型。
这种数据模型常常用在一个对象的属性数目不是一定的情况下。
在数学上,这种模型称为松散矩阵。
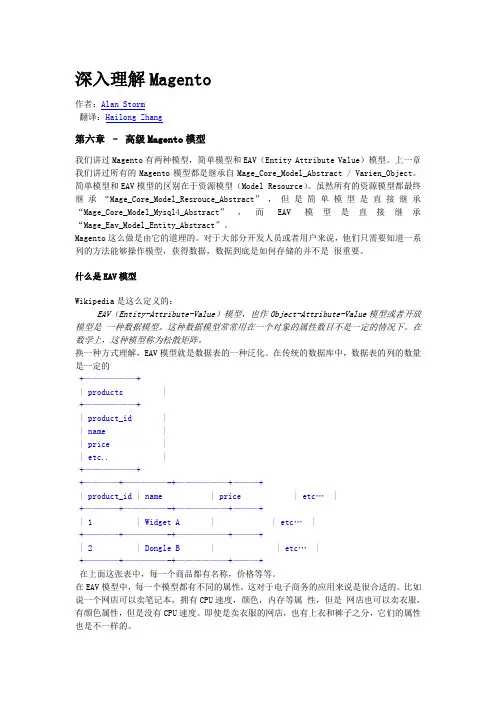
换一种方式理解,EAV模型就是数据表的一种泛化。
在传统的数据库中,数据表的列的数量是一定的+——————+| products |+——————+| product_id || name || price || etc.. |+——————++————+—————-+——————+———+| product_id | name | price | etc… |+————+—————-+——————+———+| 1 | Widget A | | etc… |+————+—————-+——————+———+| 2 | Dongle B | | etc… |+————+—————-+——————+———+在上面这张表中,每一个商品都有名称,价格等等。
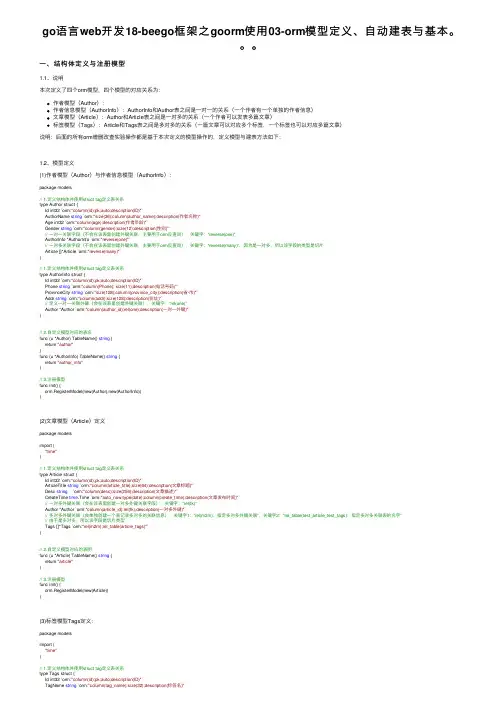
go语⾔web开发18-beego框架之goorm使⽤03-orm模型定义、⾃动建表与基本。
⼀、结构体定义与注册模型1.1、说明本次定义了四个orm模型,四个模型的对应关系为:作者模型(Author):作者信息模型(AuthorInfo):AuthorInfo和Author表之间是⼀对⼀的关系(⼀个作者有⼀个单独的作者信息)⽂章模型(Article):Author和Article表之间是⼀对多的关系(⼀个作者可以发表多篇⽂章)标签模型(Tags):Article和Tags表之间是多对多的关系(⼀篇⽂章可以对应多个标签,⼀个标签也可以对应多篇⽂章)说明:后⾯的所有orm增删改查实验操作都是基于本次定义的模型操作的,定义模型与建表⽅法如下:1.2、模型定义(1)作者模型(Author)与作者信息模型(AuthorInfo):package models// 1.定义结构体并使⽤struct tag定义表关系type Author struct {Id int32 `orm:"column(id);pk;auto;description(ID)"`AuthorName string `orm:"size(36);column(author_name);description(作者名称)"`Age int32 `orm:"column(age);description(作者年龄)"`Gender string `orm:"column(gender);size(12);description(性别)"`// ⼀对⼀关联字段(不会在该表⾥创建外键关联,主要⽤于orm反查询),关键字:“reverse(one)”AuthorInfo *AuthorInfo `orm:"reverse(one)"`// ⼀对多关联字段(不会在该表⾥创建外键关联,主要⽤于orm反查询),关键字:“reverse(many)”,因为是⼀对多,所以该字段的类型是切⽚Article []*Article `orm:"reverse(many)"`}// 1.定义结构体并使⽤struct tag定义表关系type AuthorInfo struct {Id int32 `orm:"column(id);pk;auto;description(ID)"`Phone string `orm:"column(Phone); size(11);description(电话号码)"`ProvinceCity string `orm:"size(128);column(province_city);description(省·市)"`Addr string `orm:"column(addr);size(128);description(住址)"`// 定义⼀对⼀关联外键(会在该表⾥创建外键关联),关键字:“rel(one)”Author *Author `orm:"column(author_id);rel(one);description(⼀对⼀外键)"`}// 2.⾃定义模型对应的表名func (u *Author) TableName() string {return "author"}func (u *AuthorInfo) TableName() string {return "author_info"}// 3.注册模型func init() {orm.RegisterModel(new(Author),new(AuthorInfo))}(2)⽂章模型(Article)定义package modelsimport ("time")// 1.定义结构体并使⽤struct tag定义表关系type Article struct {Id int32 `orm:"column(id);pk;auto;description(ID)"`ArticleTitle string `orm:"column(article_title);size(64);description(⽂章标题)"`Desc string `orm:"column(desc);size(256);description(⽂章描述)"`CreateTime time.Time `orm:"auto_now;type(date);column(create_time);description(⽂章发布时间)"`// ⼀对多外键关联(会在该表⾥创建⼀对多外键关联字段),关键字:“rel(fk)”Author *Author `orm:"column(article_id);rel(fk);description(⼀对多外键)"`// 多对多外键关联(会单独创建⼀个表记录多对多的关联信息),关键字1:“rel(m2m):指定多对多外键关联”,关键字2:“rel_table(test_article_test_tags):指定多对多关联表的名字”// 由于是多对多,所以该字段是切⽚类型Tags []*Tags `orm:"rel(m2m);rel_table(article_tags)"`}// 2.⾃定义模型对应的表明func (u *Article) TableName() string {return "article"}// 3.注册模型func init() {orm.RegisterModel(new(Article))}(3)标签模型Tags定义:package modelsimport ("time")// 1.定义结构体并使⽤struct tag定义表关系type Tags struct {Id int32 `orm:"column(id);pk;auto;description(ID)"`TagName string `orm:"column(tag_name);size(32);description(标签名)"`TagDesc string `orm:"column(tag_desc);size(128);description(标签描述)"`CreateTime time.Time `orm:"auto_now;type(date);column(create_time);description(标签创建时间)"`// 多对多反向查询使⽤字段(不会在该表⾥建外键关联),关键字:reverse(many),由于是多对多,所以该字段是切⽚类型 Article []*Article `orm:"reverse(many)"`}// 2.⾃定义模型对应的表明func (u *Tags) TableName() string {return "tags"}// 3.注册模型func init() {orm.RegisterModel(new(Tags))}⼆、连接数据库与建表(1)在conf⽬录下创建database.conf⽂件,添加内容如下:username = rootuserpwd = 1q2w3e$Rdbhost = localhostdbport = 3306dbname = test_beego_orm(2)在app.conf⾥引⽤database.conf⽂件,内容如下appname = beego_orm_testhttpport = 8080runmode = devinclude "database.conf"// 引⽤database.conf⽂件(3)在main.go⽂件⾥处理化连接数据库的字符串package mainimport ("beego_orm_test/models"_ "beego_orm_test/routers""/astaxie/beego""/astaxie/beego/orm"_ "/go-sql-driver/mysql")func init() {// 在配置⽂件读取数据库连接配置username := beego.AppConfig.String("username")userpwd := beego.AppConfig.String("userpwd")dbhost := beego.AppConfig.String("dbhost")dbport := beego.AppConfig.String("dbport")dbname := beego.AppConfig.String("dbname")// 拼接数据库连接串db_data_source := username + ":" + userpwd + "@tcp(" + dbhost + ":" + dbport + ")/" + dbname + "?charset=utf8"// 注册数据库驱动(这⾥需要导⼊/go-sql-driver/mysql包,否则编译会报错)orm.RegisterDriver("mysql", orm.DRMySQL)// 注册数据(参数前⼀篇⽂章⾥有说明)orm.RegisterDataBase("default", "mysql", db_data_source, 30)}func main() {// 命令⾏⽀持orm命令的参数orm.RunCommand()beego.Run()}(4)命令⾏将orm模型实现⾃动建表E:\Scripts\go\src\beego_dev\beego_orm_test>go run main.go orm syncdb -vcreate table `article`-- ---------------------------------------------------- Table Structure for `beego_orm_test/models.Article`-- --------------------------------------------------CREATE TABLE IF NOT EXISTS `article` (`id` integer AUTO_INCREMENT NOT NULL PRIMARY KEY COMMENT 'ID',`article_title` varchar(64) NOT NULL DEFAULT '' COMMENT '⽂章标题',`desc` varchar(256) NOT NULL DEFAULT '' COMMENT '⽂章描述',`create_time` date NOT NULL COMMENT '⽂章发布时间',`article_id` integer NOT NULL COMMENT '⼀对多外键') ENGINE=InnoDB;create table `author`-- ---------------------------------------------------- Table Structure for `beego_orm_test/models.Author`-- --------------------------------------------------CREATE TABLE IF NOT EXISTS `author` (`id` integer AUTO_INCREMENT NOT NULL PRIMARY KEY COMMENT 'ID',`author_name` varchar(36) NOT NULL DEFAULT '' COMMENT '作者名称',`age` integer NOT NULL DEFAULT 0 COMMENT '作者年龄',`gender` varchar(12) NOT NULL DEFAULT '' COMMENT '性别') ENGINE=InnoDB;create table `author_info`-- ---------------------------------------------------- Table Structure for `beego_orm_test/models.AuthorInfo`-- --------------------------------------------------CREATE TABLE IF NOT EXISTS `author_info` (`id` integer AUTO_INCREMENT NOT NULL PRIMARY KEY COMMENT 'ID',`Phone` varchar(11) NOT NULL DEFAULT '' COMMENT '电话号码',`province_city` varchar(128) NOT NULL DEFAULT '' COMMENT '省·市',`addr` varchar(128) NOT NULL DEFAULT '' COMMENT '住址',`author_id` integer NOT NULL UNIQUE COMMENT '⼀对⼀外键') ENGINE=InnoDB;create table `tags`-- ---------------------------------------------------- Table Structure for `beego_orm_test/models.Tags`-- --------------------------------------------------CREATE TABLE IF NOT EXISTS `tags` (`id` integer AUTO_INCREMENT NOT NULL PRIMARY KEY COMMENT 'ID',`tag_name` varchar(32) NOT NULL DEFAULT '' COMMENT '标签名',`tag_desc` varchar(128) NOT NULL DEFAULT '' COMMENT '标签描述',`create_time` date NOT NULL COMMENT '标签创建时间') ENGINE=InnoDB;create table `article_tags`-- ---------------------------------------------------- Table Structure for `beego_orm_test/models.ArticleTagss`-- --------------------------------------------------CREATE TABLE IF NOT EXISTS `article_tags` (`id` bigint AUTO_INCREMENT NOT NULL PRIMARY KEY,`article_id` integer NOT NULL,`tags_id` integer NOT NULL) ENGINE=InnoDB;(5)查看建好的表三、基本增删改查操作基本增删改查操作都是基于作者表操作的。

powered byMagento (v2.0.x - v2.1) - Mercado Pago ModuleTable of ContentsMagento (v2.0.x - v2.1) - Mercado Pago Module (2)Features (3)Wizard Installation (Magento Component Manager) (4)Manual Installation (FTP) (5)Configuration (6)Custom Checkout Payment Solution: (7)Standard Checkout Payment Solution: (9)Mercado Envios (11)FeaturesCheckout options right for your business: We offer two checkout methods that make it easy to securely accept payments from anyone, anywhere.Custom CheckoutOffer a checkout fully customized to your brand experience with our simple-to-use payments API.•Seamless integration— no coding required, unless you want to.•Full control of buying experience.•Store buyer’s card for fast checkout.•Accept tickets in addition to cards.•Accept Mercado Pago's discount coupons.•Improve conversion rate.Available for Argentina, Brazil, Colombia, Mexico, Peru and VenezuelaStandard CheckoutGreat for merchants who want to get going quickly and easily.•Easy website integration— no coding required.•Limited control of buying experience— display Checkout window as redirect, modal or iframe.•Store buyer’s card for fast checkout.•Accept tickets, bank transfer and account money in addition to cards.•Accept Mercado Pago's discount coupons.Available for Argentina, Brazil, Chile, Colombia, Mexico, Peru and Venezuela Shipment integrationThis feature allows to setup and integrate with Mercado Envios shipment method as another shipment option for customers. It includes the possibility to print the shipping label directly from the Magento Admin Panel. Free shipping is also available. Available for Argentina, Brazil and Mexico only with Standard CheckoutWizard Installation (Magento Component Manager)1.Log in to the Magento Admin as an administrator.2.Click System > Web Setup Wizard. The following page displays.3.Click System Configuration.4.If you haven’t already done so, enter your authentication keys in the providedfields.The following figure shows an example if you have already entered your keys.5.Click Save Config.6.Click Component Manager and continue with Manage your components.To upgrade Magento system software instead, see Run System Upgrade.Manual Installation (FTP)1.Copy the folder app/code/MercadoPago to the Magento root installation.Make sure to keep the Magento folders structure intact.2.Enable modules from console.o bin/magento module:enable MercadoPago_Coreo bin/magento module:enable MercadoPago_MercadoEnvios Then update magento with new modules:o bin/magento setup:upgradeConfiguration1.Go to Stores > Configuration > Sales > Payment Methods. Select MercadoPago – Global Configuration.2.Set your Country to the same where your account was created on, and saveconfig. Note: If you change the Country where your account was created you need save configuration in order to refresh the excluded payment methods.3.Other general configurations:o Category of your store: Sets up the category of the store.o Choose the status of approved orders: Sets up the order status when payments are approved.o Choose the status of refunded orders: Sets up the order status when payments are refunded.o Choose the status when payment is pending: Sets up the order status when payments are pending.o Choose the status when client open a mediation: Sets up the order status when client opens a mediation.o Choose the status when payment was reject: Sets up the order status when payments are rejected.o Choose the status when payment was canceled: Sets up the order status when payments are canceled.o Choose the status when payment was chargeback: Sets up the order status when payments are chargeback.o Logs: Enables/disables system logs.o Debug Mode: If enabled, displays the raw response from the API instead of a friendly message.Custom Checkout Payment Solution:1.Go to Stores > Configuration > Sales > Payment Methods.Select Mercado Pago - Custom Checkout.2.Set your Public Key and Access Token. In order to get them check thefollowing links according to the country you are operating in:o Argentina: https:///mla/account/credentialso Brazil: https:///mlb/account/credentialso Chile: https:///mlc/herramientas/aplicacioneso Colombia: https:///mco/account/credentialso Mexico: https:///mlm/account/credentialso Venezuela: https:///mlv/account/credentialso Peru: https:///mpe/account/credentialsIf you want to enable credit card solution, check the configurations under Checkout Custom – Credit Card:•Enabled: Enables/disables this payment solution.•Payment Title: Sets the payment title.•Statement Descriptor: Sets the label as the customer will see the charge for amount in his/her bill.•Binary Mode: When set to true, the payment can only be approved or rejected. Otherwise in_process status is added.•Banner Checkout: Sets the URL for the banner image in the payment method selection in the checkout process.•Checkout Position: The position of the payment solution in the checkout process.•Marketing - Coupon Mercado Pago: Enables/disables the coupon form.If you want to enable ticket solution, check the configurations under Checkout Custom - Ticket:•Enabled: Enables/disables this payment solution.•Payment Title: Sets the payment title.•Banner Checkout: Sets the URL for the banner image in the payment method selection in the checkout process.•Checkout Position: The position of the payment solution in the checkout process.•Marketing - Coupon Mercado Pago: Enables/disables the coupon form.Standard Checkout Payment Solution:1.Go to Stores > Configuration > Sales > Payment Methods.Select Mercado Pago - Classic Checkout.2.Enable the solution and set your Client Id and Client Secret.Get them in the following address:o Argentina: https:///mla/herramientas/aplicacion eso Brazil: https:///mlb/ferramentas/aplicacoeso Chile: https:///mlc/herramientas/aplicacioneso Colombia: https:///mco/herramientas/aplicacion eso Mexico: https:///mlm/herramientas/aplicacioneso Venezuela: https:///mlv/herramientas/aplicacio neso Peru: https:///mpe/herramientas/aplicaciones3.Check the additional configurations:o Payment Title: Sets the payment title.o Banner Checkout: Sets the URL for the banner image in the payment method selection in the checkout process.o Checkout Position: The position of the payment solution in the checkout process.o Type Checkout: Sets the type of checkout, the options are:§Iframe: Opens a Magento URL with a iframe as the content.§Redirect: Redirects to Mercado Pago URL.§Lightbox: Similar to Iframe option but opens a lightbox instead of an iframe.11Mercado EnviosIn order to setup Mercado Envios follow these instructions:1. Setup Mercado Pago Standard Checkout following these instructions.2. Go to Sales > Configuration > Sales > Shipping Methods > Mercado Envios.3. Setup the plugin:•Enabled: Enables/disables this Mercado Envios solution.•Title: Sets up the shipping method label displayed in the shipping section in checkout process.•Product attributes mapping: Maps the system attributes with the dimensions and weight. Also allows to set up the attribute unit.•Available shipping methods: Sets up the shipping options visible in the checkout process.•Free Method: Sets up the method to use as free shipping.•Free Shipping with Minimum Order Amount: Enables/disables the order minimum for free shipping to be available.•Show method if not applicable: If enabled, the shipping method is displayed when it's not available.•Displayed Error Message: Sets up the text to be displayed when the shipping method is not available.•Debug Mode: If enabled, displays the raw response from the API instead of a friendly message.•Sort order: Sets up the sort order to be displayed in the shipping step in checkout process.。
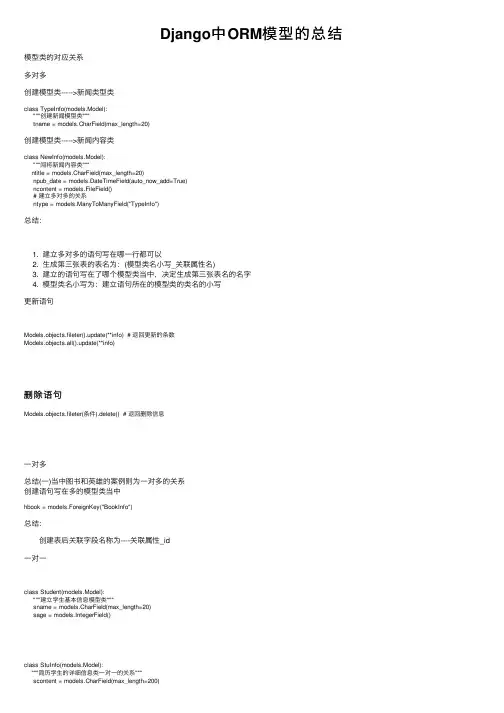
Django中ORM模型的总结模型类的对应关系多对多创建模型类----->新闻类型类class TypeInfo(models.Model):"""创建新闻模型类"""tname = models.CharField(max_length=20)创建模型类----->新闻内容类class NewInfo(models.Model):"""闯将新闻内容类"""ntitle = models.CharField(max_length=20)npub_date = models.DateTimeField(auto_now_add=True)ncontent = models.FileField()# 建⽴多对多的关系ntype = models.ManyToManyField("TypeInfo")总结:1. 建⽴多对多的语句写在哪⼀⾏都可以2. ⽣成第三张表的表名为:(模型类名⼩写_关联属性名)3. 建⽴的语句写在了哪个模型类当中,决定⽣成第三张表名的名字4. 模型类名⼩写为:建⽴语句所在的模型类的类名的⼩写更新语句Models.objects.fileter().update(**info) # 返回更新的条数Models.objects.all().update(**info)删除语句Models.objects.fileter(条件).delete() # 返回删除信息⼀对多总结(⼀)当中图书和英雄的案例则为⼀对多的关系创建语句写在多的模型类当中hbook = models.ForeignKey("BookInfo")总结: 创建表后关联字段名称为----关联属性_id⼀对⼀class Student(models.Model):"""建⽴学⽣基本信息模型类"""sname = models.CharField(max_length=20)sage = models.IntegerField() class StuInfo(models.Model):"""简历学⽣的详细信息类⼀对⼀的关系"""scontent = models.CharField(max_length=200)stu = models.OneToOneField("Student")总结: 创建语句写在哪⼀个模型类当中都可以⾃关联描述:⾃关联是⼀种特殊的⼀对多的关系。
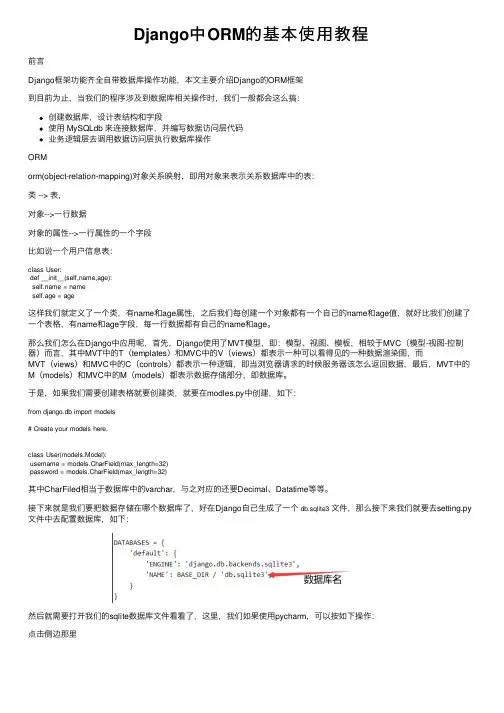
Django中ORM的基本使⽤教程前⾔Django框架功能齐全⾃带数据库操作功能,本⽂主要介绍Django的ORM框架到⽬前为⽌,当我们的程序涉及到数据库相关操作时,我们⼀般都会这么搞:创建数据库,设计表结构和字段使⽤ MySQLdb 来连接数据库,并编写数据访问层代码业务逻辑层去调⽤数据访问层执⾏数据库操作ORMorm(object-relation-mapping)对象关系映射,即⽤对象来表⽰关系数据库中的表:类 --> 表,对象-->⼀⾏数据对象的属性-->⼀⾏属性的⼀个字段⽐如说⼀个⽤户信息表:class User:def __init__(self,name,age): = nameself.age = age这样我们就定义了⼀个类,有name和age属性,之后我们每创建⼀个对象都有⼀个⾃⼰的name和age值,就好⽐我们创建了⼀个表格,有name和age字段,每⼀⾏数据都有⾃⼰的name和age。
那么我们怎么在Django中应⽤呢,⾸先,Django使⽤了MVT模型,即:模型、视图、模板,相较于MVC(模型-视图-控制器)⽽⾔,其中MVT中的T(templates)和MVC中的V(views)都表⽰⼀种可以看得见的⼀种数据渲染图,⽽MVT(views)和MVC中的C(controls)都表⽰⼀种逻辑,即当浏览器请求的时候服务器该怎么返回数据,最后,MVT中的M(models)和MVC中的M(models)都表⽰数据存储部分,即数据库。
于是,如果我们需要创建表格就要创建类,就要在modles.py中创建,如下:from django.db import models# Create your models here.class User(models.Model):username = models.CharField(max_length=32)password = models.CharField(max_length=32)其中CharFiled相当于数据库中的varchar,与之对应的还要Decimal、Datatime等等。
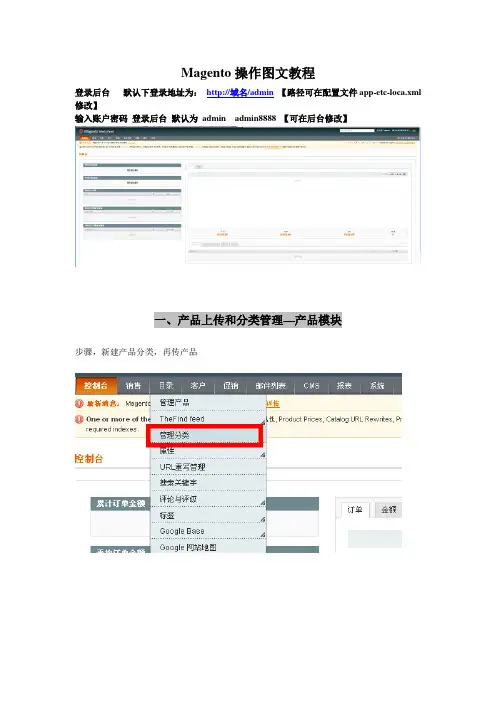
Magento操作图文教程登录后台默认下登录地址为:http://域名/admin【路径可在配置文件app-etc-loca.xml 修改】输入账户密码登录后台默认为admin admin8888 【可在后台修改】一、产品上传和分类管理—产品模块步骤,新建产品分类,再传产品1.新建产品分类导航—目录---管理分类—点进进入分类管理面板中文英文default category 是总目录,在新建分类的时候要先点击选中该分类,【所有产品分类都属于这个目录下】然后在点击添加子目录默认下,我们只需要填写基本信息即可说明: * 必填项目,分类名2.in Active: 是否在前台显示3.Description: 分类描述,可填写可不填写,填写可丰富网站内容、利于客户了解该产品以及利于SEO关键字密度:如下图4.image:分类图片:可浏览从本地导入分类图片,效果举例如下:5.Page Title:可以自己定义网页标题显示的文字,利于SEO优化,举例如下6.Meta Keywords:关键字,网页前台不显示,利于SEO优化7.Meta Description:描述,利于SEO优化8.Include in Navigation Menu:是否显示在导航,这个具体跟模板设计有关系,如果模板是程序指定显示内容,那么该功能无效,如果导航默认为推荐的产品分类,那么该选项有效其他红色框选中模块默认,暂时不用理会。
然后点击右上角的保存分类中文英文OK,一个名为Handbags的分类已经建立好了,(0)该分类下目前0个产品接下来,我们重新点击选中Default Category(0) 新建几个主分类、接下来,新建子分类鼠标单击选中Handbags分类,点击添加子目录填写子分类的分类信息,红色星号为必填选项,其他可填可不填然后右上角点击保存分类继续添加子目录,当然,我们还可以新建三级子目录,步骤一样。
产品分类新建完毕二、产品上传一、看到导航条--- 目录---下拉列表中单击管理产品进入产品管理页面二、看到左侧中间地方有一个增加产品,单击开始上传产品属性组合—默认产品类型-简单产品默认Magento功能比较强大,产品类型有多种类,可以是组合的捆绑的下载的虚拟产品等等我们默认下电子商务单品站一般就直接简单产品,然后继续产品基本信息Name*Description*EditorShort Description*SKU*Weight*Set Product as New from DateSet Product as New to DateStatus*-- 请选择--激活禁用URL keyVisibility*Allow Gift MessageIn feed三、产品价格Prices四、产品meta信息(内置SEO)五、上传图片Browse Files从电脑中选择文件然后Upload Files 六、库存三、商店设置导航---系统---设置一、基本设置--设置商店默认的国家、允许购买的国家、时区语言以及商店名称、联系人电话地址二、电子邮件地址设置---设置contact us的信息三、货币设置Base Currency 基准货币Default Display Currency 默认显示货币Allow Currencies 允许支付的货币设置了货币后我们还需要设置货币汇率导航---系统---管理货币汇率“导入”可以在线导入汇率。
【.NetCore从零开始前后端分离】(五)——轻量级ORM--SqlSugar前⾔今天学习⼀个轻量级的ORM框架——SqlSugar⼀、创建实体模型与数据库1、实体模型创建Advertisement的实体模型,其他的相关模型,⼤家⾃⾏下载代码即可:public class Advertisement{/// <summary>/// 主键/// </summary>public int Id { get; set; }/// <summary>/// ⼴告图⽚/// </summary>public string ImgUrl { get; set; }/// <summary>/// ⼴告标题/// </summary>public string Title { get; set; }/// <summary>/// ⼴告链接/// </summary>public string Url { get; set; }/// <summary>/// 备注/// </summary>public string Remark { get; set; }/// <summary>/// 创建时间/// </summary>public DateTime Createdate { get; set; } = DateTime.Now;}2、创建数据库这⾥采⽤的是MySql数据库。
sql语句在项⽬的Db⽂件夹。
使⽤来管理数据库。
这个是⼀个免费的数据库管理⼯具。
基本涵盖了所有的数据库类型。
选择Community Edition 社区版本。
当然,前提,需要先⾃⾏安装MySql。
建议安装5.7以上的版本。
打开DBeaver,在Mysql数据库类型,新建数据库Blog,选择字符类型为 utf8mb4,点击确定创建空的数据库:在创建的Blog数据库,右键⼯具-Restore database,选择sql⽂件,点击开始进⾏数据库恢复。
python之ORM操作1. SQLalchemy简介SQLAlchemy是⼀个开源的SQL⼯具包,基本Python编程语⾔的MIT许可证⽽发布的对象关系映射器。
SQLAlchemy提供了“⼀个熟知的企业级全套持久性模式,专为⾼效率和⾼性能的数据库访问⽽设计“。
SQLAlchemy的⾸次发布2006年2⽉,并已迅速成为最⼴泛使⽤的对象关系映射在Python社区的⼯具之⼀。
使⽤ORM等独⽴SQLAlchemy的⼀个优势在于其允许开发⼈员⾸先考虑数据模型,并能决定稍后可视化数据的⽅式2. SQLAlchempy的安装⾸先需安装mysql然后,下载SQLAlchemy-0.7.2,然后打开cmd,在安装包⽂件⽬录下,运⾏python setup.py install,通过python下输⼊import sqlalchemy,执⾏未报错则表⽰安装成功SQLAlchemySQLAlchemy是Python编程语⾔下的⼀款ORM框架,该框架建⽴在数据库API之上,使⽤关系对象映射进⾏数据库操作,简⾔之便是:将对象转换成SQL,然后使⽤数据API执⾏SQL并获取执⾏结果。
ORM⽅法论基于三个核⼼原则:简单:以最基本的形式建模数据。
传达性:数据库结构被任何⼈都能理解的语⾔⽂档化。
精确性:基于数据模型创建正确标准化了的结构。
Dialect⽤于和数据API进⾏交流,根据配置⽂件的不同调⽤不同的数据库API,从⽽实现对数据库的操作,如:'数据库类型+数据库驱动名称://⽤户名::端⼝号/数据库名'MySQL-Pythonmysql+mysqldb://<user>:<password>@<host>[:<port>]/<dbname>pymysqlmysql+pymysql://<username>:<password>@<host>/<dbname>[?<options>]MySQL-Connectormysql+mysqlconnector://<user>:<password>@<host>[:<port>]/<dbname>cx_Oracleoracle+cx_oracle://user:pass@host:port/dbname[?key=value&key=value...]注:2.7版本使⽤mysqldb3.5版本使⽤pymysql请⽤pip或者源码包安装,确保环境可以正常使⽤。
PythonDjangoORM与模型详解⽬录⼀、环境准备:1.docker环境2.安装mariadb数据库⼆、ORM1.ORM简介2.django配置数据库第⼀种⽅式:第⼆种⽅式:三、模型设计1.创建模型2.表关系四、模型应⽤第⼀步:第⼆步:总结⼀、环境准备:1.docker环境docker环境如下:2.安装mariadb数据库运⾏如下命令docker run -d --name [容器名称] -v test:/var/lib/mysql -p 3306:3306 --env MARIADB_USER=[⽤户名] --env MARIADB_PASSWORD=[⽤户密码] --env MARIADB_ROOT_PASSWORD=[root⽤户密码] --env MARIADB_DATABASE=[库名] mariadb:latest参数详解:name:启动容器设置容器名称v:设置容器⽬录/var/lib/mysql映射到本地⽬录testp:设置容器的3306端⼝映射到主机3306端⼝env:设置环境变量数据库相关信息d:后台运⾏容器mariadb并返回容器idmariadb:latest:启动最新的镜像版本等待命令运⾏结束后可以查看启动的容器:navicat连接测试:创建好的数据库:⼆、ORM1.ORM简介orm(object relational mapping )对象关系映射,⽤⾯向对象的⽅式,描述数据库,操作数据库,达到不编写sql语句就可以对数据库进⾏增删改查的⼀种技术,但是orm底层还是通过原⽣sql去实现的。
上图所⽰,⽽模型的对象就相当于表中数据。
2.django配置数据库在配置数据库前需要安装mysql驱动,此环境⽤的是mariadb数据库,安装驱动:pip install mysqlclient安装完成后可以通过如下两种⽅式添加配置信息:第⼀种⽅式:直接在settings.py中配置:DATABASES = {'default': {'ENGINE': 'django.db.backends.mysql','NAME': '库名','USER': '⽤户名','PASSWORD': '⽤户密码','HOST': '域名','PORT': '端⼝号'}}第⼆种⽅式:添加配置⽂件:根⽬录下新建配置⽂件⽬录,并创建配置⽂件填写数据库信息:# f[client]database = 库名user = ⽤户名password = ⽤户密码host = 域名port = 端⼝settings.py 中:DATABASES = {'default': {'ENGINE': 'django.db.backends.mysql','OPTIONS': {'read_default_file': str(BASE_DIR / [配置⽂件路径])}}}三、模型设计django中的模型准确且唯⼀的描述了数据,每个模型都是⼀个python类,继承django.db.models.Model类。
简述orm框架原理。
ORM(Object Relational Mapping)框架是一个实现了对象与关系数据库映射的工具,使得开发者能够使用面向对象的方式操作数据库,而不需要直接使用SQL语句。
ORM框架的原理是建立了对象模型和关系模型之间的映射关系,将面向对象的操作转换为对关系数据库的操作,从而简化了对数据库的操作。
ORM框架的主要原理是通过映射文件(Mapping File)或注解(Annotation)描述关系数据库中表与列的信息,并将它们转换为实体类与属性的信息。
ORM框架通过数据访问对象(DAO)将面向对象的操作映射为关系数据库中的操作,例如通过数据库连接(Connection)建立与数据库的连接,通过SQL语句执行数据库操作,获取ResultSet结果集等等。
ORM框架一般使用对象关系映射(Object Relational Mapping,ORM)技术建立对象与关系数据库之间的映射。
它首先以面向对象的方式描述关系数据库中的表和列,然后通过映射文件(Mapping File)或注解(Annotation)将它们转换为实体类与属性的信息。
通过这种方式,ORM框架将面向对象的操作转换为对关系数据库的操作,从而简化了对数据库的操作。
ORM框架的核心是ORM映射器(ORM Mapper),它是一个处理映射关系的组件,负责将实体对象映射到关系数据库中的表和列上,并且根据操作(CRUD)产生相应的SQL语句。
ORM框架一般有自己的语法、规则和数据类型,采用基于Class的方式操作数据,根据对象属性值的改变和触发条件执行自动SQL语句,包括生成INSERT、UPDATE、DELETE、SELECT等操作的SQL语句。
ORM框架通常支持的功能包括:1. 映射对象到表ORM框架将实体对象映射到关系数据库中的表和列上,从而实现面向对象的方式操作数据库。
2. 自动生成SQL语句ORM框架能够自动生成INSERT、UPDATE、DELETE、SELECT等操作的SQL语句,大大简化开发人员的工作。
go语⾔web开发17-beego框架之goorm使⽤02-orm模型名、字段名与数据库表。
1orm模型的作⽤⽤作数据库数据转换和⾃动建表2、模型名和表明的映射规则开头的⼤写字母转换为⼩写,除了开头的⼤写字母以外,遇到⼤写会将⼤写转为⼩写并在前⾯增加 _,原名称中的下划线保留。
具体看下表:orm模型名未指定表名的情况下⾃动建表后对应的表名Article articleAuthUser auth_userAuth_User auth__user (中间两个下划线)DB_AuthUser d_b__auth_user3、⾃定义表明可以给模型绑定TableName⽅法⾃定义模型对应的表明,具体如下type User struct {Id intName string}func (u *User) TableName() string {return "auth_user"// 这⾥返回的是⾃定义的表明}4、go orm模型的字段类型与MySQL表⾥的字段类型的对应关系go模型⾥的字段类型mysql表⾥的字段类型int, int32-设置auto或者名称为Id integer AUTO_INCREMENTint64-设置auto或者名称为Id bigint AUTO_INCREMENTuint, uint32 - 设置 auto 或者名称为 Id integer unsigned AUTO_INCREMENTuint64 - 设置 auto 或者名称为 Id bigint unsigned AUTO_INCREMENTbool boolstring - 默认为 size 255varchar(size)string - 设置 type(text)longtexttime.Time-设置 type为date datetime.Time datetimebyte tinyint unsignedrune integerint integerint8tinyintint16smallintint32integerint64bigintuint integer unsigneduint8tinyint unsigneduint16smallint unsigneduint32integer unsigneduint64bigint unsignedfloat32double precisionfloat64double precisionfloat64 设置digits,decimals numeric(digits, decimals)5、模型字段与表字段映射模型字段与数据库⾥表⾥字段的映射通过结构体tag来实现的,下⾯具体看下⾯⽰例:(1)模型定义与结构体tag使⽤// 1.定义模型type User struct {Id int `orm:"pk;auto"` // `orm:"pk"`:指定当前字段为主键。
PHP数据库操作:使⽤ORM什么是ORM呢?引⽤⽹友的话:ORM对象关系映射,O(Object)对象,在项⽬中就是实体,更加精确的来说就是数据Model,也可以说持久化类。
R(Relation)关系数据,M (Mapping)映射,将对象映射到关系数据,将关系数据映射到对象的过程。
更加直观理解就是,ORM就是以OOP思想,产⽣增删改查SQL语句。
相⽐PDO,ORM更适合快速开发项⽬,⽽不⽤写SQL语句。
下⾯介绍⼏个好⽤的ORM。
Medoo下⽂均以版本1.0.2为例。
环境要求PHP 5.1+, 推荐PHP 5.4+ 且⽀持PDO.⾄少安装了MySQL, MSSQL, SQLite其中⼀种.如何安装Medoo⽀持Composer安装和直接下载。
使⽤Composer安装:Copycomposer require catfan/Medoocomposer update开始使⽤引⼊Medoo并配置数据库:Copy<?php//使⽤Composer安装的这样引⼊//require 'vendor/autoload.php';// 直接下载的这样引⼊require_once 'medoo.php';// 初始化$db = new medoo(['database_type' => 'mysql','database_name' => 'test','server' => 'localhost','username' => 'root','password' => '123456','charset' => 'utf8',//可选:端⼝'port' => 3306,//可选:表前缀'prefix' => '',// PDO驱动选项 /manual/en/pdo.setattribute.php'option' => [PDO::ATTR_CASE => PDO::CASE_NATURAL]]);如果是SQLite:Copy$database = new medoo(['database_type' => 'sqlite','database_file' => 'my/database/path/database.db']);CURD查询(Read):Copyselect($table, $columns, $where) //获取所有记录- table [string] 表名- columns [string/array] 字段- where (可选) [array] 查询条件get($table, $columns, $where) //仅获取⼀条数据select($table, $join, $columns, $where)- table [string] 表名- join [array] 关联查询,如果没有可以忽略- columns [string/array] 字段- where (可选) [array] 查询条件⽰例:Copy$user = $db->select('user', '*'); //返回所有数据$user = $db->get('user', '*'); //返回⼀条数据$user = $db->select('user','*', array('name ' => 'joy'));$user = $db->select('user','name', array('age[>] ' => 20));$user = $db->select('user',['name','age'], array('age[<=] ' => 20));新增(Create):Copyinsert($table, $data)⽰例:Copy$db->insert('user', array('name'=> 't3', 'age'=>22)); //返回⾃增id注意:如果数据⾥⾯包含⼦数组将会被serialize()序列化, 你可以使⽤json_encode()作为JSON存储.更新(Update):Copyupdate($table, $data, $where)⽰例:Copy$db->update('user', array('name'=> 't5'), array('id'=> 23)); //返回受影响的⾏数删除(Delete):Copydelete($table, $where)⽰例:Copy$db->update('user', array('id'=> 23)); //返回受影响的⾏数where聚合查询Copy$db->has('user', array('id'=> 23)); //记录是否存在$db->count('user', array('id[>]'=> 23)); //统计$db->max('user', 'age', array('gender'=> 1)); //最⼤值$db->min('user', 'age', array('gender'=> 2)); //最⼩值$db->avg('user', 'age', array('gender'=> 2)); //平均值$db->sum('user', 'age', array('gender'=> 2)); //求和以上⽅法均⽀持第⼆个参数是$join,即关联查询。
seaorm的基础用法SeaORM是一个简单、高效的Rust语言数据库ORM(对象关系映射)框架,可帮助开发人员轻松地与数据库进行交互。
它提供了强大的查询构建器、事务管理和模型定义功能。
本文将介绍SeaORM的基础用法,包括数据库连接、模型定义、查询和更新操作。
数据库连接首先,我们需要通过适应的Rust数据库适配器(driver)建立与数据库的连接。
SeaORM支持多种数据库适配器,例如SQLite、MySQL 和PostgreSQL等。
下面是一个使用SQLite数据库的示例代码:```rustuse sea_orm::{Database, DbConn, QueryResult, Transaction};use tide::prelude::*;#[async_std::main]async fn main() -> tide::Result<()> {let db = Database::connect("sqlite::memory:").await.unwrap();let conn = DbConn::new(&db.pool).await;// 执行数据库操作Ok(())}```通过调用`Database::connect`方法,我们传递数据库连接字符串来建立与数据库的连接。
在上述示例中,我们使用了SQLite的内存数据库,便于演示。
你可以根据需求使用其他数据库适配器。
模型定义在与数据库进行交互之前,我们需要定义相应的模型。
SeaORM提供了类似于SQLAlchemy的模型定义语法,简洁明了。
下面是一个示例:```rustuse sea_orm::entity::prelude::*;#[derive(Clone, Debug, PartialEq, EntityModel)]#[tablename = "users"]pub struct User {#[serde(rename = "ID")]pub id: i32,pub name: String,pub age: Option<i32>,}impl UserModel {// 自定义方法}```在上述示例中,我们定义了一个名为`User`的模型,代表了数据库中的`users`表。
个人博客: http://www.vipinit.com 个人博客: http://www.vipinit.com 深入理解Magento – 第四章 – 模型和ORM基础 深入理解Magento
作者:Alan Storm 翻译:Hailong Zhang
第四章 – 模型和ORM基础 对于任何一个MVC架构,模型(Model)层的实现都是占据了很大一部分。对于Magento来说,模型占据了一个更加重要的位置,因为它常常包 含了一部分商业逻辑代码(可以说它对,也可以说它错)。这些代码在其他的MVC框架中往往出现在控制器或者帮助函数中。
传统的PHP MVC架构中的模型 本来MVC的定义就不是很清晰,不同的人有不同的看法,而对于模型的定义争议就更多了。在MVC模式被广泛采用之前,PHP程序员往往通过SQL语 句直接操作数据库。也有些程序员通过一个SQL抽象层来操作数据库(比如AdoDB)。程序员往往关注SQL语句本身,而不是和数据相关的对象。 虽然直接操作SQL的方式一直被病诟,但是很多PHP框架还是以SQL为中心的。模型层提供了一系列对象,抽象/封装了数据操作,但是程序员最终还是需为 模型层对象写SQL语句操作数据库。 还有一些框架回避了SQL,使用了对象关系映射(Object Relational Mapping,ORM)来解决这个问题。使用这个方法的话,程序员不用关注SQL,而只需要和对象打交道。我们可以操作一个对象的属性,当“Save” 方法被调用的时候,对象的属性会作为数据自动个人博客: http://www.vipinit.com 个人博客: http://www.vipinit.com 的被写入数据库。有些ORM框架会根据数据表的信息自动推测对象的属性,也有框架要求用户显示的生命对象属性 和表的关系。比较有名的ORM框架有ActiveRecord等等。【译者注:ActiveRecord源自Ruby on Rails,不过现在PHP也有了】 关于ORM的概念,我就解释到这里。但是和许多计算机领域的其他概念一样,ORM的定义也越来越模糊了。我不想在这片文章中讨论关于ORM的争议,所以我 说的ORM就是那个最基本的ORM概念。
Magento的模型 Magento理所当然的也追随潮流应用了ORM。虽然Magento自带的Zend框架提供了SQL抽象层,但是在大多数情况下我们将通过 Magento自带的模型和我们自己的模型来进行数据访问。他和视图层(View)一样,Magento的模型层也不是简单的ORM,而是一个高度灵活, 高度抽象甚至有点令人费解。
解剖Magento的模型 大部分的Magento模型分为两类。第一类是基本的ActiveRecord类型,一张表一个对象的模型。第二类是Entity Attribute Value(EAV)模型。【译者注:EAV翻译成“实体属性值”有点词不达意,还是就叫EAV的好】Magento自己定义了一个数据类型叫做模型集合 (Model Collection)。顾名思义,模型集合就是一个对象里面包含了很多模型对象。Magento的创造者Varien团队实现了PHP类库的标准接 口,“IteratorAggregate”,“Countable”。这样模型集合就能调用这些方法,这也是模型集合和数组的区别。 Magento的模型并不直接访问数据库。每一个模型都有一个资源模型(Resource Model),每一个资源模型拥有两个适配器(Adapter),一个读,一个写。这样的话逻辑模型和数据个人博客: http://www.vipinit.com 个人博客: http://www.vipinit.com 库访问就分开了,所以从理论上讲更改底层数据库 只需要重写适配器就可以了,所有上层代码都不需要更改。 创建一个基本模型 【译者注:从这一章开始我用我自己的例子替换了Alan的例子】继续我们Hello World的例子。在Hello World模块中创建BlogController.php如下 class Zhlmmc_Helloworld_BlogController extends Mage_Core_Controller_Front_Action { public function indexAction() { echo 'Hello Blog'; } } 访问以下URL http://127.0.0.1/Magento/helloworld/blog 你应该看到“Hello Blog”输出。
创建数据表 我们可以通过Magento自带的方法创建或者修改数据库,但是为了不引入过多新内容,我们暂且手工创建一张表。在你的数据库中执行以下语句 CREATE TABLE `blog_posts` ( `blogpost_id` int(11) NOT NULL auto_increment, `title` text, 个人博客: http://www.vipinit.com 个人博客: http://www.vipinit.com `post` text, `date` datetime default NULL, `timestamp` timestamp NOT NULL default CURRENT_TIMESTAMP, PRIMARY KEY (`blogpost_id`) ); INSERT INTO `blog_posts` VALUES (1,'My New Title','This is a blog post','2009-07-01 00:00:00','2009-07-02 23:12:30'); 这里我们创建了一张名为“blog_posts”的表,并填充了一条数据。
创建模型 要设置一个模型一共有以下四个步骤 启用模型 启用资源模型 在资源模型中添加实体(Entity)。对于简单的模型来说,实体就是数据表的名字 为资源模型设置读、写适配器 在进行这些步骤之前,我们先来看假设这些步骤已经做完了,我们怎么用一个模型。在Magento中,我们用以下的方式来实例化一个模型 $model = Mage::getModel('helloworld/blogpost'); 和我们以前讲过的“Mage::getHelper()”的原理类似,这里Magento也是通过全局配置去查找模型的类名。模型的类名和我们以前讲过的 块类名一样,都是分组类名。这里参数的前半部分“helloworld”是组名(Group Name),后半部分“blogpost”是半类名(Class Name)【译者注:我将“Class Name”翻译成半类名是为了和类名区分开来】。个人博客: http://www.vipinit.com 个人博客: http://www.vipinit.com 具体步骤如下 从全局配置“/global/models/GROUP_NAME/class”获得基本类名 “Zhlmmc_Helloworld_Model” 检查全局配置“/global/models/GROUP_NAME/rewrite/CLASS_NAME”是否设置,如果有那么这个节点的值 将被作为类名实例化 否则,最终的类名将是基本类名加上半类名,也就是“Zhlmmc_Helloworld_Model_Blogpost”
启用模型 修改模块的config.xml Zhlmmc_Helloworld_Model helloworld_mysql4 个人博客: http://www.vipinit.com 个人博客: http://www.vipinit.com 标签就是组名,也应该和模块名一致。标签的内容是基本类名,所有Helloworld模块的模型都用这个基本类名,命名方式如下 Packagename_Modulename_Model 标签指明了这个模块的模型要用哪个资源模型。这个标签的内容是组名加上“mysql4”我们将在后面详细介绍资源模型。 现在让我们来实例化一个模型看看,修改indexAction方法 public function indexAction() { $blogpost = Mage::getModel('helloworld/blogpost'); echo get_class($blogpost); } 清空Magento缓存,刷新页面,你应该看到一个类似这样的异常(请先打开Magento的开发模式) include(Zhlmmc\Helloworld\Model\Blogpost.php) [href='function.include'>function.include]: failed to open stream: No such file or directory 原因很简单,就是Magento尝试去实例化“Zhlmmc_Helloworld_Model_Blogpost”,但是它在Helloworld模块 的文件夹里面找不到这个类。所以我们现在来创建这个类 File: app/code/local/Zhlmmc/Helloworld/Model/Blogpost.php class Zhlmmc_Helloworld_Model_Blogpost extends Mage_Core_Model_Abstract {