CUDA_Getting_Started_2.1_Windows
- 格式:pdf
- 大小:1.98 MB
- 文档页数:16
Nsight Systems Installation GuideTABLE OF CONTENTS Chapter 1. Overview (1)Chapter 2. System Requirements (3)Supported Platforms (3)CUDA Version (3)Requirements for x86_64, Power, and Arm SBSA T argets on Linux (4)x86_64 Windows T arget Device Requirements (5)Host Application Requirements (5)Chapter 3. Getting Started Guide (7)3.1. Finding the Right Package (7)3.2. Installing GUI on the Host System (8)3.3. Optional: Setting up the CLI (8)3.4. Launching the GUI (9)Nsight Systems is a statistical sampling profiler with tracing features. It is designed to work with devices and devkits based on NVIDIA Tegra SoCs (system-on-chip), Arm SBSA (server based system architecture) systems, IBM Power systems, and systems based on the x86_64 processor architecture that also include NVIDIA GPU(s). Throughout this document we will refer to the device on which profiling happens as the target, and the computer on which the user works and controls the profiling session as the host. Note that for x86_64 based systems these may be on the same device, whereas with Tegra, Arm, or IBM Power based systems they will always be separate. Furthermore, three different activities are distinguished as follows:‣Profiling — The process of collecting any performance data. A profiling session in Nsight Systems typically includes sampling and tracing.‣Sampling — The process of periodically stopping the profilee (the application under investigation during the profiling session), typically to collect backtraces (call stacks of active threads), which allows you to understand statistically how much time is spent in each function. Additionally, hardware counters can also be sampled. This process is inherently imprecise when a low number of samples have been collected.‣Tracing — The process of collecting precise information about various activities happening in the profilee or in the system. For example, profilee API execution may be traced providing the exact time and duration of a function call.Nsight Systems supports multiple generations of Tegra SoCs, NVIDIA discrete GPUs, and various CPU architectures, as well as various target and host operating systems. This documentation describes the full set of features available in any version of Nsight Systems. In the event that a feature is not available in all versions, that will be noted in the text. In general, Nsight Systems Embedded Platforms Edition indicates the package that supports Tegra processors for the embedded and automotive market and Nsight Systems Workstation Edition supports x86_64, IBM Power, and Arm server (SBSA) processors for the workstation and cluster market.Common features that are supported by Nsight Systems on most platforms include the following:‣Sampling of the profilee and collecting backtraces using multiple algorithms (such as frame pointers or DWARF data). Building top-down, bottom-up, and flat viewsOverviewas appropriate. This information helps identify performance bottlenecks in CPU-intensive code.‣Sampling or tracing system power behaviors, such as CPU frequency.‣(Only on Nsight Systems Embedded Platforms Edition)Sampling counters from Arm PMU (Performance Monitoring Unit). Information such as cache misses gets statistically correlated with function execution.‣Support for multiple windows. Users with multiple monitors can see multiple reports simultaneously, or have multiple views into the same report file.With Nsight Systems, a user could:‣Identify call paths that monopolize the CPU.‣Identify individual functions that monopolize the CPU (across different call paths).‣For Nsight Systems Embedded Platforms Edition, identify functions that have poor cache utilization.‣If platform supports CUDA, see visual representation of CUDA Runtime and Driver API calls, as well as CUDA GPU workload. Nsight Systems uses the CUDA Profiling Tools Interface (CUPTI), for more information, see: CUPTI documentation.‣If the user annotates with NVIDIA Tools Extension (NVTX), see visual representation of NVTX annotations: ranges, markers, and thread names.‣For Windows targets, see visual representation of D3D12: which API calls are being made on the CPU, graphic frames, stutter analysis, as well as GPU workloads(command lists and debug ranges).‣For x86_64 targets, see visual representation of Vulkan: which API calls are being made on the CPU, graphic frames, stutter analysis, as well as Vulkan GPU workloads (command buffers and debug ranges).Nsight Systems supports multiple platforms. For simplicity, think of these as Nsight Systems Embedded Platforms Edition and Nsight Systems Workstation Edition, where Nsight Systems Workstation Edition supports desktops, workstations, and clusters with x86_64, IBM Power, and Arm SBSA CPUs on Linux and Windows OSs, while Nsight Systems Embedded Platforms Edition supports NVIDIA Tegra products for the embedded and gaming space on Linux for Tegra and QNX OSs.Supported PlatformsDepending on your OS, different GPUs are supportedL4T (Linux for Tegra)‣Jetson AGX Xavier‣Jetson TX2‣Jetson TX2i‣Jetson TX‣Jetson Nano‣Jetson Xavier NXx86_64, IBM Power (from Power 9), or Arm SBSA‣NVIDIA GPU architectures starting with Pascal‣OS (64 bit only)‣Ubuntu 18.04 and 20.04‣CentOS and RedHat Enterprise Linux 7.4+ with kernel version 3.10.0-693 or later.‣Windows 10, 11CUDA Version‣Nsight Systems supports CUDA 10.0, 10.1, 10.2, and 11.X for most platforms‣Nsight Systems on Arm SBSA supports 10.2 and 11.X Note that CUDA version and driver version must be compatible.CUDA Version Driver minimum version11.045010.2440.3010.1418.3910.0410.48From CUDA 11.X on, any driver from 450 on will be supported, although new features introduced in more recent drivers will not be available.For information about which drivers were specifically released with each toolkit, see CUDA Toolkit Release Notes - Major Component VersionsRequirements for x86_64, Power, and Arm SBSAT argets on LinuxWhen attaching to x86_64, Power, or Arm SBSA Linux-based target from the GUI on the host, the connection is established through SSH.Use of Linux Perf: To collect thread scheduling data and IP (instruction pointer) samples, the Linux operating system's perf_event_paranoid level must be 2 or less. Use the following command to check:If the output is >2, then do the following to temporarily adjust the paranoid level (note that this has to be done after each reboot):To make the change permanent, use the following command:Kernel version: To collect thread scheduling data and IP (instruction pointer) samples and backtraces, the kernel version must be:‣ 3.10.0-693 or later for CentOS and RedHat Enterprise Linux 7.4+‣ 4.3 or greater for all other distros including UbuntuTo check the version number of the kernel on a target device, run the following command on the device:Note that only CentOS, RedHat, and Ubuntu distros are tested/confirmed to work correctly.glibc version: To check the glibc version on a target device, run the following command:Nsight Systems requires glibc 2.17 or more recent.CUDA: See above for supported CUDA versions in this release. Use the deviceQuery command to determine the CUDA driver and runtime versions on the system. the deviceQuery command is available in the CUDA SDK. It is normally installed at:Only pure 64-bit environments are supported. In other words, 32-bit systems or 32-bit processes running within a 64-bit environment are not supported.Nsight Systems requires write permission to the /var/lock directory on the target system.Docker: See Collecting Data within a Docker section of the User Guide for more information.x86_64 Windows T arget Device RequirementsDX12 Requires:‣Windows 10 with NVIDIA Driver 411.63 or higher for DX12 trace‣Windows 10 April 2018 Update (version 1803, AKA Redstone 4) with NVIDIA Driver 411.63 or higher for DirectX Ray Tracing, and tracing DX12 Copy command queues.Host Application RequirementsThe Nsight Systems host application runs on the following host platforms:‣Windows 10, Windows Server 2019. Only 64-bit versions are supported.‣Linux Ubuntu 14.04 and higher are known to work, running on other modern distributions should be possible as well. Only 64-bit versions are supported.‣OS X 10.10 "Yosemite" and higher.3.1. Finding the Right PackageNsight Systems is available for multiple targets and multiple host OSs. To choose the right package, first consider the target system to be analyzed.‣For Tegra target systems, select Nsight Systems for Tegra available as part of NVIDIA JetPack SDK.‣For x86_64, IBM Power target systems, or Arm SBSA select from the target packages from Nsight Systems for Workstations, available from https:/// nsight-systems. This web release will always contain the latest and greatest Nsight Systems features.‣The x86_64, IBM Power, and Arm SBSA target versions of Nsight Systems are also available in the CUDA Toolkit.Each package is limited to one architecture. For example, Tegra packages do not contain support for profiling x86 targets, and x86 packages do not contain support for profiling Tegra targets.After choosing an appropriate target version, select the package corresponding to the host OS, the OS on the system where results will be viewed. These packages are inthe form of common installer types: .msi for Windows; .run, .rpm, and .deb for x86 Linux; .deb and .rpm for Linux on IBM Power; and .dmg for the macOS installer. Note: the IBM Power and Arm SBSA packages do not have a GUI for visualization of the result. If you wish to visualize your result, please download and install the GUI available for macOS, x86_64 Linux, or Windows systems.Tegra packages‣Windows host – Install .msi on Windows machine. Enables remote access to Tegra device for profiling.‣Linux host – Install .run on Linux system. Enables remote access to Tegra device for profiling.‣macOS host – Install .dmg on macOS machine. Enables remote access to Tegra device for profiling.Getting Started Guidex86_64 packages‣Windows host – Install .msi on Windows machine. Enables remote access to Linux x86_64 or Windows devices for profiling as well as running on local system.‣Linux host – Install .run, .rpm, or .deb on Linux system. Enables remote access to Linux x86_64 or Windows devices for profiling or running collection on localhost.‣Linux CLI only – The Linux CLI is shipped in all x86 packages, but if you just want the CLI, we have a package for that. Install .deb on Linux system. Enables only CLI collection, report can be imported or opened in x86_64 host.‣macOS host – Install .dmg on macOS machine. Enables remote access to Linux x86_64 device for profiling.IBM Power packages‣Power CLI only - The IBM Power support does not include a host GUI. Install .deb or .rpm on your Power system. Enables only CLI collection, report can be imported or opened in GUI on any supported host platform.Arm SBSA packages‣Arm SBSA CLI only - Arm SBSA support does not include a host GUI. Install .deb or .rpm on your Arm SBSA system. Enables only CLI collection, report can beimported or opened in GUI on any supported host platform.3.2. Installing GUI on the Host SystemCopy the appropriate file to your host system in a directory where you have write and execute permissions. Run the install file, accept the EULA, and Nsight Systems will install on your system.On Linux, there are special options to enable automated installation. Running the installer with the --accept flag will automatically accept the EULA, running withthe --accept flag and the --quiet flag will automatically accept the EULA without printing to stdout. Running with --quiet without --accept will display an error. The installation will create a Host directory for this host and a Target directory for each target this Nsight Systems package supports.All binaries needed to collect data on a target device will be installed on the target by the host on first connection to the device. There is no need to install the package on the target device.If installing from the CUDA Toolkit, see the CUDA Toolkit documentation.3.3. Optional: Setting up the CLIAll Nsight Systems targets can be profiled using the CLI. IBM Power and Arm SBSA targets can only be profiled using the CLI. The CLI is especially helpful when scripts are used to run unattended collections or when access to the target system via ssh is not possible. In particular, this can be used to enable collection in a Docker container.Getting Started Guide Installation Guide v2022.3.4 | 9The CLI can be found in the Target directory of the Nsight Systems installation. Users who want to install the CLI as a standalone tool can do so by copying the files within the Target directory to the location of their choice.If you wish to run the CLI without root (recommended mode) you will want to install in a directory where you have full access.Once you have the CLI set up, you can use the nsys status -e command to check your environment.~$ nsys status -e Sampling Environment Check Linux Kernel Paranoid Level = 1: OK Linux Distribution = Ubuntu Linux Kernel Version = 4.15.0-109-generic: OK Linux perf_event_open syscall available: OK Sampling trigger event available: OK Intel(c) Last Branch Record support: Available Sampling Environment: OKThis status check allows you to ensure that the system requirements for CPU sampling using Nsight Systems are met in your local environment. If the Sampling Environment is not OK, you will still be able to run various trace operations.Intel(c) Last Branch Record allows tools, including Nsight Systems to use hardware to quickly get limited stack information. Nsight Systems will use this method for stack resolution by default if available.For information about changing these environment settings, see System Requirements section in the Installation Guide. For information about changing the backtrace method,see Profiling from the CLI in the User Guide.To get started using the CLI, run nsys --help for a list of options or see Profiling Applications from the CLI in the User Guide for full documentation.3.4. Launching the GUIDepending on your OS, Nsight Systems will have installed an icon on your host desktop that you can use to launch the GUI. To launch the GUI directly, run the nsight-sys executable in the Host sub-directory of your installation.。
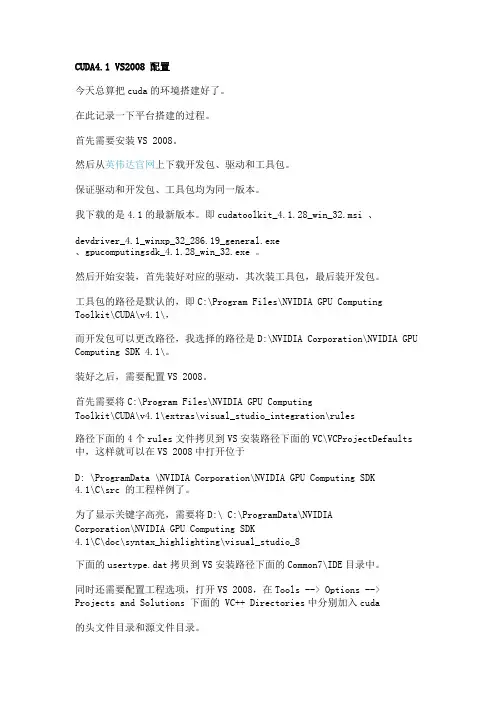
CUDA4.1 VS2008 配置今天总算把cuda的环境搭建好了。
在此记录一下平台搭建的过程。
首先需要安装VS 2008。
然后从英伟达官网上下载开发包、驱动和工具包。
保证驱动和开发包、工具包均为同一版本。
我下载的是4.1的最新版本。
即cudatoolkit_4.1.28_win_32.msi 、devdriver_4.1_winxp_32_286.19_general.exe、gpucomputingsdk_4.1.28_win_32.exe 。
然后开始安装,首先装好对应的驱动,其次装工具包,最后装开发包。
工具包的路径是默认的,即C:\Program Files\NVIDIA GPU ComputingToolkit\CUDA\v4.1\,而开发包可以更改路径,我选择的路径是D:\NVIDIA Corporation\NVIDIA GPU Computing SDK 4.1\。
装好之后,需要配置VS 2008。
首先需要将C:\Program Files\NVIDIA GPU ComputingToolkit\CUDA\v4.1\extras\visual_studio_integration\rules路径下面的4个rules文件拷贝到VS安装路径下面的VC\VCProjectDefaults 中,这样就可以在VS 2008中打开位于D: \ProgramData \NVIDIA Corporation\NVIDIA GPU Computing SDK4.1\C\src 的工程样例了。
为了显示关键字高亮,需要将D:\ C:\ProgramData\NVIDIACorporation\NVIDIA GPU Computing SDK4.1\C\doc\syntax_highlighting\visual_studio_8下面的usertype.dat拷贝到VS安装路径下面的Common7\IDE目录中。
浅析CUDA编译流程与配置方法CUDA是一种并行计算编程平台和应用程序编程接口(API),由NVIDIA公司开发而成。
它允许开发人员使用C/C++编写高性能的GPU加速应用程序。
CUDA编程使用了一种特殊的编译流程,并且需要进行相关的配置才能正确地使用。
本文将对CUDA编译流程和配置方法进行浅析。
CUDA编译流程可以分为以下几个步骤:1.源代码编写:首先,开发人员需要根据自己的需求,使用CUDAC/C++语言编写并行计算的代码。
CUDA代码中包含了主机端代码和设备端代码。
主机端代码运行在CPU上,用于管理GPU设备的分配和调度工作;设备端代码运行在GPU上,用于实际的并行计算。
2.配置开发环境:在进行CUDA编程之前,需要正确地配置开发环境。
开发环境包括安装适当的CUDA驱动程序和CUDA工具包,并设置相应的环境变量。
此外,还需要选择合适的GPU设备进行开发。
3.编译主机端代码:使用NVCC编译器编译主机端代码。
NVCC是一个特殊的C/C++编译器,它能够处理包含CUDA扩展语法的代码。
主机端代码编译后会生成可执行文件,该文件在CPU上运行,负责分配和调度GPU设备的工作。
4.编译设备端代码:使用NVCC编译器编译设备端代码。
设备端代码编译后会生成CUDA二进制文件,该文件会被主机端代码加载到GPU设备上进行并行计算。
在编译设备端代码时,需要根据GPU架构选择适当的编译选项,以充分发挥GPU性能。
5.运行程序:将生成的可执行文件在CPU上运行,主机端代码会将设备端代码加载到GPU上进行并行计算。
在程序运行期间,主机端代码可以通过调用CUDAAPI来与GPU进行数据传输和任务调度。
配置CUDA开发环境的方法如下:2. 设置环境变量:CUDA安装完成后,需要将相关的路径添加到系统的环境变量中。
具体来说,需要将CUDA安装目录下的bin和lib64路径添加到系统的PATH变量中,以便系统能够找到CUDA相关的可执行文件和库文件。
API Reference ManualTable of ContentsChapter 1. Difference between the driver and runtime APIs (1)Chapter 2. API synchronization behavior (3)Chapter 3. Stream synchronization behavior (5)Chapter 4. Graph object thread safety (7)Chapter 5. Modules (8)5.1. Data types used by CUDA driver (9)CUaccessPolicyWindow (10)CUarrayMapInfo (10)CUDA_ARRAY3D_DESCRIPTOR (10)CUDA_ARRAY_DESCRIPTOR (10)CUDA_ARRAY_SPARSE_PROPERTIES (10)CUDA_EXT_SEM_SIGNAL_NODE_PARAMS (10)CUDA_EXT_SEM_WAIT_NODE_PARAMS (10)CUDA_EXTERNAL_MEMORY_BUFFER_DESC (10)CUDA_EXTERNAL_MEMORY_HANDLE_DESC (10)CUDA_EXTERNAL_MEMORY_MIPMAPPED_ARRAY_DESC (10)CUDA_EXTERNAL_SEMAPHORE_HANDLE_DESC (10)CUDA_EXTERNAL_SEMAPHORE_SIGNAL_PARAMS (10)CUDA_EXTERNAL_SEMAPHORE_WAIT_PARAMS (10)CUDA_HOST_NODE_PARAMS (10)CUDA_KERNEL_NODE_PARAMS (10)CUDA_LAUNCH_PARAMS (11)CUDA_MEMCPY2D (11)CUDA_MEMCPY3D (11)CUDA_MEMCPY3D_PEER (11)CUDA_MEMSET_NODE_PARAMS (11)CUDA_POINTER_ATTRIBUTE_P2P_TOKENS (11)CUDA_RESOURCE_DESC (11)CUDA_RESOURCE_VIEW_DESC (11)CUDA_TEXTURE_DESC (11)CUdevprop (11)CUeglFrame (11)CUipcEventHandle (11)CUipcMemHandle (11)CUkernelNodeAttrValue (11)CUmemAllocationProp (11)CUmemLocation (11)CUmemPoolProps (12)CUmemPoolPtrExportData (12)CUstreamAttrValue (12)CUstreamBatchMemOpParams (12)CUaccessProperty (12)CUaddress_mode (12)CUarray_cubemap_face (12)CUarray_format (13)CUarraySparseSubresourceType (13)CUcomputemode (14)CUctx_flags (14)CUDA_POINTER_ATTRIBUTE_ACCESS_FLAGS (14)CUdevice_attribute (15)CUdevice_P2PAttribute (21)CUeglColorFormat (21)CUeglFrameType (27)CUeglResourceLocationFlags (27)CUevent_flags (27)CUevent_record_flags (28)CUevent_wait_flags (28)CUexternalMemoryHandleType (28)CUexternalSemaphoreHandleType (29)CUfilter_mode (29)CUfunc_cache (30)CUfunction_attribute (30)CUgraphicsMapResourceFlags (31)CUgraphicsRegisterFlags (31)CUgraphNodeType (31)CUipcMem_flags (32)CUjit_cacheMode (32)CUjit_fallback (32)CUjit_option (33)CUjit_target (35)CUjitInputType (36)CUkernelNodeAttrID (36)CUmem_advise (37)CUmemAccess_flags (37)CUmemAllocationCompType (38)CUmemAllocationGranularity_flags (38)CUmemAllocationHandleType (38)CUmemAllocationType (38)CUmemAttach_flags (39)CUmemHandleType (39)CUmemLocationType (39)CUmemOperationType (39)CUmemorytype (40)CUoccupancy_flags (40)CUpointer_attribute (40)CUresourcetype (41)CUresourceViewFormat (41)CUresult (43)CUshared_carveout (49)CUsharedconfig (50)CUstream_flags (50)CUstreamAttrID (50)CUstreamBatchMemOpType (50)CUstreamCaptureMode (51)CUstreamCaptureStatus (51)CUstreamWaitValue_flags (51)CUstreamWriteValue_flags (52)CUarray (52)CUcontext (52)CUdevice (52)CUdeviceptr (52)CUeglStreamConnection (53)CUevent (53)CUexternalMemory (53)CUexternalSemaphore (53)CUfunction (53)CUgraph (53)CUgraphExec (53)CUgraphicsResource (53)CUhostFn (53)CUmemoryPool (54)CUmipmappedArray (54)CUmodule (54)CUoccupancyB2DSize (54)CUstream (54)CUstreamCallback (54)CUsurfObject (54)CUsurfref (54)CUtexObject (54)CUtexref (55)CU_ARRAY_SPARSE_PROPERTIES_SINGLE_MIPTAIL (55)CU_DEVICE_CPU (55)CU_DEVICE_INVALID (55)CU_IPC_HANDLE_SIZE (55)CU_LAUNCH_PARAM_BUFFER_POINTER (55)CU_LAUNCH_PARAM_BUFFER_SIZE (55)CU_LAUNCH_PARAM_END (56)CU_MEM_CREATE_USAGE_TILE_POOL (56)CU_MEMHOSTALLOC_DEVICEMAP (56)CU_MEMHOSTALLOC_PORTABLE (56)CU_MEMHOSTALLOC_WRITECOMBINED (56)CU_MEMHOSTREGISTER_DEVICEMAP (56)CU_MEMHOSTREGISTER_IOMEMORY (56)CU_MEMHOSTREGISTER_PORTABLE (56)CU_MEMHOSTREGISTER_READ_ONLY (57)CU_PARAM_TR_DEFAULT (57)CU_STREAM_LEGACY (57)CU_STREAM_PER_THREAD (57)CU_TRSA_OVERRIDE_FORMAT (57)CU_TRSF_DISABLE_TRILINEAR_OPTIMIZATION (57)CU_TRSF_NORMALIZED_COORDINATES (58)CU_TRSF_READ_AS_INTEGER (58)CU_TRSF_SRGB (58)CUDA_ARRAY3D_2DARRAY (58)CUDA_ARRAY3D_COLOR_ATTACHMENT (58)CUDA_ARRAY3D_CUBEMAP (58)CUDA_ARRAY3D_DEPTH_TEXTURE (58)CUDA_ARRAY3D_LAYERED (58)CUDA_ARRAY3D_SPARSE (59)CUDA_ARRAY3D_SURFACE_LDST (59)CUDA_ARRAY3D_TEXTURE_GATHER (59)CUDA_COOPERATIVE_LAUNCH_MULTI_DEVICE_NO_POST_LAUNCH_SYNC (59)CUDA_COOPERATIVE_LAUNCH_MULTI_DEVICE_NO_PRE_LAUNCH_SYNC (59)CUDA_EGL_INFINITE_TIMEOUT (59)CUDA_EXTERNAL_MEMORY_DEDICATED (59)CUDA_EXTERNAL_SEMAPHORE_SIGNAL_SKIP_NVSCIBUF_MEMSYNC (60)CUDA_EXTERNAL_SEMAPHORE_WAIT_SKIP_NVSCIBUF_MEMSYNC (60)CUDA_NVSCISYNC_ATTR_SIGNAL (60)CUDA_NVSCISYNC_ATTR_WAIT (60)CUDA_VERSION (60)MAX_PLANES (60)5.2. Error Handling (61)cuGetErrorName (61)cuGetErrorString (61)5.3. Initialization (62)cuInit (62)5.4. Version Management (63)cuDriverGetVersion (63)5.5. Device Management (63)cuDeviceGet (64)cuDeviceGetAttribute (64)cuDeviceGetCount (70)cuDeviceGetDefaultMemPool (71)cuDeviceGetLuid (71)cuDeviceGetMemPool (72)cuDeviceGetName (72)cuDeviceGetNvSciSyncAttributes (73)cuDeviceGetTexture1DLinearMaxWidth (74)cuDeviceGetUuid (75)cuDeviceSetMemPool (76)cuDeviceTotalMem (76)5.6. Device Management [DEPRECATED] (77)cuDeviceComputeCapability (77)cuDeviceGetProperties (78)5.7. Primary Context Management (79)cuDevicePrimaryCtxGetState (79)cuDevicePrimaryCtxRelease (80)cuDevicePrimaryCtxReset (81)cuDevicePrimaryCtxRetain (82)cuDevicePrimaryCtxSetFlags (83)5.8. Context Management (84)cuCtxCreate (84)cuCtxDestroy (86)cuCtxGetApiVersion (87)cuCtxGetCacheConfig (88)cuCtxGetCurrent (89)cuCtxGetDevice (89)cuCtxGetFlags (90)cuCtxGetLimit (90)cuCtxGetSharedMemConfig (91)cuCtxGetStreamPriorityRange (92)cuCtxPopCurrent (93)cuCtxPushCurrent (94)cuCtxResetPersistingL2Cache (95)cuCtxSetCacheConfig (95)cuCtxSetCurrent (96)cuCtxSetLimit (97)cuCtxSetSharedMemConfig (99)cuCtxSynchronize (100)5.9. Context Management [DEPRECATED] (100)cuCtxAttach (100)cuCtxDetach (101)5.10. Module Management (102)cuLinkAddData (102)cuLinkAddFile (103)cuLinkComplete (104)cuLinkCreate (105)cuLinkDestroy (106)cuModuleGetFunction (106)cuModuleGetGlobal (107)cuModuleGetSurfRef (108)cuModuleGetTexRef (108)cuModuleLoadData (110)cuModuleLoadDataEx (111)cuModuleLoadFatBinary (112)cuModuleUnload (113)5.11. Memory Management (114)cuArray3DCreate (114)cuArray3DGetDescriptor (117)cuArrayCreate (118)cuArrayDestroy (120)cuArrayGetDescriptor (121)cuArrayGetPlane (122)cuArrayGetSparseProperties (123)cuDeviceGetByPCIBusId (124)cuDeviceGetPCIBusId (124)cuIpcCloseMemHandle (125)cuIpcGetEventHandle (126)cuIpcGetMemHandle (127)cuIpcOpenEventHandle (127)cuIpcOpenMemHandle (128)cuMemAlloc (129)cuMemAllocHost (130)cuMemAllocManaged (131)cuMemAllocPitch (134)cuMemcpy (135)cuMemcpy2D (137)cuMemcpy2DAsync (139)cuMemcpy2DUnaligned (142)cuMemcpy3D (145)cuMemcpy3DAsync (147)cuMemcpy3DPeer (150)cuMemcpy3DPeerAsync (151)cuMemcpyAsync (152)cuMemcpyAtoA (153)cuMemcpyAtoD (154)cuMemcpyAtoH (155)cuMemcpyAtoHAsync (156)cuMemcpyDtoA (157)cuMemcpyDtoDAsync (159)cuMemcpyDtoH (161)cuMemcpyDtoHAsync (162)cuMemcpyHtoA (163)cuMemcpyHtoAAsync (164)cuMemcpyHtoD (165)cuMemcpyHtoDAsync (166)cuMemcpyPeer (168)cuMemcpyPeerAsync (169)cuMemFree (170)cuMemFreeHost (170)cuMemGetAddressRange (171)cuMemGetInfo (172)cuMemHostAlloc (173)cuMemHostGetDevicePointer (175)cuMemHostGetFlags (176)cuMemHostRegister (177)cuMemHostUnregister (179)cuMemsetD16 (179)cuMemsetD16Async (180)cuMemsetD2D16 (181)cuMemsetD2D16Async (183)cuMemsetD2D32 (184)cuMemsetD2D32Async (185)cuMemsetD2D8 (186)cuMemsetD2D8Async (187)cuMemsetD32 (188)cuMemsetD32Async (189)cuMemsetD8 (190)cuMemsetD8Async (191)cuMipmappedArrayCreate (192)cuMipmappedArrayDestroy (195)cuMipmappedArrayGetLevel (196)cuMipmappedArrayGetSparseProperties (197)5.12. Virtual Memory Management (198)cuMemAddressFree (198)cuMemAddressReserve (199)cuMemExportToShareableHandle (201)cuMemGetAccess (202)cuMemGetAllocationGranularity (202)cuMemGetAllocationPropertiesFromHandle (203)cuMemImportFromShareableHandle (204)cuMemMap (205)cuMemMapArrayAsync (206)cuMemRelease (209)cuMemRetainAllocationHandle (210)cuMemSetAccess (210)cuMemUnmap (211)5.13. Stream Ordered Memory Allocator (212)cuMemAllocAsync (213)cuMemAllocFromPoolAsync (214)cuMemFreeAsync (215)cuMemPoolCreate (215)cuMemPoolDestroy (216)cuMemPoolExportPointer (216)cuMemPoolExportToShareableHandle (217)cuMemPoolGetAccess (218)cuMemPoolGetAttribute (218)cuMemPoolImportFromShareableHandle (220)cuMemPoolImportPointer (221)cuMemPoolSetAccess (222)cuMemPoolSetAttribute (222)cuMemPoolTrimTo (223)5.14. Unified Addressing (224)cuMemAdvise (226)cuMemPrefetchAsync (229)cuMemRangeGetAttribute (231)cuMemRangeGetAttributes (233)cuPointerGetAttribute (234)cuPointerGetAttributes (237)cuPointerSetAttribute (238)5.15. Stream Management (239)cuStreamAddCallback (240)cuStreamAttachMemAsync (241)cuStreamCopyAttributes (244)cuStreamCreate (245)cuStreamCreateWithPriority (246)cuStreamDestroy (247)cuStreamEndCapture (248)cuStreamGetAttribute (248)cuStreamGetCaptureInfo (249)cuStreamGetCtx (250)cuStreamGetFlags (251)cuStreamGetPriority (251)cuStreamIsCapturing (252)cuStreamQuery (253)cuStreamSetAttribute (254)cuStreamSynchronize (254)cuStreamWaitEvent (255)cuThreadExchangeStreamCaptureMode (256)5.16. Event Management (257)cuEventCreate (258)cuEventDestroy (259)cuEventElapsedTime (259)cuEventQuery (260)cuEventRecord (261)cuEventRecordWithFlags (262)cuEventSynchronize (263)5.17. External Resource Interoperability (264)cuDestroyExternalMemory (264)cuDestroyExternalSemaphore (265)cuExternalMemoryGetMappedBuffer (266)cuExternalMemoryGetMappedMipmappedArray (267)cuImportExternalMemory (268)cuImportExternalSemaphore (271)cuSignalExternalSemaphoresAsync (274)cuWaitExternalSemaphoresAsync (276)5.18. Stream memory operations (278)cuStreamBatchMemOp (279)cuStreamWaitValue32 (280)cuStreamWaitValue64 (281)cuStreamWriteValue64 (283)5.19. Execution Control (284)cuFuncGetAttribute (284)cuFuncSetAttribute (285)cuFuncSetCacheConfig (286)cuFuncSetSharedMemConfig (287)cuLaunchCooperativeKernel (289)cuLaunchCooperativeKernelMultiDevice (291)cuLaunchHostFunc (294)cuLaunchKernel (295)5.20. Execution Control [DEPRECATED] (297)cuFuncSetBlockShape (298)cuFuncSetSharedSize (299)cuLaunch (299)cuLaunchGrid (300)cuLaunchGridAsync (301)cuParamSetf (303)cuParamSeti (303)cuParamSetSize (304)cuParamSetTexRef (305)cuParamSetv (306)5.21. Graph Management (306)cuGraphAddChildGraphNode (307)cuGraphAddDependencies (308)cuGraphAddEmptyNode (309)cuGraphAddEventRecordNode (310)cuGraphAddEventWaitNode (311)cuGraphAddExternalSemaphoresSignalNode (312)cuGraphAddExternalSemaphoresWaitNode (313)cuGraphAddHostNode (315)cuGraphAddKernelNode (316)cuGraphAddMemcpyNode (318)cuGraphAddMemsetNode (319)cuGraphChildGraphNodeGetGraph (320)cuGraphClone (321)cuGraphCreate (322)cuGraphDestroy (323)cuGraphEventRecordNodeGetEvent (324)cuGraphEventRecordNodeSetEvent (325)cuGraphEventWaitNodeGetEvent (325)cuGraphEventWaitNodeSetEvent (326)cuGraphExecChildGraphNodeSetParams (327)cuGraphExecDestroy (328)cuGraphExecEventRecordNodeSetEvent (328)cuGraphExecEventWaitNodeSetEvent (329)cuGraphExecExternalSemaphoresSignalNodeSetParams (330)cuGraphExecExternalSemaphoresWaitNodeSetParams (331)cuGraphExecHostNodeSetParams (332)cuGraphExecKernelNodeSetParams (333)cuGraphExecMemcpyNodeSetParams (334)cuGraphExecMemsetNodeSetParams (335)cuGraphExecUpdate (336)cuGraphExternalSemaphoresSignalNodeGetParams (339)cuGraphExternalSemaphoresSignalNodeSetParams (340)cuGraphExternalSemaphoresWaitNodeGetParams (341)cuGraphExternalSemaphoresWaitNodeSetParams (342)cuGraphGetEdges (343)cuGraphGetNodes (344)cuGraphGetRootNodes (344)cuGraphHostNodeGetParams (345)cuGraphHostNodeSetParams (346)cuGraphInstantiate (347)cuGraphKernelNodeCopyAttributes (348)cuGraphKernelNodeGetAttribute (348)cuGraphKernelNodeGetParams (349)cuGraphKernelNodeSetAttribute (350)cuGraphKernelNodeSetParams (350)cuGraphLaunch (351)cuGraphMemcpyNodeGetParams (352)cuGraphMemcpyNodeSetParams (353)cuGraphMemsetNodeGetParams (353)cuGraphMemsetNodeSetParams (354)cuGraphNodeFindInClone (355)cuGraphNodeGetDependencies (356)cuGraphNodeGetType (358)cuGraphRemoveDependencies (358)cuGraphUpload (359)5.22. Occupancy (360)cuOccupancyAvailableDynamicSMemPerBlock (360)cuOccupancyMaxActiveBlocksPerMultiprocessor (361)cuOccupancyMaxActiveBlocksPerMultiprocessorWithFlags (362)cuOccupancyMaxPotentialBlockSize (363)cuOccupancyMaxPotentialBlockSizeWithFlags (365)5.23. Texture Reference Management [DEPRECATED] (366)cuTexRefCreate (366)cuTexRefDestroy (367)cuTexRefGetAddress (367)cuTexRefGetAddressMode (368)cuTexRefGetArray (369)cuTexRefGetBorderColor (369)cuTexRefGetFilterMode (370)cuTexRefGetFlags (371)cuTexRefGetFormat (371)cuTexRefGetMaxAnisotropy (372)cuTexRefGetMipmapFilterMode (373)cuTexRefGetMipmapLevelBias (373)cuTexRefGetMipmapLevelClamp (374)cuTexRefGetMipmappedArray (375)cuTexRefSetAddress (375)cuTexRefSetAddress2D (376)cuTexRefSetAddressMode (378)cuTexRefSetArray (379)cuTexRefSetBorderColor (379)cuTexRefSetFilterMode (380)cuTexRefSetFlags (381)cuTexRefSetFormat (382)cuTexRefSetMaxAnisotropy (383)cuTexRefSetMipmapFilterMode (383)cuTexRefSetMipmapLevelBias (384)cuTexRefSetMipmapLevelClamp (385)cuTexRefSetMipmappedArray (386)5.24. Surface Reference Management [DEPRECATED] (386)cuSurfRefGetArray (387)cuSurfRefSetArray (387)5.25. Texture Object Management (388)cuTexObjectCreate (388)cuTexObjectDestroy (393)cuTexObjectGetResourceDesc (393)cuTexObjectGetResourceViewDesc (394)cuTexObjectGetTextureDesc (394)5.26. Surface Object Management (395)cuSurfObjectCreate (395)cuSurfObjectDestroy (396)cuSurfObjectGetResourceDesc (396)5.27. Peer Context Memory Access (397)cuCtxDisablePeerAccess (397)cuCtxEnablePeerAccess (398)cuDeviceCanAccessPeer (399)cuDeviceGetP2PAttribute (400)5.28. Graphics Interoperability (401)cuGraphicsMapResources (401)cuGraphicsResourceGetMappedMipmappedArray (402)cuGraphicsResourceGetMappedPointer (403)cuGraphicsResourceSetMapFlags (404)cuGraphicsSubResourceGetMappedArray (405)cuGraphicsUnmapResources (406)cuGraphicsUnregisterResource (407)5.29. Profiler Control [DEPRECATED] (407)cuProfilerInitialize (408)5.30. Profiler Control (409)cuProfilerStart (409)cuProfilerStop (409)5.31. OpenGL Interoperability (410)OpenGL Interoperability [DEPRECATED] (410)CUGLDeviceList (410)cuGLGetDevices (410)cuGraphicsGLRegisterBuffer (412)cuGraphicsGLRegisterImage (413)cuWGLGetDevice (414)5.31.1. OpenGL Interoperability [DEPRECATED] (415)CUGLmap_flags (415)cuGLCtxCreate (415)cuGLInit (416)cuGLMapBufferObject (417)cuGLMapBufferObjectAsync (418)cuGLRegisterBufferObject (419)cuGLSetBufferObjectMapFlags (419)cuGLUnmapBufferObject (420)cuGLUnmapBufferObjectAsync (421)cuGLUnregisterBufferObject (422)5.32. VDPAU Interoperability (422)cuGraphicsVDPAURegisterOutputSurface (423)cuGraphicsVDPAURegisterVideoSurface (424)cuVDPAUCtxCreate (425)cuVDPAUGetDevice (426)5.33. EGL Interoperability (427)cuEGLStreamConsumerAcquireFrame (427)cuEGLStreamConsumerConnect (428)cuEGLStreamConsumerConnectWithFlags (428)cuEGLStreamConsumerDisconnect (429)cuEGLStreamConsumerReleaseFrame (430)cuEGLStreamProducerConnect (430)cuEGLStreamProducerDisconnect (431)cuEGLStreamProducerPresentFrame (432)cuEGLStreamProducerReturnFrame (433)cuEventCreateFromEGLSync (433)cuGraphicsEGLRegisterImage (434)cuGraphicsResourceGetMappedEglFrame (436)Chapter 6. Data Structures (438)CUaccessPolicyWindow (439)base_ptr (439)hitProp (439)hitRatio (439)missProp (439)num_bytes (439)CUarrayMapInfo (439)deviceBitMask (440)extentHeight (440)extentWidth (440)flags (440)layer (440)level (440)memHandleType (440)memOperationType (440)offset (440)offsetX (441)offsetY (441)offsetZ (441)reserved (441)resourceType (441)size (441)subresourceType (441)CUDA_ARRAY3D_DESCRIPTOR (441)Depth (441)Flags (441)Format (442)Height (442)NumChannels (442)Width (442)CUDA_ARRAY_DESCRIPTOR (442)Format (442)Height (442)NumChannels (442)Width (442)CUDA_ARRAY_SPARSE_PROPERTIES (443)depth (443)flags (443)height (443)miptailFirstLevel (443)miptailSize (443)width (443)CUDA_EXT_SEM_SIGNAL_NODE_PARAMS (444)extSemArray (444)numExtSems (444)CUDA_EXT_SEM_WAIT_NODE_PARAMS (444)extSemArray (444)numExtSems (444)paramsArray (445)CUDA_EXTERNAL_MEMORY_BUFFER_DESC (445)flags (445)offset (445)size (445)CUDA_EXTERNAL_MEMORY_HANDLE_DESC (445)fd (445)flags (446)handle (446)name (446)nvSciBufObject (446)size (446)type (446)win32 (446)CUDA_EXTERNAL_MEMORY_MIPMAPPED_ARRAY_DESC (447)arrayDesc (447)numLevels (447)offset (447)CUDA_EXTERNAL_SEMAPHORE_HANDLE_DESC (447)fd (447)flags (448)handle (448)name (448)nvSciSyncObj (448)type (448)win32 (448)CUDA_EXTERNAL_SEMAPHORE_SIGNAL_PARAMS (449)fence (449)fence (449)flags (449)key (449)keyedMutex (450)value (450)CUDA_EXTERNAL_SEMAPHORE_WAIT_PARAMS (450)flags (450)key (450)keyedMutex (451)nvSciSync (451)timeoutMs (451)value (451)CUDA_HOST_NODE_PARAMS (451)fn (451)userData (451)CUDA_KERNEL_NODE_PARAMS (452)blockDimX (452)blockDimY (452)blockDimZ (452)extra (452)func (452)gridDimX (452)gridDimY (452)gridDimZ (453)kernelParams (453)sharedMemBytes (453)CUDA_LAUNCH_PARAMS (453)blockDimX (453)blockDimY (453)blockDimZ (453)function (453)gridDimX (453)gridDimY (454)gridDimZ (454)hStream (454)kernelParams (454)sharedMemBytes (454)CUDA_MEMCPY2D (454)dstArray (454)dstDevice (454)dstHost (454)dstMemoryType (454)dstPitch (455)dstY (455)Height (455)srcArray (455)srcDevice (455)srcHost (455)srcMemoryType (455)srcPitch (455)srcXInBytes (455)srcY (455)WidthInBytes (456)CUDA_MEMCPY3D (456)Depth (456)dstArray (456)dstDevice (456)dstHeight (456)dstHost (456)dstLOD (456)dstMemoryType (456)dstPitch (456)dstXInBytes (457)dstY (457)dstZ (457)Height (457)reserved0 (457)reserved1 (457)srcArray (457)srcDevice (457)srcHeight (457)srcHost (457)srcLOD (457)srcMemoryType (458)srcPitch (458)srcXInBytes (458)srcY (458)srcZ (458)WidthInBytes (458)CUDA_MEMCPY3D_PEER (458)dstArray (458)dstContext (458)dstDevice (459)dstHeight (459)dstHost (459)dstLOD (459)dstMemoryType (459)dstPitch (459)dstXInBytes (459)dstY (459)dstZ (459)Height (459)srcArray (460)srcContext (460)srcDevice (460)srcHeight (460)srcHost (460)srcLOD (460)srcMemoryType (460)srcPitch (460)srcXInBytes (460)srcY (460)srcZ (461)WidthInBytes (461)CUDA_MEMSET_NODE_PARAMS (461)dst (461)elementSize (461)height (461)pitch (461)value (461)width (461)CUDA_POINTER_ATTRIBUTE_P2P_TOKENS (462)CUDA_RESOURCE_DESC (462)devPtr (462)flags (462)format (462)hArray (462)hMipmappedArray (462)numChannels (462)pitchInBytes (463)resType (463)sizeInBytes (463)width (463)CUDA_RESOURCE_VIEW_DESC (463)depth (463)firstLayer (463)firstMipmapLevel (463)format (463)height (464)lastLayer (464)lastMipmapLevel (464)width (464)CUDA_TEXTURE_DESC (464)addressMode (464)borderColor (464)filterMode (464)flags (464)maxAnisotropy (465)maxMipmapLevelClamp (465)minMipmapLevelClamp (465)mipmapFilterMode (465)mipmapLevelBias (465)CUdevprop (465)clockRate (465)maxGridSize (465)maxThreadsDim (465)maxThreadsPerBlock (465)memPitch (466)regsPerBlock (466)sharedMemPerBlock (466)SIMDWidth (466)textureAlign (466)totalConstantMemory (466)CUeglFrame (466)depth (466)eglColorFormat (466)frameType (467)height (467)numChannels (467)pArray (467)pitch (467)planeCount (467)pPitch (467)width (467)CUipcEventHandle (467)CUipcMemHandle (467)CUkernelNodeAttrValue (468)accessPolicyWindow (468)cooperative (468)CUmemAccessDesc (468)flags (468)location (468)CUmemAllocationProp (468)compressionType (468)location (469)requestedHandleTypes (469)type (469)usage (469)win32HandleMetaData (469)CUmemLocation (469)id (469)type (469)CUmemPoolProps (470)allocType (470)handleTypes (470)location (470)reserved (470)win32SecurityAttributes (470)CUmemPoolPtrExportData (470)CUstreamAttrValue (470)accessPolicyWindow (471)CUstreamBatchMemOpParams (471)Chapter 7. Data Fields (472)Chapter 8. Deprecated List (483)Chapter 1.Difference between thedriver and runtime APIsThe driver and runtime APIs are very similar and can for the most part be used interchangeably. However, there are some key differences worth noting between the two. Complexity vs. controlThe runtime API eases device code management by providing implicit initialization, context management, and module management. This leads to simpler code, but it also lacks the level of control that the driver API has.In comparison, the driver API offers more fine-grained control, especially over contexts and module loading. Kernel launches are much more complex to implement, as the execution configuration and kernel parameters must be specified with explicit function calls. However, unlike the runtime, where all the kernels are automatically loaded during initialization and stay loaded for as long as the program runs, with the driver API it is possible to only keep the modules that are currently needed loaded, or even dynamically reload modules. The driver API is also language-independent as it only deals with cubin objects.Context managementContext management can be done through the driver API, but is not exposed in the runtime API. Instead, the runtime API decides itself which context to use for a thread: if a context has been made current to the calling thread through the driver API, the runtime will use that, but if there is no such context, it uses a "primary context." Primary contexts are created as needed, one per device per process, are reference-counted, and are then destroyed when there areno more references to them. Within one process, all users of the runtime API will share the primary context, unless a context has been made current to each thread. The context thatthe runtime uses, i.e, either the current context or primary context, can be synchronized with cudaDeviceSynchronize(), and destroyed with cudaDeviceReset().Using the runtime API with primary contexts has its tradeoffs, however. It can cause trouble for users writing plug-ins for larger software packages, for example, because if all plug-ins run in the same process, they will all share a context but will likely have no way to communicate with each other. So, if one of them calls cudaDeviceReset() after finishing all its CUDA work, the other plug-ins will fail because the context they were using was destroyedDifference between the driver and runtime APIs without their knowledge. To avoid this issue, CUDA clients can use the driver API to create and set the current context, and then use the runtime API to work with it. However, contexts may consume significant resources, such as device memory, extra host threads, and performance costs of context switching on the device. This runtime-driver context sharing is important when using the driver API in conjunction with libraries built on the runtime API, such as cuBLAS or cuFFT.Chapter 2.API synchronizationbehaviorThe API provides memcpy/memset functions in both synchronous and asynchronous forms, the latter having an "Async" suffix. This is a misnomer as each function may exhibit synchronous or asynchronous behavior depending on the arguments passed to the function. MemcpyIn the reference documentation, each memcpy function is categorized as synchronous or asynchronous, corresponding to the definitions below.Synchronous1.All transfers involving Unified Memory regions are fully synchronous with respect to thehost.2.For transfers from pageable host memory to device memory, a stream sync is performedbefore the copy is initiated. The function will return once the pageable buffer has been copied to the staging memory for DMA transfer to device memory, but the DMA to final destination may not have completed.3.For transfers from pinned host memory to device memory, the function is synchronouswith respect to the host.4.For transfers from device to either pageable or pinned host memory, the function returnsonly once the copy has completed.5.For transfers from device memory to device memory, no host-side synchronization isperformed.6.For transfers from any host memory to any host memory, the function is fully synchronouswith respect to the host.Asynchronous1.For transfers from device memory to pageable host memory, the function will return onlyonce the copy has completed.2.For transfers from any host memory to any host memory, the function is fully synchronouswith respect to the host.API synchronization behavior 3.For all other transfers, the function is fully asynchronous. If pageable memory must firstbe staged to pinned memory, this will be handled asynchronously with a worker thread. MemsetThe synchronous memset functions are asynchronous with respect to the host except when the target is pinned host memory or a Unified Memory region, in which case they are fully synchronous. The Async versions are always asynchronous with respect to the host. Kernel LaunchesKernel launches are asynchronous with respect to the host. Details of concurrent kernel execution and data transfers can be found in the CUDA Programmers Guide.Chapter 3.Stream synchronizationbehaviorDefault streamThe default stream, used when 0 is passed as a cudaStream_t or by APIs that operate ona stream implicitly, can be configured to have either legacy or per-thread synchronization behavior as described below.The behavior can be controlled per compilation unit with the --default-streamnvcc option. Alternatively, per-thread behavior can be enabled by defining theCUDA_API_PER_THREAD_DEFAULT_STREAM macro before including any CUDA headers. Either way, the CUDA_API_PER_THREAD_DEFAULT_STREAM macro will be defined in compilation units using per-thread synchronization behavior.Legacy default streamThe legacy default stream is an implicit stream which synchronizes with all other streamsin the same CUcontext except for non-blocking streams, described below. (For applications using the runtime APIs only, there will be one context per device.) When an action is taken in the legacy stream such as a kernel launch or cudaStreamWaitEvent(), the legacy stream first waits on all blocking streams, the action is queued in the legacy stream, and then all blocking streams wait on the legacy stream.For example, the following code launches a kernel k_1 in stream s, then k_2 in the legacy stream, then k_3 in stream s:k_1<<<1, 1, 0, s>>>();k_2<<<1, 1>>>();k_3<<<1, 1, 0, s>>>();The resulting behavior is that k_2 will block on k_1 and k_3 will block on k_2.Non-blocking streams which do not synchronize with the legacy stream can be created using the cudaStreamNonBlocking flag with the stream creation APIs.The legacy default stream can be used explicitly with the CUstream (cudaStream_t) handle CU_STREAM_LEGACY (cudaStreamLegacy).。
Get Started With Deep Learning PerformanceGetting Started | NVIDIA DocsTable of ContentsChapter 1. Overview (1)Chapter 2. Recommendations (2)2.1. Operating In Math-Limited Regime Where Possible (2)2.2. Using Tensor Cores Efficiently With Alignment (2)2.3. Choosing Parameters To Maximize Execution Efficiency (3)Chapter 3. Checklists (4)Chapter 4. How This Guide Fits In (5)Chapter 1.OverviewGPUs accelerate machine learning operations by performing calculations in parallel. Many operations, especially those representable as matrix multiplies, will see good acceleration right out of the box. Even better performance can be achieved by tweaking operation parameters to efficiently use GPU resources.This document presents the tips that we think are most widely useful. We link to each of the other pages, with more in-depth information, where appropriate. If you want to jump straight to optimizing a network, read our Checklists!Chapter 2.Recommendations2.1. Operating In Math-Limited RegimeWhere PossibleGPUs excel at performing calculations in parallel, but data also needs to be loaded and stored around those calculations, and thus data movement speed can also limit achievable performance. If the speed of a routine is limited by calculation rate (math-limited or math-bound), performance can be improved by enabling Tensor Cores and following our other recommendations.On the other hand, if a routine is limited by the time taken to load inputs and write outputs (bandwidth-limited or memory-bound), speeding up calculation does not improve performance. For fully-connected and convolutional layers, this occurs mostly when one or more parameters of a layer are small.In other words, if an operation is memory-bound, tweaking parameters to more efficiently utilize the GPU is ineffective. Operations not representable as matrix multiplies, including activation functions, pooling, and batch normalization, are nearly always memory-bound. Those with an equivalent matrix multiply, including fully-connected, convolutional, and recurrent layers, may be memory-bound or math-bound depending on their sizes. Larger layers tend to have more calculations relative to the number of memory accesses, a ratio that we refer to as arithmetic intensity. If arithmetic intensity exceeds a particular threshold (dependent on the GPU type and the type of calculation being done), the operation is math-bound and can be optimized effectively with our tips. See Understanding Performance and Math and Memory Bounds for background and details.2.2. Using Tensor Cores Efficiently WithAlignmentTensor Cores are most efficient when key parameters of the operation are multiples of4 if using TF32, 8 if using FP16, or 16 if using INT8 (equivalently, when key dimensions of the operation are aligned to multiples of 16 bytes in memory). For fully-connected layers, the relevant parameters are the batch size and the number of inputs and outputs; for convolutional layers, the number of input and output channels; and for recurrent layers, theRecommendationsminibatch size and hidden sizes. With NVIDIA® cuBLAS 11.0 or higher and NVIDIA CUDA®Deep Neural Network library (cuDNN) 7.6.3 or higher, Tensor Cores can be used even if this requirement is not met, though performance is better if it is. In earlier versions, Tensor Cores may not be enabled if one or more dimensions aren’t aligned. This requirement is based on how data is stored and accessed in memory. Further details can be found in Tensor Core Requirements.TF32, a datatype introduced with the NVIDIA Ampere Architecture, works with existing FP32 code to leverage Tensor Cores. More detail on TF32 can be found at this link. Mixed precision is another option for networks that currently use FP32, and works with both the NVIDIA Ampere Architecture and NVIDIA Volta™ and NVIDIA Turing™ GPUs. The NVIDIA Training with Mixed Precision Guide explains how to use mixed precision with Tensor Cores, including instructions for getting started quickly in a number of frameworks.2.3. Choosing Parameters To MaximizeExecution EfficiencyGPUs perform operations efficiently by dividing the work between many parallel processes. Consequently, using parameters that make it easier to break up the operation evenly will lead to the best efficiency. This means choosing parameters (including batch size, input size, output size, and channel counts) to be divisible by larger powers of two, at least 64, and up to 256. There is no downside to using values divisible by 512 and higher powers of two, but there is less additional benefit. Divisibility by powers of two is most important for parameters that are small; choosing 512 over 520 has more impact than choosing 5120 over 5128. Additionally,for these tweaks to improve efficiency, the operation must already be math-bound, which usually requires at least one parameter to be substantially larger than 256. See Operating In Math-Limited Regime Where Possible and other linked sections about calculating arithmetic intensity.More specific requirements for different routines can be found in the corresponding checklist and guide. Background on why this matters can be found in GPU Architecture Fundamentals and Typical Tile Dimensions in CUBLAS and Performance.Chapter 3.ChecklistsWe provide the following quick start checklists with tips specific to each type of operation.‣Checklist for Fully-Connected Layers‣Checklist for Convolutional Layers‣Checklist for Recurrent Layers‣Checklist for Memory-Limited LayersChapter 4.How This Guide Fits InNVIDIA’s GPU deep learning platform comes with a rich set of other resources you can useto learn more about NVIDIA’s Tensor Core GPU architectures as well as the fundamentals of mixed-precision training and how to enable it in your favorite framework.The NVIDIA V100 GPU architecture whitepaper provides an introduction to NVIDIA Volta,the first NVIDIA GPU architecture to introduce Tensor Cores to accelerate Deep Learning operations. The equivalent whitepaper for the NVIDIA Turing architecture expands on thisby introducing NVIDIA Turing Tensor Cores, which add additional low-precision modes. The whitepaper for the NVIDIA Ampere architecture introduces Tensor Core support for additional precisions (including TF32, which works with existing FP32 workloads to leverage Tensor Cores), up to 2x throughput with the Sparsity feature, and virtual partitioning of GPUs with the Multi-Instance GPU feature.The NVIDIA Training With Mixed Precision User's Guide describes the basics of training neural networks with reduced precision such as algorithmic considerations following from the numerical formats used. It also details how to enable mixed precision training in your framework of choice, including TensorFlow, PyTorch, and MXNet. The easiest and safest way to turn on mixed precision training and use Tensor Cores is through Automatic Mixed Precision, which is supported in PyTorch, TensorFlow, and MxNet.Additional documentation is provided to help explain how to:‣Tweak parameters of individual operations by type, with examples:‣NVIDIA Optimizing Linear/Fully-Connected Layers User's Guide‣NVIDIA Optimizing Convolutional Layers User's Guide‣NVIDIA Optimizing Recurrent Layers User's Guide‣NVIDIA Optimizing Memory-Limited Layers User's Guide‣Understand the ideas behind these recommendations:‣NVIDIA GPU Performance Background User's Guide‣NVIDIA Matrix Multiplication Background User's GuideNoticeThis document is provided for information purposes only and shall not be regarded as a warranty of a certain functionality, condition, or quality of a product. NVIDIA Corporation (“NVIDIA”) makes no representations or warranties, expressed or implied, as to the accuracy or completeness of the information contained in this document and assumes no responsibility for any errors contained herein. NVIDIA shall have no liability for the consequences or use of such information or for any infringement of patents or other rights of third parties that may result from its use. This document is not a commitment to develop, release, or deliver any Material (defined below), code, or functionality.NVIDIA reserves the right to make corrections, modifications, enhancements, improvements, and any other changes to this document, at any time without notice. Customer should obtain the latest relevant information before placing orders and should verify that such information is current and complete.NVIDIA products are sold subject to the NVIDIA standard terms and conditions of sale supplied at the time of order acknowledgement, unless otherwise agreed in an individual sales agreement signed by authorized representatives of NVIDIA and customer (“Terms of Sale”). NVIDIA hereby expressly objects to applying any customer general terms and conditions with regards to the purchase of the NVIDIA product referenced in this document. No contractual obligations are formed either directly or indirectly by this document.NVIDIA products are not designed, authorized, or warranted to be suitable for use in medical, military, aircraft, space, or life support equipment, nor in applications where failure or malfunction of the NVIDIA product can reasonably be expected to result in personal injury, death, or property or environmental damage. NVIDIA accepts no liability for inclusion and/or use of NVIDIA products in such equipment or applications and therefore such inclusion and/or use is at customer’s own risk. NVIDIA makes no representation or warranty that products based on this document will be suitable for any specified use. Testing of all parameters of each product is not necessarily performed by NVIDIA. It is customer’s sole responsibility to evaluate and determine the applicability of any information contained in this document, ensure the product is suitable and fit for the application planned by customer, and perform the necessary testing for the application in order to avoid a default of the application or the product. Weaknesses in customer’s product designs may affect the quality and reliability of the NVIDIA product and may result in additional or different conditions and/or requirements beyond those contained in this document. NVIDIA accepts no liability related to any default, damage, costs, or problem which may be based on or attributable to: (i) the use of the NVIDIA product in any manner that is contrary to this document or (ii) customer product designs.No license, either expressed or implied, is granted under any NVIDIA patent right, copyright, or other NVIDIA intellectual property right under this document. Information published by NVIDIA regarding third-party products or services does not constitute a license from NVIDIA to use such products or services or a warranty or endorsement thereof. Use of such information may require a license from a third party under the patents or other intellectual property rights of the third party, or a license from NVIDIA under the patents or other intellectual property rights of NVIDIA.Reproduction of information in this document is permissible only if approved in advance by NVIDIA in writing, reproduced without alteration and in full compliance with all applicable export laws and regulations, and accompanied by all associated conditions, limitations, and notices.THIS DOCUMENT AND ALL NVIDIA DESIGN SPECIFICATIONS, REFERENCE BOARDS, FILES, DRAWINGS, DIAGNOSTICS, LISTS, AND OTHER DOCUMENTS (TOGETHER AND SEPARATELY, “MATERIALS”) ARE BEING PROVIDED “AS IS.” NVIDIA MAKES NO WARRANTIES, EXPRESSED, IMPLIED, STATUTORY, OR OTHERWISE WITH RESPECT TO THE MATERIALS, AND EXPRESSLY DISCLAIMS ALL IMPLIED WARRANTIES OF NONINFRINGEMENT, MERCHANTABILITY, AND FITNESS FOR A PARTICULAR PURPOSE. TO THE EXTENT NOT PROHIBITED BY LAW, IN NO EVENT WILL NVIDIA BE LIABLE FOR ANY DAMAGES, INCLUDING WITHOUT LIMITATION ANY DIRECT, INDIRECT, SPECIAL, INCIDENTAL, PUNITIVE, OR CONSEQUENTIAL DAMAGES, HOWEVER CAUSED AND REGARDLESS OF THE THEORY OF LIABILITY, ARISING OUT OF ANY USE OF THIS DOCUMENT, EVEN IF NVIDIA HAS BEEN ADVISED OF THE POSSIBILITY OF SUCH DAMAGES. Notwithstanding any damages that customer might incur for any reason whatsoever, NVIDIA’s aggregate and cumulative liability towards customer for the products described herein shall be limited in accordance with the Terms of Sale for the product.GoogleAndroid, Android TV, Google Play and the Google Play logo are trademarks of Google, Inc.TrademarksNVIDIA, the NVIDIA logo, CUDA, Merlin, RAPIDS, Triton Inference Server, Turing and Volta are trademarks and/or registered trademarks of NVIDIA Corporation in the United States and other countries. Other company and product names may be trademarks of the respective companies with which they are associated.Copyright© 2020-2023 NVIDIA Corporation & affiliates. All rights reserved.。
Reference ManualTable of ContentsChapter 1. Introduction (1)Chapter 2. Demos (2)2.1. deviceQuery (2)2.2. vectorAdd (2)2.3. bandwidthTest (2)2.4. busGrind (3)2.5. nbody (4)2.6. oceanFFT (4)2.7. randomFog (5)Chapter 1.IntroductionThe CUDA Demo Suite contains pre-built applications which use CUDA. These applications demonstrate the capabilities and details of NVIDIA GPUs.Chapter 2.DemosBelow are the demos within the demo suite.2.1. deviceQueryThis application enumerates the properties of the CUDA devices present in the system and displays them in a human readable format.2.2. vectorAddThis application is a very basic demo that implements element by element vector addition.2.3. bandwidthTestThis application provides the memcopy bandwidth of the GPU and memcpy bandwidth across PCI‑e. This application is capable of measuring device to device copy bandwidth, host to device copy bandwidth for pageable and page-locked memory, and device to host copy bandwidth for pageable and page-locked memory.Arguments:Usage: bandwidthTest [OPTION]...Test the bandwidth for device to host, host to device, and device to devicetransfersExample: measure the bandwidth of device to host pinned memory copies in the range 1024 Bytes to 102400 Bytes in 1024 Byte increments./bandwidthTest --memory=pinned --mode=range --start=1024 --end=102400 --increment=1024 --dtoh2.4. busGrindProvides detailed statistics about peer-to-peer memory bandwidth amongst GPUs present in the system as well as pinned, unpinned memory bandwidth.Arguments:Order of parameters maters.Examples:./BusGrind -n -p 1 -e 1 Run all pinned and P2P tests./BusGrind -n -u 1 Runs only unpinned tests./BusGrind -a Runs all tests (pinned, unpinned, p2p enabled, p2pdisabled)2.5. nbodyThis demo does an efficient all-pairs simulation of a gravitational n-body simulation in CUDA. It scales the n-body simulation across multiple GPUs in a single PC if available. Adding "-numbodies=num_of_bodies" to the command line will allow users to set ‑ of bodies for simulation. Adding "-numdevices=N" to the command line option will cause the sample to use N devices (if available) for simulation. In this mode, the position and velocity data for all bodies are read from system memory using "zero copy" rather than from device memory. For a small number of devices (4 or fewer) and a large enough number of bodies, bandwidth is not a bottleneck so we can achieve strong scaling across these devices.Arguments:2.6. oceanFFTThis is a graphical demo which simulates an ocean height field using the CUFFT library, and renders the result using OpenGL.The following keys can be used to control the output:2.7. randomFogThis is a graphical demo which does pseudo- and quasi- random numbers visualization produced by CURAND. On creation, randomFog generates 200,000 random coordinates in spherical coordinate space (radius, angle rho, angle theta) with curand's XORWOW algorithm. The coordinates are normalized for a uniform distribution through the sphere. The X axis is drawn with blue in the negative direction and yellow positive. The Y axis is drawn with green in the negative direction and magenta positive. The Z axis is drawn with red in the negative direction and cyan positive.The following keys can be used to control the output:NoticeThis document is provided for information purposes only and shall not be regarded as a warranty of a certain functionality, condition, or quality of a product. NVIDIA Corporation (“NVIDIA”) makes no representations or warranties, expressed or implied, as to the accuracy or completeness of the information contained in this document and assumes no responsibility for any errors contained herein. NVIDIA shall have no liability for the consequences or use of such information or for any infringement of patents or other rights of third parties that may result from its use. This document is not a commitment to develop, release, or deliver any Material (defined below), code, or functionality.NVIDIA reserves the right to make corrections, modifications, enhancements, improvements, and any other changes to this document, at any time without notice. Customer should obtain the latest relevant information before placing orders and should verify that such information is current and complete.NVIDIA products are sold subject to the NVIDIA standard terms and conditions of sale supplied at the time of order acknowledgement, unless otherwise agreed in an individual sales agreement signed by authorized representatives of NVIDIA and customer (“Terms of Sale”). NVIDIA hereby expressly objects to applying any customer general terms and conditions with regards to the purchase of the NVIDIA product referenced in this document. No contractual obligations are formed either directly or indirectly by this document.OpenCLOpenCL is a trademark of Apple Inc. used under license to the Khronos Group Inc.TrademarksNVIDIA and the NVIDIA logo are trademarks or registered trademarks of NVIDIA Corporation in the U.S. and other countries. Other company and product names may be trademarks of the respective companies with which they are associated.Copyright© 2016-2022 NVIDIA Corporation & affiliates. All rights reserved.NVIDIA Corporation | 2788 San Tomas Expressway, Santa Clara, CA 95051。
windows系统快速安装pytorch的详细图⽂教程pip和conda的区别之前⼀直使⽤conda和pip ,有时候经常会两者混⽤。
但是今天才发现⼆者装的东西不是在⼀个地⽅的,所以发现有的东西⾃⼰装了,但是在运⾏环境的时候发现包⽼是识别不了,⼀直都特别疑惑,直到今天注意到这个问题,所以来总结⼀下⼆者的区别。
pippip专门管理Python包编译源码中的所有内容。
(源码安装)由核⼼Python社区所⽀持(即,Python 3.4+包含可⾃动增强pip的代码)。
condaPython不可知论者。
现有软件包的主要重点是Python,⽽conda本⾝是⽤Python编写的,但你也可以为 C库或R软件包或任何其他软件包提供conda软件包。
安装⼆进制⽂件。
有⼀个名为conda build的⼯具,它可以从源代码构建软件包,但conda install本⾝会安装已经构建的conda软件包中的东西外部: Conda是Anaconda的包管理器,由Continuum Analytics提供的Python发⾏版,但它也可以在 Anaconda之外使⽤。
您可以使⽤现有的Python安装,通过pip安装它(尽管除⾮您有充分理由使⽤现有安装,否则不建议这样做)。
⼩建议conda安装时最好另建虚拟环境安装,不要安装在base⾥。
为什么要使⽤Anaconda虚拟环境安装Pytorch?因为环境中通常需要安装很多软件,例如:我同时在使⽤tensorflow框架。
但是他们所需要的Python的关联模块或版本会有所差异。
如果都装在⼀个环境中难免会引起冲突。
所以,选择虚拟环境能很好地避免环境之间的冲突。
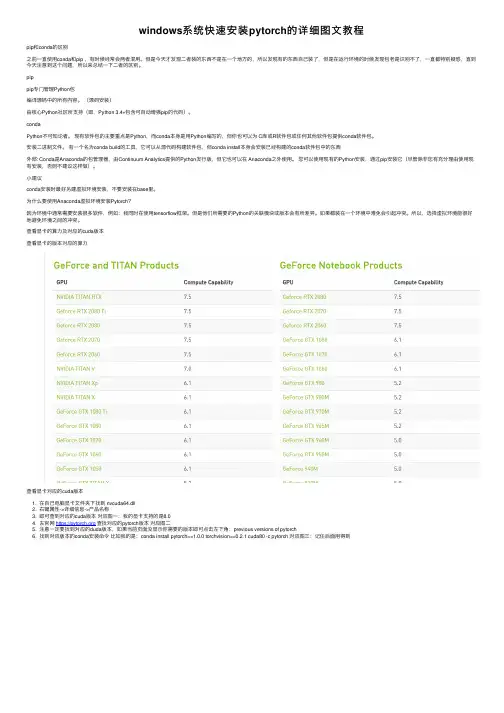
查看显卡的算⼒及对应的cuda版本查看显卡的版本对应的算⼒查看显卡对应的cuda版本1. 在⾃⼰电脑显卡⽂件夹下找到 nvcuda64.dll2. 右键属性->详细信息->产品名称3. 即可查到对应的cuda版本对应图⼀:我的显卡⽀持的是8.04. 去官⽹https://查找对应的pytorch版本对应图⼆5. 注意⼀定要找到对应的duda版本,如果当前页⾯没显⽰你需要的版本即可点击左下⾓:previous versions of pytorch6. 找到对应版本的conda安装命令⽐如我的是:conda install pytorch==1.0.0 torchvision==0.2.1 cuda80 -c pytorch 对应图三:记住后⾯⽤得到图⼀图⼆图三清华镜像原1. 简单⼀句话⽤清华镜像原:真正的安装就两⾏命令,切换清华镜像原,安装2. 打开cmd3. conda config --add channels https:///anaconda/cloud/pytorch/4. conda install pytorch==1.0.0 torchvision==0.2.1 cuda80 (注意,上⾯找到的安装命令要去掉 -c pytorch)直接上图:总结以上所述是⼩编给⼤家介绍的windows系统快速安装pytorch的详细图⽂教程,希望对⼤家有所帮助!。
cuda发展历程2006年6月,美国半导体制造商NVIDIA公司发布了CUDA (Compute Unified Device Architecture)这一并行计算平台和编程模型,它将当时NVIDIA图形处理器(GPU)的潜力拓展到通用计算领域。
CUDA的出现标志着GPU并行计算的革命,极大地推动了科学计算、机器学习和人工智能等领域的发展。
一、CUDA的初衷和概念CUDA的初衷是利用GPU强大的并行处理能力来加速科学计算任务。
之前,GPU主要用于图形渲染,而传统的CPU在并行计算方面的表现有限。
CUDA的概念是通过将计算任务分解为多个并行线程,在GPU上同时执行这些线程以加速计算过程。
这种基于并行的计算模型为科学家和工程师们提供了一个高性能、易用的平台。
二、CUDA的发展里程碑1. 第一代CUDA架构(2007年)NVIDIA在2007年发布了第一代支持CUDA的图形处理器,该架构提供了大量的核心数和全新的线程模型,使得计算性能得到了显著提升。
研究人员和开发者们开始尝试使用CUDA来解决各种科学计算问题,取得了令人瞩目的成果。
2. CUDA C/C++编程语言(2007年)为了简化CUDA编程的难度,NVIDIA公司在2007年发布了CUDA C/C++编程语言。
这个扩展自C/C++的编程语言使得开发者可以更方便地利用GPU进行并行计算,打破了以往GPU编程的限制。
3. CUDA 2.0和GPU互操作(2008年)CUDA 2.0的发布引入了GPU互操作的概念,使得GPU和CPU能够更紧密地结合起来。
这种互操作性使得开发者们能够在应用程序中有效地将CPU和GPU的计算能力结合起来,达到更高的性能。
4. CUDA 3.0和动态并行调度(2010年)CUDA 3.0引入了动态并行调度(Dynamic Parallelism)的概念,这是CUDA的一个里程碑式的突破。
动态并行调度允许GPU线程中创建新的线程,使得计算任务的粒度更细,进一步提高了并行计算的效率和灵活性。
win10配置深度学习环境⼀、安装anacondaanaconda是⽤于科学计算的python发⾏版。
直接在官⽹上下载(速度⽐较慢,也可以在清华镜像下载,速度会快⼀点)。
官⽹链接:清华镜像链接:下载完成后,按照教程安装,注意添加进环境变量,不然安装以后也⽆法启动。
安装以后,在cmd中输⼊conda list,查看是否能使⽤conda命令,若可以,则安装成功。
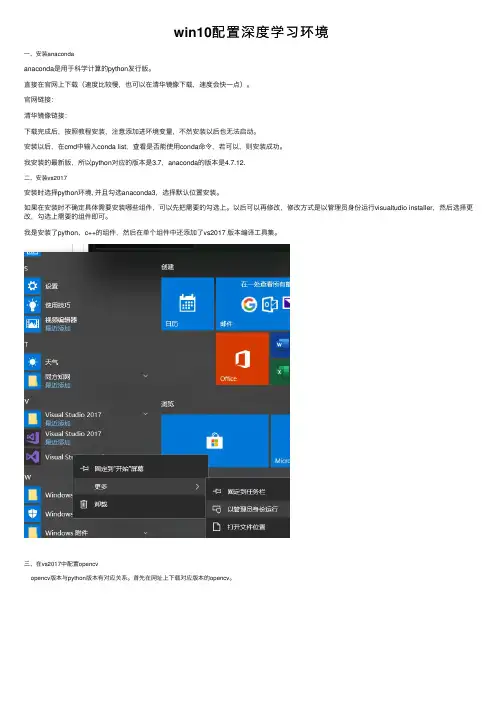
我安装的最新版,所以python对应的版本是3.7,anaconda的版本是4.7.12.⼆、安装vs2017安装时选择python环境, 并且勾选anaconda3,选择默认位置安装。
如果在安装时不确定具体需要安装哪些组件,可以先把需要的勾选上。
以后可以再修改,修改⽅式是以管理员⾝份运⾏visualtudio installer,然后选择更改,勾选上需要的组件即可。
我是安装了python、c++的组件,然后在单个组件中还添加了vs2017 版本编译⼯具集。
三、在vs2017中配置opencvopencv版本与python版本有对应关系。
⾸先在⽹址上下载对应版本的opencv。
我下载的是红框⾥的版本。
终端进⼊到存放该下载⽂件的位置,运⾏pip install opencv_python-4.1.2-cp36-cp36m-win_amd64.whl命令,即可完成安装。
终端输⼊python,import cv2,如果不报错,即安装正确。
但是基于上诉⽅法安装的opencv,没有⽣成对应的opencv/build⽂件,只能在python中使⽤。
打开vs2017,创建python空项⽬,在解决⽅案-右键python环境-查看所有python环境-选择⼀个已创建的环境,添加空⽂件,输⼊读取和显⽰图像的代码,运⾏即可。
⾄此,vs2017中,基于python的环境已配置成功。
为了能在c++中也运⾏opencv,我⼜在官⽹中下载opencv4.1.1(特别慢,我下载了整整⼀个下午),是⼀个exe⽂件。
Release NotesTABLE OF CONTENTS Changelog (iii)Patch Releases (iii)DCGM v2.2.9 (iii)DCGM v2.2.8 (iii)DCGM v2.2 GA (iv)New Features (iv)Improvements (iv)Bug Fixes (iv)Known Issues (v)This version of DCGM (v2.2) requires a minimum R418 driver that can be downloaded from NVIDIA Drivers. On NVSwitch based systems such as DGX A100 or HGX A100, a minimum of Linux R450 (>=450.80.02) driver is required. If using the new profiling metrics capabilities in DCGM, then a minimum of Linux R418 (>= 418.87.01) driver is required. It is recommended to install the latest datacenter driver from NVIDIA drivers downloads site for use with DCGM.Patch ReleasesDCGM v2.2.9DCGM v2.2.9 released in July 2021.Improvements‣Added support for the NVIDIA A100 80GB-PCIe product.‣Added support for the NVIDIA RTX A5000 product.‣The --plugin-path option is no longer supported by DCGM Diagnostics (dcgmi diag) and has been removed.Bug Fixes‣Fixed an issue where a DCGM exception (DcgmException) could result in a crash in some environments.DCGM v2.2.8DCGM v2.2.8 released in July 2021.Improvements‣DCGM now supports multiple indepdent clients (libdcgm.so) to connect and obtain GPU telemetry including profiling metrics.‣Added support to obtain GPU telemetry on systems that may have different GPU SKUs.‣Added support for the NVIDIA RTX A6000 product.‣Improved the error logging for dcgmproftester when run in incorrect configurations, such as non-administrator privileges when requesting profilingmetrics.Bug Fixes‣Fixed an issue where the DCGM packages did not include thedcgm_api_export.h header.Known Issues‣Profiling metrics are currently not supported on Arm64 server systems. This feature will be enabled in a future release of DCGM.DCGM v2.2 GADCGM v2.2.3 released in May 2021.New FeaturesGeneral‣Added support for NVIDIA A10 and A30 products.‣Added Python3 support in DCGM for the bindings.‣Profiling metrics are now supported on all NVIDIA datacenter/enterprise GPUs. Improvements‣Reduced the CPU overhead of Profiling metrics fields 1001-1012.‣Added --log-level and --log-filename parameters to dcgmproftester.‣DCGM installer packages no longer include libnvidia-nscq-dcgm.so.450.51.06 version of NSCQ. Customers are advised to install thelatest NSCQ packages from the CUDA network repository for use with DCGM.‣DCGM diagnostics now checks for row remapping failures on NVIDIA Ampere GPUs.‣DCGM libraries do not expose symbols other than dcgm* API. This should fix issues for users who link with DCGM and protobuf libraries at the same time.‣DCGM has reduced logging verbosity in some situations, resulting in a smaller log file size footprint.Bug Fixes‣Added better error message reporting when dcgmi diag cannot find the NVVS binary at the expected installed locations on the system.‣Fixed an issue where NVVS error reports would not include the GPU id.‣Fixed an issue with DCGM detecting GPU brands. DCGM has been updated to be consistent with new brand strings returned by NVML (e.g. "NVIDIA T4" vs."Tesla T4"). This issue may manifest as errors when trying to obtain profilingmetrics with the following message: Error setting watches. Result:Profiling is not supported for this group of GPUs or GPU‣Fixed an issue with the output of dcgmi discovery -v -i c where clocks were reported incorrectly.‣DCGM now reports an error when attempting to run diagnostics on a system with GPUs where some are in MIG mode.‣Fixed a bug in the DCGM Diagnostic where some valid parameters were being rejected as invalid when specified in the configuration file.Known Issues‣On DGX-2/HGX-2 systems, ensure that nv-hostengine and the Fabric Manager service are started before using dcgmproftester for testing the new profilingmetrics. See the Getting Started section in the DCGM User Guide for details oninstallation.‣On K80s, nvidia-smi may report hardware throttling(clocks_throttle_reasons.hw_slowdown = ACTIVE) during DCGMDiagnostics (Level 3). The stressful workload results in power transients thatengage the HW slowdown mechanism to ensure that the Tesla K80 productoperates within the power capping limit for both long term and short termtimescales. For Volta or later Tesla products, this reporting issue has been fixedand the workload transients are no longer flagged as "HW Slowdown". TheNVIDIA driver will accurately detect if the slowdown event is due to thermalthresholds being exceeded or external power brake event. It is recommended that customers ignore this failure mode on Tesla K80 if the GPU temperature is within specification.‣To report NVLINK bandwidth utilization DCGM programs counters in the HW to extract the desired information. It is currently possible for certain othertools a user might run, including nvprof, to change these settings after DCGMmonitoring begins. In such a situation DCGM may subsequently return errorsor invalid values for the NVLINK metrics. There is currently no way withinDCGM to prevent other tools from modifying this shared configuration. Oncethe interfering tool is done a user of DCGM can repair the reporting by runningnvidia-smi nvlink -sc 0bz; nvidia-smi nvlink -sc 1bz.NoticeTHE INFORMATION IN THIS GUIDE AND ALL OTHER INFORMATION CONTAINED IN NVIDIA DOCUMENTATION REFERENCED IN THIS GUIDE IS PROVIDED “AS IS.” NVIDIA MAKES NO WARRANTIES, EXPRESSED, IMPLIED, STATUTORY, OR OTHERWISE WITH RESPECT TO THE INFORMATION FOR THE PRODUCT, AND EXPRESSL Y DISCLAIMS ALL IMPLIED WARRANTIES OF NONINFRINGEMENT, MERCHANTABILITY, AND FITNESS FOR A PARTICULAR PURPOSE. Notwithstanding any damages that customer might incur for any reason whatsoever, NVIDIA’s aggregate and cumulative liability towards customer for the product described in this guide shall be limited in accordance with the NVIDIA terms and conditions of sale for the product.THE NVIDIA PRODUCT DESCRIBED IN THIS GUIDE IS NOT FAULT TOLERANT AND IS NOT DESIGNED, MANUFACTURED OR INTENDED FOR USE IN CONNECTION WITH THE DESIGN, CONSTRUCTION, MAINTENANCE, AND/OR OPERATION OF ANY SYSTEM WHERE THE USE OR A FAILURE OF SUCH SYSTEM COULD RESULT IN A SITUATION THAT THREATENS THE SAFETY OF HUMAN LIFE OR SEVERE PHYSICAL HARM OR PROPERTY DAMAGE (INCLUDING, FOR EXAMPLE, USE IN CONNECTION WITH ANY NUCLEAR, AVIONICS, LIFE SUPPORT OR OTHER LIFE CRITICAL APPLICATION). NVIDIA EXPRESSL Y DISCLAIMS ANY EXPRESS OR IMPLIED WARRANTY OF FITNESS FOR SUCH HIGH RISK USES. NVIDIA SHALL NOT BE LIABLE TO CUSTOMER OR ANY THIRD PARTY, IN WHOLE OR IN PART, FOR ANY CLAIMS OR DAMAGES ARISING FROM SUCH HIGH RISK USES.NVIDIA makes no representation or warranty that the product described in this guide will be suitable for any specified use without further testing or modification. T esting of all parameters of each product is not necessarily performed by NVIDIA. It is customer’s sole responsibility to ensure the product is suitable and fit for the application planned by customer and to do the necessary testing for the application in order to avoid a default of the application or the product. Weaknesses in customer’s product designs may affect the quality and reliability of the NVIDIA product and may result in additional or different conditions and/ or requirements beyond those contained in this guide. NVIDIA does not accept any liability related to any default, damage, costs or problem which may be based on or attributable to: (i) the use of the NVIDIA product in any manner that is contrary to this guide, or (ii) customer product designs.Other than the right for customer to use the information in this guide with the product, no other license, either expressed or implied, is hereby granted by NVIDIA under this guide. Reproduction of information in this guide is permissible only if reproduction is approved by NVIDIA in writing, is reproduced without alteration, and is accompanied by all associated conditions, limitations, and notices.TrademarksNVIDIA and the NVIDIA logo are trademarks and/or registered trademarks of NVIDIA Corporation in the Unites States and other countries. Other company and product names may be trademarks of the respective companies with which they are associated.Copyright© 2013-2021 NVIDIA Corporation. All rights reserved.。
抽水蓄能电站道路隧道工程施工方案1.1 概述本标段设有1座隧道,隧道桩号为K0+510—K0+650(总长140米),采用单洞双单车道型式。
隧道建筑限界宽度为7.5米,高度为8.35米。
1.2施工测量(一)在建设单位的组织下进行线路桩点的交接工作,详细了解沿线控制桩点和建筑物情况,绘制线路桩点及构筑物位置示意图,落实施工测量负责人和测量工作人员。
(二)检查、检定为本工程准备使用的测量仪器,测量仪器的各种参数均满足规范要求时采用,不符要求时,立即更换或新购,确保测量仪器在本工程使用过程中准确无误。
(三)根据隧道洞外现场实际情况进行洞外控制测量和洞口投点的测量设计,施测方法和测量精度按规范规定执行。
(四)采用交接的线路控制桩点和测量设计进行中线、水平的组网联测,桩点联测过程尽量选择无风、无雨,天空晴朗,天气较好的时间,并派测量工作经验丰富,责任心极强的高素质人员进行。
(五)根据测量数据,用电子计算机计算出测量结果,整理好测量成果书及时报送监理工程师审核批准。
(六)采用监理工程师批复的联测成果进行隧道洞口边仰坡施工放样测量和投点十字线护桩放设,护桩位置选择在牢固、稳定、通视良好的地点,以利施工过程中恢复桩点,定期复测,确保隧道位置始终处于正确状态。
1.3洞口工程施工1.3.1洞口土石方1.根据施工图纸要求,首先组织人员清除树木,杂草,对图纸未示出的地下管道、缆线和其他结构进行保护并立即报告监理工程师听候处理,修建便道至洞口边仰坡线位置,用挖掘机自上而下分层开挖,石方爆破采用光面爆破设计,严格控制装药量,进行微振动爆破,尽量减少原地层的扰动。
土石方开挖严格按照规范要求办理。
2.采用人工配合挖掘机清除边仰坡上的虚碴、危石,坡面顺直、平整,坡面如有凹凸不平及时整修平顺。
3.当土石方开挖至洞门端墙处时,立即检查,核实现场地质与设计地质情况,并结合地层稳定程度和隧道施工方法等进行开挖。
4.松软地层的边坡、仰坡开挖,采取随开挖随支护的方法,加强防护,随时监测,检查山坡的稳定情况。
Windows平台深度学习入门指南本文从最基本的依赖项开始,依次配置了VS 2015、Anaconda 4.4.0、CUDA 8.0.61 和cuDNN v5.1 等基本环境,然后再从Keras 出发安装Theano、TensorFlow 和CNTK 以作为其后端。
在完成配置深度学习框架后,本文分别利用这三个框架作为Keras 后端在CPU 和GPU 上训练了一个标准的卷积神经网络,完成该简单的卷积网络也就意味着我们完成了深度学习环境的配置。
目前有很多帮助我们在Linux 或Mac OS 上构建深度学习(DL)环境的指导文章,但很少有文章完整地叙述如何高效地在Windows 10 上配置深度学习开发环境。
此外,很多开发者安装Windows 和Ubuntu 双系统或在Windows 上安装虚拟机以配置深度学习环境,但对于入门者来说,我们更希望还是直接使用Windows 直接配置深度学习环境。
因此,本文作者Phil Ferriere 在GitHub 上发布了该教程,他希望能从最基本的环境变量配置开始一步步搭建Keras 深度学习开发环境。
如果读者希望在Windows 10 上配置深度学习环境,那么本文将为大家提供很多有利的信息。
01 依赖项下面是我们将在Windows 10(Version 1607 OS Build 14393.222)上配置深度学习环境所需要的工具和软件包:1.Visual Studio 2015 Community Edition Update 3 w. Windows Kit 10.0.10240.0:用于其C/C++编译器(而不是IDE)和SDK,选择该确定的版本是因为CUDA 8.0.61 所支持的Windows 编译器。
2.Anaconda (64-bit) w. Python3.6 (Anaconda3-4.4.0) [for Tensorflow support] orPython 2.7 (Anaconda2-4.4.0) [no Tensorflow support] with MKL:Anaconda 是一个开源的Python 发行版本,其包含了conda、Python、NumPy、SciPy 等180 多个科学包及其依赖项,是一个集成开发环境。
Nsight Systems Installation GuideTABLE OF CONTENTS Chapter 1. Overview (1)Chapter 2. System Requirements (3)Supported Platforms (3)CUDA Version (4)Requirements for Android-Based Devices (4)Requirements for x86_64, Power, and ARM SBSA T argets on Linux (5)x86_64 Windows T arget Device Requirements (6)Host Application Requirements (6)Chapter 3. Getting Started Guide (7)3.1. Finding the Right Package (7)3.2. Installing GUI on the Host System (8)3.3. Optional: Setting up the CLI (8)3.4. Launching the GUI (9)Nsight Systems is a statistical sampling profiler with tracing features. It is designed to work with devices and devkits based on NVIDIA Tegra SoCs (system-on-chip), ARM SBSA (server based system architecture) systems, IBM Power systems, and systems based on the x86_64 processor architecture that also include NVIDIA GPU(s). Throughout this document we will refer to the device on which profiling happens as the target, and the computer on which the user works and controls the profiling session as the host. Note that for x86_64 based systems these may be on the same device, whereas with Tegra, ARM, or IBM Power based systems they will always be separate. Furthermore, three different activities are distinguished as follows:‣Profiling — The process of collecting any performance data. A profiling session in Nsight Systems typically includes sampling and tracing.‣Sampling — The process of periodically stopping the profilee (the application under investigation during the profiling session), typically to collect backtraces (call stacks of active threads), which allows you to understand statistically how much time is spent in each function. Additionally, hardware counters can also be sampled. This process is inherently imprecise when a low number of samples have been collected.‣Tracing — The process of collecting precise information about various activities happening in the profilee or in the system. For example, profilee API execution may be traced providing the exact time and duration of a function call.Nsight Systems supports multiple generations of Tegra SoCs, NVIDIA discrete GPUs, and various CPU architectures, as well as various target and host operating systems. This documentation describes the full set of features available in any version of Nsight Systems. In the event that a feature is not available in all versions, that will be noted in the text. In general, Nsight Systems Embedded Platforms Edition indicates the package that supports Tegra processors for the embedded and automotive market and Nsight Systems Workstation Edition supports x86_64, IBM Power, and ARM server (SBSA) processors for the workstation and cluster market.Common features that are supported by Nsight Systems on most platforms include the following:‣Sampling of the profilee and collecting backtraces using multiple algorithms (such as frame pointers or DWARF data). Building top-down, bottom-up, and flat viewsOverviewas appropriate. This information helps identify performance bottlenecks in CPU-intensive code.‣Sampling or tracing system power behaviors, such as CPU frequency.‣(Only on Nsight Systems Embedded Platforms Edition)Sampling counters from ARM PMU (Performance Monitoring Unit). Information such as cache misses gets statistically correlated with function execution.‣Support for multiple windows. Users with multiple monitors can see multiple reports simultaneously, or have multiple views into the same report file.With Nsight Systems, a user could:‣Identify call paths that monopolize the CPU.‣Identify individual functions that monopolize the CPU (across different call paths).‣For Nsight Systems Embedded Platforms Edition, identify functions that have poor cache utilization.‣If platform supports CUDA, see visual representation of CUDA Runtime and Driver API calls, as well as CUDA GPU workload. Nsight Systems uses the CUDA Profiling Tools Interface (CUPTI), for more information, see: CUPTI documentation.‣If the user annotates with NVIDIA Tools Extension (NVTX), see visual representation of NVTX annotations: ranges, markers, and thread names.‣For Windows targets, see visual representation of D3D12: which API calls are being made on the CPU, graphic frames, stutter analysis, as well as GPU workloads(command lists and debug ranges).‣For x86_64 targets, see visual representation of Vulkan: which API calls are being made on the CPU, graphic frames, stutter analysis, as well as Vulkan GPU workloads (command buffers and debug ranges).Nsight Systems supports multiple platforms. For simplicity, stentryink of these as Nsight Systems Embedded Platforms Edition and Nsight Systems Workstation Edition, where Nsight Systems Workstation Edition supports desktops, workstations, and clusters with x86_64, IBM Power, and ARM SBSA CPUs on Linux and Windows OSs, while Nsight Systems Embedded Platforms Edition supports NVIDIA Tegra products for the embedded and gaming space on Android, Linux for Tegra, and QNX OSs.Supported PlatformsDepending on your OS, different GPUs are supportedAndroid‣NVIDIA SHIELD Android TV‣NVIDIA SHIELD Tablet‣Various devkitsL4T (Linux for Tegra)‣Jetson AGX Xavier‣Jetson TX2‣Jetson TX2i‣Jetson TX‣Jetson Nano‣Jetson Xavier NXx86_64, IBM Power (from Power 9), or ARM SBSA‣NVIDIA GPU architectures starting with Pascal‣OS (64 bit only)‣Ubuntu 14.04, 16.04, and 18.04‣CentOS and RedHat Enterprise Linux 7.4+ with kernel version 3.10.0-693 or later.‣Windows 10CUDA Version‣Nsight Systems supports CUDA 10.0, 10.1, 10.2, and 11.0 for most platforms ‣Nsight Systems on ARM SBSA supports 10.2 and 11.0Note that CUDA version and driver version must be compatible.CUDA Version Driver minimum version11.045010.2440.3010.1418.3910.0410.48 Requirements for Android-Based DevicesTo use Nsight Systems with Android-based target devices, you must first:1.Have a compatible Android device.2.Have a compatible Android OS image.If installing from CODEWORKS, note that devices from NVIDIA typically shipwith support, while OEMs or ODMs producing their own Nsight Systems choose whether or not to support this tool.To check for the version number of the kernel support of Nsight Systems on a target device, run the following command from ADB shell:cat /proc/quadd/versionMinimal supported version is 1.82.3.Install the Android SDK Platform tools.4.Install the ADB USB Driver.5.Have your target application compiled with the correct flags and packaged with thecorrect permissions.Items 3-4 can be handled automatically for you by installing the latest NVIDIA CodeWorks for Android. Item 2 may already be on your device, if it is a retail device starting with the Tegra 4 (minimum), but not all devices are required to come with OS images that support this tool. Item 2 can also be found for devkits by downloadingthe latest OS Image for your device. CodeWorks for Android can be found at: NVIDIA CodeWorks SDK.Using CodeWorks for Android is the recommended path for getting your Android device and system prepared to use Nsight Systems.Requirements for x86_64, Power, and ARM SBSAT argets on LinuxWhen attaching to x86_64, Power, or ARM SBSA Linux-based target from the GUI on the host, the connection is established through SSH.Use of Linux Perf: To collect thread scheduling data and IP (instruction pointer) samples, the Perf paranoid level on the target system must be 2 or less. Use the following command to check:If the output is >2, then do the following to temporarily adjust the paranoid level (note that this has to be done after each reboot):To make the change permanent, use the following command:Kernel version: To collect thread scheduling data and IP (instruction pointer) samples and backtraces, the kernel version must be:‣ 3.10.0-693 or later for CentOS and RedHat Enterprise Linux 7.4+‣ 4.3 or greater for all other distros including UbuntuTo check the version number of the kernel on a target device, run the following command on the device:Note that only CentOS, RedHat, and Ubuntu distros are tested/confirmed to work correctly.glibc version: To check the glibc version on a target device, run the following command:Nsight Systems requires glibc 2.14 or more recent.CUDA: See above for supported CUDA versions in this release. Use the deviceQuery command to determine the CUDA driver and runtime versions on the system. the deviceQuery command is available in the CUDA SDK. It is normally installed at:Only pure 64-bit environments are supported. In other words, 32-bit systems or 32-bit processes running within a 64-bit environment are not supported.Nsight Systems requires write permission to the `/var/lock` directory on the target system.Docker: See Collecting Data within a Docker section of Profiling in a Docker on Linux Devices for more information.x86_64 Windows T arget Device RequirementsDX12 Requires:‣Windows 10 with NVIDIA Driver 411.63 or higher for DX12 trace‣Windows 10 April 2018 Update (version 1803, AKA Redstone 4) with NVIDIA Driver 411.63 or higher for DirectX Ray Tracing, and tracing DX12 Copy command queues.Host Application RequirementsThe Nsight Systems host application runs on the following host platforms:‣Windows 7 and higher, Windows Server 2008 R2 and higher. Only 64-bit versions are supported.‣Linux Ubuntu 14.04 and higher are known to work, running on other modern distributions should be possible as well. Only 64-bit versions are supported.‣OS X 10.10 "Yosemite" and higher.3.1. Finding the Right PackageNsight Systems is available for multiple targets and multiple host OSs. To choose the right package, first consider the target system to be analyzed.‣For Tegra target systems, select Nsight Systems for Tegra available as part of NVIDIA JetPack SDK and NVIDIA CodeWorks SDK.‣For x86_64, IBM Power target systems,or ARM SDSA select from the target packages from Nsight Systems for Workstations, available from https:/// nsight-systems. This web release will always contain the latest and greatest Nsight Systems features.‣The x86_64, IBM Power, and ARM SBSA target versions of Nsight Systems are also available in the CUDA Toolkit.Each package is limited to one architecture. For example, Tegra packages do not contain support for profiling x86 targets, and x86 packages do not contain support for profiling Tegra targets.After choosing an appropriate target version, select the package corresponding to the host OS, the OS on the system where results will be viewed. These packages are inthe form of common installer types: .msi for Windows; .run, .rpm, and .deb for x86 Linux; .deb and .rpm for Linux on IBM Power; and .dmg for the MacOS installer. Note: the IBM Power and ARM SBSA packages do not have a GUI for visualization of the result. If you wish to visualize your result, please download and install the GUI available for MacOS, x86_64 Linux, or Windows systems.Tegra packages‣Windows host – Install .msi on Windows machine. Enables remote access to Tegra device for profiling.‣Linux host – Install .run on Linux system. Enables remote access to Tegra device for profiling.‣MacOS host – Install .dmg on MacOS machine. Enables remote access to Tegra device for profiling.Getting Started Guidex86_64 packages‣Windows host – Install .msi on Windows machine. Enables remote access to Linux x86_64 or Windows devices for profiling as well as running on local system.‣Linux host – Install .run, .rpm, or .deb on Linux system. Enables remote access to Linux x86_64 or Windows devices for profiling or running collection on localhost.‣Linux CLI only – The Linux CLI is shipped in all x86 packages, but if you just want the CLI, we have a package for that. Install .deb on Linux system. Enables only CLI collection, report can be imported or opened in x86_64 host.‣MacOS host – Install .dmg on MacOS machine. Enables remote access to Linux x86_64 device for profiling.IBM Power packages‣Power CLI only - The IBM Power support does not include a host GUI. Install .deb or .rpm on your Power system. Enables only CLI collection, report can be imported or opened in GUI on any supported host platform.ARM SBSA packages‣ARM SBSA CLI only - ARM SBSA support does not include a host GUI. Install .deb or .rpm on your ARM SBSA system. Enables only CLI collection, report can beimported or opened in GUI on any supported host platform.3.2. Installing GUI on the Host SystemCopy the appropriate file to your host system in a directory where you have write and execute permissions. Run the install file, accept the EULA, and Nsight Systems will install on your system.On Linux, there are special options to enable automated installation. Running the installer with the --accept flag will automatically accept the EULA, running withthe --accept flag and the --quiet flag will automatically accept the EULA without printing to stdout. Running with --quiet without --accept will display an error. The installation will create a Host directory for this host and a Target directory for each target this Nsight Systems package supports.All binaries needed to collect data on a target device will be installed on the target by the host on first connection to the device. There is no need to install the package on the target device.If installing from the CUDA Toolkit, see the CUDA Toolkit documentation.3.3. Optional: Setting up the CLIAll Nsight Systems targets can be profiled using the CLI. IBM Power and ARM SBSA targets can only be profiled using the CLI. The CLI is especially helpful when scripts are used to run unattended collections or when access to the target system via ssh is not possible. In particular, this can be used to enable collection in a Docker container.Getting Started Guide Installation Guide v2021.3.1 | 9The CLI can be found in the Target directory of the Nsight Systems installation. Users who want to install the CLI as a standalone tool can do so by copying the files within the Target directory to the location of their choice.If you wish to run the CLI without root (recommended mode) you will want to install in a directory where you have full access.Once you have the CLI set up, you can use the nsys status -e command to check your environment.~$ nsys status -e Sampling Environment Check Linux Kernel Paranoid Level = 1: OK Linux Distribution = Ubuntu Linux Kernel Version = 4.15.0-109-generic: OK Linux perf_event_open syscall available: OK Sampling trigger event available: OK Intel(c) Last Branch Record support: Available Sampling Environment: OKThis status check allows you to ensure that the system requirements for CPU sampling using Nsight Systems are met in your local environment. If the Sampling Environment is not OK, you will still be able to run various trace operations.Intel(c) Last Branch Record allows tools, including Nsight Systems to use hardware to quickly get limited stack information. Nsight Systems will use this method for stack resolution by default if available.For information about changing these environment settings, see System Requirements section in the Installation Guide. For information about changing the backtrace method,see Profiling from the CLI in the User Guide.To get started using the CLI, run nsys --help for a list of options or see Profiling Applications from the CLI in the User Guide for full documentation.3.4. Launching the GUIInstalled from Product Download PageDepending on your OS, Nsight Systems will have installed an icon on your host desktop that you can use to launch the GUI. To launch the GUI directly, run the nsight-sys executable in the Host sub-directory of your installation.Installed as Part of the CUDA ToolkitNsight Systems is installed by the CUDA Toolkit installer in /usr/local/cuda-[version]/NsightSystems-[version]. To launch the GUI, run the nsight-sys executable in the Host sub-directory there.In a future version of the CUDA Toolkit, this installation will be moved under the CUDA/bin directory.。
Nsight Systems Installation GuideTABLE OF CONTENTS Chapter 1. Overview (1)Chapter 2. System Requirements (3)Supported Platforms (3)CUDA Version (4)Requirements for Android-Based Devices (4)Requirements for x86_64, Power, and ARM SBSA T argets on Linux (5)x86_64 Windows T arget Device Requirements (6)Host Application Requirements (6)Chapter 3. Getting Started Guide (7)3.1. Finding the Right Package (7)3.2. Installing GUI on the Host System (8)3.3. Optional: Setting up the CLI (8)3.4. Launching the GUI (9)Nsight Systems is a statistical sampling profiler with tracing features. It is designed to work with devices and devkits based on NVIDIA Tegra SoCs (system-on-chip), ARM SBSA (server based system architecture) systems, IBM Power systems, and systems based on the x86_64 processor architecture that also include NVIDIA GPU(s). Throughout this document we will refer to the device on which profiling happens as the target, and the computer on which the user works and controls the profiling session as the host. Note that for x86_64 based systems these may be on the same device, whereas with Tegra, ARM, or IBM Power based systems they will always be separate. Furthermore, three different activities are distinguished as follows:‣Profiling — The process of collecting any performance data. A profiling session in Nsight Systems typically includes sampling and tracing.‣Sampling — The process of periodically stopping the profilee (the application under investigation during the profiling session), typically to collect backtraces (call stacks of active threads), which allows you to understand statistically how much time is spent in each function. Additionally, hardware counters can also be sampled. This process is inherently imprecise when a low number of samples have been collected.‣Tracing — The process of collecting precise information about various activities happening in the profilee or in the system. For example, profilee API execution may be traced providing the exact time and duration of a function call.Nsight Systems supports multiple generations of Tegra SoCs, NVIDIA discrete GPUs, and various CPU architectures, as well as various target and host operating systems. This documentation describes the full set of features available in any version of Nsight Systems. In the event that a feature is not available in all versions, that will be noted in the text. In general, Nsight Systems Embedded Platforms Edition indicates the package that supports Tegra processors for the embedded and automotive market and Nsight Systems Workstation Edition supports x86_64, IBM Power, and ARM server (SBSA) processors for the workstation and cluster market.Common features that are supported by Nsight Systems on most platforms include the following:‣Sampling of the profilee and collecting backtraces using multiple algorithms (such as frame pointers or DWARF data). Building top-down, bottom-up, and flat viewsOverviewas appropriate. This information helps identify performance bottlenecks in CPU-intensive code.‣Sampling or tracing system power behaviors, such as CPU frequency.‣(Only on Nsight Systems Embedded Platforms Edition)Sampling counters from ARM PMU (Performance Monitoring Unit). Information such as cache misses gets statistically correlated with function execution.‣Support for multiple windows. Users with multiple monitors can see multiple reports simultaneously, or have multiple views into the same report file.With Nsight Systems, a user could:‣Identify call paths that monopolize the CPU.‣Identify individual functions that monopolize the CPU (across different call paths).‣For Nsight Systems Embedded Platforms Edition, identify functions that have poor cache utilization.‣If platform supports CUDA, see visual representation of CUDA Runtime and Driver API calls, as well as CUDA GPU workload. Nsight Systems uses the CUDA Profiling Tools Interface (CUPTI), for more information, see: CUPTI documentation.‣If the user annotates with NVIDIA Tools Extension (NVTX), see visual representation of NVTX annotations: ranges, markers, and thread names.‣For Windows targets, see visual representation of D3D12: which API calls are being made on the CPU, graphic frames, stutter analysis, as well as GPU workloads(command lists and debug ranges).‣For x86_64 targets, see visual representation of Vulkan: which API calls are being made on the CPU, graphic frames, stutter analysis, as well as Vulkan GPU workloads (command buffers and debug ranges).Nsight Systems supports multiple platforms. For simplicity, stentryink of these as Nsight Systems Embedded Platforms Edition and Nsight Systems Workstation Edition, where Nsight Systems Workstation Edition supports desktops, workstations, and clusters with x86_64, IBM Power, and ARM SBSA CPUs on Linux and Windows OSs, while Nsight Systems Embedded Platforms Edition supports NVIDIA Tegra products for the embedded and gaming space on Android, Linux for Tegra, and QNX OSs.Supported PlatformsDepending on your OS, different GPUs are supportedAndroid‣NVIDIA SHIELD Android TV‣NVIDIA SHIELD Tablet‣Various devkitsL4T (Linux for Tegra)‣Jetson AGX Xavier‣Jetson TX2‣Jetson TX2i‣Jetson TX‣Jetson Nanox86_64, IBM Power (from Power 9), or ARM SBSA‣NVIDIA GPU architectures starting with Pascal‣OS (64 bit only)‣Ubuntu 14.04, 16.04, and 18.04‣CentOS and RedHat Enterprise Linux 7.4+ with kernel version 3.10.0-693 or later.‣Windows 10CUDA Version‣Nsight Systems supports CUDA 10.0, 10.1, 10.2, and 11.0 for most platforms ‣Nsight Systems on ARM SBSA supports 10.2 and 11.0Note that CUDA version and driver version must be compatible.CUDA Version Driver minimum version11.045010.2440.3010.1418.3910.0410.48 Requirements for Android-Based DevicesTo use Nsight Systems with Android-based target devices, you must first:1.Have a compatible Android device.2.Have a compatible Android OS image.If installing from CODEWORKS, note that devices from NVIDIA typically shipwith support, while OEMs or ODMs producing their own Nsight Systems choose whether or not to support this tool.To check for the version number of the kernel support of Nsight Systems on a target device, run the following command from ADB shell:cat /proc/quadd/versionMinimal supported version is 1.82.3.Install the Android SDK Platform tools.4.Install the ADB USB Driver.5.Have your target application compiled with the correct flags and packaged with thecorrect permissions.Items 3-4 can be handled automatically for you by installing the latest NVIDIA CodeWorks for Android. Item 2 may already be on your device, if it is a retail device starting with the Tegra 4 (minimum), but not all devices are required to come with OS images that support this tool. Item 2 can also be found for devkits by downloadingthe latest OS Image for your device. CodeWorks for Android can be found at: NVIDIA CodeWorks SDK.Using CodeWorks for Android is the recommended path for getting your Android device and system prepared to use Nsight Systems.Requirements for x86_64, Power, and ARM SBSAT argets on LinuxWhen attaching to x86_64, Power, or ARM SBSA Linux-based target from the GUI on the host, the connection is established through SSH.Use of Linux Perf: To collect thread scheduling data and IP (instruction pointer) samples, the Perf paranoid level on the target system must be 2 or less. Use the following command to check:If the output is >2, then do the following to temporarily adjust the paranoid level (note that this has to be done after each reboot):To make the change permanent, use the following command:Kernel version: To collect thread scheduling data and IP (instruction pointer) samples and backtraces, the kernel version must be:‣ 3.10.0-693 or later for CentOS and RedHat Enterprise Linux 7.4+‣ 4.3 or greater for all other distros including UbuntuTo check the version number of the kernel on a target device, run the following command on the device:Note that only CentOS, RedHat, and Ubuntu distros are tested/confirmed to work correctly.glibc version: To check the glibc version on a target device, run the following command:Nsight Systems requires glibc 2.14 or more recent.CUDA: See above for supported CUDA versions in this release. Use the deviceQuery command to determine the CUDA driver and runtime versions on the system. the deviceQuery command is available in the CUDA SDK. It is normally installed at:Only pure 64-bit environments are supported. In other words, 32-bit systems or 32-bit processes running within a 64-bit environment are not supported.Nsight Systems requires write permission to the `/var/lock` directory on the target system.Docker: See Collecting Data within a Docker section of Profiling in a Docker on Linux Devices for more information.x86_64 Windows T arget Device RequirementsDX12 Requires:‣Windows 10 with NVIDIA Driver 411.63 or higher for DX12 trace‣Windows 10 April 2018 Update (version 1803, AKA Redstone 4) with NVIDIA Driver 411.63 or higher for DirectX Ray Tracing, and tracing DX12 Copy command queues.Host Application RequirementsThe Nsight Systems host application runs on the following host platforms:‣Windows 7 and higher, Windows Server 2008 R2 and higher. Only 64-bit versions are supported.‣Linux Ubuntu 14.04 and higher are known to work, running on other modern distributions should be possible as well. Only 64-bit versions are supported.‣OS X 10.10 "Yosemite" and higher.3.1. Finding the Right PackageNsight Systems is available for multiple targets and multiple host OSs. To choose the right package, first consider the target system to be analyzed.‣For Tegra target systems, select Nsight Systems for Tegra available as part of NVIDIA JetPack SDK and NVIDIA CodeWorks SDK.‣For x86_64, IBM Power target systems,or ARM SDSA select from the target packages from Nsight Systems for Workstations, available from https:/// nsight-systems. This web release will always contain the latest and greatest Nsight Systems features.‣The x86_64, IBM Power, and ARM SDSA target versions of Nsight Systems are also available in the CUDA Toolkit.Each package is limited to one architecture. For example, Tegra packages do not contain support for profiling x86 targets, and x86 packages do not contain support for profiling Tegra targets.After choosing an appropriate target version, select the package corresponding to the host OS, the OS on the system where results will be viewed. These packages are inthe form of common installer types: .msi for Windows; .run, .rpm, and .deb for x86 Linux; .deb and .rpm for Linux on IBM Power; and .dmg for the MacOS installer. Note: the IBM Power and ARM SBSA packages do not have a GUI for visualization of the result. If you wish to visualize your result, please download and install the GUI available for MacOS, x86_64 Linux, or Windows systems.Tegra packages‣Windows host – Install .msi on Windows machine. Enables remote access to Tegra device for profiling.‣Linux host – Install .run on Linux system. Enables remote access to Tegra device for profiling.‣MacOS host – Install .dmg on MacOS machine. Enables remote access to Tegra device for profiling.Getting Started Guidex86_64 packages‣Windows host – Install .msi on Windows machine. Enables remote access to Linux x86_64 or Windows devices for profiling as well as running on local system.‣Linux host – Install .run, .rpm, or .deb on Linux system. Enables remote access to Linux x86_64 or Windows devices for profiling or running collection on localhost.‣Linux CLI only – The Linux CLI is shipped in all x86 packages, but if you just want the CLI, we have a package for that. Install .deb on Linux system. Enables only CLI collection, report can be imported or opened in x86_64 host.‣MacOS host – Install .dmg on MacOS machine. Enables remote access to Linux x86_64 device for profiling.IBM Power packages‣Power CLI only - The IBM Power support does not include a host GUI. Install .deb or .rpm on your Power system. Enables only CLI collection, report can be imported or opened in GUI on any supported host platform.ARM SBSA packages‣ARM SBSA CLI only - ARM SBSA support does not include a host GUI. Install .deb or .rpm on your ARM SBSA system. Enables only CLI collection, report can beimported or opened in GUI on any supported host platform.3.2. Installing GUI on the Host SystemCopy the appropriate file to your host system in a directory where you have write and execute permissions. Run the install file, accept the EULA, and Nsight Systems will install on your system.On Linux, there are special options to enable automated installation. Running the installer with the --accept flag will automatically accept the EULA, running withthe --accept flag and the --quiet flag will automatically accept the EULA without printing to stdout. Running with --quiet without --accept will display an error. The installation will create a Host directory for this host and a Target directory for each target this Nsight Systems package supports.All binaries needed to collect data on a target device will be installed on the target by the host on first connection to the device. There is no need to install the package on the target device.If installing from the CUDA Toolkit, see the CUDA Toolkit documentation.3.3. Optional: Setting up the CLIAll Nsight Systems targets can be profiled using the CLI. IBM Power and ARM SBSA targets can only be profiled using the CLI. The CLI is especially helpful when scripts are used to run unattended collections or when access to the target system via ssh is not possible. In particular, this can be used to enable collection in a Docker container.Getting Started Guide Installation Guide v2021.1.1 | 9The CLI can be found in the Target directory of the Nsight Systems installation. Users who want to install the CLI as a standalone tool can do so by copying the files within the Target directory to the location of their choice.If you wish to run the CLI without root (recommended mode) you will want to install in a directory where you have full access.Once you have the CLI set up, you can use the nsys status -e command to check your environment.~$ nsys status -e Sampling Environment Check Linux Kernel Paranoid Level = 1: OK Linux Distribution = Ubuntu Linux Kernel Version = 4.15.0-109-generic: OK Linux perf_event_open syscall available: OK Sampling trigger event available: OK Intel(c) Last Branch Record support: Available Sampling Environment: OKThis status check allows you to ensure that the system requirements for CPU sampling using Nsight Systems are met in your local environment. If the Sampling Environment is not OK, you will still be able to run various trace operations.Intel(c) Last Branch Record allows tools, including Nsight Systems to use hardware to quickly get limited stack information. Nsight Systems will use this method for stack resolution by default if available.For information about changing these environment settings, see System Requirements section in the Installation Guide. For information about changing the backtrace method,see Profiling from the CLI in the User Guide.To get started using the CLI, run nsys --help for a list of options or see Profiling Applications from the CLI in the User Guide for full documentation.3.4. Launching the GUIInstalled from Product Download PageDepending on your OS, Nsight Systems will have installed an icon on your host desktop that you can use to launch the GUI. To launch the GUI directly, run the nsight-sys executable in the Host sub-directory of your installation.Installed as Part of the CUDA ToolkitNsight Systems is installed by the CUDA Toolkit installer in /usr/local/cuda-[version]/NsightSystems-[version]. To launch the GUI, run the nsight-sys executable in the Host sub-directory there.In a future version of the CUDA Toolkit, this installation will be moved under the CUDA/bin directory.。
NVIDIA CUDA and Drivers SupportTable of Contents Chapter 1. Support Matrix (1)Chapter 1.Support MatrixNVIDIA releases CUDA Toolkit and GPU drivers at different cadences. The NVIDIA data center GPU driver software lifecycle and terminlogy are available in the lifecycle document.New CUDA Toolkits released along with a evaluation/developer driver can be used in production with a prior NFB or LTSB.The table below lists the current support matrix for CUDA Toolkit and NVIDIA data center drivers.Table 1.Note: All other previous driver branches not listed in the table above (e.g. R410, R396, R390) are end of life.NoticeTHE INFORMATION IN THIS GUIDE AND ALL OTHER INFORMATION CONTAINED IN NVIDIA DOCUMENTATION REFERENCED IN THIS GUIDE IS PROVIDED “AS IS.” NVIDIA MAKES NO WARRANTIES, EXPRESSED, IMPLIED, STATUTORY, OR OTHERWISE WITH RESPECT TO THE INFORMATION FOR THE PRODUCT, AND EXPRESSLY DISCLAIMS ALL IMPLIED WARRANTIES OF NONINFRINGEMENT, MERCHANTABILITY, AND FITNESS FOR A PARTICULAR PURPOSE. Notwithstanding any damages that customer might incur for any reason whatsoever, NVIDIA’s aggregate and cumulative liability towards customer for the product described in this guide shall be limited in accordance with the NVIDIA terms and conditions of sale for the product.THE NVIDIA PRODUCT DESCRIBED IN THIS GUIDE IS NOT FAULT TOLERANT AND IS NOT DESIGNED, MANUFACTURED OR INTENDED FOR USE IN CONNECTION WITH THE DESIGN, CONSTRUCTION, MAINTENANCE, AND/OR OPERATION OF ANY SYSTEM WHERE THE USE OR A FAILURE OF SUCH SYSTEM COULD RESULT IN A SITUATION THAT THREATENS THE SAFETY OF HUMAN LIFE OR SEVERE PHYSICAL HARM OR PROPERTY DAMAGE (INCLUDING, FOR EXAMPLE, USE IN CONNECTION WITH ANY NUCLEAR, AVIONICS, LIFE SUPPORT OR OTHER LIFE CRITICAL APPLICATION). NVIDIA EXPRESSLY DISCLAIMS ANY EXPRESS OR IMPLIED WARRANTY OF FITNESS FOR SUCH HIGH RISK USES. NVIDIA SHALL NOT BE LIABLE TO CUSTOMER OR ANY THIRD PARTY, IN WHOLE OR IN PART, FOR ANY CLAIMS OR DAMAGES ARISING FROM SUCH HIGH RISK USES.NVIDIA makes no representation or warranty that the product described in this guide will be suitable for any specified use without further testing or modification. Testing of all parameters of each product is not necessarily performed by NVIDIA. It is customer’s sole responsibility to ensure the product is suitable and fit for the application planned by customer and to do the necessary testing for the application in order to avoid a default of the application or the product. Weaknesses in customer’s product designs may affect the quality and reliability of the NVIDIA product and may result in additional or different conditions and/or requirements beyond those contained in this guide. NVIDIA does not accept any liability related to any default, damage, costs or problem which may be based on or attributable to: (i) the use of the NVIDIA product in any manner that is contrary to this guide, or (ii) customer product designs.Other than the right for customer to use the information in this guide with the product, no other license, either expressed or implied, is hereby granted by NVIDIA under this guide. Reproduction of information in this guide is permissible only if reproduction is approved by NVIDIA in writing, is reproduced without alteration, and is accompanied by all associated conditions, limitations, and notices.TrademarksNVIDIA and the NVIDIA logo are trademarks and/or registered trademarks of NVIDIA Corporation in the Unites States and other countries. Other company and product names may be trademarks of the respective companies with which they are associated.Copyright© 2021 NVIDIA Corporation. All rights reserved.NVIDIA Corporation | 2788 San Tomas Expressway, Santa Clara, CA 95051。
Getting StartedNVIDIA CUDA 2.1 Installation and Verification on Microsoft Windows XP and Windows VistaNovember 2008Getting Started with CUDA ii November 2008Table of ContentsChapter 1. Introduction (1)CUDA—Supercomputing on Desktop Systems (1)System Requirements (2)About This Document (2)Chapter 2. Installing CUDA (3)Verify CUDA-Capable GPU (3)Download CUDA Software (4)Install the CUDA Driver for Microsoft Windows XP or Windows Vista (4)Multiple-GPU Configurations (5)CUDA Software (5)Installing the Software (5)Verify the Installation (7)Chapter 3. Compiling a CUDA Program (10)Compiling Sample Projects (10)Sample Projects (10)What’s Next? (11)November 2008 iiiGetting Started with CUDA iv November 2008November 2008 1 Chapter 1.IntroductionCUDA—Supercomputing onDesktop SystemsNVIDIA ® CUDA TM is a general purpose parallel computing architecture introduced by NVIDIA. It includes the CUDA Instruction Set Architecture (ISA) and the parallel compute engine in the GPU. To program to the CUDA architecture,developers can, today, use C, one of the most widely used high-level programming languages, which can then be run at great performance on a CUDA enabled processor.The CUDA architecture and its associated software were developed with several design goals in mind:Provide a small set of extensions to standard programming languages, like C, that enable a straightforward implementation of parallel algorithms. With CUDA and C for CUDA, programmers can focus on the task of parallelization of thealgorithms rather than spending time on their implementation.Support heterogeneous computation where applications use both the CPU and GPU. Serial portions of applications are run on the CPU, and parallel portions are offloaded to the GPU. As such, CUDA can be incrementally applied to existing applications. The CPU and GPU are treated as separate devices that have their own memory spaces. This configuration also allows simultaneous computation on both the CPU and GPU without contention for memory resources. CUDA-capable GPUs have hundreds of cores that can collectively run thousands of computing threads. Each core has shared resources, including registers and memory. The on-chip shared memory allows parallel tasks running on these cores to share data without sending it over the system memory bus.This guide will show you how to install and check the correct operation of C for CUDA and CUDA runtimes.Getting Started with CUDA 2 November 2008System RequirementsTo use CUDA on your system, you will need the following installed:CUDA-enabled GPUDevice driverCUDA software (available at no cost from /cuda ) Microsoft Visual Studio 2005 or 2008, or the corresponding versions of Microsoft Visual C++ ExpressAbout This DocumentThis document is intended for readers familiar with Microsoft Windows XP orMicrosoft Windows Vista and the Microsoft Visual Studio environment. You do not need previous experience with CUDA or experience with parallel computation.November 2008 3Chapter 2.Installing CUDAThe installation of CUDA on a system running Microsoft Windows consists of four simple steps:Verify the system has a CUDA-capable GPUDownload the CUDA softwareInstall the driver for Windows XP or Windows Vista (if necessary) Install the CUDA softwareTest your installation by compiling and running one of the sample programs in the CUDA software to validate that the hardware and software are running correctly and communicating with each other.Verify CUDA-Capable GPUMany of the NVIDIA products today contain CUDA-enabled GPUs. These include:NVIDIA GeForce ® 8, 9, and 200 series GPUsNVIDIA Tesla™ computing solutions Many of the NVIDIA Quadro ® products An up-to-date list of CUDA-enabled GPUs can be found on the NVIDIA CUDA Web site at /object/cuda_learn_products.html . The Release Notes for the CUDA Toolkit also contain a list of supported products.To verify which video adapter your Windows system uses, open the Control Panel (Start Control Panel) and double click on System . In the System Propeties window that opens, click the Hardware tab, then Device Manager . Expand the Display adapters entry. There you will find the vendor name and model of your graphics card. Note: It is possible to develop CUDA software in the absence of a CUDA-enabled GPU.You can test the software in an emulation mode described later in this document. Naturally, performance on this platform is far less than on the CUDA-enabledprocessor, so the emulated hardware should not be used for release versions and performance tuning.Getting Started with CUDA 4 November 2008Download CUDA Software The CUDA driver is integrated in the NVIDIA graphics driver and is available from the main CUDA download site at /object/cuda_get.html. Choose the platform you are using, click Search , and download the driver, the CUDA Toolkit, and the CUDA SDK. The following sections describe the installation and configuration of version 2.1 of these packages.Install the CUDA Driver forMicrosoft Windows XP orWindows VistaAs mentioned in the previous section, the CUDA driver is integrated in the NVIDIA graphics driver. To use CUDA 2.1, you must have at least version 181.20 of the NVIDIA ForceWare ® graphics driver for Windows XP and Windows Vista. In most cases, if you are running a recent NVIDIA graphics adapter that has support for CUDA, you already have installed the CUDA driver. Verify that your system is running at least version 181.20.To identify the version of your NVIDIA driver, look in the NVIDIA Control Panel. Open the NVIDIA Control Panel by right clicking on the desktop and selecting by NVIDIA Control Panel . Click the System Information button in the lower leftcorner of the main panel to display a dialog box similar to that shown in Figure 1.Figure 1. System Information Dialog Box The ForceWare driver versionnumber must be 181.20 or higherIf you need to update your driver go to/object/cuda_get.html.Installing CUDANovember 2008 5 Note: New versions of CUDA can require updates of the driver, so always verify that youare running the right release of the driver for the version of CUDA you are using.Multiple-GPU ConfigurationsIf you have a multiple-GPU configuration, including -GX2 cards, for best CUDA performance you should disable SLI. On Windows Vista, each GPU needs its own NVIDIA desktop, which you can set up in the NVIDIA Control Panel. Alternatively some newer versions of the Forceware drivers offer the option to select secondary GPU as a dedicated for NVIDIA PhysX – which also enables it for use for applications using CUDA.CUDA SoftwareTo run CUDA programs, you will need the following CUDA software:The CUDA Toolkit The CUDA SDKThe CUDA Toolkit contains the tools needed to compile and build a CUDA application in conjunction with Microsoft Visual Studio. It includes tools, libraries, header files, and other resources.The CUDA SDK (software development kit) includes sample projects that have all the necessary project configuration and build files to perform one-click builds using Microsoft Visual Studio.Both software packages are available for 32-bit Windows XP and Windows Vista (called x86 on the download site) and 64-bit Windows XP and Windows Vista (called x86-64 on the download site). Download instructions appear in an earlier section of this chapter.Before installing these packages, you should read the Release Notes bundled with each, as these notes provide details on installation and software functionality. Installing the SoftwareFollow these few steps for a successful installation:1. Download the NVIDIA CUDA software from/object/cuda_get.html and save the installer to yourdesktop.2.Uninstall previous versions of the NVIDIA CUDA Toolkit and NVIDIA CUDA SDK if they have previously been installed. You can uninstall the NVIDIA CUDA Toolkit through the Start menu:Start All Programs NVIDIA Corporation CUDA Toolkit Uninstall CUDA .Uninstalling the CUDA SDK uses the same sequence.Getting Started with CUDA6 November 2008 3.Install version 2.1 of the NVIDIA CUDA Toolkit by runningNVIDIA_CUDA_Toolkit_2.1_Win32.exe (or Win64.exe, if you are using a 64-bit version of Windows). The CUDA Toolkit is installed by default underC:\CUDA. Several environment variables are defined with the toolkit installation: CUDA_BIN_PATH (defaults to C:\CUDA\bin) contains the compilerexecutables and runtime libraries.CUDA_INC_PATH (defaults to C:\CUDA\include) contains the include filesneeded to compile CUDA programs.CUDA_LIB_PATH (defaults to C:\CUDA\lib) contains the libraries needed for linking CUDA codes.In addition to these directories, the CUDA Toolkit installation also includes a documentation directory (C:\CUDA\doc) containing the CUDA Programming Guide, compiler guide, and guides for the CUDA implementation of the BLAS and FFT libraries.4.Install version 2.1 of the NVIDIA CUDA SDK by runningNVIDIA_CUDA_SDK_2.1_Win32.exe (or Win64.exe, if you are running the 64-bit version of Microsoft Windows). The CUDA SDK is installed inC:\Documents and Settings\All Users\Application Data\NVIDIACorporation\NVIDIA CUDA SDK and contains source code for many example problems and templates for Microsoft Visual Studio.Installing CUDAVerify the InstallationThe version of the CUDA Toolkit can be checked by running “nvcc –V” in aCommand Prompt window. A Command Prompt window can be obtained throughthe Start menu as follows: Start All Programs Accessories Command Prompt.In the CUDA SDK, NVIDIA includes sample programs that come in both sourceand compiled form. To verify a correct configuration of the hardware and software,it is highly recommended that you run the bandwidthTest program located inC:\Documents and Settings\All Users\Application Data\NVIDIACorporation\NVIDIA CUDA SDK\bin\win32\Release, presuming that you usedthe default installation directory structure. (On 64-bit versions of Windows, thedirectory name ends with \win64\Release.)If CUDA is installed and configured correctly, the output should look similar toFigure 2.Figure 2. Valid Results from Sample CUDAbandwidthTest ProgramNote that your device name (second line) and the bandwidth numbers will varyfrom system to system. The important items are the second line, which confirms aCUDA device was found, and the second-to-last line, which confirms that allnecessary tests passed.Should the tests not pass, make sure you do have an NVIDIA GPU on your systemthat supports CUDA and make sure it is properly installed.Getting Started with CUDATo see a graphical representation of what CUDA can do, run the sample Particlesexecutable in NVIDIA CUDA SDK\bin\win32\Release (or …\win64\Release on64-bit Windows).Installing CUDAChapter 3.Compiling a CUDA ProgramThe project files in the CUDA SDK have been designed to provide simple, one-click builds of the programs, which include all source code. To build the 32-bit or64-bit Windows projects (for release, debug, or emulated release and debug—calledemurelease and emudebug, respectively), use the provided *.sln solution files forMicrosoft Visual Studio 2005 and *_vc90.sln for Microsoft Visual Studio 2008.(Likewise for the corresponding versions of Microsoft Visual C++ ExpressEdition.) You can use either the solution files located in each of the examplesdirectories in NVIDIA CUDA SDK\projects or the global solution filesRelease.sln or Release_vc90.sln located in NVIDIA CUDA SDK\projects. Compiling Sample ProjectsThe bandwidthTest project, first mentioned on page 10, is a good sample projectto build and run. It is located in the C:\Documents and Settings\AllUsers\Application Data\NVIDIA Corporation\NVIDIA CUDASDK\projects\bandwidthTest directory. The output is placed inNVIDIA CUDA SDK\bin\win32\Debug. (As mentioned previously, the \win32segment of this address will be \win64on 64-bit versions of Windows.) Thislocation presumes that you used the default installation directory structure.Build the program using the appropriate solution file and run the executable. If allworks correctly, the output should be similar to Figure 2.Sample ProjectsThe sample projects come in four configurations: debug and release (where releasecontains no debugging information), and emulated versions of both. The emulatedversions are for developing and running CUDA software in the absence of a CUDAGPU.A few of the example projects require some additional setup. The simpleD3Dexample requires the system to have a Direct3D SDK installed and the Visual C++directory paths (located in Tools Options...) properly configured. Consult theDirect3D documentation for additional details.Most samples link to a utility library called cutil whose source code is in NVIDIACUDA SDK\common. The release and emurelease versions of these samples link tocutil32.lib (or cutil64.lib) and dynamically load cutil32.dll (orcutil64.dll). The debug and emudebug versions of these samples link toCompiling a CUDA Programcutil32D.lib and dynamically load cutil32D (or their 64-bit equivalents on 64-bitversions of Windows).To build the Win32 release and/or debug configurations of the cutil library, usethe solution files located in NVIDIA CUDA SDK\common. The output of thecompilation process should be placed in NVIDIA CUDA SDK\common\lib:cutil32.lib and cutil32D.lib (or cutil64.lib and cutil64D.lib) are the release and debug import libraries.cutil32.dll and cutil32D.dll (or cutil64.dll and cutil64D.dll) are the release and debug dynamic-link libraries, which also are copied to NVIDIA CUDASDK\bin\win32\[release|emurelease] and NVIDIA CUDASDK\bin\win32\[debug|emudebug] respectively. (Substitute \win64 for\win32 on 64-bit Windows.)What’s Next?Now that you have CUDA-capable hardware and the software installed, you canexamine and enjoy the numerous included programs. To begin using CUDA toaccelerate the performance of your own applications, consult the CUDAProgramming Guide, located in the directory where you installed the CUDA Toolkit(by default, C:\CUDA\doc).For tech support on programming questions, consult and participate in the bulletinboard and mailing list at /index.php?showforum=71.NoticeALL NVIDIA DESIGN SPECIFICATIONS, REFERENCE BOARDS, FILES, DRAWINGS, DIAGNOSTICS, LISTS, AND OTHER DOCUMENTS (TOGETHER AND SEPARATELY, “MATERIALS”) ARE BEING PROVIDED “AS IS.” NVIDIA MAKES NO WARRANTIES, EXPRESSED, IMPLIED, STATUTORY, OR OTHERWISE WITH RESPECT TO THE MATERIALS, AND EXPRESSLY DISCLAIMS ALL IMPLIED WARRANTIES OF NONINFRINGEMENT, MERCHANTABILITY, AND FITNESS FOR A PARTICULAR PURPOSE.Information furnished is believed to be accurate and reliable. However, NVIDIA Corporation assumes no responsibility for the consequences of use of such information or for any infringement of patents or other rights of third parties that may result from its use. No license is granted by implication or otherwise under any patent or patent rights of NVIDIA Corporation. Specifications mentioned in this publication are subject to change without notice. This publication supersedes and replaces all information previously supplied. NVIDIA Corporation products are not authorized for use as critical components in life support devices or systems without express written approval of NVIDIA Corporation.TrademarksNVIDIA, the NVIDIA logo, CUDA, Forceware, GeForce, and Quadro are trademarks or registered trademarks of NVIDIA Corporation. Other company and product names may be trademarks of the respective companies with which they are associated.Copyright© 2008 NVIDIA Corporation. All rights reserved.。