Switch命令大全
- 格式:doc
- 大小:71.00 KB
- 文档页数:18
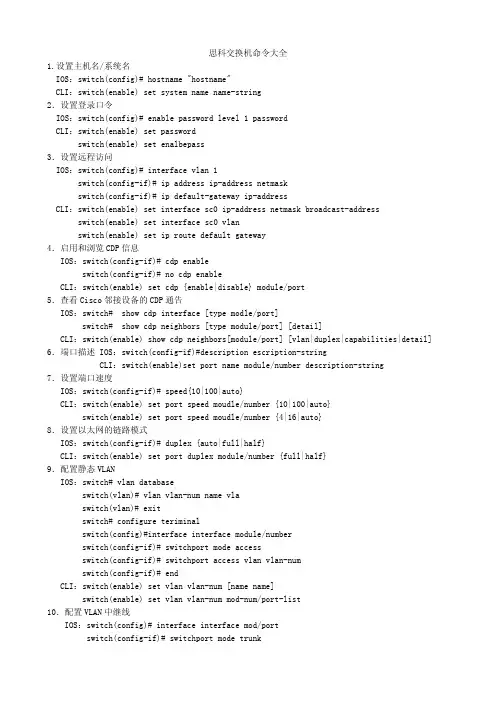
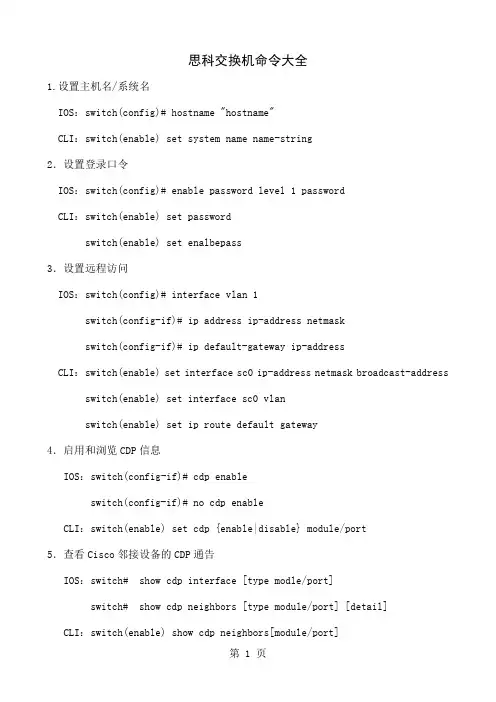
思科交换机命令大全(完整版)思科交换机命令大全思科交换机命令大全1.设置主机名/系统名IOS:switch(config)# hostname "hostname"CLI:switch(enable) set system name name-string2.设置登录口令IOS:switch(config)# enable password level 1 passwordCLI:switch(enable) set passwordswitch(enable) set enalbepass3.设置远程访问IOS:switch(config)# interface vlan 1switch(config-if)# ip address ip-address netmaskswitch(config-if)# ip default-gateway ip-addressCLI:switch(enable) set interface sc0 ip-address netmask broadcast-addressswitch(enable) set interface sc0 vlanswitch(enable) set ip route default gateway4.启用和浏览CDP信息IOS:switch(config-if)# cdp enableswitch(config-if)# no cdp enableCLI:switch(enable) set cdp {enable|disable} module/port5.查看Cisco邻接设备的CDP通告IOS:switch# show cdp interface [type modle/port]switch# show cdp neighbors [type module/port] [detail]CLI:switch(enable) show cdp neighbors[module/port][vlan|duplex|capabilities|detail]6.端口描述 IOS:switch(config-if)#description escription-stringCLI:switch(enable)set port name module/number description-string 7.设置端口速度IOS:switch(config-if)# speed{10|100|auto}CLI:switch(enable) set port speed moudle/number {10|100|auto}switch(enable) set port speed moudle/number {4|16|auto}8.设置以太网的链路模式IOS:switch(config-if)# duplex {auto|full|half}CLI:switch(enable) set port duplex module/number {full|half}9.配置静态VLANIOS:switch# vlan databaseswitch(vlan)# vlan vlan-num name vlaswitch(vlan)# exitswitch# configure teriminalswitch(config)#interface interface module/numberswitch(config-if)# switchport mode accessswitch(config-if)# switchport access vlan vlan-numswitch(config-if)# endCLI:switch(enable) set vlan vlan-num [name name]switch(enable) set vlan vlan-num mod-num/port-list10.配置VLAN中继线IOS:switch(config)# interface interface mod/portswitch(config-if)# switchport mode trunk。
思科Cisco交换机、路由器设置命令交换机口令设置:switch>enable ;进入特权模式switch#config terminal ;进入全局配置模式switch(config)#hostname <hostname> ;设置交换机的主机名switch(config)#enable secret xxx ;设置特权加密口令为 xxxswitch(config)#enable password xxx ;设置特权非密口令为 xxxswitch(config)#line console 0 ;进控制台口(Rs232)初始化switch(config-line)#line vty 0 4 ;进入虚拟终端virtual ttyswitch(config-line)#login ;允许登录switch(config-line)#password xx ;设置登录口令xx switch#exit ;返回命令交换机VLAN设置:switch#vlan database ;进入VLAN设置switch(vlan)#vlan 2 ;建VLAN 2switch(vlan)#no vlan 2 ;删vlan 2switch(config)#int f0/1 ;进入端口1switch(config-if)#switchport access vlan 2 ;当前端口1加入VLAN 2switch(config-if)#switchport mode trunk ;设置为干线switch(config-if)#switchport trunk allowed vlan 1,2;设置允许的vlan switch(config-if)#switchport trunk encap dot1q ;设置vlan中继switch(config)#vtp domain <name> ;设置发vtp域名switch(config)#vtp password <word>switch(config)#vtp mode serverswitch(config)#vtp mode client交换机设置IP地址:switch(config)#interface vlan 1 ;进入vlan 1 switch(config-if)#ip address <IP> <mask> ;添加远程登录IP switch(config)#ip default-gateway <IP> ;添加默认网关switch#dir flash: ;查看内存交换机显示命令:switch#write ;写入保存switch#show vtpswitch#show run ;查看当前配置信息switch#show vlan ;看VLANswitch#show interface ;显示所有端口信息switch#show int f0/0 ;显示端口0的信息 ^^^^^^^^^^^^^^^^^^^^^^^^^^^^^^^^^^^^^^^^^^^^^^^^^^路由器显示命令:router#show run ;显示接口router#show interface ;显示接口router#show ip route ;显示路由router#show cdp nei ;看邻居router#reload ;重新起动设置口令:router>enable ;进入特权模式router#config terminal ;进入全局配置模式router(config)#hostname <hostname> ;设置交换机的主机名router(config)#enable secret xxx ;设置特权加密口令为 xxxrouter(config)#enable password xxx ;设置特权非密口令为 xxxrouter(config)#line console 0 ;进控制台口(Rs232)初始化router(config-line)#line vty 0 4 ;进入虚拟终端virtual ttyrouter(config-line)#login ;允许登录router(config-line)#password xx ;设置登录口令xx router(config)# (Ctrl+z) ;返回特权模式router#exit ;返回命令配置IP地址:router(config)#int s0/0 ;进行串Serail接口router(config-if)#no shutdown ;起动接口router(config-if)#clock rate 64000 ;设置时钟router(config-if)#ip address 10.1.1.1 255.255.0.0 ;设置IP地址和子网掩码router(config-if)#ip add 10.1.1.2 255.255.0.0 second;router(config-if)#int f0/0.1 ;进入子接口router(config-subif.1)#ip address <ip><netmask> ;router(config-subif.1)#encapsulation dot1q <n> ;router(config)#config-register 0x2142 ;跳过配置文件router(config)#config-register 0x2102 ;正常使用配置文件router#reload ;重新引导复制操作:router#copy running-config startup-config ;存配置router#copy running-config tftp ;上载router#copy startup-config tftprouter#copy tftp flash: ;特权模式下升级IOSrouter#copy tftp startup-config ;下载配置文件到nvramROM状态:Ctrl+Break ;进入ROM监控状态rommon>confreg 0x2142 ;跳过配置,26 36 45xxrommon>confreg 0x2102 ;使用配置,恢复工作状态rommon>reset ;重新引导,等效于重开机rommon>copy xmodem:<sname> flash:<dname> ;从console升级IOSrommon>IP_ADDRESS=10.65.1.2 ;设置路由器IP rommon>IP_SUBNET_MASK=255.255.0.0 ;设置路由器掩码rommon>TFTP_SERVER=10.65.1.1 ;指定TFTP服务器IPrommon>TFTP_FILE=c2600.bin ;所要下载的文件rommon>tftpdnld ;ROM监控状态下升级IOSrommon>dir flash: ;查看闪存中的内容rommon>boot ;引导IOS静态路由:ip route <ip-address> <subnet-mask> <gateway> 例:router(config)#ip route 10.1.0.0 255.255.0.0 10.2.1.1router(config)#ip route 0.0.0.0 0.0.0.0 1.1.1.2动态路由:router(config)#ip routing ;启动路由router(config)#router rip ;启动RIP路由协议。

1.设置主机名/系统名IOS:switch(config)# hostname "hostname"CLI:switch(enable) set system name name-string2.设置登录口令IOS:switch(config)# enable password level 1 passwordCLI:switch(enable) set passwordswitch(enable) set enalbepass3.设置远程访问IOS:switch(config)# interface vlan 1switch(config-if)# ip address ip-address netmaskswitch(config-if)# ip default-gateway ip-addressCLI:switch(enable) set interface sc0 ip-address netmask broadcast-addressswitch(enable) set interface sc0 vlanswitch(enable) set ip route default gateway4.启用和浏览CDP信息IOS:switch(config-if)# cdp enableswitch(config-if)# no cdp enableCLI:switch(enable) set cdp {enable|disable} module/port5.查看Cisco邻接设备的CDP通告IOS:switch# show cdp interface [type modle/port]switch# show cdp neighbors [type module/port] [detail]CLI:switch(enable) show cdp neighbors[module/port] [vlan|duplex|capabilities|detail]6.端口描述IOS:switch(config-if)#description escription-string CLI:switch(enable)set port name module/number description-string 7.设置端口速度IOS:switch(config-if)# speed{10|100|auto}CLI:switch(enable) set port speed moudle/number {10|100|auto} switch(enable) set port speed moudle/number {4|16|auto}8.设置以太网的链路模式IOS:switch(config-if)# duplex {auto|full|half}CLI:switch(enable) set port duplex module/number {full|half}9.配置静态VLANIOS:switch# vlan databaseswitch(vlan)# vlan vlan-num name vlaswitch(vlan)# exitswitch# configure teriminalswitch(config)#interface interface module/numberswitch(config-if)# switchport mode accessswitch(config-if)# switchport access vlan vlan-numswitch(config-if)# endCLI:switch(enable) set vlan vlan-num [name name]switch(enable) set vlan vlan-num mod-num/port-list10.配置VLAN中继线IOS:switch(config)# interface interface mod/portswitch(config-if)# switchport mode trunkswitch(config-if)#switchport trunk encapsulation {isl|dotlq}switch(config-if)# switchport trunk allowed vlan remove vlan-listswitch(config-if)# switchport trunk allowed vlan add vlan-listCLI:switch(enable)set trunk module/port [on|off|desirable|auto|nonegotiate]Vlan-range [isl|dotlq|dotl0|lane|negotiate]11.配置VTP管理域IOS:switch# vlan databaseswitch(vlan)# vtp domain domain-nameCLI:switch(enable) set vtp [domain domain-name]12.配置VTP 模式IOS:switch# vlan databaseswitch(vlan)# vtp domain domain-nameswitch(vlan)# vtp {sever|cilent|transparent}switch(vlan)# vtp password passwordCLI:switch(enable) set vtp [domain domain-name] [mode{ sever|cilent|transparent }][password password]13.配置VTP版本IOS:switch# vlan databaseswitch(vlan)# vtp v2-modeCLI:switch(enable) set vtp v2 enable14.启动VTP剪裁IOS:switch# vlan databaseswitch(vlan)# vtp pruningCLI:switch(enable) set vtp pruning enable15.配置以太信道IOS:switch(config-if)# port group group-number [distribution {source|destination}] CLI:switch(enable) set port channel moudle/port-range mode{on|off|desirable|auto} 16.调整根路径成本IOS:switch(config-if)#spanning-tree [vlan vlan-list] cost costCLI:switch(enable)set spantree portcost moudle/port costswitch(enable)set spantree portvlancost moudle/port [cost cost][vlan-list]17.调整端口IDIOS:switch(config-if)#spanning-tree[vlan vlan-list]port-priority port-priorityCLI:switch(enable)set spantree portpri {mldule/port}priorityswitch(enable)set spantree portvlanpri {module/port}priority [vlans]18.修改STP时钟IOS:switch(config)# spanning-tree [vlan vlan-list] hello-time secondsswitch(config)#spanning-tree [vlan vlan-list] forward-time secondsswitch(config)#spanning-tree [vlan vlan-list] max-age secondsCLI:switch(enable) set spantree hello interval[vlan]switch(enable) set spantree fwddelay delay [vlan]switch(enable) set spantree maxage agingtiame[vlan]19.启用或禁用Port Fast 特征IOS:switch(config-if)#spanning-tree portfastCLI:switch(enable)set spantree portfast {module/port}{enable|disable}20.启用或禁用UplinkFast 特征IOS:switch(config)#spanning-tree uplinkfast [max-update-rate pkts-per-second]CLI:switch(enable)set spantree uplinkfast {enable|disable}[rate update-rate] [all-protocols off|on]为了将交换机配置成一个集群的命令交换机,首先要给管理接口分配一个IP地址,然后使用下列命令:switch(config)# cluster enable cluster-name21. 为了从一条中继链路上删除VLAN,可使用下列命令:switch(enable) clear trunk module/port vlan-range22. 用show vtp domain 显示管理域的VTP参数.23. 用show vtp statistics显示管理域的VTP参数.24. 在Catalyst交换机上定义TrBRF的命令如下:switch(enable) set vlan vlan-name [name name] type trbrf bridge bridge-num[stp {ieee|ibm}]25. 在Catalyst交换机上定义TrCRF的命令如下:switch (enable) set vlan vlan-num [name name] type trcrf {ring hex-ring-num|decring decimal-ring-num} parent vlan-num26. 在创建好TrBRF VLAN之后,就可以给它分配交换机端口.对于以太网交换,可以采用如下命令给VLAN分配端口:switch(enable) set vlan vlan-num mod-num/port-num27. 命令show spantree显示一个交换机端口的STP状态.28. 配置一个ELAN的LES和BUS,可以使用下列命令:ATM (config)# interface atm number.subint multiointATM(config-subif)# lane serber-bus ethernet elan-name29. 配置LECS:ATM(config)# lane database database-nameATM(lane-config-databade)# name elan1-name server-atm-address les1-nsap-addressATM(lane-config-databade)# name elan2-name server-atm-address les2-nsap-addressATM(lane-config-databade)# name ...30. 创建完数据库后,必须在主接口上启动LECS.命令如下: ATM(config)# interface atm numberATM(config-if)# lane config database database-nameATM(config-if)# lane config auto-config-atm-address31. 将每个LEC配置到一个不同的ATM子接口上.命令如下:ATM(config)# interface atm number.subint multipointATM(config)# lane client ethernet vlan-num elan-num32. 用show lane server 显示LES的状态.33. 用show lane bus显示bus的状态.34. 用show lane database显示LECS数据库可内容.35. 用show lane client显示LEC的状态.36. 用show module显示已安装的模块列表.37. 用物理接口建立与VLAN的连接:router# configure terminalrouter(config)# interface media module/portrouter(config-if)# description description-stringrouter(config-if)# ip address ip-addr subnet-maskrouter(config-if)# no shutdown38. 用中继链路来建立与VLAN的连接:router(config)# interface module/port.subinterfacerouter(config-ig)# encapsulation[isl|dotlq] vlan-numberrouter(config-if)# ip address ip-address subnet-mask39. 用LANE 来建立与VLAN的连接:router(config)# interface atm module/portrouter(config-if)# no ip addressrouter(config-if)# atm pvc 1 0 5 qsaalrouter(config-if)# atm pvc 2 0 16 ilnirouter(config-if)# interface atm module/port.subinterface multipoint router(config-if)# ip address ip-address subnet-maskrouter(config-if)# lane client ethernet elan-numrouter(config-if)# interface atm module/port.subinterface multipoint router(config-if)# ip address ip-address subnet-namerouter(config-if)# lane client ethernet elan-namerouter(config-if)# ...40. 为了在路由处理器上进行动态路由配置,可以用下列IOS命令来进行: router(config)# ip routingrouter(config)# router ip-routing-protocolrouter(config-router)# network ip-network-numberrouter(config-router)# network ip-network-number41. 配置默认路由: switch(enable) set ip route default gateway42. 为一个路由处理器分配VLANID,可在接口模式下使用下列命令:router(config)# interface interface numberrouter(config-if)# mls rp vlan-id vlan-id-num43. 在路由处理器启用MLSP: router(config)# mls rp ip44. 为了把一个外置的路由处理器接口和交换机安置在同一个VTP域中:router(config)# interface interface numberrouter(config-if)# mls rp vtp-domain domain-name45. 查看指定的VTP域的信息: router# show mls rp vtp-domain vtp domain name46. 要确定RSM或路由器上的管理接口,可以在接口模式下输入下列命令:router(config-if)#mls rp management-interface47. 要检验MLS-RP的配置情况:router# show mls rp48. 检验特定接口上的MLS配置:router# show mls rp interface interface number49. 为了在MLS-SE上设置流掩码而又不想在任一个路由处理器接口上设置访问列表:set mls flow [destination|destination-source|full]50. 为使MLS和输入访问列表可以兼容,可以在全局模式下使用下列命令:router(config)# mls rp ip input-acl51. 当某个交换机的第3层交换失效时,可在交换机的特权模式下输入下列命令:switch(enable) set mls enable52. 若想改变老化时间的值,可在特权模式下输入以下命令:switch(enable) set mls agingtime agingtime53. 设置快速老化:switch(enable) set mls agingtime fast fastagingtime pkt_threshold54. 确定那些MLS-RP和MLS-SE参与了MLS,可先显示交换机引用列表中的内容再确定:switch(enable) show mls include55. 显示MLS高速缓存记录:switch(enable) show mls entry56. 用命令show in arp显示ARP高速缓存区的内容。
交换机配置命令华为,思科,北电,迈普等配置命令各有不同,以下先以思科设备为例:switch> 用户模式1:进入特权模式 enableswitch> enableswitch#2:进入全局配置模式 configure terminalswitch> enableswitch#configure terminalswitch(conf)#3:交换机命名 hostname aptech2950 以aptech2950为例switch> enableswitch#configure terminalswitch(conf)#hostname aptch-2950aptech2950(conf)#4:配置使能口令 enable password cisco 以cisco为例switch> enableswitch#configure terminalswitch(conf)#hostname aptch2950aptech2950(conf)# enable password cisco5:配置使能密码 enable secret ciscolab 以cicsolab为例switch> enableswitch#configure terminalswitch(conf)#hostname aptch2950aptech2950(conf)# enable secret ciscolab6:设置虚拟局域网vlan 1 interface vlan 1 和网关地址switch> enableswitch#configure terminalswitch(conf)#hostname aptch2950aptech2950(conf)# interface vlan 1aptech2950(conf-if)#ip address 192.168.1.1 255.255.255.0 配置交换机端口ip和子网掩码aptech2950(conf-if)#no shut 是配置处于运行中aptech2950(conf-if)#exitaptech2950(conf)#ip default-gateway 192.168.254 设置网关地址7:进入交换机某一端口 interface fastehernet 0/17 以17端口为例switch> enableswitch#configure terminalswitch(conf)#hostname aptch2950aptech2950(conf)# interface fastehernet 0/17aptech2950(conf-if)#8:查看命令 showswitch> enableswitch# show version 察看系统中的所有版本信息show interface vlan 1 查看交换机有关ip 协议的配置信息show running-configure 查看交换机当前起作用的配置信息show interface fastethernet 0/1 察看交换机1接口具体配置和统计信息show mac-address-table 查看mac地址表show mac-address-table aging-time 查看mac地址表自动老化时间9:交换机恢复出厂默认恢复命令switch> enableswitch# erase startup-configureswitch# reload10:双工模式设置switch> enableswitch#configure terminalswitch2950(conf)#hostname aptch-2950aptech2950(conf)# interface fastehernet 0/17 以17端口为例aptech2950(conf-if)#duplex full/half/auto 有full , half, auto 三个可选项11:cdp相关命令switch> enableswitch# show cdp 查看设备的cdp全局配置信息show cdp interface fastethernet 0/17 查看17端口的cdp配置信息show cdp traffic 查看有关cdp包的统计信息show cdp nerghbors 列出与设备相连的cisco设备12:csico2950的密码恢复拔下交换机电源线。

1.在基于IOS的交换机上设置主机名/系统名: switch(config)# hostname hostname 在基于CLI的交换机上设置主机名/系统名: switch(enable) set system name name-string 2.在基于IOS的交换机上设置登录⼝令: switch(config)# enable password level 1 password 在基于CLI的交换机上设置登录⼝令: switch(enable) set password switch(enable) set enalbepass 3.在基于IOS的交换机上设置远程访问: switch(config)# interface vlan 1 switch(config-if)# ip address ip-address netmask switch(config-if)# ip default-gateway ip-address 在基于CLI的交换机上设置远程访问: switch(enable) set interface sc0 ip-address netmask broadcast-address switch(enable) set interface sc0 vlan switch(enable) set ip route default gateway 4.在基于IOS的交换机上启⽤和浏览CDP信息: switch(config-if)# cdp enable switch(config-if)# no cdp enable 为了查看Cisco邻接设备的CDP通告信息: switch# show cdp interface [type modle/port] switch# show cdp neighbors [type module/port] [detail] 在基于CLI的交换机上启⽤和浏览CDP信息: switch(enable) set cdp {enable disable} module/port 为了查看Cisco邻接设备的CDP通告信息: switch(enable) show cdp neighbors[module/port] [vlan duplex capabilities detail]。
交换机命令大全思科交换机命令的掌握对于思科交换机的使用有很大帮助,但是思科交换机命令繁多,为了便于记忆,总结出如下百条思科交换机命令,希望对大家有所帮助。
1.设置主机名/系统名 switch(config)# hostname "hostname" switch(enable) set system name name-string2.设置登录口令 switch(config)# enable password level 1 password switch(enable) set passwordswitch(enable) set enalbepass3.设置远程访问 switch(config)# inte***ce vlan 1switch(config-if)# ip address ip-address netmaskswitch(config-if)# ip default-gateway ip-address switch(enable) set inte***ce sc0 ip-address netmask broadcast-addressswitch(enable) set inte***ce sc0 vlanswitch(enable) set ip route default gateway4.启用和浏览CDP信息 switch(config-if)# cdp enableswitch(config-if)# no cdp enable switch(enable) set cdp {enable|disable} module/port5.查看Cisco邻接设备的CDP通告 switch# show cdp inte***ce [type modle/port]switch# show cdp neighbors [type module/port] [detail] switch(enable) show cdp neighbors[mod ule/port] [vlan|duplex|capabilities|detail]6.端口描述 switch(config-if)#description escription-string switch(enable)set port name modul e/number description-string7.设置端口速度 switch(config-if)# speed{10|100|auto} switch(enable) set port speed moudle/nu mber {10|100|auto}switch(enable) set port speed moudle/number {4|16|auto}8.设置以太网的链路模式 switch(config-if)# duplex {auto|full|half} switch(enable) set port du plex module/number {full|half9.配置静态VLAN switch# vlan databaseswitch(vlan)# vlan vlan-num name vlaswitch(vlan)# exitswitch# configure teriminalswitch(config)#inte***ce inte***ce module/numberswitch(config-if)# switchport mode accessswitch(config-if)# switchport access vlan vlan-numswitch(config-if)# end switch(enable) set vlan vlan-num [name name]switch(enable) set vlan vlan-num mod-num/port-list10.配置VLAN中继线 switch(config)# inte***ce inte***ce mod/portswitch(config-if)# switchport mode trunkswitch(config-if)#switchport trunk encapsulation {isl|dotlq}switch(config-if)# switchport trunk allowed vlan remove vlan-listswitch(config-if)# switchport trunk allowed vlan add vlan-list switch(enable)set trunk modul e/port [on|off|desirable|auto|nonegotiate]Vlan-range [isl|dotlq|dotl0|lane|negotiate]更多阅读请登录/web/ruodjc/201012/15-8048.html。

思科交换机命令大全1.设置主机名/系统名IOS:switch(config)# hostname "hostname"CLI:switch(enable) set system name name-string2.设置登录口令IOS:switch(config)# enable password level 1 passwordCLI:switch(enable) set passwordswitch(enable) set enalbepass3.设置远程访问IOS:switch(config)# interface vlan 1switch(config-if)# ip address ip-address netmaskswitch(config-if)# ip default-gateway ip-addressCLI:switch(enable) set interface sc0 ip-address netmask broadcast-address switch(enable) set interface sc0 vlanswitch(enable) set ip route default gateway4.启用和浏览CDP信息IOS:switch(config-if)# cdp enableswitch(config-if)# no cdp enableCLI:switch(enable) set cdp {enable|disable} module/port5.查看Cisco邻接设备的CDP通告IOS:switch# show cdp interface [type modle/port]switch# show cdp neighbors [type module/port] [detail]CLI:switch(enable) show cdp neighbors[module/port] [vlan|duplex|capabilities|detail] 6.端口描述 IOS:switch(config-if)#description escription-stringCLI:switch(enable)set port name module/number description-string7.设置端口速度IOS:switch(config-if)# speed{10|100|auto}CLI:switch(enable) set port speed moudle/number {10|100|auto}switch(enable) set port speed moudle/number {4|16|auto}8.设置以太网的链路模式IOS:switch(config-if)# duplex {auto|full|half}CLI:switch(enable) set port duplex module/number {full|half}9.配置静态VLANIOS:switch# vlan databaseswitch(vlan)# vlan vlan-num name vlaswitch(vlan)# exitswitch# configure teriminalswitch(config)#interface interface module/numberswitch(config-if)# switchport mode accessswitch(config-if)# switchport access vlan vlan-numswitch(config-if)# endCLI:switch(enable) set vlan vlan-num [name name]switch(enable) set vlan vlan-num mod-num/port-list10.配置VLAN中继线IOS:switch(config)# interface interface mod/portswitch(config-if)# switchport mode trunkswitch(config-if)#switchport trunk encapsulation {isl|dotlq}switch(config-if)# switchport trunk allowed vlan remove vlan-listswitch(config-if)# switchport trunk allowed vlan add vlan-list CLI:switch(enable)set trunk module/port [on|off|desirable|auto|nonegotiate] Vlan-range [isl|dotlq|dotl0|lane|negotiate]11.配置VTP管理域IOS:switch# vlan databaseswitch(vlan)# vtp domain domain-nameCLI:switch(enable) set vtp [domain domain-name]12.配置VTP 模式IOS:switch# vlan databaseswitch(vlan)# vtp domain domain-nameswitch(vlan)# vtp {sever|cilent|transparent}switch(vlan)# vtp password passwordCLI:switch(enable) set vtp [domain domain-name][mode{ sever|cilent|transparent }][password password]13.配置VTP版本IOS:switch# vlan databaseswitch(vlan)# vtp v2-modeCLI:switch(enable) set vtp v2 enable14.启动VTP剪裁IOS:switch# vlan databaseswitch(vlan)# vtp pruningCLI:switch(enable) set vtp pruning enable15.配置以太信道IOS:switch(config-if)# port group group-number [distribution {source|destination}] CLI:switch(enable) set port channel moudle/port-range mode{on|off|desirable|auto} 16.调整根路径成本IOS:switch(config-if)#spanning-tree [vlan vlan-list] cost costCLI:switch(enable)set spantree portcost moudle/port costswitch(enable)set spantree portvlancost moudle/port [cost cost][vlan-list] 17.调整端口IDIOS:switch(config-if)#spanning-tree[vlan vlan-list]port-priority port-priority CLI:switch(enable)set spantree portpri {mldule/port}priorityswitch(enable)set spantree portvlanpri {module/port}priority [vlans]18.修改STP时钟IOS:switch(config)# spanning-tree [vlan vlan-list] hello-time secondsswitch(config)#spanning-tree [vlan vlan-list] forward-time secondsswitch(config)#spanning-tree [vlan vlan-list] max-age seconds CLI:switch(enable) set spantree hello interval[vlan]switch(enable) set spantree fwddelay delay [vlan]switch(enable) set spantree maxage agingtiame[vlan]19.启用或禁用Port Fast 特征IOS:switch(config-if)#spanning-tree portfastCLI:switch(enable)set spantree portfast {module/port}{enable|disable}20.启用或禁用UplinkFast 特征IOS:switch(config)#spanning-tree uplinkfast [max-update-rate pkts-per-second]CLI:switch(enable)set spantree uplinkfast {enable|disable}[rate update-rate] [all-protocolsoff|on] 为了将交换机配置成一个集群的命令交换机,首先要给管理接口分配一个IP地址,然后使用下列命令: switch(config)# cluster enable cluster-name21. 为了从一条中继链路上删除VLAN,可使用下列命令:switch(enable) clear trunk module/port vlan-range22. 用show vtp domain 显示管理域的VTP参数.23. 用show vtp statistics显示管理域的VTP参数.24. 在Catalyst交换机上定义TrBRF的命令如下:switch(enable) set vlan vlan-name [name name] type trbrf bridge bridge-num[stp {ieee|ibm}] 25. 在Catalyst交换机上定义TrCRF的命令如下:switch (enable) set vlan vlan-num [name name] type trcrf {ring hex-ring-num|decring decimal-ring-num} parent vlan-num26. 在创建好TrBRF VLAN之后,就可以给它分配交换机端口.对于以太网交换,可以采用如下命令给VLAN分配端口:switch(enable) set vlan vlan-num mod-num/port-num27. 命令show spantree显示一个交换机端口的STP状态.28. 配置一个ELAN的LES和BUS,可以使用下列命令:ATM (config)# interface atm number.subint multiointATM(config-subif)# lane serber-bus ethernet elan-name29. 配置LECS:ATM(config)# lane database database-nameATM(lane-config-databade)# name elan1-name server-atm-address les1-nsap-addressATM(lane-config-databade)# name elan2-name server-atm-address les2-nsap-addressATM(lane-config-databade)# name ...30. 创建完数据库后,必须在主接口上启动LECS.命令如下: ATM(config)# interface atm numberATM(config-if)# lane config database database-nameATM(config-if)# lane config auto-config-atm-address31. 将每个LEC配置到一个不同的ATM子接口上.命令如下:ATM(config)# interface atm number.subint multipointATM(config)# lane client ethernet vlan-num elan-num32. 用show lane server 显示LES的状态.33. 用show lane bus显示bus的状态.34. 用show lane database显示LECS数据库可内容.35. 用show lane client显示LEC的状态.36. 用show module显示已安装的模块列表.37. 用物理接口建立与VLAN的连接:router# configure terminalrouter(config)# interface media module/portrouter(config-if)# description description-stringrouter(config-if)# ip address ip-addr subnet-maskrouter(config-if)# no shutdown38. 用中继链路来建立与VLAN的连接:router(config)# interface module/port.subinterfacerouter(config-ig)# encapsulation[isl|dotlq] vlan-numberrouter(config-if)# ip address ip-address subnet-mask39. 用LANE 来建立与VLAN的连接:router(config)# interface atm module/portrouter(config-if)# no ip addressrouter(config-if)# atm pvc 1 0 5 qsaalrouter(config-if)# atm pvc 2 0 16 ilnirouter(config-if)# interface atm module/port.subinterface multipointrouter(config-if)# ip address ip-address subnet-maskrouter(config-if)# lane client ethernet elan-numrouter(config-if)# interface atm module/port.subinterface multipointrouter(config-if)# ip address ip-address subnet-namerouter(config-if)# lane client ethernet elan-namerouter(config-if)# ...40. 为了在路由处理器上进行动态路由配置,可以用下列IOS命令来进行:router(config)# ip routingrouter(config)# router ip-routing-protocolrouter(config-router)# network ip-network-numberrouter(config-router)# network ip-network-number41. 配置默认路由: switch(enable) set ip route default gateway42. 为一个路由处理器分配VLANID,可在接口模式下使用下列命令:router(config)# interface interface numberrouter(config-if)# mls rp vlan-id vlan-id-num43. 在路由处理器启用MLSP: router(config)# mls rp ip44. 为了把一个外置的路由处理器接口和交换机安置在同一个VTP域中:router(config)# interface interface numberrouter(config-if)# mls rp vtp-domain domain-name45. 查看指定的VTP域的信息: router# show mls rp vtp-domain vtp domain name46. 要确定RSM或路由器上的管理接口,可以在接口模式下输入下列命令:router(config-if)#mls rp management-interface47. 要检验MLS-RP的配置情况: router# show mls rp48. 检验特定接口上的MLS配置:router# show mls rp interface interface number49. 为了在MLS-SE上设置流掩码而又不想在任一个路由处理器接口上设置访问列表:set mls flow [destination|destination-source|full]50. 为使MLS和输入访问列表可以兼容,可以在全局模式下使用下列命令:router(config)# mls rp ip input-acl51. 当某个交换机的第3层交换失效时,可在交换机的特权模式下输入下列命令:switch(enable) set mls enable52. 若想改变老化时间的值,可在特权模式下输入以下命令:switch(enable) set mls agingtime agingtime53. 设置快速老化:switch(enable) set mls agingtime fast fastagingtime pkt_threshold54. 确定那些MLS-RP和MLS-SE参与了MLS,可先显示交换机引用列表中的内容再确定:switch(enable) show mls include55. 显示MLS高速缓存记录: switch(enable) show mls entry56. 用命令show in arp显示ARP高速缓存区的内容。
思科交换机命令大全1.设置主机名/系统名IOS:switch(config)# hostname "hostname"CLI:switch(enable) set system name name-string2.设置登录口令IOS:switch(config)# enable password level 1 passwordCLI:switch(enable) set passwordswitch(enable) set enalbepass3.设置远程访问IOS:switch(config)# interface vlan 1switch(config-if)# ip address ip-address netmaskswitch(config-if)# ip default-gateway ip-addressCLI:switch(enable) set interface sc0 ip-address netmask broadcast-address switch(enable) set interface sc0 vlanswitch(enable) set ip route default gateway4.启用和浏览CDP信息IOS:switch(config-if)# cdp enableswitch(config-if)# no cdp enableCLI:switch(enable) set cdp {enable|disable} module/port5.查看Cisco邻接设备的CDP通告IOS:switch# show cdp interface [type modle/port]switch# show cdp neighbors [type module/port] [detail]CLI:switch(enable) show cdp neighbors[module/port] [vlan|duplex|capabilities|detail] 6.端口描述 IOS:switch(config-if)#description escription-stringCLI:switch(enable)set port name module/number description-string7.设置端口速度IOS:switch(config-if)# speed{10|100|auto}CLI:switch(enable) set port speed moudle/number {10|100|auto}switch(enable) set port speed moudle/number {4|16|auto}8.设置以太网的链路模式IOS:switch(config-if)# duplex {auto|full|half}CLI:switch(enable) set port duplex module/number {full|half}9.配置静态VLANIOS:switch# vlan databaseswitch(vlan)# vlan vlan-num name vlaswitch(vlan)# exitswitch# configure teriminalswitch(config)#interface interface module/numberswitch(config-if)# switchport mode accessswitch(config-if)# switchport access vlan vlan-numswitch(config-if)# endCLI:switch(enable) set vlan vlan-num [name name]switch(enable) set vlan vlan-num mod-num/port-list10.配置VLAN中继线IOS:switch(config)# interface interface mod/portswitch(config-if)# switchport mode trunkswitch(config-if)#switchport trunk encapsulation {isl|dotlq}switch(config-if)# switchport trunk allowed vlan remove vlan-listswitch(config-if)# switchport trunk allowed vlan add vlan-list CLI:switch(enable)set trunk module/port [on|off|desirable|auto|nonegotiate] Vlan-range [isl|dotlq|dotl0|lane|negotiate]11.配置VTP管理域IOS:switch# vlan databaseswitch(vlan)# vtp domain domain-nameCLI:switch(enable) set vtp [domain domain-name]12.配置VTP 模式IOS:switch# vlan databaseswitch(vlan)# vtp domain domain-nameswitch(vlan)# vtp {sever|cilent|transparent}switch(vlan)# vtp password passwordCLI:switch(enable) set vtp [domain domain-name][mode{ sever|cilent|transparent }][password password]13.配置VTP版本IOS:switch# vlan databaseswitch(vlan)# vtp v2-modeCLI:switch(enable) set vtp v2 enable14.启动VTP剪裁IOS:switch# vlan databaseswitch(vlan)# vtp pruningCLI:switch(enable) set vtp pruning enable15.配置以太信道IOS:switch(config-if)# port group group-number [distribution {source|destination}] CLI:switch(enable) set port channel moudle/port-range mode{on|off|desirable|auto} 16.调整根路径成本IOS:switch(config-if)#spanning-tree [vlan vlan-list] cost costCLI:switch(enable)set spantree portcost moudle/port costswitch(enable)set spantree portvlancost moudle/port [cost cost][vlan-list] 17.调整端口IDIOS:switch(config-if)#spanning-tree[vlan vlan-list]port-priority port-priority CLI:switch(enable)set spantree portpri {mldule/port}priorityswitch(enable)set spantree portvlanpri {module/port}priority [vlans]18.修改STP时钟IOS:switch(config)# spanning-tree [vlan vlan-list] hello-time secondsswitch(config)#spanning-tree [vlan vlan-list] forward-time secondsswitch(config)#spanning-tree [vlan vlan-list] max-age seconds CLI:switch(enable) set spantree hello interval[vlan]switch(enable) set spantree fwddelay delay [vlan]switch(enable) set spantree maxage agingtiame[vlan]19.启用或禁用Port Fast 特征IOS:switch(config-if)#spanning-tree portfastCLI:switch(enable)set spantree portfast {module/port}{enable|disable}20.启用或禁用UplinkFast 特征IOS:switch(config)#spanning-tree uplinkfast [max-update-rate pkts-per-second]CLI:switch(enable)set spantree uplinkfast {enable|disable}[rate update-rate] [all-protocolsoff|on] 为了将交换机配置成一个集群的命令交换机,首先要给管理接口分配一个IP地址,然后使用下列命令: switch(config)# cluster enable cluster-name21. 为了从一条中继链路上删除VLAN,可使用下列命令:switch(enable) clear trunk module/port vlan-range22. 用show vtp domain 显示管理域的VTP参数.23. 用show vtp statistics显示管理域的VTP参数.24. 在Catalyst交换机上定义TrBRF的命令如下:switch(enable) set vlan vlan-name [name name] type trbrf bridge bridge-num[stp {ieee|ibm}] 25. 在Catalyst交换机上定义TrCRF的命令如下:switch (enable) set vlan vlan-num [name name] type trcrf {ring hex-ring-num|decring decimal-ring-num} parent vlan-num26. 在创建好TrBRF VLAN之后,就可以给它分配交换机端口.对于以太网交换,可以采用如下命令给VLAN分配端口:switch(enable) set vlan vlan-num mod-num/port-num27. 命令show spantree显示一个交换机端口的STP状态.28. 配置一个ELAN的LES和BUS,可以使用下列命令:ATM (config)# interface atm number.subint multiointATM(config-subif)# lane serber-bus ethernet elan-name29. 配置LECS:ATM(config)# lane database database-nameATM(lane-config-databade)# name elan1-name server-atm-address les1-nsap-addressATM(lane-config-databade)# name elan2-name server-atm-address les2-nsap-addressATM(lane-config-databade)# name ...30. 创建完数据库后,必须在主接口上启动LECS.命令如下: ATM(config)# interface atm numberATM(config-if)# lane config database database-nameATM(config-if)# lane config auto-config-atm-address31. 将每个LEC配置到一个不同的ATM子接口上.命令如下:ATM(config)# interface atm number.subint multipointATM(config)# lane client ethernet vlan-num elan-num32. 用show lane server 显示LES的状态.33. 用show lane bus显示bus的状态.34. 用show lane database显示LECS数据库可内容.35. 用show lane client显示LEC的状态.36. 用show module显示已安装的模块列表.37. 用物理接口建立与VLAN的连接:router# configure terminalrouter(config)# interface media module/portrouter(config-if)# description description-stringrouter(config-if)# ip address ip-addr subnet-maskrouter(config-if)# no shutdown38. 用中继链路来建立与VLAN的连接:router(config)# interface module/port.subinterfacerouter(config-ig)# encapsulation[isl|dotlq] vlan-numberrouter(config-if)# ip address ip-address subnet-mask39. 用LANE 来建立与VLAN的连接:router(config)# interface atm module/portrouter(config-if)# no ip addressrouter(config-if)# atm pvc 1 0 5 qsaalrouter(config-if)# atm pvc 2 0 16 ilnirouter(config-if)# interface atm module/port.subinterface multipointrouter(config-if)# ip address ip-address subnet-maskrouter(config-if)# lane client ethernet elan-numrouter(config-if)# interface atm module/port.subinterface multipointrouter(config-if)# ip address ip-address subnet-namerouter(config-if)# lane client ethernet elan-namerouter(config-if)# ...40. 为了在路由处理器上进行动态路由配置,可以用下列IOS命令来进行:router(config)# ip routingrouter(config)# router ip-routing-protocolrouter(config-router)# network ip-network-numberrouter(config-router)# network ip-network-number41. 配置默认路由: switch(enable) set ip route default gateway42. 为一个路由处理器分配VLANID,可在接口模式下使用下列命令:router(config)# interface interface numberrouter(config-if)# mls rp vlan-id vlan-id-num43. 在路由处理器启用MLSP: router(config)# mls rp ip44. 为了把一个外置的路由处理器接口和交换机安置在同一个VTP域中:router(config)# interface interface numberrouter(config-if)# mls rp vtp-domain domain-name45. 查看指定的VTP域的信息: router# show mls rp vtp-domain vtp domain name46. 要确定RSM或路由器上的管理接口,可以在接口模式下输入下列命令:router(config-if)#mls rp management-interface47. 要检验MLS-RP的配置情况: router# show mls rp48. 检验特定接口上的MLS配置:router# show mls rp interface interface number49. 为了在MLS-SE上设置流掩码而又不想在任一个路由处理器接口上设置访问列表:set mls flow [destination|destination-source|full]50. 为使MLS和输入访问列表可以兼容,可以在全局模式下使用下列命令:router(config)# mls rp ip input-acl51. 当某个交换机的第3层交换失效时,可在交换机的特权模式下输入下列命令:switch(enable) set mls enable52. 若想改变老化时间的值,可在特权模式下输入以下命令:switch(enable) set mls agingtime agingtime53. 设置快速老化:switch(enable) set mls agingtime fast fastagingtime pkt_threshold54. 确定那些MLS-RP和MLS-SE参与了MLS,可先显示交换机引用列表中的内容再确定:switch(enable) show mls include55. 显示MLS高速缓存记录: switch(enable) show mls entry56. 用命令show in arp显示ARP高速缓存区的内容。
switch语句用法
Switch语句用法
Switch语句是一种常见的控制流语句,主要用于根据给定的条件从多个选项中选择执行代码块。
它在编写程序时提供了一种简洁而有效的方式来处理多个条件分支。
Switch语句通常由多个case分支组成,每个分支都有一个相应的值。
程序将根据给定的条件值找到与之匹配的分支,并执行相应的代码块。
下面是Switch语句的基本结构:
```
switch(condition) {
case value1:
// code block 1
break;
case value2:
// code block 2
break;
...
default:
// code block n
break;
}
```
当执行Switch语句时,首先会检查condition的值。
程序将逐个
检查每个case分支,直到找到可以匹配的分支。
一旦匹配成功,程序将执行相应的代码块,并使用break语句来退出Switch语句。
如果没有找到匹配的分支,则程序将执行default代码块(可选)。
Switch语句在处理多个相互排除的条件时非常强大和高效。
它提供了一种简单的方式来组织代码,使其更容易阅读和理解。
下面是一个实际的示例,演示了如何使用Switch语句来处理不同的条件:
```python
let day = 3;
let dayName;
switch (day) { case 1:
dayName = \。

交换机基本状态:hostname> ;用户模式hostname# ;特权模式hostname(config)# ;全局配置模式hostname(config-if)# ;接口状态交换机口令设置:switch>enable ;进入特权模式switch#config terminal ;进入全局配置模式switch(config)#hostname ;设置交换机的主机名switch(config)#enable secret xxx ;设置特权加密口令switch(config)#enable password xxa ;设置特权非密口令switch(config)#line console 0 ;进入控制台口switch(config-line)#line vty 0 4 ;进入虚拟终端switch(config-line)#login ;允许登录switch(config-line)#password xx ;设置登录口令xx switch#exit ;返回命令交换机VLAN设置:switch#vlan database ;进入VLAN设置switch(vlan)#vlan 2 ;建VLAN 2switch(vlan)#no vlan 2 ;删vlan 2switch(config)#int f0/1 ;进入端口1switch(config-if)#switchport access vlan 2 ;当前端口加入vlan 2 switch(config-if)#switchport mode trunk ;设置为干线switch(config-if)#switchport trunk allowed vlan 1,2 ;设置允许的vlan switch(config-if)#switchport trunk encap dot1q ;设置vlan 中继switch(config)#vtp domain ;设置发vtp 域名switch(config)#vtp password ;设置发vtp 密码switch(config)#vtp mode server ;设置发vtp模式switch(config)#vtp mode client ;设置发vtp模式交换机设置IP地址:switch(config)#interface vlan 1 ;进入vlan 1switch(config-if)#ip address ;设置IP地址switch(config)#ip default-gateway ;设置默认网关switch#dir Flash: ;查看闪存交换机显示命令:switch#write ;保存配置信息switch#show vtp ;查看vtp配置信息switch#show run ;查看当前配置信息switch#show vlan ;查看vlan配置信息switch#show interface ;查看端口信息switch#show int f0/0 ;查看指定端口信息完了最最要的一步。
思科交换机命令大全1.设置主机名/系统名IOS:switch(config)# hostname "hostname"CLI:switch(enable) set system name name-string2.设置登录口令IOS:switch(config)# enable password level 1 passwordCLI:switch(enable) set passwordswitch(enable) set enalbepass3.设置远程访问IOS:switch(config)# interface vlan 1switch(config-if)# ip address ip-address netmaskswitch(config-if)# ip default-gateway ip-addressCLI:switch(enable) set interface sc0 ip-address netmask broadcast-address switch(enable) set interface sc0 vlanswitch(enable) set ip route default gateway4.启用和浏览CDP信息IOS:switch(config-if)# cdp enableswitch(config-if)# no cdp enableCLI:switch(enable) set cdp {enable|disable} module/port5.查看Cisco邻接设备的CDP通告IOS:switch# show cdp interface [type modle/port]switch# show cdp neighbors [type module/port] [detail] CLI:switch(enable) show cdp neighbors[module/port][vlan|duplex|capabilities|detail]6.端口描述 IOS:switch(config-if)#description escription-stringCLI:switch(enable)set port name module/number description-string 7.设置端口速度IOS:switch(config-if)# speed{10|100|auto}CLI:switch(enable) set port speed moudle/number {10|100|auto} switch(enable) set port speed moudle/number {4|16|auto}8.设置以太网的链路模式IOS:switch(config-if)# duplex {auto|full|half}CLI:switch(enable) set port duplex module/number {full|half}9.配置静态VLANIOS:switch# vlan databaseswitch(vlan)# vlan vlan-num name vlaswitch(vlan)# exitswitch# configure teriminalswitch(config)#interface interface module/numberswitch(config-if)# switchport mode accessswitch(config-if)# switchport access vlan vlan-numswitch(config-if)# endCLI:switch(enable) set vlan vlan-num [name name]switch(enable) set vlan vlan-num mod-num/port-list10.配置VLAN中继线IOS:switch(config)# interface interface mod/portswitch(config-if)# switchport mode trunkswitch(config-if)#switchport trunk encapsulation {isl|dotlq}switch(config-if)# switchport trunk allowed vlan remove vlan-listswitch(config-if)# switchport trunk allowed vlan add vlan-list CLI:switch(enable)set trunk module/port[on|off|desirable|auto|nonegotiate]Vlan-range [isl|dotlq|dotl0|lane|negotiate]11.配置VTP管理域IOS:switch# vlan databaseswitch(vlan)# vtp domain domain-nameCLI:switch(enable) set vtp [domain domain-name]12.配置VTP 模式IOS:switch# vlan databaseswitch(vlan)# vtp domain domain-nameswitch(vlan)# vtp {sever|cilent|transparent}switch(vlan)# vtp password passwordCLI:switch(enable) set vtp [domain domain-name][mode{ sever|cilent|transparent }][password password]13.配置VTP版本IOS:switch# vlan databaseswitch(vlan)# vtp v2-modeCLI:switch(enable) set vtp v2 enable14.启动VTP剪裁IOS:switch# vlan databaseswitch(vlan)# vtp pruningCLI:switch(enable) set vtp pruning enable15.配置以太信道IOS:switch(config-if)# port group group-number [distribution{source|destination}] CLI:switch(enable) set port channel moudle/port-rangemode{on|off|desirable|auto}16.调整根路径成本IOS:switch(config-if)#spanning-tree [vlan vlan-list] cost costCLI:switch(enable)set spantree portcost moudle/port costswitch(enable)set spantree portvlancost moudle/port [costcost][vlan-list]17.调整端口IDIOS:switch(config-if)#spanning-tree[vlan vlan-list]port-priorityport-priorityCLI:switch(enable)set spantree portpri {mldule/port}priority switch(enable)set spantree portvlanpri {module/port}priority [vlans]18.修改STP时钟IOS:switch(config)# spanning-tree [vlan vlan-list] hello-time seconds switch(config)#spanning-tree [vlan vlan-list] forward-time secondsswitch(config)#spanning-tree [vlan vlan-list] max-age secondsCLI:switch(enable) set spantree hello interval[vlan]switch(enable) set spantree fwddelay delay [vlan]switch(enable) set spantree maxage agingtiame[vlan]19.启用或禁用Port Fast 特征IOS:switch(config-if)#spanning-tree portfastCLI:switch(enable)set spantree portfast {module/port}{enable|disable} 20.启用或禁用UplinkFast 特征IOS:switch(config)#spanning-tree uplinkfast [max-update-ratepkts-per-second]CLI:switch(enable)set spantree uplinkfast {enable|disable}[rate为了将交换机配置成一个集群的命令交换机,首先要给管理接口分配一个IP地址,然后使用下列命令:switch(config)# cluster enable cluster-name21. 为了从一条中继链路上删除VLAN,可使用下列命令:switch(enable) clear trunk module/port vlan-range22. 用show vtp domain 显示管理域的VTP参数.23. 用show vtp statistics显示管理域的VTP参数.24. 在Catalyst交换机上定义TrBRF的命令如下:switch(enable) set vlan vlan-name [name name] type trbrf bridge bridge-num[stp {ieee|ibm}]25. 在Catalyst交换机上定义TrCRF的命令如下:switch (enable) set vlan vlan-num [name name] type trcrf {ring hex-ring-num|decring decimal-ring-num} parent vlan-num26. 在创建好TrBRF VLAN之后,就可以给它分配交换机端口.对于以太网交换,可以采用如下命令给VLAN分配端口:switch(enable) set vlan vlan-num mod-num/port-num27. 命令show spantree显示一个交换机端口的STP状态.28. 配置一个ELAN的LES和BUS,可以使用下列命令:ATM (config)# interface atm number.subint multiointATM(config-subif)# lane serber-bus ethernet elan-name29. 配置LECS:ATM(config)# lane database database-nameATM(lane-config-databade)# name elan1-name server-atm-addressles1-nsap-addressATM(lane-config-databade)# name elan2-name server-atm-addressles2-nsap-addressATM(lane-config-databade)# name ...30. 创建完数据库后,必须在主接口上启动LECS.命令如下: ATM(config)# interface atm numberATM(config-if)# lane config database database-nameATM(config-if)# lane config auto-config-atm-address31. 将每个LEC配置到一个不同的ATM子接口上.命令如下:ATM(config)# interface atm number.subint multipointATM(config)# lane client ethernet vlan-num elan-num32. 用show lane server 显示LES的状态.33. 用show lane bus显示bus的状态.34. 用show lane database显示LECS数据库可内容.35. 用show lane client显示LEC的状态.36. 用show module显示已安装的模块列表.37. 用物理接口建立与VLAN的连接:router# configure terminalrouter(config)# interface media module/portrouter(config-if)# description description-stringrouter(config-if)# ip address ip-addr subnet-maskrouter(config-if)# no shutdown38. 用中继链路来建立与VLAN的连接:router(config)# interface module/port.subinterfacerouter(config-ig)# encapsulation[isl|dotlq] vlan-numberrouter(config-if)# ip address ip-address subnet-mask39. 用LANE 来建立与VLAN的连接:router(config)# interface atm module/portrouter(config-if)# no ip addressrouter(config-if)# atm pvc 1 0 5 qsaalrouter(config-if)# atm pvc 2 0 16 ilnirouter(config-if)# interface atm module/port.subinterface multipoint router(config-if)# ip address ip-address subnet-maskrouter(config-if)# lane client ethernet elan-numrouter(config-if)# interface atm module/port.subinterface multipoint router(config-if)# ip address ip-address subnet-namerouter(config-if)# lane client ethernet elan-namerouter(config-if)# ...40. 为了在路由处理器上进行动态路由配置,可以用下列IOS命令来进行:router(config)# ip routingrouter(config)# router ip-routing-protocolrouter(config-router)# network ip-network-numberrouter(config-router)# network ip-network-number41. 配置默认路由: switch(enable) set ip route default gateway42. 为一个路由处理器分配VLANID,可在接口模式下使用下列命令:router(config)# interface interface numberrouter(config-if)# mls rp vlan-id vlan-id-num43. 在路由处理器启用MLSP: router(config)# mls rp ip44. 为了把一个外置的路由处理器接口和交换机安置在同一个VTP域中:router(config)# interface interface numberrouter(config-if)# mls rp vtp-domain domain-name45. 查看指定的VTP域的信息: router# show mls rp vtp-domain vtp domain name46. 要确定RSM或路由器上的管理接口,可以在接口模式下输入下列命令:router(config-if)#mls rp management-interface47. 要检验MLS-RP的配置情况: router# show mls rp48. 检验特定接口上的MLS配置:router# show mls rp interface interface number49. 为了在MLS-SE上设置流掩码而又不想在任一个路由处理器接口上设置访问列表:set mls flow [destination|destination-source|full]50. 为使MLS和输入访问列表可以兼容,可以在全局模式下使用下列命令:router(config)# mls rp ip input-acl51. 当某个交换机的第3层交换失效时,可在交换机的特权模式下输入下列命令:switch(enable) set mls enable52. 若想改变老化时间的值,可在特权模式下输入以下命令:switch(enable) set mls agingtime agingtime53. 设置快速老化:switch(enable) set mls agingtime fast fastagingtimepkt_threshold54. 确定那些MLS-RP和MLS-SE参与了MLS,可先显示交换机引用列表中的内容再确定:switch(enable) show mls include55. 显示MLS高速缓存记录: switch(enable) show mls entry56. 用命令show in arp显示ARP高速缓存区的内容。
博科交换机查看IP地址命令swd77:admin> ipaddrshowSWITCHEthernet IP Address: 10.77.77.77Ethernet Subnetmask: 255.255.255.0Fibre Channel IP Address: noneFibre Channel Subnetmask: noneGateway IP Address: noneDHCP: Offswd77:admin>设置博科Brocade交换机IP地址博科交换机的默认IP地址是10.77.77.77,在命令行模式下可以通过ipaddrset命令对交换机的IP地址进行设置和修改swd77:admin> ipaddrsetEthernet IP Address [10.77.77.77]: #输入交换机需要设置的IP地址Ethernet Subnetmask [255.255.255.0]: #输入掩码Fibre Channel IP Address [none]:Fibre Channel Subnetmask [none]:Gateway IP Address [none]: # 输入网关DHCP [Off]: #是否开启DHCPswd77:admin>博科brocade交换机查看OS版本信息swd77:admin> versionKernel: 2.6.14.2 //linux内核版本Fabric OS: v6.1.0a // 交换机OS版本Made on: Thu Apr 17 21:45:31 2008 // 生产日期Flash: Tue Jan 13 23:33:44 2009BootProm: 4.6.6swd77:admin>博科brocade交换机添加license授权信息swd77:admin> licenseadd XXXXXXXX(博科的激活号)查看博科brocade交换机license授权信息在命令行模式下使用licenseshow命令可以查看博科交换机的授权情况,使用licenseadd命令可以添加授权。
Switch1配置命令如下:Switch1(config)#interface FastEthernet0/2 Switch1(config)#switchport access vlan 10 Switch1(config)#interface FastEthernet0/3 Switch1(config)# switchport access vlan 10 Switch1(config)#interface FastEthernet0/4 Switch1(config)# switchport access vlan 10 Switch2配置命令如下:Switch2(config)#interface FastEthernet0/2 Switch2(config)#switchport access vlan 20 Switch2(config)#interface FastEthernet0/3 Switch2(config)# switchport access vlan 20 Switch2(config)#interface FastEthernet0/4 Switch2(config)# switchport access vlan 20 Switch3配置命令如下:Switch3(config)#interface FastEthernet0/2 Switch3(config)#switchport access vlan30 Switch3(config)#interface FastEthernet0/3 Switch3(config)# switchport access vlan30 Switch3(config)#interface FastEthernet0/4 Switch3(config)# switchport access vlan 30 路由器R1的配置命令:①:R1的基本配置参数Router>enableRouter #configure terminalRouter(config)#hostname R1R1(config)#enable seceret cisco2950R1 (config)#no ip domain-loopupR1 (config)#line vty 0 15R1 (config-line)#exec-timeout 10 30R1 (config-line)#password classR1 (config-line)#loginR1 (config-line)#exitR1 (config)#line console 0R1 (config-line)#exec-timeout 10 30R1 (config-line)# logging synchronousR1 (config-line)#password ciscoR1 (config-line)#loginR1 (config-line)#exit②:路由器R1的IP地址规划R1 (config) interface FastEthernet0/0.10R1 (config-if)ip address 192.168.1.1 255.255.255.0R1 (config) interface FastEthernet0/0.20R1 (config-if)ip address 192.168.2.1 255.255.255.0R1 (config) interface FastEthernet0/0.30R1 (config-if)ip address 192.168.3.1 255.255.255.0R1 (config) interface se0/0/0R1 (config-if)ip address 200.200.200.2 255.255.252.0③:路由器的路由表配置、配置R1的路由功能配置一条默认路由使内部网络可以访问Internet,其配置命令如下:R1 (config)#ip route 0.0.0.0 0.0.0.0 se0/0/0直连路由表配置R1 (config)#network 192.168.1.0 255.255.255.0R1 (config)#network 192.168.2.0 255.255.255.0R1 (config)#network 192.168.3.0 255.255.255.0R1 (config)#network 200.200.220.1 255.255.255.0④:路由器的DHCP每台连接到网络的设备都需要一个IP地址,网络管理员给路由器、服务器以及其他物理位置不太可能变化的网络设备手工分配静态IP地址,然而网吧中的电脑的物理位置有时会发生变化,如果给这些主机手工分配地址,则每当网吧格局变动时,管理员又必须给它们重新分配地址,非常麻烦。
100个思科交换机命令大全1.在基于IOS的交换机上设置主机名/系统名:switch(config)# hostname hostname在基于CLI的交换机上设置主机名/系统名:switch(enable) set system name name-string2.在基于IOS的交换机上设置登录口令:switch(config)# enable password level 1 password在基于CLI的交换机上设置登录口令:switch(enable) set passwordswitch(enable) set enalbepass3.在基于IOS的交换机上设置远程访问:switch(config)# interface vlan 1switch(config-if)# ip address ip-address netmaskswitch(config-if)# ip default-gateway ip-address在基于CLI的交换机上设置远程访问:switch(enable) set interface sc0 ip-address netmask broadcast-address switch(enable) set interface sc0 vlanswitch(enable) set ip route default gateway4.在基于IOS的交换机上启用和浏览CDP信息:switch(config-if)# cdp enableswitch(config-if)# no cdp enable为了查看Cisco邻接设备的CDP通告信息:switch# show cdp interface [type modle/port]switch# show cdp neighbors [type module/port] [detail]在基于CLI的交换机上启用和浏览CDP信息:switch(enable) set cdp {enable|disable} module/port为了查看Cisco邻接设备的CDP通告信息:switch(enable) show cdp neighbors[module/port] [vlan|duplex|capabilities|detail]5.基于IOS的交换机的端口描述:switch(config-if)# description description-string基于CLI的交换机的端口描述:switch(enable)set port name module/number description-string6.在基于IOS的交换机上设置端口速度:switch(config-if)# speed{10|100|auto}在基于CLI的交换机上设置端口速度:switch(enable) set port speed moudle/number {10|100|auto}switch(enable) set port speed moudle/number {4|16|auto}7.在基于IOS的交换机上设置以太网的链路模式:switch(config-if)# duplex {auto|full|half}在基于CLI的交换机上设置以太网的链路模式:switch(enable) set port duplex module/number {full|half}8.在基于IOS的交换机上配置静态VLAN:switch# vlan databaseswitch(vlan)# vlan vlan-num name vlaswitch(vlan)# exitswitch# configure teriminalswitch(config)# interface interface module/numberswitch(config-if)# switchport mode accessswitch(config-if)# switchport access vlan vlan-numswitch(config-if)# end在基于CLI的交换机上配置静态VLAN:switch(enable) set vlan vlan-num [name name]switch(enable) set vlan vlan-num mod-num/port-list9. 在基于IOS的交换机上配置VLAN中继线:switch(config)# interface interface mod/portswitch(config-if)# switchport mode trunkswitch(config-if)# switchport trunk encapsulation {isl|dotlq}switch(config-if)# switchport trunk allowed vlan remove vlan-listswitch(config-if)# switchport trunk allowed vlan add vlan-list在基于CLI的交换机上配置VLAN中继线:switch(enable) set trunk module/port [on|off|desirable|auto|nonegotiate]Vlan-range [isl|dotlq|dotl0|lane|negotiate]10.在基于IOS的交换机上配置VTP管理域:switch# vlan databaseswitch(vlan)# vtp domain domain-name在基于CLI的交换机上配置VTP管理域:switch(enable) set vtp [domain domain-name]11.在基于IOS的交换机上配置VTP 模式:switch# vlan databaseswitch(vlan)# vtp domain domain-nameswitch(vlan)# vtp {sever|cilent|transparent}switch(vlan)# vtp password password在基于CLI的交换机上配置VTP 模式:switch(enable) set vtp [domain domain-name] [mode{ sever|cilent|transparent }][password password]12. 在基于IOS的交换机上配置VTP版本:switch# vlan databaseswitch(vlan)# vtp v2-mode在基于CLI的交换机上配置VTP版本:switch(enable) set vtp v2 enable13. 在基于IOS的交换机上启动VTP剪裁:switch# vlan databaseswitch(vlan)# vtp pruning在基于CL I 的交换机上启动VTP剪裁:switch(enable) set vtp pruning enable14.在基于IOS的交换机上配置以太信道:switch(config-if)# port group group-number [distribution {source|destination}] 在基于CLI的交换机上配置以太信道:switch(enable) set port channel moudle/port-range mode{on|off|desirable|auto}15.在基于IOS的交换机上调整根路径成本:switch(config-if)# spanning-tree [vlan vlan-list] cost cost在基于CLI的交换机上调整根路径成本:switch(enable) set spantree portcost moudle/port costswitch(enable) set spantree portvlancost moudle/port [cost cost][vlan-list]16.在基于IOS的交换机上调整端口ID:switch(config-if)# spanning-tree[vlan vlan-list]port-priority port-priority在基于CLI的交换机上调整端口ID:switch(enable) set spantree portpri {mldule/port}priorityswitch(enable) set spantree portvlanpri {module/port}priority [vlans]17. 在基于IOS的交换机上修改STP时钟:switch(config)# spanning-tree [vlan vlan-list] hello-time secondsswitch(config)# spanning-tree [vlan vlan-list] forward-time seconds` switch(config)# spanning-tree [vlan vlan-list] max-age seconds在基于CLI的交换机上修改STP时钟:switch(enable) set spantree hello interval[vlan]switch(enable) set spantree fwddelay delay [vlan]switch(enable) set spantree maxage agingtiame[vlan]18. 在基于IOS的交换机端口上启用或禁用Port Fast 特征:switch(config-if)#spanning-tree portfast在基于CLI的交换机端口上启用或禁用Port Fast 特征:switch(enable) set spantree portfast {module/port}{enable|disable}19. 在基于IOS的交换机端口上启用或禁用UplinkFast 特征:switch(config)# spanning-tree uplinkfast [max-update-rate pkts-per-second]在基于CLI的交换机端口上启用或禁用UplinkFast 特征:switch(enable) set spantree uplinkfast {enable|disable}[rate update-rate] [all-protocols off|on]20. 为了将交换机配置成一个集群的命令交换机,首先要给管理接口分配一个IP地址,然后使用下列命令: switch(config)# cluster enable cluster-name21. 为了从一条中继链路上删除VLAN,可使用下列命令:switch(enable) clear trunk module/port vlan-range22. 用show vtp domain 显示管理域的VTP参数.23. 用show vtp statistics显示管理域的VTP参数.24. 在Catalyst交换机上定义TrBRF的命令如下:switch(enable) set vlan vlan-name [name name] type trbrf bridge bridge-num[stp{ieee|ibm}]25. 在Catalyst交换机上定义TrCRF的命令如下:switch (enable) set vlan vlan-num [name name] type trcrf{ring hex-ring-num|decring decimal-ring-num} parent vlan-num26. 在创建好TrBRF VLAN之后,就可以给它分配交换机端口.对于以太网交换,可以采用如下命令给VLAN分配端口:switch(enable) set vlan vlan-num mod-num/port-num27. 命令show spantree显示一个交换机端口的STP状态.28. 配置一个ELAN的LES和BUS,可以使用下列命令:ATM (config)# interface atm number.subint multiointATM(config-subif)# lane serber-bus ethernet elan-name29. 配置LECS:ATM(config)# lane database database-nameATM(lane-config-databade)# name elan1-name server-atm-address les1-nsap-address ATM(lane-config-databade)# name elan2-name server-atm-address les2-nsap-address ATM(lane-config-databade)# name …30. 创建完数据库后,必须在主接口上启动LECS.命令如下:ATM(config)# interface atm numberATM(config-if)# lane config database database-nameATM(config-if)# lane config auto-config-atm-address31. 将每个LEC配置到一个不同的ATM子接口上.命令如下:ATM(config)# interface atm number.subint multipointATM(config)# lane client ethernet vlan-num elan-num32. 用show lane server 显示LES的状态.33. 用show lane bus显示bus的状态.34. 用show lane database显示LECS数据库可内容.35. 用show lane client显示LEC的状态.36. 用show module显示已安装的模块列表.37. 用物理接口建立与VLAN的连接:router# configure terminalrouter(config)# interface media module/portrouter(config-if)# description description-stringrouter(config-if)# ip address ip-addr subnet-maskrouter(config-if)# no shutdown38. 用中继链路来建立与VLAN的连接:router(config)# interface module/port.subinterfacerouter(config-ig)# encapsulation[isl|dotlq] vlan-numberrouter(config-if)# ip address ip-address subnet-mask39. 用LANE 来建立与VLAN的连接:router(config)# interface atm module/portrouter(config-if)# no ip addressrouter(config-if)# atm pvc 1 0 5 qsaalrouter(config-if)# atm pvc 2 0 16 ilnirouter(config-if)# interface atm module/port.subinterface multipoint router(config-if)# ip address ip-address subnet-maskrouter(config-if)# lane client ethernet elan-numrouter(config-if)# interface atm module/port.subinterface multipoint router(config-if)# ip address ip-address subnet-namerouter(config-if)# lane client ethernet elan-namerouter(config-if)# …40. 为了在路由处理器上进行动态路由配置,可以用下列IOS命令来进行: router(config)# ip routingrouter(config)# router ip-routing-protocolrouter(config-router)# network ip-network-numberrouter(config-router)# network ip-network-number41. 配置默认路由:switch(enable) set ip route default gateway42. 为一个路由处理器分配VLANID,可在接口模式下使用下列命令:router(config)# interface interface numberrouter(config-if)# mls rp vlan-id vlan-id-num43. 在路由处理器启用MLSP:router(config)# mls rp ip44. 为了把一个外置的路由处理器接口和交换机安置在同一个VTP域中: router(config)# interface interface numberrouter(config-if)# mls rp vtp-domain domain-name45. 查看指定的VTP域的信息:router# show mls rp vtp-domain vtp domain name46. 要确定RSM或路由器上的管理接口,可以在接口模式下输入下列命令: router(config-if)#mls rp management-interface47. 要检验MLS-RP的配置情况:router# show mls rp48. 检验特定接口上的MLS配置:router# show mls rp interface interface number49. 为了在MLS-SE上设置流掩码而又不想在任一个路由处理器接口上设置访问列表:set mls flow [destination|destination-source|full]50. 为使MLS和输入访问列表可以兼容,可以在全局模式下使用下列命令:router(config)# mls rp ip input-acl51. 当某个交换机的第3层交换失效时,可在交换机的特权模式下输入下列命令:switch(enable) set mls enable52. 若想改变老化时间的值,可在特权模式下输入以下命令:switch(enable) set mls agingtime agingtime53. 设置快速老化:switch(enable) set mls agingtime fast fastagingtime pkt_threshold54. 确定那些MLS-RP和MLS-SE参与了MLS,可先显示交换机引用列表中的内容再确定:switch(enable) show mls include55. 显示MLS高速缓存记录:switch(enable) show mls entry56. 用命令show in arp显示ARP高速缓存区的内容。
网络技术应用网www.591cto.com 1.在基于IOS的交换机上设置主机名/系统名: switch(config)# hostname hostname 在基于CLI的交换机上设置主机名/系统名: switch(enable) set system name name-string 2.在基于IOS的交换机上设置登录口令: switch(config)# enable password level 1 password 在基于CLI的交换机上设置登录口令: switch(enable) set password switch(enable) set enablepass 3.在基于IOS的交换机上设置远程访问: switch(config)# interface vlan 1 switch(config-if)# ip address ip-address netmask switch(config-if)# ip default-gateway ip-address 在基于CLI的交换机上设置远程访问: switch(enable) #set interface sc0 ip-address netmask broadcast-address switch(enable) #set interface sc0 vlan switch(enable) #set ip route default gateway 4.在基于IOS的交换机上启用和浏览CDP信息: 网络技术应用网www.591cto.com
switch(config-if)# cdp enable switch(config-if)# no cdp enable 为了查看Cisco邻接设备的CDP通告信息: switch# show cdp interface [type modle/port] switch# show cdp neighbors [type module/port] [detail] 在基于CLI的交换机上启用和浏览CDP信息: switch(enable) #set cdp {enable|disable} module/port 为了查看Cisco邻接设备的CDP通告信息: switch(enable) #show cdp neighbors[module/port] [vlan|duplex|capabilities|detail] 5.基于IOS的交换机的端口描述: switch(config-if)# description description-string 基于CLI的交换机的端口描述: switch(enable) #set port name module/number description-string 6.在基于IOS的交换机上设置端口速度: switch(config-if)# speed{10|100|auto} 在基于CLI的交换机上设置端口速度: switch(enable) set port speed moudle/number {10|100|auto} switch(enable) set port speed moudle/number {4|16|auto} 7.在基于IOS的交换机上设置以太网的链路模式: switch(config-if)# duplex {auto|full|half} 网络技术应用网www.591cto.com
在基于CLI的交换机上设置以太网的链路模式: switch(enable) #set port duplex module/number {full|half} 8.在基于IOS的交换机上配置静态VLAN: switch# vlan database switch(vlan)# vlan vlan-num name vla switch(vlan)# exit switch# configure teriminal switch(config)# interface interface module/number switch(config-if)# switchport mode access switch(config-if)# switchport access vlan vlan-num switch(config-if)# end 在基于CLI的交换机上配置静态VLAN: switch(enable) # set vlan vlan-num [name name] switch(enable) #set vlan vlan-num mod-num/port-list 9. 在基于IOS的交换机上配置VLAN中继线: switch(config)# interface interface mod/port switch(config-if)# switchport mode trunk switch(config-if)# switchport trunk encapsulation {isl|dotlq} switch(config-if)# switchport trunk allowed vlan remove vlan-list switch(config-if)# switchport trunk allowed vlan add vlan-list 在基于CLI的交换机上配置VLAN中继线: switch(enable) #set trunk module/port 网络技术应用网www.591cto.com
[on|off|desirable|auto|nonegotiate] Vlan-range [isl|dotlq|dotl0|lane|negotiate] 10.在基于IOS的交换机上配置VTP管理域: switch# vlan database switch(vlan)# vtp domain domain-name 在基于CLI的交换机上配置VTP管理域: switch(enable) # set vtp [domain domain-name] 11.在基于IOS的交换机上配置VTP 模式: switch# vlan database switch(vlan)# vtp domain domain-name switch(vlan)# vtp {sever|cilent|transparent} switch(vlan)# vtp password password 在基于CLI的交换机上配置VTP 模式: switch(enable) #set vtp [domain domain-name] [mode{ sever|cilent|transparent }][password password] 12. 在基于IOS的交换机上配置VTP版本: switch# vlan database switch(vlan)# vtp v2-mode 在基于CLI的交换机上配置VTP版本: switch(enable) #set vtp v2 enable 13. 在基于IOS的交换机上启动VTP剪裁: switch# vlan database 网络技术应用网www.591cto.com
switch(vlan)# vtp pruning 在基于CLI 的交换机上启动VTP剪裁: switch(enable) #set vtp pruning enable 14.在基于IOS的交换机上配置以太信道: switch(config-if)# port group group-number [distribution {source|destination}] 在基于CLI的交换机上配置以太信道: switch(enable) #set port channel moudle/port-range mode{on|off|desirable|auto} 15.在基于IOS的交换机上调整根路径成本: switch(config-if)# spanning-tree [vlan vlan-list] cost cost 在基于CLI的交换机上调整根路径成本: switch(enable) #set spantree portcost moudle/port cost switch(enable) #set spantree portvlancost moudle/port [cost cost][vlan-list] 16.在基于IOS的交换机上调整端口ID: switch(config-if)# spanning-tree[vlan vlan-list]port-priority port-priority 在基于CLI的交换机上调整端口ID: switch(enable) set spantree portpri {mldule/port} priority switch(enable) set spantree portvlanpri {module/port} priority [vlans] 网络技术应用网www.591cto.com
17. 在基于IOS的交换机上修改STP时钟: switch(config)# spanning-tree [vlan vlan-list] hello-time seconds switch(config)# spanning-tree [vlan vlan-list] forward-time seconds switch(config)# spanning-tree [vlan vlan-list] max-age seconds 在基于CLI的交换机上修改STP时钟: switch(enable) #set spantree hello interval[vlan] switch(enable) #set spantree fwddelay delay [vlan] switch(enable) #set spantree maxage agingtime[vlan] 18. 在基于IOS的交换机端口上启用或禁用Port Fast 特征: switch(config-if)#spanning-tree portfast 在基于CLI的交换机端口上启用或禁用Port Fast 特征: switch(enable) # set spantree portfast {module/port}{enable|disable} 19. 在基于IOS的交换机端口上启用或禁用UplinkFast 特征: switch(config)# spanning-tree uplinkfast [max-update-rate pkts-per-second] 在基于CLI的交换机端口上启用或禁用UplinkFast 特征: switch(enable) # set spantree uplinkfast {enable|disable}[rate update-rate] [all-protocols off|on] 20. 为了将交换机配置成一个集群的命令交换机,首先要给管理接口分配一个IP地址,然后使用下列命令: