fluentd学习——配置文件Config File(关键)
- 格式:docx
- 大小:25.29 KB
- 文档页数:8
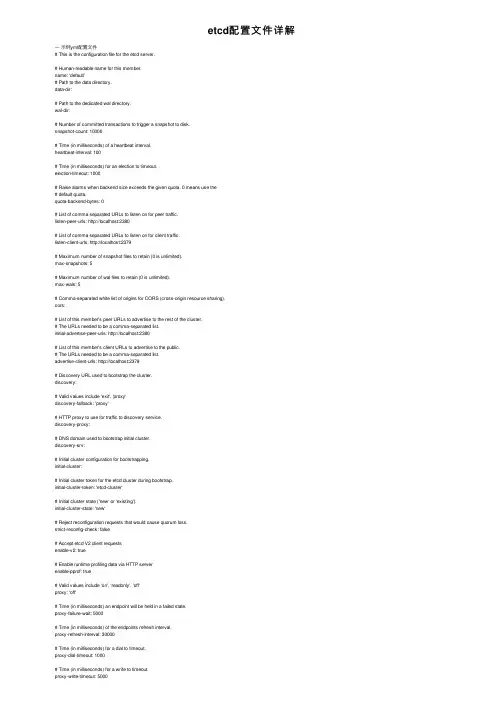
etcd配置⽂件详解⼀⽰例yml配置⽂件# This is the configuration file for the etcd server.# Human-readable name for this member.name: 'default'# Path to the data directory.data-dir:# Path to the dedicated wal directory.wal-dir:# Number of committed transactions to trigger a snapshot to disk.snapshot-count: 10000# Time (in milliseconds) of a heartbeat interval.heartbeat-interval: 100# Time (in milliseconds) for an election to timeout.election-timeout: 1000# Raise alarms when backend size exceeds the given quota. 0 means use the# default quota.quota-backend-bytes: 0# List of comma separated URLs to listen on for peer traffic.listen-peer-urls: http://localhost:2380# List of comma separated URLs to listen on for client traffic.listen-client-urls: http://localhost:2379# Maximum number of snapshot files to retain (0 is unlimited).max-snapshots: 5# Maximum number of wal files to retain (0 is unlimited).max-wals: 5# Comma-separated white list of origins for CORS (cross-origin resource sharing).cors:# List of this member's peer URLs to advertise to the rest of the cluster.# The URLs needed to be a comma-separated list.initial-advertise-peer-urls: http://localhost:2380# List of this member's client URLs to advertise to the public.# The URLs needed to be a comma-separated list.advertise-client-urls: http://localhost:2379# Discovery URL used to bootstrap the cluster.discovery:# Valid values include 'exit', 'proxy'discovery-fallback: 'proxy'# HTTP proxy to use for traffic to discovery service.discovery-proxy:# DNS domain used to bootstrap initial cluster.discovery-srv:# Initial cluster configuration for bootstrapping.initial-cluster:# Initial cluster token for the etcd cluster during bootstrap.initial-cluster-token: 'etcd-cluster'# Initial cluster state ('new' or 'existing').initial-cluster-state: 'new'# Reject reconfiguration requests that would cause quorum loss.strict-reconfig-check: false# Accept etcd V2 client requestsenable-v2: true# Enable runtime profiling data via HTTP serverenable-pprof: true# Valid values include 'on', 'readonly', 'off'proxy: 'off'# Time (in milliseconds) an endpoint will be held in a failed state.proxy-failure-wait: 5000# Time (in milliseconds) of the endpoints refresh interval.proxy-refresh-interval: 30000# Time (in milliseconds) for a dial to timeout.proxy-dial-timeout: 1000# Time (in milliseconds) for a write to timeout.proxy-write-timeout: 5000# Time (in milliseconds) for a read to timeout.proxy-read-timeout: 0client-transport-security:# Path to the client server TLS cert file.cert-file:# Path to the client server TLS key file.key-file:# Enable client cert authentication.client-cert-auth: false# Path to the client server TLS trusted CA cert file.trusted-ca-file:# Client TLS using generated certificatesauto-tls: falsepeer-transport-security:# Path to the peer server TLS cert file.cert-file:# Path to the peer server TLS key file.key-file:# Enable peer client cert authentication.client-cert-auth: false# Path to the peer server TLS trusted CA cert file.trusted-ca-file:# Peer TLS using generated certificates.auto-tls: false# Enable debug-level logging for etcd.debug: falselogger: zap# Specify 'stdout' or 'stderr' to skip journald logging even when running under systemd.log-outputs: [stderr]# Force to create a new one member cluster.force-new-cluster: falseauto-compaction-mode: periodicauto-compaction-retention: "1"ETCD的名称ETCD_NAME=ops-cuidehua001#ETCD存储⽬录ETCD_DATA_DIR=/usr/local/etcd/data#本机IP地址LOCAL_IP=10.59.87.121#初始化名称INITIAL_CLUSTER_TOKEN=etcd_cluster_cuidehua#初始化群集列表INITIAL_CLUSTER="ops-cuizhiliang001=http://10.59.87.121:2380,etcd-node-002=http://10.59.87.11:2380"#初始化状态INITIAL_CLUSTER_STATE=new⼆配置项解析2.1 成员相关标识--name含义:此成员的名称。
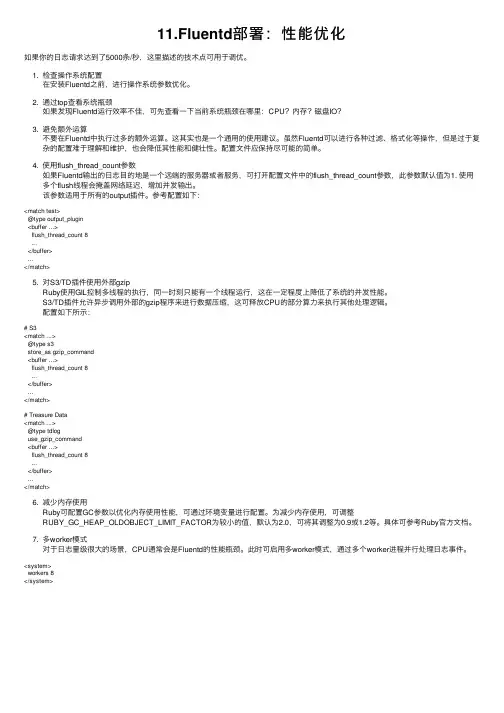
11.Fluentd部署:性能优化如果你的⽇志请求达到了5000条/秒,这⾥描述的技术点可⽤于调优。
1. 检查操作系统配置在安装Fluentd之前,进⾏操作系统参数优化。
2. 通过top查看系统瓶颈如果发现Fluentd运⾏效率不佳,可先查看⼀下当前系统瓶颈在哪⾥:CPU?内存?磁盘IO?3. 避免额外运算不要在Fluentd中执⾏过多的额外运算。
这其实也是⼀个通⽤的使⽤建议。
虽然Fluentd可以进⾏各种过滤、格式化等操作,但是过于复杂的配置难于理解和维护,也会降低其性能和健壮性。
配置⽂件应保持尽可能的简单。
4. 使⽤flush_thread_count参数如果Fluentd输出的⽇志⽬的地是⼀个远端的服务器或者服务,可打开配置⽂件中的flush_thread_count参数,此参数默认值为1. 使⽤多个flush线程会掩盖⽹络延迟,增加并发输出。
该参数适⽤于所有的output插件。
参考配置如下:<match test>@type output_plugin<buffer ...>flush_thread_count 8...</buffer>...</match>5. 对S3/TD插件使⽤外部gzipRuby使⽤GIL控制多线程的执⾏,同⼀时刻只能有⼀个线程运⾏,这在⼀定程度上降低了系统的并发性能。
S3/TD插件允许异步调⽤外部的gzip程序来进⾏数据压缩,这可释放CPU的部分算⼒来执⾏其他处理逻辑。
配置如下所⽰:# S3<match ...>@type s3store_as gzip_command<buffer ...>flush_thread_count 8...</buffer>...</match># Treasure Data<match ...>@type tdloguse_gzip_command<buffer ...>flush_thread_count 8...</buffer>...</match>6. 减少内存使⽤Ruby可配置GC参数以优化内存使⽤性能,可通过环境变量进⾏配置。
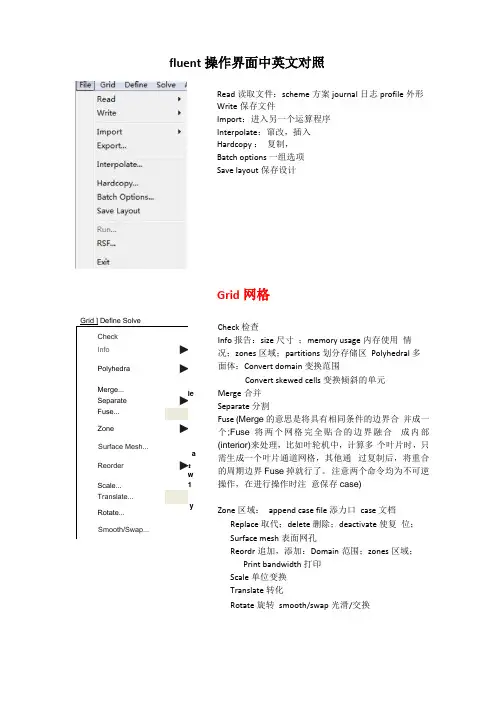
fluent 操作界面中英文对照Read 读取文件:scheme 方案journal 日志profile 外形 Write 保存文件Import :进入另一个运算程序 Interpolate :窜改,插入 Hardcopy : 复制, Batch options 一组选项 Save layout 保存设计Grid 网格Check 检查Info 报告:size 尺寸 ;memory usage 内存使用 情况;zones 区域;partitions 划分存储区 Polyhedral 多面体:Convert domain 变换范围Convert skewed cells 变换倾斜的单元Merge 合并 Separate 分割Fuse (Merge 的意思是将具有相同条件的边界合 并成一个;Fuse 将两个网格完全贴合的边界融合 成内部(interior)来处理,比如叶轮机中,计算多 个叶片时,只需生成一个叶片通道网格,其他通 过复制后,将重合的周期边界Fuse 掉就行了。
注意两个命令均为不可逆操作,在进行操作时注 意保存case) Zone 区域: append case file 添力口 case 文档 Replace 取代;delete 删除;deactivate 使复 位; Surface mesh 表面网孔Reordr 追加,添加:Domain 范围;zones 区域; Print bandwidth 打印 Scale 单位变换 Translate 转化Rotate 旋转 smooth/swap 光滑/交换CheckInfo ► Polyhedra►Merge...Separate ► Fuse...Zone►Surface Mesh... Reorder►Scale...Translate...Rotate...Smooth/Swap...ieGrid ] Define Solvea:w 1E3 SolverSolver* Pressure Based 'Density Based Space「2DL Axisymmetric 广 Axcsymmetric Swirl m 3DVelgty Formulatiqn • Absolute RelativeGradient Option区 Implicit「Explicit Time# SteadyUnsteadyPorous Formulation• Superficial VelocityPhysical Veiccity6K | Cancel] Help |Pressure based 基于压力 Density based 基于密度Models 模型:solver 解算器Formulation # Green-Gauss Cell Oased Green-Gauss N 。
FLUENT常用TUI命令Fluent是一种流行的开源计算流体动力学(CFD)软件,用于模拟流体流动和热传递等问题。
为了方便用户操作,Fluent提供了一套命令行工具(TUI),使用户能够在终端界面中进行交互式的模拟操作。
本文将介绍Fluent TUI的常用命令,帮助用户更好地利用命令行进行模拟和分析。
1. 启动Fluent TUI在终端中启动Fluent TUI的命令为:bashfluent 3d -tui这将启动Fluent的文本用户界面,用户可以通过键盘输入进行交互。
2. 基本操作2.1 文件操作导入案例文件:bash/file/read-case-data case_file.cas保存案例文件:bash/file/write-case-data case_file.cas2.2 网格操作导入网格文件:bash/file/read-case-mesh mesh_file.msh保存网格文件:bash/file/write-case-mesh mesh_file.msh2.3 求解器设置选择求解器:bash/define/models/solver/choose-flow设置迭代次数:bash/solve/iterate 1003. 模拟操作3.1 边界条件设置设置速度入口边界条件:bash/define/boundary-conditions/velocity-inlet velocity_inlet_name设置压力出口边界条件:bash/define/boundary-conditions/pressure-outlet pressure_outlet_name 3.2 物理模型设置开启湍流模型:bash/define/models/turbulence/k-epsilon设置离散方法:bash/define/models/discrete-ordinates4. 结果输出4.1 输出场变量设置输出压力场:bash/solve/monitors/residuals/pressure设置输出速度场:bash/solve/monitors/residuals/velocity4.2 结果文件输出场变量到文件:bash/file/write-data field_data_file.txt导入场变量文件:bash/file/read-data field_data_file.txt5. 后处理5.1 图形输出生成速度场图形:bash/display/contour velocity-magnitude生成压力场图形:bash/display/contour pressure5.2 报告生成生成报告文件:bash/file/write-report report_file.txt查看报告:bash/file/read-report report_file.txt6. 模拟控制6.1 开始计算启动计算:bash/solve/initialize/initialize-flow/solve/iterate 1006.2 结束计算停止计算:bash/solve/kill-process7. 注意事项与常见问题命令大小写敏感:在Fluent TUI中,命令是大小写敏感的,确保输入命令时使用正确的大小写。
Fluent用户自定义函数(UDF)VC++环境变量配置详细步骤(一)操作环境:
操作系统版本:WIN7旗舰版Service Pack 1
系统类型:64位操作系统
Fluent版本:6.3.26
VC++版本:6.0
(二)操作步骤:
(1)正确安装Fluent6.3.26和VC++6.0。
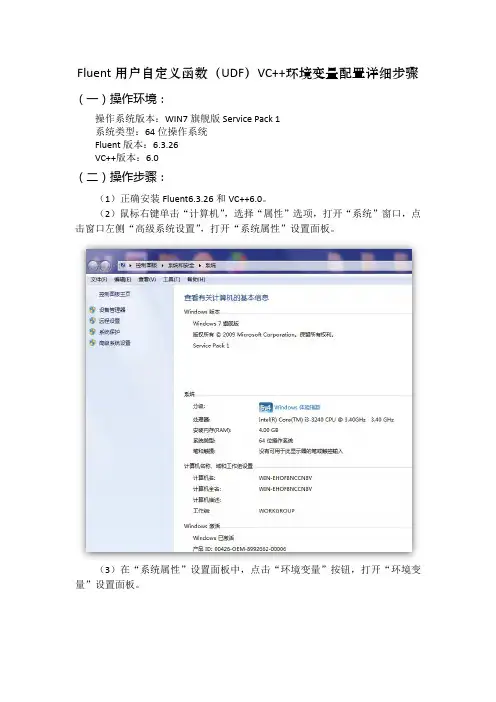
(2)鼠标右键单击“计算机”,选择“属性”选项,打开“系统”窗口,点击窗口左侧“高级系统设置”,打开“系统属性”设置面板。
(3)在“系统属性”设置面板中,点击“环境变量”按钮,打开“环境变量”设置面板。
打开“新建用户变量”对话框,开始创建环境变量。
(5)在本案例中要设置三个用户变量,分别是include、lib和path变量。
首先在“变量名”中输入“include”作为变量名,然后打开VC++6.0的安装目录,单击地址栏,使之进入可编辑状态,将路径复制到“变量值”中,单击“确定”,include变量就设置好了。
按照同样的方法设置lib变量和path变量,设置好的变量如下图所示:
未进行环境变量配置前,Fluent控制台可能显示的信息如下:
环境变量配置成功后Fluent控制台显示信息如下:。
fluentd的parser使用方式-概述说明以及解释1.引言概述部分的内容可按照以下方式进行编写:1.1 概述Fluentd是一个功能强大的开源日志处理工具,广泛应用于构建日志流水线和集中式日志管理系统。
它具有高度可扩展性、灵活性和可定制性,能够处理各种格式和来源的日志数据。
本文将重点介绍Fluentd的parser使用方式。
在日志处理过程中,parser起着非常关键的作用,它负责解析原始日志的结构,并将其转换为Fluentd可处理的标准化事件。
在介绍parser使用方式之前,本文将先对Fluentd进行简要概述,让读者了解其基本概念和架构。
然后,我们将深入探讨parser的作用及其在Fluentd中的具体应用场景。
通过学习parser的使用方式,读者将能够更好地理解Fluentd处理日志的原理,并能够根据实际情况进行配置和定制,以满足不同业务场景的需求。
接下来,本文将以清晰的结构和明确的目标,详细介绍Fluentd的parser使用方式,帮助读者深入了解其工作原理和相关配置参数。
在结论部分,我们将对parser的使用方式进行总结,并对未来Fluentd parser的发展和应用进行展望。
通过阅读本文,读者将掌握Fluentd parser的核心概念和使用方法,为构建强大的日志处理系统提供了必要的基础知识和技能。
让我们深入研究Fluentd的parser使用方式,共同探索这个日志处理工具的无限潜能。
文章结构部分的内容可以按照以下模板来撰写:1.2 文章结构本文将按照以下结构进行讲述:1. 引言:首先介绍本文的主题以及Fluentd Parser的重要性和使用场景。
2. 正文:2.1 Fluentd简介:详细介绍Fluentd的基本概念、特点和用途,为后续的Parser部分提供必要的背景知识。
2.2 Parser的作用:阐述Parser在Fluentd中的作用和功能,以及为什么使用Parser对日志进行解析和转换的重要性。
Fluent_操作⼿册第01章fluent简单算例21FLUENT是⽤于模拟具有复杂外形的流体流动以及热传导的计算机程序。
对于⼤梯度区域,如⾃由剪切层和边界层,为了⾮常准确的预测流动,⾃适应⽹格是⾮常有⽤的。
FLUENT解算器有如下模拟能⼒:●⽤⾮结构⾃适应⽹格模拟2D或者3D流场,它所使⽤的⾮结构⽹格主要有三⾓形/五边形、四边形/五边形,或者混合⽹格,其中混合⽹格有棱柱形和⾦字塔形。
(⼀致⽹格和悬挂节点⽹格都可以)●不可压或可压流动●定常状态或者过渡分析●⽆粘,层流和湍流●⽜顿流或者⾮⽜顿流●对流热传导,包括⾃然对流和强迫对流●耦合热传导和对流●辐射热传导模型●惯性(静⽌)坐标系⾮惯性(旋转)坐标系模型●多重运动参考框架,包括滑动⽹格界⾯和rotor/stator interaction modeling的混合界⾯●化学组分混合和反应,包括燃烧⼦模型和表⾯沉积反应模型●热,质量,动量,湍流和化学组分的控制体源●粒⼦,液滴和⽓泡的离散相的拉格朗⽇轨迹的计算,包括了和连续相的耦合●多孔流动●⼀维风扇/热交换模型●两相流,包括⽓⽳现象●复杂外形的⾃由表⾯流动上述各功能使得FLUENT具有⼴泛的应⽤,主要有以下⼏个⽅⾯●Process and process equipment applications●油/⽓能量的产⽣和环境应⽤●航天和涡轮机械的应⽤●汽车⼯业的应⽤●热交换应⽤●电⼦/HV AC/应⽤●材料处理应⽤●建筑设计和⽕灾研究总⽽⾔之,对于模拟复杂流场结构的不可压缩/可压缩流动来说,FLUENT是很理想的软件。
当你决定使FLUENT解决某⼀问题时,⾸先要考虑如下⼏点问题:定义模型⽬标:从CFD模型中需要得到什么样的结果?从模型中需要得到什么样的精度;选择计算模型:你将如何隔绝所需要模拟的物理系统,计算区域的起点和终点是什么?在模型的边界处使⽤什么样的边界条件?⼆维问题还是三维问题?什么样的⽹格拓扑结构适合解决问题?物理模型的选取:⽆粘,层流还湍流?定常还是⾮定常?可压流还是不可压流?是否需要应⽤其它的物理模型?确定解的程序:问题可否简化?是否使⽤缺省的解的格式与参数值?采⽤哪种解格式可以加速收敛?使⽤多重⽹格计算机的内存是否够⽤?得到收敛解需要多久的时间?在使⽤CFD分析之前详细考虑这些问题,对你的模拟来说是很有意义的。
prometheus学习系列五:Prometheus配置⽂件在prometheus监控系统,prometheus的职责是采集,查询和存储和推送报警到alertmanager。
本⽂主要介绍下prometheus的配置⽂件。
全局配置⽂件简介默认配置⽂件[root@node00 prometheus]# cat prometheus.yml.default# my global configglobal:scrape_interval: 15s # Set the scrape interval to every 15 seconds. Default is every 1 minute.evaluation_interval: 15s # Evaluate rules every 15 seconds. The default is every 1 minute.# scrape_timeout is set to the global default (10s).# Alertmanager configurationalerting:alertmanagers:- static_configs:- targets:# - alertmanager:9093# Load rules once and periodically evaluate them according to the global 'evaluation_interval'.rule_files:# - "first_rules.yml"# - "second_rules.yml"# A scrape configuration containing exactly one endpoint to scrape:# Here it's Prometheus itself.scrape_configs:# The job name is added as a label `job=<job_name>` to any timeseries scraped from this config.- job_name: 'prometheus'# metrics_path defaults to '/metrics'# scheme defaults to 'http'.static_configs:- targets: ['localhost:9090']global:此⽚段指定的是prometheus的全局配置,⽐如采集间隔,抓取超时时间等。
第一步:网格1、读入网格(File→Read→Case)2、检查网格(Grid→Check)3、平滑网格(Grid→Smooth/Swap)4、更改网格的长度单位(Grid→Scale)5、显示网格(Display→Grid)第二步:建立求解模型1、保持求解器的默认设置不变(定常)2、开启标准K-ε湍流模型和标准壁面函数Define→Models→Viscous第三步:设置流体的物理属性ari→Density→viscosity→第四步:设置边界条件对outflow、velocity-inlet、wall 采用默认值第五步:求解1、Solv→Controls→Solution中,Discretitation→Pressure→standardPressure→ Momentum→2、Solution Initialization→ all zone3、Residual Monitors→Plot第六步:迭代第七步:进行后处理第八步:1、Define→Model→Evlerian2、在Vissous Model→K-epsilon Multiphase Model→Mixture 第九步:在Define Phase Model→Discrete phase ModelInteraction↓选中→Interaction With Continuous PhaseNomber of Continuous PhaseInteractions per DPM Interaction第十步:设置物理属性第十一步:Define→Operating →重力加速度Define→Boondary Conditionsflvid→Mixture→选中Sovrce Terms 其他默认Phase-1→选中Sovrce Terms 其他默认Phase-2→选中Sovrce Terms 其他默认inflow→Mixture→全部默认Phase-1→全部默认Phase-2→Multiphase→Volume Fraction→其他默认outflow→Mixture→默认Phase-1→默认Phase-2→默认wall→Mixture→全部默认Phase-1→默认Phase-2默认第十二步:Slove→Controls→Slution Controls→Pressure→ Momentum→其余默认第十三步:千万不能再使用初始化第十四步:进行迭代计算截Z轴上的图:在Surface→iso↓Surface of constant↓Grid↓然后选x、y、z轴(根据具体情况而定)↓在Iso-Values→选取位置C的设置在New Surface Name中输入新各字→点创建然后在Display→Grid→Edge type→Feature→选中刚创建的那个面,然后Display查看刚才那面是否创建对最后在Display→Contours→Options→Filled→Surface→选中面,然后Display。
Fluentd Match 语法详解一、概述Fluentd是一个用于日志收集和事件处理的开源数据收集器。
在Fluentd中,Match语法用于定义接收特定数据流的规则,以便对其进行进一步操作。
本文将对Fluentd Match语法进行详细解析,以帮助用户更好地理解和使用Fluentd。
二、基本语法在Fluentd中,Match语法通常包括标签和条件两个部分,其基本格式如下:```type <output_plugin><output_config><tag> if <condition>```其中,type用于指定输出插件的类型,<output_config>用于配置输出插件的参数,<tag>表示数据流的标签,if <condition>表示条件判断。
三、标签(Tag)在Fluentd中,标签用于唯一标识数据流,通常由多个层级组成,以点号分隔。
webapp.access.log表示来自名为webapp的应用程序的访问日志数据流。
在Match语法中,可以使用通配符*来匹配多个标签。
app.*.log表示匹配以app.开头、以.log结尾的所有数据流。
四、条件(Condition)条件用于确定数据流是否匹配当前的Match规则。
Fluentd支持多种条件判断方式,常见的条件包括tag、time、record等。
用户可以根据实际需求选择合适的条件进行匹配。
五、示例以下是一个简单的Match语法示例:```<match app.*>type stdout</match>```该示例中,匹配了所有以app.开头的数据流,并将其输出到标准输出。
六、高级用法除了基本语法外,Fluentd还支持一些高级用法,如正则表达式匹配、标签重写等。
这些高级用法可以帮助用户更灵活地处理不同类型的数据流。
七、总结Fluentd Match语法是Fluentd中非常重要的一部分,能够帮助用户根据实际需求精确地匹配和处理数据流。
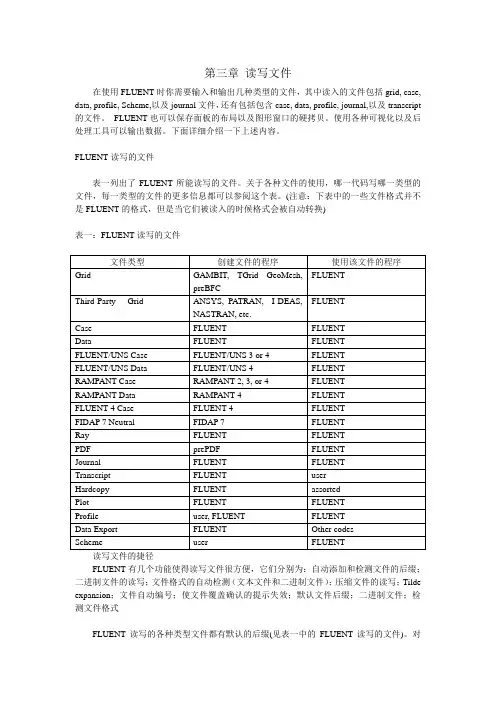
第三章读写文件在使用FLUENT时你需要输入和输出几种类型的文件,其中读入的文件包括grid, case, data, profile, Scheme,以及journal文件,还有包括包含case, data, profile, journal,以及transcript 的文件。
FLUENT也可以保存面板的布局以及图形窗口的硬拷贝。
使用各种可视化以及后处理工具可以输出数据。
下面详细介绍一下上述内容。
FLUENT读写的文件表一列出了FLUENT所能读写的文件。
关于各种文件的使用,哪一代码写哪一类型的文件,每一类型的文件的更多信息都可以参阅这个表。
(注意:下表中的一些文件格式并不是FLUENT的格式,但是当它们被读入的时候格式会被自动转换)表一:FLUENT读写的文件文件类型创建文件的程序使用该文件的程序Grid GAMBIT, TGrid GeoMesh,FLUENTpreBFCFLUENTThird-Party Grid ANSYS, PATRAN, I-DEAS,NASTRAN, etc.Case FLUENT FLUENTData FLUENT FLUENTFLUENT/UNS Case FLUENT/UNS 3 or 4 FLUENTFLUENT/UNS Data FLUENT/UNS 4 FLUENTRAMPANT Case RAMPANT 2, 3, or 4 FLUENTRAMPANT Data RAMPANT 4 FLUENTFLUENT 4 Case FLUENT 4 FLUENTFIDAP 7 Neutral FIDAP 7 FLUENTRay FLUENT FLUENTPDF prePDF FLUENTJournal FLUENT FLUENTTranscript FLUENT userHardcopy FLUENT assortedPlot FLUENT FLUENTProfile user, FLUENT FLUENTData Export FLUENT Other codesScheme user FLUENT读写文件的捷径FLUENT有几个功能使得读写文件很方便,它们分别为:自动添加和检测文件的后缀;二进制文件的读写;文件格式的自动检测(文本文件和二进制文件);压缩文件的读写;Tilde expansion;文件自动编号;使文件覆盖确认的提示失效;默认文件后缀;二进制文件;检测文件格式FLUENT读写的各种类型文件都有默认的后缀(见表一中的FLUENT读写的文件)。
Fluent 常见问题回答摘自清洁能源论坛第3 页共37 页请问一下fluent 与gambit,和exceed 是什么关系呀,我的系统是windows xp,该怎样运行gambit 呀gambit 是fluent 的前处理软件,用来为fluent 划分网格的,而gambit 必须在unix 环境下才可以运行,exceed就是在windows 环境下模拟unix 的软件。
所以进行数值模拟时,首先用gambit 划分网格,这时会自动运行exceed 来模拟unix 环境。
划分好网格后导入fluent,就可以进行数值模拟了。
FLUENT 软件的下载现在网上有很多fluent 的安装及帮助文件,大家可以到北大天网、工大校内ftp(/)等搜一下,这里给出一个下载安装软件的路径:匿名登陆即可。
FLUENT 软件的安装需要安装的软件:ExceedGambitFluent安装顺序:首先安装Exceed,再装Gambit 和Fluent。
最后不要忘了把flexlm 文件复制到系统盘根目录下。
安装完成后,你可以分别双击FLUENT.INC\ntbin\ntx86 文件夹下的gambit 和fluent 的图标,来运行它们。
gambit 运行过程中常遇到的一个问题是:在Gambit 建模过程中出现界面突然跳出,并且下次运行Gambit时,界面调不出来,这时只需删去gambit 工作目录下的(默认的工作目录为\FLUENT.INC\ntbin\ntx86)后缀为*.lok 的文件,就会恢复正常。
贴子主题:我是个新手,能说说如何学好fluent 吗?fluent 和gambit 的帮助文件都很完善,最好先做几个例子,按照帮助Tutorial Guide step by step 做下去,不懂的时候看User's Guide 。
实在不行的时候到论坛上问问各位高手。
这个东西内容很多,模型很多,牵涉的领域也很多,这个应该知道,所以,关键看你学哪一部分,这一点先请教别人(和你要搞得研究同一领域的,并且已经在比较熟练运用的人),问问它看帮助文件的那些部分,有些不涉及你自己领域的你完全可以不看,也没必要,比如说,你要搞扩散燃烧,那就先吧相应的算例跟着做一边,在以算例中牵涉到的模型和理论为基点辐射开来看(做算例比较重要,同一个算例跟着做几遍,每次都有收获——对新手而言)。
Flume安装及配置Flume安装及配置⼀、虚拟机规划主机名IP地址⾓⾊node3192.168.30.13flumenode4192.168.30.14flume⼆、Flume安装及配置1、上传Flume安装包到node3主机主⽬录2、安装软件解压安装包[root@node3 ~]# tar -zxvf apache-flume-1.6.0-bin.tar.gz -C /opt/重命名[root@node3 ~]# mv /opt/apache-flume-1.6.0-bin /opt/flume环境变量设置[root@node3 ~]# vi /etc/profile.d/hadoop.sh#⽂件内容为如下export JAVA_HOME=/opt/jdkexport HADOOP_HOME=/opt/hadoopexport ZOOKEEPER_HOME=/opt/zookeeperexport FLUME_HOME=/opt/flumeexport PATH=$PATH:$JAVA_HOME/bin:$HADOOP_HOME/bin:$HADOOP_HOME/sbin:$ZOOKEEPER_HOME/bin:$FLUME_HOME/bin 编译[root@node3 ~]# source /etc/profile3、验证[root@node3 ~]# flume-ng versionFlume 1.6.0Source code repository: https:///repos/asf/flume.gitRevision: 2561a23240a71ba20bf288c7c2cda88f443c2080Compiled by hshreedharan on Mon May 11 11:15:44 PDT 2015From source with checksum b29e416802ce9ece3269d34233baf43f三、Flume 单个代理(Agent)操作1、简单配置(netcat source—>console sink)编辑配置⽂件[root@node3 ~]# vi simple.conf# example.conf: A single-node Flume configuration# Name the components on this agenta1.sources = r1a1.sinks = k1a1.channels = c1# Describe/configure the sourcea1.sources.r1.type = netcata1.sources.r1.bind = localhosta1.sources.r1.port = 44444# Describe the sinka1.sinks.k1.type = logger# Use a channel which buffers events in memorya1.channels.c1.type = memorya1.channels.c1.capacity = 1000a1.channels.c1.transactionCapacity = 100启动服务[root@node3 ~]# flume-ng agent -n a1 -f simple.conftelnet测试[root@node3 ~]# yum install -y telnet[root@node3 ~]# telnet localhost 44444Trying 127.0.0.1...Connected to localhost.Escape character is '^]'.kkkkkOK#node3节点上20/03/24 12:18:46 INFO node.Application: Starting Source r120/03/24 12:18:46 INFO catSource: Source starting20/03/24 12:18:46 INFO catSource: Created serverSocket:sun.nio.ch.ServerSocketChannelImpl[/127.0.0.1:44444] 20/03/24 12:19:08 INFO sink.LoggerSink: Event: { headers:{} body: 6B 6B 6B 6B 6B 0D kkkkk. }2、从⽂件读取数据(file source)编辑配置⽂件[root@node3 ~]# vi execsource.conf# example.conf: A single-node Flume configuration# Name the components on this agenta1.sources = r1a1.sinks = k1a1.channels = c1# Describe/configure the sourcea1.sources.r1.type = execmand = tail -F /home/logs/1.log# Describe the sinka1.sinks.k1.type = logger# Use a channel which buffers events in memorya1.channels.c1.type = memorya1.channels.c1.capacity = 1000a1.channels.c1.transactionCapacity = 100# Bind the source and sink to the channela1.sources.r1.channels = c1a1.sinks.k1.channel = c1启动服务[root@node3 ~]# flume-ng agent -n a1 -f execsource.conf3、⽬录⽂件⽬中提取数据编辑配置⽂件[root@node3 ~]# vi directory.confa1.sources = r1a1.sinks = k1a1.channels = c1# Describe/configure the sourcea1.sources.r1.type = spooldira1.sources.r1.spoolDir = /home/logsa1.sources.r1.fileHeader = true# Describe the sinka1.sinks.k1.type = logger# Use a channel which buffers events in memorya1.channels.c1.type = memorya1.channels.c1.capacity = 1000a1.channels.c1.transactionCapacity = 100# Bind the source and sink to the channela1.sources.r1.channels = c1a1.sinks.k1.channel = c14、从⽂件读取数据到HDFS落地数据a1.sources = r1a1.sinks = k1a1.channels = c1# Describe/configure the sourcea1.sources.r1.type = execmand = tail -F /home/logs/1.loga1.sinks.k1.type=hdfsa1.sinks.k1.hdfs.path=hdfs://mycluster/flume/%Y-%m-%da1.sinks.k1.hdfs.rollCount=0a1.sinks.k1.hdfs.rollInterval=60a1.sinks.k1.hdfs.rollSize=102400a1.sinks.k1.hdfs.idleTimeout=3a1.sinks.k1.hdfs.fileType=DataStreameLocalTimeStamp=truea1.channels.c1.type = memorya1.channels.c1.capacity = 1000a1.channels.c1.transactionCapacity = 100a1.sources.r1.channels = c1a1.sinks.k1.channel = c1四、Flume 多个代理(Agent)之间传递操作1、顺序流 Setting multi-agent flow编辑配置⽂件[root@node3 ~]# vi multi-agent.conf# example.conf: A single-node Flume configuration# Name the components on this agenta1.sources = r1a1.sinks = k1a1.channels = c1# Describe/configure the sourcea1.sources.r1.type = execmand = tail -F /home/logs/1.log# Describe the sinka1.sinks.k1.type = avroa1.sinks.k1.hostname = node4a1.sinks.k1.port = 4545# Use a channel which buffers events in memorya1.channels.c1.type = memorya1.channels.c1.capacity = 1000a1.channels.c1.transactionCapacity = 100# Bind the source and sink to the channela1.sources.r1.channels = c1a1.sinks.k1.channel = c1[root@node4 ~]# vi simple.confa1.sources = r1a1.sinks = k1a1.channels = c1# Describe/configure the sourcea1.sources.r1.type = avroa1.sources.r1.bind = node4a1.sources.r1.port = 4545# Describe the sinka1.sinks.k1.type = logger# Use a channel which buffers events in memorya1.channels.c1.type = memorya1.channels.c1.capacity = 1000a1.channels.c1.transactionCapacity = 100# Bind the source and sink to the channela1.sources.r1.channels = c1a1.sinks.k1.channel = c1启动代理(agent)[root@node4 ~]# flume-ng agent -n a1 -f simple.conf[root@node3 ~]# flume-ng agent -n a1 -f multi-agent.conf2、扇出流设置# Name the components on this agenta1.sources = r1a1.sinks = k1 k2a1.channels = c1 c2a1.sources.r1.selector.type = replicating# Describe/configure the sourcea1.sources.r1.type = execmand = tail -F /data/log/nginx/nginx_access.log # Describe the sinka1.sinks.k1.type = avroa1.sinks.k1.hostname = node4a1.sinks.k1.port = 4545a1.sinks.k2.type = logger# Use a channel which buffers events in memorya1.channels.c1.type = memorya1.channels.c1.capacity = 1000a1.channels.c1.transactionCapacity = 100a1.channels.c2.type = memorya1.channels.c2.capacity = 1000a1.channels.c2.transactionCapacity = 100# Bind the source and sink to the channela1.sources.r1.channels = c1 c2a1.sinks.k1.channel = c1a1.sinks.k2.channel = c2[root@node4 ~]# vi simple.confa1.sources = r1a1.sinks = k1a1.channels = c1# Describe/configure the sourcea1.sources.r1.type = avroa1.sources.r1.bind = node4a1.sources.r1.port = 4545# Describe the sinka1.sinks.k1.type = logger# Use a channel which buffers events in memorya1.channels.c1.type = memorya1.channels.c1.capacity = 1000a1.channels.c1.transactionCapacity = 100# Bind the source and sink to the channela1.sources.r1.channels = c1a1.sinks.k1.channel = c1启动代理(agent)[root@node4 ~]# flume-ng agent -n a1 -f simple.conf[root@node3 ~]# flume-ng agent -n a1 -f multi-agent.conf。
Fluent学习笔记(20)-----fluent contours
等值线图绘制,选择contours ⾯板下的 surface type即可,此时若需要云图,点击filled即可。
选择nodes values时是对云图中的数据进⾏插值运算,或者是平滑处理,即是点击nodes values前后是对图中等值线的锯齿部分的有⽆处理。
⽽单独surfaces后,图像会出现⽹格的背景。
对于fluent绘制出来的云图,若想从图中得到观察点的云图数值,点击图⽚中的适当位置即可,在fluent的窗⼝中会相应的输出点击点的处于云图的哪⼀个等级,以及等级范围。
等值线中添加数据,将fluent的cas、dat⽂件导⼊到tecplot,选择contours,点击图⽚中在contour 下的contour type 选择lines 格式后确定,选择主页⾯上的contour后⾯的…按钮,选择labels版⾯下的show labels,具体的字体颜⾊和⼤⼩都可以修改。
ClickHouse学习系列之三【配置⽂件说明】背景最近花了些时间看了下,发现它在OLAP⽅⾯表现很优异,⽽且相对也⽐较轻量和简单,所以准备⼊门了解下该数据库系统。
在介绍了和之后,本⽂对其配置⽂件做下相关的介绍说明。
说明ClickHouse的配置⽂件是config.xml,默认在/etc/clickhouse-server/⽬录中,可以在conf.d和config.d⽬录中的*.xml和*.conf⽂件中覆盖各个设置。
还可以为这些配置⽂件的元素指定replace或remove属性,如果均未指定,它将以递归⽅式合并元素的内容,从⽽替换重复⼦元素的值。
如果指定了replace,将⽤指定的元素替换整个元素。
如果指定了remove,则删除该元素。
配置⽂件还可以定义substitutions(替代)。
如果元素具有incl属性,则⽂件中的相应值将被替换。
替换⽂件的路径为/etc/metrika.xml。
可以在配置⽂件加⼊include_from元素进⾏更改。
替换值在此⽂件的/yandex/substitution_name元素中指定。
如果incl中指定的替代不存在,则将其记录在⽇志中。
为了防⽌ClickHouse记录缺少的替代项,请指定:optional= true属性。
可以从ZooKeeper中进⾏替换,指定属性from_zk =“ /path/to/node”。
元素值将替换为ZooKeeper中/path/to/node上节点的内容。
还可以将整个XML⼦树放在ZooKeeper节点上,并将其完全插⼊到source元素中。
config.xml⽂件可以使⽤users设置,为profiles和quotas指定单独的配置。
此配置的相对路径在'users_config'元素中设置。
默认情况下,它是users.xml。
如果省略users_config,则直接在config.xml中指定。
配置参数了解了各个参数的⽬的是更好进⾏配置和使⽤资源的限制,关于参数的详细说明可以看官⽅⽂档:、Server settings:在config.xml⾥设置1. builtin_dictionaries_reload_interval:重新加载内置词典的时间间隔(以秒为单位),默认3600。
FLUENT设置(1)读入网格,file→read→case;(2)检查网格,确保最小体积为正,grid→check;(3)缩放网格,grid→scale;(4)光顺/交换网格,grid→smooth/swap,直至number swapped为0;(5)求解器设置,define→models→solver,都是默认值(设置为分离求解器、隐式算法、三维空间、稳态流动、绝对速度、压力梯度为单元压力梯度计算);(6)设置计算模型,define→models→viscous,选用标准k-ε模型或RNG k-ε,其他保持默认设置;(7)设置运行环境,define→operating condition,参考压力选用默认值,不计重力,位置选在泵进口边;首先display→grid观察来流方向(对于叶轮要运用右手准则)然后将grid→scale中来流方向的值复制给define→operating condition(8)设置转速单位,define→units,改为rpm;(9)定义材料,define→materials,选择water-liquid即清水(若Fluent Fluid Materials中没有water-liquid,则点击Fluent Database在Fluent Fluid Materials中选择water-liquid);(10)设置交界面,define→grid interface;(11)定义边界条件,define→boundary conditions;如图部分典型边界条件设置蜗壳叶轮叶轮壁面蜗壳壁面进口出口(12)设置求解参数,solve→controls→solution,选择SIMPLE算法;(13)监视残差,solve→monitors→residual,修改收敛精度为10-5,并显示残差,solve→monitors→surface,同时监测进出口面上的总压;(14)初始化流场,solve→initialize→initialize,在Solution initialization选项中的reference frame中选择relative to cell zone,all zones;(15)保存case文件,file→write→case;(16)开始迭代计算,solve→iterate。
fluentd学习——配置文件Config File(关键) 配置文件Config File(关键) http://docs.fluentd.org/articles/config-file Overview 概述
The configuration file allows the user to control the input and output behavior of Fluentd by (1) selecting input and output plugins and (2) specifying the plugin parameters. The file is required for Fluentd to operate properly.
配置文件允许用户控制Fluentd的输入和输出行为,通过(1)选择输入和输出插件(2)指定插件的参数。Fluentd的正常运作,这个配置文件是必须的。
Config File Location 配置文件位置 RPM or Deb
If you installed Fluentd using the rpm or deb packages, the config file is located at /etc/td-agent/td-agent.conf. sudo /etc/init.d/td-agent reload will reload the config file.
如果你安装Fluentd运用的是rpm或是deb 的安装包,这个配置文件在/etc/td-agent/td-agent.conf 这个目录。重新安装将会安装conf 配置文件。
$ sudo vi /etc/td-agent/td-agent.conf Gem If you installed Fluentd using the Ruby Gem, you can create the configuration file using the following commands. Sending a SIGHUP signal will reload the config file.
如果你安装Fluentd 用的是Ruby Gem,你可以创建一个配置文件运用下面的命令。发出一个终止信号将会重新安装配置文件。(如果你修改了配置文件—fluent.conf 文件,ctrl c c 终止进程,然后在配置文件下重新启动)
$ ctrl c $fluentd -c fluent.conf $ sudo fluentd --setup /etc/fluent $ sudo vi /etc/fluent/fluent.conf List of Directives
指令列表
The configuration file consists of the following directives: 这个配置文件由以下指令组成: 1. source directives determine the input sources. 2. match directives determine the output destinations. 3. include directives include other files.
1. source 指令决定输入资源。 2. match 指令决定输出目的地。 3. include 指令包含其他一些文件 (1) Source Directive source 指令
Fluentd’s input sources are enabled by selecting and configuring the desired input plugins using source directives. Fluentd’s standard input plugins include http and forward.
Fluentd 的输入源是通过选择和配置所需要的输入插件使用source指令。Fluentd的标准输入插件包含http和forward(转发)模式。
Examples # Receive events from 24224/tcp #从24224/tcp 中接收事件,tcp模式 # This is used by log forwarding and the fluent-cat command #使用日志转发和fluent-cat 命令 type forward port 24224
# http://this.host:9880/myapp.access?json={"event":"data"} type http port 9880
Each source directive must include a type parameter. The type parameter specifies the input plugin to use. 每个source指令必须包含一个type(类型)参数。type参数指定输入插件使用。 Routing 选择路径
The ‘source’ submits events into the Fluentd’s routing engine. An event consists of three entities: tag, time and record. The tag is a string separated by ‘.’s (e.g. myapp.access), and is used as the directions for Fluentd’s internal routing engine. The time is the UNIX time when the event occurs. The record is a JSON object.
source 把事件提交到fluentd的路由引擎中。一个事件包含三个实体标签:tag,time和record。tag是一个通过 . 来分离的字符串 (e.g. myapp.access),用作Fluentd内部路由引擎的方向。time是当事件产生unix时间。record是一个JSON对象。
(主要的是tag,用来指导方向,所要匹配的地方) In the example above, the HTTP input plugin submits the following event:: 在上面的例子中,HTTP输入插件提交以下事件: # generated by http://this.host:9880/myapp.access?json={"event":"data"} tag: myapp.access time: (current time) record: {"event":"data"} Plugin
插件 Users can expand Fluentd’s input sources beyond the default options by writing their own plugins. For further information regarding Fluentd’s input sources, please refer to the Input Plugin Overview article.
用户可以扩展输入源Fluentd,通过编写自己的插件而超出默认选项。为了进一步关于fluentd 的信息,请参考 Input Plugin Overview 文章。(怎样修改fluentd的默认插件的内容,就是修改fluent.conf文件)
(2) Match Directive match指令(仔细看)
Fluentd’s output destinations are enabled by selecting and configuring the desired output plugins using match directives. Fluentd’s standard output plugins include file and forward.
Fluentd 的输出的目的地是通过选择和配置所需的输出插件使用match的指令。Fluentd的标准输出插件包含file和forward。
Fluentd 的输入源是通过选择和配置所需要的输入插件使用source指令。Fluentd的标准输入插件包含http和forward(转发)模式。
Examples # Match events tagged with "myapp.access" and match 事件是为了匹配 tag myapp.access和 这就是为什么 # store them to /var/log/fluent/access.%Y-%m-%d type file path /var/log/fluent/access
type file format /var/log/fluent/myapp_hourly time_slice_format %Y%m%d%H
Each match directive must include a match pattern and a type parameter. Match patterns are used to filter the events. Only events with tag matching the pattern will be sent to the output destination. The type parameter specifies the output plugin to use.
每个match指令必须包括一个匹配模式和type参数。match模式是用来过滤事件。只有事件与tag匹配,这个模式将被发送到输出目的地。type参数指定输出插件使用。
For example, the user can send all matches to the pattern myapp.accesslog.** to file in a specified directory.
例如,用户可以发送所有匹配myapp.accesslog.* *的模式到指定的目录file。 Users can expand Fluentd’s output sources beyond the default options by writing their own plugins. For further information regarding Fluentd’s output destinations, please refer to the Output Plugin Overview article.