GC0308 Application Notes V1.0 0609
- 格式:pdf
- 大小:1.46 MB
- 文档页数:20
Product Release Notes1. General Release InformationThe ATTO Configuration Tool helps you customize the settings of your ATTO storage Controller to maximize the performance of your storage connection. While the factory settings on your host adapter should provide excellent performance for a wide range of applications, some specialized applications may benefit from modification of the adapter settings to tune the adapter for a specific performance range.These product release notes define the new features, changes, known issues and release details that apply to the ATTO Configuration Tool v4.14 that was released on May 2, 2014. This information pertains to theMicrosoft® Windows OS including Windows XP, Vista, 7, 8, 8.1, Server 2003, Server 2008, Server 2008 R2 and Server 2012.2. Changes∙ Version 4.14 (Released 5/2/14)o The following apply to changes made from v4.13 to v4.14. You must use the latest product drivers for your specific adapter whenever updating the ATTO Configuration Tool version. Thelatest driver sets can be accessed via the ATTO website.o New Features, Enhancements and Changes▪ Added single sign-on support between Windows client and service.▪ Added the ability to limit access to only Windows Administrators that are in the“ConfigTool Users” group.▪ Added support for new ATTO products: NT2012, NS2162 and Thunderlink FC 2162.▪ CLI tools are now packaged in the diagnostics package.▪ An error message when saving a (multipath) path is no longer clobbered bysuccessfully saving the next path.▪ Service now displays “replaced” and “failed” device status for firmware that reports it.▪ Added a warning for users to backup RAID groups before converting.▪ Added a notification for scheduled or canceled shutdowns is given on platforms that donot do this natively.▪ Added menu items to rescan multipathing targets and controllers.▪ Added the ability to remember login passwords.▪ Modified behavior to indicate that a reboot is required instead of error code 0 wheninstalling a Windows driver.∙ Version 4.13 (Released 1/16/14)o The following apply to changes made from v4.12 to v4.13. You must use the latest product drivers for your specific adapter whenever updating the ATTO Configuration Tool version. Thelatest driver sets can be accessed via the ATTO website.o New Features, Enhancements and Changes▪ Support for PowerCenter Pro has been added▪Support for GT and 12Gb HBAs has been added to the diagnostic scripts▪ The packaged CLI tools have been updated to the latest available version▪ RAID group names are handled in a case sensitive manner▪ Resolved an issue where ConfigTool Drive Metrics keep going even if an enclosure isunplugged.▪ Fixed a p roblem where SNMP MIB information is incorrect for “raidMemberTable”▪Fixed an issue that caused a crash to occur if certain error codes are encountered.∙Version 4.12 (Released 10/28/13)o The following apply to changes made from v4.11 to v4.12. You must use the latest product drivers for your specific adapter whenever updating the ATTO Configuration Tool version. Thelatest driver sets can be accessed via the ATTO website.o New Features, Enhancements and Changes▪Added support for Windows 8.1▪Corrected an error where the daemon failed to receive WMI events.▪Resolved an issue with link speed and topology are being marked “unknown” when connected to a 16Gb FibreConnect switch▪Fixed issue where help text hyperlinks were not working▪Fixed issue where help text does not open browser when clicking on website link∙Version 4.11 (Released 06/27/13)o The following apply to changes made from v4.10 to v4.11. You must use the latest product drivers for your specific adapter whenever updating the ATTO Configuration Tool version. Thelatest driver sets can be accessed via the ATTO website.o New Features, Enhancements and Changes▪Added a checkbox on the RAID group Properties panel that indicates the RAID group is bootable.▪Resolved a hardware buzzer issue.▪The error message was clarified if the root certificate is missing.▪Thunderbolt diagnostics are collected when no RAID HBAs are presents.∙Version 4.10 (Released 03/12/13)o The following apply to changes made from v4.09 to v4.10. You must use the latest product drivers for your specific adapter whenever updating the ATTO Configuration Tool version. Thelatest driver sets can be accessed via the ATTO website.o New Features, Enhancements and Changes▪Added support for dual domain devices.▪Added support for SSD RAID groups.▪Added support for maintaining health profile data for drive that use special characters in their serial number or other vital information.▪Added support to collect RAID firmware crash data.▪The SES slot number on the adapter drive table is displayed instead of SAS address.▪The name and type of device are properly indicated in the tree with multipathing.▪Devices are properly removed from the tree upon a cable pull.▪The S.M.A.R.T. data dialog no longer refuses to open with a message about the file being missing if the drive uses all 16 bytes of PRODUCT or all bytes of VENDOR area.▪The firmware version of the R60F expander is now displayed on the flash tab.▪The drive properties page has been rearranged so that all port addresses can bedisplayed.▪SAS or SATA is now indicated on the RAID drive properties page.▪An additional SNMP table is now provided to relay dual domain information.▪S.M.A.R.T. attributes are no longer validated, since some drives report values that are out of range which may cause the S.M.A.R.T. data dialog box from being displayed.▪The timezone for RAID adapters is now properly initialized, which fixes a one hour skew during standard time.▪Resolved an issue where the notification applet blinks when muted if the hardware buzzer is disabled.▪Resolved an issue where RAID firmware sends an un-terminated log message, causinga system crash.▪Any number of hotspares can now be created using the hotspare wizard. Also, the block size of the disks are now validated during member replacement and localhotspare creation.∙Version 4.09 (Released 11/29/12)o The following apply to changes made from v4.08 to v4.09. You must use the latest product drivers for your specific adapter whenever updating the ATTO Configuration Tool version. Thelatest driver sets can be accessed via the ATTO website.o New Features, Enhancements and Changes▪ A new tab has been added to manage NPIV settings.▪The ConfigTool now supports NPIV on windows platforms only.▪Celerity 16Gb support to the Windows and Linux diagnostic scripts.▪Devices can be added/removed in a rapid fashion without consequence .▪The adapter buzzer now sounds for non-Thunderbolt adapters when clicking the notification test button.∙Version 4.08 (Released 11/08/12)o The following apply to changes made from v4.07 to v4.08. You must use the latest product drivers for your specific adapter whenever updating the ATTO Configuration Tool version. Thelatest driver sets can be accessed via the ATTO website.o New Features, Enhancements and Changes▪Added process power management events from the ESASRAID driver.▪Activated the on-board buzzer on the adapter that triggered a buzzer event only.▪Added detect mute button events from ThunderStream products.▪Resolved a timing related crash on shutdown if SNMP is enabled.▪Resolved a crash when committing the Notifications Plane contents with an email password.▪Resolved conflict with StorNext.▪Made changes to the operating system display for Window 8.∙Version 4.07 (Released 09/28/12)o The following apply to changes made from v4.05 to v4.07. You must use the latest product drivers for your specific adapter whenever updating the ATTO Configuration Tool version. Thelatest driver sets can be accessed via the ATTO website.o New Features, Enhancements and Changes▪Removed the discovery mode option in the NVRAM panel for a 16Gb Celerity FC adapter.∙Version 4.05 (Released 08/13/12)o The following apply to changes made from v4.03 to v4.05. You must use the latest product drivers for your specific adapter whenever updating the ATTO Configuration Tool version. Thelatest driver sets can be accessed via the ATTO website.o New Features, Enhancements and Changes▪Added support for OEM branding.▪Added support for time-stamped log messages from a RIAD device.∙Version 4.03 (Released 04/23/12)o The following apply to changes made from v4.02 to v4.03. You must use the latest product drivers for your specific adapter whenever updating the ATTO Configuration Tool version. Thelatest driver sets can be accessed via the ATTO website.o New Features, Enhancements and Changes▪The installer now makes the application available to all users.▪Several freezes in the system service have been resolved.▪Several crashes related to the auto discovery system were resolved.∙Version 4.02 (Released 02/14/12)o The following apply to changes made from v4.01 to v4.02. You must use the latest product drivers for your specific adapter whenever updating the ATTO Configuration Tool version. Thelatest driver sets can be accessed via the ATTO website.o New Features, Enhancements and Changes▪SNMP support has been added.▪Help menu now features a ‘Run Diagnostics’ option for troubleshooting purposes, which displaces the former option to save logs under the Notifications panel. RAIDlogging has also been improved.▪Support for FastFrame CT and NT adapter series has been added.▪Gen 3 PCIe transfer rate support has been added.▪Hot spares can now be assignable to RAID groups via CLI.▪Support for sounding the buzzer on buzzer-equipped hardware, controllable by the Notification Application.▪Performance, stability and logging improvements.∙Version 4.01 (Released 09/06/11)o The following apply to changes made from v4.0 to v4.01. You must use the latest product drivers for your specific adapter whenever updating the ATTO Configuration Tool version. Thelatest driver sets can be accessed via the ATTO website.o New Features, Enhancements and Changes▪The integrated help text features new icons for the buttons the user can click as well as manipulate in the table of contents.▪This release offers improved support and functionality with 3Gb RAID adapters.▪Rare instances of system hangs have been resolved.∙Version 4.0 (Released 08/17/11)o The following apply to changes made from v3.38 to v4.0. You must use the latest product drivers for your specific adapter whenever updating the ATTO Configuration Tool version. Thelatest driver sets can be accessed via the ATTO website.o New Features, Enhancements and Changes▪Support for ExpressSAS H6F0GT.▪This release represents a major update to the GUI interface and capabilities. Whereas previous versions contained a single application, this release provides a GUIapplication and system service. Refer to the product manual for more information onthe setup and operation of these components.▪This release offers the ability to set-up, manage and optimize storage connected locally and remotely to ATTO storage controllers. This includes the ability to remotely accessand update NVRAM settings, updating system firmware and drivers, as well asretrieving system event logs.▪Only one instance of the ConfigTool can be installed on a host at any one time (i.e.either v3.38 or v4.0, but not both).▪This version does not have SNMP enabled. Use an earlier version of the ATTOConfigTool if you require SNMP.3. Known Issues/Advisements∙The Notifications tab can be viewed and changed without logging into a host.∙The audible and visual notifications only work with the system service on the local machine (not remotely).∙Drives may not disappear in the ConfigTool if a cable is pulled with no IO.∙The ConfigTool client doesn’t detect when it has been disconnected from a daemon.∙Manually entered IP addresses or hostnames are not saved.∙Installer extraction process does not automatically start the installation process on Windows.∙The maximum transfer size control is no longer available in 4.xx.∙No warning message is displayed after resuming from “sleep” or “hibernate” to infor m a user about the time required for the 3808 to boot.∙The ConfigTool installer may flag the installation with an error but no error occurred.∙User must terminate the ConfigTool to disconnect from a remotely connected host.∙The ConfigTool shows an incorrect date for the flash version.∙The ConfigTool many hang when running the diagnostics package when an R680 is in a bad state.∙The ConfigTool hangs at “Connecting” message box when MPD has missing LUNs.∙Volumes are not displayed when using Multipathing and Windows Server 2012.4. Affected ProductsATTO ConfigTool for the following ATTO products:CelerityFCExpressSAS H6xxExpressSAS H12xxExpressSAS R6xxThunderStream SC 3808D/EThunderlink FCThunderlink NSThunderlink NT5. Contacting ATTO SupportATTO Technology, Inc. is renowned for its technical support services. ATTO’s goal is to provide you the quickest response possible for your technical support needs, and is available Monday-Friday, 8:00 AM to 6:00 PM EST (except holidays).ATTO Technical Support can be contacted via phone or email:∙Phone: 716.691.1999 ext. 242∙E-Mail: ************************。
Windows错误代码大全[color=Red]当你遇到windows错误时,只要打开查询我们的手册,立马能知道是哪类错误,能利于针对解决问题![/color][color=Blue]0000 操作已成功完成。
0001 错误的函数。
0002 系统找不到指定的文件。
0003 系统找不到指定的路径。
0004 系统无法打开文件。
0005 拒绝访问。
0006 句柄无效。
0007 存储区控制块已损坏。
0008 可用的存储区不足,无法执行该命令。
0009 存储区控制块地址无效。
0010 环境错误。
0011 试图使用不正确的格式加载程序。
0012 访问代码无效。
0013 数据无效。
0014 可用的存储区不足,无法完成该操作。
0015 系统找不到指定的驱动器。
0016 无法删除该目录。
0017 系统无法将文件移到其他磁盘驱动器上。
0018 没有其他文件。
0019 媒体写保护。
0020 系统找不到指定的设备。
0021 设备尚未准备好。
0022 设备无法识别该命令。
0023 数据错误(循环冗余检查)。
0024 程序发出命令,但是该命令的长度错误。
0025 驱动器在磁盘上无法定位指定的区域或磁道。
0026 无法访问指定的磁盘或软盘。
0027 驱动器找不到所请求的扇区。
0028 打印机缺纸。
0029 系统无法写入指定的设备。
0030 系统无法读取指定的设备。
0031 与系统连接的设备不能正常运转。
0032 其他进程正使用该文件,因此现在无法访问。
0033 另一进程已锁定该文件的某一部分,因此现在无法访问。
0034 驱动器中的软盘不正确。
请将%2 (卷标序列号: %3)插入驱动器%1。
0036 打开共享的文件太多。
0038 已到达文件结尾。
0039 磁盘已满。
0050 不支持此网络请求。
0051 远程计算机无法使用。
0052 网络中存在重名。
0053 找不到网络路径。
0054 网络正忙。
0055 指定的网络资源或设备已不可用。
第一章websphere问题类型:1.不能migrate Websphere Application Server或者不能安装应用程序。
2.WAS管理和配置方面的问题。
3.一个应用程序或者websphere application server进程不能启动。
4.应用程序不能响应用户请求。
5.一个应用程序处理后得到unexpected results(errors/exceptions)。
6.应用程序无法连接外部系统或资源。
7.应用响应缓慢或者随着时间推移性能下降。
预防问问题几种途径:1.查询IBM官方网站的APAR,下载产品问题补丁,升级产品以便预防问题。
2.检查was基础硬件和软件环境,确保满足was运行的基本需求。
3.对部署在was上面的应用做全面的测试。
4.维护一套同生产环境完全相同的一套测试环境(硬件、网络……)。
5.定义一套安全的操作流程。
确定具体角色的明确职责。
6.领用V6以后的版本“集群”的新特性,解决高可用和容错管理。
7.通过监控预防问题发生。
8.记录应用运行环境下的所有变化。
9.为问题诊断收集数据发生问题的时候作什么1.恢复成长的生产环境2.鉴别问题症状a.观察到的问题具体症状是什么?是否有报错?应用程序是否产生了一个unexpectedresult?应用是否对所有请求都不予响应了?b.问题发生的上下文是什么?用户是否执行什么特定操作?是否在一个异常的高负载情况下发生的问题?是否在应用重启之后就发生了问题?c.如何知道这种问题何时产生?是否有一个标志性的特征表明问题再次发生?d.如何知道问题已经解决了?是否不会再产生其他的错误信息了?应用程序的行为是否变化了?怎么显式地证明问题已经解决了?e.问题出在哪个部分?问题是否只在测试环境出现,或者只在生产环境出现,或者两套环境都出现了?问题是否只在一套系统出现?是否在多套系统环境中都出现了这个问题?问题是出现在集群的每个成员还是只出现在其中的一个成员上?f.问题什么时候产生?发生问题的和健康状态的时间分解点是什么时候?问题发生了一次还是多次?问题的发生频率?是定期发生还是时间点上没有规律?是否有什么事件引发问题?g.问题可能因为什么发生的?是否有有什么特殊功能是第一次用到的?最近是否改过程序或者配置是否有所改变?如果只在一套环境中发生,这套环境与其他环境有什么不同?h.问题诊断数据是否收集了?诊断数据是否提示了问题所在?3.调查研究问题。
Agile e6.0.4Installation Manual for Agile e6.0.4 Windows Client Part Number: INSWINCLIENT-604BCopyrights and TrademarksCopyright © 1992, 2007 Oracle and/or its affiliates. All rights reserved.The Programs (which include both the software and documentation) contain proprietary information; they are provided under a license agreement containing restrictions on use and disclosure and are also protected by copyright, patent, and other intellectual and industrial property laws. Reverse engineering, disassembly, or decompilation of the Programs, except to the extent required to obtain interoperability with other independently created software or as specified by law, is prohibited.The information contained in this document is subject to change without notice. If you find any problems in the documentation, please report them to us in writing. This document is not warranted to be error-free. Except as may be expressly permitted in your license agreement for these Programs, no part of these Programs may be reproduced or transmitted in any form or by any means, electronic or mechanical, for any purpose.If the Programs are delivered to the United States Government or anyone licensing or using the Programs on behalf of the United States Government, the following notice is applicable:U.S. GOVERNMENT RIGHTSPrograms, software, databases, and related documentation and technical data delivered to U.S. Government customers are "commercial computer software" or "commercial technical data" pursuant to the applicable Federal Acquisition Regulation and agency-specific supplemental regulations. As such, use, duplication, disclosure, modification, and adaptation of the Programs, including documentation and technical data, shall be subject to the licensing restrictions set forth in the applicable Oracle license agreement, and, to the extent applicable, the additional rights set forth in FAR 52.227-19, Commercial Computer Software--Restricted Rights (June 1987). Oracle USA, Inc., 500 Oracle Parkway, Redwood City, CA 94065.The Programs are not intended for use in any nuclear, aviation, mass transit, medical, or other inherently dangerous applications. It shall be the licensee's responsibility to take all appropriate fail-safe, backup, redundancy and other measures to ensure the safe use of such applications if the Programs are used for such purposes, and we disclaim liability for any damages caused by such use of the Programs.The Programs may provide links to Web sites and access to content, products, and services from third parties. Oracle is not responsible for the availability of, or any content provided on, third-party Web sites. You bear all risks associated with the use of such content. If you choose to purchase any products or services from a third party, the relationship is directly between you and the third party. Oracle is not responsible for: (a) the quality of third-party products or services; or (b) fulfilling any of the terms of the agreement with the third party, including delivery of products or services and warranty obligations related to purchased products or services. Oracle is not responsible for any loss or damage of any sort that you may incur from dealing with any third party.Oracle is a registered trademark of Oracle Corporation. Other names may be trademarks of their respective owners.NOTICE OF RESTRICTED RIGHTS:The Software is a “commercial item,” as that term is defined at 48 C.F.R. 2.101 (OCT 1995), consisting of “commercial computer software” and “commercial computer software documentation” as such terms are used in 48 C.F.R. 12.212 (SEPT 1995) and when provided to the U. S. Government, is provided (a) for acquisition by or on behalf of civilian agencies, consistent with the policy set forth in 48 C.F.R. 12.212; or (b) for acquisition by or on behalf of units of the Department of Defense, consistent with the policies set forth in 48 C.F.R. 227.7202-1 (JUN 1995) and 227.7202-4 (JUN 1995).August 10, 2007iiR EVISIONSdocumentI nitialAllA 31/01/2007B 26/07/2007 All Updated to e6.0.4iiiC ONTENTSChapter 1Introduction 1 Where to Go for More Information 1Chapter 2Preparing the Installation 2 Requirements 2 Setting the Prerequisites 2 Parallel Installation of Agile e5.1 and Agile e6 clients 3 Split Server and Client Installation 3Chapter 3Installing the Windows Client 4 Upgrading from an older Agile e6 Installation 4 Starting the Installation 4 Modify, Repair and Remove Options 10 Repairing the Installation 10Chapter 4Uninstalling the Windows Client 11 Uninstalling the Office Suite component 11 Uninstalling the Client 11Chapter 5OfficeSuite 12 .NET Framework 12 Known problem with the Install Selector 12 Manual OfficeSuite Installation 13 Install Files 13 Installation 13Chapter 6Software Distribution 17 Components 17 Installation notes 17ivChapter 1Introduction This guide describes how to install the Agile e6 Windows Client (also known as the PC Client) and the Agile e6 Java Client on a computer running Microsoft Windows 2003, Windows 2000, or Windows XP.Where to Go for More InformationThe Agile e6 installation program allows you to install any of the Agile e6 components listed below:ClientOffice SuiteServerFile Service (FMS)Database system: OracleThis manual describes only the Windows Client and Windows Java Client installation.Both clients are installed if you select the respective client during installation.Please refer to the Administration Manual for Agile e6 (PLM604_Admin.pdf) for moreinformation about how to use the Java Client with WebStart.After the Client is installed, it should be able to connect to a running Agile e6 Server. For information on installing the Agile e6 Server, refer to one of the following documents, which are provided on the product CD/DVD:Installation Manual for Agile e6.0.4 on Windows Server (PLM604_WindowsServer.pdf) – for installing a PLM Server that runs under Windows and uses an Oracle 10g databasesystem.Installation Manual for Agile e6.0.4 on UNIX Server (PLM604_UnixServer.pdf) – for installing a PLM Server that runs under UNIX and uses an Oracle 10g database system Consult your Agile e6 administrator or Customer Support representative for information on installing other Agile e6 components and optimizing your system with the components.Note:The Agile e6 installation guides are available in the doc directory on theproduct DVD. To view Adobe® Portable Document Format (PDF) files, usethe Adobe Acrobat Reader® software, which is available at no charge at.1Agile e6Chapter 2Preparing the InstallationRequirementsTo install and run the Windows Client and Java Client on a separate machine than the Agile e6 Server, you will need:A Pentium class PC running one of the following Microsoft operating systems:Windows XP Professional with Service Pack 2 or higher Windows 2000 Professional with Service Pack 3 or higherWindows Server 2003 Enterprise Edition with Service Pack 1 or higher024 by 768 pixels or higher 512 MB RAM160 MB disk space, for the installation directoryThe Java client needs a Java 2 Runtime Environment in the Version 1.4.2Windows .NET Framework version 1.1 (for the Office Suite part of the Windows Client)llowing:JAVA_HOME needs to be set to the path where the Java RuntimeEnvironment is installed. Note:This can be done during the installation of the Agile e6 Client Software.4. 6 Java Client, verify that the Java 2 Runtime Environment in5..1 any higher versions of the .NET Framework that is already installed on your computer.Note:o to /fwlink/?LinkId=17153 A Windows display with a resolution of 1 Setting the PrerequisitesBefore starting the installation, do the fo 1. Open the Windows Control Panel.2. Click the Advanced tab on the System properties sheet.3. The environment variableIf you intend to use the Agile e the Version 1.4.2 is installed.If you intend to use the Agile e6 Office Suite, make sure that the .NET Framework Version 1.1is installed as this version is explicitly required. You can install .NET Framework Version 1in parallel toTo download the .Net Framework Version 1.1, gClient, make sure that you have not set the /3GBparameter in the Microsoft boot.ini file.6. If you intend to use the Agile e6 DataView 2Chapter 2 Pr e paring th e InstallationParallel Installation of Agile e5.1 and Agile e6 clientsTo install Agile e5.1 and Agile e6 client in parallel on the same machine, it is required to use separate client settings (profiles) for each version. Before installing the Agile e6 client, copy or rename the settings _Default and _Large because the next installation will change these settings. This can be done using the Agile e5.1 (or e6) client setup dialog. After the parallel installation each client version must be started using the corresponding settings.Note:The Office Suite feature of Agile e5.1 and Agile e6 cannot be installed parallel on the same machine.Split Server and Client InstallationThe combined Server and Client installation was split with Agile e6.0.2 into two packages:Agile e6 Client Agile e6 ServerNote: Due too the nature of this split the two installations cannot share the same installation directory.Note: The new default installation location for the Agile e6 Client is C:\Agile_e6_Client3Agile e6Chapter 3Installing the Windows Client Agile e6 is a client-server application that uses a relational database as the application and data repository. The instructions in this section describe how to install only the Agile e6 Windows Client.Upgrading from an older Agile e6 InstallationPlease refer to Upgrade Guide from e6.0.3 to Agile e6.0.4 (PLM604_Upgrade.pdf).Starting the InstallationNote:Use an account with Windows Administrator privileges to install or uninstall Agile e6.1.Insert the Agile e6 Installation DVD.If the CD/DVD autostart feature is enabled on the machine, the Agile e6 main setup window opens automatically.If the autostart feature is not enabled, open the window manually by double-clicking the file setup.bat in the root directory of the DVD.Note:For the latest information on the Agile e6 installation, click Read This First document on the DVD.2.Click Install/Upgrade Agile e6 Client.This starts a window for selecting the installation language:4Chapter 3Installing the Windows Client3.Select the language you want to use during the installation of Agile e6 and click OK tocontinue.4.Click Next to continue.The License Agreement window is opened.5.After reviewing the license agreement, select I accept the terms in the license agreement andclick Next.5Agile e66.Update your user name and the name of your organization if they are incorrect.7.Select one of the installation options:Anyone who uses this computer (all users) — recommendedOnly for me8.Click Next to continue.9.Select the installation directory and click Next.Note:The installation path must not contain blank spaces.10.Select the Setup Type for the installation.6Chapter 3Installing the Windows ClientNote: A Complete Setup Type will install all features, but will not set theJAVA_HOME environment variable, which has to be set for the Java Client orthe Workflow Editor.11.Click Next and continue with step 17 or change the Setup Type to Custom and follow the nextsteps.The Custom Setup window is opened.The Client program is automatically selected.12.If you want to install the Office Suite, click Office Suite and choose ‘This feature will beinstalled on local hard drive’.Agile e6Note:See Chapter 5 for more information about the OfficeSuite feature.13.Click Next to continue.You will get different dialogs depending on the selected features.14.The Java Runtime dialog will only appear if the Java Client and/or Workflow Editor featureswere enabled.Note:The Installer finds all installed Java Runtime Environments and lets you select one that will be used for Agile e6.Note:It is required that JAVA_HOME is set and pointing to the correct JavaRuntime Environment, either by setting it here or in the system environmentof your Windows Operating System.15.Select the Java 2 Runtime Environment Directory and click Next.16.Click Next to continue.Chapter 3Installing the Windows Client17.Click Install to start the installation.18.After the installation is complete, click Finish to exit the Installation wizard.19.On the main installation window, click Exit to close the setup program.A new entry for Agile e6 Client appears on the Windows Start menu.Note:The first time you click the Mask Generator button in the Windows Client to regenerate a mask, you must be logged into an account that has WindowsAdministrator privileges.For further help, refer to the Agile e6 Read This First document or the online documentation, which can be found under \axalant\hlp\doc_ep\ in the directory where you installed the Agile e6 Client. To view the Online Help, open the file plm.chm.Agile e6Modify, Repair and Remove OptionsIf you start the Agile e6 Client setup program and the Windows installer detects a previously installed version of Agile e6 Client on your system, it presents options for repairing or removing the existing installation. This section provides an overview of what you can and cannot do to change or remove existing Agile e-series installations.You can make any of the following changes to an existing client installation:Add or remove any of the features from the Custom SetupChange the Java RuntimeModify an installationRemove an installationNote:The extra OfficeSuite MSI installations are not affected by any changes for the Agile e6 Client installation. Please refer to the Chapter 5 if you add theOfficeSuite feature after the installation.Repairing the InstallationYou can use the Repair function to fix an Agile e6 Client installation that is not working properly. If the Repair function discovers that the key file for an Agile e6 Client component is damaged or missing, it restores all parts of the component—such as its registry entries, service entries, shortcut, and files.Chapter 4Uninstalling the Windows ClientChapter 4 Uninstalling the Windows Client Agile recommends that you use the Remove option in the Windows Control Panel to uninstall Agile e6.Uninstalling the Office Suite componentThe GDMToolsSetup and GDMAddIn components have to be manually removed from theAdd/Remove Programs Windows Control Panel before uninstalling the Agile e6 client.Uninstalling the Client1.In the Windows Control Panel open Add/Remove Programs.2.Select Agile e6 from the list of currently installed programs.3.Click the Remove button.Note:The Java 2 Runtime Environment is not removed if you uninstall the Agile e6 client.Agile e6Chapter 5 OfficeSuiteThe Agile e6 OfficeSuite installation consists of three parts:Agile e6 Client OfficeSuite featureThis feature installs additional libraries and executables GDMToolsSetupAn extra MSI component for document propertiesGDMAddInAn extra MSI component for the icons in the Office products and for the interconnection with the Agile e product.OfficeSuite feature, or a complete installation was selected for the Agile e6 Client installation.Note: the Install Selector described in Chapter 3 Installing the Windows Client.Note: e d if .NET Framework version 1.1could not be detected on your system.The two GDM MSI files are automatically installed during the start.bat installation, if theThe OfficeSuite will be installed for “All Users” during an installation of the Agile e6 Client with .NET FrameworkThe following window will appear if you have selected to install the OfficSuite, anClick No and install the .NET Framework 1.1 via Windows Update and re-start the manual installation of the OfficeSuite MSIs.installation with the Install Selector f described in Chapter 3 Installing the Windows Client.Known problem with the Install SelectorThis requester will open a second time for the second OfficeSuite MSI if this was anChapter 5 Offic e Suit eClick the Nobutton again and the following window will open.Please follow the description in the next section on how to install the OfficeSuite manually.Manual OfficeSuite InstallationThe GDMAddIn and GDMTools MSI files have to be installed separately if the Agile e6 Client was n of the OfficeSuite.y of the Agile e6 Client axalant\bin\intel-ms-nt5.0The In.msi and GDMTools.msi files can be found in the WinRoot\client subdirectory on the install tion DVD.There ecial Installationrst OfficeSuite MSI by double clicking on the file in the WindowsExplorer. Note:The following screenshots shows the GDMAddIn installation, but the GDMTools installation is very similar and has only one page less then the GDMAddIn installation.2. The Welcome Screen opensdirectly installed with the Agile e6 Client MSI and not with the setup.bat menu or if there was an error during the installatio These two MSI files have to be installed in the following subdirector installation directory: Install FilesGDMAdd a is no sp order required in installing these two MSI files.1. Start the installation of the fiAgile e63.Click Next to continue.4.The Select Installation Folder window opens.5.Change the installation FolderNote:These two MSI files have to be installed in the following subdirectory of the Agile e6 Client installation directory: axalant\bin\intel-ms-nt5.0The OfficeSuite will not work if the MSI files are not installed in this Agile e6Client subdirectory.6.Select one of the installation options:Everyone — recommendedJust meChapter 5 Offic e Suit eThis selection should match the one, which was chosen in Error! Reference source not found.,Step 7 for the Agile e6 Client.7. Click Next to continue.8. The Confirm Installation window opens.Note:The GDMAddIn has the additional Customer Information window where you can enter your user name and organization.9. Click Next to start the installation.The installation is started. .Agile e610.Click Close to finish the installation.11.Install the second OfficeSuite MSI installation by double clicking on the second file and repeatthe described steps.Chapter 6 Softwar e DistributionChapter 6Software DistributionThe Agile e6 client is a MSI based installation with CAB files.ComponentsAll components can be found in the WinRoot\client subdirectory on the installation DVDAgile e6 Client.msiAgile e6 client CAB files:ECI64.cabJClient.cabOfficeS.cab bGDMTools.msiIns vironment variable is only needed for the Java Client and talled separately in the following nt installation directoryaxalant\bin\intel-ms-nt5.0WClient.ca Wfled.cabGDMAddIn.msitallation notesA silent installation will install all CAB files, but does not set the JAVA_HOME environment variable. This en /or for the Workflow Editor.The GDMAddIn and GDMTools MSI files have to be ins subdirectory of the Agile e6 Clie 17。
Win8.1中常见错误代码店铺带给大家的是win8.1常见错误代码及解决方法汇总,下文将会例举一些win8/win8.1常见问题代码,我们可以根据不同的代码采取不同的解决方法,大家可以来参考一下。
Win8.1中常见错误代码1.找不到详细错误说明。
(错误代码:0xC004C4AA)无法激活具有Media Center 的Windows 8.1 专业版或具有Media Center 的 Windows 8 专业版含义及解决办法:在使用“将功能添加到Windows 8.1”或“将功能添加到Windows 8”来将当前版本的Windows 升级为具有Media Center 的Windows 8.1 专业版或具有Media Center 的Windows 8 专业版之后,可能会看到该错误。
仅可以在以下情况下激活不同版本的 Windows:在预安装 Windows 的电脑上激活,或者Windows 是通过 Windows 网站或零售商店购买的。
要解决此问题,你需要使用通过购买确认电子邮件或DVD 提供的产品密钥来安装Windows。
2.找不到详细错误说明。
(错误代码 0xC004C400)无法激活具有Media Center 的Windows 8.1 专业版或具有Media Center 的 Windows 8 专业版含义及解决办法:在添加 Windows Media Center 包并尝试输入新产品密钥之后,可能会看到该错误。
若要解决此问题,你可以通过手机激活 Windows。
- 从屏幕右边缘向中间轻扫,然后点击“搜索”。
(如果使用鼠标,则指向屏幕右上角,然后将鼠标指针向下移动,再单击“搜索”。
) - 在搜索框中输入 SLUI 04,然后点击或单击“SLUI 04”。
- 按照屏幕上的说明进行操作。
3.正版验证检测到Windows 二进制文件被篡改。
(错误代码0xC004C4AE)含义及解决办法:如果你使用第三方应用添加Windows 当前不支持的显示语言,可能会看到此错误。

Application GuideTable of ContentsChapter 1. Introduction (1)Chapter 2. System Design (2)Chapter 3. Application Architecture (4)Chapter 4. DOCA Libraries (7)Chapter 5. Configuration Flow (8)Chapter 6. Running Application (9)Chapter 7. Arg Parser DOCA Flags (11)Chapter 8. References (13)Chapter 1.IntroductionThe file integrity application exhibits how to use the DOCA Comm Channel and DOCA SHA libraries to send and receive a file securely.The application's logic includes both a client and a server:‣Client side – the application opens a file, calculates the SHA (secure hash algorithm) digest on it, and sends to the server the digest of the source file alongside the file itself ‣Server side – the application calculates the SHA on the received file and compares the received digest to the calculated one to check if the file has been compromisedChapter 2.System DesignThe file integrity application runs in both client mode (host) and server mode (DPU).System DesignChapter 3.Application ArchitectureThe file integrity application runs on top of the DOCA Comm Channel API to send and receive files from the host and DPU.1.Connection is established on both sides by the Comm Channel API.2.Client submits SHA job with the DOCA SHA Library and sends the result to the server.3.Client sends the number of messages needed to send the content of the file.4.Client sends data segments in size of up to 4032 bytes.5.Server submits a partial SHA job on each received segment.6.Server sends an ACK message to the client when all parts of the file are receivedsuccessfully.7.Server compares the received SHA to the calculated SHA.Chapter 4.DOCA LibrariesThis application leverages the following DOCA libraries:‣DOCA SHA Library‣DOCA Comm Channel LibraryChapter 5.Configuration Flow1.Parse application argument.a).Initialize arg parser resources and register DOCA general parameters.doca_argp_init();b).Register file integrity application parameters.register_file_integrity_params();c).Parse the arguments.doca_argp_start();i.Parse app flags.2.Set queue-pair attributes.set_endpoint_properties();a).Set maximum message size of 4032 bytes.b).Set maximum messages allowed on queue pair.3.Create Comm Channel endpoint.doca_comm_channel_ep_create();a).Create endpoint for client/server.4.Create SHA context.doca_sha_create();a).Create SHA context for submitting SHA jobs for client/server.5.Run client/server main logic.file_integrity_client/server();6.Clean up the application.file_integrity_cleanup();a).Free all application resources.Chapter 6.Running Application1.Refer to the following documents:‣NVIDIA DOCA Installation Guide for Linux for details on how to install BlueField-related software.‣NVIDIA DOCA Troubleshooting Guide for any issue you may encounter with the installation, compilation, or execution of DOCA applications.‣NVIDIA DOCA Applications Overview for additional compilation instructions and development tips regarding the DOCA applications.2.The file compression binary is located under /opt/mellanox/doca/applications/file_integrity/bin/doca_file_integrity. To build all the applications together, run: cd /opt/mellanox/doca/applications/meson buildninja -C build3.To build only the file compression application:a).Edit the following flags in /opt/mellanox/doca/applications/meson_options.txt:‣Set enable_all_applications to false‣Set enable_file_integrity to trueb).Run the commands in step 2.Note:doca_file_integrity is created under ./build/file_integrity/src/.Application usage:Usage: doca_file_integrity [DOCA Flags] [Program Flags]DOCA Flags:-h, --help Print a help synopsis-v, --version Print program version information-l, --log-level Set the log level for the program <CRITICAL=20, ERROR=30, WARNING=40, INFO=50, DEBUG=60>Program Flags:-f, --file <path> File to send by the client / File to write by the server-d, --dev-pci Comm Channel DOCA device PCI address-r, --rep-pci Comm Channel DOCA device representor PCI address Note: For additional information on the application, use -h option:/opt/mellanox/doca/applications/file_integrity/bin/doca_file_integrity -hRunning Application 4.CLI example for running the application on BlueField:/opt/mellanox/doca/applications/file_integrity/bin/doca_file_integrity -d 03:00.0 -r b1:00.0 -f recieved_data.txt5.CLI example for running the application on the host:/opt/mellanox/doca/applications/file_integrity/bin/doca_file_integrity -d b1:00.0 -f file_data.txtNote: Refer to section "Running DOCA Application on Host" in NVIDIA DOCA VirtualFunctions User Guide.6.To run doca_file_compression using a JSON file:doca_file_integrity --json [json_file]For example:cd /opt/mellanox/doca/applications/file_integrity/bin./doca_file_integrity --json file_integrity_params.jsonChapter 7.Arg Parser DOCA Flags For more information, refer to NVIDIA DOCA Arg Parser User Guide.Arg Parser DOCA FlagsChapter 8.References‣/opt/mellanox/doca/applications/file_integrity/src/file_integrity.cNoticeThis document is provided for information purposes only and shall not be regarded as a warranty of a certain functionality, condition, or quality of a product. NVIDIA Corporation nor any of its direct or indirect subsidiaries and affiliates (collectively: “NVIDIA”) make no representations or warranties, expressed or implied, as to the accuracy or completeness of the information contained in this document and assume no responsibility for any errors contained herein. NVIDIA shall have no liability for the consequences or use of such information or for any infringement of patents or other rights of third parties that may result from its use. This document is not a commitment to develop, release, or deliver any Material (defined below), code, or functionality.NVIDIA reserves the right to make corrections, modifications, enhancements, improvements, and any other changes to this document, at any time without notice. Customer should obtain the latest relevant information before placing orders and should verify that such information is current and complete.NVIDIA products are sold subject to the NVIDIA standard terms and conditions of sale supplied at the time of order acknowledgement, unless otherwise agreed in an individual sales agreement signed by authorized representatives of NVIDIA and customer (“Terms of Sale”). NVIDIA hereby expressly objects to applying any customer general terms and conditions with regards to the purchase of the NVIDIA product referenced in this document. No contractual obligations are formed either directly or indirectly by this document.NVIDIA products are not designed, authorized, or warranted to be suitable for use in medical, military, aircraft, space, or life support equipment, nor in applications where failure or malfunction of the NVIDIA product can reasonably be expected to result in personal injury, death, or property or environmental damage. NVIDIA accepts no liability for inclusion and/or use of NVIDIA products in such equipment or applications and therefore such inclusion and/or use is at customer’s own risk. NVIDIA makes no representation or warranty that products based on this document will be suitable for any specified use. Testing of all parameters of each product is not necessarily performed by NVIDIA. It is customer’s sole responsibility to evaluate and determine the applicability of any information contained in this document, ensure the product is suitable and fit for the application planned by customer, and perform the necessary testing for the application in order to avoid a default of the application or the product. Weaknesses in customer’s product designs may affect the quality and reliability of the NVIDIA product and may result in additional or different conditions and/or requirements beyond those contained in this document. NVIDIA accepts no liability related to any default, damage, costs, or problem which may be based on or attributable to: (i) the use of the NVIDIA product in any manner that is contrary to this document or (ii) customer product designs.No license, either expressed or implied, is granted under any NVIDIA patent right, copyright, or other NVIDIA intellectual property right under this document. Information published by NVIDIA regarding third-party products or services does not constitute a license from NVIDIA to use such products or services or a warranty or endorsement thereof. Use of such information may require a license from a third party under the patents or other intellectual property rights of the third party, or a license from NVIDIA under the patents or other intellectual property rights of NVIDIA.Reproduction of information in this document is permissible only if approved in advance by NVIDIA in writing, reproduced without alteration and in full compliance with all applicable export laws and regulations, and accompanied by all associated conditions, limitations, and notices.THIS DOCUMENT AND ALL NVIDIA DESIGN SPECIFICATIONS, REFERENCE BOARDS, FILES, DRAWINGS, DIAGNOSTICS, LISTS, AND OTHER DOCUMENTS (TOGETHER AND SEPARATELY, “MATERIALS”) ARE BEING PROVIDED “AS IS.” NVIDIA MAKES NO WARRANTIES, EXPRESSED, IMPLIED, STATUTORY, OR OTHERWISE WITH RESPECT TO THE MATERIALS, AND EXPRESSLY DISCLAIMS ALL IMPLIED WARRANTIES OF NONINFRINGEMENT, MERCHANTABILITY, AND FITNESS FOR A PARTICULAR PURPOSE. TO THE EXTENT NOT PROHIBITED BY LAW, IN NO EVENT WILL NVIDIA BE LIABLE FOR ANY DAMAGES, INCLUDING WITHOUT LIMITATION ANY DIRECT, INDIRECT, SPECIAL, INCIDENTAL, PUNITIVE, OR CONSEQUENTIAL DAMAGES, HOWEVER CAUSED AND REGARDLESS OF THE THEORY OF LIABILITY, ARISING OUT OF ANY USE OF THIS DOCUMENT, EVEN IF NVIDIA HAS BEEN ADVISED OF THE POSSIBILITY OF SUCH DAMAGES. Notwithstanding any damages that customer might incur for any reason whatsoever, NVIDIA’s aggregate and cumulative liability towards customer for the products described herein shall be limited in accordance with the Terms of Sale for the product.TrademarksNVIDIA, the NVIDIA logo, and Mellanox are trademarks and/or registered trademarks of Mellanox Technologies Ltd. and/or NVIDIA Corporation in the U.S. and in other countries. The registered trademark Linux® is used pursuant to a sublicense from the Linux Foundation, the exclusive licensee of Linus Torvalds, owner of the mark on a world¬wide basis. Other company and product names may be trademarks of the respective companies with which they are associated.Copyright© 2022 NVIDIA Corporation & affiliates. All rights reserved.NVIDIA Corporation | 2788 San Tomas Expressway, Santa Clara, CA 95051。

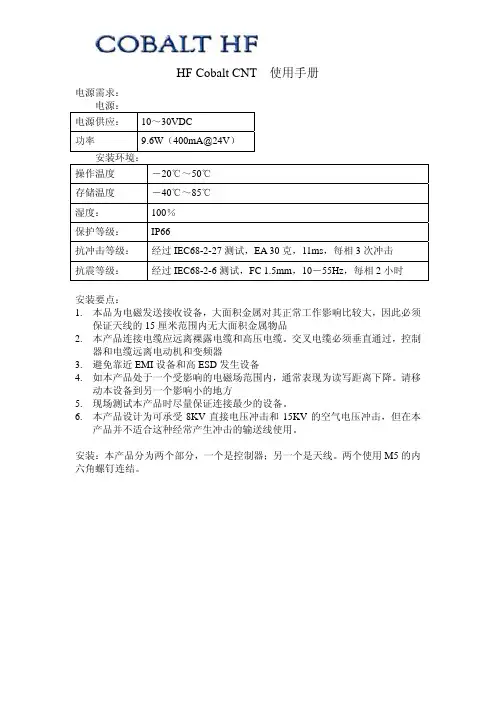
HF Cobalt CNT 使用手册电源需求:电源:电源供应: 10~30VDC功率 9.6W(400mA@24V)安装环境:操作温度-20℃~50℃存储温度-40℃~85℃湿度: 100%保护等级: IP66抗冲击等级:经过IEC68-2-27测试,EA 30克,11ms,每相3次冲击抗震等级:经过IEC68-2-6测试,FC 1.5mm,10-55Hz,每相2小时安装要点:1.本品为电磁发送接收设备,大面积金属对其正常工作影响比较大,因此必须保证天线的15厘米范围内无大面积金属物品2.本产品连接电缆应远离裸露电缆和高压电缆。
交叉电缆必须垂直通过,控制器和电缆远离电动机和变频器3.避免靠近EMI设备和高ESD发生设备4.如本产品处于一个受影响的电磁场范围内,通常表现为读写距离下降。
请移动本设备到另一个影响小的地方5.现场测试本产品时尽量保证连接最少的设备。
6.本产品设计为可承受8KV直接电压冲击和15KV的空气电压冲击,但在本产品并不适合这种经常产生冲击的输送线使用。
安装:本产品分为两个部分,一个是控制器;另一个是天线。
两个使用M5的内六角螺钉连结。
控制器下部有两个接口:左边借口为5针的标准DeviceNet接口右边为标准RS232串口DeviceNet接口针脚定义:定义1 接地GND2 电源正V+3 电源负V-4 CAN_H5 CAN_LRS232串口针脚定义定义1~5 未使用6 RX(连接计算机TX)7 TX(连接计算机RX)8 SGND(信号地)RS232连结图:配置:使用DeveceNet接口供应24V电压,读写器上电至自检完毕使用标准RS232电缆连接DNT的232口,并设置计算机的串口参数如下:设置值波特率(Baud) 9600字长(Data Bits) 8停止字符(Stop bit) 1Parity None握手(Handshaking) None使用EMS公司提供的配置软件Dashboard连接本读写器读写器模块网络状态指示灯:状态指示灯表示意义如下描述熄灭模块未在线或未上电常绿模块正常,DeviceNet网络正常绿色闪烁网络已经连接,但是需要PLC重新配置输入输出缓冲区红色闪烁可恢复性错误或网络连接超时常红不可恢复错误(通常为节点冲突)连接后界面如下本产品的默认DeveceNet配置如下=63=125K可在上图的右下角位置修改这两个选项PLC连接安装EDS文件004E00000BD60204.eds当DeviceNet模块扫描到DNT模块后,需要手动配置输入输出缓冲区。
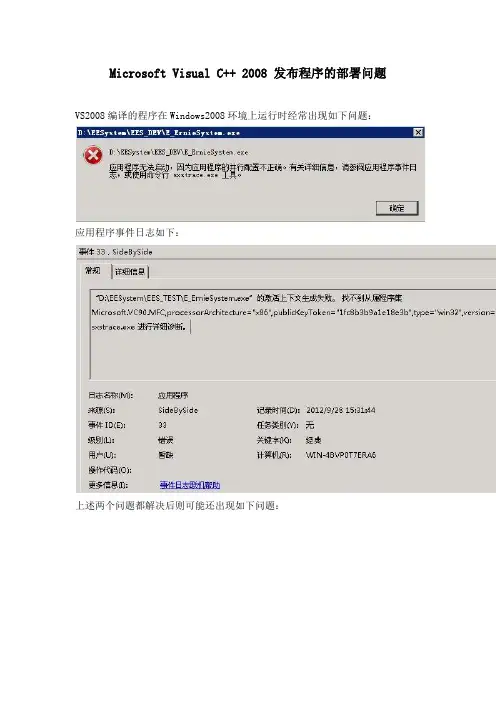
Microsoft Visual C++ 2008 发布程序的部署问题VS2008编译的程序在Windows2008环境上运行时经常出现如下问题:应用程序事件日志如下:上述两个问题都解决后则可能还出现如下问题:注意:此时是调用dll出现问题了,而不是运行主程序出错。
主要问题是“找不到从属程序集Microsoft.VC90.MFC”,解决办法如下:将整个“C:\Application\Microsoft Visual Studio 9.0\VC\ redist\x86\Microsoft.VC90.MFC”拷贝到exe文件所在目录下,如果exe程序所涉及调用的dll与该exe文件不在同一目录,那么须要在dll所在目录也拷贝一份。
详细描述如下:这个问题有好多Blog和Forum已经讨论过了,但都不详尽,在具体的操作过程中还是有许多疑问。
我摘录并整合了许多网络文章,希望能够做个最终了结。
一、VC2005和VC2008编译出来的程序如何发布/lf426/archive/2008/04/12/46885.aspxVC2005和VC2008编译出来的程序放到别人的电脑上为什么有可能无法运行呢?1:Microsoft Visual C++ 2008 Express Edition可以发布软件吗?能!很多人说,因为是Express版,不是Studio,所以只是用来练习语言的,不能发布软件——错!除了没有MFC和ATL,基本上跟 .net 版本是一样的。
发布出来的,是完整的可执行文件。
2:VC 2008 (2005) 发布出来的程序必须附带上他们特定的dll文件吗?不一定。
如果目标系统是个经常升级的系统,微软已经为其打上了所需要的dll文件补丁了,不需要在软件包里面附加特定的dll文件。
特别在Vista系统中,你更是不需要VC8和VC9的dll文件。
但是在一些老版本的系统中,这些文件就是必须的。
3:VC2008和VC2005特定的dll文件是哪些?VC8: msvcm80.dll, msvcp80.dll, msvcr80.dllVC9: msvcm90.dll, msvcp90.dll, msvcr90.dll4:如何部署文件?首先,请选择release版本;在生成可执行文件(exe文件)的时候,会得到相应的部署文件(manifest文件)。
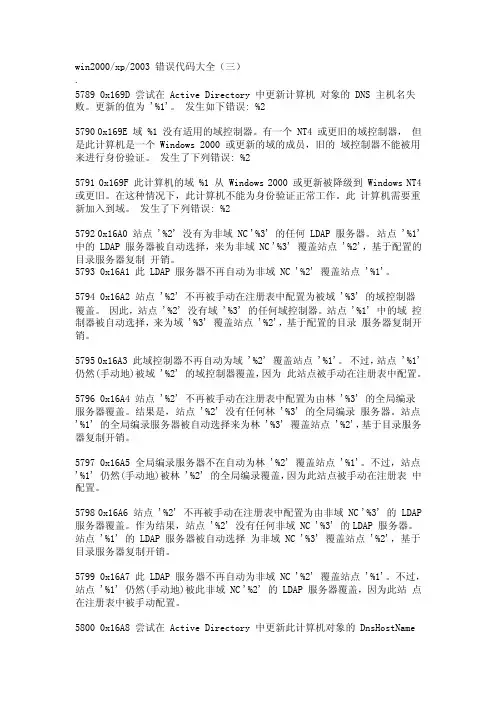
win2000/xp/2003 错误代码大全(三).5789 0x169D 尝试在 Active Directory 中更新计算机对象的 DNS 主机名失败。
更新的值为 '%1'。
发生如下错误: %25790 0x169E 域 %1 没有适用的域控制器。
有一个 NT4 或更旧的域控制器,但是此计算机是一个 Windows 2000 或更新的域的成员,旧的域控制器不能被用来进行身份验证。
发生了下列错误: %25791 0x169F 此计算机的域 %1 从 Windows 2000 或更新被降级到 Windows NT4 或更旧。
在这种情况下,此计算机不能为身份验证正常工作。
此计算机需要重新加入到域。
发生了下列错误: %25792 0x16A0 站点 '%2' 没有为非域 NC '%3' 的任何 LDAP 服务器。
站点 '%1' 中的 LDAP 服务器被自动选择,来为非域 NC '%3' 覆盖站点 '%2',基于配置的目录服务器复制开销。
5793 0x16A1 此 LDAP 服务器不再自动为非域 NC '%2' 覆盖站点 '%1'。
5794 0x16A2 站点 '%2' 不再被手动在注册表中配置为被域 '%3' 的域控制器覆盖。
因此,站点 '%2' 没有域 '%3' 的任何域控制器。
站点 '%1' 中的域控制器被自动选择,来为域 '%3' 覆盖站点 '%2',基于配置的目录服务器复制开销。
5795 0x16A3 此域控制器不再自动为域 '%2' 覆盖站点 '%1'。
不过,站点 '%1' 仍然(手动地)被域 '%2' 的域控制器覆盖,因为此站点被手动在注册表中配置。
WebSphere配置说明1 安装部署中用到的参数 (2)2 数据库客户端准备 (3)3 设置服务器端配置参数 (6)3.1 启动服务前准备 (6)3.1.1 WebSphere 5.1 (6)3.1.2 WebLogic 8.1 (6)3.1.3 WebLogic 6.1 (7)3.2 运行服务器配置工具 (7)3.2.1 WebSphere 5.1 (7)3.2.2 WebLogic 8.1 (8)3.2.3 WebLogic 6.1 (9)3.3 设置服务器参数 (10)3.3.1 WebSphere 5.1 (10)3.3.2 WebLogic 8.1 (12)3.3.3 WebLogic 6.1 (13)3.4 安装系统服务器、业务服务器 (13)3.4.1 WebSphere 5.1 (13)3.4.2 WebLogic 8.1 (14)3.4.3 WebLogic 6.1 (19)3.5 设置数据缓冲池 (20)3.5.1 WebSphere 5.1 (20)3.5.2 WebLogic 8.1 (21)3.5.3 WebLogic 6.1 (24)3.6 配置JDBC数据源 (26)3.6.1 WebSphere 5.1 (26)3.6.2 WebLogic 8.1 (29)3.6.3 WebLogic 6.1 (31)3.7 配置EJBConfig.xml (33)3.7.1 设置服务器间连接参数 (33)3.7.2 设置数据连接的JNDI名称 (35)3.7.3 设置EJBConfig.xml的数据连接和业务数据库的连接参数 (35)3.7.4 部署EJBConfig.xml文件 (39)3.8 重新启动WebSphere服务 (40)4 安装配置Web服务器 (41)4.1 安装Web模块 (41)4.1.1 WebSphere 5.1 (41)4.1.2 WebLogic 8.1 (42)4.1.3 WebLogic 6.1 (46)4.2 复制NewV ersion目录到服务器 (46)4.2.1 WebSphere 5.1 (46)4.2.2 WebLogic 8.1 (47)4.2.3 WebLogic 6.1 (47)5 客户端配置 (48)6 错误处理 (49)7 WebSphere 5.1的安装 (51)8 Weblogic 8.1的安装 (56)8.1 安装 (56)8.2 创建新的域 (61)8.3 启动WebLogic的域服务 (64)9 安装WebLogic 6.1 (66)9.1 安装 (66)9.2 创建域 (70)9.3 启动服务 (71)10 附件 (71)1安装部署中用到的参数这里是本安装说明文件用到的各种参数1.1 WebSphere 5.11.2 WebLogic 8.11.3 WebLogic 6.1 todo2数据库客户端准备2.1 Oracle2.1.1Oracle数据库JDBC驱动安装Oracle客户端,JDBC驱动程序在d:\Oracle\ora92\java\lib目录下JDBC驱动文件classes12.jar、nls_charset12.jar、ocrs12.jarURL jdbc:oracle:oci:@testdbDriver Classname oracle.jdbc.driver.OracleDriverProperties user=BusinessDemo2.1.2weblogic 8.1自带驱动JDBC驱动文件wloracle.jarURL jdbc:bea:oracle://192.168.1.116:1521Driver Classname weblogic.jdbc.oracle.OracleDriverProperties user=BusinessDemoportNumber=1521SID=testdbserverName=192.168.1.1162.2 SQL Server2.2.1SQL Server 2000 Driver for JDBC Service Pack 31.下载安装JDBC驱动●下载,并安装/downloads/details.aspx?FamilyID=07287b11-0502-461a-b138-2aa54bfdc03a&DisplayLang=en●拷贝D:\Program Files\Microsoft SQL Server 2000 Driver for JDBC\SQLServerJTA\sqljdbc.dll 到C:\Program Files\Microsoft SQL Server\MSSQL\Binn目录下●在SQL Analyser中打开并执行D:\Program Files\Microsoft SQL Server 2000 Driverfor JDBC\SQLServer JTA\instjdbc.sql文件●或者在DOS下,执行ISQL -Usa -P sa_password -S server_name -i location\instjdbc.sql注意:大小写区分,而且location目录名不能有空格2.连接参数JDBC驱动文件在D:\Program Files\Microsoft SQL Server 2000 Driver for JDBC\lib目录下JDBC驱动文件mssqlserver.jar、msbase.jar、msutil.jarURL jdbc:microsoft:sqlserver://192.168.0.133:1433Driver Classname: com.microsoft.jdbc.sqlserver.SQLServerDriverproperties user=saselectMethod=cursordataSourceName=SQL2000JDBCuserName=sadatabaseName=Test1554serverName=192.168.0.133注意:在Websphere 5.1下,请删掉数据源v4的定制属性的disable2Phase属性。
WOSA3.0 错误码1.公共错误码(-2) WOSA版本不对(-3) WOSA版本不对(-4) 操作取消(-5) 注册表配置不对(-6) 注册表配置不对(-7) 注册表配置不对(-8) 注册表配置不对(-9) 注册表配置不对(-10) 注册表配置不对(-11) 注册表配置不对(-12) 注册表配置不对(-13) 设备没有准备好,设备故障(-14) 设备故障(-15) 内部错误(-16) 无效地址(-17) 无效的 APP 句柄(-18) 无效的缓冲区(-19) 无效的命令种类(-20) 无效的操作命令(-21) 无效的事件类别(-22) 无效的服务句柄(-23) 无效的服务句柄WFS_ERR_INVALID_HWND (-24) 无效的窗口句柄WFS_ERR_INVALID_HWNDREG (-25) 无效的参数WFS_ERR_INVALID_POINTER (-26) 无效的指针WFS_ERR_INVALID_REQ_ID (-27) 无效的请求 IDWFS_ERR_INVALID_RESULT (-28) 无效的返回结果WFS_ERR_INVALID_SERVPROV (-29) 无效的 SP,可能 sp 服务没有启动WFS_ERR_INVALID_TIMER (-30) 无效的参数WFS_ERR_INVALID_TRACELEVEL (-31) 无效的日志级别WFS_ERR_LOCKED (-32) 服务已经被加锁WFS_ERR_NO_BLOCKING_CALL (-33) 不能调用 BLOCKING CALLWFS_ERR_NO_SERVPROV (-34) sp 不存在,可能 sp 服务没有启动WFS_ERR_NO_SUCH_THREAD (-35) 线程不存在WFS_ERR_NO_TIMER (-36) 计时器创建失败WFS_ERR_NOT_LOCKED (-37) 加锁不成功WFS_ERR_NOT_OK_TO_UNLOAD (-38) 不能加载 sp 的 dllWFS_ERR_NOT_STARTED (-39) StartUp 失败WFS_ERR_NOT_REGISTERED (-40) 没有注册事件WFS_ERR_OP_IN_PROGRESS (-41) 操作正在执行中WFS_ERR_OUT_OF_MEMORY (-42) 内存溢出WFS_ERR_SERVICE_NOT_FOUND (-43) WOSA版本不对WFS_ERR_SPI_VER_TOO_HIGH (-44) WOSA版本不对WFS_ERR_SPI_VER_TOO_LOW (-45) WOSA版本不对WFS_ERR_SRVC_VER_TOO_HIGH (-46) WOSA版本不对WFS_ERR_SRVC_VER_TOO_LOW (-47) WOSA版本不对WFS_ERR_TIMEOUT (-48) 操作超时WFS_ERR_UNSUPP_CATEGORY (-49) 不支持的查询类别WFS_ERR_UNSUPP_COMMAND (-50) 不支持的操作命令WFS_ERR_VERSION_ERROR_IN_SRVC(-51) WOSA版本错误WFS_ERR_INVALID_DATA (-52) 无效的数据WFS_ERR_SOFTWARE_ERROR (-53) 软件错误WFS_ERR_CONNECTION_LOST (-54) 连接断开WFS_ERR_USER_ERROR (-55) 用户使用错误WFS_ERR_UNSUPP_DATA (-56) 不支持的数据2. PrinterWFS_ERR_PTR_FORMNOTFOUND (-100) FORM 未找到WFS_ERR_PTR_FIELDNOTFOUND (-101) FIELD 未找到WFS_ERR_PTR_NOMEDIAPRESENT (-102) 缺纸WFS_ERR_PTR_READNOTSUPPORTED (-103) 设备不支持读操作WFS_ERR_PTR_FIELDSPECFAILURE (-106) Field 语法错误WFS_ERR_PTR_FIELDERROR (-107) 处理 Field 时发生错误WFS_ERR_PTR_MEDIANOTFOUND (-108) Media 未找到WFS_ERR_PTR_EXTENTNOTSUPPORTED (-109) 设备无法获得范围WFS_ERR_PTR_MEDIAINV ALID (-110) 无效的 MediaWFS_ERR_PTR_FORMINV ALID (-111) 无效的 FormWFS_ERR_PTR_FIELDINV ALID (-112) 无效的 FieldWFS_ERR_PTR_MEDIASKEWED (-113) Media 错误WFS_ERR_PTR_FLUSHFAIL (-104) 不支持 FLUSHWFS_ERR_PTR_MEDIAOVERFLOW (-105) Media 超域WFS_ERR_PTR_RETRACTBINFULL (-114) 回收箱满WFS_ERR_PTR_STACKERFULL (-115) STACKE 满WFS_ERR_PTR_PAGETURNFAIL (-116) 设备不能翻页WFS_ERR_PTR_MEDIATURNFAIL (-117) 设备不能翻转介质WFS_ERR_PTR_SHUTTERFAIL (-118) Shutter 执行命令失败WFS_ERR_PTR_MEDIAJAMMED (-119) 卡纸WFS_ERR_PTR_FILE_IO_ERROR (-120) 文件读取失败WFS_ERR_PTR_CHARSETDATA (-121) 字符集不一致WFS_ERR_PTR_PAPERJAMMED (-122) 卡纸WFS_ERR_PTR_PAPEROUT (-123) 缺纸WFS_ERR_PTR_INKOUT (-124) 墨水用玩WFS_ERR_PTR_TONEROUT (-125) 色带用玩WFS_ERR_PTR_LAMPINOP (-126) 成象灯不可操作WFS_ERR_PTR_SOURCEINVALID (-127) 资源无效WFS_ERR_PTR_SEQUENCEINVALID (-128) 命令序列不对WFS_ERR_PTR_MEDIASIZE (-129) 介质的长度不对3. CardReaderWFS_ERR_IDC_INV ALIDDATA (-204) 无效的数据WFS_ERR_IDC_INV ALIDMEDIA (-205) 无效的 MediaWFS_ERR_IDC_FORMNOTFOUND (-206) Form 未找到WFS_ERR_IDC_FORMINV ALID (-207) Form 无效WFS_ERR_IDC_MEDIAJAM (-200) 卡堵塞WFS_ERR_IDC_NOMEDIA (-201) 没有卡WFS_ERR_IDC_MEDIARETAINED (-202) 吞卡WFS_ERR_IDC_RETAINBINFULL (-203) 吞卡箱满WFS_ERR_IDC_DATASYNTAX (-208) 数据语法错误WFS_ERR_IDC_SHUTTERFAIL (-209) 打开 Shutter 失败WFS_ERR_IDC_SECURITYFAIL (-210) 安全检测失败WFS_ERR_IDC_PROTOCOLNOTSUPP (-211) 协议不支持WFS_ERR_IDC_ATRNOTOBTAINED (-212) ATR 未获得WFS_ERR_IDC_INVALIDKEY (-213) Key 无效WFS_ERR_IDC_WRITE_METHOD (-214) 不支持写的操作WFS_ERR_IDC_CHIPPOWERNOTSUPP (-215) 不支持 IC 读写WFS_ERR_IDC_CARDTOOSHORT (-216) 卡长度过短WFS_ERR_IDC_CARDTOOLONG (-217) 卡长度过长4. CashDispenserWFS_ERR_CDM_INVALIDCURRENCY (-300) 无效的币种WFS_ERR_CDM_INVALIDTELLERID (-301) 无效的 TellerIDWFS_ERR_CDM_CASHUNITERROR (-302) 钞箱故障WFS_ERR_CDM_INVALIDDENOMINATION (-303) 无效的配钞WFS_ERR_CDM_INVALIDMIXNUMBER (-304) 参数错误WFS_ERR_CDM_NOCURRENCYMIX (-305) 参数错误WFS_ERR_CDM_NOTDISPENSABLE (-306) 无法挖出指定的钞票WFS_ERR_CDM_TOOMANYBILLS (-307) 要求挖的钞票过多,无法挖出WFS_ERR_CDM_INVALIDPOSITION (-308) 无效的位置WFS_ERR_CDM_POSITIONLOCKED (-309) 出口位置被锁住WFS_ERR_CDM_SAFEDOOROPEN (-310) 挖钞时安全门是打开的,无法挖钞WFS_ERR_CDM_INVALIDRETRACT (-311) Retract 命令无效WFS_ERR_CDM_SHUTTERNOTOPEN (-312) Shutter 打开失败WFS_ERR_CDM_SHUTTEROPEN (-313) Shutter 已经打开WFS_ERR_CDM_SHUTTERCLOSED (-314) Shutter 已经关闭WFS_ERR_CDM_INVALIDCASHUNIT (-315) 无效的钞箱编号WFS_ERR_CDM_NOBILLS (-316) 没有钞票WFS_ERR_CDM_EXCHANGEACTIVE (-317) 设备处于维护状态中WFS_ERR_CDM_NOEXCHANGEACTIVE (-318) 设备未处于维护状态中WFS_ERR_CDM_SHUTTERNOTCLOSED (-319) Shutter 关闭失败WFS_ERR_CDM_PRERRORNOBILLS (-320) 送钞时没有钞票WFS_ERR_CDM_PRERRORBILLS (-321) 送钞时发生错误,并且部分钞票已送出WFS_ERR_CDM_PRERRORUNKNOWN (-322) 送钞时发生错误,钞票位置未知WFS_ERR_CDM_BILLSTAKEN (-323) 收钞时部分或全部钞票被取走WFS_ERR_CDM_TOOMANYCOINS (-324) 要求挖的硬币过多WFS_ERR_CDM_CASHINACTIVE (-325) 设备处于存款过程中WFS_ERR_CDM_NOCASHINSTARTED (-326) 没有开始存款过程WFS_ERR_CDM_INVALIDMIXTABLE (-327) 无效的配钞表WFS_ERR_CDM_OUTPUTPOS_NOT_EMPTY (-328) 出钞口有钞票WFS_ERR_CDM_INVALIDRETRACTPOSITION (-329) 回收钞票位置无效WFS_ERR_CDM_NOTRETRACTAREA (-330) 指定的回收位置不支持WFS_ERR_CDM_NOCASHBOXPRESENT (-333) 没有 Cash boxWFS_ERR_CDM_AMOUNTNOTINMIXTABLE (-334) 指定的配钞没有在配钞表中WFS_ERR_CDM_ITEMSNOTTAKEN (-335) 钞票未拿走WFS_ERR_CDM_ITEMSLEFT (-336)) 钞票遗留在钞道或出钞口上5. PinpadWFS_ERR_PIN_KEYNOTFOUND (-400) 按键未找到WFS_ERR_PIN_MODENOTSUPPORTED (-401) 不支持的模式WFS_ERR_PIN_ACCESSDENIED (-402) 访问拒绝WFS_ERR_PIN_INVALIDID (-403) ID 无效WFS_ERR_PIN_DUPLICATEKEY (-404) Key 已存在WFS_ERR_PIN_KEYNOVALUE (-406) Key 没有加载WFS_ERR_PIN_USEVIOLATION (-407) Key 使用不对WFS_ERR_PIN_NOPIN (-408) 键盘中没有密码WFS_ERR_PIN_INVALIDKEYLENGTH (-409) 无效的 Key 长度WFS_ERR_PIN_KEYINVALID (-410) 无效的按键WFS_ERR_PIN_KEYNOTSUPPORTED (-411) 存在不支持的按键WFS_ERR_PIN_NOACTIVEKEYS (-412) 没有激活任何按键WFS_ERR_PIN_INVALIDKEY (-413) 无效的 keyWFS_ERR_PIN_NOTERMINATEKEYS (-414) 没有终止键WFS_ERR_PIN_MINIMUMLENGTH (-415) 最小密码长度无效WFS_ERR_PIN_PROTOCOLNOTSUPP (-416) 协议不支持WFS_ERR_PIN_INVALIDDATA (-417) 无效的数据WFS_ERR_PIN_NOTALLOWED (-418) 不允许进行操作WFS_ERR_PIN_NOKEYRAM (-419) Key RAM空间不够WFS_ERR_PIN_NOCHIPTRANSACTIVE (-420) 还没开始 ChipTransactionWFS_ERR_PIN_ALGORITHMNOTSUPP (-421) 算法不支持WFS_ERR_PIN_FORMATNOTSUPP (-422) 格式不支持WFS_ERR_PIN_HSMSTATEINVALID (-423) HSMSTATE无效WFS_ERR_PIN_MACINVALID (-424) MAC无效WFS_ERR_PIN_PROTINVALID (-425) 协议无效WFS_ERR_PIN_FORMATINVALID (-426) 格式无效WFS_ERR_PIN_CONTENTINVALID (-427) 内容无效6. TTUWFS_ERR_TTU_FIELDERROR (-701) Field 错误WFS_ERR_TTU_FIELDINVALID (-702) Field 无效WFS_ERR_TTU_FIELDNOTFOUND (-703) Field 未找到WFS_ERR_TTU_FIELDSPECFAILURE (-704) Field 语法错误WFS_ERR_TTU_FORMINV ALID (-705) 无效的 FormWFS_ERR_TTU_FORMNOTFOUND (-706) Form 未找到WFS_ERR_TTU_INV ALIDLED (-707) LED 无效WFS_ERR_TTU_KEYCANCELED (-708) 按键取消WFS_ERR_TTU_MEDIAOVERFLOW (-709) Media 超域WFS_ERR_TTU_RESNOTSUPP (-710) 分辨率不支持WFS_ERR_TTU_CHARSETDATA (-711) 字符集不对WFS_ERR_TTU_KEYINVALID (-712) 按键无效WFS_ERR_TTU_KEYNOTSUPPORTED (-713) 按键不支持WFS_ERR_TTU_NOACTIVEKEYS (-714) 没有激活任何按键7. SIUWFS_ERR_SIU_INVALID_PORT (-801) 端口无效WFS_ERR_SIU_SYNTAX (-802) 参数错误WFS_ERR_SIU_PORT_ERROR (-803) 执行命令时硬件故障8. CashAcceptorWFS_ERR_CIM_INVALIDCURRENCY (-1300) 无效币种WFS_ERR_CIM_INVALIDTELLERID (-1301) 无效的 TellerIDWFS_ERR_CIM_CASHUNITERROR (-1302) 钞箱故障WFS_ERR_CIM_TOOMANYITEMS (-1307) 存款放入的钞票过多WFS_ERR_CIM_UNSUPPOSITION (-1308) 指定的位置不支持WFS_ERR_CIM_SAFEDOOROPEN (-1310) 存款时安全门是打开的WFS_ERR_CIM_SHUTTERNOTOPEN (-1312) Shutter 打开失败WFS_ERR_CIM_SHUTTEROPEN (-1313) Shutter 已经打开WFS_ERR_CIM_SHUTTERCLOSED (-1314) Shutter 已经关闭WFS_ERR_CIM_INVALIDCASHUNIT (-1315) 无效的钞箱编号WFS_ERR_CIM_NOITEMS (-1316) 没有钞票WFS_ERR_CIM_EXCHANGEACTIVE (-1317) 设备处于维护状态WFS_ERR_CIM_NOEXCHANGEACTIVE (-1318) 设备没有处于维护状态WFS_ERR_CIM_SHUTTERNOTCLOSED (-1319) Shutter 关闭失败WFS_ERR_CIM_ITEMSTAKEN (-1323) 回收钞票时部分钞票被拿走WFS_ERR_CIM_CASHINACTIVE (-1325) 设备处于存款过程中WFS_ERR_CIM_NOCASHINACTIVE (-1326) 设备没有处于存款过程中WFS_ERR_CIM_POSITION_NOT_EMPTY (-1328) 入钞或出钞口有钞票WFS_ERR_CIM_INVALIDRETRACTPOSITION (-1334) 回收位置无效WFS_ERR_CIM_NOTRETRACTAREA (-1335) 指定的回收位置不可用。
曦帆桌面管理常见问题手册福建升腾资讯有限公司Centerm Information Co.,Ltd.1引言 (3)1.1面向的读者 (3)1.2约定 (3)2部署常见问题 (3)2.1无法添加数据服务器,提示IP或端口错误 (3)2.2 CDMS安装完成后UnitedWeb服务启动,却无法访问 (3)2.3 如何判断CDMS服务器工作是否正常 (3)2.4 如何正确手工启动、关闭CDMS服务器 (4)2.5 如何判断数据服务器工作是否正常 (4)2.6 如何判断XPe客户端工作是否正常 (4)2.7 分发软件,镜像等文件相关的作业失败 (4)2.8帐号审批邮件无法发送 (4)2.9部署文件无法上传 (4)2.10消息管理 (5)2.11性能监控收不到邮件通知 (5)2.12批量分发作业总出现部分状态不正确 (5)2.13Windows系统镜像还原后无法进入系统 (5)2.14Linux补丁下发失败 (5)2.15Linux系统升级看不到进度 (5)2.16Linux系统在恢复出厂设置后Agent版本号变化 (6)2.17添加XPe TC失败 (6)2.18远程监控失败 (6)2.19 数据库停止后,TCM需要手动启动 (6)2.20 UnitedWeb服务无法启动 (6)1引言本手册旨在简要地列出CDMS部署和维护的常见问题汇总。
1.1 面向的读者本手册所面向的读者主要是CDMS管理员。
1.2约定●Agent:曦帆管理系统客户端●CDMS:曦帆管理服务器●CDS:曦帆管理系统数据服务器2部署常见问题2.1无法添加数据服务器,提示IP或端口错误(1)请确认是否已经安装数据服务器。
(2)检查安装数据服务器的机子是否开启了防火墙,数据服务器工作的端口(默认9999,10021)必须开放。
可以通过以下命令进行诊断telnet 数据服务器IP 9999如果端口连接不通,则说明存在问题。
建议重新安装CDS。
Ecology安装手册——AIX篇联系人朱巍(Well)Weaver Software上海(总部):中国上海浦东软件园陆家嘴分园101号3层上海(总部)邮政编码:200127华南(深圳):广东省深圳市福田区景田路擎天华庭大厦B座32A华南(深圳)邮政编码:518034电话:+86 755 83144692-808上海泛微网络科技有限公司 1传真:+86 755 83144671文档版本历史上海泛微网络科技有限公司 2目录一、安装准备 (5)1. 本地环境准备 (5)1.1 服务器访问地址 (5)1.2 服务器开放端口 (5)1.3 需使用的工具 (5)2. 检查操作系统 (5)2.1 检查操作系统版本 (5)2.2 检查操作系统字符集 (6)3. 检查SDK是否安装 (6)3.1 根据操作系统版本下载SDK (6)3.2 安装SDK (6)3.3 检查SDK是否安装成功 (7)4. 确认HA划分目录 (7)5. 检查Oracle需使用的包 (8)二、安装Oralce (9)1. 检查Oracle安装所需要的环境参数 (9)1.1 内存 (9)1.2 SWAP (9)1.3 /tmp目录 (9)1.4 Oracle安装目录 (9)1.5 修改limits文件 (9)2. 安装补丁包 (10)2.1 确认补丁是否已打 (10)2.2 下载补丁包文件 (10)2.3 打包安装 (10)3. 准备Oracle安装 (11)3.1 上传文件 (11)3.2 解压gz包 (11)3.3 解压cpio包 (11)3.4 创建用户、组并授权对应目录 (11)3.5 修改oracle用户的环境变量 (12)3.6 root账户的准备 (13)4. 安装Oracle (13)4.1 使用oracle用户登录检查环境变量 (13)4.2 使用GUI安装数据库 (13)4.3 安装数据库实例 (14)4.4 创建数据库监听 (14)4.5 配置Oracle数据库自启动 (14)4.6 AIX下Oracle常用命令 (15)三、安装Ecology产品 (16)1. 上传文件 (16)上海泛微网络科技有限公司 32. 解压文件 (16)3. 配置resin (16)4. 创建用户并授权 (17)5. 完成 (17)上海泛微网络科技有限公司 4一、安装准备1.本地环境准备1.1服务器访问地址确认服务器的访问地址,保证本地与两台小型机之间能够正常访问。
DBC文件格式文档版本01/2007Vector发布的此规范仅供参考,仅按“原样”提供。
在法律允许的范围内,Vector对使用本规范不承担任何保证或责任。
未经授权使用(例如复制,展示或以其他方式使用本文档中的任何内容)是违反法律和知识产权的行为。
您不得将此规范分发给部门以外的任何人或您公司已收到此规范的项目,特别是公司外部的分发明确不予受理。
©2007 Vector Informatik GmbH保留所有权利。
文件管理修订记录版编辑描述2007-02-09曲规范已创建目录1 介绍 (1)2 一般定义 (1)3 DBC文件的结构 (2)4 版本和新符号规范 (3)5 比特定时定义 (3)6 节点定义 (3)7 价值表定义 (3)7.1价值描述(价值编码) (4)8 消息定义 (4)8.1信号定义 (4)8.2消息发送器的定义 (6)8.3信号值描述(值编码) (6)9 环境变量定义 (6)9.1环境变量值描述 (7)10 信号类型和信号组定义 (7)11 评论定义 (7)12 用户定义的属性定义 (8)12.1属性定义 (8)12.2属性值 (8)13 例子 (8)1 介绍DBC文件描述了单个CAN网络的通信。
此信息足以监视和分析网络并模拟物理上不可用的节点(剩余总线模拟)。
足够的DBC文件还可用于开发电子控制单元的通信软件,该电子控制单元应是CAN网络的一部分。
DBC文件未解决ECU的功能行为。
2 一般定义本文档中使用以下常规元素:unsigned_integer:无符号整数signed_integer:有符号整数无符号整型整型(有符号)double:双精度浮点数双精度浮点型char_string:由除双连字符('“')之外的任何可打印字符组成的任意字符串。
可打印的字符串C_identifier:有效的C_identifier。
C_identifiers必须以字母字符或下划线开头,可能还包括字母数字人物和下划线。