TinyXML指南
- 格式:doc
- 大小:127.50 KB
- 文档页数:27
tinyxml用法TinyXML是一个用于解析和生成XML文件的C++库。
它提供了一组简单且易于使用的API,可将XML文档解析为树状结构,让用户可以通过遍历这棵树来获取和修改XML文件中的内容。
本文将详细介绍TinyXML的使用方法,包括如何解析XML文件、访问节点、修改节点内容以及生成XML 文件等。
一、解析XML文件1.引入头文件和命名空间要使用TinyXML,首先需要引入头文件tinyxml.h:#include <tinyxml.h>然后在代码中使用命名空间:using namespace std;using namespace tinyxml2;2.打开并解析XML文件创建一个XML文档对象以及一个错误代码对象,然后调用LoadFile(方法打开并解析XML文件:XMLDocument doc;doc.LoadFile("example.xml");3.获取根节点使用RootElement(方法获取根节点:XMLElement* root = doc.RootElement(;4.遍历子节点可以使用FirstChildElement(方法获取第一个子节点,然后使用NextSiblingElement(方法依次获取下一个兄弟节点,直到遍历完所有子节点:for (XMLElement* child = root->FirstChildElement(; child != NULL; child = child->NextSiblingElement()//对子节点进行操作5.获取节点属性和内容使用Attribute(方法获取节点的属性值,使用GetText(方法获取节点的文本内容:const char* attributeValue = node->Attribute("属性名");const char* textContent = node->GetText(;二、访问和修改节点1.创建新节点可以使用NewElement(方法创建一个新节点,然后将其添加到指定节点的子节点列表中:XMLElement* newNode = doc.NewElement("节点名称");parentNode->InsertEndChild(newNode);2.修改节点属性和内容使用SetAttribute(方法设置节点的属性值,使用SetText(方法设置节点的文本内容:node->SetAttribute("属性名", "属性值");node->SetText("文本内容");3.删除节点使用DeleteChildren(方法删除节点的所有子节点:node->DeleteChildren(;4.复制节点可以使用CloneNode(方法复制一个节点:XMLElement* newNode = node->CloneNode(true);三、生成XML文件1.创建一个XML文档对象XMLDocument doc;2.创建根节点使用NewElement(方法创建一个根节点并将其添加到文档中:XMLElement* root = doc.NewElement("根节点名称");doc.InsertEndChild(root);3.创建子节点使用NewElement(方法创建一个子节点并将其添加到根节点的子节点列表中:XMLElement* child = doc.NewElement("子节点名称");root->InsertEndChild(child);4.创建属性使用SetAttribute(方法设置节点的属性值:child->SetAttribute("属性名", "属性值");5.创建文本内容使用SetText(方法设置节点的文本内容:child->SetText("文本内容");6.保存XML文件使用SaveFile(方法将XML文档保存为文件:doc.SaveFile("example.xml");以上就是TinyXML库的基本用法。
TinyXml使用指南(1) 作者:tamsyn 来源: 时间:2006-8-16 【字体:大中小】〖双击滚屏〗在这里我们并不是要讲解如何使用XML,或在网页中使用它。
而是要在C/C++中使用它。
详细一点就是在C/C++嵌套使用XML文件。
要在C/C++中使用XML文件,你就必须需要一个能分析XML文件的函数库。
在这方面有很多,比如libxml2,tinxml,expat等等很多。
而我使用的是tinyxml,为什么要使用它呢?因为它很小巧,只有两个头文件和四个CPP文件。
正如作者在tinyxml官方文件中所说的,如果你不是想在浏览器中使用XML,那么tinyxml非常适合你。
我们下面来看一下tinyxml是如何在C/C++中建立XML文件的。
char floader[200],buffer[200];TiXmlDocument* m_xmlDoc = new TiXmlDocument();TiXmlElement xElement("player");sprintf(buffer,"%d", 1);xElement.SetAttribute("admin", buffer);TiXmlElement xPos("pos");sprintf(buffer,"%d",2);xPos.SetAttribute("x", buffer);sprintf(buffer,"%d",3);xPos.SetAttribute("y", buffer);sprintf(buffer,"%d",4);xPos.SetAttribute("zone", buffer);xElement.InsertEndChild(xPos);m_xmlDoc->InsertEndChild(xElement);sprintf(floader,"%s.xml", "antking");m_xmlDoc->SaveFile(floader);delete m_xmlDoc;这段简单的代码的作用就是将用户数据保存在XML文件中。
TinyXML2使⽤教程(转)原⽂转⾃1.TinyXML2概述TinyXML2是simple、small、efficient开源的C++ XML⽂件解析库,可以很⽅便的应⽤到现有的项⽬之中。
⾮常适合存储简单数据,配置⽂件,对象序列化等数据量不是很⼤的操作。
TinyXML2详细介绍与源码获取⽅法详见:。
2. TinyXML1与TinyXML2对⽐TinyXML1与TinyXML2这两个著名的开源XML⽂件解析库均出⾃Lee Thomason之⼿,向这位满怀开源精神的⼤家致敬。
TinyXML2适⽤于⼤部分的C/C++项⽬开发,经得住考验,是最好的选择。
较TinyXML1⽽⾔,TinyXML2化繁为简,使⽤时只需要包含两个⽂件,⽽TinyXML1需要6个⽂件,⼀般⽣成静态链接库供项⽬的使⽤。
TinyXML1详细介绍与源码见:。
TinyXML1⽤法⽤例可以参考博⽂:。
TinyXML2使⽤了与TinyXML1相似都可API,并且拥有丰富的案例。
但TinyXML2解析器相对TinyXML1在代码上是完全重写,使其更适合于游戏开发中使⽤。
它使⽤更少的内存,更快,并使⽤更少的内存分配。
TinyXML2⽆需STL,也放弃了对STL⽀持。
所有字符串查询均使⽤C风格字符串“const char *”来表⽰,省去string类型对象的构造,并使代码更简单。
⼆者共同点:(1)都使⽤了简单易⽤的API。
(2)都是基于DOM(Document Object Model,⽂档对象模型)的解析器。
(3)都⽀持UTF-8编码。
TinyXML2的优点:(1)对⼤部分⼤部分的C/C++项⽬具有普适性。
(2)使⽤较少的内存(约TinyXML1的40%),速度变得更快。
(3)没有C++的STL的要求。
(4)更接近现代C++的特性,如使⽤了适当的命名空间。
(5)适当有效的处理了的空⽩字符(空格,TAB 和回车)。
TinyXML1的优点:(1)可以报告分析错误的位置。
原来的Windows 平台下的项目使用了MSXML组件来访问Web Service 接口,后来因为跨平台的需要,在Linux平台下改用了GSOAP+TinyXML(TinyXPath)来完成所需功能。
使用TinyXPath还是遇到了一些问题,总结一下。
这里要说明一下TinyXPath是TinyXML+XPath,下载TinyXPath包的时候会包含TinyXML的原文件。
1. 使用XPath,来获取XML子节点TinyXpath所支持的XPath并不完整,而且缺少文档资料,试了一整天才试出来,直接把结果写下来1.)节点名大小写无关匹配这里要用到name函数和translate函数,首先转化所有的节点名到大写,然后再比较。
语法如下:*[translate(name(),'abcdefghijklmnopqrstuvwxyz','ABCDEFGHIJKLMNOPQRSTUVWXYZ')='XXXX']name函数返回节点名字,translate函数转换到大写。
2.)节点内容比较text函数返回节点内容,语法为*[text()='XXXX']3.)选择固定位置节点position函数用以指定第几个节点,语法为:*[position()=XXX] ,此处是数字类型举个例子,我们要选定节点名字为AAA,内容为BBB的第二个节点,XPath应改名为:*[translate(name(),'abcdefghijklmnopqrstuvwxyz','ABCDEFGHIJKLMNOPQRSTUVWXYZ')='AAA' and text()='BBB' and position()=2]这里还有个查询效率问题,并不确定把 position()=2 条件放在最前面是不是可以提高效率。
以上内容可以封装成一个函数:inline string getNodeXPath(const string & strNodeName, string strText="", string pos=""){string strVal;strVal += "*[";strVal += "translate(name(),'abcdefghijklmnopqrstuvwxyz','ABCDEFGHIJKLMNOPQRSTUVWXYZ') = '"+ strNode Name + "'";if(!strText.empty())strVal +=" and text()= '" +strText+"'";if(!pos.empty())strVal +=" and position()= " +pos;strVal += "]";return strVal;}#define NODE(node) getNode(node)#define NODE_AT(node,pos) getNode(node,"",pos)4.) 查询子节点满足一定条件的节点没有看到TinyXPath提供的直接可以获取子节点内容的函数,这里使用变通的方法,即先判断子节点条件然后使用parent关键词指定返回父节点,定义了HAS_CHILD宏#define HAS_CHILD(node,txt)string(string("/")+getNode(node,txt)+string("/parent::*"))举个例子:string strXPath;strXPath= "/" + NODE("XMLDATA") + "/" + NODE("RATES") ;strXPath+= "/" + NODE("REPORATEVO")+HAS_CHILD("TERMBYYEAR",mStrType)+HAS_CHILD("CONTRACTDATE",mStrSubTyp e);strXPath+= "/" + NODE("RATE");多个HAS_CHILD之间是并列关系。
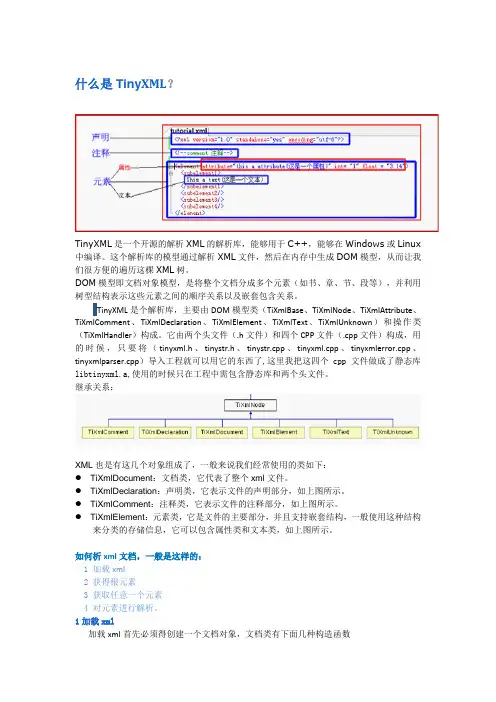
什么是Tiny XML?TinyXML是一个开源的解析XML的解析库,能够用于C++,能够在Windows或Linux 中编译。
这个解析库的模型通过解析XML文件,然后在内存中生成DOM模型,从而让我们很方便的遍历这棵XML树。
DOM模型即文档对象模型,是将整个文档分成多个元素(如书、章、节、段等),并利用树型结构表示这些元素之间的顺序关系以及嵌套包含关系。
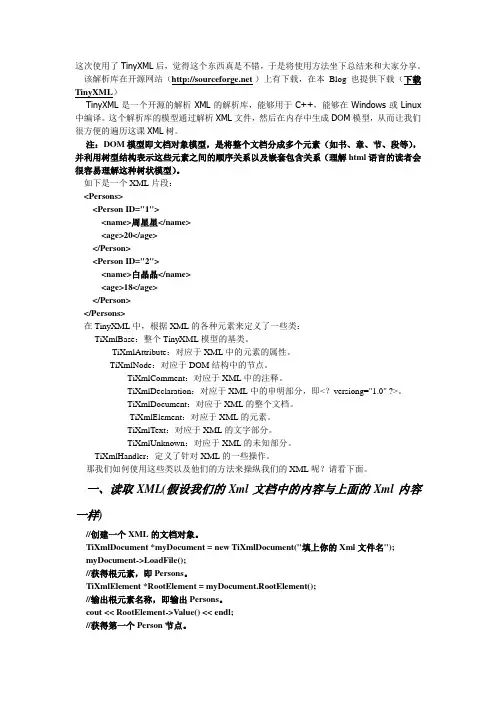
TinyXML是个解析库,主要由DOM模型类(TiXmlBase、TiXmlNode、TiXmlAttribute、TiXmlComment、TiXmlDeclaration、TiXmlElement、TiXmlText、TiXmlUnknown)和操作类(TiXmlHandler)构成。
它由两个头文件(.h文件)和四个CPP文件(.cpp文件)构成,用的时候,只要将(tinyxml.h、tinystr.h、tinystr.cpp、tinyxml.cpp、tinyxmlerror.cpp、tinyxmlparser.cpp)导入工程就可以用它的东西了,这里我把这四个cpp文件做成了静态库libtinyxml.a,使用的时候只在工程中需包含静态库和两个头文件。
继承关系:XML也是有这几个对象组成了,一般来说我们经常使用的类如下:● TiXmlDocument:文档类,它代表了整个xml文件。
● TiXmlDeclaration:声明类,它表示文件的声明部分,如上图所示。
● TiXmlComment:注释类,它表示文件的注释部分,如上图所示。
● TiXmlElement:元素类,它是文件的主要部分,并且支持嵌套结构,一般使用这种结构来分类的存储信息,它可以包含属性类和文本类,如上图所示。
如何析xml文档,一般是这样的:1 加载xml2 获得根元素3 获取任意一个元素4 对元素进行解析。
1加载xml加载xml首先必须得创建一个文档对象,文档类有下面几种构造函数TiXmlDocument();//Create a document with a name. The name of the document is also the filename of the xml.TiXmlDocument( const char * documentName );●通过文件载入有了文档对象后可以载入文件,载入文件的函数原型为bool LoadFile( TiXmlEncoding encoding = TIXML_DEFAULT_ENCODING );bool LoadFile( const char * filename, TiXmlEncoding encoding = TIXML_DEFAULT_ENCODING );●通过字符串载入也可以通过载入xml字符串,函数原型为:virtual const char* Parse( const char* p, TiXmlParsingData* data = 0,TiXmlEncoding encoding = TIXML_DEFAULT_ENCODING );TiXmlParsingData* data 这个参数不知道有什么用,默认使用了没问题例如:TiXmlDocument doc();doc.Prase("<xml version=\"1.1\" ><a><n a=\"a\" /></a></xml>");●文档对象的四个成员函数void Print() const输出到控制台窗口bool SaveFile( const std::string& filename ) const;保存文档到指定文件名const char * ErrorDesc() const; //用来输出错误说明int ErrorId()const ; //用来输出错误ID2 获得根元素通过上一步加载的文档对象来获取跟元素,下面是获取根元素的函数原型:TiXmlElement* RootElement() ;doc.RootElement();//通过文档对象获取跟元素;3 获取任意一个元素通过上一步获取的根元素对象可以获取文档中的任意一个元素对象,主要通过以下函数:下面两个函数,返回第一个子元素。
这次使用了TinyXML后,觉得这个东西真是不错,于是将使用方法坐下总结来和大家分享。
该解析库在开源网站()上有下载,在本Blog也提供下载(下载TinyXML)TinyXML是一个开源的解析XML的解析库,能够用于C++,能够在Windows或Linux 中编译。
这个解析库的模型通过解析XML文件,然后在内存中生成DOM模型,从而让我们很方便的遍历这课XML树。
注:DOM模型即文档对象模型,是将整个文档分成多个元素(如书、章、节、段等),并利用树型结构表示这些元素之间的顺序关系以及嵌套包含关系(理解html语言的读者会很容易理解这种树状模型)。
如下是一个XML片段:<Persons><Person ID="1"><name>周星星</name><age>20</age></Person><Person ID="2"><name>白晶晶</name><age>18</age></Person></Persons>在TinyXML中,根据XML的各种元素来定义了一些类:TiXmlBase:整个TinyXML模型的基类。
TiXmlAttribute:对应于XML中的元素的属性。
TiXmlNode:对应于DOM结构中的节点。
TiXmlComment:对应于XML中的注释。
TiXmlDeclaration:对应于XML中的申明部分,即<?versiong="1.0" ?>。
TiXmlDocument:对应于XML的整个文档。
TiXmlElement:对应于XML的元素。
TiXmlText:对应于XML的文字部分。
TiXmlUnknown:对应于XML的未知部分。
TiXmlHandler:定义了针对XML的一些操作。
tinyxml使用笔记与总结tinyxml使用笔记与总结tinyxml使用笔记与总结在TinyXML中,根据XML的各种元素来定义了一些类:TiXmlBase:整个TinyXML模型的基类。
TiXmlAttribute:对应于XML中的元素的属性。
TiXmlNode:对应于DOM结构中的节点。
TiXmlComment:对应于XML中的注释。
TiXmlDeclaration:对应于XML中的申明部分,即<?versiong="1.0" ?>。
TiXmlDocument:对应于XML的整个文档。
TiXmlElement:对应于XML的元素。
TiXmlText:对应于XML的文字部分。
TiXmlUnknown:对应于XML的未知部分。
TiXmlHandler:定义了针对XML的一些操作。
例如:<?xml version="1.0" standalone=no><!– Our to do list data –><ToDo><Item priority="1"> Go to the <bold>Toy store!</bold></Item><Item priority="2"> Do bills</Item></ToDo> 整个对象树:TiXmlDocument "demo.xml"TiXmlDeclaration "version=’1.0′" "standalone=no"TiXmlComment " Our to do list data"TiXmlElement "ToDo"TiXmlElement "Item" Attribtutes: priority = 1TiXmlText "Go to the "TiXmlElement "bold"TiXmlText "Toy store!"TiXmlElement "Item" Attributes: priority=2TiXmlText "Do bills"在tinyXML中,用FirstChild("名字")查找节点时,调用FirstChild函数的节点与要查找的节点必须成“父子关系”。
TinyXml使用指南一、 TinyXml的特点TinyXml是一个基于DOM模型的、非验证的轻量级C++解释器。
1. SAX和DOM目前XML的解析主要有两大模型:SAX和DOM。
其中SAX是基于事件的,其基本工作流程是分析XML文档,当发现了一个新的元素时,产生一个对应事件,并调用相应的用户处理函数。
这种方式占用内存少,速度快,但用户程序相应得会比较复杂。
而DOM(文档对象模型),则是在分析时,一次性的将整个XML文档进行分析,并在内存中形成对应的树结构,同时,向用户提供一系列的接口来访问和编辑该树结构。
这种方式占用内存大,速度往往慢于SAX,但可以给用户提供一个面向对象的访问接口,对用户更为友好。
2. 验证和非验证对于一个特定的XML文档而言,其正确性分为两个层次。
首先是其格式应该符合XML的基本格式要求,比如第一行要有声明,标签的嵌套层次必须前后一致等等,符合这些要求的文件,就是一个合格的XML文件,称作well-formatted。
但除此之外,一个XML文档因其内容的不同还必须在语义上符合相应的标准,这些标准由相应的DTD 文件或者Schema文件来定义,符合了这些定义要求的XML文件,称作valid。
因此,解析器也分为两种,一种是验证的,即会跟据XML文件中的声明,用相应的DTD文件对XML文件进行校验,检查它是否满足DTD文件的要求。
另一种是忽略DTD文件,只要基本格式正确,就可以进行解析。
就我所知,验证的解析器通常都是比较重量级的。
TinyXml不支持验证,但是体积很小,用在解析格式较为简单的XML文件,比如配置文件时,特别的合适。
二、 TinyXml的构建和使用1. 获取TinyXml首页在/tinyxml/index.html,从这里可以找到最新版本的源代码,目前的版本是2.3.4。
2.构建TinyXml在构建时可以选择是否支持STL,选择的话,则可以使用std::string,所以通常应该打开这个选项。
TinyXML 指南这是什么?这份指南有一些关于如何有效地使用TinyXML的技巧和建议。
我也会尝试讲一些诸如怎样使字符串与整型数相互转化的C++技巧。
这与TinyXML本身没什么关系,但它也许会对你的项目有所帮助,所以我还是把它加进来了。
如果你不知道基本的C++概念,那么这份指南就没什么用了。
同样的,如果你不知道什么是DOM,那先从其它地方找来看看吧。
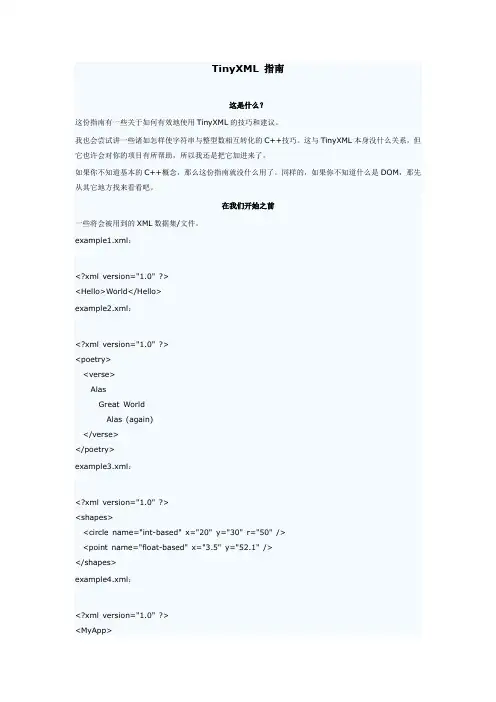
在我们开始之前一些将会被用到的XML数据集/文件。
example1.xml:<?xml version="1.0" ?><Hello>World</Hello>example2.xml:<?xml version="1.0" ?><poetry><verse>AlasGreat WorldAlas (again)</verse></poetry>example3.xml:<?xml version="1.0" ?><shapes><circle name="int-based" x="20" y="30" r="50" /><point name="float-based" x="3.5" y="52.1" /></shapes>example4.xml:<?xml version="1.0" ?><MyApp><!–Settings for MyApp –><Messages><Welcome>Welcome to MyApp</Welcome><Farewell>Thank you for using MyApp</Farewell></Messages><Windows><Window name="MainFrame" x="5" y="15" w="400" h="250" /></Windows><Connection ip="192.168.0.1" timeout="123.456000" /></MyApp>开始把文件加载成XML把一个文件加载成TinyXML DOM的最简单方法是:TiXmlDocument doc( "demo.xml" );doc.LoadFile();一个更接近于现实应用的例子如下。
TinyXML中文文档六月08TinyXML中文文档TinyXML No Comments »完整显示 1 2 3 4 5 6 7  译注:本文是TinyXML 2.5.2版本Document的中文文档,经原作者Lee Thomason同意由hansen翻译,如有误译或者错漏,欢迎指正。
版权:版权归原作者所有,翻译文档版权归本人hansen所有,转载请注明出处。
原文:/tinyxmldocs/index.html 0;TinyXml 文档2.5.2TinyXMLTinyXML是一个简单小巧,可以很容易集成到其它程序中的C++ XML解析器。
它能做些什么简单地说,TinyXML解析一个XML文档并由此生成一个可读可修改可保存的文档对象模型(DOM)。
XML的意思是“可扩展标记语言“(eXtensible Markup Language)。
它允许你创建你自己的文档标记。
在为浏览器标记文档方面HTML做得很好,然而XML允许你定义任何文档标记,比如可以为一个组织者应用程序定义一个描述“to do”列表的文档。
XML拥有一个结构化并且方便的格式,所有为存储应用程序数据而创建的随机文件格式都可以用XML代替,而这一切只需要一个解析器。
最全面正确的说明可以在/TR/2004/REC-xml-20040204/找到,但坦白地说,它很晦涩难懂。
事实上我喜欢/xml/tutorial上关于XML的介绍。
有不同的方法可以访问和与XML数据进行交互。
TinyXML 使用文档对象模型(DOM),这意味着XML数据被解析成一个可被浏览和操作的C++对象,然后它可以被写到磁盘或者另一个输出流中。
你也可以把C++对象构造成一个XML文档然后把它写到磁盘或者另一个输出流中。
TinyXML被设计得容易快速上手。

Linux下TinyXml库使⽤⽅法及实例解析 TinyXml库下载,我保存在⾃⼰的⽹盘中,可⾃⾏下载:链接:提取码:e50y⾸先介绍⼀下TinyXml类XmlBase:整个TinyXML模型的基类;XmlAttribute:对应于XML中的元素的属性;XmlComment:对应于XML中的注释,评论类;XmlDeclaration:对应于XML中的申明部分,即<?versiong="1.0" ?>;XmlElement:对应于XML的元素;XmlDocument:对应于XML的整个⽂档;XmlText:对应于XML的⽂字部分;XmlUnknown:对应于XML的未知部分;XmlHandler:定义了针对XML的⼀些操作;类之间的关系如下:需要注意的是:元素⼀定的节点,节点不⼀定是元素(TiXmlElement类)⼀.加载XML⽂件//加载XML⽂件TiXmlDocument doc;if(!doc.LoadFile("test.xml")){qDebug()<<"加载XML⽂件失败";const char *errorStr = doc.ErrorDesc();qDebug()<<errorStr; //打印失败原因;}⼆.获取XML 的根节点//加载XML⽂件TiXmlDocument doc;if(!doc.LoadFile("test.xml")){qDebug()<<"加载XML⽂件失败";const char *errorStr = doc.ErrorDesc();qDebug()<<errorStr; //打印失败原因;}else{//获取根节点元素TiXmlElement *root = doc.FirstChildElement();}三.常⽤⽅法TiXmlDocument doc;doc.LoadFile("test.xml");TiXmlElement *root = doc.FirstChildElement(); //获取根节点元素QString ElementName = root->Value(); //获取元素名bool Children = root->NoChildren(); //判断该元素是否有⼦元素返回true 有,false 没有TiXmlElement *child = root->FirstChildElement(); //获取root元素下的第⼀个⼦元素child = root->FirstChildElement("major"); //获取root元素的⼦元素指定元素名字(major)TiXmlElement *brother = child->NextSiblingElement(); //获取child元素的下⼀个兄弟元素brother = child->NextSiblingElement("specVersion"); //获取child元素的兄弟元素指定元素名字(specVersion)QString text = brother->GetText(); //获取brother元素的值TiXmlAttribute *Attribute = brother->FirstAttribute(); //获取brother元素的第⼀个属性QString AttributeName = Attribute->Name(); //获取Attribute属性的名字QString AttributeValue = Attribute->Value(); //获取Attribute属性的值AttributeValue = brother->Attribute("AttributeName"); //获取brother的属性名为(AttributeName)的值TiXmlDocument *myDocument = new TiXmlDocument(); //创建⼀个XML⽂件TiXmlDeclaration *pDeclaration=new TiXmlDeclaration("1.0","UTF-8",""); //创建xml⽂件头(<?xml version="1.0" encoding="UTF-8" ?>)myDocument->LinkEndChild(pDeclaration); //加⼊将xml⽂件头加⼊⽂档中TiXmlElement *BUSINESS=new TiXmlElement("BUSINESS"); //创建⼀个元素节点myDocument->LinkEndChild(BUSINESS); //加⼊BUSINESS元素节点到⽂档中TiXmlElement *COUNTRY = new TiXmlElement("COUNTRY"); //创建两个节点TiXmlElement *PLANET = new TiXmlElement("PLANET");BUSINESS->LinkEndChild(PLANET); //将新建的节点加到BUSINESS下⼀级BUSINESS->LinkEndChild(COUNTRY);TiXmlText *PLANETtxt = new TiXmlText("one"); //添加节点内的⽂本TiXmlText *COUNTRYtxt = new TiXmlText("china");COUNTRY->LinkEndChild(COUNTRYtxt);PLANET->LinkEndChild(PLANETtxt);myDocument->SaveFile("test.xml"); //保存xml下⾯介绍⼀个实例解析使⽤TinyXML库进⾏解析时,只需要将其中的6个⽂件拷贝到项⽬中就可以直接使⽤了,这六个⽂件是:tinyxml.h、tinystr.h、tinystr.cpp、tinyxml.cpp、tinyxmlerror.cpp、tinyxmlparser.cpp;XML⽂件如下---test.xml1 <School name="软件学院">2 <Class name = "C++">3 <Student name="tinyxml" number="123">4 <email>tinyxml@</email>5 <address>中国</address>6 </Student>7 <Student name="jsoncpp" number="456">8 <email>jsoncpp@</email>9 <address>美国</address>10 </Student>1112 </Class>1314 </School>~解析实例代码为:readxml.cpp1 #include<iostream>2 #include"tinyxml.h"3 #include<string>45using namespace std;67int main()8 {9const char * xmlFile = "test.xml";10 TiXmlDocument doc;11if(doc.LoadFile(xmlFile)){12 doc.Print();13 }else{14 cout << "can not parse xml school" << endl;1516 }17 TiXmlElement* rootElement = doc.RootElement();18 TiXmlElement* classElement = rootElement->FirstChildElement();19 TiXmlElement* studentElement = classElement->FirstChildElement();2021for(; studentElement != NULL; studentElement = studentElement->NextSiblingElement()){22 TiXmlAttribute* attribute0fStudent = studentElement->FirstAttribute();23for(; attribute0fStudent != NULL; attribute0fStudent = attribute0fStudent->Next()){24 cout << attribute0fStudent->Name() << " : " << attribute0fStudent->Value() << endl ;25 }26 TiXmlElement* studentContactElement = studentElement->FirstChildElement();27for(; studentContactElement != NULL; studentContactElement = studentContactElement->Ne xtSiblingElement()){28string contactType = studentContactElement->Value();29string contactValue = studentContactElement->GetText();30 cout << contactType << " : " << contactValue << endl;31 }32 }33return0;34 }35~如下为我⼯程下的⽂件csc105@csc105:~/workspace/configure-the-lower-computer/zmqcore/test_t/template/tinyxml$ lsreadxml test.xml tinystr.h tinyxmlerror.cpp tinyxmlparser.cppreadxml.cpp tinystr.cpp tinyxml.cpp tinyxml.h运⾏执⾏⽂件,解析结果为:csc105@csc105:~/workspace/configure-the-lower-computer/zmqcore/test_t/template/tinyxml$ ./readxml <School name="软件学院"><Class name="C++"><Student name="tinyxml" number="123"><email>tinyxml@</email><address>中国</address></Student><Student name="jsoncpp" number="456"><email>jsoncpp@</email><address>美国</address></Student></Class></School>name : tinyxmlnumber : 123email : tinyxml@address : 中国name : jsoncppnumber : 456email : jsoncpp@address : 美国到此,完成了XML 实例的解析最后感谢原博主:https:///qq_26374395/article/details/80171906。
开源TinyXML最简单的新⼿教程TinyXML它是基于⼀个⾮常受欢迎的现在DOM型号XML解析器,简单易⽤且⼩巧玲珑,很适合存储简单数据。
配置⽂件。
该项⽬属于开源项⽬,在sourceforge上边的链接是:当前最新版本号是2.6.2先看⼀下源代码⽂档的结构:Docs是帮助⽂档。
⾥边有许多的使⽤说明,只截⼀张图看⼀下:详细依据须要再看我们使⽤的是它的库。
能够是静态的也能够是动态库。
我就⽤静态库了,将这⾥边的⼏个头⽂件和源⽂件⼀起创建⼀个project,⽣成Lib库:tinyxml.lib使⽤的时候,将这两个头⽂件以及⽣成的静态库加进去:⼀个简单的样例#include <iostream>using namespace std;#ifdef TIXML_USE_STL#include <iostream>#include <sstream>using namespace std;#else#include <stdio.h>#endif#if defined( WIN32 ) && defined( TUNE )#include <crtdbg.h>_CrtMemState startMemState;_CrtMemState endMemState;#endif#include "tinyxml/tinyxml.h"int main(){TiXmlDocument *pDoc = new TiXmlDocument;if (NULL==pDoc){return false;}TiXmlDeclaration *pDeclaration = new TiXmlDeclaration("1.0","gb2312","");if (NULL==pDeclaration){return false;}pDoc->LinkEndChild(pDeclaration);// ⽣成⼀个根节点TiXmlElement *pRootEle = new TiXmlElement("索引数据包信息");pDoc->LinkEndChild(pRootEle);//头节点TiXmlElement *pHeader = new TiXmlElement("头节点");pRootEle->LinkEndChild(pHeader);TiXmlElement *pCellNode = new TiXmlElement("字段1");pHeader->LinkEndChild(pCellNode);pCellNode->SetAttribute("str1","1状态");pCellNode->SetAttribute("str2","0状态");pDoc->SaveFile("d:\\result.xml");return 0;}结果:临时这⾥边的字符串不能是宽字符的。
tinyxml使用文档TinyXML是一个用于解析和生成XML文档的C++库。
它提供了简单而高效的API,使得在C++中处理XML变得容易。
本文将介绍TinyXML的基本使用方法,包括XML的解析、创建和修改。
1. 引入TinyXML库2.解析XML文档要解析XML文档,可以使用TinyXML提供的XMLDocument类。
首先,需要创建一个XMLDocument对象,并通过调用其LoadFile(方法加载XML 文件。
以下是一个解析XML文档的示例:```cpp#include "tinyxml.h"int mainTiXmlDocument doc;if (doc.LoadFile("example.xml"))TiXmlElement* root = doc.RootElement(;if (root)//处理根元素//...}}return 0;```在上面的示例中,首先创建一个XMLDocument对象,并通过调用LoadFile(方法加载名为"example.xml"的XML文件。
然后,通过调用RootElement(方法获取根元素,并进行进一步处理。
3.遍历XML元素要遍历XML元素,可以使用TiXmlElement类的NextSiblingElement(和FirstChildElement(方法。
NextSiblingElement(方法返回下一个同级元素,而FirstChildElement(方法返回第一个子元素。
以下是一个遍历XML元素的示例:```cppTiXmlElement* element = root->FirstChildElement(;while (element)//处理元素//...element = element->NextSiblingElement(;```在上面的示例中,首先通过调用FirstChildElement(方法获取第一个子元素,然后使用一个循环遍历所有同级元素。
TinyXML入门教程 1什么是XML? 1文档类 2创建文档对象 3输出文档对象 3保存文档对象 4返回第一个根元素 5声明类 5注释类 6元素类 6节点名 6父节点 6子节点 7编辑子节点 7同级节点 7遍历元素 8元素属性 8元素函数总结 9属性类 10文章下载源代码下载什么是XML?XML全称EXtensible Markup Language,翻译为可扩展标记语言,简而言之就是你可以自定义数据的标识,以此来区分各种不同的数据,以便于进行数据交换,例如html就可以理解为一种简单的xml语言。
XML文件通常就是一个文本文件,可以使用任何编码上图就是我系统中一个xml文件的图标,使用VC2005打开它,你可以看到如下内容:XML也是有这几个对象组成了,一般来说我们经常使用的类如下:l TiXmlDocument:文档类,它代表了整个xml文件。
l TiXmlDeclaration:声明类,它表示文件的声明部分,如上图所示。
l TiXmlComment:注释类,它表示文件的注释部分,如上图所示。
l TiXmlElement:元素类,它是文件的主要部分,并且支持嵌套结构,一般使用这种结构来分类的存储信息,它可以包含属性类和文本类,如上图所示。
n TiXmlAttribute/TiXmlAttributeSet:元素属性,它一般嵌套在元素中,用于记录此元素的一些属性,如上图所示。
n TiXmlText:文本对象,它嵌套在某个元素内部,如上图所示。
TinyXml使用文档对象模型(DOM)来解析xml文件,这种模型的处理方式为在分析时,一次性的将整个XML文档进行分析,并在内存中形成对应的树结构,同时,向用户提供一系列的接口来访问和编辑该树结构。
这种方式占用内存大,但可以给用户提供一个面向对象的访问接口,对用户更为友好,非常方便用户使用。
下面我们依次来介绍各个类的用法。
文档类文档类代表一个XML文档,通过它,你可以保存,载入和打印输出文档。
TinyXml使用说明1. 安装和引入TinyXml库2.创建XML文档使用TinyXml,你可以创建一个XML文档对象。
首先,包含头文件`tinyxml.h`。
```cpp#include "tinyxml.h"```然后,通过使用 `TiXmlDocument` 类来创建一个XML文档对象。
```cppTiXmlDocument doc;```3.加载和保存XML文档一旦你创建了一个XML文档对象,你就可以加载一个XML文件或字符串,并将其保存为XML文件。
-加载XML文件:```cppbool loadSuccess = doc.LoadFile("example.xml");if (loadSuccess)//文件加载成功,可以对其进行处理} else//文件加载失败,进行错误处理}```-加载XML字符串:```cppconst char* xmlString ="<root><element>value</element></root>";bool loadSuccess = doc.Parse(xmlString);if (loadSuccess)//字符串解析成功,可以对其进行处理} else//字符串解析失败,进行错误处理}```-保存XML文档:```cppdoc.SaveFile("output.xml");```4.获取XML元素使用TinyXml,你可以获取XML文档中的元素和属性。
首先,你需要获取XML文档的根元素。
```cppTiXmlElement* root = doc.RootElement(;```接下来,你可以使用 `TiXmlElement` 类的成员函数来获取元素的名称、值和属性。
-获取元素的名称和值:```cppconst char* elementName = root->Value(;const char* elementValue = root->GetText(;```-获取元素的属性:```cppconst char* attributeName = root->Attribute("name");```5.遍历XML元素使用TinyXml,你可以遍历XML文档中的元素和属性,并对其进行处理。
从文件中载入XML将文件载入到TinyXML DOM的最简单方法是:TiXmlDocument doc( "demo.xml" );doc.LoadFile();下面的代码更实用一些,它载入文件并在STDOUT里显示内容:// 载入文件并输出到STDOUTvoid dump_to_stdout(const char* pFilename){TiXmlDocument doc(pFilename);bool loadOkay = doc.LoadFile();if (loadOkay){printf(" %s: ", pFilename);dump_to_stdout( &doc ); // 此函数在后文定义}else{printf("Failed to load file \"%s\" ", pFilename);}}在main函数中使用这个函数的简单示例:int main(void){dump_to_stdout("example1.xml");return 0;}你可以用这个XML来测试上面的代码:<?xml version="1.0" ?><Hello>World</Hello>这段程序会在控制台中输入如下信息:DOCUMENT+ DECLARATION+ ELEMENT Hello+ TEXT[World]dump_to_stdout函数定义在本文后面,你可以参考它来了解怎样递归遍历DOM。
用代码生成XML文件下面的代码可以生成上例中的XML文件:void build_simple_doc( ){// Make xml: <?xml ..><Hello>World</Hello>TiXmlDocument doc;TiXmlDeclaration * decl = new TiXmlDeclaration( "1.0", "", "" ); TiXmlElement * element = new TiXmlElement( "Hello" );TiXmlText * text = new TiXmlText( "World" );element->LinkEndChild( text );doc.LinkEndChild( decl );doc.LinkEndChild( element );doc.SaveFile( "madeByHand.xml" );生成的XML文件与之前“拷贝\粘贴”的文件没有区别,同样可以被dump_to_stdout函数处理:dump_to_stdout("madeByHand.xml"); // 此函数在后文定义并且输出同样的结果:madeByHand.xml:Document+ Declaration+ Element [Hello]+ Text: [World]下面这个代码生成完全一样的XML DOM,只是改变了一下节点的生成和链接顺序:void write_simple_doc2( ){// 与write_simple_doc相同,只是尽早链接节点而已TiXmlDocument doc;TiXmlDeclaration * decl = new TiXmlDeclaration( "1.0", "", "" );doc.LinkEndChild( decl );TiXmlElement * element = new TiXmlElement( "Hello" );doc.LinkEndChild( element );TiXmlText * text = new TiXmlText( "World" );element->LinkEndChild( text );doc.SaveFile( "madeByHand2.xml" );}属性为给定的节点设置属性很简单:window = new TiXmlElement( "Demo" );window->SetAttribute("name", "Circle");window->SetAttribute("x", 5);window->SetAttribute("y", 15);window->SetDoubleAttribute("radius", 3.14159);如果愿意,你也可以使用TiXmlAttribute对象。
TinyXML中文文档译注:本文是TinyXML 2.5.2版本Document的中文文档,经原作者Lee Thomason同意由hansen翻译,如有误译或者错漏,欢迎指正。
版权:版权归原作者所有,翻译文档版权归本人hansen所有,转载请注明出处。
原文:/tinyxmldocs/index.htmlTinyXml 文档2.5.2TinyXMLTinyXML是一个简单小巧,可以很容易集成到其它程序中的C++ XML解析器。
它能做些什么简单地说,TinyXML解析一个XML文档并由此生成一个可读可修改可保存的文档对象模型(DOM)。
XML的意思是―可扩展标记语言―(eXtensible Markup Language)。
它允许你创建你自己的文档标记。
在为浏览器标记文档方面HTML做得很好,然而XML允许你定义任何文档标记,比如可以为一个组织者应用程序定义一个描述―to do‖列表的文档。
XML拥有一个结构化并且方便的格式,所有为存储应用程序数据而创建的随机文件格式都可以用XML代替,而这一切只需要一个解析器。
最全面正确的说明可以在/TR/2004/REC-xml-20040204/找到,但坦白地说,它很晦涩难懂。
事实上我喜欢/xml/tutorial上关于XML的介绍。
有不同的方法可以访问和与XML数据进行交互。
TinyXML使用文档对象模型(DOM),这意味着XML数据被解析成一个可被浏览和操作的C++对象,然后它可以被写到磁盘或者另一个输出流中。
你也可以把C++对象构造成一个XML文档然后把它写到磁盘或者另一个输出流中。
TinyXML被设计得容易快速上手。
它只有两个头文件和四个cpp文件。
只需要把它们简单地加到你的项目中就行了。
有一个例子文件——xmltest.cpp来引导你该怎么做。
TinyXML以Zlib许可来发布,所以你可以在开源或者商业软件中使用它。
许可证更具体的描述在每个源代码文件的顶部可以找到。
TinyXML 指南注:本文是 TinyXML 2.5.3 版本 Document 中的《TinyXML Tutorial》的翻译文档,由本人Dennis.Gao 翻译,版权归原作者所有,转载本文档请注明出处。
原文出自 TinyXML 源码包doc 目录。
在线文档:/tinyxmldocs/tutorial0.htmlAuthor :Dennis.GaoDate : 2008.01.01这是什么?本指南就如何有效的使用 TinyXML 提供一些窍门和建议。
这里也会包括一些 C++ 的窍门,像如何在字符串和整数之间进行转换。
这和 TinyXML 本身并没有任何关系,但是它会对你的工程有所帮助,所以我把它写了进来。
如果你不知道 C++ 的基本概念,那么本指南对你没有任何用处。
同样,如果你不知道 DOM 是什么,先在别的地方学习一下吧。
开始之前一些 XML 数据集/文件将会被用到:example1.xml:example2.xml:example3.xml:example4.xml:开始起步从文件加载XML将一个文件加载到 TinyXML DOM 中的最简单方法:下面是一个更实际的用法。
它会加载文件并在标准输出中显示文件内容:这是在main() 函数中使用这个函数的简单示例:运行这个程序就可以将 XML 文件显示在控制台或 DOS 窗口中:在本指南的后面会给出 dump_to_stdout() 函数的定义,它对你了解如何递归遍历一个 DOM 十分有用。
通过编程建立XML 文档下面的函数可以建立 Example 1 文档:可以通过下面的调用来加载文件并将它显示在控制台上:你会发现它和 Example 1 是完全一样的:下面这段代码通过节点的建立和连接的不同顺序生成一个完全相同的 XML DOM :void write_simple_doc2(){// same as write_simple_doc1 but add each node// as early as possible into the tree.TiXmlDocument doc;TiXmlDeclaration * decl =new TiXmlDeclaration("1.0","", "");doc.LinkEndChild( decl );TiXmlElement * element =new TiXmlElement("Hello");doc.LinkEndChild( element );TiXmlText * text =new TiXmlText("World");element->LinkEndChild( text );doc.SaveFile("madeByHand2.xml");}也就是这种结构形式:属性很简单就可以给一个已经存在的节点设置属性:你也可以使用 TiXmlAttribute 对象来做这件事。
下面这段代码给出了一种(并非仅此一种)如何得到一个元素的所有属性,然后打印出名字和字符串值的方法,并且,如果这些值可以转换成整形或浮点型,那么把他们也打印出来:将文档写入文件将建立好的DOM 写入一个文件很简单:回想一下 example 4:下面的函数用来建立这个 DOM 并把它写进一份名为 "appsettings.xml" 的文件中:void write_app_settings_doc(){TiXmlDocument doc;TiXmlElement* msg;TiXmlDeclaration* decl =new TiXmlDeclaration("1.0","", "");doc.LinkEndChild( decl );TiXmlElement * root =new TiXmlElement("MyApp");doc.LinkEndChild( root );TiXmlComment * comment =new TiXmlComment();comment->SetValue(" Settings for MyApp ");root->LinkEndChild( comment );TiXmlElement * msgs =new TiXmlElement("Messages");root->LinkEndChild( msgs );msg =new TiXmlElement("Welcome");msg->LinkEndChild(new TiXmlText("Welcome to MyApp")); msgs->LinkEndChild( msg );msg =new TiXmlElement("Farewell");msg->LinkEndChild(new TiXmlText("Thank you for using MyApp"));msgs->LinkEndChild( msg );TiXmlElement * windows =new TiXmlElement("Windows"); root->LinkEndChild( windows );TiXmlElement * window;window =new TiXmlElement("Window");windows->LinkEndChild( window );window->SetAttribute("name","MainFrame");window->SetAttribute("x", 5);window->SetAttribute("y", 15);window->SetAttribute("w", 400);window->SetAttribute("h", 250);TiXmlElement * cxn =new TiXmlElement("Connection");root->LinkEndChild( cxn );cxn->SetAttribute("ip","192.168.0.1");cxn->SetDoubleAttribute("timeout", 123.456);// floating point attribdump_to_stdout(&doc );doc.SaveFile("appsettings.xml");}通过 dump_to_stdout() 函数可以显示这个结构:+ Comment: [ Settings for MyApp ]+ Element [Messages](No attributes)+ Element [Welcome](No attributes)+ Text: [Welcome to MyApp]+ Element [Farewell](No attributes)+ Text: [Thank you for using MyApp]+ Element [Windows](No attributes)+ Element [Window]+ name: value=[MainFrame]+ x: value=[5] int=5 d=5.0+ y: value=[15] int=15 d=15.0+ w: value=[400] int=400 d=400.0+ h: value=[250] int=250 d=250.05 attributes+ Element [Connection]+ ip: value=[192.168.0.1] int=192 d=192.2+ timeout: value=[123.456000] int=123 d=123.52 attributes很高兴在默认的情况下, TinyXml 用其他的 API 所谓的“优美”格式来写 XML ,它修改元素文字的空白,然后用嵌套层次的方式显示这棵树。
我没有注意到在写文件的时候是否有办法关掉缩排,但是这肯定很容易。
[ Lee:在 STL 模式下很容易,只要使用 cout << myDoc 就可以了。
非 STL 模式通常是“优美”格式的。
加入一个“开关”会是一个不错的特性,并且已经这么做了。
]XML 与C++ 对象之间的转换介绍这个示例假定你正要加载你的应用设置并把它们保存在 XML 文件中,就像 example4.xml 那样。
有许多办法可以完成这件事。
例如,看一看 TinyBind 这个工程,你可以在这里找到它:/projects/tinybind本节给出一个使用 XML 来加载并保存一个基本的对象结构的浅显易懂的方法。
建立你的对象类先从下面的这些基类入手:#include<string>#include<map>using namespace std;typedef std::map<std::string,std::string> MessageMap;// a basic window abstraction - demo purposes onlyclass WindowSettings{public:int x,y,w,h;string name;WindowSettings(): x(0), y(0), w(100), h(100), name("Untitled") {}WindowSettings(int x,int y,int w,int h,const string& name) {this->x=x;this->y=y;this->w=w;this->h=h;this->name=name;}};class ConnectionSettings{public:string ip;double timeout;};class AppSettings{public:string m_name;MessageMap m_messages;list<WindowSettings> m_windows; ConnectionSettings m_connection;AppSettings(){}void save(const char* pFilename);void load(const char* pFilename);// just to show how to do itvoid setDemoValues()这是一个简化的 main() 函数,它演示了如何建立一个默认设置的树的对象,保存它以及重新载入它:下面这个 main() 函数演示了如何建立,修改,保存,还有加载一个结构体:settings.m_messages["Welcome"]="Don't Panic";settings.m_messages["Farewell"]="Thanks for all the fish";settings.m_windows.push_back(WindowSettings(15,25,300 ,250,"BookFrame"));settings.m_connection.ip="192.168.0.77";settings.m_connection.timeout=42.0;settings.save("appsettings2.xml");}// block: load settings{AppSettings settings;settings.load("appsettings2.xml");printf("%s: %s\n", settings.m_name.c_str(),settings.m_messages["Welcome"].c_str());WindowSettings & w=settings.m_windows.front();printf("%s: Show window '%s' at %d,%d (%d x %d)\n", settings.m_name.c_str(), .c_str(), w.x, w.y, w.w, w.h);printf("%s: %s\n", settings.m_name.c_str(),settings.m_messages["Farewell"].c_str());}return 0;}编码为XML有许多不同的方法来解决如何将它(一个结构体)保存在文件中。