
Modeling a Head in C4D
Jannis Labelle
Email Address
Labelle Art, London, England
?2003 Jannis Labelle and https://www.doczj.com/doc/9914432525.html,. All rights are reserved.
Article Focus:
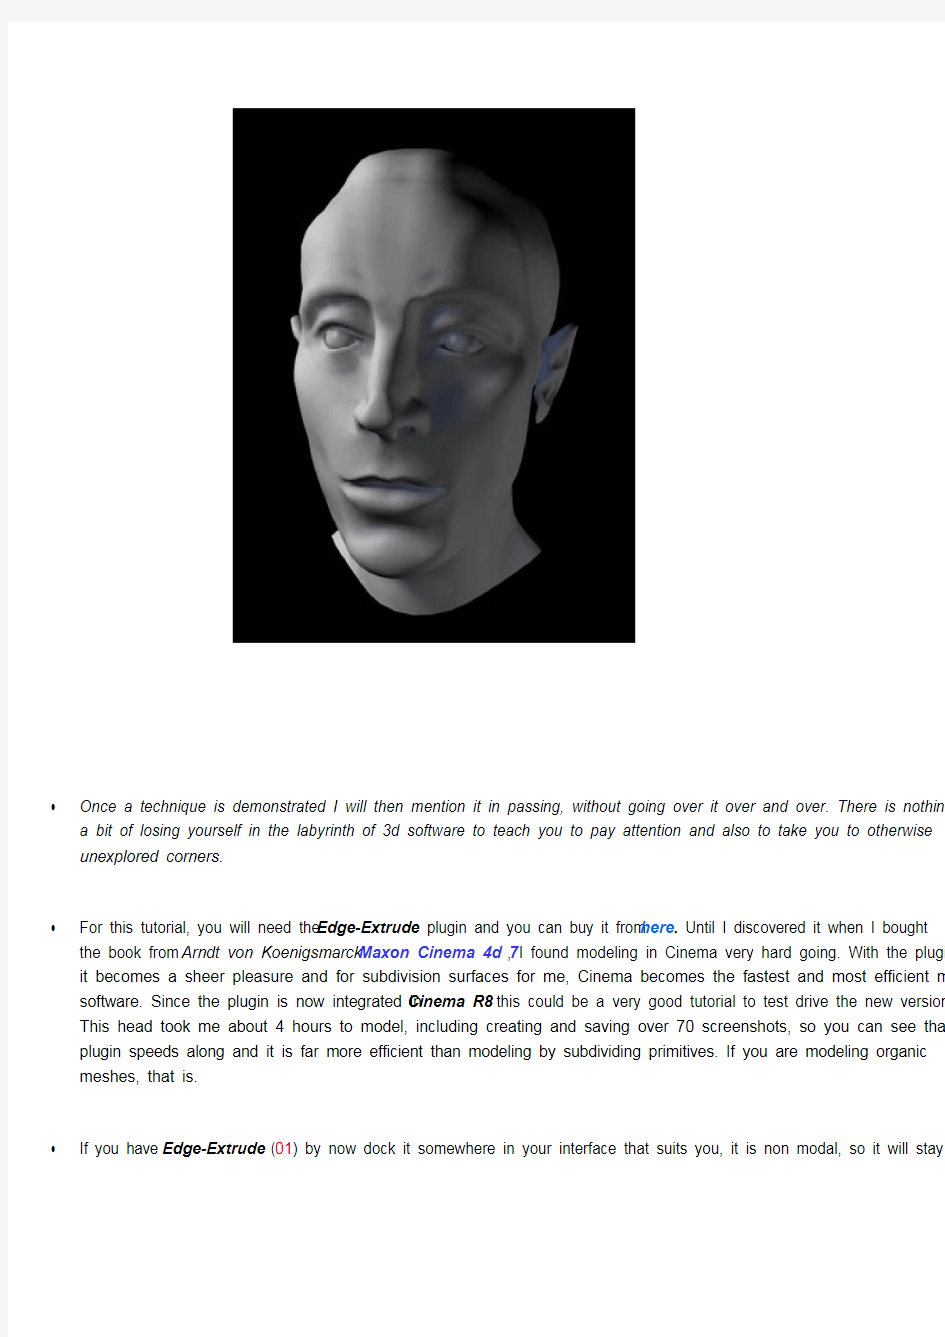
In this tutorial, Jannis Labelle demonstrates modeling a head using the Edge-Extrude plugin. This is a tutorial for intermediate or advanced Modelers with Cinema 4D who already have an understanding of the modeling capabilities of the software, although enthusiastic beginners can follow also with a little bit of perseverance. Jannis has tried to include as many screen shots as possible and tries to make the instructions clear and let the pictures talk for themselves. This technique can also be easily followed with any program that can extrude edges, like Maya for instance.
Jannis has included a file of the head mesh for you to download here and use as you wish. If you do use this mesh a small mention will be appreciated.
Once a technique is demonstrated I will then mention it in passing, without going over it over and over. There is nothing like
a bit of losing yourself in the labyrinth of 3d software to teach you to pay attention and also to take you to otherwise
unexplored corners.
For this tutorial, you will need the Edge-Extrude plugin and you can buy it from here. Until I discovered it when I bought the book from Arndt von Koenigsmarck Maxon Cinema 4d 7, I found modeling in Cinema very hard going. With the plugin it becomes a sheer pleasure and for subdivision surfaces for me, Cinema becomes the fastest and most efficient modeling software. Since the plugin is now integrated in Cinema R8 this could be a very good tutorial to test drive the new version.
This head took me about 4 hours to model, including creating and saving over 70 screenshots, so you can see that the plugin speeds along and it is far more efficient than modeling by subdividing primitives. If you are modeling organic meshes, that is.
If you have Edge-Extrude (01) by now dock it somewhere in your interface that suits you, it is non modal, so it will stay
open after every operation. OK.. Presuming you have the plugin or you have R8, (better still), let's start with the tutorial.
01
I have adjusted two images in Photoshop so that all the main features are aligned. One for the front view and one for the
profile. I have used the image of a sculpture head because it allows you into the knowledge that a sculptor has of the
contours of the human face. Photographs on the other hand don't give you that, so it is good to study how surfaces have been put together by a sculptor if you really want to produce high class meshes.
0203
Click on the images(02) (03) to bring up the larger versions. Then right-click on the images and choose 'save image as'.
Save them as jpg and then open up Cinema.
1.In the XY view click edit then configure and choose path.. to navigate to where you have saved the pictures(04), making
sure that they are saved in the same folder as the Cinema file and choose Front_Face.jpg.
2.Make sure also that both the horizontal and vertical size are set to 800 m, this maintains the original ratio of the pictures.
3.Do the same with the YZ view but this time choose Profil.jpg
Now you are set and are ready to model, so click on to the next page to start modeling the eyes.
04
This tutorial is divided into five parts, you can either do them sequentially or if there is a particular part that interests you, you can jump directly into that part. This whole tutorial is made so that you can print it out and study it at your leisure away from the screen (something I would strongly advise) and then come back and do it, or you can follow it from the screen.
If you want to print it, in your Browser go to File, Print Preview, make sure the pages print OK and then press Print. Of course you will have to do this with all five parts.
Part 1: Modeling the Eye
01In Cinema have the background pictures side to side on the YZ and XY views (01)
This is optional, but go to snap options and disable world
grid --this stops the world grid from getting in the way when you want to see your mesh in wireframe, something I find I need to do often.
02From Objects get a Polygon object , than
from Objects, Modeling get
a Symmetry object and further down from Nurbs get a HyperNurb(02).
If you have the Supernurb plugin, which I recommend, use that instead. You can
get Supernurb from here.
Again if you working with R8 this is integrated in the new version. Your object manager should look like picture 02
03In the full face view create a ring of points(03), making sure you have four points to describe the tear duct in the corner of the eye.
04
05
You will do this by
choosing points mode (04)and
then right clicking in the view and
choosing, add points (05)
06Add another ring of points this time a little larger(06). You can do this by either using the add points tool again or by selecting the first ring of points then going to the structure manager and choose, copy then paste and then using the scale tool scale the new ring accordingly.
Now using the Bridge tool, you can see it in (05) underneath
the Add points tool, create a ring of polygons.
If you don't know how to use
the Bridge tool now is the time to have a break look in your manual how it is used and then come back.
07Now it is time to use the Extrude Edge plugin. It starts to work once you have polygons created this is why we had to make the first polys with the Bridge tool.
Select the outer of the two points ring (06) and on the plugin click on Create (08)leaving all other settings at their default.Scale the second ring of polys in order to see them.
Using the profil picture move the points around in order to create the curved shape of the eye.
Create a primitive
sphere (07)and use it as a reference in Perspective view to shape the eyelids properly.
08
09If you are happy with the eye curvature, still in points mode, with the Bridge tool close the hole of the eye socket (09).
10Select all the new polys you have created and extrude them a small step inwards(10). You have to be in Polygon mode for this (04).
You will find the Extrude tool in the same right click menu as
the Bridge tool.
11
Holding down control key deselect
the tear duct poly and extrude
once more to create the little step
for the tear duct.
Delete the selected polys making
sure you don't delete the tear duct
poly(11).
12
13A good tip here is to use
the Object Axis tool which is the bottom icon on (13) to move the pivot point of the object. This will enable you to rotate the eye much better. At the moment the pivot point as you can see in(12) is too far away.
In (13) I have moved in the center of the eye so I can manipulate the mesh much better. I will be using this technique allot so keep this in mind if you see the Object
Axis moving around in this tutorial.
14Create another ring of polys by again selecting the outer ring of points in point mode and using the Extrude Edge plugin press create. Once again scale the new points and using the background pictures as reference adjust them accordingly.
You can use (14) as a visual aid towards what you should be aiming.
Now select all the polys and go
to Selection, Set Selection(15). You will see a selection tag in
the Object manager.
Selection tags are very useful for many reasons and they are used a lot in modeling. They help to hide and unhide parts of your mesh in order to get to some tricky areas and also they are very useful in animation and texturing.
Double click on the tag and give
the name Eye.
If you have not used these tags
before play with the options to
Hide and Unhide the mesh and so
on.
This concludes the Eye tutorial. If you have done it to a degree that satisfies you, give yourself a pat on the back. Even if you struggled through it, give yourself a pat, because you have learned a lot. In any case go out for a coffee before you start on the nose tutorial.
Part 2: Nose Tutorial
01
Welcome back. I hope you are refreshed and
you are ready for the next session. So let's
get cracking.
This is as far as we have got so far(01).
02
In the Profile view trace the outline of the
nose creating points with the add points tool.
(Remember? Contro l click, add points)(02).
Make sure they are placed in the center line
and that you are not getting a gap when you
turn the Symmetry on.
If you do, you might have to change the Weld
points input to a higher number (03)
03
04Copy and paste these points using
the Structure manager Edit menu and move them so that you create the ridge of the nose.
Use the Bridge tool to create the new polys and move them to match the shape of the ridge of the nose(04).
05In the Perspective view select the three top points and Extrude Edge them and using the references images move them close to the eye shaping them in anticipation of one more extrusion(05).
06Using the Bridge tool bridge create the two polys that will connect the nose to the eyes(06)
07Select and Edge Extrude the six polys as indicated (07), move them in line with the other polys and Weld them.
You can use the Weld tool found in the right click menu, or better still, go and get the Weld Center plugin from here. This plugin is more efficient than the native Cinema tool.
08Select the three points on the tip of the nostril and Edge Extrude them three times, adjusting them each time to the shape of the image (08)
09Select points 1 and 2 and Edge
Extrude them downwards, then select 2 and 3 and extrude them sideways twice.
Then, as in the picture, weld the two points together to form closed hole of the nostril(09).
10With the Bridge tool close the gap of the nostril(10) and Weld any points that need welding.
11Select the polys that make up the nostril
and Extrude them inwards twice to create the nostril properly(11).
From here on you have to go into points mode from time to time to adjust your modeling so that it conforms to the reference.
12Select the three points as shown(12)
and Edge Extrude them, then weld them to the appropriate points to finish the nose.
13Double click on the selection tag of
the Eye and select Hide Polygons. This should leave you only the nose polys in the views.
Make sure the Eye selection tag is not selected by selecting another tag
(a smoothing tag for instance) and then choose Edit, Select All.
When all the nose polys are selected choose Selection,Set Selection to create a new selection tag(13).
14Double click on the new Selection tag and name it, wait for it... Nose(14).
This concludes the Nose tutorial and as you can see the modeling is flowing very easy with the Edge Extrude. If you have tried to model by using the cutter and primitives you can see that this is a faster and much more intuitive way to model.
Part Three: Modeling the Mouth
01This is the stage we have reached so far.
Because we want to be able to animate the Head at a later stage we will not only model the mouth in this part but also the inner mouth.
02With the Add Points tool create a row of points where the lips meet and again copy and paste them.
Move the new row of points upwards and shape the two rows in the shape of the upper lip.
With the Bridge tool create a line of polys(02).
03Repeat the same steps as above to create the bottom lip, adding points and bridging them.
This time Edge Extrude the three points as shown and then move both the top and bottom lips inner points inwards to create the slope of the lips(03).
Also using the reference images shape them into the curve of the mouth.
04Now Weld the two points that form the corner of the mouth(04) and then move the two outer points in preparation to Bridge them (05).
05Although is not a good idea to have too may triangles in your mesh, one or two are permitted.
In this case in particular the mesh works much better with a triangle than a quad in this position.
06
Choosing the top row of points Edge Extrude them
only slightly up to make the thin defining line of the
top lip.
Extrude a couple more times and then Bridge to
connect the mesh(06).
Make sure that from time to time you are adjusting
the points to fit your reference images.
07
Select the points shown and Edge Extrude them to
the left, adjust them and then Weld them.
08
This finishes more or less the main shape of the
lips(08).
09Now to make the inner mouth. Double click on the Eye and Nose selection set tags and hide them to make yourself more room.
Select the inner ring of points and Edge
Extrude them inwards(09).
10You want to make the shape of a bubble for the inner mouth so with every extrusion scale the points to create that shape (10).
11Once you have reached the back of the mouth scale the points down and the Weld them to close the cavity(11)
Make two new Selection Sets one for the Mouth and one for the Inner Mouth, call them something appropriate like.... Mouth and Inner Mouth and then you are finished with the mouth tutorial.
In the next part we will be finishing the whole head. So go for a walk or a drink or any activity that will take you away from the screen for a little while.
Actually a long while....
Part Four: Finishing the Head
01OK. This is as far as we have reached. The inner mouth is hidden to make things easier.
In this part we will be using some techniques that maybe you have not used before, but which will hopefully become a welcome addition to your modeling range. A lot of the time when modeling with extrusions we have to delete unwanted polys and weld new gaps.
On the other hand, if you use the following methods you might find that your modeling technique will become more intuitive.
Enough words lets get cracking.
02Select the three points as shown and Edge Extrude them twice(02)
03Follow (03), (04), (05), and create an Edge Loop from the chin to the corner of the eye.
04I nstead of modeling row upon row of polygons with this technique we are literally following the structure of the head, modeling along the line of the jaw.
05This has got many advantages.
Your meshes looks more real, the workflow is less messy and it animates better.
The only thing is it requires that you have a good understanding of Anatomy, but then modeling in every form always did, whether traditional or computer generated.
Let's face it, this is no different to sculpture. In fact it is sculpture!
06OK, if you have progressed this far you don't need me to hold your hand any longer.
Using Edge Extrude, Bridge and Add Points follow (06) (07) (08) and fill the rest of the face.
0708