路由知识 Cisco路由器auto secure命令总结
- 格式:doc
- 大小:26.00 KB
- 文档页数:3

问题与解答CISCO IOS 软件版本 12.3T问题:什么类型的客户会对部署 Cisco IOS®软件版本 12.3T 感兴趣?解答:思科建议需要实现以下目标的“企业”、“接入”和“服务提供商集团”客户使用版本 12.3T:• 通过增强安全性、提高分支机构的语音质量和功能性以及增强“服务质量”(QoS) 提高企业的生产率• 部署或升级 IPv6、NetFlow 以及相关管理功能• 部署需要安全互联网接入和企业网络连接的小型远程办公室和远程工作者• 实现新的内容分发功能、网络语音增强功能、改进的安全性以及有效的管理与部署工具问题:客户可以从哪里下载版本 12.3T?解答:访问 上的软件中心以下载任何版本的产品。
要下载版本 12.3T,请登录至 并访问:/kobayashi/library/12.3/index.shtml该网站还提供了 Cisco IOS 软件的软硬件兼容性与订购过程方面的有用信息。
请确保您已具备有效的 SMARTnet 合同或购买功能许可授权,以便访问和下载版本。
问题:部署版本 12.3T 有任何相关的特殊内存需求吗?解答:在安装 12.3T 之前,请咨询“Cisco IOS 升级规划人员”,了解内存需求。
因为内存需求取决于硬件产品和选择的映像特性集。
/go/iosplannerCisco IOS 软件版本的类型问题:版本 12.3T 是哪类版本?解答:版本 12.3T 是一个新技术版本 (T),综合了主版本 12.3的功能、新功能、硬件支持以及特定应用版本。
问题:主版本与新技术版本之间有什么关系?解答:主版本合并了自前一版本系列后推出的所有新技术版本。
例如,主版本 12.3 合并了版本 12.2T 系列的所有功能和硬件支持。
主版本定期进行软件缺陷修复,但不加入新功能或硬件支持。
新技术版本派生于主版本,并使用相同的编号。
例如,版本 12.3T 派生于主版本 12.3。

Cisco SSL VPN 配置实例一、网络拓扑图二、SSL VPN Server 配置 软件版本:Cisco IOS Software, 7200 Software (C7200-ADVSECURITYK9-M), Version 12.4(9)T1, RELEASE SOFTWARE (fc2)VPN 客户端软件:sslclient-win-1.1.2.169.pkg1、格式化disk0R1#format disk0:Format operation may take a while. Continue? [confirm]Format operation will destroy all data in "disk0:". Continue? [confirm] Format: Drive communication & 1st Sector Write OK... Writing Monlib sectors................................................................................................................................................Monlib write completeFormat: All system sectors written. OK...Format: Total sectors in formatted partition: 8009 Format: Total bytes in formatted partition: 4100608 Format: Operation completed successfully.Format of disk0 complete2、上传软件R1#copy tftp disk0:Address or name of remote host []? 192.168.10.100 Source filename []? sslclient-win-1.1.2.169.pkg制作:张选波Destination filename [sslclient-win-1.1.2.169.pkg]?Accessing tftp://192.168.10.100/sslclient-win-1.1.2.169.pkg...Loading sslclient-win-1.1.2.169.pkg from 192.168.10.100 (via FastEthernet0/0): !! [OK - 415090 bytes]415090 bytes copied in 12.892 secs (32197 bytes/sec)3、安装client 软件R1(config)#webvpn install svc disk0:/sslclient-win-1.1.2.169.pkg SSLVPN Package SSL-VPN-Client : installed successfully4、配置SSL VPNR1(config)# aaa new-modelR1(config)# aaa authentication login default local R1(config))# aaa authentication login webvpn local R1(config)# username user1 password 123 R1(config))# webvpn gateway vpngatewayR1 (config-webvpn-gateway)# ip address 192.168.10.10 port 443 R1 (config-webvpn-gateway)# inservice R1 (config)# webvpn context webcontextR1 (config-webvpn-context)# gateway vpngateway domain sshvpn R1 (config-webvpn-context)# aaa authentication list webvpn R1 (config-webvpn-context)# inserviceR1(config)# ip local pool ssl-add 11.1.1.10 11.1.1.20 R1(config)# webvpn context webcontextR1(config-webvpn-context)# policy group sslvpn-policy R1(config-webvpn-group)# functions svc-enabled R1(config-webvpn-group)# svc address-pool ssl-addR1(config-webvpn-group)# svc split include 192.168.20.0 255.255.255.0 R1(config-webvpn-group)#exitR1(config-webvpn-context)# default-group-policy sslvpn-policy5、完整配置R1#show running-config Building configuration...Current configuration : 3223 bytes !version 12.4service timestamps debug datetime msec service timestamps log datetime msec no service password-encryption !制作:张选波hostname R1 !boot-start-marker boot-end-marker ! !aaa new-model ! !aaa authentication login default local aaa authentication login webvpn local !aaa session-id common !resource policy ! ip cef ! ! !crypto pki trustpoint TP-self-signed-4294967295 enrollment selfsigned subject-name cn=IOS-Self-Signed-Certificate-4294967295 revocation-check none rsakeypair TP-self-signed-4294967295 ! !crypto pki certificate chain TP-self-signed-4294967295 certificate self-signed 013082023A 308201A3 A0030201 02020101 300D0609 2A864886 F70D0101 04050030 31312F30 2D060355 04031326 494F532D 53656C66 2D536967 6E65642D 43657274 69666963 6174652D 34323934 39363732 3935301E 170D3038 31323135 31393039 30335A17 0D323030 31303130 30303030 305A3031 312F302D 06035504 03132649 4F532D53 656C662D 5369676E 65642D43 65727469 66696361 74652D34 32393439 36373239 3530819F 300D0609 2A864886 F70D0101 01050003 818D0030 81890281 8100C6F2 B499879D 1CEB3638 BA59B459 A72167BB FDD2CD73 3E3E6FB6 D1347E43 8CC21C65 BAC01E28 50013497 71CF8062 C54F254C A6DB2D5A CDDB864D CFF71A50 F3C20566 1405E49B 18CE2DAB 469C58E8 5B4A1FD6 59DCBCA5 12A34543 4F6842B6 24B9A7BD CE36E98A A5463EB3 2D2C5BC0 FAA247C1 E44DB455 4537465F 18895A1466D10203 010001A3 62306030 0F060355 1D130101 FF040530 030101FF 300D0603制作:张选波551D1104 06300482 02523130 1F060355 1D230418 30168014 9F7F1B46 F6903BC5 803F4AD7 2433EBD0 5813E29D 301D0603 551D0E04 1604149F 7F1B46F6 903BC580 3F4AD724 33EBD058 13E29D30 0D06092A 864886F7 0D010104 05000381 81002516 3F75E2AA 33544113 9A9179DB DFED2529 DF5A972F C2BFDE0E 0279D1F5 8D30CAC7 59BE79C6 85825281 AB2D0B08 2CA84D01 85A4DB19 8977BC82 9E59F764 ADE75E22 9A7FF37A 9D83819A 2287BE75 773FAA32 D38DD3C2 2C0DF23F 7D45D7A3 E8006C1A 6B9E0540 12483241 6EEAA0FF B31240F3 94044BCB 75210037 FEF5AD15 F49B quitusername user1 password 0 123 ! ! ! ! ! !interface Loopback0ip address 11.1.1.1 255.255.255.0 !interface FastEthernet0/0ip address 192.168.10.10 255.255.255.0 duplex half !interface Serial1/0ip address 10.1.1.1 255.255.255.0 serial restart-delay 0 !interface Serial1/1 no ip address shutdownserial restart-delay 0 !interface Serial1/2 no ip address shutdownserial restart-delay 0 !interface Serial1/3 no ip address shutdown制作:张选波serial restart-delay 0 ! router rip version 2 network 10.0.0.0 network 11.0.0.0 network 192.168.10.0 no auto-summary !ip local pool ssl-add 11.1.1.10 11.1.1.20 no ip http serverno ip http secure-server ! ! !logging alarm informational ! ! ! ! !control-plane ! !line con 0exec-timeout 0 0 stopbits 1 line aux 0 stopbits 1 line vty 0 4 ! !webvpn gateway vpngatewayip address 192.168.10.10 port 443 ssl trustpoint TP-self-signed-4294967295 inservice !webvpn install svc disk0:/webvpn/svc.pkg !webvpn context webcontext ssl authenticate verify all ! !policy group sslvpn-policy制作:张选波functions svc-enabled svc address-pool "ssl-add"svc split include 192.168.20.0 255.255.255.0 default-group-policy sslvpn-policy aaa authentication list webvpngateway vpngateway domain sshvpn inservice ! ! endR2#show running-config Building configuration...Current configuration : 973 bytes !version 12.4service timestamps debug datetime msec service timestamps log datetime msec no service password-encryption !hostname R2 !boot-start-marker boot-end-marker ! !no aaa new-model !resource policy !ip cef ! ! ! ! ! !interface Loopback1ip address 22.1.1.1 255.255.255.0 !interface FastEthernet0/0ip address 192.168.20.10 255.255.255.0 duplex half制作:张选波!interface Serial1/0ip address 10.1.1.2 255.255.255.252 serial restart-delay 0 !interface Serial1/1 no ip address shutdownserial restart-delay 0 !interface Serial1/2 no ip address shutdownserial restart-delay 0 !interface Serial1/3 no ip address shutdownserial restart-delay 0 !router rip version 2 network 10.0.0.0 network 22.0.0.0 network 192.168.20.0 no auto-summary !no ip http serverno ip http secure-server !! !logging alarm informational ! ! ! ! !control-plane ! !line con 0exec-timeout 0 0 stopbits 1制作:张选波line aux 0 stopbits 1 line vty 0 4 ! ! end三、客户端配置在浏览器中输入https://192.168.10.10/sshvpn 访问WebVPN 。
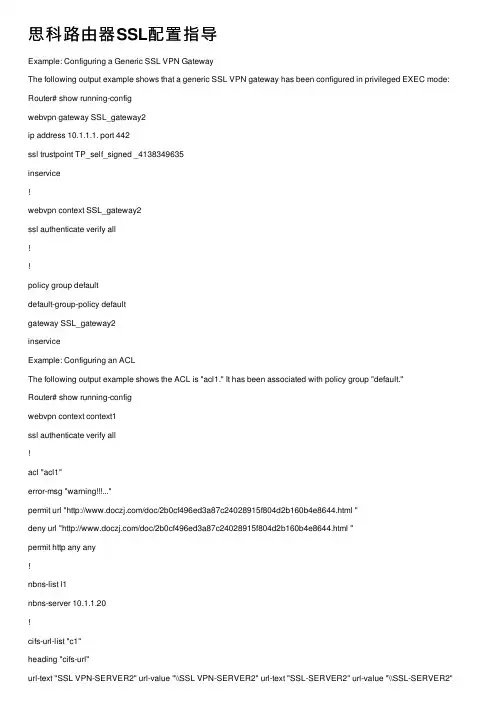
思科路由器SSL配置指导Example: Configuring a Generic SSL VPN GatewayThe following output example shows that a generic SSL VPN gateway has been configured in privileged EXEC mode: Router# show running-configwebvpn gateway SSL_gateway2ip address 10.1.1.1. port 442ssl trustpoint TP_self_signed _4138349635inservice!webvpn context SSL_gateway2ssl authenticate verify all!!policy group defaultdefault-group-policy defaultgateway SSL_gateway2inserviceExample: Configuring an ACLThe following output example shows the ACL is "acl1." It has been associated with policy group "default."Router# show running-configwebvpn context context1ssl authenticate verify all!acl "acl1"error-msg "warning..."permit url "/doc/2b0cf496ed3a87c24028915f804d2b160b4e8644.html "deny url "/doc/2b0cf496ed3a87c24028915f804d2b160b4e8644.html "permit http any any!nbns-list l1nbns-server 10.1.1.20!cifs-url-list "c1"heading "cifs-url"url-text "SSL VPN-SERVER2" url-value "\\SSL VPN-SERVER2" url-text "SSL-SERVER2" url-value "\\SSL-SERVER2"!policy group defaultacl "acl1"cifs-url-list "c1"nbns-list "l1"functions file-accessfunctions file-browsefunctions file-entrydefault-group-policy defaultgateway publicinservice!Example: Configuring HTTP ProxyThe following output example shows that HTTP proxy has been configured and that the portal (home) page from URL "/doc/2b0cf496ed3a87c24028915f804d2b160b4e8644.html " will automatically download the home page of the user:Router# show running-configwebvpn context myContextssl authenticate verify all!!port-forward "email"local-port 20016 remote-server "ssl-server1.SSL/doc/2b0cf496ed3a87c24028915f804d2b160b4e8644.html " remote-port 110description "POP-ssl-server1"!policy group myPolicyport-forward "email" auto-download http-proxy proxy-url"/doc/2b0cf496ed3a87c24028915f804d2b160b4e8644.html "inserviceExample: Configuring Microsoft File Shares for Clientless Remote AccessNBNS Server List ExampleThe following example, starting in global configuration mode, configures a server list for NBNS resolution:Router(config)# webvpn context context1Router(config-webvpn-context)# nbns-list SERVER_LISTRouter(config-webvpn-nbnslist)# nbns-server 172.16.1.1 masterRouter(config-webvpn-nbnslist)# nbns-server 172.16.2.2 timeout 10 retries 5Router(config-webvpn-nbnslist)# nbns-server 172.16.3.3 timeout 10 retries 5Router(config-webvpn-nbnslist)# exitFile Share Permissions ExampleThe following example attaches the server list to and enables full file and network access permissions for policy group ONE: Router(config-webvpn-context)# policy group ONERouter(config-webvpn-group)# nbns-list SERVER_LISTRouter(config-webvpn-group)# functions file-accessRouter(config-webvpn-group)# functions file-browseRouter(config-webvpn-group)# functions file-entryRouter(config-webvpn-group)# endExample: Configuring Citrix Application Support for Clientless Remote AccessThe following example, starting in global configuration mode, enables Citrix application support for remote users with a source IP address in the 192.168.1.0/24 network: Router(config)# access-list 100 permit ip 192.168.1.0 0.255.255.255 any Router(config)# webvpn context context1Router(config-webvpn-context)# policy group ONERouter(config-webvpn-group)# citrix enabledRouter(config-webvpn-group)# filter citrix 100Example: Configuring Application Port ForwardingThe following example, starting in global configuration mode, configures port forwarding for well-known e-mail application port numbers:Router(config)# webvpn context context1Router(config-webvpn-context)# port-forward EMAILRouter(config-webvpn-port-fwd)# local-port 30016 remote-server/doc/2b0cf496ed3a87c24028915f804d2b160b4e8644.htmlremote-port 110 description POP3Router(config-webvpn-port-fwd)# local-port 30017 remote-server/doc/2b0cf496ed3a87c24028915f804d2b160b4e8644.htmlremote-port 25 description SMTPRouter(config-webvpn-port-fwd)# local-port 30018 remote-server/doc/2b0cf496ed3a87c24028915f804d2b160b4e8644.htmlremote-port 143 description IMAPRouter(config-webvpn-port-fwd)# exitRouter(config-webvpn-context)# policy group ONERouter(config-webvpn-group)# port-forward EMAILRouter(config-webvpn-group)# endExample: Configuring VRF VirtualizationThe following example, starting in global configuration mode, associates the VRF under the SSL VPN context configuration: Router(config)# ip vrf vrf1Router(config-vrf)# rd 10.100.100.1:1Router(config-vrf)# exitRouter(config)# webvpn context context1Router(config-webvpn-context)# policy group group1Router(config-webvpn-group)# exitRouter(config-webvpn-context)# default-group-policy policy1Router(config-webvpn-context)# vrf-name vrf2Router(config-webvpn-context)# endNote When you configure the VRF Virtualization feature in Cisco IOS Release 12.4(24)T1 and later releases, the following message is displayed:% IP VRF vrf1 configuration applied.% But please use Virtual-Template to configure VRF.See the "Examples: SSL VPN DVTI Support" section for an example on how to use a virtual template to configure a VRF. Example: RADIUS Accounting for SSL VPN SessionsThe following output example shows that RADIUS accounting has been configured for SSL VPN user sessions:Router# show running-configversion 12.4service timestamps debug datetime msecservice timestamps log datetime msecno service password-encryption!hostname host1!aaa new-model!!aaa accounting network SSL VPNaaa start-stop group radius aaa accounting update periodic 1aaa session-id commonip subnet-zeroip cef!!no ip domain lookupip domain name /doc/2b0cf496ed3a87c24028915f804d2b160b4e8644.htmlip name-server 172.16.2.133ip name-server 172.16.11.48!line con 0exec-timeout 0 0line aux 0line vty 0 4!!webvpn gateway GW1ip address 172.19.216.141 port 443inservice!webvpn gateway SSL VPNno inservice!webvpn install svc flash:/webvpn/svc.pkgwebvpn aaa accounting-list SSL VPNaaa!webvpn context Default_contextssl encryptionssl authenticate verify all!no inservice!!Example: URL Obfuscation (Masking)The following output example shows that URL obfuscation (masking) has been configured for policy group "gp_urlobf." Router: show running-config!!policy group gp_urlobfmask-urlsdefault-group-policy gp_urlobfgateway gw domain dominservice!!Example: Adding a CIFS Server URL List and Attaching It to a Policy ListThe following output example shows that the CIFS server URLs "SSLVPN-SERVER2" and "SSL-SERVER2" have been added as portal page URLs to which a user has access. The output also shows that the two servers have been attached to a policy group.webvpn context context_1ssl authenticate verify all!acl "acl1"error-msg "warning..."permit url "/doc/2b0cf496ed3a87c24028915f804d2b160b4e8644.html "deny url "/doc/2b0cf496ed3a87c24028915f804d2b160b4e8644.html "permit http any any!nbns-list l1nbns-server 10.1.1.20!cifs-url-list "c1"heading "cifs-url"url-text "SSLVPN-SERVER2" url-value "\\SSLVPN-SERVER2" url-text "SSL-SERVER2" url-value "\\SSL-SERVER2"!policy group defaultacl "acl1"cifs-url-list "c1"nbns-list "l1"functions file-accessfunctions file-browsefunctions file-entrydefault-group-policy defaultgateway publicinservice!Example: Typical SSL VPN ConfigurationThe following output is an example of an SSL VPN configuration that includes most of the features that are available using SSL VPN:Router# show running-confighostname sslvpn!!aaa new-model!!aaa authentication login default local group radius !!crypto pki trustpoint Gatewayenrollment selfsignedip-address 192.168.22.13revocation-check crlrsakeypair keys 1024 1024!!crypto pki certificate chain Gatewaycertificate self-signed 02!!interface Loopback0ip address 10.10.10.1 255.255.255.0!!interface GigabitEthernet0/1ip address 192.168.22.14 255.255.255.0 secondary ip address 192.168.22.13 255.255.255.0duplex autospeed automedia-type rj45!!ip local pool svc-pool 10.10.10.100 10.10.10.110 !!ip radius source-interface FastEthernet1/1!!webvpn gateway ssl-vpnip address 192.168.22.13 port 443http-redirect port 80ssl trustpoint Gatewayinservice!! The following line is required for SSLVPN Client.webvpn install svc flash:/webvpn/svc.pkg!! The following line is required for Cisco Secure Desktop. webvpn install csd flash:/webvpn/sdesktop.pkg!webvpn context ssl-vpnssl authenticate verify all!url-list "sslvpn-dt"url-text "sslvpn-dt" url-value "http://10.1.1.40"url-text "Exchange Server" url-value"http://10.1.1.40/exchange"!sso-server "netegrity"web-agent-url "http://10.1.1.37/vpnauth/"secret-key "sslvpn1"retries 3timeout 15!nbns-list cifsnbns-server 10.1.1.40!port-forward "mail_test"local-port 30016 remote-server "/doc/2b0cf496ed3a87c24028915f804d2b160b4e8644.html " remote-port 143 description "IMAP-test"local-port 30017 remote-server "/doc/2b0cf496ed3a87c24028915f804d2b160b4e8644.html " remote-port 110 description "POP3-test"local-port 30018 remote-server "/doc/2b0cf496ed3a87c24028915f804d2b160b4e8644.html " remote-port 25 description "SMTP-test"!policy group default! The following line applies the URL list.url-list "sslvpn-dt"! The following line applies TCP port forwarding.port-forward "mail_test"! The following line applies CIFS.nbns-list "cifs"! The following line enables CIFS functionality.functions file-access! The following line enables CIFS functionality.functions file-browse! The following line enables CIFS functionality.functions file-entry! The following line enables SSLVPN Client.functions svc-enabled! The following line enables clientless Citrix.citrix enableddefault-group-policy default! The following line maps this context to the virtual gateway and defines the domain touse.gateway ssl-vpn domain sslvpn! The following line enables Cisco Secure Desktop.csd enableinservice!!endExample: Cisco Express Forwarding-Processed PacketsThe following output example from the show webvpn stats command shows information about Cisco Express Forwarding-processed packets:Router# show webvpn statsUser session statistics:Active user sessions : 56 AAA pendingreqs : 0Peak user sessions : 117 Peaktime : 00:13:19Active user TCP conns : 0 Terminated user sessions : 144Session alloc failures : 0 Authentication failures : 0VPN session timeout : 0 VPN idletimeout : 0User cleared VPN sessions : 0 Exceeded ctx user limit : 0Exceeded total user limit : 0Client process rcvd pkts : 1971 Server process rcvd pkts : 441004Client process sent pkts : 921291 Server process sent pkts : 2013Client CEF received pkts : 1334 Server CEF received pkts : 951610Client CEF rcv punt pkts : 0 Server CEF rcv punt pkts : 779Client CEF sent pkts : 1944439 Server CEF sent pkts : 0Client CEF sent punt pkts : 21070 Server CEF sent punt pkts : 0Example: Multiple AnyConnect VPN Client Package FilesThe following example shows that three AnyConnect VPN Client packages have been installed to a gateway and shows the resulting show webvpn install command output:Router(config)# webvpn install svc vpn1_i386-Release-2.0.0077-k9.pkg sequence 6Router(config)# webvpn install svc vpn2_powerpc-Release-2.0.0077-k9.pkg sequence 8Router(config)# webvpn install svc svc_1.pkg sequence 4Router# show webvpn install status svcSSLVPN Package SSL-VPN-Client version installed:CISCO STC win2k+2,0,0148Fri 12/29/2006 19:13:56.37SSLVPN Package SSL-VPN-Client version installed:CISCO STC Darwin_i3862,0,0Wed Nov 8 04:01:57 MST 2006SSLVPN Package SSL-VPN-Client version installed:CISCO STC Darwin_powerpc2,0,0Wed Nov 8 03:54:50 MST 2006The following example shows that three AnyConnect VPN client packages have been configured and typical output from the show-running config command:Router# show running-config | begin webvpnwebvpn install svc flash:/webvpn/svc_4.pkg sequence 4!webvpn install svc flash:/webvpn/svc_6.pkg sequence 6!webvpn install svc flash:/webvpn/svc_9.pkg sequence 9 Example: Local AuthorizationThe following example shows that local authorization has been configured:aaa new-model!aaa authentication login default localaaa authorization network default local!aaa attribute list l2attribute type banner "user2"!aaa attribute list l1attribute type banner "user1"attribute type urllist-name "my-url-list"!username user1 password 0 passwd1username user1 aaa attribute list l1username user2 password 0 passwd2username user2 aaa attribute list l2!webvpn context bestssl authenticate verify all!url-list "my-url-list"heading "external url"url-text "example" url-value "/doc/2b0cf496ed3a87c24028915f804d2b160b4e8644.html " ! policy group defaultdefault-group-policy defaultaaa authorization list defaultgateway public domain d1inserviceExample: URL Rewrite SplitterThe following example shows that URL mangling has been configured for a specific host and IP address. The unmatched action has been defined as direct access.webvpn context e1!url rewritehost "/doc/2b0cf496ed3a87c24028915f804d2b160b4e8644.html "ip 10.1.0.0 255.255.0.0unmatched-action direct-access!Example: Backend HTTP ProxyThe following example shows that a backend HTTP proxy has been configured:webvpn context e1!policy group g1http proxy-server "192.0.2.0" port 2034default-group-policy g1Example: Stateless High Availability with HSRPFigure 15 shows the topology of a typical stateless high availability with HSRP setup. Router 1 and Router 2 are configured for HSRP on gateway Webvpn. The example following Figure 15 shows the actual configuration.Figure 15 Stateless High Availability with HSRP SetupRouter 1 ConfigurationRouter# configure terminalRouter(config)# interface gateway 0/1Router(config-if)# standby 0 ip 10.1.1.1Router(config-if)# standby 0 name SSLVPNRoute(config-if)# exitRouter(config)# webvpn gateway WebvpnRouter(config-webvpn-gateway)# ip address 10.1.1.1 port 443 standby SSLVPNRouter 2 ConfigurationRouter# configure terminalRouter(config)# interface gateway 0/0Router(config-if)# standby 0 ip 10.1.1.1Router(config-if)# standby 0 name SSLVPN2Router(config-if)# exitRouter(config)# webvpn gateway WebvpnRouter(config-webvpn-gateway)# ip address 10.1.1.1 port 443 standby SSLVPNigh2Examples: InternationalizationThe following configuration and output examples display various aspects of the Internationalization feature. This section contains the following examples:Example: Generated Browser Attribute TemplateExample: Copying the Browser Attribute File to Another PC for EditingExample: Copying the Edited File to flashExample: Output Showing That the Edited File Was ImportedExample: Copying the Language File to Another PC for EditingExample: Copying the Edited Language File to the Storage DeviceExample: Language Template CreatedExamples: URL ListExample: Generated Browser Attribute TemplateThe following is an example of a generated browser attribute template:#003333#336666whiteblackWelcome toCisco Systems WebVPN Service#003333Example: Copying the Browser Attribute File to Another PC for EditingThe following example shows how to copy a browser attribute file to another PC for editing:Router# copy flash: tftp:Source filename [battr_tpl.xml]?Address or name of remote host []? 10.1.1.30Destination filename [battr_tpl.xml]?!!677 bytes copied in 0.004 secs (169250 bytes/sec) Example: Copying the Edited File to flashThe following example shows how to copy an edited attribute file to flash:Router# copy tftp://directory/edited_battr_tpl.xmlflash:Example: Output Showing That the Edited File Was ImportedThe following show running-config output shows that the browser attribute file was correctly copied to flash:Router# show running-configwebvpn context gbrowser-attribute import flash:battr_tpl.xmlssl authenticate verify allExample: Copying the Language File to Another PC for EditingThe following example shows how to copy a language file to another PC for editing: Router# copy flash: tftp:Source filename [lang.js]?Address or name of remote host []? 10.1.1.30Destination filename [lang.js]?!!10649 bytes copied in 0.028 secs (380321 bytes/sec) Example: Copying the Edited Language File to the Storage Device The following example shows how to copy the edited language file to flash:Router# copy tftp://directory/edited_lang.js flash:Example: Language Template CreatedThe following show running-config command output shows that the language file "lang.js" has been imported correctly: Router# show running-configpolicy group defaultfunctions file-accessfunctions file-browsefunctions file-entryfunctions svc-enabledmask-urlssvc address-pool "mypool"svc keep-client-installedsvc split include 10.1.1.0 255.255.255.0default-group-policy defaultgateway glanguage customize mylang flash:lang.jsinserviceExamples: URL ListThe following example shows that the URL list template file has been copied to another PC for editing:Router# copy flash: tftp:Source filename [url_list_tpl.xml]?Address or name of remote host []? 10.1.1.30Destination filename [url_list_tpl.xml]The following example shows that the URL template file has been copied to flash:Router# copy tftp://directory/edited_url_list_tpl.xmlflash:The following show running-config command output shows that URL list file has been imported into the url-list and that it has been bound to the policy group:Router# show running-configpolicy group defaulturl-list "test"functions file-accessfunctions file-browsefunctions file-entryfunctions svc-enabledmask-urlssvc address-pool "mypool"svc keep-client-installedsvc split include 10.1.1.0 255.255.255.0default-group-policy defaultgateway glanguage customize mylang flash:lang.jsinserviceExamples: Virtual TemplateThe following configuration and output examples display various aspects of the Virtual Template feature. The following example, starting in global configuration mode, creates a virtual template and associates it with an SSL VPN context configuration. It also configures the virtual template for VRF and NAT:Router(config)# interface virtual-template 100Router(config-if)# ip unnumbered GigabitEthernet 0/0Router(config-if)# ip vrf forwarding vrf1Router(config-if)# ip nat insideRouter(config-if)# exitRouter(config)# webvpn context context1Router(config-webvpn-context)# virtual-template 100Router(config-webvpn-context)# exitThe following example creates a virtual template and associates it with a security zone: Router(config)# interface virtual-template 200Router(config-if)# ip unnumbered GigabitEthernet 0/0Router(config-if)# zone-member security vpnRouter(config-if)# exitRouter(config)# webvpn context context2Router(config-webvpn-context)# virtual-template 200Router(config-webvpn-context)# exitExamples: SSL VPN DVTI SupportExamples: Configuring per-Tunnel Virtual TemplatesExample: Configuring per-Context Virtual TemplatesExamples: Configuring per-Tunnel Virtual TemplatesFigure 16 shows an example network where remote users User1 and User2 belong to a context called Context1, User3 belongs to a context called Context2, and they connect to the SSL VPN gateway and access the backend server in the corporate network.Figure 16 Topology Showing a per-Tunnel Virtual TemplateExample: Configuring in the per-Tunnel Context Using Virtual TemplatesExample: Configuring in the per-Tunnel Context Using Virtual Templates and a AAA ServerExample: Configuring in the per-Tunnel Context Using Virtual TemplatesThe following example shows how to apply VRF, a firewall policy, and ACLs to each user based on the virtual template configuration.If the VRF, firewall policy, and ACL features are configured in the virtual template and user policies are not configured on the AAA server, then only the IP features configured in the virtual template are applied to the users. In this example, User1 and User2 belonging to Context1 have zone1, vrf1, and ACL 1 configured whereas User3 belonging to Context2 has zone3, vrf3, and ACL 3 configured. Hence, different users have different IP features configured.Virtual Template for User1 and User2configure terminalinterface virtual-template 1zone-member security zone1ip vrf forwarding vrf1ip access-group 1 inip unnumbered GigabitEthernet 0/1Virtual Template for User3configure terminalinterface virtual-template 3zone-member security zone3ip vrf forwarding vrf3ip access-group 3 inip unnumbered GigabitEthernet 0/1WebVPN Context for User1 and User2configure terminalwebvpn context context1virtual-template 1 tunnelinserviceWebVPN Context for User3configure terminalwebvpn context context2virtual-template 3 tunnelinserviceExample: Configuring in the per-Tunnel Context Using Virtual Templates and a AAA ServerThe following example shows how to apply the IP feature configuration to the users based on the user-specific configuration available on the AAA server. The user-specific attributes configured on the AAA server are applied to the users when an SSL VPN session establishes a virtual tunnel. The configuration applied to the users will be a combination of the configurations in the virtual template and the AAA server, where AAA attributes have a higher priority when there is a configuration conflict.In this example, ACL 1 is configured for User1, ACL 2 is configured for User2, and ACL 3 is configured for User3 on the AAA server using the inacl attribute. Even though ACL 4 is applied to all the users in the virtual template, User1 has ACL 1, User2 has ACL 2, and User3 has ACL 3 configured along with zone and VRF configurations available in the virtual template.Virtual Template for User1 and User2configure terminalinterface virtual-template 1zone-member security zone1ip vrf forwarding vrf1ip access-group 4 inip unnumbered GigabitEthernet 0/1Virtual Template for User3configure terminalinterface virtual-template 3zone-member security zone3ip vrf forwarding vrf3ip access-group 4 inip unnumbered GigabitEthernet 0/1WebVPN Context for User1 and User2 configure terminalwebvpn context context1virtual-template 1 tunnelinserviceWebVPN Context for User3 configure terminalwebvpn context context2virtual-template 3 tunnelinservice。
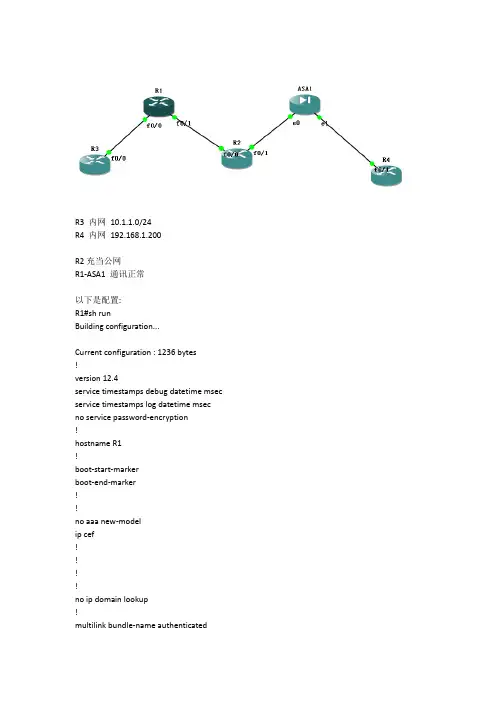
R3 内网10.1.1.0/24R4 内网192.168.1.200R2充当公网R1-ASA1 通讯正常以下是配置:R1#sh runBuilding configuration...Current configuration : 1236 bytes!version 12.4service timestamps debug datetimemsec service timestamps log datetimemsec no service password-encryption!hostname R1!boot-start-markerboot-end-marker!!no aaa new-modelipcef!!!!no ip domain lookup!multilink bundle-name authenticated!!!!!!!!!!!!!!!!crypto isakmp policy 1hash md5authentication pre-sharegroup 2crypto isakmp key cisco123 hostname ZGPTcrypto isakmp identity hostnamecrypto isakmpkeepalive 10 periodic!crypto isakmp peer address 23.1.1.3set aggressive-mode password cisco123!!crypto ipsec transform-set ccieesp-des esp-md5-hmac !crypto map cisco 1 ipsec-isakmpset peer 23.1.1.3set transform-set ccieset pfs group2match address A!!!!!interface FastEthernet0/0ip address 10.1.1.1 255.255.255.0duplex auto!interface FastEthernet0/1ip address 12.1.1.1 255.255.255.0duplex autospeed autocrypto map cisco!ip route 0.0.0.0 0.0.0.0 12.1.1.2no ip http serverno ip http secure-server!!!ip access-list extended Apermit ip 10.1.1.0 0.0.0.255 host 192.168.1.200 !logging alarm informational!!!!!!control-plane!!!!!!gatekeepershutdown!!line con 0stopbits 1line aux 0line vty 0 4!!endR1# sh cry isasaIPv4 Crypto ISAKMP SAdstsrc state conn-id slot status12.1.1.1 23.1.1.3 QM_IDLE 1002 0 ACTIVE IPv6 Crypto ISAKMP SAR1#R1#R2#sh runBuilding configuration...Current configuration : 661 bytes!version 12.4service timestamps debug datetimemsecservice timestamps log datetimemsecno service password-encryption!hostname R2!boot-start-markerboot-end-marker!!no aaa new-modelipcef!!!!!multilink bundle-name authenticated!!!!!!!!!!!!!!!!!!!!!interface FastEthernet0/0ip address 12.1.1.2 255.255.255.0 duplex autospeed auto!interface FastEthernet0/1ip address 23.1.1.2 255.255.255.0 duplex autospeed auto!no ip http serverno ip http secure-server!!!logging alarm informational!!!!!!control-plane!!!!!!gatekeepershutdown!!line con 0stopbits 1line aux 0line vty 0 4!!endR3#sh runBuilding configuration...Current configuration : 685 bytes!version 12.4service timestamps debug datetimemsec service timestamps log datetimemsec no service password-encryption!hostname R3!boot-start-markerboot-end-marker!!no aaa new-modelipcef!!!!!multilink bundle-name authenticated!!!!!!!!!!!!!!!!!!!!interface FastEthernet0/0ip address 10.1.1.3 255.255.255.0 duplex autospeed auto!interface FastEthernet0/1no ip addressshutdownduplex autospeed auto!ip route 0.0.0.0 0.0.0.0 10.1.1.1 no ip http serverno ip http secure-server!!!logging alarm informational!!!!!!control-plane!!!!!!gatekeepershutdown!line con 0stopbits 1line aux 0line vty 0 4!!endR3#ping 192.168.1.200Type escape sequence to abort.Sending 5, 100-byte ICMP Echos to 192.168.1.200, timeout is 2 seconds: !!!!!Success rate is 100 percent (5/5), round-trip min/avg/max = 8/55/168 msR4#sh runBuilding configuration...Current configuration : 693 bytes!version 12.4service timestamps debug datetimemsecservice timestamps log datetimemsecno service password-encryption!hostname R4!boot-start-markerboot-end-marker!!no aaa new-modelipcef!!!!!multilink bundle-name authenticated!!!!!!!!!!!!!!!!!!!!interface FastEthernet0/0no ip addressshutdownduplex autospeed auto!interface FastEthernet0/1ip address 192.168.1.200 255.255.255.0 duplex autospeed auto!ip route 0.0.0.0 0.0.0.0 192.168.1.3no ip http serverno ip http secure-server!!!logging alarm informational!!!!!!control-plane!!!!!gatekeepershutdown!!line con 0stopbits 1line aux 0line vty 0 4!!endR4#ping 10.1.1.3Type escape sequence to abort.Sending 5, 100-byte ICMP Echos to 10.1.1.3, timeout is 2 seconds:!!!!!Success rate is 100 percent (5/5), round-trip min/avg/max = 20/73/168 msASA(config)#ASA(config)#ASA(config)# sh run: Saved:ASA Version 8.0(2)!hostname ASAenable password 8Ry2YjIyt7RRXU24 encryptednames!interface Ethernet0/0nameif outsidesecurity-level 0ip address 23.1.1.3 255.255.255.0!interface Ethernet0/1nameif insidesecurity-level 100ip address 192.168.1.3 255.255.255.0!interface Ethernet0/2shutdownno nameifno security-levelno ip address!interface Ethernet0/3shutdownno nameifno security-levelno ip address!interface Ethernet0/4shutdownno nameifno security-levelno ip address!interface Ethernet0/5shutdownno nameifno security-levelno ip address!passwd 2KFQnbNIdI.2KYOU encryptedftp mode passiveaccess-list VPN extended permit ip host 192.168.1.200 10.1.1.0 255.255.255.0 pager lines 24mtu inside 1500mtu outside 1500no failovericmp unreachable rate-limit 1 burst-size 1no asdm history enablearp timeout 14400route outside 0.0.0.0 0.0.0.0 23.1.1.2 1timeout xlate 3:00:00timeout conn 1:00:00 half-closed 0:10:00 udp 0:02:00 icmp 0:00:02timeout sunrpc 0:10:00 h323 0:05:00 h225 1:00:00 mgcp 0:05:00 mgcp-pat 0:05:00 timeout sip 0:30:00 sip_media 0:02:00 sip-invite 0:03:00 sip-disconnect 0:02:00 timeout uauth 0:05:00 absolutedynamic-access-policy-record DfltAccessPolicyno snmp-server locationno snmp-server contactsnmp-server enable traps snmp authentication linkup linkdowncoldstart crypto ipsec transform-set ccieesp-des esp-md5-hmaccrypto map cisco 10 match address VPNcrypto map cisco 10 set pfscrypto map cisco 10 set peer 12.1.1.1crypto map cisco 10 set transform-set cciecrypto map cisco 10 set phase1-mode aggressivecrypto map cisco interface outsidecrypto isakmp identity hostnamecrypto isakmp enable outsidecrypto isakmp policy 10authentication pre-shareencryption deshash md5group 2lifetime 86400crypto isakmp policy 65535authentication pre-shareencryption 3deshash shagroup 2lifetime 86400telnet timeout 5ssh timeout 5console timeout 0threat-detection basic-threatthreat-detection statistics access-list!!tunnel-group 12.1.1.1 type ipsec-l2ltunnel-group 12.1.1.1 ipsec-attributespre-shared-key *prompt hostname contextCryptochecksum:00000000000000000000000000000000: endASA(config)#ASA(config)#ASA(config)#ASA(config)# sh cry isasaActive SA: 1Rekey SA: 0 (A tunnel will report 1 Active and 1 Rekey SA during rekey)Total IKE SA: 11 IKE Peer: 12.1.1.1Type : L2L Role : initiatorRekey : no State : AM_ACTIVEASA(config)# sh cry ipssainterface: outsideCrypto map tag: cisco, seqnum: 10, local addr: 23.1.1.3access-list VPN permit ip host 192.168.1.200 10.1.1.0 255.255.255.0local ident (addr/mask/prot/port): (192.168.1.200/255.255.255.255/0/0)remote ident (addr/mask/prot/port): (10.1.1.0/255.255.255.0/0/0) current_peer: 12.1.1.1#pktsencaps: 29, #pkts encrypt: 29, #pkts digest: 29#pktsdecaps: 29, #pkts decrypt: 29, #pkts verify: 29#pkts compressed: 0, #pkts decompressed: 0#pkts not compressed: 29, #pkts comp failed: 0, #pktsdecomp failed: 0#pre-frag successes: 0, #pre-frag failures: 0, #fragments created: 0#PMTUs sent: 0, #PMTUs rcvd: 0, #decapsulatedfrgs needing reassembly: 0 #send errors: 0, #recv errors: 0local crypto endpt.: 23.1.1.3, remote crypto endpt.: 12.1.1.1path mtu 1500, ipsec overhead 58, media mtu 1500current outbound spi: F8A5A2B4inbound espsas:spi: 0xD98DD580 (3649951104)transform: esp-des esp-md5-hmac nonein use settings ={L2L, Tunnel, PFS Group 2, }slot: 0, conn_id: 8192, crypto-map: ciscosa timing: remaining key lifetime (kB/sec): (4274997/3166)IV size: 8 bytesreplay detection support: Youtbound espsas:spi: 0xF8A5A2B4 (4171604660)transform: esp-des esp-md5-hmac nonein use settings ={L2L, Tunnel, PFS Group 2, }slot: 0, conn_id: 8192, crypto-map: ciscosa timing: remaining key lifetime (kB/sec): (4274997/3166)IV size: 8 bytesreplay detection support: Y。
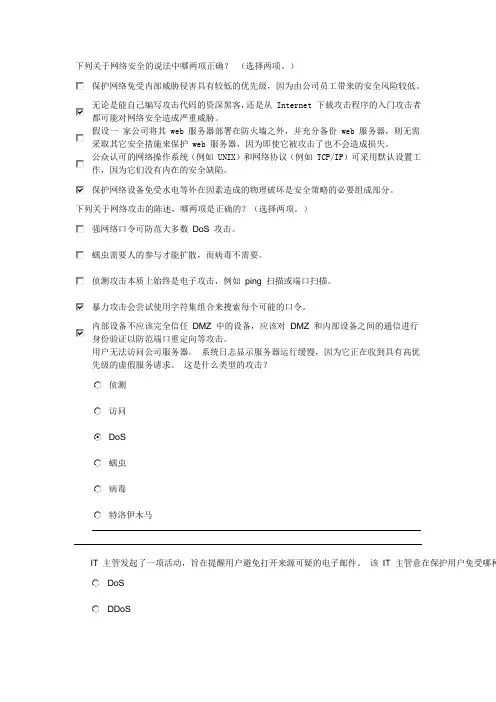
下列关于网络安全的说法中哪两项正确?(选择两项。
)保护网络免受内部威胁侵害具有较低的优先级,因为由公司员工带来的安全风险较低。
无论是能自己编写攻击代码的资深黑客,还是从 Internet 下载攻击程序的入门攻击者都可能对网络安全造成严重威胁。
假设一家公司将其 web 服务器部署在防火墙之外,并充分备份 web 服务器,则无需采取其它安全措施来保护 web 服务器,因为即使它被攻击了也不会造成损失。
公众认可的网络操作系统(例如 UNIX)和网络协议(例如 TCP/IP)可采用默认设置工作,因为它们没有内在的安全缺陷。
保护网络设备免受水电等外在因素造成的物理破坏是安全策略的必要组成部分。
下列关于网络攻击的陈述,哪两项是正确的?(选择两项。
)强网络口令可防范大多数DoS 攻击。
蠕虫需要人的参与才能扩散,而病毒不需要。
侦测攻击本质上始终是电子攻击,例如ping 扫描或端口扫描。
暴力攻击会尝试使用字符集组合来搜索每个可能的口令。
内部设备不应该完全信任DMZ 中的设备,应该对DMZ 和内部设备之间的通信进行身份验证以防范端口重定向等攻击。
用户无法访问公司服务器。
系统日志显示服务器运行缓慢,因为它正在收到具有高优先级的虚假服务请求。
这是什么类型的攻击?侦测访问DoS蠕虫病毒特洛伊木马IT 主管发起了一项活动,旨在提醒用户避免打开来源可疑的电子邮件。
该IT 主管意在保护用户免受哪种DoSDDoS病毒访问侦测下列关于预防网络攻击的说法中哪两项正确?(选择两项。
)现代服务器和PC 操作系统具有可以信赖的默认安全设置。
入侵防御系统可以记录可疑的网络活动,但在没有用户干预的情况下无法对抗正在进行的攻击。
物理安全威胁的防范包括控制对设备控制台端口的访问、标识关键电缆、安装UPS 系统以及提供温湿控制。
防止网络钓鱼攻击的最好方法是采用防火墙设备。
更改默认的用户名和口令并禁用或取消不必要的服务有助于加强设备安全性。
入侵检测发生在“安全轮”的哪个阶段?保护监控测试改进侦测安全策略必须实现哪两个目标?(选择两项。

新版CCNA 640-801考试IOS命令大全?给出一个帮助屏幕0.0.0.0 255.255.255.255通配符命令;作用与any命令相同access-class将标准的IP访问列表应用到VTY线路access-list创建-个过滤网络的测试列表any指定任何主机或任何网络;作用与0.0.0.0 255.255.255.255命令相同Backspace删除一个字符Bandwidth设置--个串行接口止的带宽Banner为登录到本路由器上的用户创建--个标志区cdp enable打开-个特定接口的CDPcdp holdtime修改CDP分组的保持时间cdp run打开路由器上的CDPcdp timer修改CDP更新定时器clear counters清除某一接口上的统计信息、clear line清除通过T elnet连接到路由器的连接clear mac-address-table 清除该交换机动态创建的过滤表clock rate 提供在串行DCE接口上的时钟config memory 复制startup-config到running-configconfig network 复制保存在TFTP主机上的配置到running-configconfig terminal 进人全局配置模式并修改running-configconfig-register 告诉路由器如何启动以及如何修改配置寄存器的设置copy flash tftp 将文件从闪存复制到TFTP主机copy run start copy running-config startup-config的快捷方式,将配置复制到NVRAM中copy run tftp 将running-config文件复制到TFTP主机Copy tftp flash 将文件从TFTP主机复制到闪存Copy tftp run 将配置从TFTP主机复制为running-config文件Ctrl+A 移动光标到本行的开始位置Ctrl+D 删除一个字符Ctrl+E 移动光标到本行的末尾Ctrl+F 光标向前移动一个字符Ctrl+R 重新显示一行,Ctrl+Shitf+6,then X 当telnet到多个路由器时返回到原路由器Ctrl+U 删除一行Ctrl+W 删除一个字CTRL+Z 结束配置模式并返回EXEC(执行状态)debug dialer 显示呼叫建立和结束的过程debug frame-relay lmi 显示在路由器和帧中继交换机之间的lmi交换信息debug ip igrp events 提供在网络中运行的IGRP路由选择信息的概要debug ip igrp transactions 显示来自相邻路由器要求更新的请求消息和由路由器发到相邻路器的广播消息debug ip rip 发送控制台消息显示有关在路由器接口上收发RIP数据包的信息debug ipx 显示通过路由器的RIP和SAP信息debug isdn q921 显示第层进程debug isdn q931 显示第三层进程delete nvram 删除1900交换机-NVRAM的内容delete vip 删除交换机的VTP配置description 在接口上设置---个描述dialer idle-timeout number 告诉BRI线路如果没有发现触发DDR的流量什么时候断开dialer list number protocol 为DDR链路指定触发DDR的流量protocol permit/deny dialer load-threshold number 设置描述什么时候在ISDN链路上启闭第二个BRI的参数inbound/outbound/eitherDialer map protocol address 代替拨号串用于作ISDN网络中提供更好的安全性name hostname numberdialer string 设置用于拨叫BRl接口的电话号码disable 从特权模式返回用户模式disconnect 从原路由器断开同远楞路由豁的连接dupler 设置一个接口的双工enable 进入特权模式enable password 设置不加密的启朋口令enable password level 1 设置用户模式口令enable password level 15 设置启用模式口令enable secret 设置加密的启用秘密口令。
cisco检查机框板卡电源SN信息指令cisco查看机框板卡电源SN信息指令1、根除NAT缓存:clearipnattranslation*2、根除沟通机上的悉数配备:erasenvram/wrieerase------reload (重启)3、设置路由器telnet处理:en-----conft------linevty04------login------passwordcisco4、设置沟通机telnet处理:en-----conft------interfacevlan1------noshut------ipaddress192.168.0.253-------enablepasswordcisco 假定想处理别的网段的沟通机需设置网关:ien-----conft------pdefault-gateway192.168.0.254-------telnet192.168.1.2535、查看硬件信息:showidballshowversion75系列查看机框序列号:showdiag查看板卡序列号:showrspchassis-info7513查看板卡序列号:showdiagbus6509:showmodule(后可加参数)showidprom(后可参数,可查如电扇、电源等序列号等)6、使日志同步(可吊销输入指令时体系主动生成的日志):loggingsynchronous7、超时设置:A、登入超时(输入用户名和暗码时):timeoutloginresponse20(20秒)B、登入后无操作超时:exec-timeout00(为永不超时)8、配备SSH:Router(config)#iphttpserverRouter(config)#iphttpsecure-serverRouter(config)#iphttpauthenticationlocalRouter(config)#usernameciscoprivilege15password0ciscoRouter(config)#lineconsole0Router(config-line)#loginlocalRouter(config-line)#exitRouter(config)#linevty04Router(config-line)#privilegelevel15Router(config-line)#loginlocalRouter(config-line)#transportinputtelnetRouter(config-line)#transportinputtelnetsshRouter(config-line)#^ZRouter#conftRouter(config)#intf0/0Router(config-if)#ipaddress1.1.1.1255.255.255.0Router(config-if)#noshutRouter(config-if)#doping1.1.1.2!!!!!---------------------------------------------------------------------------------------------------翻开WEB,输入https://1.1.1.1进行联接查验9、配备无线:Router(config)#intdotl1radio0Router(config-if)#ipaddress十.1.12.1255.255.255.0Router(config-if)#noshutRouter(config-if)#ssidWIRELESSRouter(config-if-ssid)#guest-modeRouter(config-if-ssid)#authenticationopenRouter(config-if-ssid)#infrastructure-ssidRouter(config-if-ssid)#exitRouter(config-if)#linecon0Router(config-line)#passwordconsoleRouter(config-line)#loggingsyncRouter(config-line)#exec-timeout00Router(config-line)#exit.........十、配备DHCP:Router(config)#ipdhcppoolR3WLANRouter(dhcp-config)#network十.11.2.0255.255.255.0Router(dhcp-config)#default-router十.1.12.1Router(dhcp-config)#exitRouter(config)#ipdhcpexcluded-address十.1.12.111、根除ASA55十的配备:writeerase/从头加载:reload12、思科iOS根柢配备R(config)#hostnamewildlee一;一;设置思科IOS体系称谓R(config)#noipdomainlookup一;一;关闭域名解析功用Wildlee(config)#lineconsole0一;-指定操控线路Wildlee(config)#linevty015一;ndash;指定虚拟终端拜访线路Wildlee(config-line)#exec-timeout50一;ndash;指定线路超不时间5分0秒Wildlee(config-line)#passwordwildlee一;ndash;指定console线路的拜访暗码为wildleeWildlee(config)#enablesecretwildlee一;一;设置特权拜访暗码为wildleeWildlee(config)#servicepassword-encryption一;一;加密明文暗码Wildlee(config)#bannermotd$thisistext$一;一;等候广告词VLAN配备指令1.创立vlanWildlee(config)#vlan{vlanid}一;一;ndash;给vlan设置IDWildlee(config-vlan)#name{vlanname}一;一;一;给vlan取名2.配备中继端口wildlee(config-if)#switchporttrunkencapsulationdot1q一;一;一;-界说中继端口封装办法wildlee(config-if)#switchportmodetrunk一;一;一;一;-配备端口为中继端口3.差异端口wildlee(config)#interface{interface}一;一;-指定要参加vlan的接口wildlee(config)#interfacerange{interface},{interface}一;一;-将多个不接连端口差异到vlanwildlee(config)#interfacerange{interface0/1ndash;20}一;一;一;将多个接连的端口差异到vlanwildlee(config-if)#speed{十|十0|十00}一;一;指定接口速率wildlee(config-if)#duplex{auto|half|full}一;一;-指定双工办法wildlee(config-if)#switchportmodeaccess一;一;一;一;将指定接口界说为拜访端口wildlee(config-if)#switchportaccessvlanid一;一;一;ndash;将指定端口分配到特定vlanwildlee#showmac-address-table一;一;-查看接口MAC地址列表wildlee#showmac-address-tableaging-time一;一;一;-查看沟通机MAC地址学习老化时间wildlee(config)#mac-address-tableaging-timetime[s]一;一;一;批改此刻刻值4.给vlan配备IPwildlee(config)#interfacevlan{vlanid}一;一;一;指定VLAN号wildlee(config-vlan)#ipaddress{ipaddress与netmask}一;ndash;给vlan配备IP地址用于vlan间路由5.查看配备wildlee#showinterfacefastEthernet{interface}一;一;一;查看指定接口wildlee#showinterfacefastEthernet{interface}switchport一;一;-查看沟通机端口情况及封装办法wildlee#showipinterfacebrief一;一;一;查看接口摘要信息wildlee#showvlan-switchport一;一;-查看vlan接口配备情况VTP配备指令Wildlee(config)#vtpdomain{vtpname}一;一;一;配备vtp域名Wildlee(config)#vtpmode{server|client|transparent}一;一;ndash;配备配备vtp作业办法Wildlee(config)#vtppassword{vtppassword}一;一;-给vtp设置暗码Wildlee(config)#vtppruning一;一;-启用vtp修剪Wildlee#showvtpstatus一;一;查看vtp配备情况Wildlee#showvtpcounters一;一;-闪现vtp音讯发送与接纳情况典型VTP与VLAN配备进程a.设置VTPDOMAIN(基地、分支沟通机上都设置)b.配备中继(基地、分支沟通机上都设置)c.创立VLAN(在server上设置)d.将沟通机端口划入VLANe.配备三层沟通STP生成树协议wildlee(config)#spanning-treevlan{vlanid}一;一;-翻开生成树协议wildlee(config)#spanning-treevlan{vlanid}rootprimary一;一;-设置为根沟通机wildlee(config)#spanning-treevlan{vlanid}priority{bridgepriority}一;一;-设置沟通机ID优先级值wildlee(config-if)#spanning-treevlan{vlanid}cost{cost}一;一;一;设置沟通机端口本钱值wildlee(config-if)#spanning-treevlan{vlanid}port-priority{priority}一;一;一;设置端口优先级wildlee#showspanning-tree一;一;-查看生成树信息设定沟通机MAC地址老化时间switch(config)#mac-address-tableaging-timelt;十-十00000--------默许是300秒设定沟通机端口/MAC绑定switch(config)#mac-address-tablestatic0十0.5e00.0005vlan1interfacef0/113、ipunnumberedLoopback0借用端口IP地址指令借用IP地址实习即是:一个接口上没有配备IP地址,可是还想运用该接口。
路由器setup模式当弹出Would you like to enter the initial configuration dialog? [yes/no]: 执⾏yes后,会进⼊setup模式.setup模式会通过与路由器的交互对话实现路由器的配置。
当你使⽤⼀台全新的路由器或者你执⾏命令erase startup-config想完全重新配置⼀台路由器的时候,就会有此设置画⾯的弹出。
设置例:--- System Configuration Dialog ---Would you like to enter the initial configuration dialog? [yes/no]: yesAt any point you may enter a question mark '?' for help.Use ctrl-c to abort configuration dialog at any prompt.Default settings are in square brackets '[]'.Basic management setup configures only enough connectivityfor management of the system, extended setup will ask youto configure each interface on the systemWould you like to enter basic management setup? [yes/no]: noFirst, would you like to see the current interface summary? [yes]: yesAny interface listed with OK? value "NO" does not have a valid configurationInterface IP-Address OK? Method Status ProtocolEthernet0/0 unassigned NO unset up upEthernet0/1 unassigned NO unset up upEthernet0/2 unassigned NO unset up upEthernet0/3 unassigned NO unset up upConfiguring global parameters:Enter host name [Router]:The enable secret is a password used to protect access toprivileged EXEC and configuration modes. This password, afterentered, becomes encrypted in the configuration.Enter enable secret: ciscoThe enable password is used when you do not specify anenable secret password, with some older software versions, andsome boot images.Enter enable password: cisco% Please choose a password that is different from the enable secretEnter enable password: ciscoThe virtual terminal password is used to protectaccess to the router over a network interface.Enter virtual terminal password: ciscoConfigure SNMP Network Management? [yes]: noConfigure LAT? [yes]: noConfigure bridging? [no]:Configure IP? [yes]: noConfigure DECnet? [no]:Configure CLNS? [no]:Configure IPX? [no]:Configuring interface parameters:Do you want to configure Ethernet0/0 interface? [yes]: noDo you want to configure Ethernet0/1 interface? [yes]: noDo you want to configure Ethernet0/2 interface? [yes]: noDo you want to configure Ethernet0/3 interface? [yes]: noWould you like to go through AutoSecure configuration? [yes]: noAutoSecure dialog can be started later using "auto secure" CLIThe following configuration command script was created:hostname Routerenable secret 5 $1$alHO$th7t1cLRUcfTDteRHfric0enable password ciscoline vty 0 4password ciscono snmp-server!no bridge 1no ip routingno decnet routingno clns routingno ipx routing!interface Ethernet0/0shutdownno ip address!interface Ethernet0/1shutdownno ip address!interface Ethernet0/2shutdownno ip address!interface Ethernet0/3shutdownno ip addressdialer-list 1 protocol ip permitdialer-list 1 protocol ipx permit!end[0] Go to the IOS command prompt without saving this config.[1] Return back to the setup without saving this config.[2] Save this configuration to nvram and exit.Enter your selection [2]:The enable password you have chosen is the same as your enable secret.This is not recommended. Re-enter the enable password.Building configuration...Use the enabled mode 'configure' command to modify this configuration.执⾏erase startup-config的效果Router>Router>enRouter#erase startup-conRouter#erase startup-configErasing the nvram filesystem will remove all configuration files! Continue? [confirm] [OK]Erase of nvram: completeRouter#*Feb 28 16:32:46.079: %SYS-7-NV_BLOCK_INIT: Initialized the geometry of nvram Router#重新启动路由器--- System Configuration Dialog ---Would you like to enter the initial configuration dialog? [yes/no]:你也可以在特权模式下输⼊setup来进⾏重新配置Router>Router>enPassword:Router#setup--- System Configuration Dialog ---Continue with configuration dialog? [yes/no]:。
Cisco交换机基础命令+WinServer08R2多⽹卡配置链路聚合最近捣⿎服务器链路集合需要配置交换机…以前没弄过交换机,现学现卖…⼀般交换机是⽀持telnet的,配置好ip可以直接telnet,当然如果没配的话就要⽤串⼝了,串⼝要选择Serial…还好我们万能的 putty 都⽀持,⽤⼀个⼯具就OK了,当然你也可以选择 Secure CRT…登录后输⼊密码,然后就需要第⼀个命令:enable //进⼊特权模式补充下密码的修改,来⾃:特权模式密码修改:Route>enableRoute#config terminalRoute(config)#enable secret CISCO ----设置加密密码为"CISCO"(若把"secret"改为"password"则为⽂明显⽰,在show running-config中可以清楚的看出两者的区别)Route(config)#exit删除特权模式密码:Route>enableRoute#config terminalRoute(config)#no enable secret CISCORoute(config)#exit修改登录密码:Console⼝:(这个是设置进⼊路由器的密码)Route>enableRoute#config terminalRoute(config)#line console 0 ----进⼊console⼝模式Route(config-line)#password CISCO ----设置密码为"CISCO"(若要加密密码可在之前:service pass-encryption启⽤路由器密码保护-但是在Boson Netsim环境下没有找到这个命令⼤家知道的可以讨论下) Route(config-line)#login ---- 登⼊时加密Route(config-line)#exitaux⼝:Route>enableRoute#config terminalRoute(config)#line aux 0 ----进⼊aux⼝模式Route(config-line)#password CISCO ----设置密码为"CISCO"(若要加密密码可在之前:service pass-encryption启⽤路由器密码保护)Route(config-line)#login ---- 登⼊时加密Route(config-line)#exitvty(telnet远程登陆⼝):Route>enableRoute#config terminalRoute(config)#line vty 0 4 ----进⼊telnet远程登陆⼝模式(0 4 允许5个⽤户)Route(config-line)#password CISCO ----设置密码为"CISCO"(若要加密密码可在之前:service pass-encryption启⽤路由器密码保护)Route(config-line)#login ---- 登⼊时加密Route(config-line)#exit继续接着上⾯进⼊特权模式,进⼊特权模式后就能⼲什么东西了,不过⼀般应该先看下交换机的信息:show run //show running-config如果我们需要看端⼝的配置信息,那么需要:show run inter 端⼝名 //show run interface端⼝名要看某个端⼝的当前状态信息是:show inter 端⼝名 //show interface端⼝名⽐如我这⾥是 show interfaces gigabitEthernet1/0/45,简写成show inter g1/0/45 就可以(我是多个交换机堆叠,所以要交换机名+端⼝)在这⾥我们可以看到这个端⼝的⼯作⽅式是全双⼯我们可以修改端⼝的⼯作⽅式(全双⼯、半双⼯、⾃动)Switch#conf tSwitch(config)#inter g1/0/45Switch(config-if)#deluplex auto full/half/auto修改后:如果需要关闭某端⼝:Switch#conf tSwitch(config)#inter g1/0/45Switch(config-if)#shutdown开启的话是Switch(config-if)#no shutdown设定端⼝的vlan:Switch#conf tSwitch(config)#inter g1/0/45Switch(config-if)#switchport access vlan 999设置vlan为999下⾯还是回归这次的正题,做链路集合⾸先,我们需要在交换机上建port-channel(注意port-channel貌似最⼤只允许48,另外不能重复…)Switch#conf tSwitch(config)#inter port-channel 21Switch(config-if)#switchport mode accessSwitch(config-if)#switchport access vlan 123Switch(config-if)#description test port channel看下设置结果:然后我们需要设置端⼝的channel-group,把端⼝加到port-channel中Switch#conf tSwitch(config)#inter g1/0/43Switch(config-if)#channel-group 21 mode onSwitch(config-if)#description test group然后依次把端⼝加进来,结果(我测试只加了两个):最后别忘了⽤ wr 写⼊配置⽂件,不然重启就失效了…dir下看看⽂件⽇期是否正确然后交换机的设置就完成了,下⾯就需要设置服务器,我在⽤的是server08 r2,联想的服务器⽤的⽹卡是Inter I350先更新⽹卡驱动,就可以看到选项卡⾥有了“分组”我们新建分组,选择⽹卡⽀持多种类型,根据需要进⾏选择然后把两个⽹卡插上⽹线插好,搞定收⼯…:。
Cisco交换机SHOW命令详解Cisco 交换机SHOW 命令详解show cdp entry * 同show cdpneighbordetail命令一样,但不能用于1900交换机show cdp interface 显示启用了CDP的特定接口show cdp neighbor 显示直连的相邻设备及其详细信息show cdp neighbor detail 显示IP地址和IOS版本和类型,并且包括show cdpneighbor命令显示的所有信息show cdp traffic 显示设备发送和接收的CDP分组数以及任何出错信息Show controllers s 0 显示接口的DTE或DCE状态show dialer 显示拨号串到达的次数、B信道的空闲超时时间值、呼叫长度以及接口所连接的路由器的名称show flash 显示闪存中的文件show frame-relay Imi 在串行接口上设置LMI类型show frame-relay map 显示静态的和动态的网络层到PVC的映射show frame-relay pvc 显示路由器上己配置的PVC和DLCI号show history 默认时显示最近输人的10个命令show hosts 显示主机表中的内容show int fO/26 显示抑/26的统汁show inter e0/l 显示接口e0/l的统计show interface So 显示接口serial上的统计信息show ip 显示该交换机的IP配置show ip access-list 只显示IP访问列表show ip interface 显示哪些接口应用了IP访问列表show ip interface 显示在路由器上配置的路由选择协议及与每个路由选择协议相关的定时器show ip route 显示IP路由表show ipx access-list 显示路由器上配置的IPX访问列表trunk on 将一个端口设为永久中继模式usemame name password 为了Cisco路由器的身份验证创建用户名和口令passwordvariance 控制最佳度量和最坏可接受度量之间的负载均衡vlan 2 name Sales 创建一个名为Sales的VLAN2lan-membership static 2 给端口分配一个静态VLANvtp client 将该交换机设为一个VTP客户vtp domain 设置为该VTP配置的域名vtp password 在该VTP域上设置一个口令vtp pruning enable 使该交换机成为一台修剪交换机vtp server 将该交换机设为一个VTP服务器show ipx interface 显示一个特定接口上发送和接收的RIP和SAP 信息。
思科自防御网络安全综合方案典型配置方案简介:组建安全可靠的总部和分支LAN和WAN;总部和分支的终端需要提供安全防护,并实现网络准入控制,未来实现对VPN用户的网络准入检查;需要提供IPSEC/SSL VPN接入;整体方案要便于升级,利于投资保护。
详细内容:1. 用户需求分析客户规模:∙客户有一个总部,具有一定规模的园区网络;∙一个分支机构,约有20-50名员工;∙用户有很多移动办公用户客户需求:∙组建安全可靠的总部和分支LAN和WAN;∙总部和分支的终端需要提供安全防护,并实现网络准入控制,未来实现对VPN用户的网络准入检查;∙需要提供IPSEC/SSLVPN接入;∙在内部各主要部门间,及内外网络间进行安全区域划分,保护企业业务系统;∙配置入侵检测系统,检测基于网络的攻击事件,并且协调设备进行联动;∙网络整体必须具备自防御特性,实现设备横向联动抵御混合式攻击;∙图形化网络安全管理系统,方便快捷地控制全网安全设备,进行事件分析,结合拓扑发现攻击,拦截和阻断攻击;∙整体方案要便于升级,利于投资保护;思科建议方案:∙部署边界安全:思科IOS 路由器及ASA 防火墙,集成SSL/IPSec VPN;∙安全域划分:思科FWSM防火墙模块与交换机VRF及VLAN特性配合,完整实现安全域划分和实现业务系统之间的可控互访;∙部署终端安全:思科准入控制NAC APPLIANCE及终端安全防护CSA解决方案紧密集成;∙安全检测:思科IPS42XX、IDSM、ASA AIP模块,IOS IPS均可以实现安全检测并且与网络设备进行联动;∙安全认证及授权:部署思科ACS 4.0认证服务器;∙安全管理:思科安全管理系统MARS,配合安全配置管理系统CSM使用。
2. 思科建议方案设计图3. 思科建议方案总体配置概述∙安全和智能的总部与分支网络o LAN:总部,核心层思科Cat6500;分布层Cat4500;接入层Cat3560和CE500交换机,提供公司总部园区网络用户的接入;分支可以采用思科ASA5505 防火墙内嵌的8FE接口连接用户,同时其头两个LAN端口支持POE以太网供电,可以连接AP及IP电话等设备使用,并且ASA5505留有扩展槽为便于以后对于业务模块的支持。
SecureCRT的自动登录和自动脚本记录功能图解一.实现自动登陆SecureCRT 的自动登陆是在它的会话选项—登陆动作—自动登陆下设置的1 192.168.10.1的会话上点右键,选择属性3 选择登陆登陆动作选项卡,对自动登陆多选框打√4选中login 和password分别编辑预期username 是路由器准备给你发来的登陆提示以telnet 192.168.10.1为例,登陆使用Username + Password认证当路由器发送预期字符“Username: ”时,CRT自动发送用户名“apple”给路由器当路由器发送预期字符“Password:”时,CRT自动发送密码“12345678”给路由器User Access VerificationUsername: applePassword: 12345678Cwnpchina#5 编辑好后点确定,关闭会话选项6 连接测试,现在连接192.168.10.1就不用手工输入账号密码了二.脚本录制及自动初始化配置路由器在使用dynamips或GNS3做网络实验的时候,每次路由器初始化配置一些基本功能在网络中大规模部署网络设备的时候,也会遇到大量设备要做很多相同的配置的时候这些配置虽然简单但是数量很大,会浪费掉很多宝贵的时间,如果使用SceureCRT功能强大的脚本功能,就可以化繁为简,使做实验和工程达到事半功倍的效果!SecureCRT自动配置设备是通过脚本文件来实现的,脚本可以录制,也可以手工编写这里的脚本使用的是.vbs格式的1 脚本的录制单击“开始录制脚本”后,在路由器中输入的任何命令都会当成脚本里的命令记录下来,我们在这里为路由器R1做一个初始化配置的脚本,现在输入其配置命令如下:enconf tline con 0logging syncexec-time 0 0endconf thostname R1interface s1/1ip address 12.1.1.1 255.255.255.0no shutdowninterface s1/2encapsulation frame-relayno shutdowninterface f0/0ip address dhcpno shutdowninterface loopback 0ip address 10.10.10.10 255.255.255.0no shutdownline vty 0 4logging syncexec-time 0 0password ciscologinendconf t2 停止录制脚本,后保存为R1.vbs 拓展名是.vbs打开脚本可以看到其内容,通过修改脚本就很快制作出其他路由器的配置脚本crt.Screen.Synchronous = True' This automatically generated script may need to be' edited in order to work correctly.Sub Maincrt.Screen.Send "en" & chr(13)crt.Screen.Send "conf t" & chr(13)crt.Screen.Send "line con 0" & chr(13)crt.Screen.Send "logging sync" & chr(13)crt.Screen.Send "exec-time 0 0" & chr(13)crt.Screen.WaitForString "R1(config-line)#"crt.Screen.Send "end" & chr(13)crt.Screen.Send "conf t" & chr(13)crt.Screen.Send chr(13)crt.Screen.Send "hostname R1" & chr(13)crt.Screen.WaitForString "R1#"crt.Screen.Send chr(13)crt.Screen.Send "interface s1/1" & chr(13)crt.Screen.WaitForString "R1(config)#"crt.Screen.Send "ip address 12.1.1.1 255.255.255.0" & chr(13)crt.Screen.Send "no shutdown" & chr(13)crt.Screen.WaitForString "R1(config-if)#ip address"crt.Screen.Send chr(13)crt.Screen.Send "interface s1/2" & chr(13)crt.Screen.Send "encapsulation frame-relay" & chr(13)crt.Screen.WaitForString "R1(config-if)#no shu"crt.Screen.Send "no shutdown" & chr(13)crt.Screen.Send chr(13)crt.Screen.WaitForString "R1(config-if)#no "crt.Screen.Send "interface f0/0" & chr(13)crt.Screen.Send "ip address dhcp" & chr(13)crt.Screen.WaitForString "R1(config-if)#"crt.Screen.Send "no shutdown" & chr(13)crt.Screen.Send chr(13)crt.Screen.Send "interface loopback 0" & chr(13)crt.Screen.Send "ip address 10.10.10.10 255.255.255.0" & chr(13)crt.Screen.Send "no shutdown" & chr(13)crt.Screen.Send chr(13)crt.Screen.Send "line vty 0 4 " & chr(13)crt.Screen.Send "logging sync" & chr(13)crt.Screen.Send "exec-time 0 0" & chr(13)crt.Screen.Send "password cisco" & chr(13)crt.Screen.Send "login" & chr(13)crt.Screen.Send "end" & chr(13)crt.Screen.Send "conf t"End Sub3 使用制作好的脚本文件的两种方法(1)手工运行配置脚本文件:然后选择已经做好的脚本文件,这里给R3做配置选R3.vbs执行的效果是SecureCRT自动为R3路由器做了初如化配置:(2)设备启动自动加载脚本运行,依旧是登陆动作选项卡,如图配置即可三.保存配置日志secureCRT 的日志保存是通过虚拟打印机来实现的1虚拟打印机配置全局选项—终端—打印2配置虚拟打印机及指定纸张参数当然选默认配置也可以3打印当前屏幕保存文件名为R3log.xps文档之后就可以双击打开该文档看到CRT上刚才屏幕上的内容已经被记录下来了:4 自动打印——实现日志记录功能开始选择自动打印—选择打印文档存储的位置之后屏幕上所有的输入输出都会被记录下来!我们打下自动打印后在路由器R3上配置好RIP,开debug 看下输出R3>enR3#conf tEnter configuration commands, one per line. End with CNTL/Z.R3(config)#router ripR3(config-router)#ver 2R3(config-router)#no autoR3(config-router)#net 30.0.0.0R3(config-router)#net 23.0.0.0R3(config-router)#endR3#debug ip rip这是屏幕输出,缺点是一闪而过,没法保存下来仔细分析下面是打印机保存的文档,可以把输出永久保存!。
路由知识 Cisco路由器auto secure命令总结
路由知识 Cisco路由器auto secure命令总结
路由器命令auto secure用起来比较方便,而且可以关闭一些不安全的服务和启用一些
安全的服务。这里对这个命令做了一个总结。
总结如下:
1、关闭一些全局的不安全服务如下:
Finger
PAD
Small Servers
Bootp
HTTP service
Identification Service
CDP
NTP
Source Routing
2、开启一些全局的安全服务如下:
Password-encryption service
Tuning of scheduler interval/allocation
TCP synwait-time
TCP-keepalives-in and tcp-kepalives-out
SPD configuration
No ip unreachables for null 0
3、关闭接口的一些不安全服务如下:
ICMP
Proxy-Arp
Directed Broadcast
Disables MOP service
Disables icmp unreachables
Disables icmp mask reply messages.
4、提供日志安全如下:
Enables sequence numbers & timestamp
Provides a console log
Sets log buffered size
Provides an interactive dialogue to configure the logging server ip address.
5、保护访问路由器如下:
Checks for a banner and provides facility to add text to automatically configure:
Login and password
Transport input & output
Exec-timeout
Local AAA
SSH timeout and ssh authentication-retries to minimum number
Enable only SSH and SCP for access and file transfer to/from the router
6、保护转发Forwarding Plane
Enables Cisco Express Forwarding (CEF) or distributed CEF on the router, when
available
Anti-spoofing
Blocks all IANA reserved IP address blocks
Blocks private address blocks if customer desires
Installs a default route to NULL 0, if a default route is not being used
Configures TCP intercept for connection-timeout, if TCP intercept feature is
available and the user is interested
Starts interactive configuration for CBAC on interfaces facing the Internet, when
using a Cisco IOS Firewall image,
Enables NetFlow on software forwarding platforms