虚拟机Linux系统中安装SYNOPSYS工具图解教程
- 格式:docx
- 大小:2.04 MB
- 文档页数:23
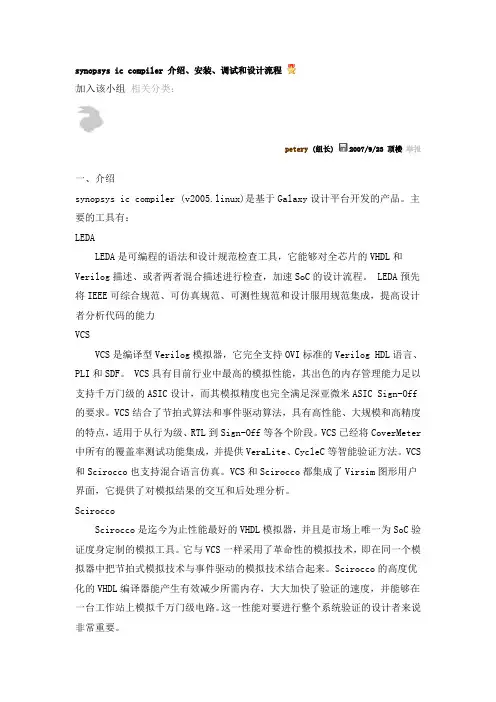
synopsys ic compiler 介绍、安装、调试和设计流程加入该小组相关分类:petery (组长) 2007/9/23 顶楼举报一、介绍synopsys ic compiler (v2005.linux)是基于Galaxy设计平台开发的产品。
主要的工具有:LEDALEDA是可编程的语法和设计规范检查工具,它能够对全芯片的VHDL和Verilog描述、或者两者混合描述进行检查,加速SoC的设计流程。
LEDA预先将IEEE可综合规范、可仿真规范、可测性规范和设计服用规范集成,提高设计者分析代码的能力VCSVCS是编译型Verilog模拟器,它完全支持OVI标准的Verilog HDL语言、PLI和SDF。
VCS具有目前行业中最高的模拟性能,其出色的内存管理能力足以支持千万门级的ASIC设计,而其模拟精度也完全满足深亚微米ASIC Sign-Off的要求。
VCS结合了节拍式算法和事件驱动算法,具有高性能、大规模和高精度的特点,适用于从行为级、RTL到Sign-Off等各个阶段。
VCS已经将CoverMeter中所有的覆盖率测试功能集成,并提供VeraLite、CycleC等智能验证方法。
VCS和Scirocco也支持混合语言仿真。
VCS和Scirocco都集成了Virsim图形用户界面,它提供了对模拟结果的交互和后处理分析。
SciroccoScirocco是迄今为止性能最好的VHDL模拟器,并且是市场上唯一为SoC验证度身定制的模拟工具。
它与VCS 一样采用了革命性的模拟技术,即在同一个模拟器中把节拍式模拟技术与事件驱动的模拟技术结合起来。
Scirocco的高度优化的VHDL编译器能产生有效减少所需内存,大大加快了验证的速度,并能够在一台工作站上模拟千万门级电路。
这一性能对要进行整个系统验证的设计者来说非常重要。
VeraVera验证系统满足了验证的需要,允许高效、智能、高层次的功能验证。
WindowsSubsystemforLinux运行Ubuntu并安装Synopsys软件Windows Subsystem for Linux运行EDA软件导言大家用什么方式来运行Linux?安装各种EDA安装包呢?常见的可能是双系统、虚拟机、服务器、docker,或者试试WSL2?这些方案除了服务器亦安没有搭建体验过,其他的方案均测试过,WSL是一个很好的运行Linux的方案,本文主要介绍WSL安装,以及给大家一个完整的WSL备份压缩包,内部已经安装VCS2018,Verdi2018,DC2018,VCS_MAX2018,仅供学习使用。
什么是WSL2?即Windows Subsystem for Linux,在win系统下能运行linux的环境,比如安装ubuntu,并和win有极强的交互性。
相比较wsl1,wsl2有了很大的进步,能运行大多数linux命令行,工具和应用,并且使用了真正的linux内核,几乎具备linux的完整功能,它的目标是提高文件系统性能,以及添加完全的系统调用兼容性。
安装有win系统要求:win10 2004及更高版本(内部版本19041及更高版本)或win11。
以管理员运行PowerShell执行wsl --install即可,当然还需要在windows功能中勾选:•适用于Linux的Window子系统•虚拟机平台有重启要求的按照要求重启,安装非常简单,具体大家到官网看教程,还会有wsl的命令行介绍。
https:///zh-cn/windows/wsl/install到微软商店搜WSL或Linux会出现Ubuntu这些发行版本,亦安安装了Ubuntu18.04和Ubuntu20.04,这个根据自己的需求,但如果需要安装Centos,微软商店不支持,则需要到以下网站下载:https:///mishamosher/CentOS-WSL优势•交互性强,比如说,子系统可以完全访问win下的文件。
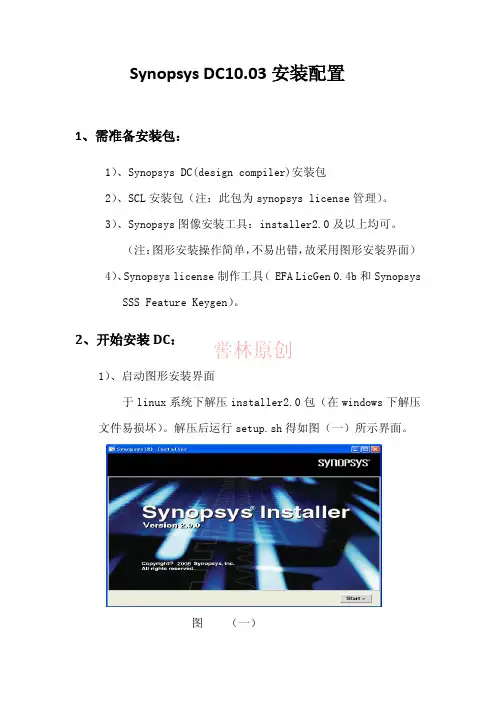
喾林原创Synopsys DC10.03安装配置1、需准备安装包:1)、Synopsys DC(design compiler)安装包2)、SCL 安装包(注:此包为synopsys license 管理)。
3)、Synopsys 图像安装工具:installer2.0及以上均可。
(注:图形安装操作简单,不易出错,故采用图形安装界面)4)、Synopsys license 制作工具( EFA LicGen 0.4b 和Synopsys SSS Feature Keygen )。
2、开始安装DC : 1)、启动图形安装界面于linux 系统下解压installer2.0包(在windows 下解压文件易损坏)。
解压后运行setup.sh 得如图(一)所示界面。
图 (一)喾林原创点击“start ”有如图(二)所示界面开始安装。
在“Source ”栏选中DC 安装文件所在上层目录。
“Done ”后“Next ”(此次“Next ”时间较长,耐心等待)。
图 (二) 之后可一直“NEXT ”到如图(三)所示。
图 (三)在该界面勾选linux选项即可,继续下一步到如图(四)所示。
选择安装路径后继续下一步直到结束。
喾林原创图(四)至此DC安装结束。
3、开始安装SCL:此安装与DC安装步骤一直,几乎没有差别,唯一不同的就是安装路径不同。
4、license的制作:License的制作是在windows下制作的。
1)、打开EFA LicGen 0.4b文件夹运行LicGen.exe程序出现如图(五)所示界面。
喾林原创图(五)点击“OPEN”选择Synopsys.lpd文件,“打开”。
回到图(五)所示界面。
勾选上Custon、Use Daemon及最后一个Custon。
喾林原创在两个“Custon ”后输入Linux 系统的MAC 。
注:Linux MAC 获取命令。
A :lmhostid 下图(六)红线处即为 MAC 。

Synopsys DC200809 安装说明By:方奇Email: fangqi-gz@说明:Windows版本:win7 64 家庭高级版。
虚拟机:VMware 7.1.4。
(最好到官方网站上下原本,有32位和64位)Linux :RHEL4-U4-i386-AS。
(迅雷搜搜)一、软件下载。
包括以下部分/thread-301143-1-1.html,解压后有两部分:/thread-301143-1-1.html/thread-301143-1-1.html,也包括两部分:/thread-301143-1-1.html,解压也包括两部分:二、安装(虚拟机安装RHEL省去)最好在root下安装,可以免去很多不必要的麻烦。
按下面步骤进入root&su口令***这里输入你自己的密码就进入到root下了#开始安装1.目录结构,本人在linux的根目录下建了/usr/synopsys文件夹,需要说明的是必须用管理员的身份进入usr文件夹才能在其中新建文件夹。
下面是我的目录结构,仅供查考/usr/synopsys |---installer|---10.9.3|---scl_v10.9.3_commom.tar|---scl_v10.g.3.linux.tar|---license|---B-2008.09|---sdc_200809_linux|---scd_200809_common2.安装installer,将installer2.0 解压到installer 文件夹即可。
解压后出现以下文件:3.安装SCL 在终端root下出现安装界面选中scl解压所在文件夹,这里的source为/usr/synopsys/10.9.3/scl_v10.9.3_linux然后一直next,过程中有些选项都不需要管,也不需要填,直到选中安装目标路径,这里的安装路径是/usr/synopsys/10.9.3同样把scl_common文件安装到10.9.3。
Synopsys系列软件破@解及安装配置教程Synopsys 系列软件破@解及安装配置教程一、生成 lic:1、使用Synopsys.src 替换EFA LicGen 0.4b\packs 目录下的Synopsys.src(此处 feature要全,生成的 lic 就好用)2、利用 LicGen.exe 生成 synopsys.dat(注意:选 custom,并填入 hostid)3、在虚拟 dos 环境下(在 windows 界面下,使用 cmd 进入),键入:sssverify synopsys.dat得到 SECRET DATA4、在 windows 界面下,双击 KeyGen.exe填入上一步得到的 SECRET DATA 和第 2 步使用的 hostid。
Generate 之后在本目录下会产生一个 license.dat 文件。
5、将 license.dat 中的 SSS Feature 拷贝到 synopsys.dat。
如:FEATURE SSS snpslmd 1.0 31-dec-2020 uncounted AD05306DE9F195C50A3E \VENDOR_STRING="69656 d1d88 34cc3 38a6f 538ce df1f2 30f43 8258f \ecc22 fcf" HOSTID=000ae426dd0d ISSUER="Team ZWT 2006" \NOTICE="Licensed to mammoth//ZWT 2006 [PLEASE DO NOT DELETE THIS \SSS KEY]" SN=RK:1978-0:001224:0 START=1-jan-2006注:若第 2 步生成的 synopsys.dat 中有 SSS FEATURE,可将其删除。
6、修改 synopsys.dat 的头两句,如:SERVER 000ae426dd0d 27000DAEMON snpslmd /home/eda/linux/bin/snpslmd其中:snpslmd 指向 SCL 的 snpslmd。
![[转载]redhat安装synopsys软件(Installer](https://uimg.taocdn.com/0b2ec8c66e1aff00bed5b9f3f90f76c661374c08.webp)
[转载]redhat安装synopsys软件(Installer环境:vmware9虚拟机redhat_server 6.4软件版本:Installer_v3.0、SCL 11.5、vcs_mx_vH-2013.06第一章开始安装1. 目录结构,本人在linux 的用户bluesea根目录下建了/home/bluesea/study_space/synopsys 文件夹,安装文件全部解压在/synopsys/setup-files下(如果遇到权限问题,自主切换为root)。
文件结构:/studu_space/synopsys|---installer_v3.0|--- scl_v11.5|---license|---setup-files|--- vcs-mx_vH-2013.062. 安装installer,将installer3.0 解压到installer_v3.0 文件夹即可。
解压后出现以下文件:Install_bin、installer、installer_v3.0.tar.Z、install.now、setup.sh3. 安装SCL(1)将SCL解压到setup-files/scl_v11.文件夹下,可能生成scl_v11.5_linux.tar、scl_v11.5_common.tar、scl_v11.5_amd64.tar,再分别解压,生成的是三个文件夹scl_v11.5_linux、scl_v11.5_common、scl_v11.5_amd64,每个文件夹中会有类似release或者linux的文件夹。
(2)在终端下$ cd /home/bluesea/study_space/synopsys/installer_v3.0$ ./setup.sh(或者./installer -gui)注意:这里登陆redhat系统时要选择非root用户,否则提示类似 isn’t a TK application的错误。
synopsys ic compiler 介绍、安装、调试和设计流程加入该小组相关分类:petery (组长) 2007/9/23 顶楼举报一、介绍synopsys ic compiler (v2005.linux)是基于Galaxy设计平台开发的产品。
主要的工具有:LEDALEDA是可编程的语法和设计规范检查工具,它能够对全芯片的VHDL和Verilog描述、或者两者混合描述进行检查,加速SoC的设计流程。
LEDA预先将IEEE可综合规范、可仿真规范、可测性规范和设计服用规范集成,提高设计者分析代码的能力VCSVCS是编译型Verilog模拟器,它完全支持OVI标准的Verilog HDL语言、PLI和SDF。
VCS具有目前行业中最高的模拟性能,其出色的内存管理能力足以支持千万门级的ASIC设计,而其模拟精度也完全满足深亚微米ASIC Sign-Off 的要求。
VCS结合了节拍式算法和事件驱动算法,具有高性能、大规模和高精度的特点,适用于从行为级、RTL到Sign-Off等各个阶段。
VCS已经将CoverMeter 中所有的覆盖率测试功能集成,并提供VeraLite、CycleC等智能验证方法。
VCS 和Scirocco也支持混合语言仿真。
VCS和Scirocco都集成了Virsim图形用户界面,它提供了对模拟结果的交互和后处理分析。
SciroccoScirocco是迄今为止性能最好的VHDL模拟器,并且是市场上唯一为SoC验证度身定制的模拟工具。
它与VCS一样采用了革命性的模拟技术,即在同一个模拟器中把节拍式模拟技术与事件驱动的模拟技术结合起来。
Scirocco的高度优化的VHDL编译器能产生有效减少所需内存,大大加快了验证的速度,并能够在一台工作站上模拟千万门级电路。
这一性能对要进行整个系统验证的设计者来说非常重要。
VeraVera验证系统满足了验证的需要,允许高效、智能、高层次的功能验证。
Synopsys Design Compiler 2008.09安装步骤安装环境说明:此文讲述的是基于虚拟机VMware 中的Ubuntu10.04系统安装DC 的详细过程。
在其它Linux 系统安装也可以循此步骤安装。
安装资源准备:synopsys installer 2.0版本;scl(scl_v10.9.3_common 和scl_v10.9.3_linux);DC _200809(Design Compiler_200809_common 和Design Compiler_200809_linux);license 。
破解工具:EFA LicGen 0.4b 和 Synopsys SSS Feature Keygen 。
安装的目录结构:在安装的过程中会选择要安装的路径,这些指安装后的文件夹结构。
安装过程:(安装是在root 权限下进行的,推荐)1. 安装前确保Linux 系统已经安装了csh .若没有安装,通过命令apt-get installer csh 安装,如下所示:2. 安装installer :将synopsys installer2.0 解压到installer 文件夹即可.3. 安装SCL : 通过命令./installer –gui ,采用图形化用户界面的方式安装。
首先用cd 命令转到installer 目录下,然后执行 ./installer –gui 命令。
如图所示:(参照图中下方两行命令)选中目标后,点击Done。
接下来一直点击Next就行,出现下面的情况,点击NO,继续安装。
接着选择要安装的路径(这时选择的路径是最开始准备好的那个目录结构,不能选错了)。
这样scl_v10.9.3_common就安装成功。
用同样的方法安装scl_v10.9.3_linux。
(这个目录与scl_v10.9.3_common安装的时候是选择同一个路径的)。
最后出现安装成功的画面的话,scl就完成安装了。
SYNOPSYS HSPICE SPICE_EXPLORER安装 for LINUXby ys0290学习资料,切勿商用,以身试法,后果自负###########################################################################################首先,还是感谢给我这个可能,让我有地方去查找安装包和安装方法,特别是Drucul aC和另一位仁兄对我成功安装起了很大的作用,在此一并感谢!!!其次,介绍一下相关情况,我的系统是ubuntu10.04,installer是1.8(安装完整理资料我才发现它不是2.0),scl是10.9.3,hspice是2009.09,spice explorer是2006.1(sandwork),spice explorer 是看波形的,linux下没有awaves,有个cscope,听说没spice explorer好。
其实,我写的这个安装方法也适用于08版甚至更低版本之前,我已经在电脑上成功安装了Cadence Virtuoso(6.1.0)和modelsim6.5b###########################################################################################好了,现在正式安装吧:准备程序包:synopsys_installer 1.8: installer_v1.8SCL: scl_v10.9.3_common 和 scl_v10.9.3_linuxHspice:hspice_vC-2009.09_common 和 hspice_vC-2009.09_linuxlicense 生成程序:synopsys_crack(应该是09版的)spice explorer:sandwork_sx2006(如前所说,这个是看波形的,各位根据自己情况可安可不安,在这里我就说透吧:如果是cadence调用hspiceD进行仿真,cadence有自己的看波形软件,就不用另安装了,如果是单独使用hspice仿真但又有其它看波形软件也无需安装这个,如果不看波形就更不用安了,你不看波形吗?:)安装hspice后提示少一个库:libXm.so.3,可以从网上下一个(这里附带),放到/usr/lib/下面(另外,我附上一个压缩包,里面有些库文件,如果不成功,可以看看是不是缺少这些文件)。
Synopsys系列软件安装说明magellan。
Synopsys软件一共有三个:VCS、formality、安装这是一套验证软件,现在我们说一下它们的安装流程:VWmare1.安装执行可执行文件。
安装无注意事项。
按照步骤安装直到完成。
REDHAT4.22.安装REDHAT 。
加载运行虚拟机,在file选项下选择new下的virtual mashine在左下角虚拟光驱中加载接下来按照提示加载在提示加载其他的光盘时,disc1.这。
加载之后记得connect(安装前提是硬盘空间最小要15G)剩下的光盘镜像,样直到安装完成。
3.安装VMware Tools开始启动系统,然后用安装完系统后,点击start this virtual machine账号登陆,密码就是在安装系统时自己设置的密码。
在上面的工具栏菜单root界面外,不LINUX选择VM\install VMware Tools(目的是鼠标可以直接移动到共享文件windowsLINUX界面的大小,同时也可以实现和再需要Ctrl+Alt;设置拷贝到任何目VMwareTools-6.0.0-45731.tar.gz夹),生成VmWare Tools后将zxvf录下,然后在终端中的该目录下用tar –命令进行解压,然后进入解压后得到的VMwareTools-7.8.4-126130.tar.gz一切选择./ vmware-install.pl进行安装(vmware-tools-distrib的目录,执行默认就行)。
安装目录下的一个另一种方法:如果第一种方法不行,出现错误,就加载VM里面有个文件linux.iso镜像,在系统中打开cd-romhomeTools压缩包。
把它拷贝到VMwareTools-8.1.3-203739.tar.gz就是VMwarexvzfVMwareTools-8.1.3-203739.tar.gz 解压缩文件,文件夹下,然后用tar – ./vmware-install.pl 进行安装。
虚拟机Linux系统中安装SYNOPSYS工具图解教程陈浩利2011-05-16一、安装环境虚拟机:VMware 7.1操作系统:Fedora 10installer版本:2.0scl版本:10.9.3(据网上资料,有些用了11.1版本的,兼容性不是很好,故用此版本)dc版本:syn_vC-2009.06-SP5vcs版本:vcs-mx_vD-2009.12simif版本:simif_vC-2009.06-SP1pt版本:prime time pts_vD-2009.12-SP1(以上软件EETOP上均有下载链接)二、安装步骤2.1建立共享文件夹前提:VMware和Linux系统均安装了VMware Tools,如果没有可以将VMware Tools安装文件拷贝在U 盘中(Fedora 10可以识别U盘)进行安装。
新建一个虚拟机,然后编辑虚拟机:添加共享文件夹目录:设置的文件夹Windows系统和Linux系统均可对其进行读写,将Synopsy的各种安装文件放在这个文件夹,再拷贝到Linux系统自己的分区。
2.2 拷贝安装文件2.2.1 新建文件夹进入Fedora10 操作系统,在/home/chenhaoli(不同用户有不同的用户名,Fedora10中,用户只有在该路径下具有完全读写权限)下新建文件夹:/home/chenhaoli/eda(新建)/synopsys(新建)|--installer|--tar(存放installer安装文件)|--installer_v2.0(安装路径)|--scl|--tar(存放scl安装文件)|--scl_v10.9.3(scl安装路径)|--license(存放license)|--dc|--tar(存放dc安装文件)|--dc_2009(dc_2009安装路径)|--vcs|--tar(存放dc安装文件)|--vcs_2009(vcs_2009安装路径)|--simif|--tar(存放dc安装文件)|--simif_2009(simif_2009安装路径)|--pt|--tar(存放dc安装文件)|--pt_2009(pt_2009安装路径)2.2.2 拷贝安装文件将installer_v2.0.tar.Z拷贝到/synopsys/installer/tar中;scl_v10.9.3_common.tar、scl_v10.9.3_linux.tar拷贝到/synopsys/scl/tar中;syn_vC-2009.06-SP5_common.tar、syn_vC-2009.06-SP5_linux.tar拷贝到/synopsys/dc/tar中。
Discovery AMS Simulation Interface Guide for HSPICE®Version D-2010.03, March 2010ii Discovery AMS Simulation Interface Guide for HSPICE®D-2010.03Copyright Notice and Proprietary InformationCopyright © 2009 Synopsys, Inc. All rights reserved. This software and documentation contain confidential and proprietary information that is the property of Synopsys, Inc. The software and documentation are furnished under a license agreement and may be used or copied only in accordance with the terms of the license agreement. No part of the software and documentation may be reproduced, transmitted, or translated, in any form or by any means, electronic, mechanical, manual, optical, or otherwise, without prior written permission of Synopsys, Inc., or as expressly provided by the license agreement.Right to Copy DocumentationThe license agreement with Synopsys permits licensee to make copies of the documentation for its internal use only. Each copy shall include all copyrights, trademarks, service marks, and proprietary rights notices, if any. Licensee must assign sequential numbers to all copies. These copies shall contain the following legend on the cover page:“This document is duplicated with the permission of Synopsys, Inc., for the exclusive use of __________________________________________ and its employees. This is copy number __________.”Destination Control StatementAll technical data contained in this publication is subject to the export control laws of the United States of America. Disclosure to nationals of other countries contrary to United States law is prohibited. It is the reader’s responsibility to determine the applicable regulations and to comply with them.DisclaimerSYNOPSYS, INC., AND ITS LICENSORS MAKE NO WARRANTY OF ANY KIND, EXPRESS OR IMPLIED, WITH REGARD TO THIS MA TERIAL, INCLUDING, BUT NOT LIMITED TO, THE IMPLIED WARRANTIES OF MERCHANTABILITY AND FITNESS FOR A P ARTICULAR PURPOSE.Registered Trademarks (®)Synopsys, AMPS, Astro, Behavior Extracting Synthesis T echnology, Cadabra, CA TS, Certify, CHIPit, Design Compiler, DesignWare, Formality, HDL Analyst, HSIM, HSPICE, Identify, iN-Phase, Leda, MAST , ModelTools, NanoSim, OpenVera, PathMill, Physical Compiler, PrimeTime, SCOPE, Simply Better Results, SiVL, SNUG, SolvNet, Syndicated, Synplicity, the Synplicity logo, Synplify, Synplify Pro, Synthesis Constraints Optimization Environment, T etraMAX, UMRBus, VCS, Vera, and YIELDirector are registered trademarks of Synopsys, Inc.Trademarks (™)AFGen, Apollo, Astro-Rail, Astro-Xtalk, Aurora, AvanWaves, BEST, Columbia, Columbia-CE, Confirma, Cosmos, CosmosLE, CosmosScope, CRITIC, CustomExplorer, CustomSim, DC Expert, DC Professional, DC Ultra, Design Analyzer, Design Vision, DesignerHDL, DesignPower, DFTMAX, Direct Silicon Access, Discovery, Eclypse, Encore, EPIC, Galaxy, Galaxy Custom Designer, HANEX, HAPS, HapsTrak, HDL Compiler, Hercules, Hierarchical Optimization T echnology, High-performance ASIC Prototyping System, HSIM plus , i-Virtual Stepper, IICE, in-Sync, iN-T andem, Jupiter, Jupiter-DP , JupiterXT , JupiterXT-ASIC , Liberty, Libra-Passport, Library Compiler, Magellan, Mars, Mars-Rail, Mars-Xtalk, Milkyway, ModelSource, Module Compiler, MultiPoint, Physical Analyst, Planet, Planet-PL, Polaris, Power Compiler, Raphael, Saturn, Scirocco, Scirocco-i, Star-RCXT, Star-SimXT , StarRC, System Compiler, System Designer, T aurus, T otalRecall, TSUPREM-4, VCS Express, VCSi, VHDL Compiler, VirSim, and VMC are trademarks of Synopsys, Inc.Service Marks (sm )MAP-in, SVP Café, and T AP-in are service marks of Synopsys, Inc.SystemC is a trademark of the Open SystemC Initiative and is used under license.ARM and AMBA are registered trademarks of ARM Limited.Saber is a registered trademark of SabreMark Limited Partnership and is used under license.All other product or company names may be trademarks of their respective owners.ContentsAudience . . . . . . . . . . . . . . . . . . . . . . . . . . . . . . . . . . . . . . . . . . . . . . . . . . . . .v The HSPICE Documentation Set. . . . . . . . . . . . . . . . . . . . . . . . . . . . . . . . . . .v Conventions. . . . . . . . . . . . . . . . . . . . . . . . . . . . . . . . . . . . . . . . . . . . . . . . . . .vii Customer Support . . . . . . . . . . . . . . . . . . . . . . . . . . . . . . . . . . . . . . . . . . . . . .viii1.Introduction to the Discovery AMS Simulation Interface. . . . . . . . . . . . . .1Overview . . . . . . . . . . . . . . . . . . . . . . . . . . . . . . . . . . . . . . . . . . . . . . . . . . . . .1 HSPICE Simulation Interface Requirements. . . . . . . . . . . . . . . . . . . . . . . . . .3 Licenses. . . . . . . . . . . . . . . . . . . . . . . . . . . . . . . . . . . . . . . . . . . . . . . . . .3Supported Platforms . . . . . . . . . . . . . . . . . . . . . . . . . . . . . . . . . . . . . . . .3 Summary of Features . . . . . . . . . . . . . . . . . . . . . . . . . . . . . . . . . . . . . . . . . . .4 Requirements: Discovery AMS SimIF Integration with Virtuoso Schematic Editor5 Installing the SimIF-Cadence Virtuoso Schematic Editor Interface. . . . . . . . .6 Setting up your Discovery AMS SimIF Environment . . . . . . . . . . . . . . . . . . . .6 Setting Up Tests Using Absolute Paths. . . . . . . . . . . . . . . . . . . . . . . . . . . . . .7 Customizing the SimIF Defaults. . . . . . . . . . . . . . . . . . . . . . . . . . . . . . . . . . . .7 Using the discoveryAMSArtistSaveDir SKILL Variable . . . . . . . . . . . . . .8Using the discoveryAMSModelLibraryList SKILL Variable. . . . . . . . . . . .8Using the discoveryAMSScale SKILL Variable . . . . . . . . . . . . . . . . . . . .9Using the discoveryAMSDesignVariableList SKILL Variable . . . . . . . . . .92.Setting up Your Cadence Environment . . . . . . . . . . . . . . . . . . . . . . . . . . . .11Contents of this Section. . . . . . . . . . . . . . . . . . . . . . . . . . . . . . . . . . . . . . . . . .11 Invoking the Command Interpreter Window. . . . . . . . . . . . . . . . . . . . . . . . . . .11 Loading Designs with the Library Manager. . . . . . . . . . . . . . . . . . . . . . . . . . .12 Using the Hierarchy Editor. . . . . . . . . . . . . . . . . . . . . . . . . . . . . . . . . . . . . . . .16 Using the Virtuoso Schematic Editing Window . . . . . . . . . . . . . . . . . . . . . . . .201Contents3.Setting Up a Simulation in the AMS Discovery SimIF . . . . . . . . . . . . . . . .23Contents of this Section. . . . . . . . . . . . . . . . . . . . . . . . . . . . . . . . . . . . . . . . . .23Invoking SimIF from Cadence Virtuoso Schematic Editor . . . . . . . . . . . . . . .23Creating a T estbench in SimIF. . . . . . . . . . . . . . . . . . . . . . . . . . . . . . . . . . . . .24Setting Up the Netlist and Stimulus Options . . . . . . . . . . . . . . . . . . . . . . . . . .27 Specifying a Model Library. . . . . . . . . . . . . . . . . . . . . . . . . . . . . . . . . . . .27Specifying Design Variables. . . . . . . . . . . . . . . . . . . . . . . . . . . . . . . . . . .28Specifying Analog Options. . . . . . . . . . . . . . . . . . . . . . . . . . . . . . . . . . . .29 Setting Up an HSPICE Simulation and Analysis . . . . . . . . . . . . . . . . . . . . . . .30 Setting Up for Analysis. . . . . . . . . . . . . . . . . . . . . . . . . . . . . . . . . . . . . . .304.Running a Simulation in the Discovery AMS SimIF. . . . . . . . . . . . . . . . . .41Contents of this Section. . . . . . . . . . . . . . . . . . . . . . . . . . . . . . . . . . . . . . . . . .41Starting a Simulation in SimIF. . . . . . . . . . . . . . . . . . . . . . . . . . . . . . . . . . . . .41Netlisting Settings . . . . . . . . . . . . . . . . . . . . . . . . . . . . . . . . . . . . . . . . . . . . . .42Simulation Run Settings. . . . . . . . . . . . . . . . . . . . . . . . . . . . . . . . . . . . . . . . . .43Setting Up Local or Remote Simulations in SimIF. . . . . . . . . . . . . . . . . . . . . .44Netlisting and Running. . . . . . . . . . . . . . . . . . . . . . . . . . . . . . . . . . . . . . . . . . .46Viewing the Netlist. . . . . . . . . . . . . . . . . . . . . . . . . . . . . . . . . . . . . . . . . . . . . .47Using CosmosScope to Analyze Simulation Results. . . . . . . . . . . . . . . . . . . .50Back-Annotate DC Operating Point and Device Bias Condition . . . . . . . . . . .54Conclusion. . . . . . . . . . . . . . . . . . . . . . . . . . . . . . . . . . . . . . . . . . . . . . . . . . . .57A.Writing Custom Netlist Procedures for the Discovery AMS Netlister. . . .59Overview . . . . . . . . . . . . . . . . . . . . . . . . . . . . . . . . . . . . . . . . . . . . . . . . . . . . .59Understanding Custom Netlist Procedures . . . . . . . . . . . . . . . . . . . . . . . . . . .59Understanding the CDF simInfo. . . . . . . . . . . . . . . . . . . . . . . . . . . . . . . . . . . .60Discovery AMS Netlister Custom Netlist Procedure Rules . . . . . . . . . . . . . . .62Discovery AMS Netlister Custom Netlist Procedure Example. . . . . . . . . . . . .63Discovery AMS APIs . . . . . . . . . . . . . . . . . . . . . . . . . . . . . . . . . . . . . . . . . . . .67 discoveryAMSGetInstName. . . . . . . . . . . . . . . . . . . . . . . . . . . . . . . . . . .68discoveryAMSGetPortNetListStr . . . . . . . . . . . . . . . . . . . . . . . . . . . . . . .68 2ContentsdiscoveryAMSGetModelName. . . . . . . . . . . . . . . . . . . . . . . . . . . . . . . . .69discoveryAMSGetInstPropListStr. . . . . . . . . . . . . . . . . . . . . . . . . . . . . . .70discoveryAMSGetNamedInstPropListStr. . . . . . . . . . . . . . . . . . . . . . . . .71discoveryAMSGetQuotedInstPropListStr. . . . . . . . . . . . . . . . . . . . . . . . .73discoveryAMSGetOrderedParamStr . . . . . . . . . . . . . . . . . . . . . . . . . . . .74 Index. . . . . . . . . . . . . . . . . . . . . . . . . . . . . . . . . . . . . . . . . . . . . . . . . . . . . . . . . . . .753Contents 4Discovery AMS Simulation Interface Guide for HSPICE®v D-2010.03About This ManualThe Discovery AMS Simulation Interface (SimIF) feature is integrated with the Cadence® Virtuoso® Schematic Editor. This integration provides a linkbetween the Cadence Schematic and the Synopsys simulation flow. This manual describes this flow.AudienceUsers of this feature should be very familiar with HSPICE, and have some background with the Cadence® Virtuoso® Analog Design Environment.The HSPICE Documentation SetThis manual is a part of the HSPICE documentation set, which includes thefollowing manuals: Manual DescriptionHSPICE User Guide:Simulation and AnalysisDescribes how to use HSPICE to simulate and analyze your circuit designs, and includes simulation applications. This is the main HSPICE user guide. HSPICE User Guide:Signal IntegrityDescribes how to use HSPICE to maintain signal integrity in your chip design.HSPICE User Guide: RFAnalysisDescribes how to use special set of analysis and design capabilities added to HSPICE to support RF and high-speed circuit design. HSPICE ReferenceManual: Commands andControl Options Provides reference information for HSPICE and HSPICE RF commands and options.vi Discovery AMS Simulation Interface Guide for HSPICE®D-2010.03The HSPICE Documentation SetSearching Across the HSPICE Documentation SetY ou can access the PDF format documentation from your install directory forthe current release by entering -docs on the terminal command line when theHSPICE tool is open.Synopsys includes an index with your HSPICE documentation that lets yousearch the entire HSPICE documentation set for a particular topic or keyword.In a single operation, you can instantly generate a list of hits that are hyper-linked to the occurrences of your search term. For information on how toperform searches across multiple PDF documents, see the HSPICE releasenotes (available on SolvNet at /ReleaseNotes ) orthe Adobe Reader online help.Note: T o use this feature, the HSPICE documentation files, the Indexdirectory, and the index.pdx file must reside in the samedirectory. (This is the default installation for Synopsysdocumentation.) Also, Adobe Acrobat must be invoked as astandalone application rather than as a plug-in to your webbrowser.Y ou can also invoke HSPICE and HSPICE RF command help by entering-help on your terminal command line when the HSPICE tool is open. This HSPICE ReferenceManual: Elements andDevice ModelsDescribes standard models you can use when simulating your circuit designs in HSPICE, including passive devices, diodes, JFET and MESFET devices, and BJT devices. HSPICE ReferenceManual: MOSFET ModelsDescribes available MOSFET models you can use when simulating your circuit designs in HSPICE.HSPICE Integration toCadence ™ Virtuoso®Analog DesignEnvironment User Guide Describes use of the HSPICE simulator integration to the Cadence tool.AMS Discovery Simulation Interface Guide for HSPICEDescribes use of the Simulation Interface with otherEDA tools for HSPICE.Manual DescriptionConventions opens a browser-based help system for fast navigation to commands andoptions used in HSPICE and the HSPICE RF flow.ConventionsThe following typographical conventions are used in Synopsys HSPICEdocumentation.Convention DescriptionCourier Indicates command syntax.Italic Indicates a user-defined value, such as object_name.Bold Indicates user input—text you type verbatim—in syntax andexamples.[]Denotes optional parameters, such as:write_file [-f filename]...Indicates that parameters can be repeated as many times asnecessary:pin1 pin2 ... pinN|Indicates a choice among alternatives, such aslow | medium | high+Indicates a continuation of a command line./Indicates levels of directory structure.Edit > Copy Indicates a path to a menu command, such as opening theEdit menu and choosing Copy.Control-c Indicates a keyboard combination, such as holding down theControl key and pressing c.Discovery AMS Simulation Interface Guide for HSPICE®vii D-2010.03Customer SupportCustomer SupportCustomer support is available through SolvNet online customer support andthrough contacting the Synopsys T echnical Support Center.Accessing SolvNetSolvNet includes an electronic knowledge base of technical articles andanswers to frequently asked questions about Synopsys tools. SolvNet alsogives you access to a wide range of Synopsys online services, which includedownloading software, viewing Documentation on the Web, and entering a callto the Support Center.T o access SolvNet:1.Go to the SolvNet Web page at .2.If prompted, enter your user name and password. (If you do not have aSynopsys user name and password, follow the instructions to register withSolvNet.)If you need help using SolvNet, click SolvNet Help in the Support Resourcessection.Contacting the Synopsys Technical Support CenterIf you have problems, questions, or suggestions, you can contact the SynopsysT echnical Support Center in the following ways:■Open a call to your local support center from the Web by going to (Synopsys user name and password required),then clicking “Enter a Call to the Support Center.”■Send an e-mail message to your local support center.•E-mail support_center@ from within North America.•Find other local support center e-mail addresses at/support/support_ctr.■T elephone your local support center.•Call (800) 245-8005 from within the continental United States.•Call (650) 584-4200 from Canada.viii Discovery AMS Simulation Interface Guide for HSPICE®D-2010.03Customer Support •Find other local support center telephone numbers at/support/support_ctr.Discovery AMS Simulation Interface Guide for HSPICE®ixCustomer Supportx Discovery AMS Simulation Interface Guide for HSPICE®1 Introduction to the Discovery AMS SimulationInterface The Discovery AMS Simulation Interface is integrated with the Cadence®Virtuoso® Schematic Editor. This integration provides a link between theCadence schematic and the Synopsys simulation flow, enabling you to simulatepure analog (transistor) and mixed-signal designs from the same environment.You can run NanoSim, NanoSim-VCS (NS-VCS), and HSPICE within theCadence Design Environment.OverviewThe Discovery AMS Simulation Interface (SimIF) enables you to setup andsimulate multiple tests/designs. Y ou can run multiple tests/designs locally orremotely on a load-share system, such as the SUN GRID cluster technology orLSF (load sharing facility).The simulation is run inside the SimIF, which is launched from the VirtuosoSchematic Editor window. The integration has its own netlister, the DiscoveryAMS netlister. The netlister supports the HSPICE and SPECTRE netlistformats. The netlister is invoked from SimIF.Note:The HSPICE netlister translates "()" to quotes to generate aHSPICE compatible netlist.The SimIF integration with the Virtuoso® Schematic Editor flow is shown inFigure1.Discovery AMS Simulation Interface Guide for HSPICE®12Discovery AMS Simulation Interface Guide for HSPICE®Chapter 1:Introduction to the Discovery AMS Simulation InterfaceOverview Figure 1Discovery AMS (SimIF) Cadence Virtuoso Schematic Editor FlowY ou do not need to add any special views to use the Discovery AMSintegration. The Discovery AMS netlister can use either the hspiceS orhspiceD view to generate an HSPICE netlist file. The netlister uses thespectre view to generate the Spectre netlist file. A Cadence OASIS license isnot required when running this interface.The Discovery AMS SimIF integration only supports the analog library thatCadence bundles with their software. If you have customized the Cadenceanalog library (or have your own version of the analog library) you must updateyour custom netlist route for Discovery AMS.This chapter contains the following topics:■HSPICE Simulation Interface Requirements ■Summary of Features ■Requirements: Discovery AMS SimIF Integration with Virtuoso SchematicEditor■Installing the SimIF-Cadence Virtuoso Schematic Editor Interface■Setting up your Discovery AMS SimIF EnvironmentChapter 1:Introduction to the Discovery AMS Simulation InterfaceHSPICE Simulation Interface RequirementsHSPICE Simulation Interface RequirementsThe Discovery AMS SimIF integration with the Virtuoso Schematic Editorrequires the following product release versions:■SimIF 2006.06-SP1 (or later)■HSPICE 2006.09 (or later)■CosmosScope 2006.06-SP1 (or later)■Virtuoso Schematic Editor version IC4.46 (or later)NOTE: Linux 3.0 only works with IC5.141LicensesY ou must have the following product licenses: Synopsys HSPICE, SimIF,CosmosScope, and Cadence Virtuoso Schematic Editor.■HSPICE■SimIF■CosmosScope■Cadence Virtuoso Schematic EditorSupported PlatformsThe following platforms are supported:■32-bit platformSUNOS 5.9, HP, Linux Red Hat RHEL v3■64-bit platformSUNOS 5.9, HP, Linux Red Hat RHEL v3Discovery AMS Simulation Interface Guide for HSPICE®3Chapter 1:Introduction to the Discovery AMS Simulation InterfaceSummary of FeaturesSummary of FeaturesFor a summary of the currently supported and unsupported features for theDiscovery AMS Simulation Interface Integration, see T able1.Table 1Summary of HSPICE Features for SimIFSupported Features Unsupported FeaturesHSPICE netlist Spectre netlistVerilog-A netlist*SimIF supports sessions management- Simulate multiple tests/designssimultaneouslyCadence Schematic & config viewCross-probe between SimIF and VirtuosoSchematic Editor■Save node voltages from schematic■Save terminal currents from schematic■Save nodal capacitance from schematic■Save power consumption from schematic■Cross-probe between SimIF interactivemode and schematicBack annotation of DC operating points and DC element bias conditions Back annotation of transient analysis resultsCosmosScope waveform viewerCross-probe between CosmosScope andVirtuoso Schematic EditorSave and Load SimIF states- Accepts the Cadence Virtuoso AnalogDesign Environment (ADE) statesCustomizing Cadence defaults using .cdsinitfile**4Discovery AMS Simulation Interface Guide for HSPICE®Discovery AMS Simulation Interface Guide for HSPICE®5Chapter 1:Introduction to the Discovery AMS Simulation InterfaceRequirements: Discovery AMS SimIF Integration with Virtuoso Schematic EditorNote: * If you have Verilog-A in your design, it is specified in the Spectrenetlist with an ahdl_include statement, and it is specified inthe HSPICE netlist file with an .hdl statement.** Y ou can customize your SimIF default settings using the.cdsinit file.Requirements: Discovery AMS SimIF Integration with Virtuoso Schematic EditorT o use the Discovery AMS SimIF integration with the Virtuoso SchematicEditor, you must satisfy the following requirements:1.An hspiceS or hspiceD view in your Cadence libraries. The DiscoveryAMS netlister can use either the hspiceS or hspiceD view to generate anHSPICE netlist file.2. A Cadence schematic or config view for your design.3.Set the path for CosmosScope (2006.03 release). If you have not set thepath to CosmosScope, you will get the following warning message whenDiscovery AMS is invoked, as shown in Figure 2.Figure 2CosmosScope warning messageChapter 1:Introduction to the Discovery AMS Simulation InterfaceInstalling the SimIF-Cadence Virtuoso Schematic Editor InterfaceInstalling the SimIF-Cadence Virtuoso Schematic Editor InterfaceBefore installing the SimIF code, make sure you have the appropriate HSPICE,SimIF, CosmosScope, and Cadence software versions, licenses, andenvironment settings.T o install the SimIF, follow this procedure:1.Install the Discovery AMS SimIF release2.Add the following lines to your Cadence .cdsinit file:load(strcat(getShellEnvVar("SNPS_SIMIF")"/interfaces/simif/virtuoso/discoveryAMS.al"))3.Install the latest HSPICE release4.Install the latest CosmosScope release.Setting up your Discovery AMS SimIF Environment T o set up your SimIF environment, follow this procedure:1.Source the Discovery AMS Simulation Interface CSHRC file. The CSHRCfile is located under the SimIF installation directory (install_directory/CSHRC_simif)For example:source /home/synopsys/Y-2006.06-SP1/CSHRC_simifThe.cshrc file sets the path for the Discovery AMS skill code.Here is a sample of what the CSHRC_simif file contains:setenv SNPS_SIMIF /home/synopsys/Y-2006.06-SP1set path = (${SNPS_SIMIF}/bin $path)2.Set the CosmosScope path.For example:set path = (/home/synopsys/Cscope_2006.06-SP1/sparcOS5/ai_bin $path)3.Set the Cadence environment path.6Discovery AMS Simulation Interface Guide for HSPICE®Chapter 1:Introduction to the Discovery AMS Simulation InterfaceSetting Up Tests Using Absolute PathsFor example:setenv CDSHOME /home/cadence/IC5141setenv CDS_INST_DIR $CDSHOMEsetenv CDS_HOME $CDSHOMEset path=($path $CDSHOME/tools/bin $CDSHOME/tools/dfII/bin)Setting Up Tests Using Absolute PathsIf you specify your files as absolute paths, SimIF saves them as relative pathswith respect to the test directory. If you move the project to a different location,then these relative paths are resolved with respect to the test directory in thenew location. However, in the files created by SimIF these absolute paths arewritten as relative with respect to the run directory where the simulation wouldbe run.Example:Original netlist path: /remote/misc16/user3/projects/netlist/mynetlist.spNetlist as specified in SimIF:/remote/misc16/user3/projects/netlist/mynetlist.spAssuming the project and test directories are:/remote/misc16/user3/projects/my_projectand/remote/misc16/user3/projects/my_project/my_testthe netlist file would be stored as:../../netlist/mynetlist.spIf you move the directory /remote/misc16/user3/projects (which holds bothnetlists and the project) to a different location, then the paths are resolvedcorrectly.Example run script when absolute paths are used:cd /remote/misc16/user3/projects/netlisthspice -i ./mynetlist.spCustomizing the SimIF DefaultsY ou can customize the Discovery AMS SimIF default settings by including Skillvariables in your .cdsinit files. The Skill variables listed in T able2 can be Discovery AMS Simulation Interface Guide for HSPICE®78Discovery AMS Simulation Interface Guide for HSPICE®Chapter 1:Introduction to the Discovery AMS Simulation InterfaceCustomizing the SimIF Defaultsused to set the default path to the state directory, model libraries, Verilog library directories, and Verilog library files.Using the discoveryAMSArtistSaveDir SKILL VariableBy default, the SimIF state files are stored in your home directory,~user/.artist_states . Y ou can change the default location for the statefiles by setting the discoveryAMSArtistSaveDir skill variable in your.cdsinit file.In Example 1, the discoveryAMSArtistSaveDir skill variable is used to setthe state directory to /home/user/projects/artist_states .Example 1Setting the default location for the state directorydiscoveryAMSArtistSaveDir="/home/user/projects/artist_states"The discoveryAMSArtistSaveDir skill variable is a string type. Refer tothe Cadence Skill Reference Guide for more information on the skill variable type string.Using the discoveryAMSModelLibraryList SKILLVariableY ou can add the SimIF discoveryAMSModelLibraryList skill variable toyour .cdsinit file to set the default path to the process model library file(s) forTable 2Discovery AMS-supported .cdsinit variables Skill Variable VariableType PurposediscoveryAMSArtistSaveDirstring Default value for state directory discoveryAMSModelLibraryListlist Model library and corner names discoveryAMSScale string For setting the command .optionscale=<value>or .optionscalm=<value> in the HSPICEnetlist formatdiscoveryAMSDesignVariableList listFor loading design variables intothe Design Variables paneChapter 1:Introduction to the Discovery AMS Simulation InterfaceCustomizing the SimIF Defaults your design. The discoveryAMSModelLibraryList skill variable enablesyou to set the path to multiple model library file(s).In Example2, two models files, cmos90nm.spi (tt corner) and bjt.spi are inthe directory /home/projects/Models/HSPICE. Set the skill variable asshown.Example 2Setting the default path to the process model librariesdiscoveryAMSModelLibraryList='(("/home/projects/Models/HSPICE/cmos90nm.spi" "tt")("/home/projects/Models/HSPICE/bjt.spi"))Once you have set the path to the model file in the .cdsinit file, the modelfiles field is automatically populated when you create a test in the SimIF.The discoveryAMSModelLibraryList skill variable is a list-type variable.Refer to the Cadence Skill Reference Guide for more information on the skillvariable type list.Using the discoveryAMSScale SKILL VariableY ou can add the SimIF discoveryAMSScale skill variable to your .cdsinitfile to by setting the command.option scale=1 or.option scalm=<value> in theHSPICE netlist format for your HSPICE simulation.In Example3, the discoveryAMSScale skill variable enables you to set thedefault geometric scale.Example 3Setting the default geometric scale (option SCALE)discoveryAMSScale = "1u"Refer to the Cadence Skill Reference Guide for more information on the skillvariable type string.Using the discoveryAMSDesignVariableList SKILLVariableY ou can add the SimIF discoveryAMSDesignVariableList to automatethe process of populating the Design Variables form. For example, if you havenumerous reference parameters which do not depend on the current design,you can set the list-type variable for design variables in your .cdsinit file.Discovery AMS Simulation Interface Guide for HSPICE®9。
Synopsys VDK 使用方法Synopsys VDK(Virtualizer Development Kit)是一款用于虚拟开发和测试的软件工具。
它提供了一套完整的虚拟开发环境,包括模拟器、调试器和分析工具,帮助用户在不依赖硬件的情况下进行软件开发和测试。
本文将介绍Synopsys VDK的使用方法,包括安装、配置、使用和调试等方面的内容。
一、安装VDK1.1 下载VDK安装包在Synopsys冠方全球信息站上下载VDK的安装包,选择适合自己系统的版本进行下载。
1.2 安装VDK解压下载的安装包并按照提供的安装指南进行VDK的安装。
在安装过程中,可以根据自己的需求选择安装的组件和路径。
1.3 激活VDK安装完成后,根据提供的激活码激活VDK软件。
二、配置VDK2.1 创建新的虚拟开发项目在VDK中创建新的虚拟开发项目,设置项目的名称、目标处理器和其他相关配置信息。
2.2 导入软件模型将需要开发和测试的软件模型导入到VDK中,包括处理器模型、外设模型等。
2.3 配置虚拟开发环境配置VDK的虚拟开发环境,包括处理器的初始化、外设的连接和虚拟的外部环境设置等。
三、使用VDK3.1 虚拟化软件开发在VDK中进行软件的开发,包括编译、调试和运行等操作。
可以使用VDK提供的调试器进行软件的调试和分析。
3.2 虚拟化软件测试利用VDK进行软件的测试,包括单元测试、集成测试和系统测试等。
可以通过虚拟化的方式模拟各种复杂的场景和情况进行测试。
3.3 虚拟化性能分析使用VDK进行软件的性能分析,包括性能指标的监控、分析和优化等。
可以通过VDK提供的分析工具进行性能分析的工作。
四、调试VDK4.1 软件调试在VDK中进行软件的调试工作,包括断点设置、变量监视和程序运行状态检查等。
4.2 虚拟硬件调试利用VDK进行虚拟硬件的调试,包括外设的模拟、接口的调试和虚拟硬件的状态监控等。
4.3 软硬件协同调试在VDK中进行软硬件协同的调试工作,包括软硬件的交互调试、数据传输的监控和协同数据处理等。
前言:这是本人经过两个星期的奋斗,从对linux命令的生涩到熟练,对后端工具的陌生到熟悉的一段战斗史!!!下面我把我的操作过程详细写下,供大家学习参考!!一:准备工作所需平台1、vmware92、RHEL(红帽企业版)6.3Synopsys 工具1、installer_v3.0(安装synopsys EDA tools 的图形界面的安装工具)2、scl_10.9.3(synopsys license 管理工具,用于启动tools 的features)3、dc_2009.06(逻辑综合工具)4、icc_2009.06(布局布线工具)5、pt_2012.12(时序分析工具)License生成工具1、EFA LicGen 0.4b2、Synopsys SSS Feature Keygen3、Synposys.src(最新的据我所知是40kb大小,有比较全的features)二:搭建RHEL1、安装vmware:本章节详见另一个文档。
文档名为“vmware安装手册”。
还有一份汉化包,需要可自行下载。
2、安装RHEL:本章详见另一个文档。
文档名为“RHEL6.3安装手册”。
Ps:有一个页面会让你选择安装的软件包,这个时候人工勾上所有的软件包,不然启eda 工具的时候会发现很多系统库找不到。
三:vmware tools安装1、以root用户进入linux,找到左上角的VM选项,下拉之后选择安装wmwaretools。
过一会儿会弹出来一个框框,显示vmwaretools-9.2.2-893683.tar.gz然后新开一个终端,输入cd /media 你会看到vmwaretools-9.2.2-893683.tar.gz就在那里。
然后把他拷贝出来,后解压安装。
具体命令可以网上搜索。
四:license制作License制作要用到上述的材料,具体详见另一个文档。
文档名为“license制作”。
将license文件,即synopsys.dat文件放到linux下的共享文件夹。
Synopsys 工具安装和 license 制作简易教程Linux virtual machine “Ubuntu_16_04_for_synopsys” Info,Username: jackPassword: login123Memory: 2GBHard disk: 64GBProcessor counts: 1Internet connection mode: NAT安装过程(软件环境:VMware12pro / ubuntu16.04 / 32 位版本;64 位版本运行不成功)事先安装好 VMware12pro 和 ubuntu16.04,之后在 ubuntu 中操作设置 Ubuntu 镜像源如图 1(a)所示,将 ubuntu software->Software & Updates->Download from 设置成中国的网站,设置成功后关闭窗口,不选择更新如图 1(b)所示,在终端中键入命令$ sudo apt-get update 进行更新(a) ubuntu software (b) apt update图 1 ubuntu 镜像源更新安装必要工具键入命令$ sudo apt-get install vim csh dconf-editor libjpeg62-dev设置 Ubuntu 显示中文键入命令$ dconf-editor如图 2 所示,将org->gnome->gedit->preferences->encodings->candidate-encodings 的值设置成['CURRENT', 'ISO-8859-15', 'GB18030', 'UTF-8', 'UTF-16']图 2 dconf-editor键入命令ifconfig,确定网卡名是否为eth0,否则按照下列步骤更改成eth0 键入命令$ su root键入命令# vim /etc/default/grub,在GRUB_CMDLINE_LINUX 中添加net.ifnames=0biosdevname=0,新GRUB_CMDLINE_LINUX 如下GRUB_CMDLINE_LINUX="find_preseed=/preseed.cfg auto noprompt priority=critical locale=en_USnet.ifnames=0 biosdevname=0"键入命令# update-grub键入命令# vim /etc/network/interfaces,添加auto eth0iface eth0 inet dhcp重启系统新建synopsys 工具安装目录,并拷贝安装源tar 压缩包到sources 文件夹下,如图3 所示;同时将installer_v3.2.tar 解压到文件夹installer 中图3 安装目录树以安装Synopsys design compiler, dc 为例,而scl、vcs 和pt 的安装同dc(注:synopsys的其他工具的安装过程都相同)键入命令$ ~/eda/synopsys/installer/setup.sh 开启图形安装界面,如图4(a)所示选择安装源路径为/home/jack/eda/synopsys/sources,如图4(b)所示选择安装syn,即为dc,如图4(c)所示选择安装路径为/home/jack/eda/synopsys/dc,如图4(d)所示其他未说明步骤按默认处理(a) 启动界面(b) 选择安装源路径(c) 选择安装DC (d) 选择安装路径图4 DC 安装过程制作license(注:各种synopsys license 制作包大同小异)键入命令$ ifconfig –a,记录eth0 的MAC 地址在Windows(不一定是本机,也可以是其他电脑)中进行操作,关掉一切杀毒软件运行license 制作包中的LicGen.exe点开Open 按钮,选择synopsys.lpd,如图5(a)所示如图5(b)所示在两处Host ID->Custom 键入eth0 的MAC 地址,点击Generate 生成的内容Save 成synopsys.dat将生成的synopsys.dat 文件保存到Synopsys SSS Feature Keygen 文件夹中打开cmd,进入Synopsys SSS Feature Keygen 目录后运行sssverify.exe synopsys.dat,复制生成的SECRET DATA,如图5(c)和图5(d)打开Synopsys SSS Feature Keygen 文件夹中的KeyGen.exe,如图5(e)所示,键入SECRET DATA 和eth0 的MAC 地址,生成license.dat如图5(f)所示,将license.dat 中的FEATURE SSS 内容粘贴到synopsys.dat 中,如果synopsys.dat 中存在则替换如图5(g)所示,在相应位置修改localhost 和snpslmd path;其中在ubuntu 中键入命令$ hostname 可获取localhost,而snpslmd 后面的链接地址设置成绝对路径~/eda/synopsys/scl/linux/bin/snpslmd(附录A 为synopsys.dat 更改后的部分内容)(a) 选择Synopsys.lpd (b) 生成synopsys.dat(c) 验证synopsys.dat(d) 生成SECRET DATA(e) 生成license.dat(f) license.dat(g) 修改后的synopsys.dat图5 license 制作过程验证license将制作好的license 拷贝到~/eda/synopsys/license 目录下,同时终端进来该目录如图6 所示,键入命令$ ~/eda/synopsys/scl/linux/bin/sssverify synopsys.dat,出现PASSED 表示OK图6 验证license环境变量配置键入命令$ vim ~/.bashrc,添加如图7 所示的环境变量,详见附件B图7 环境变量设置运行每次运行前先键入命令$ lmli2,启动scl,如图8(a)所示键入命令$ dc,启动dc 的图形界面,如图8(b)所示键入命令$ dve,启动vcs 的图形界面,如图8(c)所示键入命令$ pt,启动pt 的图形界面,如图8(d)所示(a) 启动scl(b) dc 的图形界面(c) vcs 的图形界面(d) pt 的图形界面(缺图)图8 运行界面遇到的问题记录1. 如在终端中显示缺什么,就试试安装什么,$ sudo apt-get install *2. lmgrd 找不到$ sudo apt install lsb-core3. grep: /etc/redhat-release: No such file or directory$ sudo > /etc/redhat-release4. /bin/sh: 0: Illegal option –h$ sudo mv /bin/dash /bin/dash~$ sudo ln -s /bin/bash /bin/dash附录ASERVER ubuntu 000c2960189e 27000DAEMON snpslmd /home/jack/eda/synopsys/scl/linux/bin/snpslmdFEATURE SSS snpslmd 1.0 31-dec-2020 uncounted 0EFAB50928B9EDBDB856 \ VENDOR_STRING="69656 d1d88 34cc3 35f9b 39561 08bdd 779a4 23589 \aa9a3 196" HOSTID=000c2960189e ISSUER="Team ZWT 2006" \NOTICE="Licensed to mammoth//ZWT 2006 [PLEASE DO NOT DELETE THIS \ SSS KEY]" SN=RK:1978-0:001224:0 START=1-jan-2006附录B# 添加以下环境变量到~/.bashrc# 适用于32 位,64 位只需将链接中linux 替换成amd64# (以下必选)# synopsysexport SYNOPSYS_HOME=/home/jack/eda/synopsys# licenseexport LM_LICENSE_FILE=$SYNOPSYS_HOME/license/sysnopsys.datexport SNPSLMD_LICENSE_FILE=27000@localhost.localdomain# sclexport SCL_HOME=$SYNOPSYS_HOME/sclexport PATH=$PATH:$SCL_HOME/linux/binalias lmli2="lmgrd -c $LM_LICENSE_FILE -l ~/syn_lic.log"# (以下可选)# vcsexport VCS_HOME=$SYNOPSYS_HOME/vcsexport PATH=$PATH:$VCS_HOME/bin# dcexport DC_HOME=$SYNOPSYS_HOME/dcexport PATH=$PATH:$DC_HOME/binalias dc=design_visionalias dcs=dc_shell# ptexport PT_HOME=$SYNOPSYS_HOME/ptexport PATH=$PATH:$PT_HOME/binalias pt=primetimealias pts=pt_shell# simifexport SIMIF_HOME=$SYNOPSYS_HOME/simif export PATH=$PATH:$SIMIF_HOME/bin# hspiceexport HSPICE_HOME=$SYNOPSYS_HOME/hspice export PATH=$PATH:$HSPICE_HOME/hspice/bin# sxexport SX_HOME=$SYNOPSYS_HOME/sxexport PATH=$PATH:$SX_HOME/binalias sx=sx2007# iccexport ICC_HOME=$SYNOPSYS_HOME/iccexport PATH=$PATH:$ICC_HOME/binalias iccs=icc_shell# herculesexport HERCULES_HOME=$SYNOPSYS_HOME/hercules export PATH=$PATH:$HERCULES_HOME/bin# starrcexport STARRC_HOME=$SYNOPSYS_HOME/starrc export PATH=$PATH:$STARRC_HOME/bin。
虚拟机Linux系统中安装SYNOPSYS工具图解教程陈浩利2011-05-16 一、安装环境虚拟机:VMware 7.1操作系统:Fedora 10installer版本:2.0scl版本:10.9.3(据网上资料,有些用了11.1版本的,兼容性不是很好,故用此版本)dc版本:syn_vC-2009.06-SP5vcs版本:vcs-mx_vD-2009.12simif版本:simif_vC-2009.06-SP1pt版本:prime time pts_vD-2009.12-SP1(以上软件EETOP上均有下载链接)二、安装步骤2.1 建立共享文件夹前提:VMware和Linux系统均安装了VMware Tools,如果没有可以将VMware Tools安装文件拷贝在U 盘中(Fedora 10可以识别U盘)进行安装。
新建一个虚拟机,然后编辑虚拟机:添加共享文件夹目录:设置的文件夹Windows系统和Linux系统均可对其进行读写,将Synopsy的各种安装文件放在这个文件夹,再拷贝到Linux系统自己的分区。
2.2 拷贝安装文件2.2.1 新建文件夹进入Fedora10 操作系统,在/home/chenhaoli(不同用户有不同的用户名,Fedora10中,用户只有在该路径下具有完全读写权限)下新建文件夹:/home/chenhaoli/eda(新建)/synopsys(新建)|--installer|--tar(存放installer安装文件)|--installer_v2.0(安装路径)|--scl|--tar(存放scl安装文件)|--scl_v10.9.3(scl安装路径)|--license(存放license)|--dc|--tar(存放dc安装文件)|--dc_2009(dc_2009安装路径)|--vcs|--tar(存放dc安装文件)|--vcs_2009(vcs_2009安装路径)|--simif|--tar(存放dc安装文件)|--simif_2009(simif_2009安装路径)|--pt|--tar(存放dc安装文件)|--pt_2009(pt_2009安装路径)2.2.2 拷贝安装文件将installer_v2.0.tar.Z拷贝到/synopsys/installer/tar中;scl_v10.9.3_common.tar、scl_v10.9.3_linux.tar拷贝到/synopsys/scl/tar中;syn_vC-2009.06-SP5_common.tar、syn_vC-2009.06-SP5_linux.tar拷贝到/synopsys/ dc/ tar中。
2.3 安装installer_v2.0以管理员身份进入系统[chenhaoli@localhost ~]$ suPassword:[root@localhost chenhaoli]#进入installer_v2.0安装文件路径[root@localhost chenhaoli]# cd /home/chenhaoli/eda/synopsys/installer/tar解压缩installer_v2.0.tar.Ztar –zxvf installer_v2.0.tar.Z -C /home/chenhaoli/eda/synopsys/installer/installer_v2.0(解压文件名)(解压路径)KO2.4 安装scl_v10.9.32.4.1 安装sch【有些linux操作系统安装时已经默认安装了sch,则不必进行此操作】在Fedora10的安装光盘中找到tcsh-6.15-6.fc10.i386.rpm,拷贝到Linux系统中。
安装rpm包[root@localhost synopsys]# cd /home/chenhaoli/eda/synopsys[root@localhost synopsys]# rpm –i tcsh-tcsh-6.15-6.fc10.i386.rpm2.4.2 启动installer_v2.0安装工具进入installer_v2.0安装路径[root@localhost installer_v2.0]# cd /home/chenhaoli/eda/synopsys/installer/installer_v2.0运行installer_v2.0[root@localhost installer_v2.0]# ./installer -gui出现图形化安装界面2.4.3 安装scl_v10.9.3选择scl_v10.9.3安装文件路径进入安装信息询问,一路Next选择安装路径KO2.5 安装其他Synopsys工具以同样方法安装其他Synopsys工具。
安装vcs-mx_2009时,需要把安装文件的名字改成vcs-mx_vD-2009.12_common.tar、vcs-mx_vD-2009.12_linux.tar和vcs-mx_vD-2009.12_amd64.tar。
其他同理。
2.6 制作license2.6.1 查询虚拟机MAC地址进入Linux操作系统虚拟机安装目录以记事本编辑.vmx文件其中ethernet0.generatedAddress = "00:0c:29:b5:55:20"表明其MAC地址为000c29b55520(不同的虚拟机地址不同)2.6.2 生成synopsys.dat运行LicGen.exe保存为synopsys.dat2.6.3 生成license.dat将synopsys.dat 拷到Synopsys SSS Feature Keygen 目录里在windows中进入虚拟doc环境记下SECRET DATA这串数字运行KeyGen.exe产生一个license.dat文件2.6.4 合并licese用记事本打开license.dat,将license.dat中以下字段复制到synopsys.dat中FEATURE SSS snpslmd 1.0 31-dec-2020 uncounted ED6EF85B8F17D5781D8F \ VENDOR_STRING="69656 d1d88 34cc3 36f8e 3a5e5 5fae4 70228 44942 \4fa94 e7e" HOSTID=000c29b55520 ISSUER="Team ZWT 2006" \NOTICE="Licensed to mammoth//ZWT 2006 [PLEASE DO NOT DELETE THIS \ SSS KEY]" SN=RK:1978-0:001224:0 START=1-jan-2006修改synopsys.dat的hostname和snpslmd路径2.6.5 验证license将修改后的synopsys.dat拷贝到/home/chenhaoli/eda/synopsys/license路径下运行sssverify程序验证licenseKO2.7 环境变量设置打开linux系统中用户目录下的.bashrc配置文件将以下字段拷贝到.bashrc文件的最后(红色部分需要自己手动修改)############################################################################### #lmgrdexport PATH="/home/chenhaoli/eda/synopsys/scl/scl_v10.9.3/linux/bin:"$PATH#start synopsys license using lmgrdalias lmli2="lmgrd -c /home/chenhaoli/eda/synopsys/license/synopsys.dat -l ~/syn_lic.log" setenv VCS_ARCH_OVERRIDE linux#Design Compilerexport PATH="/home/chenhaoli/eda/synopsys/dc/dc_2009/bin:"$PATH#vcs-mxexport PATH="/home/chenhaoli/eda/synopsys/vcs/vcs-mx_2009/bin:"$PATH#simifexport PATH="/home/chenhaoli/eda/synopsys/simif/simif_2009/bin:"$PATH#ptsexport PATH="/home/chenhaoli/eda/synopsys/pt/pt_2009/bin:"$PATH#Set Home Directoryexport SYNOPSYS="/home/chenhaoli/eda/synopsys"export DC_HOME="/home/chenhaoli/eda/synopsys/dc/dc_2009"export VCS_HOME="/home/chenhaoli/eda/synopsys/vcs/vcs-mx_2009" export SIMIF_HOME="/home/chenhaoli/eda/synopsys/simif/simif_2009" export PT_HOME="/home/chenhaoli/eda/synopsys/pt/pt_2009"#SNPSLMD_LICENSE_FILEexport SNPSLMD_LICENSE_FILE=27000@localhost#Aliasalias dc="dc_shell"alias dv="design_vision"alias vcs="vcs"alias simif="simif"alias pt="primetime"2.8 启动dc2.8.1 启动dc在终端运行命令:lmli2然后再运行命令:dcKO2.8.2 启动dv在终端运行命令:lmli2然后再运行命令:dvKO2.8.3 启动vcs在终端运行命令:lmli2然后再运行命令:vcs -...(需要带参数才能启动vcs)2.8.4 启动simif在终端运行命令:lmli2然后再运行命令:simifKO2.8.5 启动pt在终端运行命令:lmli2然后再运行命令:ptKO。