taraVRbuilder
- 格式:pptx
- 大小:2.40 MB
- 文档页数:93
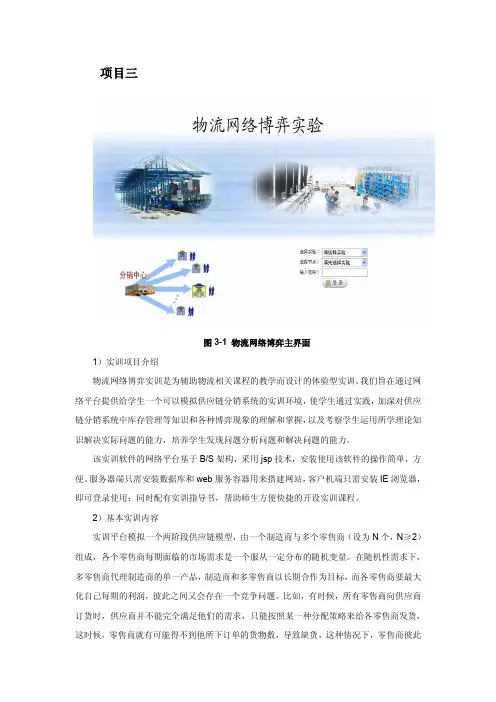
项目三图3-1 物流网络博弈主界面1)实训项目介绍物流网络博弈实训是为辅助物流相关课程的教学而设计的体验型实训。
我们旨在通过网络平台提供给学生一个可以模拟供应链分销系统的实训环境,使学生通过实践,加深对供应链分销系统中库存管理等知识和各种博弈现象的理解和掌握,以及考察学生运用所学理论知识解决实际问题的能力,培养学生发现问题分析问题和解决问题的能力。
该实训软件的网络平台基于B/S架构,采用jsp技术,安装使用该软件的操作简单,方便。
服务器端只需安装数据库和web服务容器用来搭建网站,客户机端只需安装IE浏览器,即可登录使用;同时配有实训指导书,帮助师生方便快捷的开设实训课程。
2)基本实训内容实训平台模拟一个两阶段供应链模型,由一个制造商与多个零售商(设为N个,N≥2)组成,各个零售商每期面临的市场需求是一个服从一定分布的随机变量。
在随机性需求下,多零售商代理制造商的单一产品,制造商和多零售商以长期合作为目标,而各零售商要最大化自己每期的利润,彼此之间又会存在一个竞争问题。
比如,有时候,所有零售商向供应商订货时,供应商并不能完全满足他们的需求,只能按照某一种分配策略来给各零售商发货,这时候,零售商就有可能得不到他所下订单的货物数,导致缺货,这种情况下,零售商彼此之间就存在一个博弈问题,当供应商的库存量下降到一定的程度后,需要适当地虚报订单量才能得到自己所需求的货物,而这个虚报尺度应该如何去掌握,这就是物流网络博弈。
而如果考虑到整个分销系统收益的最大化,其信息透明度是需要考虑的一个主要因素,也就是分销系统中各个元素彼此合作,进行信息共享的程度。
信息共享程度越高,各元素在决策时考虑到的整体因素就越多,对整个系统而言就越有益。
实训系统由联网的一台服务器和多台客户机组成,包括一个供应商和多个零售商以及每个零售商所对应的终端市场。
其中分销中心的角色由服务器来扮演,零售商对应的终端市场由服务器用随机数来模拟,而零售商的角色则是由实训者来扮演。
1物流分拣系统模型研究目标1.1TaraVRbuilder 仿真建模简介TaraVRbuilder 是由德国tarakosGmbH 公司开发的一款应用于物料流领域、输送科技领域以及工厂计划领域内简便快捷地创造动态三维窗口的软件。
该程序的特色在于其用户在编程和三维设计技能都较为缺乏的情况下,能够实现最大效率地对虚拟、三维动画场景进行创建,也被称为“数码工厂”。
利用TaraVRbuilder 构建只要按照计划方案在界面上选择建模必要的装备,将各个装备按照计划方案智能地链接,进而构建成体系,同时还必须要计划好各个相干元素的属性,掌控其各关键计划以组成总体。
1.2物流分拣业务物流所采取的分拣体系主要有三种,目前最智能化的系统全自动分拣体系,全自动分拣系统主要通过计算机的程序设定将货物进行全自动化的分拣和运算处理。
它是目前物流中最能影响配送效率的关键因素之一,任何一个大型的快件企业若失去全自动分拣系统都很难能够获得高额利润。
较全自动分拣系统更加遍及的是半自动分拣体系,该体系是指经由计算机提前将快件信息进行辨认,再有一定数量的操作人员根据识别出来的信息快速地进行快件分拣的工作。
这种分拣方式有着成本低、规模小的特点,所以应用也较为广泛。
但从企业发展的长远来看,人工成本也是相当高的,终将被自动分拣所取代。
人工分拣因其费用高、效率低也在逐渐被淘汰,而且还存在出错率高、暴力分拣等问题。
2物流分拣业务调研及前期准备结合自动化立体仓库进行物料仓储与调度管理的实际情况,拣货作业流程表现:电脑编写程序控制AGV 小车行走路线及堆垛机搬运路线,机械手抓取货物放置AGV 小车托盘上,由AGV 小车在规定路线上运送货物至自动化立体仓【基金项目】大连民族大学大学生创新训练计划(省级201912026079)资助;2019年大连民族大学本科教育教学改革研究与实践项目YB2019021。
【作者简介】张闯(1998-),男,黑龙江绥化人,本科在读,从事工业工程研究。


室内实例教程本章要点:在完整地学习了以上内容之后,独立地制作一个VR场景已不再是个难题。
整个操作流程也很简单:首先在3dsmax中建立模型,并赋予相应的材质,然后再为该场景设臵好灯光,最后再应用熟悉的渲染方法对其进行渲染,这样,在3ds max中的工作就基本上完成了。
接下来的操作也很简单,如应用VRP插件将整个场景导出至VR-Builder 中,最后再应用所学知识在VR-Builder中对该场景进行相应的调整与设臵,由此一个完美的VR场景就制作完成了。
为了让用户再次熟悉整个操作流程,本章以一个典型的室内案例的制作全过程来帮助用户再次享受应用VRP制作VR场景的那种无与伦比的快乐感觉。
本章具体包括以下内容:Max中的操作导入到VRP中VRP中操作发布Exe文件8.1 3ds Max中的操作在制作VR场景时,前期的工作大多数是在3ds max中进行的,如建立模型、设置材质与灯光。
本节将为用户详细介绍一个室内VR场景的制作全过程。
提示:在制作本场景时,建议用户的机器符合以下配臵,如表8.1所示:表8.1 用户机器配置明细表:室内VR场景在3ds max中的制作步骤如下:步骤一:建立模型用户可以打开本操作手册附带光盘中所提供的max文件,调用火星时代的一个室内客厅场景。
如图8.1所示。
图8.1 max模型提示:为了使场景不漏光,需要把场景做成一个封闭式场景。
最后再将户外高尔夫球场隐藏,这样在渲染和烘焙时避免将太阳光挡住。
这里值得注意的是场景中的面数,如果能减少面数的物体尽量减少,能用单面的物体用单面。
例如地面,可以用片做。
如图8.2所示。
图8.2 用片做地面步骤二:设置灯光VRP对灯光的类型与设置没有特殊要求,用户可以根据自己场景的需要进行相应的设置。
当前场景中的灯光为场景模型中自带的。
如图8.3所示。
图8.3 泛光灯为模拟为光提示:有关灯光的设臵在此不做详细介绍,具体操作可以参见火星时代教程《室内效果风暴》。
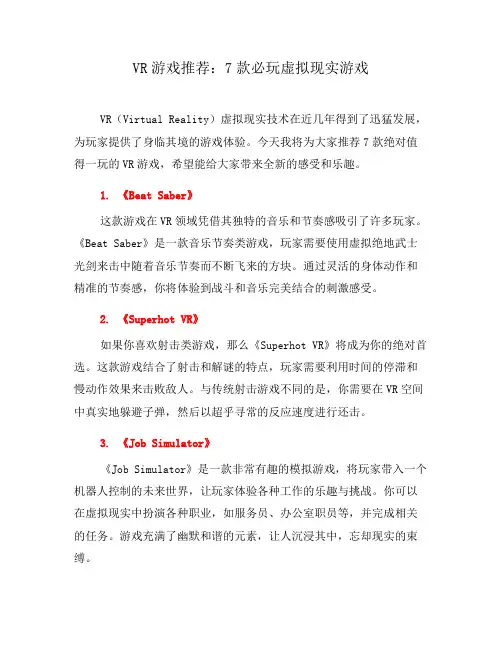
VR游戏推荐:7款必玩虚拟现实游戏VR(Virtual Reality)虚拟现实技术在近几年得到了迅猛发展,为玩家提供了身临其境的游戏体验。
今天我将为大家推荐7款绝对值得一玩的VR游戏,希望能给大家带来全新的感受和乐趣。
1. 《Beat Saber》这款游戏在VR领域凭借其独特的音乐和节奏感吸引了许多玩家。
《Beat Saber》是一款音乐节奏类游戏,玩家需要使用虚拟绝地武士光剑来击中随着音乐节奏而不断飞来的方块。
通过灵活的身体动作和精准的节奏感,你将体验到战斗和音乐完美结合的刺激感受。
2. 《Superhot VR》如果你喜欢射击类游戏,那么《Superhot VR》将成为你的绝对首选。
这款游戏结合了射击和解谜的特点,玩家需要利用时间的停滞和慢动作效果来击败敌人。
与传统射击游戏不同的是,你需要在VR空间中真实地躲避子弹,然后以超乎寻常的反应速度进行还击。
3. 《Job Simulator》《Job Simulator》是一款非常有趣的模拟游戏,将玩家带入一个机器人控制的未来世界,让玩家体验各种工作的乐趣与挑战。
你可以在虚拟现实中扮演各种职业,如服务员、办公室职员等,并完成相关的任务。
游戏充满了幽默和谐的元素,让人沉浸其中,忘却现实的束缚。
4. 《The Elder Scrolls V: Skyrim VR》作为一款被广泛认可的开放世界角色扮演游戏,《The Elder Scrolls V: Skyrim》在VR版中为玩家提供了更加真实的游戏体验。
你可以亲身感受到这个充满奇幻世界的壮观景色,并通过头部和手部动作来与NPC进行交互。
5. 《Moss》对于爱好冒险和解谜的玩家来说,《Moss》是一款不容错过的VR 游戏。
游戏中,你扮演一只小老鼠的保护者,通过观察环境、解开谜题,并与角色互动来完成任务。
细腻的视觉效果和引人入胜的故事情节使玩家彻底沉浸在这个神奇而精致的奇幻世界中。
6. 《Arizona Sunshine》如果你喜欢僵尸题材的游戏,《Arizona Sunshine》将给你带来真实感十足的僵尸生存体验。
功能简介taraVRbuilder “专业版”版本6.5(2007年6月修订)tarakos GmbH Joseph-von-Fraunhofer-Str. 1 D-39106 Magdeburg目录一.概要二.系统的操作2.1 排列、置位和选项设置2.2 二维+三维显示选项,虚拟空间中的导航2.3 支持用户的操作功能三.功能3.1 数据和模型的导入或导出3.2 分析和计算评估功能四.数据库4.1 输送设备数据库、物料流数据库和生产数据库4.2 输送设备系统对象的动画过程和源4.3 不同货物的数据库4.4 建筑部件数据库4.5 过道、路径和平台的数据库4.6 基本图形数据库4.7 静态三维模型数据库4.8 管道和输送管数据库五.额外辅助软件和视图器5.1 带有优化导入功能的taraVRoptimizer5.2 为视图创建的taraVRbuilder-projects的taraVRviewer程序六.服务6.1 培训6.2 升级服务6.3 热线服务七.技术要求八.产品范围8.1 含有以下内容的程序CD8.2 加密狗dongle8.3 说明书九.额外数据库及额外工具Ⅰ额外的地面输送设备数据库(FFZ)“自动导航车(AGV)和叉式自动装卸车”Ⅱ额外的“RFID”数据库Ⅲ额外的“手动顺序提货”数据库Ⅳ额外的“货架”数据库1.概要这份功能简介简要描述了taraVRbuilder —专业版—程序的所有功能,以便提供用户程序的综述。
这份简介并不能代替软件使用说明书,说明书将作为单独的文件提供给用户。
这份简介用于答复询问、招标以及作为用户为获取并购买此软件所需要的文件说明。
简要介绍:taraVRbuilder是一款运用虚拟现实技术进行三维建模和模拟基于时间的传输、物流和保管/仓储物资的软件工具。
这套软件用于对机组装置的可视管理和分析。
它的应用领域包括销售支持、计划、工程规划以及档案整理等。
taraVRbuilder可以作为“数码工厂”软件来使用。
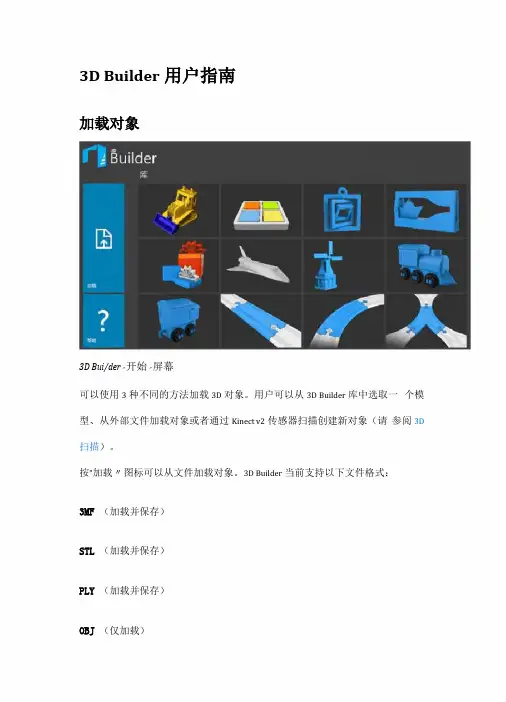
3D Builder用户指南加载对象3D Bui/der〃开始〃屏幕可以使用3种不同的方法加载3D对象。
用户可以从3D Builder库中选取一个模型、从外部文件加载对象或者通过Kinect v2传感器扫描创建新对象(请参阅3D 扫描)。
按"加载〃图标可以从文件加载对象。
3D Builder当前支持以下文件格式:3MF (加载并保存)STL (加载并保存)PLY (加载并保存)OBJ (仅加载)VRML (仅加载) 相机移动鼠标旋转相 机 相机平 移 相机缩 放 聚焦 双击触控鼠标滚动用左键拖 动用右键拖 动选择控件控件 描述 快捷方式还原选择/最小化 选择此图标还原选择或最小化选择工具。
无全选 选择场景中的所有对象。
Ctrl + A取消全选对象转换对象的质量中心)中的一条轴旋转对象。
拖动箭头,向箭头所指方向缩放对象。
(使纵横比保持打开状态)(删除纵横比)注意:旋转相机可能更改显示箭头的侧面。
这可用于按所需方向缩放对象。
1------编辑移动、旋转或缩放的值。
注意:在缩放模式下点击单位测量会将其转换空格键 为百分比。
最大化的选择控件描述快捷方式拖动其中一个箭头,围绕3条轴(轴中心位于拖动其中一个箭头,按照所选维度移动对象。
移动R旋转缩放编辑值注意:箭头键也可以用于更改对象转换参数。
撤消撤消撤消更改。
恢复q恢复更改。
对象模式控件描述对象模式△克隆么删除III 3D Builder工具栏激活/禁用对象模式。
创建所选3D对象的副本。
删除所选对象。
快捷方式无Ctrl + Shift + C Ctrl + X40Ctrl + ZCtrl + Y放置允许你在打印台上平放所选3D对象。
无组合将所选内容组合。
Ctrl + G取消组取消对所选内容的组合。
Ctrl + Shift + G 合 ;建;聚焦视图将相机聚焦在所选3D对象上。
Ctrl + O激活了对象模式的工具栏文件模式控件描述快捷方式文件激活/禁用文件模式。

The World’s Only Complete L abor and Delivery Suite Introducing the first-ever, integrated solution for labor anddelivery training, featuring a complete suite of fully operable, hands-in-the-body simulators for delivery,C-Section and emergency obstetric procedures.C-SECTIONP PHCHYS TD E L I VERYAvailable Replacement Parts• U terine incision inserts for C-Section trainer 1021393• A bdominal inserts and repair inserts (each enables two incisions and two repairs) 1021394• E mergency hysterectomy replaceable uteri1021390• R eplaceable abdominal insert and pregnant uterus10213963B Scientific GmbH • Rudorffweg 8 • 21031 Hamburg • Germany • Phone: +49 40 73966-0 • Fax: +49 40 73966-100 • E-mail:*********************LABOR AND DELIVERY SUITE99834/218RealMom™C-Celia™Vaginal DeliveryThe world’s most natural and realistic vaginal delivery simulator.+Natural delivery with active, soft tissue birth canal+Realistic, soft tissue and accurate internal anatomy+Full-body female simulator and full-term baby with unsurpassed realism and lifelike appearance+Provides a full-range of delivery procedures including forceps and vacuum assist+Postpartum hemorrhage control+Instructor control of dilation and delivery progression +Physiological presentation and control of maternal andf etal heart rate, fetal heart tones and contractions,pulses, blood pressure and SPO2C-SectionA complete C-Section delivery training system availableas a full suite or in custom configurations designed tomeet your learning needs.+Fetal Extraction Simulator – open, post C-Sectionabdomen enabling difficult delivery maneuversincluding forceps and suction assist+C-Section Skills Trainer – abdominal and incisionrepair simulator with pregnant abdomen and uterusfor incision practice and tissue repair+Emergency C-Section Delivery Simulator – pregnantabdomen simulator enabling full transverse or verticalemergency C-Section through abdominal wall anduterus with baby, placenta, and pressurizedlubricationsystem with simulated amniotic fluidPostpartum HemorrhageOpen abdomen simulator for practicing hemorrhagecontrol techniques.+P ostpartum hemorrhage control trainer withintegrated pressurized bleeding and lubrication for re-pair of complex lacerations and uterine artery injuries+Open abdomen with empty, durable, multi-use uterusenables scores of procedures before uterus placement+Supports hemorrhage control techniques includingBakri Balloon, B-Lynch suture, Hayman suture andO’Leary StitchEmergency HysterectomyTraining for postpartum and caesarean hysterectomyprocedures including hemorrhage control andfully-operable removal of the uterus.+Open abdomen with bleeding and integratedlubrication includes durable, flaccid, abdominal wallinsert, attachable, partially contracted uterus+Model contains a uterus, bladder, ureters and detailedrepresentations of uterine arteriesFinally, a complete and integrated training solution f or the entire labor and delivery continuum of care.Say goodbye to the old, unreliable plastic manikin technology and discover what real, hands-in-the-body simulation looks like. OEI simulators are fully operable and feature incredibly accurate and tactile anatomy, realistic blood and fluids, and are uniquely designed to provide learners with a high-adrenaline, real-world operative experience.And, with OEI, there’s no complicated programming or setups and no simulator down time – because our products simply work.。

系统建模与仿真实验指导书ⅠARENA二维仿真建模实验一、实验目的:1简单流水线建模实验掌握ARENA二维仿真软件的基本操作,掌握ARRIVE、DEPART、SEVER、INSPECT、SIMULATION等模块的应用与连接,学会采用该软件建立一条简单的生产流水线,并进行逻辑模块的参数设置和物理模块的界面设计,建成的仿真系统能运行并返回需要的统计数据。
2生产制造过程仿真建模实验借助工业工程综合实验——装配线设计实验的成果——装配线的结构与布局以及各主要工位的操作数据,通过ARENA软件进行仿真建模,比较系统运行的结果,对综合实验的设计方案进行验证实验,调整参数,寻求优化方案,进行优化设计实验。
二、实验步骤主要解决的四个问题:1)模型的建立,确定该系统需要的模块类型和数量:输入(Arrive),输出(Depart),加工操作(Sever),检验操作(Inspect)以及他们的先后顺序和连接关系2)参数设置:包括模块内参数设置和系统参数设置3)统计分析功能的建立:成品及废品平均流程时间、成品率、废品率以及其方差设置和实现,并能对此进行分析和评价,重新调整参数以实现系统优化;4)界面优化,利用系统工具或者画图工具,对仿真运行界面进行优化,体现更清晰的运动状态和物流路径,模拟加工过程的实现附:上机操作指导软件工具介绍一、Arena 软件工具的特点Arena是一个Microsoft Windows下的工具,所以它的基本界面你应该早已熟悉,但是由于Arena仿真软件是属于专业软件,并不常见,国内对该软件的操作方面的资料甚少,而且还都是外文版,所以有必要对Arena的操作界面以及相关的仿真建模操作和模块进行介绍。
(一)、操作界面图 3-1 Arena的界面1 File 菜单在这个菜单里,你可以新建Arena模型文件,打开现有模型,关闭窗口,存储模型或创建一个只许观看的模型,你也可以引进CAD图形,将AUTOCAD作为Arena 的支持工具,而在一些情况下,活动元素将允许你使用现有的详尽的机器设备的图形。

avive 操作方法解密“Avive”:手把手教你玩转这神秘黑科技在我们生活的这个瞬息万变的科技时代,一款名为“Avive”的神器正在悄然改变我们的生活节奏。
这款集高效、便捷与智能于一身的操作系统,犹如一股清流,席卷而来,让众多极客和新手们纷纷为之侧目。
本文就带你深入探索Avive操作方法的奥秘,让你轻松上手,游刃有余。
首先,咱们得先聊聊Avive系统的启动过程,“一键启动,瞬息之间”,按下开机键那一刻,你就能感受到那种“如丝般顺滑”的启动体验。
那感觉就像是骑着火箭从地球直飞火星,眨眼间已身处未知的新世界。
哎呀妈呀,这种速度感和流畅度,真是让人欲罢不能!接下来,便是Avive的核心——界面操作。
“一图胜千言”,Avive采用的是直观且人性化的图形用户界面,图标设计鲜明亮丽,布局简洁有序,让人一眼看去,就像置身于一座精心设计的数字园林中。
只需轻轻一点,无论是打开应用、浏览文件还是设置参数,都能轻松实现,真正实现了“指哪打哪”的操作境界。
再者,Avive的一大亮点就是其智能化的语音助手功能。
“君子动口不动手”,对着Avive喊出你的需求,它便能快速响应并执行。
不管是查询天气、设定闹钟,还是播放音乐、发送信息,都只需要一句简单的口头指令,无需繁琐的手动操作,真正实现了“言出法随”的高科技生活体验。
对于数据管理这块,Avive更是有一套。
它内置的文件管理系统犹如一位贴心的管家,帮你把各类文件资料整理得井井有条。
只需轻点几下,无论是查找、移动、复制还是删除文件,都能迅速完成,让人不禁感叹:“这才是我梦寐以求的效率利器!”至于更新维护方面,Avive也是做足了功夫。
自动更新机制确保系统时刻保持最新状态,安全防护体系则为你的数据保驾护航。
每当有新的系统补丁或者功能升级,Avive都会悄无声息地完成,让你安心享受科技带来的便利,再也不用担心“后院起火”。
总而言之,Avive以其独特的魅力和卓越的性能,为我们开启了一扇通往未来的大门。
TAL-MOD TAL Software GmbH 2018 ©Introduction (3)Installation (4)Windows (4)OS X (5)Registration (6)Menu (7)Oscillators (9)Filter (11)Serial Filter mode (12)Parallel Filter mode (12)Modulators (12)MOD Envelope: (13)Sequencer (14)Effects (FX) (15)Routing Modulations (16)MIDI Learn (17)License (18)IntroductionThe TAL-MOD is a virtual analog synth with a lot of possibilities that mixes analog sound, a modern full scalable and compact user interface that is fun to use and that make it easy to create new sounds.Don’t be scared because of the cables. It’s not required to know something about modular synths. There are no multiplexers or other hard to understand components. The cables are just an easy way to route the modulations instead of combo boxes. This way you immediately see what’s going on and where the modulations are connected.The full stereo path and the oscillator model are able to create big stereo sounds without any FX but it’s also possible to create great sounding classic analog sounds. It’s tested and works within the most common audio hosts as Ableton Live, Cubase, Logic Pro, Garage Band, Reaper and DSP-Quattro. No standalone version available. Try the unregistered demo version to be sure that the plugin works in your environment.The demo fades in a noise every minute.Please use at your own risk. We take no responsibility for any damage caused by our VST, AU (Audio Unit) and AAX plug-ins.InstallationWindowsRequirements:- SSE 2 compatible processor (Pentium II or higher is required or an AMD equivalent)- Windows XP or higher.- A VST 2.4 compatible host or Pro-Tools 3.6 or higher.Installation:- Download the file install_TAL-Mod.zip and unzip it.- Execute install_vst_32.exe if you want to install the 32 bit version of the plugin or install_vst_64.exe if you have a 64bit host (sequencer). Please read themanual of your sequencer to find out whether it needs 32 or 64 bit plugins. It’s also possible to install both versions of the plugin.- Step through the wizard and choose the path where you want to install the plugin. Please read the manual of your host to get more information where this directory is.In hosts like Cubase, the plugin will show up after a restart. Some hosts need a plugin rescan. If you use Ableton Live and the plugin does not show upafter a VST plugin rescan, try to disable and re-enable VST plugin support.Uninstall:Just delete the plugin *.dll file to uninstall it.OS XRequirements:- OSX 10.7 or higher.- Intel Processor.- AU (Audio Unit) or VST 2.4 compatible host or Pro-Tools 3.6 or higher.. Installation:- Download the TAL-Mod-installer.pkg, unpack it and run the installer. The installer copies the plugin to the right directory. It installs all available versions by default (VST 32/64bit, AU 32/64bit, AAX 32/64bit).Uninstall:Delete the plugin. It’s located in following directories:/Library/Audio/Plug-Ins/VST//Library/Audio/Plug-Ins/Components/In hosts like Cubase, the plugin will show up after a restart. Some hosts need a plugin rescan. If you use Ableton Live and the plugin does not show up after a VST plugin rescan, try to disable and re-enable VST plugin support.RegistrationYou need to buy and register the plugin to disable the demo mode that fades in a noisy sound every minute.The registration process is simple. You need to start the demo plug-in and copy paste the serial you got with an email after you bought the plugin.Paste it with a click into the input field on the top right:You maybe restart the host after the registration to make sure that also other TAL-Mod plug-in instances are registered.MenuA click at the preset name on the top left opens the menu.The menu contains following items:Keep MIDI Mapping:This option allows it to keep the current MIDI mapping also when loading a preset with another mapping. Otherwise TAL-Mod always takes the MIDI mapping from the new preset if mappings are mapped. It always keeps the mapping for the controls that are not mapped in the new preset. Microtuning:Allows to import standard microtuning *.tune files. This allows detuning all 128 MIDI notes. There are programs available that can create a microtuning. Cable Transparency:Allows setting the visibility / transparency of the cables.Change UI Colors…:Allows you to set your own look and feel colors. There are some default schemes you can choose from.Show presets folder:Opens the Microsoft Explorer or Apples Finder at the preset location. Paste other presets into that folder to add them. Create folders to organize the presets.Restore original plug-in size:Restores the plug-in windows size to the default setting.Reduce plug-in sizeReduces the plug-in size. Helpful when the UI is too big to grab the resize corner on the bottom right.Default PresetThere is a preset with the name “default” in the presets root folder. TAL-Mod loads this preset when you create a new instance of the plug-in. You maybe create your own default preset that also contains your default MIDI mappings.OscillatorsTAL-Mod has three oscillators. OSC I and OSC II have additional features and can produce up to 7 voices each that can be spread in the stereo signal. Only OSC I and OSC II do have a hard sync option.HS:Hard syncs the oscillator to OSC III. The SINE waveform can’t be synced. WAVEFORM:Defines the basic waveform for the oscillator. It’s possible to choose between SAW, PULSE, TRIANGLE and SINE.PW:Modulates the pulse width of the pulse oscillator. It does not affect the other waveforms.VOLUME:Is the main volume of the oscillator.TUNE:The oscillator tuning in +- 24 halftones.FINE TUNE:The oscillator tuning +-1 halftones without any steps.PAN:The stereo panorama of this oscillator.INV:Inverses the oscillator output waveform.PHASE:The oscillator phase for hard sync and when the note starts if TRIG is enabled. TRIG:Resets the phase of the oscillator each time a new note starts.VOICES:Adds up to 6 oscillators with the given waveform. The phase of the additional oscillators will be spread equal. The additional voices also hard sync when enabled. DETUNE:Detunes the additional oscillators to the main oscillator for a bigger and fuller sound. MIX:The volume of the additional oscillators. It also reduces the volume of the main oscillator.STEREO:Stereo spread of the additional oscillators. This is only active for an odd number of VOICES (3, 5, 7). Otherwise a symmetrical spread would not be possible.Ring ModulationOscillator 2 supports RM (ring modulation). The RM knob adjusts the how many of the RM is mixed to the oscillator. RM always happens between OSC I and OSC II. FMOscillator 1 supports built in FM (frequency modulation). The FM knob adjusts the FM amount where the OSC 2 frequency is used for the modulation. The modulation always happens with a sine with the frequency of OSC 2. There is already a frequency offset included for easy handling.FilterTAL-Mod has two filters that can have different filter types. With common parameters:Filter Types:LP 4 Pole (24dB), LP 3 Pole (18dB), LP 2 Pole (12 dB), LP 1 Pole (6dB), HP 3 Pole (18dB), HP 2 Pole (12dB), BP 4 Pole (2 * 12dB), Notch 2 Pole (12 dB), All Pass SATURATION:Defines the input volume for the filter and its non-linear components. This is also useful to reduce the resonance peak.Cutoff:The cutoff frequency of the filter. Up to more than 30 kHz.Resonance:Filter feedback value.ADSR:ADSR modulation intensity +-1.KEYB:Key Follow for the filter cutoff.CUTOFF LINK: Controls the cutoff of filter I and filter II (-+1). The value will be added or removed from the current cutoff frequency of the filter. The offset of the two cutoff frequencies stays the same in the log scaled spectrum.TRIG: Resets the filter to zero when a new note starts. This could be useful when the exactly same note start (attack) is needed for a filtered bass sound (together with OSC trigger). Disable this for an analog behavior where every note starts a bit different or if you want to use self-oscillation (to avoid the build-up time when a new note starts, especially at low cutoff frequencies).BALANCE: The knob between the sound sources (OSC I, OSC II…). The button is only active in parallel mode. It adjusts the balance / mix between the two filter outputs.Serial Filter modeThe filter runs in SERIAL mode when PARALLEL is disabled. In this case FILTER I is processed and the result filtered by FILTER II. This is especially useful when Low Pass is combined with another filter type or for creating a 48 dB Low Pass filter.The filter section outputs the dry signal if an oscillator isn’t selected.Parallel Filter modeThe PARALLEL mode allows a lot of routing possibilities. Each oscillator can be configured to be filtered with FILTER I or/and FILTER II. The output of the two filters will be summed together. The balance knob in the middle adjusts the mix between the two filters.The filter section outputs the dry signal if an oscillator isn’t selected for Filter I or II. ModulatorsTAL-Mod offers three envelopes and two LFO modulators.ADSRAll three ADSR envelopes contain a shape knob for the attack, decay and release part of the envelope. They turn the envelope curve from concave to convex or theopposite. Turn the shape knobs to the middle for linear ADSR’s.ADSR AMP:The amplitude ADSR (Attack, Decay, Sustain, Release).ADSR I / II:The modulation ADSR (Attack, Decay, Sustain, Release).LFOTwo identical LFO’s (Low Frequency Oscillator). They can produce SINE, TRIANGLE, SAW, SQUARE, Sample & Hold random and Noise waveforms. RATE is the LFO speed that can be synced to the host speed. TRIG triggers the LFO at any note on event to the given PHASE. DELAY is the delay time until the LFO drops in. UNI runs the LFO in UNIPOLAR mode. In this mode the LFO returns only positive values from 0 to 1.MOD EnvelopeThe mod envelope can be used to create special envelope or LFO curves. Click into the area to add new points, move points or control points (the small points that show up when a main point is selected) to create your own curve. Delete a point with a double click or drag it out of the view at the bottom border.Tempo OptionDefines how long the whole envelope is. Relative to the host’s Bpm.FIX SPEEDSets the tempo fix to 120 Bpm. This is useful for drum envelopes or for effects that don’t depend on the host tempo.ONE SHOTThe envelope will be played only once without cycling. The modulation envelope acts as an LFO if this option is not enabled.RESETDeletes the envelope.SMOOTHSmooths the envelope curve. This can be especially useful in the step mode. TRIGGERTriggers the envelope on each note-on event. Enabled is default.UNIPOLARUnipolar [0..1] is the default mode for the modulation envelope. Disable this to get modulation values in the range [-1..1].STEP MODESwitches to the step mode. In this mode the values of 16 steps can be defined instead of the spline. They are always in the range [-1..1].SequencerTAL-Mod offers two different modes. An arpeggiator and a sequencer mode.The arpeggiator offers can choose between different modes: UP, DOWN, UP & DOWN and AS PLAYED. The user can choose how many octaves it should play. TEMPO:The tempo can be chosen free or it’s possible to sync it to the host, but it can also be triggered to the note-on event.SHUFFLE:Shuffle adds some groove the sequence.The sequencer supports S (SLIDE), P (PAUSE), Velocity (Slider in the middle).The + and – buttons adjust the note offset in halftones. The number value on the velocity slider shows the note offset in halftones. It’s possible to have up to 16 steps. Slide does not work out of the box. You need to set the number of voices to 1 and enable portamento to make this work.Effects (FX)The effect section offers some basic effects that can be added to a sound. The lock symbols on the top allow locking the effect section when changing presets. This is helpful when you want to listen to the presets without any effects or with a specific effect.Routing ModulationsCables can be added with a click at connector (the round rings). Keep pressing the mouse button and drag the cable that shows up to another connector. Every gray target connector can be connected to a green modulation source.A button shows up at the top of the gray connector and the cable stays when a connection was made successfully. A click at the button on the top of the connector shows a small window where the user can adjust the modulation amount in the range of +-1.The CONTROL AMOUNT combo box allows it to define a modulation source that modulates the modulation intensity. Standard is +1 (no modulation, always 1).This makes it very easy to set up modulations with almost endless possibilities. And it’s fun :)Close the windows with a click into an empty area on the synth UI.MIDI LearnAssign a midi controller to every control of the synth. Do following steps to make a successful assignment:1. Enable MIDI LEARN (top right corner)2. Click at a plug-in slider you want to control.3. Move your hardware controller4. Disable MIDI LEARN or do some more assignments.MIDI LEARN CLEARDeletes all midi learn assignments.Cubase and VST are trademarks of Steinberg Soft- und Hardware GmbHLicenseEND-USER LICENSE AGREEMENT FOR TAL-U-NO_LX IMPORTANT PLEASE READ THE TERMS AND CONDITIONS OF THIS LICENSE AGREEMENT CAREFULLY BEFORE CONTINUING WITH THIS PROGRAM INSTALL: TAL - Togu Audio Line End-User License Agreement ("EULA") is a legal agreement between you (either an individual or a single entity) and TAL - Togu Audio Line. for the TAL - Togu Audio Line software product(s) identified above which may include associated software components, media, printed materials, and "online" or electronic documentation ("SOFTWARE PRODUCT"). By installing, copying, or otherwise using the SOFTWARE PRODUCT, you agree to be bound by the terms of this EULA. This license agreement represents the entire agreement concerning the program between you and TAL - Togu Audio Line, (referred to as "licenser"), and it supersedes any prior proposal, representation, or understanding between the parties. If you do not agree to the terms of this EULA, do not install or use the SOFTWARE PRODUCT. The SOFTWARE PRODUCT is protected by copyright laws and international copyright treaties, as well as other intellectual property laws and treaties. The SOFTWARE PRODUCT is licensed, not sold.1. GRANT OF LICENSE.The SOFTWARE PRODUCT is licensed as follows:(a) Installation and Use.TAL - Togu Audio Line grants you the right to install and use copies of the SOFTWARE PRODUCT on your computer running a validly licensed copy of the operating system for which the SOFTWARE PRODUCT was designed [e.g., Windows 95, Windows NT, Windows 98, Windows 2000, Windows 2003, Windows XP, Windows ME, Windows Vista].(b) Backup Copies.You may also make copies of the SOFTWARE PRODUCT as may be necessary for backup and archival purposes.2. DESCRIPTION OF OTHER RIGHTS AND LIMITATIONS.(a) Maintenance of Copyright Notices.You must not remove or alter any copyright notices on any and all copies of the SOFTWARE PRODUCT.(b) Distribution.You may not distribute registered copies of the SOFTWARE PRODUCT to third parties. Evaluation versions available for download from TAL - Togu Audio Line's websites may be freely distributed.(c) Prohibition on Reverse Engineering, Decompilation, and Disassembly.You may not reverse engineer, decompile, or disassemble the SOFTWARE PRODUCT, except and only to the extent that such activity is expressly permitted by applicable law notwithstanding this limitation.(d) Rental.You may not rent, lease, or lend the SOFTWARE PRODUCT.(e) Support Services.TAL - Togu Audio Line may provide you with support services related to the SOFTWARE PRODUCT ("Support Services"). Any supplemental software code provided to you as part of the Support Services shall be considered part of the SOFTWARE PRODUCT and subject to the terms and conditions of this EULA.(f) Compliance with Applicable Laws.You must comply with all applicable laws regarding use of the SOFTWARE PRODUCT.3. TERMINATIONWithout prejudice to any other rights, TAL - Togu Audio Line may terminate this EULA if you fail to comply with the terms and conditions of this EULA. In such event, you must destroy all copies of the SOFTWARE PRODUCT in your possession.4. COPYRIGHTAll title, including but not limited to copyrights, in and to the SOFTWARE PRODUCT and any copies thereof are owned by TAL - Togu Audio Line or its suppliers. All title and intellectual property rights in and to the content which may be accessed through use of the SOFTWARE PRODUCT is the property of the respective content owner and may be protected by applicable copyright or other intellectual property laws and treaties. This EULA grants you no rights to use such content. All rights not expressly granted are reserved by TAL - Togu Audio Line.5. NO WARRANTIESTAL - Togu Audio Line expressly disclaims any warranty for the SOFTWARE PRODUCT. The SOFTWARE PRODUCT is provided 'As Is' without any express or implied warranty of any kind, including but not limited to any warranties of merchantability, noninfringement, or fitness of a particular purpose. TAL - Togu Audio Line does not warrant or assume responsibility for the accuracy or completeness of any information, text, graphics, links or other items contained within the SOFTWARE PRODUCT. TAL - Togu Audio Line makes no warranties respecting any harm that may be caused by the transmission of a computer virus, worm, time bomb, logic bomb, or other such computer program. TAL - Togu Audio Line further expressly disclaims any warranty or representation to Authorized Users or to any third party. 6. LIMITATION OF LIABILITYIn no event shall TAL - Togu Audio Line be liable for any damages (including, without limitation, lost profits, business interruption, or lost information) rising out of'Authorized Users' use of or inability to use the SOFTWARE PRODUCT, even if TAL - Togu Audio Line has been advised of the possibility of such damages. In no event will TAL - Togu Audio Line be liable for loss of data or for indirect, special, incidental, consequential (including lost profit), or other damages based in contract, tort or otherwise. TAL - Togu Audio Line shall have no liability with respect to the content of the SOFTWARE PRODUCT or any part thereof, including but not limited to errors or omissions contained therein, libel, infringements of rights of publicity, privacy, trademark rights, business interruption, personal injury, loss of privacy, moral rights or the disclosure of confidential information.。
虚拟现实软件:VRP-BUILDER虚拟现实编辑器简介——人性化,易操作,强大的二次开发接口,最适合中国人的三维互联网仿真平台(一)VRP-BUILDER定义:VRP-BUILDER虚拟现实编辑器是中视典数字科技()研发的一款直接面向三维美工的虚拟现实软件,所有操作都是用美工可以理解的方式(不需要程序员参与),可以让美工将所有精力投入到效果制作中来,从而,有效较低制作成本,提高成果质量。
如果你有良好的3DMAX的建模和不渲染基础,只要对VRP-BUILDER加以学习和研究,你就可以很快制作出自己的虚拟现实场景。
(二)VRP-BUILDER应用范围:建筑行业:城市规划、地产演示、场馆展示...室内设计:虚拟样板房、地板/瓷砖/涂料等建材虚拟...CG行业:互动广告、三维产品展示...工业:工控仿真、设备管理、虚拟装配...文物保护:古迹复原、虚拟漫游...交通行业:道路桥梁规划设计、城市交通仿真、铁道系统仿真...游戏娱乐:三维PC游戏、模拟器游戏...军事:电子沙盘,虚拟战场...地理:气候、植被、水利模拟...教育:立体几何教学、物理化学课件模拟...视频行业:虚拟演播室...(三)VRP-BUILDER产品特点:(1)友好的图形编辑界面(2)高效快捷的工作流程(3)强大的3D图形处理能力(4)任意角度、实时的3D显示(5)支持二位导航地图,并可实时定位(6)支持高效、高精度碰撞检测算法(7)高精度抓图(8)支持建筑位置、大小、方位任意调整(9)支持模型的导入导出(10)支持多人在线网络互动(11)支持强大的人物角色系统(12)支持强大的物理系统(13)支持菲涅耳水面特效(14)支持各种全屏特效(15)支持高真实感、高效实时渲染画质(16)支持300万面以上超大规模场景的组织和渲染能力(17)支持各种事件触发(18)内嵌强大的脚本和函数功能,可对三维场景进行各种控制和交互(19)支持任意模型的实时复制、删除(20)支持自动漫游、手动漫游、可自定义漫游轨迹(21)支持骨骼动画、位移动画、变形动画(22)支持刚体动力学、物流仿真模拟(23)支持各种生物特效(24)功能强大的实时材质编辑器(25)支持二维界面编辑、独立运行功能(26)支持打包为可独立执行的exe文化格式进行发布(27)支持贴图格式批量转换和资源管理(28)支持嵌入IE,支持网络在线浏览(29)支持嵌入各种多媒体软件,如Neobook、Director,MMB等(30)支持各种工业造型软件,如Pro/e,UG,SolidWorks,SolidEdge (31)支持各种三维建筑和地形造型软件如Civil3d、Revit等…………。
虚拟现实技术的开发工具介绍和使用教程虚拟现实技术(Virtual Reality,VR)正逐渐成为现代科技领域的热门话题。
从虚拟交互游戏到虚拟旅行体验,人们体验到了VR技术所带来的沉浸式感受。
然而,要开发出令人激动的虚拟现实应用,并不是一件简单的事情。
本文将介绍几个主要的虚拟现实开发工具,并提供相应的使用教程,帮助您开始您的VR开发之旅。
1. UnityUnity是一款多平台游戏开发引擎,也是目前最受欢迎的虚拟现实开发工具之一。
Unity支持多种VR设备,包括Oculus Rift、HTC Vive和PlayStation VR等。
它提供了一个直观且易于使用的用户界面,使开发者可以轻松地创建虚拟现实场景、添加交互元素和调整相机视角。
使用Unity进行虚拟现实开发的第一步是安装Unity编辑器。
您可以在Unity官方网站上找到适用于不同操作系统的安装包,并按照指示进行安装。
安装完成后,打开Unity,点击“New Project”创建一个新项目。
选择合适的项目名称和存储路径,并确保选择了支持虚拟现实的项目模板。
在创建了项目之后,您可以开始建立场景并添加各种虚拟现实元素,如模型、音频和动画。
Unity提供了一个强大的资源库,您可以从中选择合适的元素来增加场景的真实感。
同时,Unity还支持编写脚本,以实现更高级的交互和动画效果。
要在VR设备上进行测试,您需要将Unity项目导出为特定设备的应用程序。
不同的VR设备可能有不同的设置步骤,您可以参考设备的开发文档来进行相应的设置和导出操作。
确保您的设备已正确连接到计算机,然后运行导出的应用程序以在虚拟现实环境中进行测试。
2. Unreal EngineUnreal Engine是另一个流行的虚拟现实开发工具,特别适用于创建高质量的虚拟现实应用和游戏。
与Unity类似,Unreal Engine也支持多种VR设备,并提供了一个强大的开发环境和工作流程。
要开始使用Unreal Engine进行虚拟现实开发,您需要先下载并安装Unreal Engine编辑器。
Project Builder说明:一、进入Project Builder有两种方式:1、从桌面上的快捷方式进入;2、从Start菜单中的All Programs中的Traintools中的快捷方式Project Builder进入。
二、Project Builder的内部说明1、进入Project Builder时,会要求登录并输入帐号和密码。
如下图:不登录的话,只能以访客的身份看,不能修改;登录管理员帐号才能修改程序。
2、要打开程序的话,需要先点击,然后在弹出的对话框中选择PA3_2(1线机组选择PA3_1)程序,然后点击OK按钮就会打开程序。
见下图:见上图,Save Project是保存当前程序,Get Project Revision是恢复未保存在默认目录下的程序备份的,Restore Project是恢复未保存在默认目录下的程序备份的。
默认目录是D:\TrainTools\Projects\PA3_2\Revisions按下Save Project后弹出上面的窗口,PA3_2_ZhY是起的名字,后面的数字是每次备份程序时自动生成的。
Include complied files是包含编译程序,这个勾必须要勾上。
Descrition是写描述的地方,可以不填。
按下OK键程序就会自动保存在D:\TrainTools\Projects\PA3_2\Revisions目录下。
恢复备份的话,必须先关掉TrainView和ArcCom。
按下Get Project Revision会让你选择程序备份,选择你需要的程序备份下的后缀名为.ttr的文件,如下图。
在上图中,按下Open键就会进入下一步,见下图,它显示了一些信息,按下Get就会开始恢复程序。
不想恢复程序的话,请按下Cancel。
按下Restore Revision会让你在默认目录下选择程序备份,选择后按下OK键就能自动恢复,见下图。
3、上图就是打开程序后的样子,其中Control Room是上位机;TrainView是画面;Severs是数据库服务;AlarmEvent Sever是报警事件服务器,分别连接HIMA_A和HIMA_B、SE291910;S5 Alarm/Events是CCC CPU的报警事件服务器;ArcCom是历史趋势记录服务器;ModbusOPC是将HIMA的数据连接到CCC的上位机的桥接;S5 OPC是将CCC CPU的数据连接到CCC的上位机的桥接;Script_Sever_Seletion是将SE291910的数据连接到CCC的上位机的桥接;SE291910是脚本编辑处理器,用来处理HIMA_A和HIMA_B的冗余通讯。