TextView中文字滚动效果
- 格式:doc
- 大小:103.50 KB
- 文档页数:4
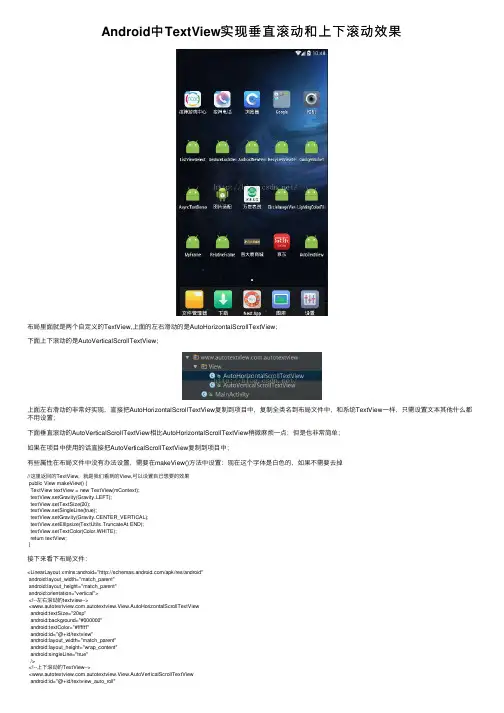
Android中TextView实现垂直滚动和上下滚动效果布局⾥⾯就是两个⾃定义的TextView,上⾯的左右滑动的是AutoHorizontalScrollTextView;下⾯上下滚动的是AutoVerticalScrollTextView;上⾯左右滑动的⾮常好实现,直接把AutoHorizontalScrollTextView复制到项⽬中,复制全类名到布局⽂件中,和系统TextView⼀样,只需设置⽂本其他什么都不⽤设置;下⾯垂直滚动的AutoVerticalScrollTextView相⽐AutoHorizontalScrollTextView稍微⿇烦⼀点;但是也⾮常简单;如果在项⽬中使⽤的话直接把AutoVerticalScrollTextView复制到项⽬中;有些属性在布局⽂件中没有办法设置,需要在makeView()⽅法中设置:现在这个字体是⽩⾊的,如果不需要去掉//这⾥返回的TextView,就是我们看到的View,可以设置⾃⼰想要的效果public View makeView() {TextView textView = new TextView(mContext);textView.setGravity(Gravity.LEFT);textView.setTextSize(20);textView.setSingleLine(true);textView.setGravity(Gravity.CENTER_VERTICAL);textView.setEllipsize(TextUtils.TruncateAt.END);textView.setTextColor(Color.WHITE);return textView;}接下来看下布局⽂件:<LinearLayout xmlns:android="/apk/res/android"android:layout_width="match_parent"android:layout_height="match_parent"android:orientation="vertical"><!--左右滚动的textview--><.autotextview.View.AutoHorizontalScrollTextViewandroid:textSize="20sp"android:background="#000000"android:textColor="#ffffff"android:id="@+id/textview"android:layout_width="match_parent"android:layout_height="wrap_content"android:singleLine="true"/><!--上下滚动的TextView--><.autotextview.View.AutoVerticalScrollTextViewandroid:id="@+id/textview_auto_roll"android:layout_width="match_parent"android:layout_height="wrap_content"android:background="#000000"android:padding="5dp"/></LinearLayout>布局⽂件就⾮常简单了,接下来说下两个View具体怎么使⽤:左右滚动的TextView,直接设置⼀个TextView即可;horizontalScrollTV = (AutoHorizontalScrollTextView) findViewById(R.id.textview);horizontalScrollTV.setText(titleStr);⽽垂直滚动的TextView需要的是⼀个数组,当执⾏next()⽅法的时候会执⾏动画切换下⼀个数据;在项⽬中我直接定义了⼀个计时器,每隔2秒发送⼀个消息,然后执⾏AutoVerTicalScrollTextView.next();private String[] strings={"我的剑,就是你的剑!","俺也是从⽯头⾥蹦出来得!","我⽤双⼿成就你的梦想!","⼈在塔在!","犯我德邦者,虽远必诛!","我会让你看看什么叫残忍!","我的⼤⼑早已饥渴难耐了!"}; verticalScrollTV = (AutoVerticalScrollTextView) findViewById(R.id.textview_auto_roll);verticalScrollTV.setText(strings[0]);new Thread(){@Overridepublic void run() {while (isRunning){SystemClock.sleep(3000);handler.sendEmptyMessage(199);}}}.start();private Handler handler = new Handler() {public void handleMessage(Message msg) {if (msg.what == 199) {verticalScrollTV.next();number++;verticalScrollTV.setText(strings[number%strings.length]);}}};点击事件是后期加上去的,在MainActivity的initView()⽅法中添加以下代码:verticalScrollTV.setOnClickListener(new View.OnClickListener() {@Overridepublic void onClick(View v) {Toast.makeText(MainActivity.this,strings[number%strings.length],Toast.LENGTH_SHORT).show();}});以上所述是⼩编给⼤家介绍的Android中TextView实现垂直滚动效和上下滚动效果,希望对⼤家有所帮助,如果⼤家有任何疑问请给我留⾔,⼩编会及时回复⼤家的。
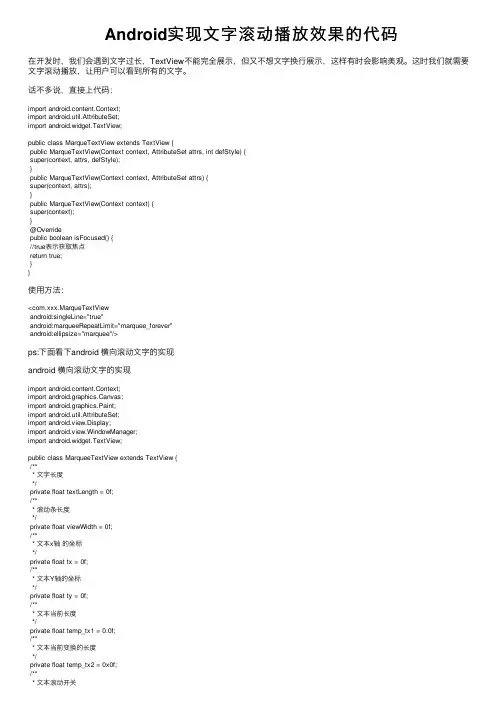
Android实现⽂字滚动播放效果的代码在开发时,我们会遇到⽂字过长,TextView不能完全展⽰,但⼜不想⽂字换⾏展⽰,这样有时会影响美观。
这时我们就需要⽂字滚动播放,让⽤户可以看到所有的⽂字。
话不多说,直接上代码:import android.content.Context;import android.util.AttributeSet;import android.widget.TextView;public class MarqueTextView extends TextView {public MarqueTextView(Context context, AttributeSet attrs, int defStyle) {super(context, attrs, defStyle);}public MarqueTextView(Context context, AttributeSet attrs) {super(context, attrs);}public MarqueTextView(Context context) {super(context);}@Overridepublic boolean isFocused() {//true表⽰获取焦点return true;}}使⽤⽅法:<com.xxx.MarqueTextViewandroid:singleLine="true"android:marqueeRepeatLimit="marquee_forever"android:ellipsize="marquee"/>ps:下⾯看下android 横向滚动⽂字的实现android 横向滚动⽂字的实现import android.content.Context;import android.graphics.Canvas;import android.graphics.Paint;import android.util.AttributeSet;import android.view.Display;import android.view.WindowManager;import android.widget.TextView;public class MarqueeTextView extends TextView {/*** ⽂字长度*/private float textLength = 0f;/*** 滚动条长度*/private float viewWidth = 0f;/*** ⽂本x轴的坐标*/private float tx = 0f;/*** ⽂本Y轴的坐标*/private float ty = 0f;/*** ⽂本当前长度*/private float temp_tx1 = 0.0f;/*** ⽂本当前变换的长度*/private float temp_tx2 = 0x0f;/*** ⽂本滚动开关*/private boolean isStarting = false;/*** 画笔对象*/private Paint paint = null;/*** 显⽰的⽂字*/private String text = "";/*** ⽂本滚动速度**/private float sudu;public MarqueeTextView(Context context, AttributeSet attrs) {super(context, attrs);}/*** 初始化⾃动滚动条,每次改变⽂字内容时,都需要重新初始化⼀次** @param windowManager 获取屏幕* @param text 显⽰的内容* @param su ⽂字滚动的速度*/public void initScrollTextView(WindowManager windowManager, String text, float su) {// 得到画笔,获取⽗类的textPaintpaint = this.getPaint();// 得到⽂字this.text = text;this.sudu = su;textLength = paint.measureText(text);// 获得当前⽂本字符串长度viewWidth = this.getWidth();// 获取宽度return mRight - mLeft;if (viewWidth == 0) {// 获取当前屏幕的属性Display display = windowManager.getDefaultDisplay();viewWidth = display.getWidth();// 获取屏幕宽度 viewWidth 是滚动的开始位置,需要修改的 // 可再此⼊⼿}tx = textLength;temp_tx1 = viewWidth + textLength;temp_tx2 = viewWidth + textLength * 2;// ⾃⼰定义,⽂字变化多少// // ⽂字的⼤⼩+距顶部的距离ty = this.getTextSize() + this.getPaddingTop();}/*** 开始滚动*/public void starScroll() {// 开始滚动isStarting = true;this.invalidate();// 刷新屏幕}/*** 停⽌⽅法,停⽌滚动*/public void stopScroll() {// 停⽌滚动isStarting = false;this.invalidate();// 刷新屏幕}/*** 重写onDraw⽅法*/@Overrideprotected void onDraw(Canvas canvas) {if (isStarting) {// A-Alpha透明度/R-Read红⾊/g-Green绿⾊/b-Blue蓝⾊//paint.setARGB(255, 200, 200, 200);canvas.drawText(text, temp_tx1 - tx, ty, paint);tx += sudu;// 当⽂字滚动到屏幕的最左边if (tx > temp_tx2) {// 把⽂字设置到最右边开始tx = textLength;}this.invalidate();// 刷新屏幕}super.onDraw(canvas);}}使⽤:MarqueeTextView marqueeTextView = contentView.findViewById(R.id.five_text__view);marqueeTextView.initScrollTextView(getWindowManager(), "滚动⽂字", 1);marqueeTextView.setText("");marqueeTextView.starScroll();到此这篇关于Android实现⽂字滚动播放效果的代码的⽂章就介绍到这了,更多相关Android实现⽂字滚动播放内容请搜索以前的⽂章或继续浏览下⾯的相关⽂章希望⼤家以后多多⽀持!。
初学android的很多朋友都会对TextView的属性一知半解,下面我们就一起来了解下:android:autoLink设置是否当文本为URL链接/email/电话号码/map时,文本显示为可点击的链接。
可选值(none/web/email/phone/map/all)android:autoText如果设置,将自动执行输入值的拼写纠正。
此处无效果,在显示输入法并输入的时候起作用。
android:bufferType指定getText()方式取得的文本类别。
选项editable 类似于StringBuilder可追加字符,也就是说getText后可调用append方法设置文本内容。
spannable 则可在给定的字符区域使用样式,参见这里1、这里2。
android:capitalize设置英文字母大写类型。
此处无效果,需要弹出输入法才能看得到,参见EditView此属性说明。
android:cursorVisible设定光标为显示/隐藏,默认显示。
android:digits设置允许输入哪些字符。
如“1234567890.+-*/% ()”android:drawableBottom在text的下方输出一个drawable,如图片。
如果指定一个颜色的话会把text的背景设为该颜色,并且同时和background使用时覆盖后者。
android:drawableLeft在text的左边输出一个drawable,如图片。
android:drawablePadding设置text与drawable(图片)的间隔,与drawableLeft、drawableRight、drawableTop、drawableBottom一起使用,可设置为负数,单独使用没有效果。
android:drawableRight在text的右边输出一个drawable。
android:drawableTop在text的正上方输出一个drawable。
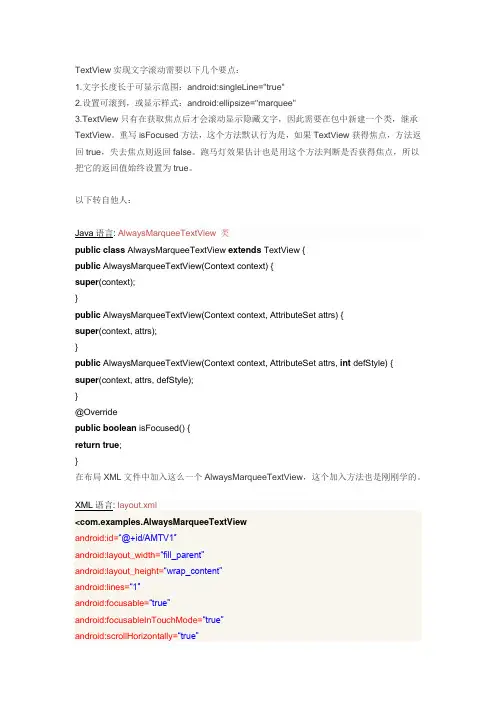
TextView实现文字滚动需要以下几个要点:1.文字长度长于可显示范围:android:singleLine="true"2.设置可滚到,或显示样式:android:ellipsize="marquee"3.TextView只有在获取焦点后才会滚动显示隐藏文字,因此需要在包中新建一个类,继承TextView。
重写isFocused方法,这个方法默认行为是,如果TextView获得焦点,方法返回true,失去焦点则返回false。
跑马灯效果估计也是用这个方法判断是否获得焦点,所以把它的返回值始终设置为true。
以下转自他人:Java语言: AlwaysMarqueeTextView 类public class AlwaysMarqueeTextView extends TextView{public AlwaysMarqueeTextView(Contextcontext) {super(context);}public AlwaysMarqueeTextView(Contextcontext,AttributeSetattrs) {super(context,attrs);}public AlwaysMarqueeTextView(Contextcontext,AttributeSetattrs,int defStyle) {super(context,attrs,defStyle);}@Overridepublic boolean isFocused() {return true;}在布局XML文件中加入这么一个AlwaysMarqueeTextView,这个加入方法也是刚刚学的。
XML语言: layout.xml<com.examples.AlwaysMarqueeTextViewandroid:id=―@+id/AMTV1″android:layout_width=―fill_parent‖android:layout_height=―wrap_content‖android:lines=―1″android:focusable=―true‖android:focusableInTouchMode=―true‖android:scrollHorizontally=―true‖android:marqueeRepeatLimit=―marquee_forever‖android:ellipsize=―marquee‖android:background=―@android:color/transparent‖/>ellipsize属性设置当文字过长时,该控件该如何显示。
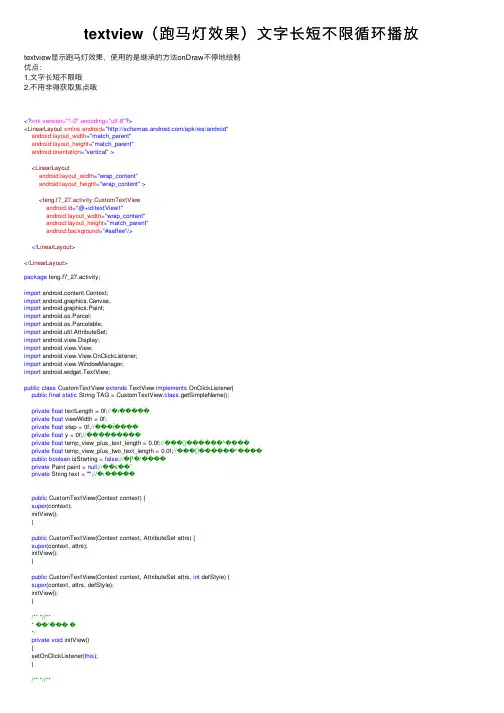
textview(跑马灯效果)⽂字长短不限循环播放textview显⽰跑马灯效果,使⽤的是继承的⽅法onDraw不停地绘制优点:1.⽂字长短不限哦2.不⽤⾮得获取焦点哦 <?xml version="1.0" encoding="utf-8"?><LinearLayout xmlns:android="/apk/res/android"android:layout_width="match_parent"android:layout_height="match_parent"android:orientation="vertical"><LinearLayoutandroid:layout_width="wrap_content"android:layout_height="wrap_content"><feng.f7_27.activity.CustomTextViewandroid:id="@+id/textView1"android:layout_width="wrap_content"android:layout_height="match_parent"android:background="#aaffee"/></LinearLayout></LinearLayout>package feng.f7_27.activity;import android.content.Context;import android.graphics.Canvas;import android.graphics.Paint;import android.os.Parcel;import android.os.Parcelable;import android.util.AttributeSet;import android.view.Display;import android.view.View;import android.view.View.OnClickListener;import android.view.WindowManager;import android.widget.TextView;public class CustomTextView extends TextView implements OnClickListener{public final static String TAG = CustomTextView.class.getSimpleName();private float textLength = 0f;//�ı�����private float viewWidth = 0f;private float step = 0f;//���ֵĺ����private float y = 0f;//���ֵ������private float temp_view_plus_text_length = 0.0f;//��� ������ʱ����private float temp_view_plus_two_text_length = 0.0f;//��� ������ʱ����public boolean isStarting = false;//�Ƿ�ʼ����private Paint paint = null;//��ͼ��ʽprivate String text = "";//�ı�����public CustomTextView(Context context) {super(context);initView();}public CustomTextView(Context context, AttributeSet attrs) {super(context, attrs);initView();}public CustomTextView(Context context, AttributeSet attrs, int defStyle) {super(context, attrs, defStyle);initView();}/***//*** ��ʼ��� �*/private void initView(){setOnClickListener(this);}/***//*** �ı���ʼ����ÿ�θ���ı���� ����ı�Ч��� ����Ҫ���³�ʼ��һ�� */public void init(WindowManager windowManager){paint = getPaint();text = getText().toString();textLength = paint.measureText(text);viewWidth = getWidth();if(viewWidth == 0){if(windowManager != null){Display display = windowManager.getDefaultDisplay();viewWidth = display.getWidth();}}step = textLength;temp_view_plus_text_length = viewWidth + textLength;temp_view_plus_two_text_length = viewWidth + textLength * 2;y = getTextSize() + getPaddingTop()+15;}@Overridepublic Parcelable onSaveInstanceState(){Parcelable superState = super.onSaveInstanceState();SavedState ss = new SavedState(superState);ss.step = step;ss.isStarting = isStarting;return ss;}@Overridepublic void onRestoreInstanceState(Parcelable state){if (!(state instanceof SavedState)) {super.onRestoreInstanceState(state);return;}SavedState ss = (SavedState)state;super.onRestoreInstanceState(ss.getSuperState());step = ss.step;isStarting = ss.isStarting;}public static class SavedState extends BaseSavedState {public boolean isStarting = false;public float step = 0.0f;SavedState(Parcelable superState) {super(superState);}@Overridepublic void writeToParcel(Parcel out, int flags) {super.writeToParcel(out, flags);out.writeBooleanArray(new boolean[]{isStarting});out.writeFloat(step);}public static final Parcelable.Creator<SavedState> CREATOR= new Parcelable.Creator<SavedState>() {public SavedState[] newArray(int size) {return new SavedState[size];}@Overridepublic SavedState createFromParcel(Parcel in) {return new SavedState(in);}};private SavedState(Parcel in) {super(in);boolean[] b = null;in.readBooleanArray(b);if(b != null && b.length > 0)isStarting = b[0];step = in.readFloat();}}/** *//*** ��ʼ����*/public void startScroll(){isStarting = true ;invalidate();}/** *//*** ����*/public void stopScroll(){isStarting = false ;invalidate();}@Overridepublic void onDraw(Canvas canvas) {canvas.drawText(text, temp_view_plus_text_length - step, y, paint); if (!isStarting){return ;}step += 0.5;if (step > temp_view_plus_two_text_length)step = textLength;invalidate();}@Overridepublic void onClick(View v) {if (isStarting)stopScroll();elsestartScroll();}}tv.setText("aaaaaavvv");tv.init(getWindowManager());tv.startScroll();。
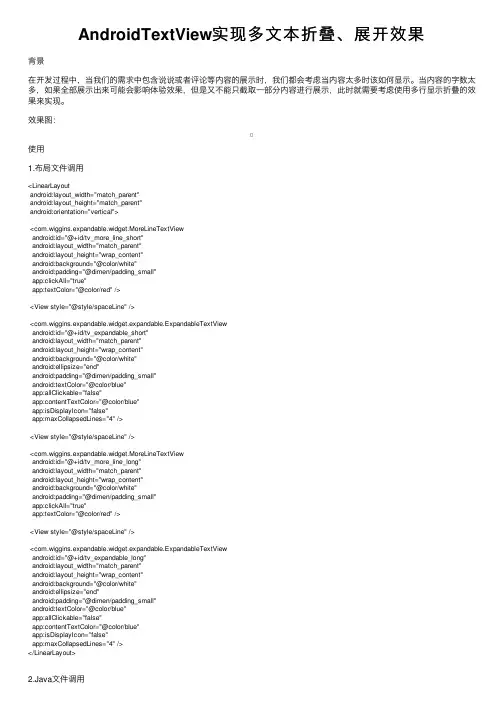
AndroidTextView实现多⽂本折叠、展开效果背景在开发过程中,当我们的需求中包含说说或者评论等内容的展⽰时,我们都会考虑当内容太多时该如何显⽰。
当内容的字数太多,如果全部展⽰出来可能会影响体验效果,但是⼜不能只截取⼀部分内容进⾏展⽰,此时就需要考虑使⽤多⾏显⽰折叠的效果来实现。
效果图:使⽤1.布局⽂件调⽤<LinearLayoutandroid:layout_width="match_parent"android:layout_height="match_parent"android:orientation="vertical"><com.wiggins.expandable.widget.MoreLineTextViewandroid:id="@+id/tv_more_line_short"android:layout_width="match_parent"android:layout_height="wrap_content"android:background="@color/white"android:padding="@dimen/padding_small"app:clickAll="true"app:textColor="@color/red" /><View style="@style/spaceLine" /><com.wiggins.expandable.widget.expandable.ExpandableTextViewandroid:id="@+id/tv_expandable_short"android:layout_width="match_parent"android:layout_height="wrap_content"android:background="@color/white"android:ellipsize="end"android:padding="@dimen/padding_small"android:textColor="@color/blue"app:allClickable="false"app:contentTextColor="@color/blue"app:isDisplayIcon="false"app:maxCollapsedLines="4" /><View style="@style/spaceLine" /><com.wiggins.expandable.widget.MoreLineTextViewandroid:id="@+id/tv_more_line_long"android:layout_width="match_parent"android:layout_height="wrap_content"android:background="@color/white"android:padding="@dimen/padding_small"app:clickAll="true"app:textColor="@color/red" /><View style="@style/spaceLine" /><com.wiggins.expandable.widget.expandable.ExpandableTextViewandroid:id="@+id/tv_expandable_long"android:layout_width="match_parent"android:layout_height="wrap_content"android:background="@color/white"android:ellipsize="end"android:padding="@dimen/padding_small"android:textColor="@color/blue"app:allClickable="false"app:contentTextColor="@color/blue"app:isDisplayIcon="false"app:maxCollapsedLines="4" /></LinearLayout>2.Java⽂件调⽤private void initData() {mTvMoreLineShort.setText(Constant.content1);mTvExpandableShort.setText(Constant.content2);mTvMoreLineLong.setText(Constant.content3);mTvExpandableLong.setText(Constant.content4);}MoreLineTextView使⽤1.在attr.xml中定义属性<declare-styleable name="MoreTextStyle"><!--内容⼤⼩--><attr name="textSize" format="dimension" /><!--内容颜⾊--><attr name="textColor" format="color" /><!--内容默认最⼤⾏数--><attr name="maxLine" format="integer" /><!--展开/收起图标--><attr name="expandIcon" format="reference" /><!--展开/收起动画执⾏时间--><attr name="durationMillis" format="integer" /><!--可点击区域,默认展开/收起区域可点击--><attr name="clickAll" format="boolean" /></declare-styleable>2.是否显⽰折叠效果@Overrideprotected void onMeasure(int widthMeasureSpec, int heightMeasureSpec) {super.onMeasure(widthMeasureSpec, heightMeasureSpec);// 如果没有变化,测量并返回if (!mRelayout || getVisibility() == View.GONE) {super.onMeasure(widthMeasureSpec, heightMeasureSpec);return;}mRelayout = false;super.onMeasure(widthMeasureSpec, heightMeasureSpec);// 内容区域初始显⽰⾏⾼mTvContent.setHeight(mTvContent.getLineHeight() * (mMaxLine > mTvContent.getLineCount() ? mTvContent.getLineCount() : mMaxLine)); mLlExpand.post(new Runnable() {@Overridepublic void run() {// 是否显⽰折叠效果mLlExpand.setVisibility(mTvContent.getLineCount() > mMaxLine ? View.VISIBLE : View.GONE);}});}3.设置显⽰内容/*** @Description 设置显⽰内容*/public void setText(String str) {mRelayout = true;mTvContent.setText(str);setVisibility(TextUtils.isEmpty(str) ? View.GONE : View.VISIBLE);}4.展开/收起动画@Overridepublic void onClick(View v) {if (mTvContent.getLineCount() <= mMaxLine) {return;}isExpand = !isExpand;mTvContent.clearAnimation();final int deltaValue;final int startValue = mTvContent.getHeight();if (isExpand) {deltaValue = mTvContent.getLineHeight() * mTvContent.getLineCount() - startValue;//计算要展开⾼度RotateAnimation animation = new RotateAnimation(0, 180, Animation.RELATIVE_TO_SELF, 0.5f, Animation.RELATIVE_TO_SELF, 0.5f); animation.setDuration(mDurationMillis);animation.setFillAfter(true);mIvExpand.startAnimation(animation);mTvExpand.setText(getContext().getString(R.string.collapse));} else {deltaValue = mTvContent.getLineHeight() * mMaxLine - startValue;//为负值,收缩的⾼度RotateAnimation animation = new RotateAnimation(180, 0, Animation.RELATIVE_TO_SELF, 0.5f, Animation.RELATIVE_TO_SELF, 0.5f); animation.setDuration(mDurationMillis);animation.setFillAfter(true);mIvExpand.startAnimation(animation);mTvExpand.setText(getContext().getString(R.string.expand));}Animation animation = new Animation() {protected void applyTransformation(float interpolatedTime, Transformation t) {//interpolatedTime:为当前动画帧对应的相对时间,值总在0-1之间,原始长度+⾼度差*(从0到1的渐变)即表现为动画效果mTvContent.setHeight((int) (startValue + deltaValue * interpolatedTime));}};animation.setDuration(mDurationMillis);mTvContent.startAnimation(animation);}ExpandableTextView使⽤1.在attr.xml中定义属性<declare-styleable name="ExpandableTextView"><!--内容默认最⼤⾏数,超过隐藏--><attr name="maxCollapsedLines" format="integer" /><!--展开/收起动画执⾏时间--><attr name="animDuration" format="integer" /><!--展开图⽚--><attr name="expandDrawable" format="reference" /><!--收起图⽚--><attr name="collapseDrawable" format="reference" /><!--内容颜⾊--><attr name="contentTextColor" format="color" /><!--内容⼤⼩--><attr name="contentTextSize" format="dimension" /><!--收起/展开颜⾊--><attr name="collapseExpandTextColor" format="color" /><!--收起/展开⼤⼩--><attr name="collapseExpandTextSize" format="dimension" /><!--收起⽂字--><attr name="textCollapse" format="string" /><!--展开⽂字--><attr name="textExpand" format="string" /><!--可点击区域,默认展开/收起区域可点击--><attr name="allClickable" format="boolean" /><!--是否显⽰展开/收起图标,默认显⽰--><attr name="isDisplayIcon" format="boolean" /><!--收起/展开位置,默认左边--><attr name="collapseExpandGrarity"><flag name="left" value="3" /><flag name="right" value="5" /></attr><!--收起/展开图标位置,默认右边--><attr name="drawableGrarity"><flag name="left" value="3" /><flag name="right" value="5" /></attr></declare-styleable>2.是否显⽰折叠效果@Overrideprotected void onMeasure(int widthMeasureSpec, int heightMeasureSpec) {// 如果没有变化,测量并返回if (!mRelayout || getVisibility() == View.GONE) {super.onMeasure(widthMeasureSpec, heightMeasureSpec);return;}mRelayout = false;// Setup with optimistic case// i.e. Everything fits. No button neededmLlExpand.setVisibility(View.GONE);mTvContent.setMaxLines(Integer.MAX_VALUE);// Measuresuper.onMeasure(widthMeasureSpec, heightMeasureSpec);//如果内容真实⾏数⼩于等于最⼤⾏数,不处理if (mTvContent.getLineCount() <= mMaxCollapsedLines) {return;}// 获取内容tv真实⾼度(含padding)mTextHeightWithMaxLines = getRealTextViewHeight(mTvContent);// 如果是收起状态,重新设置最⼤⾏数if (mCollapsed) {mTvContent.setMaxLines(mMaxCollapsedLines);}mLlExpand.setVisibility(View.VISIBLE);// Re-measure with new setupsuper.onMeasure(widthMeasureSpec, heightMeasureSpec);if (mCollapsed) {// Gets the margin between the TextView's bottom and the ViewGroup's bottommTvContent.post(new Runnable() {@Overridepublic void run() {mMarginBetweenTxtAndBottom = getHeight() - mTvContent.getHeight();}});// 保存这个容器的测量⾼度mCollapsedHeight = getMeasuredHeight();}}3.设置显⽰内容/*** @Description 设置显⽰内容*/public void setText(CharSequence text) {mRelayout = true;mTvContent.setText(text);setVisibility(TextUtils.isEmpty(text) ? View.GONE : View.VISIBLE);}4.展开/收起动画@Overridepublic void onClick(View view) {if (mLlExpand.getVisibility() != View.VISIBLE) {return;}mCollapsed = !mCollapsed;// 修改收起/展开图标、⽂字setDrawbleAndText();// 保存位置状态if (mCollapsedStatus != null) {mCollapsedStatus.put(mPosition, mCollapsed);}// 执⾏展开/收起动画mAnimating = true;ValueAnimator valueAnimator;if (mCollapsed) {valueAnimator = new ValueAnimator().ofInt(getHeight(), mCollapsedHeight);} else {mCollapsedHeight = getHeight();valueAnimator = new ValueAnimator().ofInt(getHeight(), getHeight() + mTextHeightWithMaxLines - mTvContent.getHeight()); }valueAnimator.addUpdateListener(new ValueAnimator.AnimatorUpdateListener() {@Overridepublic void onAnimationUpdate(ValueAnimator valueAnimator) {int animatedValue = (int) valueAnimator.getAnimatedValue();mTvContent.setMaxHeight(animatedValue - mMarginBetweenTxtAndBottom);getLayoutParams().height = animatedValue;requestLayout();}});valueAnimator.addListener(new Animator.AnimatorListener() {@Overridepublic void onAnimationStart(Animator animator) {}@Overridepublic void onAnimationEnd(Animator animator) {// 动画结束后发送结束的信号,清除动画标志mAnimating = false;// 通知监听if (mListener != null) {mListener.onExpandStateChanged(mTvContent, !mCollapsed);}}@Overridepublic void onAnimationCancel(Animator animator) {}@Overridepublic void onAnimationRepeat(Animator animator) {}});valueAnimator.setDuration(mAnimationDuration);valueAnimator.start();}项⽬地址☞以上就是本⽂的全部内容,希望对⼤家的学习有所帮助,也希望⼤家多多⽀持。
今天发现android开发中有一个android:ellipsize=marquee,这个感觉像html中的marquee功能,可以实现滚动效果,于是测试了一下,结果不行呀,后来百度了一下解决办法,下面大家一起来看看。
希望抛砖引玉。
若要让TextView里的文本滚动,必须满足以下几个因素:1,TextView里文本宽度超过TextView的宽度2,android:ellipsize="marquee"3,只有在TextView获取到焦点时,才会滚动.所以加上android:focusableInTouchMode="true" android:focusable="true"最容易忽略的是第三条.滚动重复次数设置:android:marqueeRepeatLimit="marquee_forever"看一个TextView属性android:ellipsize实现跑马灯效果Android系统中TextView实现跑马灯效果,必须具备以下几个条件:1、android:ellipsize=”marquee”2、TextView必须单行显示,即内容必须超出TextView大小3、TextView要获得焦点才能滚动XML代码:android:ellipsize="marquee", android:singleLine="true"Java代码:mTVText.setText;mTVText.setSingleLine(true);mTVText.<>="marquee", android:singleLine="true" mTVText.setEllipsize(TruncateAt.MARQUEE);PS: TextView.setHorizontallyScrolling(true); //让文字可以水平滑动TextView还可以设置跑马灯效果的滚动次数,如下:XML代码设置:android:marqueerepeatlimit="1"。
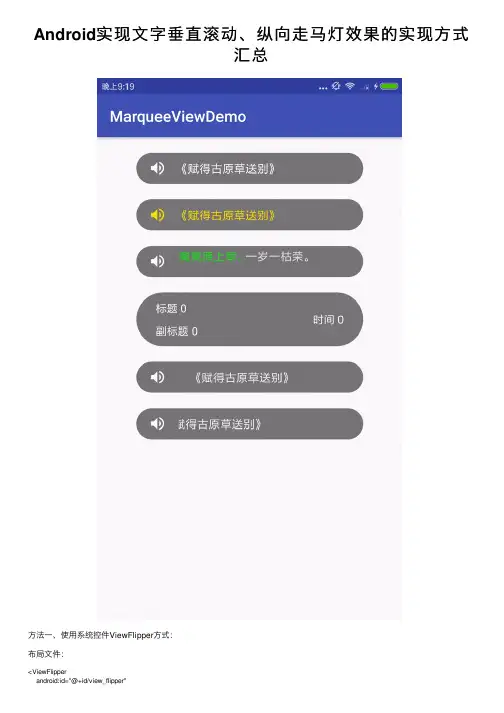
Android实现⽂字垂直滚动、纵向⾛马灯效果的实现⽅式汇总⽅法⼀、使⽤系统控件ViewFlipper⽅式:布局⽂件:<ViewFlipperandroid:id="@+id/view_flipper"android:layout_width="300dp"android:layout_height="35dp"android:layout_centerInParent="true"android:autoStart="true"android:background="@drawable/warning_bg"android:flipInterval="3000"android:inAnimation="@anim/slide_in_bottom"android:outAnimation="@anim/slide_out_top"><TextViewandroid:id="@+id/tv_warning_content1"android:layout_width="match_parent"android:layout_height="match_parent"android:ellipsize="middle"android:gravity="center"android:singleLine="true"android:text="有预警信息有预警信息有预警信息"android:textColor="#000000"android:textSize="16sp"/><TextViewandroid:id="@+id/tv_warning_content2"android:layout_width="match_parent"android:layout_height="match_parent"android:ellipsize="middle"android:gravity="center"android:singleLine="true"android:text="当前天⽓状况当前天⽓状况当前"android:textColor="#000000"android:textSize="16sp"/><TextViewandroid:id="@+id/tv_warning_content3"android:layout_width="match_parent"android:layout_height="match_parent"android:ellipsize="middle"android:gravity="center"android:singleLine="true"android:text="123456465"android:textColor="#000000"android:textSize="16sp"/></ViewFlipper>背景⽂件:warning_bg.xml<?xml version="1.0" encoding="utf-8"?><shape xmlns:android="/apk/res/android"android:shape="rectangle"><solid android:color="#34000000"/><corners android:radius="80dp"/></shape>切⼊动画:slide_in_bottom.xml<?xml version="1.0" encoding="utf-8"?><set xmlns:android="/apk/res/android"><translateandroid:duration="1000"android:fromYDelta="100%p"android:toYDelta="0" /></set>切出动画:slide_out_top.xml<?xml version="1.0" encoding="utf-8"?><set xmlns:android="/apk/res/android"><translateandroid:duration="1000"android:fromYDelta="0"android:toYDelta="-100%p" /></set>注意:如果不在布局⽂件⾥设置: android:autoStart="true",可以在代码中动态设置开始循环mViewFlipper.startFlipping();在Activity中显⽰正常,但在fragment中可能会有重影的现象。
Android之TextView实现文字过长时省略部分或者滚动显示TextV iew中有个ellipsize属性,作用是当文字过长时,该控件该如何显示,解释如下:1.android:ellipsize=”start”—–省略号显示在开头2.android:ellipsize=”end”——省略号显示在结尾3.android:ellipsize=”middle”—-省略号显示在中间4.android:ellipsize=”marquee”–以跑马灯的方式显示(动画横向移动)文字左右滚动三个属性:android:singleLine= trueandroid:ellipsize= marqueeandroid:marqueeRepeatLimit= marquee_foreverAndroid中我们为了实现文本的滚动可以在ScrollView中嵌入一个TextV iew,其实TextView自己也可以实现多行滚动的,毕竟ScrollView必须只能有一个直接的子类布局。
只要在layout中简单设置几个属性就可以轻松实现。
TextV iewandroid:id= @+id/tvCWJandroid:layout_width= fill_parentandroid:layout_height= wrap_contentandroid:scrollbars= vertical !--垂直滚动条--android:singleLine= false !--实现多行--android:maxLines= 15 !--最多不超过15行--android:textColor= #FF0000/TextV iewandroid:id = @+id/app_shortcontentandroid:layout_width = wrap_contentandroid:layout_height = wrap_contentandroid:singleLine = trueandroid:textColor = #FFFFFFFFandroid:scrollHorizontally = trueandroid:focusable = trueandroid:ellipsize = marqueeandroid:marqueeRepeatLimit = marquee_forever /当然我们为了让TextV iew动起来,还需要用到TextV iew的setMovementMethod方法设置一个滚动实例,代码如下TextV iew tv =(TextView)findViewById(CWJ);tv.setMovementMethod(ScrollingMovementMethod.getInstance()); //Android开发网提示相关的可以查看SDK中android.text.method分支了解更多附:顺便讲下TextV iew 自动滚动的实现方法,下面介绍两种方法:一、在代码中实现:textView .setEllipsize(TextUtils.TruncateAt.MARQUEE);textView .setSingleLine(true);textView .setMarqueeRepeatLimit(6);二、在XML中实现:TextV iew android:id= @+id/TextView01 android:layout_width= wrap_contentandroid:layout_height= wrap_content android:singleLine= trueandroid:text= dddddddddddddddddddddddddddddddddddddddddddddddddddddddddddddddd android:marqueeRepeatLimit= marquee_forever android:ellipsize= marqueeandroid:scrollHorizontally= true android:width= 150dip /TextView一切OK,当textView 获取焦点后,就会自动滚动。
在做一个小的电子书程序,要求电子书具有放大缩小的功能,所以肯定的要用到TextView的滚动效果。
同样的还要求TextView在水平方向和垂直方向上都可以滚动。
刚做的时候,也是没有头绪,后来想到了,TextView有一个ScrollTo或者ScrollBy方法,何不如此一用呢!1. 前期找资料因为刚开始,不知道怎么能够滚动,所以先去网上查找资料,垂直滚动很容易实现,直接使用TextView的setMovementMethod(ScrollingMovementMethod.getInstance());方法就可以了。
可是水平滚动如何实现?晚上说在TextView的前面在套一层HorizontalScrollView,这个我也做了尝试,效果不佳,因为你有可能要在程序中动态的改变TextView的布局,这样子程序中就会出错;在者如果你设定了你的TextView为500px,而你的内容一行要有700px,这时你的内容不会自动的切为两行;第三,在添加一个HorizontalScrollView感觉很不舒服,起码界面是这样。
所以综合这几点,我放弃了使用这种方法。
接着就想到用ScrollTo方法,首先需要声明的是,采用这种方法,你的程序中是没有水平和垂直滚动条的,这个你可以自己去优化实现,理论上是绝对可行的。
我现在说的是我能保证文本可以水平和垂直滚动,但没有保证有滚动条。
好,接下来,King就以一个实例做一下简单的使用。
2. 我的实现。
(里面注释很详细,就不过多说了)public class Test_ScrollingText extends Activity implements OnTouchListener,OnGestureListener { // 实现触摸和手势的接口private TextView mContent;private DisplayMetrics metrics;private int mScreenWidth, mScreenHeight;// 屏幕分辨率private GestureDetector mDetector;// 手势监听者private String mDisplayTxt = "";private int mCurrentX = 0, mCurrentY = 0;// TextView左上角的像素值/** Called when the activity is first created. */@Overridepublic void onCreate(Bundle savedInstanceState) {super.onCreate(savedInstanceState);requestWindowFeature(Window.FEATURE_NO_TITLE);getWindow().setFlags(youtParams.FLAG_FULLSCREEN, youtParams.FLAG_FULLSCREEN);// 全屏metrics = new DisplayMetrics();getWindowManager().getDefaultDisplay().getMetrics(metrics);mScreenWidth = metrics.widthPixels;mScreenHeight = metrics.heightPixels;// 获得屏幕分辨率setContentView(yout.main);// 指定布局mContent = (TextView) findViewById(R.id.content);resetTextView();loadFile();mDetector = new GestureDetector(this);mContent.setOnTouchListener(this);mContent.setLongClickable(true);// 初始化,注意这三步是必不可少的,但没顺序的限制mContent.setText(mDisplayTxt);// 显示文件内容}// 加载文件private void loadFile() {// TODO Auto-generated method stubString mTemp;try {InputStream mInputStream = getAssets().open("jinju.txt");BufferedReader mBufferedInputStream = new BufferedReader(new InputStreamReader(mInputStream));while((mTemp = mBufferedInputStream.readLine()) != null) { mDisplayTxt += mTemp;}mDisplayTxt = mDisplayTxt.replace(' ', '\n');} catch (IOException e) {// TODO Auto-generated catch blocke.printStackTrace();}}// 重置TextView的大小private void resetTextView() {// TODO Auto-generated method stubyoutParams mParams = (LayoutParams) mContent .getLayoutParams();mParams.width = mScreenWidth + 300;mParams.height = mScreenHeight + 500;mContent.setLayoutParams(mParams);}// 触摸TextView@Overridepublic boolean onTouch(View v, MotionEvent event) {// TODO Auto-generated method stubreturn mDetector.onTouchEvent(event);// 工作交给手势监听者}// 下面的各个函数是OnGestureListener的实现,具体动作这里不做赘述@Overridepublic boolean onDown(MotionEvent e) {// TODO Auto-generated method stubreturn false;}@Overridepublic boolean onFling(MotionEvent e1, MotionEvent e2, float velocityX,float velocityY) {// TODO Auto-generated method stubreturn false;}@Overridepublic void onLongPress(MotionEvent e) {// TODO Auto-generated method stub}@Overridepublic boolean onScroll(MotionEvent e1, MotionEvent e2, floatdistanceX,float distanceY) {// TODO Auto-generated method stubint mLayoutWidth = mContent.getLayoutParams().width;// 获得TextView的宽度int mLayoutHeight = mContent.getLineCount() *mContent.getLineHeight();// 获得TextView的实际高度if (mCurrentX + distanceX >= 0) {if (mCurrentX + distanceX > mLayoutWidth - mScreenWidth) { mCurrentX = mLayoutWidth - mScreenWidth;} else {mCurrentX = (int) (mCurrentX + distanceX);}} else {mCurrentX = 0;}if (mCurrentY + distanceY >= 0) {if (mCurrentY + distanceY > mLayoutHeight - mScreenHeight) {mCurrentY = mLayoutHeight - mScreenHeight;} else {mCurrentY = (int) (mCurrentY + distanceY);}} else {mCurrentY = 0;}mContent.scrollTo(mCurrentX, mCurrentY); // 使文本滚动到指定的地方return false;}@Overridepublic void onShowPress(MotionEvent e) {// TODO Auto-generated method stub}@Overridepublic boolean onSingleTapUp(MotionEvent e) {// TODO Auto-generated method stubreturn false;}}3.后续我的文件是jinju.txt,是放在assets文件夹下面的,当然你可以放在其他的位置,指定你自己的路径就可以了,main.xml里面只有一个TextView,所以也没贴出来,下面看几张效果图:4.你可以随意转载,但请注明出处,这里是的/ljlkings/home小窝。
AndroidMarqueeTextView:轻松实现⽂本滚动(跑马灯)效果前⾔Android 的TextView虽然有属性android:ellipsize="marquee"有⽂字滚动效果,但是坑多,⽐如焦点变化了就不动了,⽽且不能控制滚动的速度,在RecyclerView⾥的表现更是灾难级的。
为了解决以上问题,所以就有了MarqueeTextView:⼀个由 Kotlin 实现的⽂本滚动⾃定义 View。
相关属性xml 属性属性说明android:textSize⽂字⼤⼩android:textColor⽂字颜⾊android:text⽂本内容marqueeRepeat循环模式:singe-单次执⾏;singleLoop-单项循环;fillLoop-填充循环marqueeItemDistance每个item之间的距离,marqueeRepeat=fillLoop有效marqueeStartLocationDistance开始的起始位置按距离控件左边的百分⽐ 0~1之间marqueeSpeed⽂字滚动速度marqueeResetLocation重新改变内容的时候,是否初始化位置,默认为true,改变主要⽅法start : 滚动开始stop : 滚动停⽌toggle : 切换滚动开始/停⽌使⽤⽅式<com.xin.marquee.text.view.MarqueeTextViewandroid:id="@+id/tv1"android:layout_width="match_parent"android:layout_height="50dp"android:layout_marginStart="20dp"android:layout_marginEnd="20dp"android:layout_marginBottom="16dp"android:text="Kotlin 实现⽂本横向滚动,跑马灯效果。
Android实现⽂字上下滚动效果关于Android实现⽂字上下滚动这个功能,我⽬前有两种⽅法实现:⼀个是在TextView 中加上翻转的动画效果,然后设置循环滚动;⼀种是改写ViewPager 的滚动⽅向,使它从下到上进⾏滚动,并设置循环滚动;⾸先介绍第⼀种⽅法:实现思路:⾃定义TextView,在TextView中加上从下到上滚动的动画效果,然后设置循环播放;创建⼀个AutoTextVieW使之继承TextView,然后在onDraw⽅法中调⽤getHeight()⽅法获取textview当前的⾼度。
在接下来的动画翻转效果中,根据这个⾼度设置TextView上下滚动的距离。
下⾯是动画实现的⽅法:/*** 向上脱离屏幕的动画效果*/private void animationStart() {ObjectAnimator translate = ObjectAnimator.ofFloat(this, "translationY", 0, -height);ObjectAnimator alpha = ObjectAnimator.ofFloat(this, "alpha", 1f, 0f);mAnimStart = new AnimatorSet();mAnimStart.play(translate).with(alpha);mAnimStart.setDuration(DURATION);mAnimStart.addListener(this);}/*** 从屏幕下⾯向上的动画效果*/public void animationOver() {ObjectAnimator translate = ObjectAnimator.ofFloat(this, "translationY", height, 0);ObjectAnimator alpha = ObjectAnimator.ofFloat(this, "alpha", 0f, 1f);mAnimOver = new AnimatorSet();mAnimOver.play(translate).with(alpha);mAnimOver.setDuration(DURATION);}接下来实现ObjectAnimator的监听事件,在onAnimationEnd 调⽤setText⽅法,在动画没结束⼀次更新⽂字,并且继续执⾏动画效果@Overridepublic void onAnimationEnd(Animator animator) {super.setText(mText);if (mAnimOver == null) {animationOver();}mAnimOver.start();}然后调⽤⼀个可以设置循环滚动的类,这⾥可以使⽤ScheduledExecutorService,也可以使⽤ Timer⼏设置计时滚动,在更新UI的时候,调⽤Handler⽅法更新;因为采⽤Timer执⾏定时任务时只创建⼀个线程,所以这⾥建议采⽤ScheduledExecutorService;/*** 获取数据并设置滚动播放* @param textView* @param list* @param autoPlayTime*/public void getTextData(final IdeaAutoTextview textView, List<String> list, int autoPlayTime) {this.textView = textView;this.textList = list;if (autoPlayTime != 0) {scheduledExecutorService = Executors.newSingleThreadScheduledExecutor();scheduledExecutorService.scheduleWithFixedDelay(new WeakTimerTask(this), autoPlayTime, autoPlayTime, TimeUnit.SECONDS);}}private TimeTaskHandler mHandler = new TimeTaskHandler(this);private static class WeakTimerTask extends TimerTask {private WeakReference<IdeaAutoTextview> autoTextReference;public WeakTimerTask(IdeaAutoTextview mautoText) {this.autoTextReference = new WeakReference<>(mautoText);}@Overridepublic void run() {IdeaAutoTextview autoText = autoTextReference.get();if (autoText != null) {if (autoText.isShown()) {autoText.mHandler.sendEmptyMessage(0);}} else {cancel();}}}定时刷新频率较⾼,容易产⽣内存泄漏,这⾥采⽤弱引⽤避免这个情况发⽣private final class TimeTaskHandler extends Handler {private WeakReference<IdeaAutoTextview> autoTextReference;public TimeTaskHandler(IdeaAutoTextview autoText) {this.autoTextReference = new WeakReference<>(autoText);}@Overridepublic void handleMessage(Message msg) {IdeaAutoTextview autoText = autoTextReference.get();if (autoText!=null){/*** 设置当前⽂字*/String text = textList.get(index);index++;if (index > textList.size() - 1) {index = 0;}textView.setAutoText(text);}}}到此第⼀种⽅法介绍完毕。
常用控件应用之文本框(TextView)特效1.TextView之跑马灯效果android:ellipsize属性使用之跑马灯效果android:ellipsize设置当文字过长时,该控件该如何显示。
有如下值设置:"start"—–省略号显示在开头"end"——省略号显示在结尾"middle"—-省略号显示在中间"marquee" ——以跑马灯的方式显示(动画横向向左移动)布局文件中给TextView加入如下属性即可:android:ellipsize="marquee"android:marqueeRepeatLimit="marquee_forever"android:focusable="true"android:focusableInTouchMode="true"布局文件中设置如下(完整代码稍后给出)<TextViewandroid:id="@+id/marquee_effect"android:layout_width="100dip"android:layout_height="wrap_content"android:layout_gravity="center_horizontal"android:ellipsize="marquee"android:focusable="true"android:focusableInTouchMode="true"android:marqueeRepeatLimit="marquee_forever"android:singleLine="true"android:text="@string/marquee_effect" />如果一个页面想实现多个TextView同时跑马灯效果解决方案:给要跑动的textview加上如下代码就行了textview.setSelected(true);2.TextView之阴影效果(可在布局文件里加入如下属性进行设置也可通过程序设置)android:shadowDx——设置阴影横向坐标开始位置(相对于文本内容)android:shadowDy——设置阴影纵向坐标开始位置(相对于文本内容)android:shadowRadius——设置阴影的半径android:shadowColor——指定文本阴影的颜色//关键代码(完整代码稍后给出)textview.setShadowLayer(2.5f, 15, -10, 0xff00ff00);3.html标签设置样式效果补充:textView.setAutoLinkMask(Linkify.WEB_URLS);// 当文本内容中包含超链接格式的文本时,自动转换成超链接样式,点击会自动跳转到指定的网页textView.setAutoLinkMask(Linkify.PHONE_NUMBERS);//自动转手机号码点击它可进入系统拨号界面textView.setAutoLinkMask(Linkify.EMAIL_ADDRESSES);//自动转邮件地址点击它可发送邮件(要提前设置好自己的电子邮件)textView.setAutoLinkMask(Linkify.MAP_ADDRESSES);//自动转街道地址点击它可查看位置(前提已安装了google地图)textView.setAutoLinkMask(Linkify.ALL);//包括上面4种情况关键代码(完整代码稍后给出):TextView tv = (TextView) findViewById(R.id.fromhtml_effect);StringBuffer sb = new StringBuffer();sb.append("<h1><font color='#ff0000'>Html标签方式:</font></h1>");sb.append("<h6><b><i><font color='#00ff00'><ahref='/bravestarrhu/'>");sb.append(getString(R.string.fromhtml_effect));sb.append("</a></font></i></b></h6>");tv.setText(Html.fromHtml(sb.toString()));tv.setMovementMethod(LinkMovementMethod.getInstance());// 这句很重要,使超链接<a href>起作用4.TextView之动画效果(rotate旋转、alpha透明度、scale缩放、translate移动)实现动画需要在res/anim目录下新建对应的xml文件(稍后给出)关键代码(完整代码稍后给出):TextView tv = null;// TextView旋转动画效果tv = (TextView) findViewById(R.id.rotate);Animation mAnimationRight = AnimationUtils.loadAnimation(TextViewEffectActivity.this, R.anim.rotate);tv.setAnimation(mAnimationRight);// TextView透明度动画效果tv = (TextView) findViewById(R.id.alpha);mAnimationRight = AnimationUtils.loadAnimation(TextViewEffectActivity.this, R.anim.alpha);tv.setAnimation(mAnimationRight);// TextView缩放动画效果tv = (TextView) findViewById(R.id.scale);mAnimationRight = AnimationUtils.loadAnimation(TextViewEffectActivity.this, R.anim.scale);tv.setAnimation(mAnimationRight);// TextView移动动画效果tv = (TextView) findViewById(R.id.translate);mAnimationRight = AnimationUtils.loadAnimation(TextViewEffectActivity.this, R.anim.translate);tv.setAnimation(mAnimationRight);5.TextView之霓虹灯效果采用timer+TimerTask+Handler实现主要用到SpannableStringBuilder对象关键代码(完整代码稍后给出):// 霓虹灯效果(此段代码会使"光"变红色)String wholeContent = "欢迎光临";SpannableStringBuilder spannable = new SpannableStringBuilder(wholeContent);spannable.setSpan(new ForegroundColorSpan(Color.RED), 2,3, Spannable.SPAN_EXCLUSIVE_INCLUSIVE); // 设置指定位置文字的颜色(索引0开始)6.TextView之包含图片的效果实现步骤(1.构建ImageGetter;2.直接使用append进行追加)关键代码(完整代码稍后给出):TextView tv = (TextView) findViewById(R.id.image_effect);tv.setText(R.string.image_effect);// 通过HTML标记获得res目录下指定的图片ImageGetter imageGetter = new ImageGetter() {@Overridepublic Drawable getDrawable(String source) {int id = Integer.parseInt(source);// 根据id从资源文件中获取图片对象Drawable d = getResources().getDrawable(id);d.setBounds(0, 0, d.getIntrinsicWidth(), d.getIntrinsicHeight());return d;}};tv.append(Html.fromHtml("<img src='" + R.drawable.log + "'/>",imageGetter, null));完整代码:1>清单文件AndroidManifest.xml<?xml version="1.0" encoding="utf-8"?><manifest xmlns:android="/apk/res/android"package="com.bravestarr.app.textvieweffect"android:versionCode="1"android:versionName="1.0"><uses-sdk android:minSdkVersion="7"/><applicationandroid:icon="@drawable/ic_launcher"android:label="@string/app_name"><activityandroid:name=".TextViewEffectActivity"android:label="@string/app_name"><intent-filter><action android:name="android.intent.action.MAIN"/><category android:name="UNCHER"/> </intent-filter></activity></application></manifest>2>main.xml<?xml version="1.0" encoding="utf-8"?><LinearLayout xmlns:android="/apk/res/android"android:layout_width="fill_parent"android:layout_height="fill_parent"android:orientation="vertical"><!--android:ellipsize属性使用之跑马灯效果android:ellipsize设置当文字过长时,该控件该如何显示。
AndroidTextView⾃定义数字滚动动画背景在开发需求当中,当有总收益、总⽤户数等数字要显⽰时,为了更好的给⽤户提供展⽰效果,往往会想加⼊炫酷的数字滚动动画,使呆板平静的数字变得灵活起来,给⼈⼀种增值的直观感受。
简介NumberRollingView是⼀个⾃定义的⾃带数字滚动动画的TextView,通过使⽤setContent(String str)⽅法进⾏数字字符串设置,传⼊相应的⾦额数字字符串(如"9686.86")或者整数数字字符串(如"968"),设置的数字必须是正数。
当显⽰页⾯初始化完成的过程中,就可以看到数字滚动的效果了。
效果图:使⽤1.在attr.xml中配置NumberRollingView的⾃定义属性<declare-styleable name="NumberRollingView"><!--帧数--><attr name="frameNum" format="integer"></attr><!--内容的格式--><attr name="textType"><enum name="money" value="0"></enum><enum name="num" value="1"></enum></attr><!--是否设置每三位数字⼀个逗号--><attr name="useCommaFormat" format="boolean"></attr><!--是否当内容改变的时候使⽤动画,反之则不使⽤动画--><attr name="runWhenChange" format="boolean"></attr></declare-styleable>frameNum:动画的帧数,默认为30帧;textType:内容的格式,有money(⾦额、两位⼩数)和num(整数)两种格式,默认为0(⾦额格式);useCommaFormat:是否设置每三位数字⼀个逗号,默认为true(设置逗号显⽰);runWhenChange:是否当内容改变的时候使⽤动画,反之则不使⽤动画,默认为true(内容改变时使⽤动画);2.在XML布局⽂件中引⽤View<com.wiggins.digitalchange.widget.NumberRollingViewandroid:id="@+id/tv_money"android:layout_width="wrap_content"android:layout_height="wrap_content"android:text="0.00"android:textColor="@color/white"android:textSize="@dimen/font_max"android:textStyle="bold" /><com.wiggins.digitalchange.widget.NumberRollingViewandroid:id="@+id/tv_num"android:layout_width="wrap_content"android:layout_height="wrap_content"android:text="0"android:textColor="@color/white"android:textSize="@dimen/font_max"android:textStyle="bold"app:textType="num" />前者是⾦额数字View,后者是整数数字View。
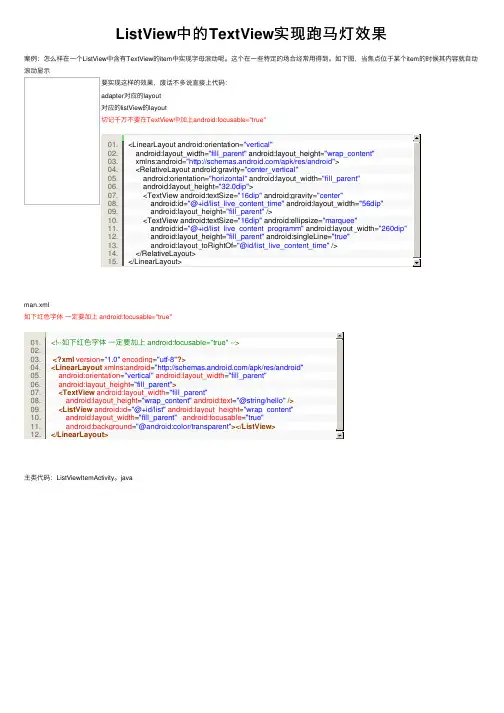
TextView中文字滚动效果一、说明1、实现滚动显示效果,TextView需满足的条件(1)文本显示框的内容超过文本显示框的宽度。
(2)文本显示框设置成单行显示,即android:singleLine=”true”。
默认情况下超出部分会自动换行显示。
(3)设置文本滚动显示,即android:ellipsize=”marquee”。
单行情况下,超出显示框宽度部分默认不显示。
EidtText和textview中内容过长的话自动换行,使用android:ellipsize与android:singleLine 可以解决,使只有一行。
EditText不支持marquee。
用法如下:①在xml中●android:ellipsize = "none" 默认值,什么都不加●android:ellipsize = "end"省略号在结尾●android:ellipsize = "start" 省略号在开头●android:ellipsize = "middle" 省略号在中间●android:ellipsize = "marquee" 跑马灯●android:singleLine = "true"②在activity文件中●t.setEllipsize(TextUtils.TruncateAt.valueOf("END"));●t.setEllipsize(TextUtils.TruncateAt.valueOf("START"));●t.setEllipsize(TextUtils.TruncateAt.valueOf("MIDDLE"));●t.setEllipsize(TextUtils.TruncateAt.valueOf("MARQUEE"));●t.setSingleLine(true);实例:通过方法实现文本跑马灯效果。
TextView中文字滚动效果
一、说明
1、实现滚动显示效果,TextView需满足的条件
(1)文本显示框的内容超过文本显示框的宽度。
(2)文本显示框设置成单行显示,即android:singleLine=”true”。
默认情况下超出部分会自动换行显示。
(3)设置文本滚动显示,即android:ellipsize=”marquee”。
单行情况下,超出显示框宽度部分默认不显示。
EidtText和textview中内容过长的话自动换行,使用android:ellipsize与android:singleLine 可以解决,使只有一行。
EditText不支持marquee。
用法如下:
①在xml中
●android:ellipsize = "none" 默认值,什么都不加
●android:ellipsize = "end"省略号在结尾
●android:ellipsize = "start" 省略号在开头
●android:ellipsize = "middle" 省略号在中间
●android:ellipsize = "marquee" 跑马灯
●android:singleLine = "true"
②在activity文件中
●t.setEllipsize(TextUtils.TruncateAt.valueOf("END"));
●t.setEllipsize(TextUtils.TruncateAt.valueOf("START"));
●t.setEllipsize(TextUtils.TruncateAt.valueOf("MIDDLE"));
●t.setEllipsize(TextUtils.TruncateAt.valueOf("MARQUEE"));
●t.setSingleLine(true);
实例:通过方法实现文本跑马灯效果。
activity_main.xml
<RelativeLayout xmlns:android="/apk/res/android"
xmlns:tools="/tools"
android:layout_width="match_parent"
android:layout_height="match_parent"
tools:context=".MainActivity">
<TextView
android:id="@+id/tv"
android:layout_width="wrap_content"
android:layout_height="wrap_content"
android:focusableInTouchMode="true"
android:focusable="true"
android:text="123456789123456789123456789123456789123456789"
android:textSize="50dp"/>
</RelativeLayout>
MainActivity.java
package com.example.test;
import android.os.Bundle;
import android.app.Activity;
import android.text.TextUtils;
import android.view.Menu;
import android.widget.TextView;
public class MainActivity extends Activity {
protected void onCreate(Bundle savedInstanceState) {
super.onCreate(savedInstanceState);
setContentView(yout.activity_main);
TextView t=(TextView)findViewById();
t.setEllipsize(TextUtils.TruncateAt.valueOf("MARQUEE"));
t.setSingleLine(true);
}
public boolean onCreateOptionsMenu(Menu menu) {
getMenuInflater().inflate(R.menu.main, menu);
return true;
}
}
(4)TextView需获得焦点
设置android:focusableInTouchMode=”true”,android:focusable=”true”。
当文本失去焦点时,文本将不再滚动。
实例:文本失去焦点时,文本将不再滚动。
<RelativeLayout xmlns:android="/apk/res/android"
xmlns:tools="/tools"
android:layout_width="match_parent"
android:layout_height="match_parent"
tools:context=".MainActivity">
<TextView
android:layout_width="wrap_content"
android:layout_height="wrap_content"
android:singleLine="true"
android:ellipsize="marquee"
android:focusableInTouchMode="true"
android:focusable="true"
android:text="aaaaaaaaaaaaaasssssssssssssssssswwwwwwwwwwwwwwrrrrrrrrrrttttt"
android:textSize="20dp"/>
<EditText
android:id="@+id/editText1"
android:layout_width="wrap_content"
android:layout_height="wrap_content"
android:layout_alignParentBottom="true" //与父控件底端对齐
android:layout_centerHorizontal="true" //水平居中
android:layout_marginBottom="166dp" //距离父控件底端166dp
android:text="text">
</EditText>
</RelativeLayout>
二、案例
<RelativeLayout xmlns:android="/apk/res/android"
xmlns:tools="/tools"
android:layout_width="match_parent"
android:layout_height="match_parent"
tools:context=".MainActivity">
<TextView
android:layout_width="wrap_content"
android:layout_height="wrap_content"
android:singleLine="true"
android:ellipsize="marquee"
android:focusableInTouchMode="true"
android:focusable="true"
android:text="123456789123456789123456789123456789123456789"
android:textSize="50dp"/>
</RelativeLayout>。