Apache(https)配置手册
- 格式:doc
- 大小:179.00 KB
- 文档页数:14
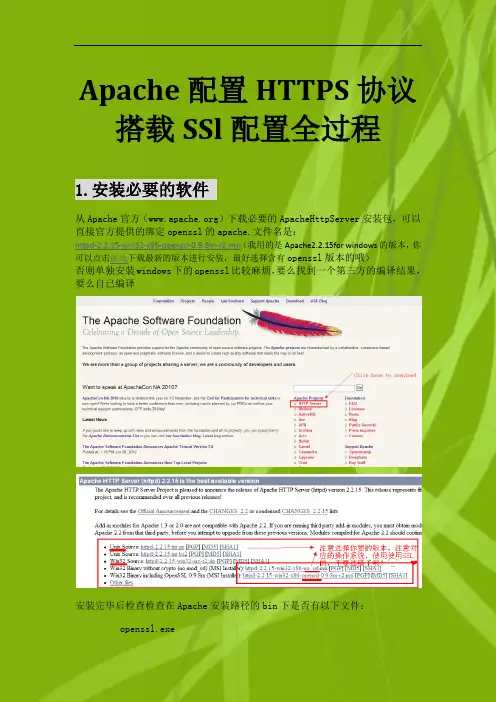
Apache配置HTTPS协议搭载SSl配置全过程1.安装必要的软件从Apache官方()下载必要的ApacheHttpServer安装包,可以直接官方提供的绑定openssl的apache.文件名是:httpd-2.2.15-win32-x86-openssl-0.9.8m-r2.msi(我用的是Apache2.2.15for windows的版本,你可以点击此处下载最新的版本进行安装,最好选择含有openssl版本的哦)否则单独安装windows下的openssl比较麻烦,要么找到一个第三方的编译结果,要么自己编译安装完毕后检查检查在Apache安装路径的bin下是否有以下文件:openssl.exessleay32.dlllibeay32.dll2. 生成服务器证书安装好在bin目录下有一个openssl.exe文件,用来生成证书和密钥。
1). 生成服务器用的私钥文件server.key(注:在Windows操作系统环境下需先设置Openssl环境变量:在DOS命令下进入conf目录,执行命令行:set OPENSSL_CONF=..\conf\f;请在执行之前确保f存在,否则会出现:WARNING: can't open config file: /usr/local/ssl/f 信息提示。
还有在windows系统下.cnf 默认会被当成快捷方式,看不到扩展名。
)在DOS命令下进入bin目录,执行命令行命令:openssl genrsa 1024> server.key说明:这是用128位rsa算法生成密钥,得到server.key文件>是输出文件的标识符这种生成方法生成的是没有密钥的私钥文件,当然,Apache提供了加入密钥(Password)的命令,就是加入参数-des3,全部的命令为:命令:openssl genrsa 1024-des3 > server.key使用 openssl genrsa -des3 > 1024 server.key生成私钥文件是需要输入密钥的,运行的时候会让你输入并确认你的密钥,但是在Windows环境下会导致以下错误:错误:Apache启动失败,错误提示是:Init: SSLPassPhraseDialog builtin is not supported on Win32 (key file .....)原因是window下的apache不支持加密的私钥文件。
实训Apache服务配置一、实训目的掌握APACHE服务器的配置与应用方法。
二、实训的内容练习利用APAHE服务搭建普通WEB网站,用户个人主页,虚拟目录,基于主机的访问控制,基于用户认证的访问控制,虚拟主机。
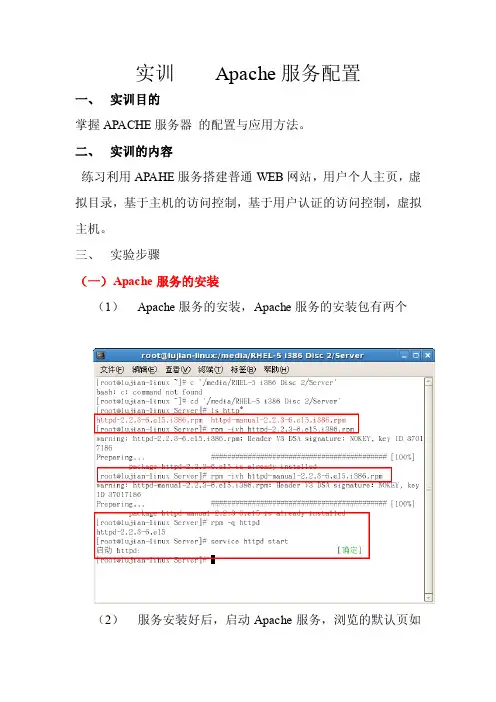
三、实验步骤(一)Apache服务的安装(1)Apache服务的安装,Apache服务的安装包有两个(2)服务安装好后,启动Apache服务,浏览的默认页如图:(二)配置用户个人主页的站点:在ip地址为192.168.23.123的apache服务器中,为系统用户lujian设置个人主页空间,该用户的家目录为/home/lujian个人空间所在的目录为public_html1.1修改用户的家目录权限,使其他的用户具有读取和执行的权限。
创建存取用户个人主页空间目录,并创建存放用户个人主页空间的目录:1.2修改HTTPD.CONF文件中<IFMODULE MOD_USERDIR.C>模块的内容将USERDIR的值设置为//public_html;,并将<Directory /home/*/public_html>容器的注释去掉1.3重新启动Apache服务,在客户端的浏览器中输入http://192.168.23.123/~lujian,个人空间的访问效果如下图所示(三)虚拟目录在ip地址为192.168.18.4的apache服务器中,创建名为/test/的虚拟目录,他对应的物理路径是”/dir1/test/,在客户端上测试。
”2.1//创建虚拟目录/dir/test/ ,创建虚拟目录中的默认首页文件,修改默认文件的权限,是其他的用户具有读取和执行的权限2.2修改http.dconf文件,添加下面的语句Alias /test/ “/dir1/test/’2.3利用”service httpd restart “命令,重新启动服务2.4在客户端的浏览器中输入http://192.168.23.123/test/index.html,个人空间的访问效果如下图所(三)基于主机的访问控制设置对于上面例子的中的/test/虚拟目录,允许列出目录列表3.1在/dir1/test目录中创建目录subdir1 subdir2用命令mkdir subdir1 subdir23.2将该目录下的默认首页文件index.html改名为index.html1用命令mv index.html index.html13.4在httpd.conf文件中添加对应的行3.5重新启动httpd服务,在客户端的浏览器上进行测试设置对于上面例子的中的/test/虚拟目录,禁止允许列出目录列表3.6修改httpd.conf文件中的对应的行3.7在客户端的浏览器上进行测试通过.htaccess文件,禁止对/test虚拟目录列出目录列表。
linuxapacheTomcat配置SSL(https)步骤1. https简介它是由Netscape开发并内置于其浏览器中,⽤于对数据进⾏压缩和解压操作,并返回⽹络上传送回的结果。
HTTPS实际上应⽤了Netscape的安全套接字层(SSL)作为HTTP应⽤层的⼦层。
(HTTPS使⽤端⼝443,⽽不是象HTTP那样使⽤端⼝80来和TCP/IP进⾏通信。
)SSL使⽤40 位关键字作为RC4流加密算法,这对于商业信息的加密是合适的。
HTTPS和SSL⽀持使⽤X.509数字认证,如果需要的话⽤户可以确认发送者是谁。
也就是说它的主要作⽤可以分为两种:⼀种是建⽴⼀个信息安全通道,来保证数据传输的安全;另⼀种就是确认⽹站的真实性。
2. HTTPS和HTTP的区别 ⼀、https协议需要到ca申请证书,⼀般免费证书很少,需要交费。
⼆、http是超⽂本传输协议,信息是明⽂传输,https 则是具有安全性的ssl加密传输协议。
三、http和https使⽤的是完全不同的连接⽅式,⽤的端⼝也不⼀样,前者是80,后者是443。
四、http的连接很简单,是⽆状态的;HTTPS协议是由SSL+HTTP协议构建的可进⾏加密传输、⾝份认证的⽹络协议,⽐http协议安全。
3. SSL介绍为Netscape所研发,⽤以保障在Internet上数据传输之安全,利⽤数据加密(Encryption)技术,可确保数据在⽹络上之传输过程中不会被截取及窃听。
⽬前⼀般通⽤之规格为40 bit之安全标准,美国则已推出128 bit之更⾼安全标准,但限制出境。
只要3.0版本以上之I.E.或Netscape浏览器即可⽀持SSL。
当前版本为3.0。
它已被⼴泛地⽤于Web浏览器与服务器之间的⾝份认证和加密数据传输。
SSL协议位于TCP/IP协议与各种应⽤层协议之间,为数据通讯提供安全⽀持。
SSL协议可分为两层:SSL记录协议(SSL Record Protocol):它建⽴在可靠的传输协议(如TCP)之上,为⾼层协议提供数据封装、压缩、加密等基本功能的⽀持。
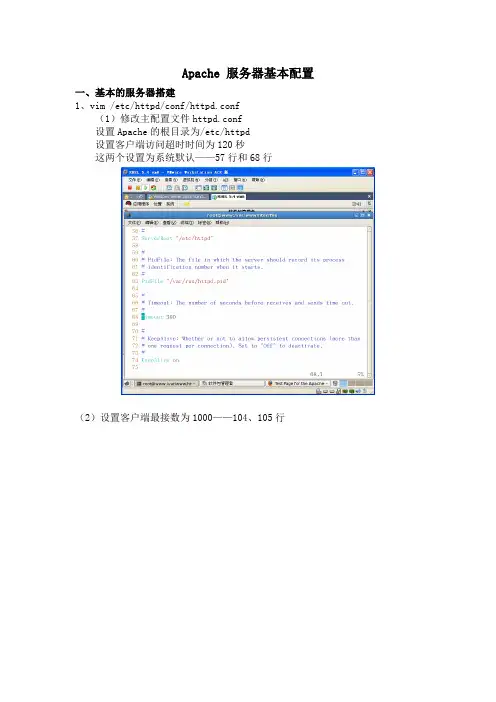
Apache 服务器基本配置一、基本的服务器搭建1、vim /etc/httpd/conf/httpd.conf(1)修改主配置文件httpd.conf设置Apache的根目录为/etc/httpd设置客户端访问超时时间为120秒这两个设置为系统默认——57行和68行(2)设置客户端最接数为1000——104、105行(3)设置httpd监听端口80,默认——134行(4)设置管理员E-mail地址为rootbenet.——251行设置WEB服务器的主机名和监听端口为www.benet.:80——265行(5)设置文档目录为/——281行(6)允许所有人访问/var//html/file目录——306、333行(此行可不配置)(7)设置主页文件为index.html——391行(8)设置服务器的默认编码为GB2312——747行(9)重新启动httpd[rootdns Server]# mkdir / (重要一步,不然不能启动) [rootdns Server]# vim / /index.html[rootdns Server]# service httpd restart停止 httpd: [确定]启动 httpd: [确定][rootdns Server]# setup设置防火墙二、多个站点的搭建1、基于ip地址的站点搭建[root ~]# vim /etc/httpd/conf/httpd.conf其次在主配置文件的最后加上如下配置<VirtualHost 192.168.0.223:80>ServerAdmin webmasterdummy-host.example.DocumentRoot //1ServerName dummy-host.example.ErrorLog logs/dummy-host.example.-error_logCustomLog logs/dummy-host.example.-access_log common </VirtualHost><VirtualHost 192.168.0.253:80>ServerAdmin webmasterdummy-host.example.DocumentRoot //2ServerName dummy-host.example.ErrorLog logs/dummy-host.example.-error_logCustomLog logs/dummy-host.example.-access_log common </VirtualHost>配置完成后重启服务[root ~]# service httpd restart然后在IE浏览器进行访问测试2、基于端口的站点搭建[root ~]# vim /etc/httpd/conf/httpd.conf首先加上如下配置,监听端口:Listen 801Listen 802其次在主配置文件的最后加上如下配置<VirtualHost 192.168.0.223:801>ServerAdmin webmasterdummy-host.example.DocumentRoot //1ServerName dummy-host.example.ErrorLog logs/dummy-host.example.-error_logCustomLog logs/dummy-host.example.-access_log common </VirtualHost><VirtualHost 192.168.0.223:802>ServerAdmin webmasterdummy-host.example.DocumentRoot //2ServerName dummy-host.example.ErrorLog logs/dummy-host.example.-error_logCustomLog logs/dummy-host.example.-access_log common </VirtualHost>配置完成后重启服务[root ~]# service httpd restart然后在IE浏览器进行访问测试3、基于域名的站点搭建首先必须保证DNS服务器正常运行[root ~]# vim /etc/httpd/conf/httpd.conf首先把#NameVirtualHost *:80改为如下配置:NameVirtualHost 192.168.0.223:80其次在主配置文件的最后加上如下配置<VirtualHost 192.168.0.223:80>ServerAdmin webmasterdummy-host.example.DocumentRoot //1ServerName www1.zzptc.ErrorLog logs/dummy-host.example.-error_logCustomLog logs/dummy-host.example.-access_log common </VirtualHost><VirtualHost 192.168.0.223:80>ServerAdmin webmasterdummy-host.example.DocumentRoot //2ServerName www2.zzptc.ErrorLog logs/dummy-host.example.-error_logCustomLog logs/dummy-host.example.-access_log common </VirtualHost>配置完成后重启服务[root ~]# service httpd restart然后在IE浏览器进行访问测试。
APACHE主配置文件说明\conf\httpd.conf# This is the main Apache HTTP server configuration file. It contains the# configuration directives that give the server its instructions.# See <URL:/docs/2.2> for detailed information.# In particular, see# <URL:/docs/2.2/mod/directives.html># for a discussion of each configuration directive.## Do NOT simply read the instructions in here without understanding# what they do. They're here only as hints or reminders. If you are unsure # consult the online docs. You have been warned.## Configuration and logfile names: If the filenames you specify for many# of the server's control files begin with "/" (or "drive:/" for Win32), the# server will use that explicit path. If the filenames do *not* begin# with "/", the value of ServerRoot is prepended -- so "logs/foo.log"# with ServerRoot set to "D:/sw/app/Apache" will be interpreted by the# server as "D:/sw/app/Apache/logs/foo.log".## NOTE: Where filenames are specified, you must use forward slashes# instead of backslashes (e.g., "c:/apache" instead of "c:\apache").# If a drive letter is omitted, the drive on which httpd.exe is located# will be used by default. It is recommended that you always supply# an explicit drive letter in absolute paths to avoid confusion.## ServerRoot: The top of the directory tree under which the server's# configuration, error, and log files are kept.## Do not add a slash at the end of the directory path. If you point# ServerRoot at a non-local disk, be sure to point the LockFile directive# at a local disk. If you wish to share the same ServerRoot for multiple# httpd daemons, you will need to change at least LockFile and PidFile.#ServerRoot "."## Listen: Allows you to bind Apache to specific IP addresses and/or# ports, instead of the default. See also the <VirtualHost># directive.## Change this to Listen on specific IP addresses as shown below to# prevent Apache from glomming onto all bound IP addresses.##Listen 12.34.56.78:80#监听IP:端口Listen 80## Dynamic Shared Object (DSO) Support## To be able to use the functionality of a module which was built as a DSO you # have to place corresponding `LoadModule' lines at this location so the# directives contained in it are actually available _before_ they are used.# Statically compiled modules (those listed by `httpd -l') do not need# to be loaded here.## Example:# LoadModule foo_module modules/mod_foo.so#加载模块LoadModule actions_module modules/mod_actions.soLoadModule alias_module modules/mod_alias.soLoadModule asis_module modules/mod_asis.soLoadModule auth_basic_module modules/mod_auth_basic.so#LoadModule auth_digest_module modules/mod_auth_digest.so#LoadModule authn_alias_module modules/mod_authn_alias.so#LoadModule authn_anon_module modules/mod_authn_anon.so#LoadModule authn_dbd_module modules/mod_authn_dbd.so#LoadModule authn_dbm_module modules/mod_authn_dbm.so LoadModule authn_default_module modules/mod_authn_default.so LoadModule authn_file_module modules/mod_authn_file.so#LoadModule authnz_ldap_module modules/mod_authnz_ldap.so#LoadModule authz_dbm_module modules/mod_authz_dbm.so LoadModule authz_default_module modules/mod_authz_default.so LoadModule authz_groupfile_module modules/mod_authz_groupfile.so LoadModule authz_host_module modules/mod_authz_host.so#LoadModule authz_owner_module modules/mod_authz_owner.so LoadModule authz_user_module modules/mod_authz_user.so LoadModule autoindex_module modules/mod_autoindex.so#LoadModule cache_module modules/mod_cache.so#LoadModule cern_meta_module modules/mod_cern_meta.so LoadModule cgi_module modules/mod_cgi.so#LoadModule charset_lite_module modules/mod_charset_lite.so#LoadModule dav_module modules/mod_dav.so#LoadModule dav_fs_module modules/mod_dav_fs.so#LoadModule dav_lock_module modules/mod_dav_lock.so#LoadModule dbd_module modules/mod_dbd.so#LoadModule deflate_module modules/mod_deflate.soLoadModule dir_module modules/mod_dir.so#LoadModule disk_cache_module modules/mod_disk_cache.so#LoadModule dumpio_module modules/mod_dumpio.so LoadModule env_module modules/mod_env.so#LoadModule expires_module modules/mod_expires.so#LoadModule ext_filter_module modules/mod_ext_filter.so#LoadModule file_cache_module modules/mod_file_cache.so#LoadModule filter_module modules/mod_filter.soLoadModule headers_module modules/mod_headers.so#LoadModule ident_module modules/mod_ident.so#LoadModule imagemap_module modules/mod_imagemap.so LoadModule include_module modules/mod_include.so#LoadModule info_module modules/mod_info.soLoadModule isapi_module modules/mod_isapi.so#LoadModule ldap_module modules/mod_ldap.so#LoadModule logio_module modules/mod_logio.soLoadModule log_config_module modules/mod_log_config.so#LoadModule log_forensic_module modules/mod_log_forensic.so#LoadModule mem_cache_module modules/mod_mem_cache.so LoadModule mime_module modules/mod_mime.so#LoadModule mime_magic_module modules/mod_mime_magic.so LoadModule negotiation_module modules/mod_negotiation.so#LoadModule proxy_module modules/mod_proxy.so#LoadModule proxy_ajp_module modules/mod_proxy_ajp.so#LoadModule proxy_balancer_module modules/mod_proxy_balancer.so #LoadModule proxy_connect_module modules/mod_proxy_connect.so #LoadModule proxy_ftp_module modules/mod_proxy_ftp.so#LoadModule proxy_http_module modules/mod_proxy_http.so LoadModule rewrite_module modules/mod_rewrite.soLoadModule setenvif_module modules/mod_setenvif.so#LoadModule speling_module modules/mod_speling.so#LoadModule ssl_module modules/mod_ssl.so#LoadModule status_module modules/mod_status.so#LoadModule substitute_module modules/mod_substitute.so#LoadModule unique_id_module modules/mod_unique_id.so#LoadModule userdir_module modules/mod_userdir.so#LoadModule usertrack_module modules/mod_usertrack.so#LoadModule version_module modules/mod_version.so#LoadModule vhost_alias_module modules/mod_vhost_alias.so LoadModule jk_module modules/mod_jk-1.2.28-httpd-2.2.3.so LoadModule expires_module modules/mod_expires.soLoadModule cache_module modules/mod_cache.soLoadModule disk_cache_module modules/mod_disk_cache.so LoadModule file_cache_module modules/mod_file_cache.soLoadModule mem_cache_module modules/mod_mem_cache.soLoadModule proxy_module modules/mod_proxy.soLoadModule proxy_ajp_module modules/mod_proxy_ajp.so LoadModule proxy_balancer_module modules/mod_proxy_balancer.so LoadModule proxy_connect_module modules/mod_proxy_connect.so LoadModule proxy_ftp_module modules/mod_proxy_ftp.so LoadModule proxy_http_module modules/mod_proxy_http.so<IfModule !mpm_netware_module><IfModule !mpm_winnt_module>## If you wish httpd to run as a different user or group, you must run# httpd as root initially and it will switch.## User/Group: The name (or #number) of the user/group to run httpd as. # It is usually good practice to create a dedicated user and group for# running httpd, as with most system services.#User daemonGroup daemon</IfModule></IfModule># 'Main' server configuration## The directives in this section set up the values used by the 'main'# server, which responds to any requests that aren't handled by a# <VirtualHost> definition. These values also provide defaults for# any <VirtualHost> containers you may define later in the file.## All of these directives may appear inside <VirtualHost> containers,# in which case these default settings will be overridden for the# virtual host being defined.### ServerAdmin: Your address, where problems with the server should be # e-mailed. This address appears on some server-generated pages, such # as error documents. e.g. admin@#ServerAdmin jan.liang@## ServerName gives the name and port that the server uses to identify itself. # This can often be determined automatically, but we recommend you specify # it explicitly to prevent problems during startup.## If your host doesn't have a registered DNS name, enter its IP address here. #ServerName PnServer:80## DocumentRoot: The directory out of which you will serve your# documents. By default, all requests are taken from this directory, but# symbolic links and aliases may be used to point to other locations.#root目录,如果使用虚拟主机这里可以注释掉DocumentRoot "D:\sw\root"## Each directory to which Apache has access can be configured with respect # to which services and features are allowed and/or disabled in that# directory (and its subdirectories).## First, we configure the "default" to be a very restrictive set of# features.#<Directory />Options FollowSymLinksAllowOverride NoneOrder deny,allowDeny from all</Directory>## Note that from this point forward you must specifically allow# particular features to be enabled - so if something's not working as# you might expect, make sure that you have specifically enabled it# below.### This should be changed to whatever you set DocumentRoot to.#root目录权限配置<Directory "D:/sw/root">## Possible values for the Options directive are "None", "All",# or any combination of:# Indexes Includes FollowSymLinks SymLinksifOwnerMatch ExecCGI MultiViews ## Note that "MultiViews" must be named *explicitly* --- "Options All"# doesn't give it to you.## The Options directive is both complicated and important. Please see# /docs/2.2/mod/core.html#options# for more information.#Options -Indexes FollowSymLinks## AllowOverride controls what directives may be placed in .htaccess files.# It can be "All", "None", or any combination of the keywords:# Options FileInfo AuthConfig Limit#AllowOverride None## Controls who can get stuff from this server.#Order allow,denyAllow from all</Directory>## DirectoryIndex: sets the file that Apache will serve if a directory# is requested.#全局首页配置<IfModule dir_module>DirectoryIndex index.html</IfModule>## The following lines prevent .htaccess and .htpasswd files from being# viewed by Web clients.#<FilesMatch "^\.ht">Order allow,denyDeny from allSatisfy All</FilesMatch>## ErrorLog: The location of the error log file.# If you do not specify an ErrorLog directive within a <VirtualHost># container, error messages relating to that virtual host will be# logged here. If you *do* define an error logfile for a <VirtualHost># container, that host's errors will be logged there and not here.#ErrorLog "logs/error.log"## LogLevel: Control the number of messages logged to the error_log.# Possible values include: debug, info, notice, warn, error, crit,# alert, emerg.#定义错误日志级别LogLevel debug<IfModule log_config_module>LogFormat "%h %l %u %t \"%r\" %>s %b" common#定义combined-proxy日志格式将%h(远端主机)改为%{X-Forwarded-For}iLogFormat "%{X-Forwarded-For}i %l %u %t \"%r\" %>s %b \"%{Referer}i\" \"%{User-Agent}i\"" combined-proxyLogFormat "%h %l %u %t \"%r\" %>s %b \"%{Referer}i\" \"%{User-Agent}i\"" combined#判断是否为X-Forwarded-For头格式SetEnvIf X-Forwarded-For "^.*\..*\..*\..*" is-forwarder<IfModule logio_module># You need to enable mod_logio.c to use %I and %OLogFormat "%h %l %u %t \"%r\" %>s %b \"%{Referer}i\" \"%{User-Agent}i\" %I %O" combinedio</IfModule>## The location and format of the access logfile (Common Logfile Format).# If you do not define any access logfiles within a <VirtualHost># container, they will be logged here. Contrariwise, if you *do*# define per-<VirtualHost> access logfiles, transactions will be# logged therein and *not* in this file.#CustomLog "logs/access.log" common## If you prefer a logfile with access, agent, and referer information# (Combined Logfile Format) you can use the following directive.##CustomLog "logs/access.log" combined</IfModule><IfModule alias_module>## Redirect: Allows you to tell clients about documents that used to# exist in your server's namespace, but do not anymore. The client# will make a new request for the document at its new location.# Example:# Redirect permanent /foo http://1/bar## Alias: Maps web paths into filesystem paths and is used to# access content that does not live under the DocumentRoot.# Example:# Alias /webpath /full/filesystem/path## If you include a trailing / on /webpath then the server will# require it to be present in the URL. You will also likely# need to provide a <Directory> section to allow access to# the filesystem path.## ScriptAlias: This controls which directories contain server scripts.# ScriptAliases are essentially the same as Aliases, except that# documents in the target directory are treated as applications and# run by the server when requested rather than as documents sent to the # client. The same rules about trailing "/" apply to ScriptAlias# directives as to Alias.#ScriptAlias /cgi-bin/ "D:/sw/app/Apache/cgi-bin/"</IfModule><IfModule cgid_module>## ScriptSock: On threaded servers, designate the path to the UNIX# socket used to communicate with the CGI daemon of mod_cgid.##Scriptsock logs/cgisock</IfModule>## "D:/sw/app/Apache/cgi-bin" should be changed to whatever your ScriptAliased # CGI directory exists, if you have that configured.#CGI目录配置<Directory "D:/sw/app/Apache/cgi-bin">AllowOverride NoneOptions NoneOrder allow,denyAllow from all</Directory>## DefaultType: the default MIME type the server will use for a document# if it cannot otherwise determine one, such as from filename extensions.# If your server contains mostly text or HTML documents, "text/plain" is# a good value. If most of your content is binary, such as applications# or images, you may want to use "application/octet-stream" instead to# keep browsers from trying to display binary files as though they are# text.#DefaultType text/plain<IfModule mime_module>## TypesConfig points to the file containing the list of mappings from# filename extension to MIME-type.#TypesConfig conf/mime.types## AddType allows you to add to or override the MIME configuration# file specified in TypesConfig for specific file types.##AddType application/x-gzip .tgz## AddEncoding allows you to have certain browsers uncompress# information on the fly. Note: Not all browsers support this.##AddEncoding x-compress .Z#AddEncoding x-gzip .gz .tgz## If the AddEncoding directives above are commented-out, then you# probably should define those extensions to indicate media types:#AddType application/x-compress .ZAddType application/x-gzip .gz .tgz## AddHandler allows you to map certain file extensions to "handlers":# actions unrelated to filetype. These can be either built into the server# or added with the Action directive (see below)## To use CGI scripts outside of ScriptAliased directories:# (You will also need to add "ExecCGI" to the "Options" directive.)##AddHandler cgi-script .cgi# For type maps (negotiated resources):#AddHandler type-map var## Filters allow you to process content before it is sent to the client.## To parse .shtml files for server-side includes (SSI):# (You will also need to add "Includes" to the "Options" directive.)##AddType text/html .shtml#AddOutputFilter INCLUDES .shtml</IfModule>## The mod_mime_magic module allows the server to use various hints from the # contents of the file itself to determine its type. The MIMEMagicFile# directive tells the module where the hint definitions are located.##MIMEMagicFile conf/magic## Customizable error responses come in three flavors:# 1) plain text 2) local redirects 3) external redirects## Some examples:#ErrorDocument 500 "The server made a boo boo."#ErrorDocument 404 /missing.html#ErrorDocument 404 "/cgi-bin/missing_handler.pl"#ErrorDocument 402 http://1/subscription_info.html### EnableMMAP and EnableSendfile: On systems that support it,# memory-mapping or the sendfile syscall is used to deliver# files. This usually improves server performance, but must# be turned off when serving from networked-mounted# filesystems or if support for these functions is otherwise# broken on your system.##EnableMMAP off#EnableSendfile off# Supplemental configuration## The configuration files in the conf/extra/ directory can be# included to add extra features or to modify the default configuration of # the server, or you may simply copy their contents here and change as # necessary.# Server-pool management (MPM specific)#加载MPM配置,性能优化Include conf/extra/httpd-mpm.conf# Multi-language error messages#Include conf/extra/httpd-multilang-errordoc.conf# Fancy directory listings#Include conf/extra/httpd-autoindex.conf# Language settings#Include conf/extra/httpd-languages.conf# User home directories#Include conf/extra/httpd-userdir.conf# Real-time info on requests and configuration#Include conf/extra/httpd-info.conf# Virtual hosts#加载虚拟主机配置Include conf/extra/httpd-vhosts.conf# Local access to the Apache HTTP Server Manual#Include conf/extra/httpd-manual.conf# Distributed authoring and versioning (WebDAV)#Include conf/extra/httpd-dav.conf# Various default settings#Include conf/extra/httpd-default.conf# Secure (SSL/TLS) connections#加载SSL配置#Include conf/extra/httpd-ssl.conf## Note: The following must must be present to support# starting without SSL on platforms with no /dev/random equivalent # but a statically compiled-in mod_ssl.#<IfModule ssl_module>SSLRandomSeed startup builtinSSLRandomSeed connect builtin</IfModule>FileETag INode MTime SizeFileETag None#JK配置JkWorkersFile conf/workers.properties.clusterJkShmFile logs/mod_jk.shmJkLogFile logs/mod_jk.logJkLogLevel infoJkLogStampFormat "[%a %b %d %H:%M:%S %Y] "#浏览器缓存定义ExpiresActive onExpiresDefault "access plus 5 minutes"ExpiresByType application/javascript "access plus 2 minutes" ExpiresByType application/xml "access plus 10 minutes" ExpiresByType text/html "access plus 10 minutes"ExpiresByType image/gif "access plus 10 minutes"ExpiresByType image/jpeg "access plus 10 minutes"ExpiresByType image/png "access plus 10 minutes"ExpiresByType image/jpg "access plus 10 minutes"workers.properties.cluster(普通的连接配置)worker.list=worker-isp,worker-olol #列表worker.worker-isp.type=ajp13 #协议worker.worker-isp.host=172.16.15.76 #主机worker.worker-isp.port=8009 #协议端口worker.worker-isp.socket_timeout= 600000 #超时worker.worker-olol.type=ajp13worker.worker-olol.host=172.16.15.99worker.worker-olol.port=8011workers.properties.cluster(TOMCAT集群配置)worker.list = controller,tomcat1,tomcat2 #server 列表#========tomcat1========worker.tomcat1.port=8009 #ajp13 端口号,在tomcat下server.xml配置,默认8009worker.tomcat1.host=172.16.15.91 #tomcat的主机地址,如不为本机,请填写ip地址worker.tomcat1.type=ajp13worker.tomcat1.lbfactor = 1 #server的加权比重,值越高,分得的请求越多#========tomcat2========worker.tomcat2.port=8009 #ajp13 端口号,在tomcat下server.xml配置,默认8009 worker.tomcat2.host=172.16.15.92 #tomcat的主机地址,如不为本机,请填写ip地址worker.tomcat2.type=ajp13worker.tomcat2.lbfactor = 1 #server的加权比重,值越高,分得的请求越多#========controller,负载均衡控制器========worker.controller.type=lb#指定分担请求的tomcatworker.controller.balanced_workers=tomcat1,tomcat2worker.controller.sticky_session=1#通用配置指定以下虚拟主机监听的IP和端口NameVirtualHost *#禁止访问/WEB-INF/目录<Directory ~ "/WEB-INF/">Order allow,denyDeny from all</Directory><VirtualHost *>#管理员EMAILServerAdmin info@#定义主机名(域名)ServerName #定义别名ServerAlias #定义编码#AddDefaultCharset UTF-8#错误页跳转ErrorDocument 404 ErrorDocument 402 ErrorDocument 403 ErrorDocument 500 DocumentRoot "d:\sw\root\root"#定义日志,这里使用第3方程序做24小时日志分割CustomLog "|bin/cronolog.exe D:/sw/logs//_1_access_%Y%m%d.log" combined env=!is-forwarder CustomLog "|bin/cronolog.exe D:/sw/logs//_1_access_%Y%m%d.log" combined-proxy env=is-forwarderErrorLog "|bin/cronolog.exe D:/sw/logs//_1_error_%Y%m%d.log"#定义代理当有$host/data/*访问的时候,代理到http://172.16.15.76/cms/data/ ProxyPass /data http://172.16.15.76/cms/data/ProxyPassReverse /data http://172.16.15.76/cms/data/ProxyPass /UserFiles http://172.16.15.76/cms/UserFiles/ProxyPassReverse /UserFiles http://172.16.15.76/cms/UserFiles/#JK的跳转配置,当有/ISP/*的访问时,使用JK配置中的worker-ispJkMount /isp/* worker-ispJkMount /isp/admin worker4JkMount /isp/codeImg worker-ispJkMount /ad28/* worker-ad28JkMount /olol/* worker-ololJkMount /cms/* worker-cmsJkMount /PkgManage/* worker-wsJkMount /xfireServer/* worker-wsJkMount /xmlserver/* worker-ws</VirtualHost>Apache虚拟主机中的权限配置(访问者IP)<Directory ~ "/WEB-INF/">Order allow,denyDeny from all</Directory><VirtualHost *>#禁止所有,开放60.190.244.158的访问<Location />Order Allow,DenyAllow from 60.190.244.158</Location>#由于是继承关系,如果要允许/css对外的访问需要在这里配置<Location /css/>Order allow,denyAllow from all</Location>JkMount /* tomcat-mobileAddDefaultCharset UTF-8ServerName CustomLog "|bin/cronolog.exe D:/sw/logs//access_%Y%m%d.log" combined env=!is-forwarderCustomLog "|bin/cronolog.exe D:/sw/logs//access_%Y%m%d.log" combined-proxy env=is-forwarderErrorLog "|bin/cronolog.exe D:/sw/logs//error_%Y%m%d.log"。
apachehttps配置详细步骤讲解SSL: SSl是为Http传输提供安全的协议,通过证书认证来确保客户端和⽹站服务器之间的数据是安全。
也就是说在SSL下http 传输是安全的,我们成为 https.配置过程如下:1.安装配有SSL模块的apache,apache_2.2.8-win32-x86-openssl-0.9.8g2.配置apache以⽀持SSL:打开apache的配置⽂件conf/httpd.conf1)LoadModule ssl_module modules/mod_ssl.soInclude conf/extra/httpd-ssl.conf去掉两⾏前⾯的#2)注意修改httpd-ssl.conf ⽂件⾥的两个字段:SSLCertificateFile "C:/Apache2.2/conf/server.crt"SSLCertificateKeyFile "C:/Apache2.2/conf/server.key"3.安装php,整合apache和Php(略)为下⾯你所⽣成的证书和密钥地址。
1. ⽣成服务器的私钥进⼊命令⾏:D:\local\apache2\bin\openssl genrsa -out server.key 1024在当前⽬录下⽣成了⼀个server.key⽣成签署申请2. ⽣成签署申请D:\local\apache2\bin>openssl req -new –out server.csr -key server.key -config ..\conf\f此时⽣成签署⽂件server.csr.1.⽣成CA私钥D:\local\apache2\bin\openssl genrsa -out ca.key 1024多出ca.key⽂件2.利⽤CA的私钥产⽣CA的⾃签署证书D:\local\apache2\bin\openssl req -new -x509 -days 365 -key ca.key -out ca.crt -config ..\conf\f此时需要输⼊⼀些信息,注意Common Name为服务器域名,如果在本机,为本机IP。
APACHE安装配置说明⼀、软件下载⼆、环境检查# rpm -qa|grep zlibzlib-devel-1.2.3-3zlib-1.2.3-3# rpm -qa|grep sslopenssl-devel-0.9.8b-10.el5openssl-0.9.8b-10.el5如果需要依赖包,安装其对应的devel包即可,此处仅⽤到zlib和ssl。
另,如果有httpd包,要先卸载掉或停⽌其服务。
三、编译安装1、针对安装⽬的的说明(来⾃INSTALL⽂件)如果是开发者则使⽤此选项,--with-included-apr利于连接apache的代码或者是调试apache,其消除了由于版本或者编译中跟APR或者APR-util代码产⽣的不匹配;如果从⼦版本编译apache,要先运⾏buildconf(需要Python,GNU autoconf和libtool),然后运⾏configure。
发⾏包不⽤。
如果要在FreeBSD5.4之前编译时包含apache的threaded MPM,需要使⽤--enable-threads和--with-mpm 参数在Mac上编译⼦版本,要使⽤GNU Libtool 1.4.2及以上版本2、关于SSL加密和正则表达式(来⾃⽂件README)Apache2.0及以上版本在⽬录modules/ssl/下包含了mod_ssl模块⽤于配置和监听ssl⽹络接⼝的连接。
(另外,⼀些apr-util版本在⽬录srclib/apr-util/ssl/下提供了ssl⽹络接⼝)带有单词crypto的包的名字,可能包含openssl加密库的⽬标代码。
如果apache的加密功能不理想或者要排除再重分配,则可以使⽤包的名字包含nossl的发布包。
Apache使⽤PCRE包包含的正则表达式。
3、对configure参数的说明配置帮助表:-h, --help显⽰帮助信息display this help and exit--help=short ⽤short参数将只显⽰正在运⾏的当前脚本的选项,⽽不能列出适⽤于Apache配置脚本所运⾏的外部配置脚本的选项display optionsspecific to thispackage--help=recursive 使⽤recursive参数将显⽰所有程序包的简短描述display the shorthelp of all theincluded packages-V, --version显⽰版本display version information and exit-q, --quiet, --silent不显⽰checking……信息do notprint`checking...' messages--cache-file=FILE在指定⽂件中存储测试结果cache test results in FILE [disabled]-C, --config-cache 在⽂件config.cache中存储测试结果alias for `--cachefile=config.cache'-n, --no-create configure脚本运⾏结束后不输出结果⽂件,常⽤于正式编译前的测试。
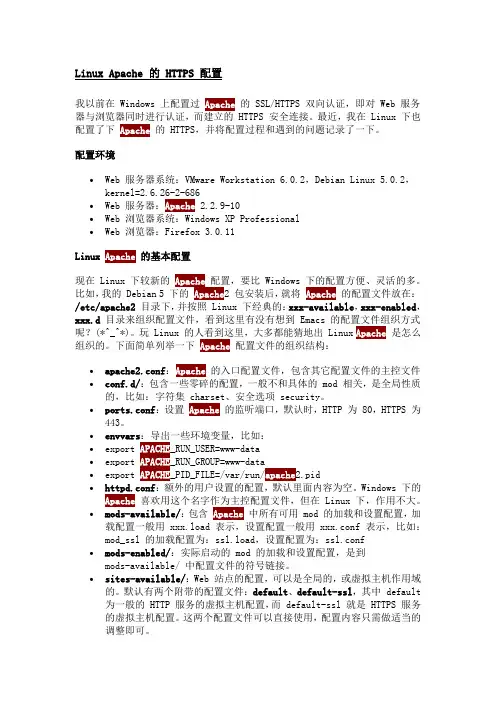
Linux Apache 的 HTTPS 配置我以前在 Windows 上配置过Apache的 SSL/HTTPS 双向认证,即对 Web 服务器与浏览器同时进行认证,而建立的 HTTPS 安全连接。
最近,我在 Linux 下也配置了下Apache的 HTTPS,并将配置过程和遇到的问题记录了一下。
配置环境∙Web 服务器系统:VMware Workstation 6.0.2,Debian Linux 5.0.2,kernel=2.6.26-2-686∙Web 服务器:Apache 2.2.9-10∙Web 浏览器系统:Windows XP Professional∙Web 浏览器:Firefox 3.0.11Linux Apache的基本配置现在 Linux 下较新的Apache配置,要比 Windows 下的配置方便、灵活的多。
比如,我的 Debian 5 下的Apache2 包安装后,就将Apache的配置文件放在:/etc/apache2目录下,并按照 Linux 下经典的:xxx-available,xxx-enabled,xxx.d目录来组织配置文件,看到这里有没有想到 Emacs 的配置文件组织方式呢?(*^_^*)。
玩 Linux 的人看到这里,大多都能猜地出 Linux Apache是怎么组织的。
下面简单列举一下Apache配置文件的组织结构:∙apache2.conf:Apache的入口配置文件,包含其它配置文件的主控文件∙conf.d/:包含一些零碎的配置,一般不和具体的 mod 相关,是全局性质的,比如:字符集 charset、安全选项 security。
∙ports.conf:设置Apache的监听端口,默认时,HTTP 为 80,HTTPS 为443。
∙envvars:导出一些环境变量,比如:∙export APACHE_RUN_USER=www-data∙export APACHE_RUN_GROUP=www-data∙export APACHE_PID_FILE=/var/run/apache2.pid∙httpd.conf:额外的用户设置的配置,默认里面内容为空。
Apache2.2 openssl配置Https应用1、关于Apache网上有很多关于Apache配置Http,Https 的帖子,写的各式各样大同小异。
但说到都比较浅,至少我感觉没有说明白原理。
当然,这里我也只是针对我现在的理解来说一下Apache Https那些事。
通常我们开发的web项目都要部署在weblogic中间件上,然后为了网络安全,在停火区搭建web server用于请求转发。
最常用的web server之一就是Apache。
如果是金融领域的应用的话,基本上都是要配置Https的,以防敏感数据被窃取。
Apache有很多版本,有些版本只能配置Http的应用,要想配置Https的话,需要下载专门的Apache,我这里用的是:httpd-2.2.21-win32-x86-openssl-0.9.8r.msi,使用这个软件可以自制证书,可以配置Https。
(虽然是32位的,也可以安装在64位的windows上,我也没找到专门的64位软件)。
2、关于证书部署Https应用需要证书,可以自制也可以购买。
当然,如果你的应用是公司级的又是金融领域的,那基本上要购买了,比如天威诚信的证书。
因为自制证书可能被黑客替换,用户体验也不好每次浏览器都会提示不安全证书。
自制证书步骤:进入D:\Apache2.2\bin执行以下命令:#生成rsa私钥opensslgenrsa -des3 -out root.key#配置环境变量,制定openssl.cfg配置文件的路径setOPENSSL_CONF=C:\cert\OpenSSL-Win64\bin\openssl.cfg#生成CA的crt,用来签署下面的root.csr文件,有效期10年openssl req -new -x509 -key root.key -out ca.crt -days 3650#生成的csr文件交给CA签名后形成服务器自己的证书.重要:有一个common name可以写域名,如果为了https申请,这个必须和域名吻合,否则会引发浏览器报警openssl req -new -key root.key -out root.csr#输入key的密钥后,完成证书生成.-CA 选项指明用于被签名的csr证书,-CAkey选项指明用于签名的密钥,-CAserial指明序列号文件,而-CAcreateserial指明文件不存在时自动生成.#最后生成了私用密钥:root.key 和自己的SSL证书root.crtopenssl x509 -req -days 3650 -in root.csr -CA ca.crt -CAkey root.key -CAcreateserial -out root.crt#证书合并:cat root.key root.crt > root.pem #linuxcopy /b /y root.key+root.crt root.pem #windows#统一接入网关密码设置为:admin123C:\cert\OpenSSL-Win64\bin>openssl pkcs12-export -in root.pem -inkey root.key -out root.pfx3、配置Https背景:Weblogic10.3.6,Apache2.2 ,windows2008EnterpriseApache安装在D://Apache2.2,weblogic安装在Redhat6上。
Linux下apache配置https方法教程Linux下apache怎么配置https访问,Linux下apache配置https方法教程,apache配置https方法步骤介绍。
1.安装Openssl要使Apache支持SSL,需要首先安装Openssl支持。
下载Openssl:/source/ ;tar -zxf openssl-1.0.1h.tar.gz //解压安装包;cd openssl-1.0.1h //进入已经解压的安装包;./config //配置安装,推荐使用默认配置;make && make install //编译及安装;openssl默认将被安装到/usr/local/ssl当然这里的路径也可以指定安装路径;2. 安装Apache./configure --prefix=/usr/local/apache --enable-so --enable-ssl--with-ssl=/usr/local/ssl --enable-mods-shared=all //配置安装,推荐动态编译模块。
make&& make install动态编译Apache模块,便于模块的加载管理。
Apache 将被安装到/usr/local/apache3.申请证书去沃通WoSign官网申请一张EV SSL证书,申请成功后,会得到一个有密码的压缩包文件,输入证书密码后解压得到五个文件:forApache、forIIS、forNgnix、forTomcat、forOther Server,这个是证书的几种格式,Apache上需要用到forApache格式的证书。
4.安装ssl证书a、打开apache安装目录下conf目录中的httpd.conf文件,找到#LoadModulessl_module modules/mod_ssl.so#Includeconf/extra/httpd_ssl.conf删除行首的配置语句注释符号“#”保存退出。
Apache配置文件参数详细介绍ServerType standaloneServerType定义服务器的启动方式,缺省值为独立方式standalone,httpd服务器将由其本身启动,并驻留在主机中监视连接请求。
在Linux下将在启动文件/etc/rc.d/rc.local/init.d/apache中自动启动Web服务器,这种方式是推荐设置。
启动Apache服务器的另一种方式是inet方式,使用超级服务器inetd监视连接请求并启动服务器。
当需要使用inetd启动方式时,便需要更改为这个设置,并屏蔽/etc/rc.d/rc.local/init.d/apache文件,以及更改/etc/inetd.conf并重起inetd,那么Apache就能从inetd中启动了。
ServerRoot "/etc/httpd"ServerRoot用于指定守护进程httpd的运行目录,httpd在启动之后将自动将进程的当前目录改变为这个目录,因此如果设置文件中指定的文件或目录是相对路径,那么真实路径就位于这个ServerRoot定义的路径之下。
LockFile /var/run/httpd.lock由于httpd会经常进行并发的文件操作,就需要使用加锁的方式来保证文件操作不冲突,由于NFS文件系统在文件加锁方面能力有限,因此这个目录应该是本地磁盘文件系统,而不应该使用NFS文件系统。
LockFile参数指定了httpd守护进程的加锁文件,一般不需要设置这个参数,Apache服务器将自动在ServerRoot 下面的路径中进行操作。
但如果ServerRoot为NFS文件系统,便需要使用这个参数指定本地文件系统中的路径。
PidFile /var/run/httpd.pidPidFile指定的文件将记录httpd守护进程的进程号,由于httpd能自动复制其自身,因此系统中有多个httpd进程,但只有一个进程为最初启动的进程,它为其他进程的父进程,对这个进程发送信号将影响所有的httpd进程。
下载地址PHP:/download#Releases选择x64 Thread Safe,Zip格式Apache:https:///download/https://aka.ms/vs/15/release/VC_redist.x64.exe(VC库,下载完后直接双击安装)存储结构C:\NJ\Apache\PHP\MySQL\Web\WordPressPHP1.打开PHP目录下的"php.ini-production"文件,另存为"php.ini"。
2. 修改插件目录(搜索关键词: extension_dir)extension_dir = "C:\NJ\PHP\ext"ApacheP:每个需要编写的配置文件,在操作前,都先将该配置文件内的所有"c:/Apache24"替换为"C:/NJ/Apache"1.打开"C:\NJ\Apache\conf\httpd.conf",修改参数"ServerName"、"ServerAdmin"。
(若没有注册ServerName处域名可填写IP,若填写局域网IP则只有局域网用户可访问。
)2. 修改参数"DocumentRoot"(网站的根目录)DocumentRoot "C:/NJ/Web"<Directory "C:/NJ/Web">3.找到LoadModule区域,添加如下信息:(注意查看PHP目录下的dll文件版本)LoadModule php7_module C:\NJ\PHP\php7apache2_4.dllPHPIniDir "C:\NJ\PHP"<FilesMatch "\.(php|phtml|html|htm)$">SetHandler application/x-httpd-php</FilesMatch>4. 修改默认检索index.html为index.php。
Apache是一个历史悠久并且功能十分强大的WEB服务器,但其丰富的功能对于一个新手来说往往不知道从何下手。
我个人感觉Apache的设计充分体现了模块化设计的优势,通过在动态模块加载(DSO)模式下的安装,任何子应用模块都可以通过配置文件的简单修改进行积木式的灵活配置。
安装的过程可以从简单的静态html服务开始,一个模块一个模块的学习使用。
从单纯的HTML静态服务(core),到复杂的动态页面服务(core + php, core + resin, core + php + mod_gzip, core + resin + mod_expire)。
本文主要从简化安装==>性能调优==>维护方便的角度,介绍了WEB服务的规划、HTTPD安装/应用模块配置、升级/维护等过程。
让Apache和PHP,Resin等应用模块的独立升级,完全互不影响。
1.WEB应用容量规划:根据硬件配置和WEB应用的特点进行WEB服务的规划及一些简单的估算公式;2.Apache安装过程:apache的通用的简化安装选项,方便以后的应用的模块化配置;修改 HARD_SERVER_LIMIT:vi /path/to/apache_src/src/include/httpd.h#define HARD_SERVER_LIMIT 2560 <===将原来的 HARD_SERVER_LIMIT 256 后面加个“0”apache编译:./configure --prefix=/home/apache --enable-shared=max --enable-module=most3.可选应用模块/工具的安装:php resin mod_gzip mod_expire及各个模块之间的配合;mod_php安装:./configure --with-apxs=/home/apache/bin/apxs --enable-track-vars --with-mysqlmod_resin安装:./configure --with-apxs=/home/apache/bin/apxsmod_gzip安装:修改Makefile中的 apxs路径:然后make make install工具:日志轮循工具cronolog安装:4.升级/维护:看看通用和模块化的安装过程如何简化了日常的升级/维护工作;按照以上的方法:系统管理员和应用管理员的职责可以清楚的分开,互相独立。
Table of ContentsAbout1 Chapter 1: Getting started with apache2 Remarks2 Versions2 Various Apache httpd releases2 Examples2 Installation or Setup2 Ubuntu Installation2 Windows Installation2 CentOS Installation2 macOS Installation3 [Ubuntu] Simple Hello World Example3 Installing Requirements3 Setting up the HTML3 Visiting Your Webpage4 To ensure the server is up.4 Chapter 2: .htaccess files in Apache5 Examples5 Rewrite Engine5 Force HTTPS5 Enable CORS6 Prerequisites7 301 Redirection by Htaccess7 Chapter 3: Apache Flume8 Introduction8 Examples8 Streaming / Log Data8 Chapter 4: How to create virtual host in Apache9 Remarks9 Examples9Name-based virtual host configuration9 PHP Development Virtual Host10 Virtual Host In WAMP111) IP based vhosts 2) Multiple vhosts with the same Port 3) Defining vhosts using Macro (A12Force HTTPS using virtual host13 Credits14AboutYou can share this PDF with anyone you feel could benefit from it, downloaded the latest version from: apacheIt is an unofficial and free apache ebook created for educational purposes. All the content is extracted from Stack Overflow Documentation, which is written by many hardworking individuals at Stack Overflow. It is neither affiliated with Stack Overflow nor official apache.The content is released under Creative Commons BY-SA, and the list of contributors to each chapter are provided in the credits section at the end of this book. Images may be copyright of their respective owners unless otherwise specified. All trademarks and registered trademarks are the property of their respective company owners.Use the content presented in this book at your own risk; it is not guaranteed to be correct nor accurate, please send your feedback and corrections to ********************Chapter 1: Getting started with apache RemarksThis section provides an overview of what apache is, and why a developer might want to use it. It should also mention any large subjects within apache, and link out to the related topics. Sincethe Documentation for apache is new, you may need to create initial versions of those relatedtopics.VersionsVarious Apache httpd releasesExamplesInstallation or SetupDetailed instructions on getting apache set up or installed.Ubuntu Installationsudo apt-get install apache2Windows InstallationCheck out the WAMP stack. WAMP stands for Windows, Apache, MySQL, PhpMyAdmin. CentOS InstallationApache 2.2 comes with CentOS6, whereas 2.4 comes with CentOS7, to install on either OS, run yum -y install httpdmacOS InstallationmacOS comes with Apache pre-installed,however,can install Apache via HomebrewIf you already have the built-in Apache running, it will need to be shutdown first, and any auto-loading scripts removed.$ sudo apachectl stop$ sudo launchctl unload -w /System/Library/LaunchDaemons/org.apache.httpd.plist 2>/dev/null $ brew install httpd24 --with-privileged-ports --with-http2[Ubuntu] Simple Hello World ExampleThis example will guide you through setting up a back end serving an a Hello World HTML page. Installing RequirementsOrder matters for this step!•sudo apt-get install apache2Setting up the HTMLApache files live in /var/www/html/. Lets quickly get there. Make sure you're in your root directory first, cd, then cd /var/www/html/.This html directory is where all your website files will live. Lets quickly make a simple Hello World file.Using your favorite text editor, type the following in<!DOCTYPE html><html><head><title>Hello World!</title></head><body><h1>Hello World!</h1></body></html>Save this file as index.html in the current directory and you're set to go!Visiting Your WebpageTo visit the page you just created, in your browser of choice, go to localhost. If that doesn't work, try 127.0.0.1. You should see "Hello World!" as a h1. You're done!To ensure the server is up.If you get a message that the browser can't connect to the server, first check to ensure the server is up.$ ps -aef | grep httpdYou should see a few httpd processes if Apache is up and running.Read Getting started with apache online: https:///apache/topic/964/getting-started-with-apacheChapter 2: .htaccess files in ApacheExamplesRewrite EngineThe RewriteEngine module within Apache is used to dynamically rewrite URLs and paths depending on various expressions provided:<IfModule mod_rewrite.c>RewriteEngine OnRewriteBase /RewriteRule ^index\.php$ - [L]RewriteCond %{REQUEST_FILENAME} !-fRewriteCond %{REQUEST_FILENAME} !-dRewriteRule . /index.php [END]</IfModule>The above rules will rewrite PHP files to no longer show their extension, and so that index.php will just show as a naked domain (similar to the behavior normally seen in index.html). The above rule ships with WordPress.Note that in Apache httpd 2.2.16 and later, this entire block can be replaced with a single line using the FallbackResource directive:FallbackResource /index.phpForce HTTPS.htaccess can be used to force your HTTP site to redirect to HTTPS.Here's a quick way that doesn't require editing the code for your domain:RewriteEngine OnRewriteCond %{HTTPS} =offRewriteRule ^ https://%{HTTP_HOST}%{REQUEST_URI} [L,R=301]Warning: The code above assumes that you can trust %{HTTP_HOST} to point to yourdomain.If you need to be sure that the redirect location is your domain, replace %{HTTP_HOST}with your domain.The code above does this:1.Enable RewriteEngine.2.Continue if the current request is not using HTTPS.3.Do a HTTP 301 redirect to https://%{HTTP_HOST}%{REQUEST_URI}, where•%{HTTP_HOST} is the host requested by the browser and•%{REQUEST_URI} is the URI requested by the browser (everything after the domain).Warning: Your web application must be able to handle HTTPS requests, and Apachefor your host should be configured with a valid site certificate.Note that it is significantly more efficient to simply do a Redirect in the http vhost than to do these multiple per-request comparisons in a .htaccess file. See /httpd/RedirectSSL for further discussion of this technique.Enable CORSTo enable Cross-Origin Resource Sharing (CORS) in Apache you'll need to set at least one HTTP header which changes it (the default behaviour is to block CORS). In the following example, we're going to be setting this HTTP header inside .htaccess, but it can also be set in your site your-site.conf file or the Apache config file. Regardless of how your configuration looks like, you can set the relevant HTTP headers in any Apache config block, i.e. <VirtualHost>, <Directory>,<Location>, and <Files>.There are a few CORS related HTTP headers which you can return in the response:Access-Control-Allow-OriginAccess-Control-Allow-CredentialsAccess-Control-Allow-MethodsAccess-Control-Max-AgeAccess-Control-Allow-HeadersAccess-Control-Expose-HeadersSome of the above are required for "preflight" requests. Some HTTP clients (namely, modern browsers) perform a request before your desired request just to see if they have authorisation to make the actual request on the server. See https:///wiki/Cross-origin_resource_sharing for more on the preflight request.The main HTTP header we need is Access-Control-Allow-Origin and that's we're going to set. However, the same principle applies pretty much to all of them (you just need to know what to return).The following example sets the required HTTP header within a <Directory> config block to enable an SSL protected client Full Qualified Domain Name (FQDN):<Directory /path/to/your/site/>Header set Access-Control-Allow-Origin "https://my.CLIENT.domain"</Directory>After we've set this on the server, we can now perform a request from https://my.client.domain to our server and it should respond.Note: A lot of people use Access-Control-Allow-Origin: "*" which is a wildcard, to mean requests from ALL domains should be accepted. This is usually ill-advised unless you're running some sortof a public API or repository of files. Also, please note the context of you HTTP header setting. You might want to allow HTTP requests for an API, but not for "hotlinking" images etc. You can set this header anywhere you want within your Apache config flow to only set it in specific situations. For example, the following would only set the CORS HTTP header when the requested path is not a file or directory (suits a public API which disallows image hotlinking):<Directory /path/to/your/site/>Options +FollowSymlinksOptions +IndexesRewriteEngine On#Make sure it's not a specific file or directory that they're trying to reachRewriteCond %{SCRIPT_FILENAME} !-fRewriteCond %{SCRIPT_FILENAME} !-dHeader set Access-Control-Allow-Origin "*"RewriteRule ^(.*)$ index.php/$1 [L]</Directory>PrerequisitesYou've got to have mod_headers installed and enabled: a2enmod headers301 Redirection by HtaccessThe HTTP response status code 301 Moved Permanently is used for permanent URL redirection, meaning current links or records using the URL that the response is received for should be updated. The new URL should be provided in the Location field included with the response. The 301 redirect is considered a best practice for upgrading users from HTTP to HTTPS. write this code in htaccess file for PHP-APACHERedirect 301 /oldpage/ /newpage/Here is an example using an htaccess file to redirect to a non www with an SSL attached to the domain.RewriteEngine OnRewriteCond %{HTTPS} offRewriteCond %{HTTP_HOST} ^www\.(.*)$ [NC]RewriteRule ^(.*)$ http://%1/$1 [R=301,L]RewriteCond %{HTTPS} onRewriteCond %{HTTP_HOST} ^www\.(.*)$ [NC]RewriteRule ^(.*)$ https://%1/$1 [R=301,L]RewriteEngine OnRewriteCond %{SERVER_PORT} 80RewriteRule ^(.*)$ https:///$1 [R,L]Read .htaccess files in Apache online: https:///apache/topic/2089/-htaccess-files-in-apacheChapter 3: Apache FlumeIntroductionApache Flume is a tool/service/data ingestion mechanism for collecting aggregating and transporting large amounts of streaming data such as log files, events (etc...) from various sources to a centralized data store.Flume is a highly reliable, distributed, and configurable tool. It is principally designed to copy streaming data (log data) from various web servers to HDFS.ExamplesStreaming / Log DataGenerally, most of the data that is to be analyzed will be produced by various data sources like applications servers, social networking sites, cloud servers, and enterprise servers. This data will be in the form of log files and events.Log file − In general, a log file is a file that lists events/actions that occur in an operating system. For example, web servers list every request made to the server in the log files.On harvesting such log data, we can get information about −the application performance and locate various software and hardware failures. the user behavior and derive better business insights. The traditional method of transferring data into the HDFS system is to use the put command. Let us see how to use the put command.Read Apache Flume online: https:///apache/topic/9630/apache-flumeChapter 4: How to create virtual host in ApacheRemarksThe main entry point for Apache's VirtualHost is at Apache Virtual Host documentation. From there, you have general documentation about virtual host configuration, and reference documentation about VirtualHost and related directives as well.ExamplesName-based virtual host configurationName-based virtual hosting on Apache is described on the Apache website as such: With name-based virtual hosting, the server relies on the client to report the hostnameas part of the HTTP headers. Using this technique, many different hosts can share thesame IP address.Therefore, more than one website can be hosted on one server through this method. On ubuntu, the configuration files are in /etc/apache2/sites-available. In that directory, you will find 000-default.conf. That is the default configuration, all requests will be sent to this configuration file until others have been set up.To set up a virtual host, here will be used, but you should replace it with your . Copy the default file:cp 000-default.conf .confThe configuration file can have the following directives:<VirtualHost *:80>****************************ServerName ServerAlias DocumentRoot /var/www//htmlErrorLog /var/log/apache/logs/error.log# Possible values include: debug, info, notice, warn, error, crit,# alert, emerg.LogLevel warnCustomLog /var/log/apache/logs/access.log combined</VirtualHost>•The first line, indicates that all requests on port 80 (default http port) should be matched. Youcan also have a IP address instead of * which is the IP of the server.•ServerAdmin is the contact details of website admin used for displaying with http errormessages.•ServerName is the domain name of website.•ServerAlias is a secondary name of the website, usually will be •DocumentRoot is the root folder loaded when we browse a website.•ErrorLog is the file in where errors are directed•LogLevel. is the level of errors to be sent to the log•CustomLog is the file where access information is directedEdit the file replacing with your website domain name and appropriate directory for the website files.Save the file and enable the site with the following Apache command:sudo a2ensite .confReload apachesudo service apache2 reloadA few more things that must be checked:•Ensure your DNS for your domain is set up for the correct IP (this may take time topropogate)•Ensure your port 80 is open on the firewall•Ensure your file permissions are setup correctly on the server files - ownership should be www-data:www-data and directory permissions should be 750 and file permissions should be 640.Your virtual host should be up and running! You can repeat this for other websites on the same server, with a different configuration file (using the same naming convention) and different directories under /var/www.PHP Development Virtual HostThis is an example on how to control PHP error logging in a virtual host site for development and debugging. AssumptionsThe PHP module has been installed.••Development environment is not for production.<VirtualHost *:80>ServerName DocumentRoot /var/www/domains//htmlErrorLog /var/www/domains//apache.error.logCustomLog /var/www/domains//apache.access.log commonphp_flag log_errors onphp_flag display_errors onphp_value error_reporting 2147483647php_value error_log /var/www/domains//php.error.log</VirtualHost>Note: The Virtual Host configuration is for development only because the display_errors is enabled and you do not want that in production.Virtual Host In WAMPAssuming that you are working with Windows 7 PCStep 1: GOTO -> C:\Windows\System32\drivers\etc Where you will find a file named “hosts”, kindly copy it and paste it at the same location. A copy file of hosts will be created there.Now we need to make some modifications in this file but if you try to edit it with any editor like notepad or notepad++, it will not allow you to save the file.Now again copy the same file and paste it on your desktop, now you can edit this file easily.You will find one or many entries like: 127.0.0.1 localhost In that file. Now add another line below that line, for example: 127.0.0.1 myproject1.local By this way you have defined a new sub-domain “myproject1.local” which can work in place of “localhost/myproject1”.Step 2: Okay, now it’s time to define the root path to access this newly created domain right? GOTO : C:\wamp\bin\apache\Your-Apache-Version\conf\extra Here you will find a file named “httpd-vhosts”. Open it in editor and paste the below lines in it.<VirtualHost *:80>**********************************.comDocumentRoot "c:/wamp/www/myproject1/”ServerName myproject1.localErrorLog "logs/myproject1.local-error.log"CustomLog "logs/myproject1.local.log" common</VirtualHost>Now you are almost there to access the project which resides at “c:/wamp/www/myproject1/”Step3: GOTO : C:\wamp\bin\apache\your-Apache-Version\confFind a file named “httpd.conf”, copy it and paste it at the same location for safety. Open file in editor and find a word “# Virtual hosts”, below you will find a line “Include conf/extra/httpd-vhosts.conf” If it is commented then make it uncommented and restart your wamp-server’s services.Go to your web-browser and write myproject1.local, you can see the project running now.Now you might face a problem that your localhost will not work by using localhost as a URL. No Worries…paste this code in “httpd-vhosts” file.<VirtualHost *:80>**********************************.comDocumentRoot "c:/wamp/www"ServerName localhostErrorLog "logs/localhost-error.log"CustomLog "logs/localhost.log" common</VirtualHost>Restart all the services of WAMP, the work is done.Thanks & cheers Chintan Gor1) IP based vhosts 2) Multiple vhosts with the same Port 3) Defining vhosts using Macro (Apache2.4)1) IP based vhosts<VirtualHost 192.168.13.37>ServerName DocumentRoot /var/www/domains//htmlErrorLog /var/log//error.logCustomLog /var/log//access.log common</VirtualHost><VirtualHost 192.168.47.11>ServerName DocumentRoot /srv/www/htdocs//htmlErrorLog /var/log//error.logCustomLog /var/log//access.log common</VirtualHost>Just change the port to your given IP(s). The port is irrelevant for the decision which vhost is chosen.2) Multiple vhosts with the same PortSince NameVirtualHost isn't needed anymore you can just write multiple vhosts with the same port.<VirtualHost *:80>DocumentRoot /srv/www/htdocs//htmlErrorLog /var/log//error.logCustomLog /var/log//access.log common</VirtualHost><VirtualHost *:80>ServerName ServerAlias DocumentRoot /var/www/domains//htmlErrorLog /var/log//error.logCustomLog /var/log//access.log common</VirtualHost>Here the opposite applies: the IP is irrelevant, but if the request is received on port 80 the name you entered is evaluated. Did you call the 2nd vhost gets picked. And if you called any other url (like , but also ) the first one will be picked. You can use thisvhost as a 'fallback' if you will.3) Defining vhosts using Macro (Apache2.4)<Macro VHost $port $host><VirtualHost *:$port>Servername $hostDocumentRoot /srv/www/htdocs/$hostErrorLog /var/log/$host/error.log</VirtualHost></Macro>Use VHost 80 Use VHost 443 secure_Creates two vhosts, one for port 80, one for 443, and sets the used variables accordingly.Force HTTPS using virtual hostUse Redirect to force users to connect to the secure URL.<VirtualHost *:80>ServerName SSLProxyEngine onRedirect permanent / https://secure_/</VirtualHost>The rest of the configuration can be put in the ssl virtual host (port 443) since everything is redirected.<VirtualHost _default_:443>ServerName secure_********************************DocumentRoot /var/www/domains/secure_/htmlErrorLog /var/log/secure_/error.logCustomLog /var/log/secure_/access.log commonSSLEngine On...</VirtualHost>Read How to create virtual host in Apache online: https:///apache/topic/4856/how-to-create-virtual-host-in-apacheCredits。
Apache 配置支持HTTPS的SSL证书在设置Apache + SSL之前, 需要做:安装Apache, 下载安装Apache时请下载带有ssl版本的Apache安装程序.并且ssl需要的文件在如下的位置:[Apache安装目录]/modules/ mod_ssl.so[Apache安装目录]/bin/ openssl.exe, libeay32.dll, ssleay32.dll, f [Apache安装目录]/conf/ f创建SSL证书(注意,我下载的是PHPStudy里面自带了openssl,但是bin目录下没有f,需要将conf下的f拷贝一份到bin目录下,但总体原理一样)一.生成一个带CA(Certificate Authority)授权的证书打开CMD,进入到Apache安装目录下的bin目录下:步骤一:执行命令,生成私钥:openssl genrsa -out tian_server.key 2048(RSA密钥对的默认长度是1024,取值是2的整数次方,并且密钥长度约长,安全性相对会高点)。
完成密钥server.key生产完毕后进行步骤二操作。
步骤二:配置f请确保以下数据这里所要求的值default_md = md5 #默认是default,会触发[default digest message is not supported ]req_extensions = v3_req #默认签名被注释了[ v3_req ]basicConstraints = CA:FALSEkeyUsage = nonRepudiation, digitalSignature, keyEncipherment subjectAltName = @alt_names #此项不存在,需要添加[ alt_names ] #此项不存在,需要添加,注意DNS.xDNS.1 = #自定义DNS.2 = #自定义DNS.3 = #自定义DNS.4 = #自定义DNS.5 = #自定义DNS.6 = #自定义然后创建目录和文件demoCA/newcerts/private/index.txtindex.txt.attrserial #此文件初始值输入00即可生成Certificate Signing Request文件,用于向CA机构申请证书:openssl req -new -key tian_server.key -out tian_server.csr -config f (如果不加-config f参数的话,常会报Unable to load config info from .../ssl/f)之后就会要求输入一系列的参数:Country Name (2 letter code) [AU]:CN ISO 国家代码(只支持两位字符)State or Province Name (full name) [Some-State]:ZJ 所在省份Locality Name (eg, city) []:HZ 所在城市Organization Name (eg, company): 公司名称Organizational Unit Name (eg, section) []: 组织名称Common Name (eg, YOUR name) []: 申请证书的域名(建议和httpd.conf中serverName必须一致)Email Address []:admin@ 管理员邮箱Please enter the following 'extra' attributes to be sent with your certificate re quest A challenge password []: 交换密钥An optional company name []:注:Common Name建议和httpd.conf中serverName必须一致,或者与f 中的alt_names中的一个域名保持一致,否则证书有可能申请不到,并且启动apache 时错误提示为:server RSA certificate CommonName (CN) `Kedou' does NOT match server name!?)我们得到CSR之后,第三方CA机构申请通过后,会把生成好下发给你,如果你选择了第三方机构,可以跳过步骤三和四,直接到步骤五。
開始安裝 mod_ssl1. 先到右下角工作列圖示 Apache Monitor 先 STOP Apache2. 解壓縮 Apache_2.0.59-Openssl_0.9.8b-Win32.zip (放桌面就好了)將裡面的./Apache_2.0.59-Openssl_0.9.8d-Win32/bin/Apache.exe./Apache_2.0.59-Openssl_0.9.8d-Win32/bin/ssleay32.dll./Apache_2.0.59-Openssl_0.9.8d-Win32/bin/libeay32.dll3 個檔案複製到 X:/AppServ/Apache2/bin/ 裡面, 取代 Apache.exe將./Apache_2.0.59-Openssl_0.9.8d-Win32/conf/ssl.conf複製到 X:/AppServ/Apache2/conf/ 裡面3. 開啟 X:/AppServ/Apache2/conf/ssl.conf找到複製內容到剪貼板代碼:# General setup for the virtual hostDocumentRoot "你的網頁根目錄可以找 httpd.conf 下的 DocumentRoot" ServerName 你的 domain name:443ServerAdmin 你的 emailErrorLog logs/error_logTransferLog logs/access_log修改一下你的網站資料4. 接下來我們要產生 SSL連線(HTTPS)時所需要加密的 key 及身份驗證用的CA。
首先,找個地方解開 Openssl-0.9.8b-Win32.zip比方說 D:\OpenSSL ,接著再把 f 放到該目錄下,並且找到下列地方將它修改成:複製內容到剪貼板代碼:dir = sslcerts = $dir\\certscrl_dir = $dir\\crldatabase = $dir\\index.txtnew_certs_dir = $dircertificate = $dir\\cacert.pemserial = $dir\\serialcrl = $dir\\crl.pemprivate_key = $dir\\privkey.pemRANDFILE = $dir\\privkey.rnd如果你無法開啟 f, 先開啟 UltraEdit 或是新增記事本, 將f 拉到裡面就可以了還有別忘了把這個檔案裡的x509extensions這一行在開頭加上 # 把它註解掉。
linux apache 配置http和https 访问1、安装openssl:#tar zxvf openssl-0.9.81.tar.gz#cd openssl-0.9.81#./config#make#make install2、安装apache:#tar zxvf httpd-2.0.63.tar.gz#cd httpd-2.0.63#./configure --prefix=/usr/local/apache/httpd --enable-ssl=static --with-ssl=/usr/local/ssl#make#make install此步骤在/apache/httpd目录中安装httpd服务(通过参数--prefix指定),同时使用--with-ssl指定刚才所安装OpenSSL的路径,用于将mod_ssl静态的编译到httpd服务中。
修改3、生成证书:openssl genrsa 1024 > server.keyopenssl req -new -key server.key > server.csr填写相关信息:Country Name (2 letter code) [GB]:CNState or Province Name (full name) [Berkshire]:BEIJINGLocality Name (eg, city) [Newbury]:BEIIJINGOrganization Name (eg, company) [My Company Ltd]:TESTOrganizational Unit Name (eg, section) []:TESTCommon Name (eg, your name or your server's hostname) []:TESTEmail Address []:TEST@openssl req -x509 -days 365 -key server.key -in server.csr > server.crt4、配置ssl:修改conf/httpd.conf文件将httpd.conf 中的Include conf/extra/httpd-ssl.conf 打开修改conf/extra/httpd-ssl.conf文件找到SSLCertificateFile 和SSLCertificateKeyFile 项将上面生成的测试证书路径填写完整5、配置域名:修改conf/httpd.conf文件将httpd.conf 中的Include conf/extra/httpd-vhost.conf 打开修改conf/extra/httpd-vhost.conf 文件配置需要访问的域名注:由于证书为我们自己测试创建,如有需要应到指定公司去认证。
Apache(https)配置手册拟制:tipyluo 日期:yyyy/mm/dd 审核:日期:yyyy/mm/dd 项目名称:项目经理:深圳腾讯计算机系统有限公司版权所有不得复制修订记录目录1 概述 (4)2 解决方案(原理) (4)2.1 SSL握手协议和通讯 (5)3 系统配置要求 (5)3.1 硬件要求 (6)3.2 软件要求 (6)4 安装流程 (6)4.1 安装前准备 (6)4.2 执行安装 (6)安装apache (6)4.3 安装后验证 (7)4.4 安装过程常见问题解决 (7)5 系统配置 (7)5.1 调整黙认选项 (7)5.2 虚拟机配置 (7)5.3 单向认证https配置 (8)5.4 双向认证https配置 (11)5.5 自建根证书 (12)5.6 服务器证书签署 (12)5.7 客户端证书签署 (13)6 系统使用及维护 (13)7 FAQ (13)7.1 FAQ1-XXX (14)8 参考资源 (14)1概述互联网技术的普及为人们的生活、工作带来了更多的便利,现在只要你有一台可以上网的电脑,那么足不出户,你只需要动一动鼠标就可以在家轻松实现网上购物、网上结汇帐务、网上股票交易等等原来需要耗费大量时间和精力并且要来回奔波才能完成的事情。
然而,我们在享受互联网技术给我们的生活和工作带来的便利的同时,是否想到在虚拟的网络世界中,我们在做每一次网上购物或是网上银行帐务查询时,我们如何保证我们所定的货物,使我们所需求的;我们汇出得钱款能够安全到达指定位置;我们的查询信息能够不被别人窃取。
近年来,网上假冒网站进行欺诈的行为已经发生了多起,假冒交易或会员网站,骗取用户资料,假冒银行的网站,盗取用户帐户的事件;更由甚者,在发生自然灾难的时候,假冒慈善网站骗取钱财,可以说恶劣至极。
作为网站的提供方,出发点是为了方便用户,同时在展现自己企业风采的同时,降低与用户沟通的成本然而,假冒网站却给网站的提供者和使用者,都提出以下安全问题,需要认真对待解决:∙网站的真实性:用户访问网站时需要确认网站的真实性,由于互联网的广泛性和开放性,使得互联网上存在很多虚假的网站,如何让用户信任自己访问的网站。
∙信息的机密性:现在大量的网上应用需要用户向应用服务器提交一些隐私及机密信息,同时应用服务器也可能向用户返回一些隐私及机密信息,如何确保这些信息的安全。
这些问题即是此文档要着重讨论及解决的问题。
2解决方案(原理)网站安全认证架构图1.采用网站安全认证解决方案,通过为网站配置服务器证书(通过CA机构认证签发),可以为网站提供安全、可靠的身份认证方案,用户通过验证网站的服务器证书来判断网站的真实性;2.通过配置服务器证书将在客户端和服务器之间建立安全通道,确保客户端和服务器之间数据传输的安全;3.通过扩展,服务器可以启用双向认证的连接,服务器可以要求客户端提供用户证书,来判断用户的真实身份。
2.1SSL握手协议和通讯为了便于更好的认识和理解SSL 协议,这里着重介绍SSL 协议的握手协议。
SSL 协议既用到了公钥加密技术又用到了对称加密技术,对称加密技术虽然比公钥加密技术的速度快,可是公钥加密技术提供了更好的身份认证技术。
SSL 的握手协议非常有效的让客户和服务器之间完成相互之间的身份认证,其主要过程如下:①客户端的浏览器向服务器传送客户端SSL 协议的版本号,加密算法的种类,产生的随机数,以及其他服务器和客户端之间通讯所需要的各种信息。
②服务器向客户端传送SSL 协议的版本号,加密算法的种类,随机数以及其他相关信息,同时服务器还将向客户端传送自己的证书。
③客户利用服务器传过来的信息验证服务器的合法性,服务器的合法性包括:证书是否过期,发行服务器证书的CA 是否可靠,发行者证书的公钥能否正确解开服务器证书的“发行者的数字签名”,服务器证书上的域名是否和服务器的实际域名相匹配。
如果合法性验证没有通过,通讯将断开;如果合法性验证通过,将继续进行第四步。
④用户端随机产生一个用于后面通讯的“对称密码”,然后用服务器的公钥(服务器的公钥从步骤②中的服务器的证书中获得)对其加密,然后将加密后的“预主密码”传给服务器。
⑤如果服务器要求客户的身份认证(在握手过程中为可选),用户可以建立一个随机数然后对其进行数据签名,将这个含有签名的随机数和客户自己的证书以及加密过的“预主密码”一起传给服务器。
⑥如果服务器要求客户的身份认证,服务器必须检验客户证书和签名随机数的合法性,具体的合法性验证过程包括:客户的证书使用日期是否有效,为客户提供证书的CA 是否可靠,发行CA 的公钥能否正确解开客户证书的发行CA 的数字签名,检查客户的证书是否在证书废止列表(CRL)中。
检验如果没有通过,通讯立刻中断;如果验证通过,服务器将用自己的私钥解开加密的“预主密码”,然后执行一系列步骤来产生主通讯密码(客户端也将通过同样的方法产生相同的主通讯密码)。
⑦服务器和客户端用相同的主密码即“通话密码”,一个对称密钥用于SSL 协议的安全数据通讯的加解密通讯。
同时在SSL 通讯过程中还要完成数据通讯的完整性,防止数据通讯中的任何变化。
⑧客户端向服务器端发出信息,指明后面的数据通讯将使用的步骤⑦中的主密码为对称密钥,同时通知服务器客户端的握手过程结束。
⑨服务器向客户端发出信息,指明后面的数据通讯将使用的步骤⑦中的主密码为对称密钥,同时通知客户端服务器端的握手过程结束。
⑩SSL 的握手部分结束,SSL 安全通道的数据通讯开始,客户和服务器开始使用相同的对称密钥进行数据通讯,同时进行通讯完整性的检验。
3系统配置要求3.1硬件要求3.2软件要求操作系统:Linuxhttp服务器:Apache/1.3.33mod_ssl-2.8.22-1.3.33.tar.gzopenssl-0.9.7或以上4安装流程4.1安装前准备下载以下软件包:apache_1.3.33.tar.gzmod_ssl-2.8.22-1.3.33.tar.gzopenssl-0.9.7f.tar.gz4.2执行安装安装apache1.拷贝以上三个文件到/usr/local,并解压tar zxvf apache_1.3.33.tar.gztar zxvf mod_ssl-2.8.22-1.3.33.tar.gztar zxvf openssl-0.9.7f.tar.gz2.配置mod_sslcd mod_ssl-2.8.22-1.3.33./configure --with-apache=../apache_1.3.333.设置ssl的基本路径cd ../apache_1.3.33SSL_BASE=../openssl-0.9.7f4.配置apache./configure --prefix=/usr/local/apache --enable-module=ssl --enable-shared=ssl 5.编译/安装apachemakemake install6.编译openssl./config --prefix=/usr/local/opensslmakemake install4.3安装后验证1.检查目标目录是否已创建:/usr/local/apache/usr/local/openssl2.检查mod_ssl插件是否已生成/usr/local/apache/libexec/libssl.so3.启动apache,检查是否可以访问cd /usr/local/apache/bin./apachectl startssl4.4安装过程常见问题解决问题1-名称5系统配置5.1调整黙认选项根据公司安全中心拟订的《Apache安全checklist.doc》手册为参考,调整系统的黙认配置。
5.2虚拟机配置这里说的虚拟主机是指在一台机器上仅运行一个httpd后台程序支持多个Apache 服务器,如在公司某部门有一台web服务器,名为,同时又想为另一个部门建立网站,网站内容也放在该机器上,通过访问,这就要用到虚拟主机设置。
设置Apache虚拟主机通常有两种方案:◆基于IP的虚拟主机这种方式需要在机器上设置IP别名,象上面的例子,在一台机器的网卡上绑定多个IP地址去服务多个虚拟主机。
◆基于名字的虚拟主机它的优势就是不需要更多的IP地址,容易配置,不需要其它软硬件,现代的浏览器大多都支持这种方式。
添加基于名字的虚拟主机步骤如下:1 修改httpd.conf,在最后添加以下配置# NameVirtualHost 必须加在所有虚拟机配置之前NameVirtualHost 192.168.3.180# 虚拟机一配置<VirtualHost 192.168.3.180>ServerAdmin webmaster@DocumentRoot /usr/local/ oiweb_test_account/htdocs/ServerName ScriptAlias /cgi-bin/ "/usr/local/oiweb_test_account/cgi-bin/"ErrorLog logs/int_qq-error_logCustomLog logs/int_qq-access_log common</VirtualHost><VirtualHost 192.168.3.180>ServerAdmin tipyluo@DocumentRoot /usr/local/oiweb_test_sales/htdocs/ServerName ScriptAlias /cgi-bin/ "/usr/local/oiweb_test_sales/cgi-bin/"ErrorLog logs/int_qq-error_logCustomLog logs/int_qq-access_log common</VirtualHost>5.3单向认证https配置首先在配置之前明白一些基本概念,1.SSL所使用的证书可以是自建生成的,也可以通过一个商业性CA如Verisign签署证书。
2.证书的概念:首先要有一个根证书(可自建),然后用根证书来签发服务器证书和客户证书,一般理解:服务器证书和客户证书是平级关系。
在SSL必须安装根证书和服务器证书来认证。
单向认证配置需要服务器公钥证书和证书对应的私钥,命名为server.crt和server.key(可改为其它名字)。
编辑httpd.conf,调整“<VirtualHost _default_:443>…< /VirtualHost>”之间的内容:<VirtualHost _default_:443># General setup for the virtual hostDocumentRoot "/usr/local/oiweb_test_www/htdocs"ServerName ScriptAlias /cgi-bin/ "/usr/local/oiweb_test_www/cgi-bin/"ServerAdmin root@ErrorLog /usr/local/apache/logs/error_logTransferLog /usr/local/apache/logs/access_log# SSL Engine Switch:# Enable/Disable SSL for this virtual host.SSLEngine on# SSL Cipher Suite:# List the ciphers that the client is permitted to negotiate.# See the mod_ssl documentation for a complete list.SSLCipherSuiteALL:!ADH:!EXPORT56:RC4+RSA:+HIGH:+MEDIUM:+LOW:+SSLv2:+EXP:+eNULL# Server Certificate:# Point SSLCertificateFile at a PEM encoded certificate. If# the certificate is encrypted, then you will be prompted for a# pass phrase. Note that a kill -HUP will prompt again. A test# certificate can be generated with `make certificate' under# built time. Keep in mind that if you've both a RSA and a DSA # certificate you can configure both in parallel (to also allow# the use of DSA ciphers, etc.)SSLCertificateFile /usr/local/apache/conf/ssl.crt/server.crt#SSLCertificateFile /usr/local/apache/conf/ssl.crt/server-dsa.crt# Server Private Key:# If the key is not combined with the certificate, use this# directive to point at the key file. Keep in mind that if# you've both a RSA and a DSA private key you can configure# both in parallel (to also allow the use of DSA ciphers, etc.) SSLCertificateKeyFile /usr/local/apache/conf/ssl.key/server.key#SSLCertificateKeyFile /usr/local/apache/conf/ssl.key/server-dsa.key # Server Certificate Chain:# Point SSLCertificateChainFile at a file containing the# concatenation of PEM encoded CA certificates which form the # certificate chain for the server certificate. Alternatively# the referenced file can be the same as SSLCertificateFile# when the CA certificates are directly appended to the server# certificate for convinience.#SSLCertificateChainFile /usr/local/apache/conf/ssl.crt/ca.crt# Certificate Authority (CA):# Set the CA certificate verification path where to find CA# certificates for client authentication or alternatively one# huge file containing all of them (file must be PEM encoded)# Note: Inside SSLCACertificatePath you need hash symlinks# to point to the certificate files. Use the provided# Makefile to update the hash symlinks after changes.#SSLCACertificatePath /usr/local/apache/conf/ssl.crt#SSLCACertificateFile /usr/local/apache/conf/ssl.crt/ca-bundle.crt # Certificate Revocation Lists (CRL):# Set the CA revocation path where to find CA CRLs for client# authentication or alternatively one huge file containing all# of them (file must be PEM encoded)# Note: Inside SSLCARevocationPath you need hash symlinks# to point to the certificate files. Use the provided# Makefile to update the hash symlinks after changes.#SSLCARevocationPath /usr/local/apache/conf/ssl.crl#SSLCARevocationFile /usr/local/apache/conf/ssl.crl/ca-bundle.crl # Client Authentication (Type):# Client certificate verification type and depth. Types are# none, optional, require and optional_no_ca. Depth is a# number which specifies how deeply to verify the certificate# issuer chain before deciding the certificate is not valid.#SSLVerifyClient require#SSLVerifyDepth 10# Access Control:# With SSLRequire you can do per-directory access control based# on arbitrary complex boolean expressions containing server# variable checks and other lookup directives. The syntax is a# mixture between C and Perl. See the mod_ssl documentation# for more details.#<Location />#SSLRequire ( %{SSL_CIPHER} !~ m/^(EXP|NULL)/ \# and %{SSL_CLIENT_S_DN_O} eq "Snake Oil, Ltd." \# and %{SSL_CLIENT_S_DN_OU} in {"Staff", "CA", "Dev"} \# and %{TIME_WDAY} >= 1 and %{TIME_WDAY} <= 5 \# and %{TIME_HOUR} >= 8 and %{TIME_HOUR} <= 20 ) \ # or %{REMOTE_ADDR} =~ m/^192\.76\.162\.[0-9]+$/#</Location># SSL Engine Options:# Set various options for the SSL engine.# o FakeBasicAuth:# Translate the client X.509 into a Basic Authorisation. This means that# the standard Auth/DBMAuth methods can be used for access control. The # user name is the `one line' version of the client's X.509 certificate.# Note that no password is obtained from the user. Every entry in the user# file needs this password: `xxj31ZMTZzkV A'.# o ExportCertData:# This exports two additional environment variables: SSL_CLIENT_CERT and # SSL_SERVER_CERT. These contain the PEM-encoded certificates of the# server (always existing) and the client (only existing when client# authentication is used). This can be used to import the certificates# into CGI scripts.# o StdEnvVars:# This exports the standard SSL/TLS related `SSL_*' environment variables.# Per default this exportation is switched off for performance reasons,# because the extraction step is an expensive operation and is usually# useless for serving static content. So one usually enables the# exportation for CGI and SSI requests only.# o CompatEnvVars:# This exports obsolete environment variables for backward compatibility# to Apache-SSL 1.x, mod_ssl 2.0.x, Sioux 1.0 and Stronghold 2.x. Use this# to provide compatibility to existing CGI scripts.# o StrictRequire:# This denies access when "SSLRequireSSL" or "SSLRequire" applied even# under a "Satisfy any" situation, i.e. when it applies access is denied# and no other module can change it.# o OptRenegotiate:# This enables optimized SSL connection renegotiation handling when SSL# directives are used in per-directory context.#SSLOptions +FakeBasicAuth +ExportCertData +CompatEnvVars +StrictRequire<Files ~ "\.(cgi|shtml|phtml|php3?)$">SSLOptions +StdEnvVars</Files><Directory "/usr/local/apache/cgi-bin">SSLOptions +StdEnvVars</Directory># SSL Protocol Adjustments:# The safe and default but still SSL/TLS standard compliant shutdown# approach is that mod_ssl sends the close notify alert but doesn't wait for# the close notify alert from client. When you need a different shutdown# approach you can use one of the following variables:# o ssl-unclean-shutdown:# This forces an unclean shutdown when the connection is closed, i.e. no# SSL close notify alert is send or allowed to received. This violates# the SSL/TLS standard but is needed for some brain-dead browsers. Use# this when you receive I/O errors because of the standard approach where# mod_ssl sends the close notify alert.# o ssl-accurate-shutdown:# This forces an accurate shutdown when the connection is closed, i.e. a# SSL close notify alert is send and mod_ssl waits for the close notify# alert of the client. This is 100% SSL/TLS standard compliant, but in# practice often causes hanging connections with brain-dead browsers. Use# this only for browsers where you know that their SSL implementation# works correctly.# Notice: Most problems of broken clients are also related to the HTTP# keep-alive facility, so you usually additionally want to disable# keep-alive for those clients, too. Use variable "nokeepalive" for this.# Similarly, one has to force some clients to use HTTP/1.0 to workaround# their broken HTTP/1.1 implementation. Use variables "downgrade-1.0" and# "force-response-1.0" for this.SetEnvIf User-Agent ".*MSIE.*" \nokeepalive ssl-unclean-shutdown \downgrade-1.0 force-response-1.0# Per-Server Logging:# The home of a custom SSL log file. Use this when you want a# compact non-error SSL logfile on a virtual host basis.CustomLog /usr/local/apache/logs/ssl_request_log \"%t %h %{SSL_PROTOCOL}x %{SSL_CIPHER}x \"%r\" %b"</VirtualHost对于单向认证的模式,从开发上来说与不使用https没有不同,不需要特殊处理。