appium python api
- 格式:docx
- 大小:64.97 KB
- 文档页数:24
Appium+Python⾃动化测试之运⾏App程序⽰例在上⼀篇博客中,已经将环境搭建好了。
现在,我们利⽤搭建的环境来运⾏⼀条测试脚本,脚本中启动⼀个计算器的应⽤,并实现加法的运算。
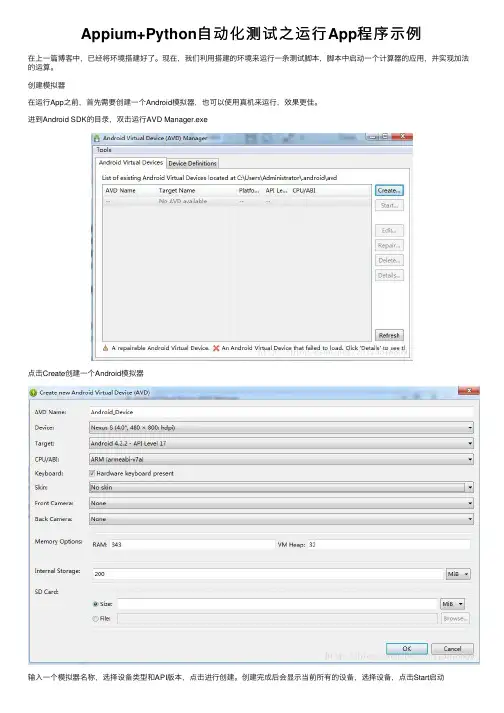
创建模拟器在运⾏App之前,⾸先需要创建⼀个Android模拟器,也可以使⽤真机来运⾏,效果更佳。
进到Android SDK的⽬录,双击运⾏AVD Manager.exe点击Create创建⼀个Android模拟器输⼊⼀个模拟器名称,选择设备类型和API版本,点击进⾏创建。
创建完成后会显⽰当前所有的设备,选择设备,点击Start启动第⼀次启动的时候会有点慢,要等⼏分钟,启动以后就好了,模拟器刚启动后的界⾯是这样的获取应⽤的packageName和activityName在写测试脚本之前,要知道被测试apk的packageName和要启动的activityName,如果是第三⽅的apk,有现成的可以直接使⽤。
这⾥启动的是模拟器内置的应⽤,所以要把apk从模拟器中导出来模拟器中预置的应⽤都放在⼿机的system/app⽬录中,使⽤adb shell命令进⼊⽬录查看计算器应⽤的apk名称使⽤ls *.apk命令列出所有的apk,查找到apk⽂件为Calculator.apk,然后使⽤adb pull system/app/Calculator.apk d:/命令将⽂件导出到电脑中。
将apk导出后,Android SDK中有⼀个aapt的⼯具可以⽤来查看应⽤的包名和要启动的activity名称,⼯具在SDK的build-tools⽬录下,命令格式为”aapt dump badging apk路径”输⼊命令后,第⼀⾏的输⼊中包含应⽤的包名package: name='com.android.calculator2' versionCode='17' versionName='4.2.2-3453820'在输⼊快到结尾的时候,有⼀⾏包含应⽤启动时打开的activity名称launchable-activity: name='com.android.calculator2.Calculator' label=” icon='这样就得到了packageName和activityNameCapabilityCapability是⼀个字典,配置的是⾃动化测试的⼀些必要信息,包含了本次测试的平台名称及版本号、启动的是浏览器还是app等,客户端将这些告诉服务器,服务器根据这些信息创建⾃动化会话。
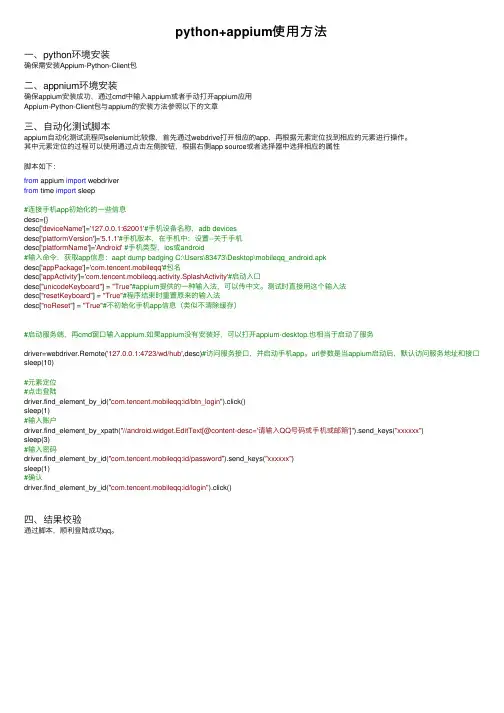
python+appium使⽤⽅法⼀、python环境安装确保需安装Appium-Python-Client包⼆、appnium环境安装确保appium安装成功,通过cmd中输⼊appium或者⼿动打开appium应⽤Appium-Python-Client包与appium的安装⽅法参照以下的⽂章三、⾃动化测试脚本appium⾃动化测试流程同selenium⽐较像,⾸先通过webdrive打开相应的app,再根据元素定位找到相应的元素进⾏操作。
其中元素定位的过程可以使⽤通过点击左侧按钮,根据右侧app source或者选择器中选择相应的属性脚本如下:from appium import webdriverfrom time import sleep#连接⼿机app初始化的⼀些信息desc={}desc['deviceName']='127.0.0.1:62001'#⼿机设备名称,adb devicesdesc['platformVersion']='5.1.1'#⼿机版本,在⼿机中:设置--关于⼿机desc['platformName']='Android'#⼿机类型,ios或android#输⼊命令,获取app信息:aapt dump badging C:\Users\83473\Desktop\mobileqq_android.apkdesc['appPackage']='com.tencent.mobileqq'#包名desc['appActivity']='com.tencent.mobileqq.activity.SplashActivity'#启动⼊⼝desc["unicodeKeyboard"] = "True"#appium提供的⼀种输⼊法,可以传中⽂。
Python与自动化测试使用Selenium和Appium自动化测试是现代软件开发领域中的一个重要环节,可帮助开发人员有效减少手动测试工作量并提高测试准确率。
Python是一种功能强大且易于学习的编程语言,Selenium和Appium则是两个常用的自动化测试工具。
本文将探讨如何使用Python编写自动化测试脚本,并介绍Selenium和Appium的使用方法。
一、Python与自动化测试Python是一种面向对象的编程语言,因其易于学习、灵活性高、拥有强大而广泛的库等特点而备受欢迎。
Python可以处理各种不同类型的数据和文件,包括文本、图像、视频和音频等。
在自动化测试领域,Python也有广泛应用。
Python可以与各种自动化测试工具集成,帮助开发人员快速创建测试脚本、运行测试并自动化生成测试报告。
此外,Python还支持自动化测试的并发执行,并可轻松处理测试结果和测试日志等信息。
二、SeleniumSelenium是一组用于自动化Web浏览器测试的工具。
它在各种不同的浏览器和平台上都可以运行,并支持多种编程语言。
Selenium使用起来非常方便,可帮助开发人员实现自动化测试的各种操作,如交互式测试、单元测试和端到端测试等。
Selenium最常见的应用场景是自动化Web应用程序界面的测试。
使用Selenium,可以很容易地编写Python脚本来测试Web应用程序的各种用户交互和界面功能。
Selenium还支持分布式测试、并发测试和测试结果分析等功能。
三、AppiumAppium是一个用于移动应用程序自动化测试的工具。
它支持iOS、Android和Windows等操作系统,并提供了多种语言的API,包括Python。
使用Appium,开发人员可以轻松创建具有交互性和丰富用户界面的移动应用程序的自动化测试。
相对于在真机上进行手动测试,使用Appium可以更快地确定问题并更准确地监测应用程序的性能和响应时间。
移动测试Appium之API手册展开全文声明本公众号所有内容,均属微信公众号: 开源优测所有,任何媒体、网站或个人未经授权不得转载、链接、转贴或以其他方式复制发布/发表。
已经本公众号协议授权的媒体、网站,在使用时必须注明"稿件来源微信公众号:开源优测",违者本公众号将依法追究责任。
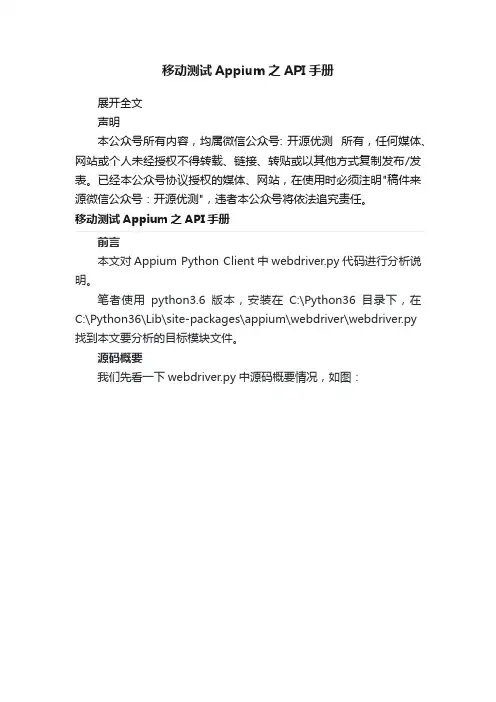
移动测试Appium之API手册前言本文对Appium Python Client中webdriver.py代码进行分析说明。
笔者使用python3.6版本,安装在C:\Python36目录下,在C:\Python36\Lib\site-packages\appium\webdriver\webdriver.py 找到本文要分析的目标模块文件。
源码概要我们先看一下webdriver.py中源码概要情况,如图:从上图来看,整个模块分为两大块:1.导入相关的基础模块或资源2.从webdriver.Remote继承,定义和实现了Appium Python版本的客户端驱动webdriver类由此我们可以清楚的得出以下几个结论:1.Appium Python的webdriver客户端是依赖selenium2中的webdriver的2.Appium-Python-Client定义和实现了针对android和ios移动设备专用的方法3.只要是selenium2中定义的webdriver方法在移动设备端可用,那么在移动测试时,可以直接用API说明下面我们把上述的API以一个表格的方式进行说明,以便后续大家在使用appium进行自动化测试时使用,这些API是必须熟练掌握的。
def__init__(self,command_executor='http://127.0.0.1:4444/wd/hub', de sired_capabilities=None,browser_profile=None, proxy=None, keep_alive=False): # 调用父类的__init__进行初始化 super(WebDriver, self).__init__(command_executor, desired_capabilities,browser_profile,proxy,keep_alive)# 初始化command_executor if mand_executor is not None: self._addCommands()# 初始化错误处理器 self.error_handler = MobileErrorHandler()# 切换至默认上下文 self._switch_to = MobileSwitchTo(self)# 初始化默认定位方式# add new method to the`find_by_*` pantheon By.IOS_UIAUTOMATION = MobileBy.IOS_UIAUTOMATION By.IOS_PREDICATE = MobileBy.IOS_PREDICATE By.IOS_CLASS_CHAIN = MobileBy.IOS_CLASS_CHAIN By.ANDROID_UIAUTOMATOR = MobileBy.ANDROID_UIAUTOMATOR By.ACCESSIBILITY_ID = MobileBy.ACCESSIBILITY_ID关键函数分析在webdirver类中,主要定义了以下函数,本文只将常用的函数进行说明,其他的请自行查阅代码:函数:contexts参数:无描述:返回当前会话所有的上下文用法:driver.contexts函数:current_context参数:无描述:返回当前会话中当前的上下文用法:driver.current_context函数:context参数:无描述:返回当前会话中当前的上下文用法:driver.context函数:find_element_by_ios_uiautomation参数:uia_string描述:通过元素名称查找一个ios元素用法:driver.find_element_by_ios_uiautomation('.elements()[1].cells()[2 ]')函数:find_elements_by_ios_uiautomation参数:uia_string描述:通过元素名查找N个ios元素用法:driver.find_elements_by_ios_uiautomation('.elements()[1].cells()[2]')函数:find_element_by_ios_predicate参数:predicate_string描述:通过一个谓词查找一个ios元素用法:driver.find_element_by_ios_predicate('label == "myLabel"')函数:find_elements_by_ios_predicate参数:predicate_string描述:通过一个谓词查找N个ios元素用法:driver.find_elements_by_ios_predicate('label == "myLabel"')函数:find_element_by_ios_class_chain参数:class_chain_string描述:通过class chain字符串查找一个ios元素用法:driver.find_element_by_ios_class_chain函数:find_elements_by_ios_class_chain参数:class_chain_string描述:通过class chain字符串查找N个ios元素用法:driver.find_elements_by_ios_class_chain('XCUIElementTypeWind ow[2]/XCUIElementTypeAny[-2]')函数:find_element_by_android_uiautomator参数:uia_string描述:通过元素名称查找一个android元素用法:driver.find_element_by_android_uiautomator('.elements()[1].cells ()[2]')函数:find_elements_by_android_uiautomator参数:uia_string描述:通过元素名称查找N个android元素用法:driver.find_elements_by_android_uiautomator('.elements()[1].cell s()[2]')函数:find_element_by_accessibility_id 参数:id描述:通过元素accessibility id查找一个元素用法:driver.find_element_by_accessibility_id()函数:find_elements_by_accessibility_id参数:id描述:通过元素accessibility id查找N个元素用法:driver.find_elements_by_accessibility_id()函数:create_web_element参数:element_id描述:使用指定的element id创建一个web元素函数:scroll参数:origin_el, destination_el描述:从一个元素位置滚动到另一个元素位置用法:driver.scroll(el1, el2)函数:drag_and_drop参数:origin_el, destination_el描述:将一个元素从一个位置拖曳到另外一个位置用法:driver.drag_and_drop(origin_el, destination_el)函数:tap参数:positions, duration描述:点击屏幕指定位置,并在该位置停留duration指定的时长用法:driver.tap([(100, 20), (100, 60), (100, 100)], 500)函数:swipe参数:start_x, start_y, end_x, end_y, duration=None描述:从一个位置到另外一个位置滑动屏幕用法:driver.swipe(100, 100, 100, 400)函数:flick参数:start_x, start_y, end_x, end_y描述:从一个位置到另外一个位置快速滑动用法:driver.flick(100, 100, 100, 400)函数:pinch参数:element=None, percent=200, steps=50描述:捏用法:driver.pinch(element)函数:zoom参数:element=None, percent=200, steps=50描述:缩放屏幕用法:driver.zoom(element)函数:app_strings参数:language=None, string_file=None描述:获取应用字符串函数:reset参数:无描述:重置设备当前的app用法:driver.reset()函数:hide_keyboard参数:key_name=None, key=None, strategy=None 描述:隐藏键盘函数:current_activity参数:无描述:获取设备当前app的activity用法:driver.current_activity函数:current_package参数:无描述:获取设备当前运行app的package用法:driver.current_package函数:set_value参数:element, value描述:给指定元素设置值用法:driver.set_value(element, value)函数:pull_file参数:path描述:从设备拉取文件用法:driver.pull_file(path)函数:push_file参数:path, base64data描述:以Base64编码方式向设备推送文件用法:driver.push_file(path, base64data) 函数:background_app参数:seconds描述:将指定的app放在后端运行一段时间用法:driver.background_app(seconds)函数:is_app_installed参数:bundle_id描述:根据bundle id判断app是否已经安装用法:driver.is_app_installed(bundle_id) 函数:install_app参数:app_path描述:安装app到设备用法:driver.install_app(app_path)函数:remove_app参数:app_id描述:卸载指定的app用法:driver.remove_app(app_id)函数:launch_app参数:无描述:启动desired capabilities指定的app用法:unch_app函数:close_app参数:无描述:停止desired capabilities指定的app用法:driver.close_app()函数:start_activity参数:app_package, app_activity, **opts描述:启动指定参数的app, android专用函数:lock参数:seconds描述:锁屏一段时间,ios专用用法:driver.lock(5)函数:shake参数:无描述:摇动设备用法:driver.shake()函数:open_notifications参数:无描述:打开通知,android专用,要求API level 18及以上用法:driver.open_notifications()函数:get_settings参数:无描述:获取当前appium服务端的设置用法:driver.get_settings函数:update_settings参数:settings描述:重设当前会话的设置,请参见 https:///appium/appium/blob/master/docs/en/ad vanced-concepts/settings.md函数:device_time参数:无描述:返回设备的日期时间用法: driver.device_time开源优测分享软件测试开源技术、经验、方案的首发平台。
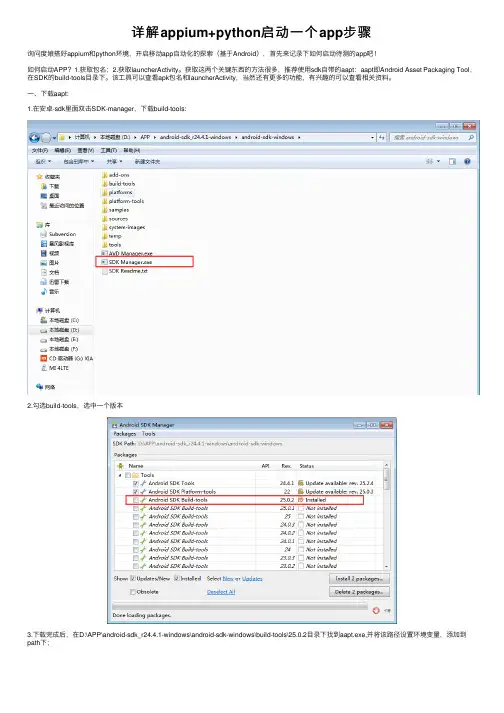
详解appium+python启动⼀个app步骤询问度娘搭好appium和python环境,开启移动app⾃动化的探索(基于Android),⾸先来记录下如何启动待测的app吧!如何启动APP?1.获取包名;2.获取launcherActivity。
获取这两个关键东西的⽅法很多,推荐使⽤sdk⾃带的aapt:aapt即Android Asset Packaging Tool,在SDK的build-tools⽬录下。
该⼯具可以查看apk包名和launcherActivity,当然还有更多的功能,有兴趣的可以查看相关资料。
⼀、下载aapt:1.在安卓-sdk⾥⾯双击SDK-manager,下载build-tools:2.勾选build-tools,选中⼀个版本3.下载完成后,在D:\APP\android-sdk_r24.4.1-windows\android-sdk-windows\build-tools\25.0.2⽬录下找到aapt.exe,并将该路径设置环境变量,添加到path下;4.打开cmd,输⼊aapt出现如下界⾯,说明环境OK了⼆、获取apk包名1.将准备测试的apk放到D盘某个⽬录,如D:\test2.打开cmd,输⼊指令aapt dump badging D:\test xx.apk3.以taobao.apk为例,如图:4.在这⾥可以看到apk包名:com.taobao.taobao三、获取launcherActivity1.接着上⼀步操作,cmd屏幕拖到中间找到launcherActivity2.这⾥可以看到,淘宝的laucherActivity值为com.taobao.tao.welcome.Welcome四、写脚本1.platformName:这⾥是android的apk2.deviceName:⼿机设备名称,通过adb devices查看3.platformVersion:android系统的版本号4.appPackage:apk包名5.appActivity:apk的launcherActivity# -*- coding:utf-8 -*-'''本段代码⾮淘宝,⽽是本⼈实际操作的app'''import os, time, unittestfrom selenium import webdriverPATH = lambda p:os.path.abspath(os.path.join(os.path.dirname(__file__),p)) desired_caps = {}desired_caps['platformName'] = 'Android' # 设备系统desired_caps['platformVersion'] = '6.0.1' # 设备系统版本desired_caps['deviceName'] = 'MI 4LTE' # 设备名称desired_caps['app'] = PATH(r"E:\tests\GuoYuB2B_2.1.apk")desired_caps['appPackage'] = 'com.guoyu.b2b'desired_caps['appActivity'] = 'com.guoyu.b2b.ui.activity.SplashActivity' driver = webdriver.Remote("http://localhost:4723/wd/hub", desired_caps) time.sleep(5)五、运⾏appium1.启动appium,右上⾓变成三⾓形2.确认⼿机连上电脑3.在pycharm运⾏脚本,随后在⼿机(⼿机不要设置锁屏),会看到app被⾃动启动了4.成功!!后⾯继续⼀起学习以上就是本⽂的全部内容,希望对⼤家的学习有所帮助,也希望⼤家多多⽀持。
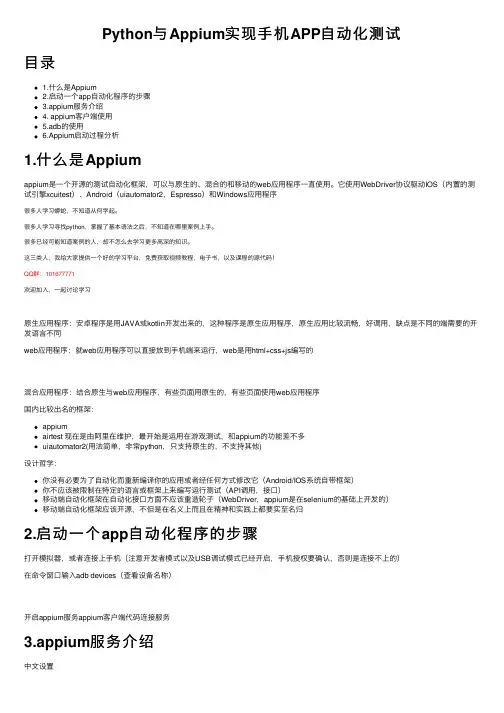
Python与Appium实现⼿机APP⾃动化测试⽬录1.什么是Appium2.启动⼀个app⾃动化程序的步骤3.appium服务介绍4. appium客户端使⽤5.adb的使⽤6.Appium启动过程分析1.什么是Appiumappium是⼀个开源的测试⾃动化框架,可以与原⽣的、混合的和移动的web应⽤程序⼀直使⽤。
它使⽤WebDriver协议驱动IOS(内置的测试引擎xcuitest)、Android(uiautomator2,Espresso)和Windows应⽤程序很多⼈学习蟒蛇,不知道从何学起。
很多⼈学习寻找python,掌握了基本语法之后,不知道在哪⾥案例上⼿。
很多已经可能知道案例的⼈,却不怎么去学习更多⾼深的知识。
这三类⼈,我给⼤家提供⼀个好的学习平台,免费获取视频教程,电⼦书,以及课程的源代码!QQ群:101677771欢迎加⼊,⼀起讨论学习原⽣应⽤程序:安卓程序是⽤JAVA或kotlin开发出来的,这种程序是原⽣应⽤程序,原⽣应⽤⽐较流畅,好调⽤,缺点是不同的端需要的开发语⾔不同web应⽤程序:就web应⽤程序可以直接放到⼿机端来运⾏,web是⽤html+css+js编写的混合应⽤程序:结合原⽣与web应⽤程序,有些页⾯⽤原⽣的,有些页⾯使⽤web应⽤程序国内⽐较出名的框架:appiumairtest 现在是由阿⾥在维护,最开始是运⽤在游戏测试,和appium的功能差不多uiautomator2(⽤法简单,⾮常python,只⽀持原⽣的,不⽀持其他)设计哲学:你没有必要为了⾃动化⽽重新编译你的应⽤或者经任何⽅式修改它(Android/IOS系统⾃带框架)你不应该被限制在特定的语⾔或框架上来编写运⾏测试(API调⽤,接⼝)移动端⾃动化框架在⾃动化接⼝⽅⾯不应该重造轮⼦(WebDriver,appium是在selenium的基础上开发的)移动端⾃动化框架应该开源,不但是在名义上⽽且在精神和实践上都要实⾄名归2.启动⼀个app⾃动化程序的步骤打开模拟器,或者连接上⼿机(注意开发者模式以及USB调试模式已经开启,⼿机授权要确认,否则是连接不上的)在命令窗⼝输⼊adb devices(查看设备名称)开启appium服务appium客户端代码连接服务3.appium服务介绍中⽂设置除了简单设置,还有⼀些⾼级设置,我们可以看⼀下保存了可以查看预设,⽅便以后使⽤编辑配置是进⼊修改环境变量主机和端⼝号不需要设置,直接可以开启服务器开启后,可以看到服务器运⾏中,右边三个按钮的功能分别是启动检查器会话,获取原始⽇志,停⽌运⾏服务器点击后⾃动经记事本打开,如果安装了其他编辑软件,可以选择打开⽅式服务开启后,就可以使⽤python来进⾏客户端来连接服务4. appium客户端使⽤使⽤前确定已经安装了,pip install appium-python-client,安装后,直接导⼊使⽤看⼀下Remote的源代码同时appium服务端也会显⽰500的错误犹豫appium1.20.2版本的,不像之前的版本需要传⼊的必须参数多了,现在只需要传platformName即可,所以具体可以看⾃⼰安装的是什么版本,不过加上更多参数也不受影响常⽤的caps参数:platformName 平台名称(Android,IOS)必选deviceName 设备名称(可选)udid (和deviceName作⽤⼀样,在不同版本下这个参数重好⽤,所以以后⽤udid代替deviceName)app apk的存放路径(可选)appActivity(页⾯名称,相当于web页⾯中title)和 appPackage(包名)platformVersion 系统版本号(可选,版本不匹配会报错)noReset 选择True 不重启(意思是app的引导页⾯,缓存数据等不清空,如果选择False,app相当于重新安装了,把之前的数据都清空了)automationName 驱动名称browserName 直接测web⽤ChromeautoWebview 开机进⼊webview模式(开机直接进⼊⽹页模式,不需要进⼊原⽣页⾯)chromedriverExecutable ⽹页浏览器驱动所放路径(必须是完整路径)chromedriverExecutableDir ⽹页浏览器驱动所放⽬录unicodekeyboard 开启unicode编码形式的键盘resetKeyboard 重启键盘(和上⼀个⼀块配置,两个都设置成True,就可以开启中⽂输⼊,相当于我们的电脑安装输⼊法)autoGrantPermissions 开启⼿机权限(相当于web端中弹出来的alert弹框,⽆法定位元素,设置了True,就⽅便定位元素)官⽹上还有很多⽤法,感兴趣的可以参考⼀下:通过adb获取appPackage和appActivity:⽅法⼀:adb shell am monitor 监控操作(在cmd中执⾏此命令后,然后在⼿机上或模拟器上操作对应的app,就会显⽰对应的包名)⽅法⼆:adb logcat | findStr -i displayed 从⽇志进⾏查询包名和页名称通过aapt获取appPackage和appActivity:aapt dump badging 全路径.apk拿到appPackage和appActivity后,可以使⽤包名的⽅式来访问app,代码如下:from appium.webdriver import Remote# 启动⼀次请求# 1.指明需要连接的服务地址和端⼝号# 2.You must include a platformName capabilitycaps = {"platformName": "Android","udid": "emulator-5554","appPackage": "com.lemon.lemonban","appActivity": ".activity.WelcomeActivity"}driver = Remote(command_executor='http://127.0.0.1:4723/wd/hub',desired_capabilities=caps)运⾏结果:总结:platformName 必填,其他可选deviceName重要app安装apk包,⾃动打开(已经安装过的不会重新安装),apk包路径最好不要有中⽂,不知道为什么我的电脑⽤这种⽅式运⾏⼀直报错,最后也未能解决,所以我使⽤包名运⾏在复制appActivity时,注意⼀定是app的⾸页页⾯名称,别复制错了5.adb的使⽤adb(Android Debug Bridge)安卓调试桥:作⽤就是操作安卓⼿机中的app相关命令:adb devices 查看设备是否连接(可以⼿动连接 adb connect 127.0.0.1:5554,⽹上可以搜索不同模拟器的端⼝号)adb shell 登录设备(进⼊⼿机系统⾥⾯)adb shell dumpsys activity | find "mFocusedActivity" 查看前台应⽤activity应⽤名称(注意⼀定要打开了app,再去执⾏命令,dumpsys下有很多命令,可以查看帮助⽂档进⾏更多了解)adb install 电脑/包名.apk 安装软件adb uninstall 电脑/包名.apk 制裁软件adb pull ⼿机⽂件路径电脑⽂件路径从⼿机下载/拉⽂件电脑端adb push 电脑⽂件路径⼿机⽂件路径从电脑推送/上传到⼿机端adb shell pm list packages 显⽰所有的安装包名6.Appium启动过程分析客户端通过wd/hub/session发送请求创建⼀个会话session提供了参数就是cpas服务端接收到caps信息后,检验caps参数是否合法adb install io.setting.appium判断有没有包名启动app获取操作系统的版本:adb.exe -P 5037 -s emulator-5554 shell getprop ro.build.version.release判断包名是否已经安装到⼿机上:adb.exe -P 5037 -s emulator-5554 shell dumpsys package com.lemon.lemon启⽤app:adb.exe -P 5037 -s emulator-5554 shell am start -W -n com.lemon.lemonban/.activity.WelcomeActivity -S 到此这篇关于python+appium实现⾃动化测试的⽰例代码的⽂章就介绍到这了。
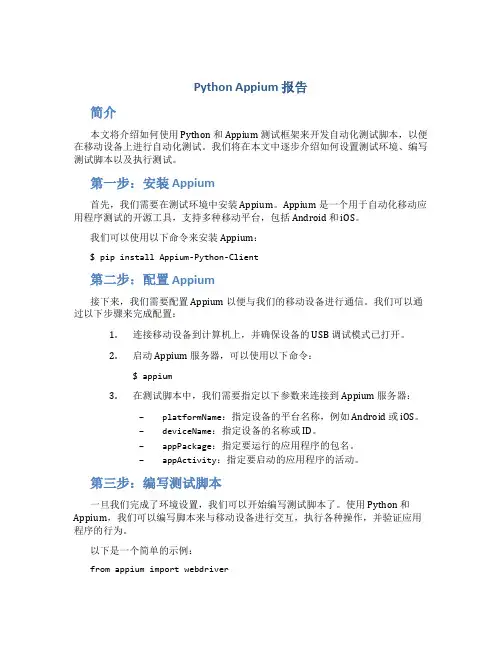
Python Appium 报告简介本文将介绍如何使用 Python 和 Appium 测试框架来开发自动化测试脚本,以便在移动设备上进行自动化测试。
我们将在本文中逐步介绍如何设置测试环境、编写测试脚本以及执行测试。
第一步:安装 Appium首先,我们需要在测试环境中安装 Appium。
Appium 是一个用于自动化移动应用程序测试的开源工具,支持多种移动平台,包括 Android 和 iOS。
我们可以使用以下命令来安装 Appium:$ pip install Appium-Python-Client第二步:配置 Appium接下来,我们需要配置 Appium 以便与我们的移动设备进行通信。
我们可以通过以下步骤来完成配置:1.连接移动设备到计算机上,并确保设备的 USB 调试模式已打开。
2.启动 Appium 服务器,可以使用以下命令:$ appium3.在测试脚本中,我们需要指定以下参数来连接到 Appium 服务器:–platformName:指定设备的平台名称,例如 Android 或 iOS。
–deviceName:指定设备的名称或 ID。
–appPackage:指定要运行的应用程序的包名。
–appActivity:指定要启动的应用程序的活动。
第三步:编写测试脚本一旦我们完成了环境设置,我们可以开始编写测试脚本了。
使用 Python 和Appium,我们可以编写脚本来与移动设备进行交互,执行各种操作,并验证应用程序的行为。
以下是一个简单的示例:from appium import webdriver# 设置 Appium 服务器参数desired_capabilities = {'platformName': 'Android','deviceName': 'Android Emulator','appPackage': 'com.example.android.app','appActivity': 'com.example.android.app.MainActivity'}# 连接到 Appium 服务器driver = webdriver.Remote('http://localhost:4723/wd/hub', desired_capab ilities)# 执行测试操作element = driver.find_element_by_id('com.example.android.app:id/button') element.click()# 断言验证assert driver.find_element_by_id('com.example.android.app:id/text').tex t =='Hello, World!'# 关闭连接driver.quit()在这个示例中,我们首先设置了 Appium 服务器的参数,然后使用webdriver.Remote方法连接到服务器。
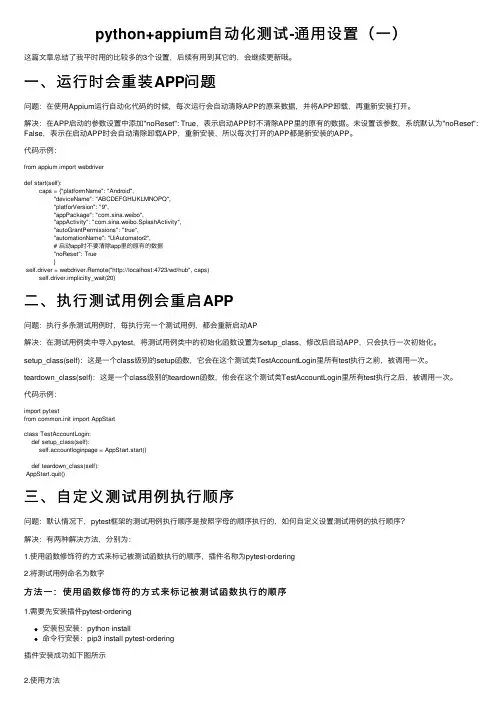
python+appium⾃动化测试-通⽤设置(⼀)这篇⽂章总结了我平时⽤的⽐较多的3个设置,后续有⽤到其它的,会继续更新哦。
⼀、运⾏时会重装APP问题问题:在使⽤Appium运⾏⾃动化代码的时候,每次运⾏会⾃动清除APP的原来数据,并将APP卸载,再重新安装打开。
解决:在APP启动的参数设置中添加"noReset": True,表⽰启动APP时不清除APP⾥的原有的数据。
未设置该参数,系统默认为"noReset": False,表⽰在启动APP时会⾃动清除卸载APP,重新安装,所以每次打开的APP都是新安装的APP。
代码⽰例:from appium import webdriverdef start(self):caps = {"platformName": "Android","deviceName": "ABCDEFGHIJKLMNOPQ","platforVersion": "9","appPackage": "com.sina.weibo","appActivity": "com.sina.weibo.SplashActivity","autoGrantPermissions": "true","automationName": "UiAutomator2",# 启动app时不要清除app⾥的原有的数据"noReset": True}self.driver = webdriver.Remote("http://localhost:4723/wd/hub", caps)self.driver.implicitly_wait(20)⼆、执⾏测试⽤例会重启APP问题:执⾏多条测试⽤例时,每执⾏完⼀个测试⽤例,都会重新启动AP解决:在测试⽤例类中导⼊pytest,将测试⽤例类中的初始化函数设置为setup_class,修改后启动APP,只会执⾏⼀次初始化。
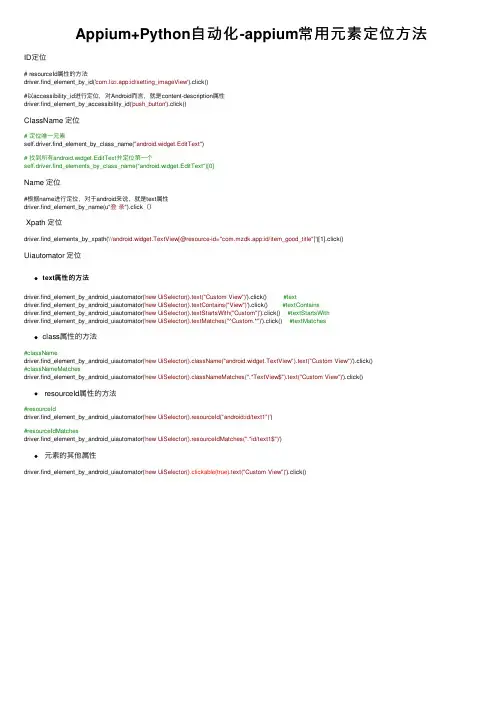
Appium+Python⾃动化-appium常⽤元素定位⽅法ID定位# resourceId属性的⽅法driver.find_element_by_id('com.lizi.app:id/setting_imageView').click()#以accessibility_id进⾏定位,对Android⽽⾔,就是content-description属性driver.find_element_by_accessibility_id('push_button').click()ClassName 定位# 定位唯⼀元素self.driver.find_element_by_class_name("android.widget.EditText")# 找到所有android.widget.EditText并定位第⼀个self.driver.find_elements_by_class_name("android.widget.EditText")[0]Name 定位#根据name进⾏定位,对于android来说,就是text属性driver.find_element_by_name(u"登录").click() Xpath 定位driver.find_elements_by_xpath('//android.widget.TextView[@resource-id="com.mzdk.app:id/item_good_title"]')[1].click()Uiautomator 定位text属性的⽅法driver.find_element_by_android_uiautomator('new UiSelector().text("Custom View")').click() #textdriver.find_element_by_android_uiautomator('new UiSelector().textContains("View")').click() #textContainsdriver.find_element_by_android_uiautomator('new UiSelector().textStartsWith("Custom")').click() #textStartsWithdriver.find_element_by_android_uiautomator('new UiSelector().textMatches("^Custom.*")').click() #textMatchesclass属性的⽅法#classNamedriver.find_element_by_android_uiautomator('new UiSelector().className("android.widget.TextView").text("Custom View")').click()#classNameMatchesdriver.find_element_by_android_uiautomator('new UiSelector().classNameMatches(".*TextView$").text("Custom View")').click() resourceId属性的⽅法#resourceIddriver.find_element_by_android_uiautomator('new UiSelector().resourceId("android:id/text1")')#resourceIdMatchesdriver.find_element_by_android_uiautomator('new UiSelector().resourceIdMatches(".*id/text1$")')元素的其他属性driver.find_element_by_android_uiautomator('new UiSelector().clickable(true).text("Custom View")').click()。
AppiumPython⾃动化测试之环境搭建的步骤Appium简介Appium是⼀个⾃动化测试开源⼯具,⽀持IOS和Android平台上的移动原⽣应⽤、移动Web应⽤和混合应⽤。
所谓的“移动原⽣应⽤”是指那些⽤IOS或者Android SDK写的应⽤;所谓的“移动Web应⽤”是指使⽤移动浏览器⽅位的应⽤(Appium⽀持IOS上的Safari和Android上的Chrome);所谓的“混合应⽤”是指原⽣代码封装⽹页视图(原⽣代码和Web内容交互)。
更重要的是,Appium是⼀个跨平台的⼯具,它允许测试⼈员使⽤同样的接⼝、基于不同的平台(IOS、Android)编写⾃动化测试脚本,这样⼤⼤增加了IOS和Android测试间代码的复⽤性。
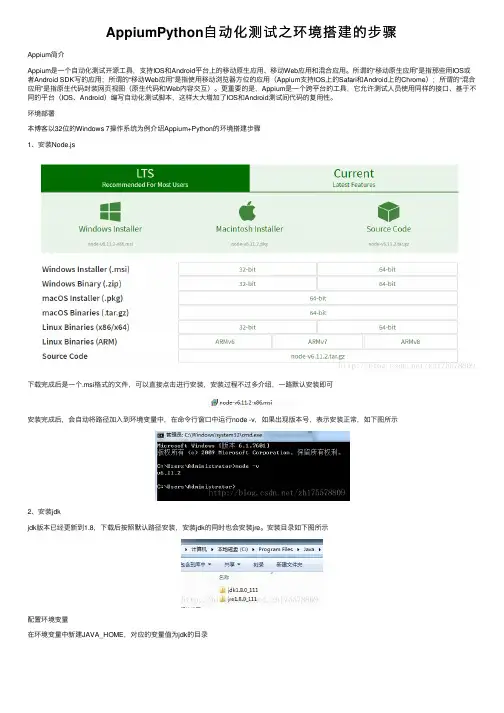
环境部署本博客以32位的Windows 7操作系统为例介绍Appium+Python的环境搭建步骤1、安装Node.js下载完成后是⼀个.msi格式的⽂件,可以直接点击进⾏安装,安装过程不过多介绍,⼀路默认安装即可安装完成后,会⾃动将路径加⼊到环境变量中,在命令⾏窗⼝中运⾏node -v,如果出现版本号,表⽰安装正常,如下图所⽰2、安装jdkjdk版本已经更新到1.8,下载后按照默认路径安装,安装jdk的同时也会安装jre。
安装⽬录如下图所⽰配置环境变量在环境变量中新建JAVA_HOME,对应的变量值为jdk的⽬录再新建⼀个变量名CLASSPATH的环境变量,变量值为:%JAVA_HOME%\lib\tools.jar;%JAVA_HOME%\lib\dt.jar找到Path变量,在变量值的末尾增加两个路径:%JAVA_HOME%\bin;%JAVA_HOME%\jre\bin配置好以后,新打开⼀个命令⾏窗⼝,在其中输⼊java -version,会出现jdk的版本号,表⽰配置正确3、安装Android SDKAndroid SDK是Google提供的Android开发⼯具包,在开发Android应⽤的时候会⽤到,需要通过引⼊⼯具包来调⽤Android的API双击打开SDK Manage.exe,选择需要安装的API版本和对应的⼯具包进⾏安装,这些在运⾏模拟器和真机测试的时候会使⽤到这些⼯具包都安装完成后,sdk的⽬录如下图所⽰配置环境变量新建环境变量ANDROID_HOME,变量值为sdk的路径:E:\Android\android-sdk在Path变量中增加两个路径:E:\Android\android-sdk\platform-tools和E:\Android\android-sdk\tools配置了环境变量后,在命令⾏窗⼝中运⾏adb -version,出现以下信息4、安装python5、安装Appium下载后,双击压缩包中的appium-installer.exe进⾏安装,这个的安装时间要长⼀些。
中⽂AppiumAPI⽂档中⽂Appium API ⽂档第⼀章:关于appium1.1 appium客户端客户端类库列表及Appium服务端⽀持这些类库封装了标准Selenium客户端类库,为⽤户提供所有常见的JSON 格式selenium命令以及额外的移动设备控制相关的命令,如多点触控⼿势和屏幕朝向。
Appium客户端类库实现了Mobile JSON Wire Protocol(⼀个标准协议的官⽅扩展草稿)和W3C Webdriver spec(⼀个传输不可预知的⾃动化协议,该协议定义了MultiAction 接⼝)的元素。
1.2 appium介绍Appium 介绍Appium 是⼀个⾃动化测试开源⼯具,⽀持 iOS 平台和 Android 平台上的原⽣应⽤,web 应⽤和混合应⽤。
所谓的“移动原⽣应⽤”是指那些⽤ iOS 或者 Android SDK 写的应⽤。
所谓的“移动 web 应⽤”是指使⽤移动浏览器访问的应⽤(Appium ⽀持iOS 上的 Safari 和 Android 上的 Chrome)。
所谓的“混合应⽤”是指原⽣代码封装⽹页视图——原⽣代码和 web 内容交互。
⽐如,像Phonegap,可以帮助开发者使⽤⽹页技术开发应⽤,然后⽤原⽣代码封装,这些就是混合应⽤。
重要的是,Appium 是⼀个跨平台的⼯具:它允许测试⼈员在不同的平台(iOS,Android)使⽤同⼀套API来写⾃动化测试脚本,这样⼤⼤增加了 iOS 和 Android 测试套件间代码的复⽤性。
想知道 Appium 如何⽀持平台,版本和⾃动化形态的详细信息,请参见platform support doc。
Appium 的理念为了满⾜移动⾃动化需求,Appium 遵循着⼀种哲学,重点体现于以下4个需求:你⽆需为了⾃动化,⽽重新编译或者修改你的应⽤。
你不必局限于某种语⾔或者框架来写和运⾏测试脚本。
⼀个移动⾃动化的框架不应该在接⼝上重复造轮⼦。
python + appium 环境搭建Appium 是一个自动化测试开源工具,支持IOS平台和Android平台上的原生应用,web应用和混合应用。
由.net编写,环境搭建比较麻烦。
包含Android开发环境、appium环境、python环境的搭建.Android:在Android端,appium基于WebDriver协议,利用Bootstrap.jar,最后通过调用UiAutomator 的命令,实现App的自动化测试。
UiAutomator测试框架是Android SDK自带的App UI自动化测试Java库。
另外由于UiAutomator对H5的支持有限,appium引入了chromedriver以及safaridriver等来实现基于H5的自动化。
appium 在android端工作流如下:1.client端也就是我们的webdriver测试脚本;2.中间起的是Appium服务,Appium在服务端起了一个Server(端口:4723)。
跟selenium Webdriver测试框架类似,Appium持标准的WebDriver JSONWireProtocol。
在这里提供它提供了一套REST的接口,Appium Server接收web driver client标准rest请求,解析请求内容,调对应的框架响应操作;3.appium server会把请求转发给中间件Bootstrap.jar ,它是用java写的,安装在手机上.Bootstrap监听4724端口并接收appium 的命令,最终通过调用UiAutomator的命令来实现;4.Bootstrap将执行的结果返回给appium server;5.appium server最后将结果返回给appium client。
IOS:在IOS端,appium同样使WebDriver的一套协议。
与Android端测试框架不同的是,appium ios封装了apple的Instruments框架,主要用了Instrument里的UI Automation(Apple的自动化测试框架),然后在设备中注入bootstrap.js进行监听。
APP测试(appium+Python基础操作)⼀⼀、Appium⼊门案例1. demofrom appium import webdriverfrom time import sleep# server 启⽤参数desired_caps = {}# 设备信息desired_caps['platformName'] = 'Android' # 设备名称desired_caps['platformVersion'] = '7.1.2' # 设备版本desired_caps['deviceName'] = '127.0.0.1:62001' # 设备号# app信息desired_caps['appPackage'] = 'com.android.settings' # 应⽤包名desired_caps['appActivity'] = '.Settings' # 启动的activitydesired_caps["automationName"] = 'UiAutomator1' # 解决新版appium报错driver = webdriver.Remote('http://localhost:4723/wd/hub', desired_caps)sleep(3)# 关闭app driver对象不会关闭driver.close_app()sleep(3)# 关闭驱动对象driver.quit()2. 常⽤参数platformName 平台的名称:iOS, Android, or FirefoxOSplatformVersion 设备系统版本号deviceName 设备号 IOS:instruments -s devices,Android: adb devicesapp 安装⽂件路径:/abs/path/to/my.apk or /appappActivity 启动的ActivityappPackage 启动的包unicodeKeyboard unicode设置(允许中⽂输⼊)resetKeyboard 键盘设置(允许中⽂输⼊)⼆、App操作API1. 安装apk到⼿机中import osfrom appium import webdriverfrom time import sleep# server 启⽤参数desired = {# 设备信息'platformName': 'Android', # 设备名称'platformVersion': '7.1.2', # 设备版本'deviceName': '127.0.0.1:62001', # 设备号# app信息'appPackage': 'com.android.settings', # 应⽤包名'appActivity': '.Settings', # 启动的activity# 解决新版appium报错'automationName': 'UiAutomator1'}driver = webdriver.Remote('http://localhost:4723/wd/hub', desired)sleep(3)# 下载apkdriver.install_app(os.getcwd() + os.sep + "jisuanqi.apk")sleep(3)# 关闭app driver对象不会关闭driver.close_app()sleep(3)# 关闭驱动对象driver.quit()说明:driver.install_app(app_path)参数:app_path:APK⽂件所在路径2. 从⼿机中卸载apkimport osfrom appium import webdriverfrom time import sleep# server 启⽤参数desired = {# 设备信息'platformName': 'Android', # 设备名称'platformVersion': '7.1.2', # 设备版本'deviceName': '127.0.0.1:62001', # 设备号# app信息'appPackage': 'com.youba.calculate', # 应⽤包名'appActivity': '.MainActivity', # 启动的activity# 解决新版appium报错'automationName': 'UiAutomator1'}driver = webdriver.Remote('http://localhost:4723/wd/hub', desired)sleep(3)# 卸载apkdriver.remove_app("com.youba.calculate")sleep(3)# 关闭app driver对象不会关闭driver.close_app()# 关闭驱动对象driver.quit()说明:driver.remove_app(app_id)参数:app_id:需要卸载的app包名3. 判断APP是否有安装import osfrom appium import webdriverfrom time import sleep# server 启⽤参数desired = {# 设备信息'platformName': 'Android', # 设备名称'platformVersion': '7.1.2', # 设备版本'deviceName': '127.0.0.1:62001', # 设备号# app信息'appPackage': 'com.android.settings', # 应⽤包名'appActivity': '.Settings', # 启动的activity# 解决新版appium报错'automationName': 'UiAutomator1'}driver = webdriver.Remote('http://localhost:4723/wd/hub', desired)sleep(3)result = driver.is_app_installed("com.youba.calculate")print(result)# 判断是否有com.youba.calculate该apk,有就删除 True,没有就下载 Falseif result:driver.remove_app("com.youba.calculate")else:driver.install_app(os.getcwd() + os.sep + "jisuanqi.apk")sleep(3)# 关闭app driver对象不会关闭driver.close_app()# 关闭驱动对象driver.quit()说明:driver.is_app_installed(bundle_id)参数:bundle_id: 可以传⼊app包名,返回结果为True(已安装) / False(未安装)。
篇1 安卓app自动化测试-appium环境篇1.1概要本篇主旨是介绍安卓app自动化测试,就不在这里扯些无关的废话,有机会再在以后的文章中慢慢阐述一些理论的东西。
有关智能机(Android/IOS)上app的自动化测试原理一句话:通过python脚本利用appium第三方库实现。
(另:多说一句,其他语言或其他工具同样能够做,这里不做优劣,好坏评判。
我讲的是python)我后面一系列的文章都会有个主基调—实战为主。
1.2 环境篇—环境准备操作系统windows10 64位,本篇只涉及windows的环境安装,至于MAC的系统会在以后的文章中涉及(毕竟你想要做ios的app自动化测试必须要在苹果机上装环境,而MAC 的环境安装可以说是噩梦!)所以大家在准备环境时,一定要看清楚自己的电脑是64位还是32位,因为有些软件的安装要按照自身的系统选择版本!涉及到时候我会提醒大家。
准备及安装步骤:python的安装有关python的安装(已经有环境的筒子略过),目前可供选择的版本Python3.6.0 - Python 2.7.13。
简单说2.7比较成熟老套,3.0以后就是比较时尚。
至于选择安装哪个版本自行决断。
我的是2.7 的版本。
提醒:python的安装是傻瓜式的,一步步next就好,别瞎去改安装路径,最后记得勾选配置环境变量(也就是说安装的时候就自动把环境变量给你配置好,省的自己再去配置)完成安装后,运行—cmd—输入python看到这个没报错,显示以上信息表示python的运行环境ok了。
简单点输入print 1+1回车,结果应该是命令窗返回2(1)node.js的安装从这里开始就是有关appium运行环境的准备了。
第一步安装node.js。
提醒:注意!!!下载对应自己操作系统的版本鉴于我的操作系统是win10 64位,所以我下载的是第一个条目的64-bit的版本。
安装过程无需赘述。
安装完成后,同样的在运行—cmd—输入npm -v显示以上内容表示node也装好了!(2).NET Framework 4.5的安装提醒:去官网下载最新的就是了,目前是4.5。
详解基于Android的Appium+Python⾃动化脚本编写1.AppiumAppium是⼀个开源测试⾃动化框架,可⽤于原⽣,混合和移动Web应⽤程序测试,它使⽤WebDriver协议驱动iOS,Android和Windows应⽤程序。
通过Appium,我们可以模拟点击和屏幕的滑动,可以获取元素的id和classname,还可以根据操作⽣成相关的脚本代码。
下⾯开始Appium的配置。
appPackage和APPActivity的获取任意下载⼀个app解压但是解压出来的xml⽂件可能是乱码,所以我们需要反编译⽂件。
逆向AndroidManifest.xml下载AXMLPrinter2.jar⽂件,逆向xml⽂件:命令⾏输⼊以下命令:java -jar AXMLPrinter2.jar AndroidManifest.xml ->AndroidManifest.txt获得以下可以查看的TXT⽂件寻找带有launcher 的Activity寻找manifest⾥⾯的packageDevicename的获取通过命令⾏输⼊ adb devices:appium的功能介绍下⾯将根据上图序号⼀⼀介绍功能:选中界⾯元素,显⽰元素相关信息模拟滑动屏幕,先点击⼀下代表触摸起始位置,在点击⼀下代表触摸结束为⽌模拟点击屏幕模拟⼿机的返回按钮刷新左边的页⾯,使之与⼿机同步记录模拟操作,⽣成相关脚本根据元素的id或者其他相关信息查找元素复制当前界⾯的xml布局⽂件退出2.Python的脚本元素定位的使⽤(1).xpath定位xpath定位是⼀种路径定位⽅式,主要是依赖于元素绝对路径或者相关属性来定位,但是绝对路径xpath执⾏效率⽐较低(特别是元素路径⽐较深的时候),⼀般使⽤⽐较少。
通常使⽤xpath相对路径和属性定位。
by_xpath.pyfrom find_element.capability import driverdriver.find_element_by_xpath('//android.widget.EditText[@text="请输⼊⽤户名"]').send_keys('123456')driver.find_element_by_xpath('//*[@class="android.widget.EditText" and @index="3"]').send_keys('123456')driver.find_element_by_xpath('//android.widget.Button').click()driver.find_element_by_xpath('//[@class="android.widget.Button"]').click()(2).classname定位classname定位是根据元素类型来进⾏定位,但是实际情况中很多元素的classname都是相同的,如⽤户名和密码都是clasName属性值都是:“android.widget.EditText” 因此只能定位第⼀个元素也就是⽤户名,⽽密码输⼊框就需要使⽤其他⽅式来定位,这样其实很鸡肋.⼀般情况下如果有id就不必使⽤classname定位。
使用Appium执行自动化测试在软件开发中,自动化测试已成为一项非常重要的任务。
使用自动化测试可以大大减少测试工作量,提高测试效率,同时也可以快速校准程序代码。
然而,在自动化测试过程中,一个关键的问题就是如何减少测试工具的复杂性,提高测试的可维护性和扩展性。
为了达到这个目的,可以使用Appium来执行自动化测试。
Appium是一种自动化测试工具,它可以用于测试所有的移动应用程序(包括iOS和Android)。
Appium是基于Selenium WebDriver的,具有许多类似于Selenium WebDriver的功能。
它使用JSON格式的Wire协议与测试脚本交互,并同时支持测试有线和无线设备。
因此,Appium被广泛用于跨平台测试,以确保软件的良好品质和稳定性。
使用Appium执行自动化测试,需要正确配置测试环境和测试用例。
以下是具体的步骤:1.安装Appium如果您还没有安装Appium,它可以从Appium官方网站(www.appium.io)下载并安装。
在安装过程中,请确保选择正确的平台,例如Mac或Windows。
2.安装Appium客户端Appium客户端是一个用于创建和执行测试用例的软件。
你可以选择任何你喜欢的编程语言,例如Java或Python,并通过适当配置来启动测试程序。
我们建议使用Appium Python客户端(Python语言的Appium库)。
3.安装手机模拟器或真实测试设备为了进行Android或iOS测试,您需要获得一个Android模拟器或iOS测试设备。
如果您没有实际测试设备,则可以使用Android SDK来创建一个Android测试环境。
4.创建Appium测试用例要创建一个Appium测试用例,您需要使用Appium Python客户端API。
这个API提供了许多函数和类,可用于控制设备,执行操作和断言测试结果。
例如,您可以使用以下代码在Appium上启动一个新的Android应用程序:1、import unittest2、from appium import webdriver3、class Test(unittest.TestCase):4、 def setUp(self):5、 desired_caps = {}6、 desired_caps['platformName'] = 'Android'7、 desired_caps['platformVersion'] = '4.4.2'8、 desired_caps['deviceName'] = 'Android'9、 desired_caps['appPackage'] ='com.example.android.application'10、 desired_caps['appActivity'] = '.MainActivity'11、 self.driver =webdriver.Remote('http://localhost:4723/wd/hub', desired_caps)12、 def test_app_starts(self):13、self.assertTrue(self.driver.is_app_installed('com.example.android.appli cation'))14、 def tearDown(self):15、 self.driver.quit()16、if __name__ == '__main__':17、 unittest.main()在这个测试用例中,我们定义了一个Test类,它继承了Python 的unittest.TestCase。
APPIUMAPI整理(python)---元素查找最近在学习⾃动化框架appium,⽹上找⼀些API相关资料整理了⼀下1.find_element_by_idfind_element_by_id(self, id_):Finds element within this element's children by ID(通过元素的ID定位元素):Args: - id_ - ID of child element to locate.⽤法 driver. find_element_by_id(“id”)find_element_by_id⽅法,是对于那些有id⽽且可以互相区分的控件的操作使⽤,⼀般通过android sdk 的tools路径下的uiautomatorviewer.bat⾃带⼯具来获取,使⽤这个⼯具⾸先要确保前⾯环境配置ok,然后确定测试机器或android模拟器处于连接状态(cmd上输⼊adb devices),下⾯是使⽤uiautomatorviewer.bat⼯具获取resource-id代码举例:#点击天⽓应⽤driver.find_element_by_id('com.huawei.android.totemweather:id/mulan_widget_currentweather_smallicon').click() 2.find_element_by_xpathfind_element_by_xpath(self, xpath):```:Args:xpath - xpath of element to locate. "//input[@class='myelement']"Note: The base path will be relative to this element's location.This will select the first link under this element.::myelement.find_elements_by_xpath(".//a")However, this will select the first link on the page.::myelement.find_elements_by_xpath("//a")```⽤法 find_element_by_xpath(“//*”)find_element_by_xpath⽅法也需要使⽤uiautomatorviewer.bat⼯具来定位控件,如下图所⽰右边相机控件id为空,这时就需要使⽤xpath来定位元素了,我们可以使⽤xpath⽤text和index来定位元素,可以这样定位相机:driver.find_element_by_xpath("//android.widget.TextView[contains(@text,'相机')]")driver.find_element_by_xpath("//android.widget.TextView[contains(@index,8)]")如下图的图库那个控件index和天⽓温度控件是相同的,都是index=7,就只能⽤text或text与index结合了,如:driver.find_element_by_xpath("//android.widget.TextView[contains(@text,'图库')]")driver.find_element_by_xpath("//android.widget.TextView[contains(@text,'图库')and@index='7']")上⾯的代码就可以这样写# -*-coding=utf-8 -*-from appium import webdriverimport timedesired_caps = {'platformName' : 'Android','deviceName' : '76P4C158********','platformVersion' : '5.1',#测试apk包名'appPackage' : 'uncher',#测试apk的launcherActivity'appActivity' : '.Launcher',}#进⼊android系统launcherdriver = webdriver.Remote('http://127.0.0.1:4723/wd/hub',desired_caps)time.sleep(5)#从launcher主界⾯进⼊相机应⽤并退出的两种⽅法driver.keyevent('3')#xpath使⽤text定位控件driver.find_element_by_xpath("//android.widget.TextView[contains(@text,'相机')]").click()time.sleep(2)driver.keyevent('3')time.sleep(2)#xpath使⽤index定位控件driver.find_element_by_xpath("//android.widget.TextView[contains(@index,8)]").click()time.sleep(2)driver.keyevent('3')time.sleep(2)#从launcher主界⾯进⼊图库应⽤并退出的两种⽅法#xpath使⽤text定位控件driver.find_element_by_xpath("//android.widget.TextView[contains(@text,'图库').click()time.sleep(2)driver.keyevent('3')time.sleep(2)#xpath使⽤text与index⼀起定位控件driver.find_element_by_xpath("//android.widget.TextView[contains(@text,'图库')and@index='7']").click()time.sleep(5)driver.keyevent('3')time.sleep(2)driver.quit()3. find_element_by_namefind_element_by_name(self, name):Finds element within this element's children by name【通过元素Name定位(元素的名称属性text)】:Args: - name - name property of the element to find.⽤法: driver.find_element_by_name(“name”)find_elements_by_name⽅法的控件元素也需要使⽤uiautomatorviewer.bat⼯具来定位,如上⾯例⼦中带有text信息的控件就可以直接使⽤,如driver.find_element_by_xpath("//android.widget.TextView[contains(@text,'相机')]")driver.find_element_by_xpath("//android.widget.TextView[contains(@index,8)]") 可以使⽤driver.find_element_by_name('相机')脚本如下from appium import webdriverimport timedesired_caps = {'platformName' : 'Android','deviceName' : '76P4C158********','platformVersion' : '5.1',#测试apk包名'appPackage' : 'uncher',#测试apk的launcherActivity'appActivity' : '.Launcher',}#进⼊android系统launcherdriver = webdriver.Remote('http://localhost:4723/wd/hub',desired_caps)time.sleep(5)#name⽅法进⼊相机应⽤time.sleep(2)driver.find_element_by_name("相机").click()time.sleep(5)driver.quit()4. find_element_by_class_namefind_element_by_class_name(self, name):Finds element within this element's children by class name(通过元素class name属性定位元素):Args: - name - class name to search for.⽤法 driver. find_element_by_class_name(“android.widget.LinearLayout”)find_element_by_class_name⽅法其实很不实⽤,⼀般控件的class基本相同,如下图上⾯的应⽤控件class都是android.widget.TextView,所以不好区分元素。
Appium Python API 中文版By-HZJAppium ·huanzhijin ·于 6 天前发布·最后由huanzhijin于 1 天前回复· 801 次阅读根据appium 1.4.13.1版本整理Appium_Python_Api文档1.contextscontexts(self):Returns the contexts within the current session.返回当前会话中的上下文,使用后可以识别H5页面的控件:Usage:driver.contexts用法 driver.contexts2. current_contextcurrent_context(self):Returns the current context of the current session.返回当前会话的当前上下文:Usage:driver.current_context用法driver. current_context3. contextcontext(self):Returns the current context of the current session.返回当前会话的当前上下文。
:Usage:driver.context用法driver. Context4. find_element_by_ios_uiautomationfind_element_by_ios_uiautomation(self, uia_string):Finds an element by uiautomation in iOS.通过iOS uiautomation查找元素:Args:- uia_string - The element name in the iOS UIAutomation li brary:Usage:driver.find_element_by_ios_uiautomation('.elements ()[1].cells()[2]')用法dr.find_element_by_ios_uiautomation(…elements‟)5. find_element_by_accessibility_idfind_element_by_accessibility_id(self, id):Finds an element by accessibility id.通过accessibility id查找元素:Args:-id- a string corresponding to a recursive element search using theId/Name that the native Accessibility options utilize:Usage:driver.find_element_by_accessibility_id()用法driver.find_element_by_accessibility_id(…id‟)6.scrollscroll(self, origin_el, destination_el):Scrolls from oneelementtoanother从元素origin_el滚动至元素destination_el:Args:- originalEl - theelementfromwhichtobeingscrolling- destinationEl - theelementtoscrollto:Usage:driver.scroll(el1, el2)用法driver.scroll(el1,el2)7. drag_and_dropdrag_and_drop(self, origin_el, destination_el):Drag the origin element to the destination element将元素origin_el拖到目标元素destination_el:Args:- originEl - the element to drag- destinationEl - the element to drag to用法 driver.drag_and_drop(el1,el2)8.taptap(self, positions, duration=None):Taps on an particular place with up to five fingers, holdi ng for a certain time模拟手指点击(最多五个手指),可设置按住时间长度(毫秒):Args:- positions - an array of tuples representing the x/y coor dinates ofthe fingers to tap. Length can be up to five.- duration - (optional) length of time to tap, in ms:Usage:driver.tap([(100, 20), (100, 60), (100, 100)], 500) 用法 driver.tap([(x,y),(x1,y1)],500)9. swipeswipe(self, start_x, start_y, end_x, end_y, duration=None):Swipe from onepointtoanotherpoint, foranoptionalduration.从A点滑动至B点,滑动时间为毫秒:Args:- start_x - x-coordinateatwhichtostart- start_y - y-coordinateatwhichtostart- end_x - x-coordinateatwhichtostop- end_y - y-coordinateatwhichtostop- duration - (optional) timetotaketheswipe, inms.:Usage:driver.swipe(100, 100, 100, 400)用法driver.swipe(x1,y1,x2,y2,500)10.flickflick(self, start_x, start_y, end_x, end_y):Flick from onepointtoanotherpoint.按住A点后快速滑动至B点:Args:- start_x - x-coordinateatwhichtostart- start_y - y-coordinateatwhichtostart- end_x - x-coordinateatwhichtostop- end_y - y-coordinateatwhichtostop:Usage:driver.flick(100, 100, 100, 400)用法driver.flick(x1,y1,x2,y2)11.pinchpinch(self, element=None, percent=200, steps=50):Pinch on an element a certain amount在元素上执行模拟双指捏(缩小操作):Args:- element - the element to pinch- percent - (optional) amount to pinch. Defaults to 200% - steps - (optional) number of steps in the pinch action:Usage:driver.pinch(element)用法driver.pinch(element)12.zoomzoom(self, element=None, percent=200, steps=50):Zooms in on an element a certain amount在元素上执行放大操作:Args:- element - the element to zoom- percent - (optional) amount to zoom. Defaults to 200%- steps - (optional) number of steps in the zoom action:Usage:driver.zoom(element)用法driver.zoom(element)13.resetreset(self):Resets the current application on the device.重置应用(类似删除应用数据)用法 driver.reset()14. hide_keyboardhide_keyboard(self, key_name=None, key=None, strategy=None):Hides the software keyboard on the device. In iOS, use `ke y_name` to press a particular key, or`strategy`. In Androi d, no parameters are used.隐藏键盘,iOS使用key_name隐藏,安卓不使用参数:Args:- key_name - key to press- strategy - strategy for closing the keyboard (e.g., `tap Outside`)driver.hide_keyboard()15. keyeventkeyevent(self, keycode, metastate=None):Sends a keycode to the device. Android only. Possible keyc odes can be found in /referenc e/android/view/KeyEvent.html.发送按键码(安卓仅有),按键码可以上网址中找到:Args:- keycode - the keycode to be sent to the device- metastate - meta information about the keycode being sen t用法 dr.keyevent(…4‟)16. press_keycodepress_keycode(self, keycode, metastate=None):Sends a keycode to the device. Android only. Possible keyc odes can be found in /referenc e/android/view/KeyEvent.html.发送按键码(安卓仅有),按键码可以上网址中找到:Args:- keycode - the keycode to be sent to the device- metastate - meta information about the keycode being sen t用法 driver.press_ keycode(…4‟)dr.keyevent(‘4’)与driver.press_ keycode(‘4’) 功能实现上一样的,都是按了返回键17. long_press_keycodelong_press_keycode(self, keycode, metastate=None):Sends a long press of keycode to the device. Android only. Possible keycodes can befound in /reference/androi d/view/KeyEvent.html.发送一个长按的按键码(长按某键):Args:- keycode - the keycode to be sent to the device- metastate - meta information about the keycode being sen t用法 driver.long_press_keycode(…4‟)18.current_activitycurrent_activity(self):Retrieves the current activity on the device.获取当前的activity用法print(driver.current_activity())19. wait_activitywait_activity(self, activity, timeout, interval=1):Wait for an activity: block until target activity presents or time out.This is an Android-only method.等待指定的activity出现直到超时,interval为扫描间隔1秒即每隔几秒获取一次当前的activity返回的True或False:Agrs:- activity - target activity- timeout -max wait time, in seconds- interval - sleep interval between retries, in seconds用法driver.wait_activity(….activity.xxx‟,5,2)20. background_appbackground_app(self, seconds):Puts the application in the background on the device for a certain duration.后台运行app多少秒:Args:- seconds - the duration for the application to remain in t he background用法 driver.background_app(5) 置后台5秒后再运行21.is_app_installedis_app_installed(self, bundle_id):Checks whether the application specified by `bundle_id`is installed on the device.检查app是否有安装返回True or False:Args:- bundle_id - the id of the application to query用法 driver.is_app_installed(“com.xxxx”)22.install_appinstall_app(self, app_path):Install the application found at `app_path` on the device.安装app,app_path为安装包路径:Args:- app_path - the local or remote path to the application to install用法 driver.install_app(app_path)23.remove_appremove_app(self, app_id):Remove the specified application from thedevice.删除app:Args:- app_id - theapplicationidtoberemoved用法driver.remove_app(“com.xxx.”)unch_applaunch_app(self):Start on the device the application specified in the desir ed capabilities.启动app用法 unch_app()25.close_appclose_app(self):Stop the running application, specified in the desired cap abilities, on the device.关闭app用法 driver.close_app()启动和关闭app运行好像会出错26. start_activitystart_activity(self, app_package, app_activity, **opts):Opens an arbitrary activity during a test. If the activity belongs toanother application, that application is started and th e activity is opened.This is an Android-only method.在测试过程中打开任意活动。