ORALCE8.0.5学习 + Powebuilder 6.5
- 格式:doc
- 大小:1.15 MB
- 文档页数:28
ORACLE FORM 开发实战李正海2008/09/22目录1一个基础的FORM (3)2一个查询FORM (12)3多画布的操作方法 (13)4LOV使用 (15)5LIST的使用 (22)6FORM的参数调用 (23)7包含主从表的FORM (26)8加入自定义菜单 (29)9加入图像的方法 (31)10一个选择的范例 (32)11常用系统热键 (35)1一个基础的FORM1.在文件中选择新建,表格,从而新增出一个FORM。
2.建立数据块a)在导航器中点击该FORM,选择数据块向导b)输入表名,点刷新,显示出字段名c)使用,把字段全部选择到数据库项中。
d)点下一步,注意使用默认的:“请先创建数据库,然后调用布局向导”。
3.建立布局a)进入布局向导b)选择默认的布局向导c)选择显示项,把可用项全部变成显示项d)选择框架风格为默认的表格e)指定框架的名称及显示记录数f)完成布局向导4.运行FORMa)运行FORMb)点击查询中的执行,显示出所有数据c)点增加,新建立一条记录,输入数据,点保存,完成一条记录的输入d)在某条记录中,改变数据内容,点保存,完成一条记录的修改e)点删除,则删除该记录f)点退出,结束FORM运行2一个查询FORM1.新建一个块2.加入一个框架3.加入数据项4.加入按纽,输入如下代码:GO_BLOCK('LZHTEST001');SET_BLOCK_PROPERTY('LZHTEST001',DEFAULT_WHERE,'NAME LIKE :block15.text_item21||''%''');EXECUTE_QUERY;3多画布的操作方法1.加入一个画布,再加入一个堆叠式画布。
2.加入两个块3.设置块的关系4.加入向子画布切换的按纽其对应的WHEN_BUTTON_PRESSED语句为go_block('lzhtest0011'); --lzhtest0011为子块名5.加入子画布隐藏的按纽HIDE_VIEW('CANVAS39');-- CANVAS39为子块所在的画布名GO_BLOCK('LZHTEST001');-- LZHTEST001为主块名4LOV使用设置LOV的基本过程包括如下:b)增加LOV,点击在导航器中的LOVS,点后,进行LOV添加。
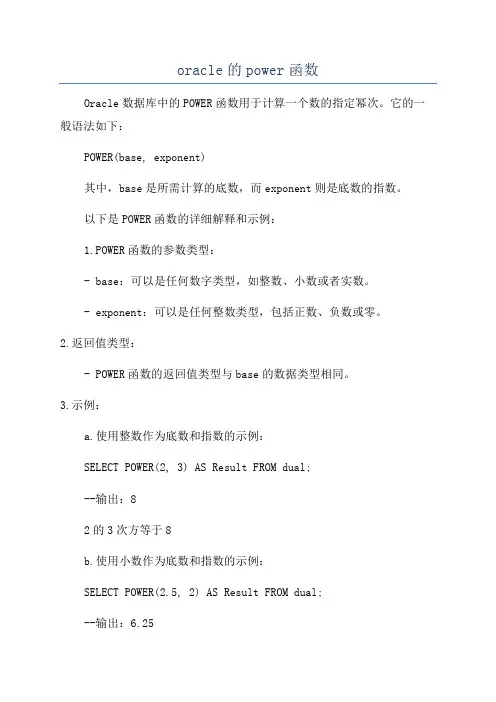
oracle的power函数Oracle数据库中的POWER函数用于计算一个数的指定幂次。
它的一般语法如下:POWER(base, exponent)其中,base是所需计算的底数,而exponent则是底数的指数。
以下是POWER函数的详细解释和示例:1.POWER函数的参数类型:- base:可以是任何数字类型,如整数、小数或者实数。
- exponent:可以是任何整数类型,包括正数、负数或零。
2.返回值类型:- POWER函数的返回值类型与base的数据类型相同。
3.示例:a.使用整数作为底数和指数的示例:SELECT POWER(2, 3) AS Result FROM dual;--输出:82的3次方等于8b.使用小数作为底数和指数的示例:SELECT POWER(2.5, 2) AS Result FROM dual;--输出:6.252.5的2次方等于6.25c.使用负数作为指数的示例:SELECT POWER(4, -2) AS Result FROM dual;--输出:0.06254的-2次方等于1/16,即0.0625d.使用0作为底数的示例:SELECT POWER(0, 3) AS Result FROM dual;--输出:00的任何正指数次方都等于0。
e.使用0作为指数的示例:SELECT POWER(2, 0) AS Result FROM dual;--输出:1任何数的0次方都等于1f.使用POWER函数进行表达式计算的示例:SELECT POWER(2 + 3, 2 - 1) AS Result FROM dual; --输出:5(2+3)的(2-1)次方等于5需要注意的是,POWER函数的底数不能为负数,并且不能为0且指数不能为负数的情况下,否则会返回空。
在进行POWER函数计算时,应始终注意数值范围以避免溢出或得到不准确的结果。
除了POWER函数,Oracle还提供了其他一些数学函数,如SQRT(计算开方)、LOG(计算对数)、EXP(计算指数)、ABS(返回绝对值)等,以满足各种数学计算的需求。
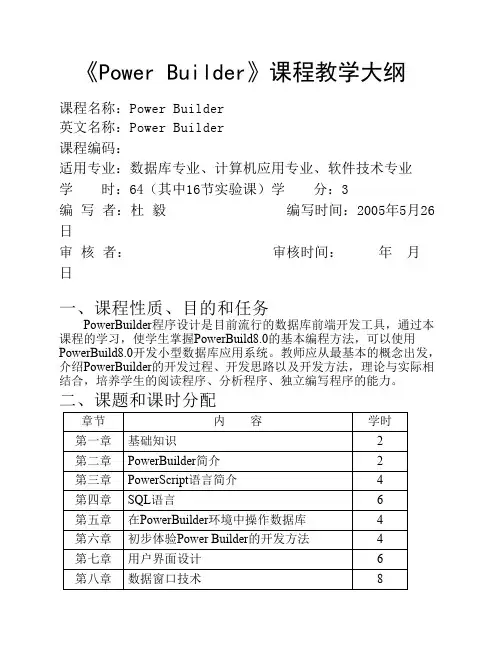
《Power Builder》课程教学大纲课程名称:Power Builder英文名称:Power Builder课程编码:适用专业:数据库专业、计算机应用专业、软件技术专业学 时:64(其中16节实验课)学 分:3编 写 者:杜 毅 编写时间:2005年5月26日审 核 者: 审核时间: 年 月 日一、课程性质、目的和任务PowerBuilder程序设计是目前流行的数据库前端开发工具,通过本课程的学习,使学生掌握PowerBuild8.0的基本编程方法,可以使用PowerBuild8.0开发小型数据库应用系统。
教师应从最基本的概念出发,介绍PowerBuilder的开发过程、开发思路以及开发方法,理论与实际相结合,培养学生的阅读程序、分析程序、独立编写程序的能力。
二、课题和课时分配章节内容学时第一章基础知识2第二章PowerBuilder简介2第三章PowerScript语言简介4第四章SQL语言6第五章在PowerBuilder环境中操作数据库4第六章初步体验Power Builder的开发方法4第七章用户界面设计6第八章数据窗口技术8第九章用户对象与软件可重用6第十章高级专题6合计48三、课程内容第一章基础知识第一节数据库应用模式的发展1.主机应用模式2.文件服务器应用模式3.客户/服务器应用模式4.文件服务器与客户/服务器的数据库操作5.分布式计算机应用模式6.Web网络应用模式教学要求:了解以上六种数据库应用模式的特点与使用情况。
第二节数据库应用系统开发方法概述1.结构化生命周期法2.快速原型法3.面向对象方法面向对象的基本概念面向对象的分析与设计面向对象技术在PowerBuilder中的实现4.PowerBuilder的开发方法教学要求:掌握结构化生命周期法、快速原型法方法的思想。
重点掌握并领会面向对象方法的思想以及在PB中的实现方法。
第二章 PowerBuilder简介1.PowerBuilder的特点2.PowerBuilder8.0的新特性3.PowerBuilder8.0对象概述对象、属性与事件,PowerBuilder库(Library),应用(Application)对象,窗口(Window)对象,数据窗口(DataWindow)对象,菜单(Menu),全局函数(Global function),查询(Query),结构(Structrue),用户(User)对象,工程(Project)对象4.PowerBuilder8.0的开发环境画板(Painter),PowerBuilder窗口,定制工具栏教学要求:了解PowerBuilder的特点与PowerBuilder8.0的新特性熟悉PowerBuilder8.0的对象和开发环境。
oracle forms builder开发流程英文版Oracle Forms Builder Development ProcessOracle Forms Builder is a powerful tool that allows developers to create interactive, database-driven applications. It offers a visual interface for designing forms, reports, and other user interfaces that can seamlessly integrate with Oracle databases. Here's a brief overview of the Oracle Forms Builder development process:1. Requirement Analysis:Begin by understanding the requirements of the application. Identify the necessary data fields, relationships, and business logic. Determine the user interface elements required, such as buttons, text fields, combo boxes, etc.2. Environment Setup:Ensure that you have the necessary software and licenses installed, including Oracle Forms Builder and the associatedOracle database. Set up your development environment, including the required tools and libraries.3. Database Design:Design the database schema based on the requirements. Create tables, views, and stored procedures as needed. Define relationships and constraints to ensure data integrity.4. Form Design:Open Oracle Forms Builder and start designing the form. Use the visual design tools to add controls, such as text fields, buttons, combo boxes, and other interface elements. Arrange these controls layout to create an intuitive and user-friendly interface.5. Data Binding:Bind the form controls to the database fields. Define the necessary data sources and queries to populate the form with data from the database. Set up triggers and event handlers to handle user interactions, such as button clicks or data validation.6. Logic Implementation:Implement the business logic using PL/SQL or other programming languages supported by Oracle Forms Builder. This includes data validation, calculations, and other operations required to process form data.7. Testing:Thoroughly test the form to ensure it functions correctly. Test various scenarios, including edge cases and error conditions. Use debugging tools to identify and fix any issues.8. Deployment:Deploy the form to the production environment. This involves packaging the form and deploying it to the server where it will be accessed by users. Ensure that the necessary dependencies and configurations are in place.9. Maintenance and Enhancements:Regularly monitor and maintain the form to address any issues or bugs that arise. Continuously improve the form based on user feedback and business requirements.中文翻译Oracle Forms Builder开发流程Oracle Forms Builder是一个强大的工具,允许开发人员创建交互式、基于数据库的应用程序。
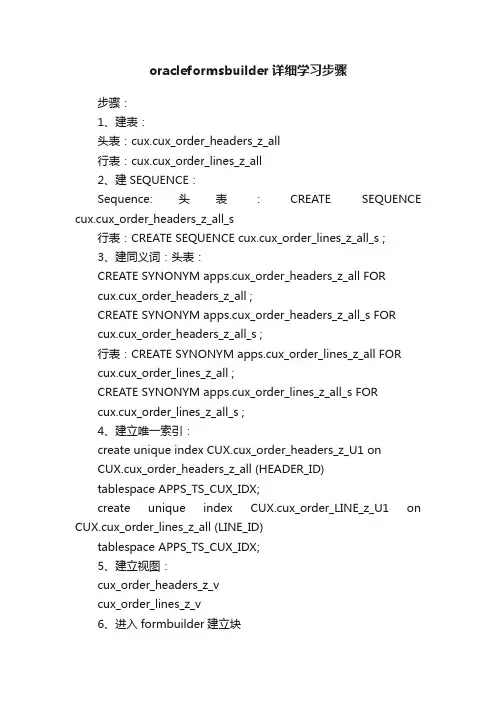
oracleformsbuilder详细学习步骤步骤:1、建表:头表:cux.cux_order_headers_z_all行表:cux.cux_order_lines_z_all2、建SEQUENCE:Sequence:头表:CREATE SEQUENCE cux.cux_order_headers_z_all_s行表:CREATE SEQUENCE cux.cux_order_lines_z_all_s ;3、建同义词:头表:CREATE SYNONYM apps.cux_order_headers_z_all FORcux.cux_order_headers_z_all ;CREATE SYNONYM apps.cux_order_headers_z_all_s FORcux.cux_order_headers_z_all_s ;行表:CREATE SYNONYM apps.cux_order_lines_z_all FORcux.cux_order_lines_z_all ;CREATE SYNONYM apps.cux_order_lines_z_all_s FORcux.cux_order_lines_z_all_s ;4、建立唯一索引:create unique index CUX.cux_order_headers_z_U1 onCUX.cux_order_headers_z_all (HEADER_ID)tablespace APPS_TS_CUX_IDX;create unique index CUX.cux_order_LINE_z_U1 on CUX.cux_order_lines_z_all (LINE_ID)tablespace APPS_TS_CUX_IDX;5、建立视图:cux_order_headers_z_vcux_order_lines_z_v6、进入formbuilder建立块7、创建程序包:(1)执行生成包语句:(2)DECLARE(3)BEGIN(4)HAND_PLSQL_AUTOCREATE.TABLE_HANDLE_PKG(P_TABLE_NAM E => 'CUX_ORDER_HEADERS_Z_ALL',(5) P_OWNER => 'CUX',(6) P_PRIMARY_KEY =>'HEADER_ID');(7)END;查看输出output,生成了创建包的语句8、创建存储过程:(1)执行生成存储过程语句:(2)DECLARE(3)BEGIN(4)HAND_PLSQL_AUTOCREATE.form_table_handle(p_block_name => 'HEADER',p_package_name => 'CUX_ORDER_HEADERS_Z_ALL_PKG'(5) ,p_table_name => 'CUX_ORDER_HEADERS_Z_ALL',p_primary_key =>'HEADER_ID');(6)END;输出output存储过程体语句;9、创建值列表:组织值列表编制人值列表10、创建参数:11、创建CUXORDER程序包12、头、行块中增加触发器13、建立主从块之间的关系14、注册程序。
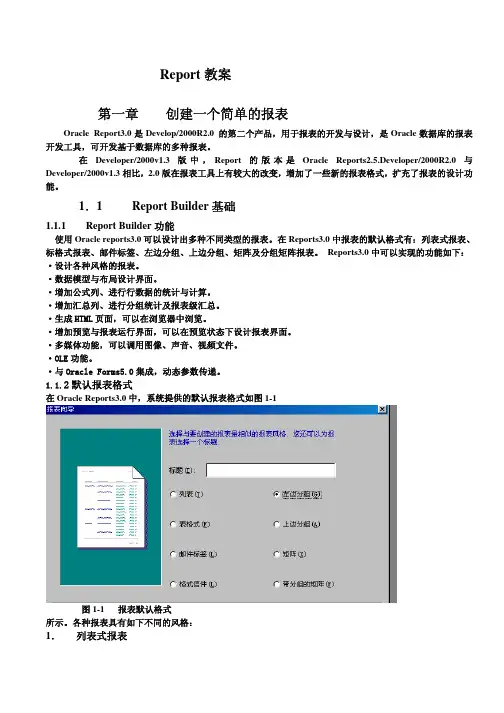
Report教案第一章 创建一个简单的报表Oracle Report3.0是Develop/2000R2.0 的第二个产品,用于报表的开发与设计,是Oracle数据库的报表开发工具,可开发基于数据库的多种报表。
在Developer/2000v1.3版中,Report的版本是Oracle Reports2.5.Developer/2000R2.0与Developer/2000v1.3相比,2.0版在报表工具上有较大的改变,增加了一些新的报表格式,扩充了报表的设计功能。
1.1 ReportBuilder基础Builder功能1.1.1 Report使用Oracle reports3.0可以设计出多种不同类型的报表。
在Reports3.0中报表的默认格式有:列表式报表、标格式报表、邮件标签、左边分组、上边分组、矩阵及分组矩阵报表。
Reports3.0中可以实现的功能如下:·设计各种风格的报表。
·数据模型与布局设计界面。
·增加公式列、进行行数据的统计与计算。
·增加汇总列、进行分组统计及报表级汇总。
·生成HTML页面,可以在浏览器中浏览。
·增加预览与报表运行界面,可以在预览状态下设计报表界面。
·多媒体功能,可以调用图像、声音、视频文件。
·OLE功能。
·与Oracle Forms5.0集成,动态参数传递。
1.1.2默认报表格式在Oracle Reports3.0中,系统提供的默认报表格式如图1-1图1-1 报表默认格式所示。
各种报表具有如下不同的风格:1.列表式报表列表示报表是普通的报表形式,也是最常用的一种报表。
这种报表的特点是各列的列名显示在域的上面。
列的数据从上向下打印输出。
如图1-2所示。
图1-2 列表式报表风格2.表格式报表表格式报表的显示方式是每页显示一个记录,打印完一条记录即换页。
如图1-3所示。
图1-3 表格式报表风格3.邮电标签报表这种报表主要用于打印信封封面。
Oracle基础必学知识点1. 数据库概念:Oracle是一种关系型数据库管理系统(RDBMS),用于存储和管理大量结构化数据。
它支持SQL语言,可以通过SQL语句进行数据查询、插入、更新和删除操作。
2. 数据库对象:Oracle数据库由多个对象组成,包括表、视图、索引、序列、存储过程等。
这些对象用于存储和处理数据,可以通过SQL语句进行操作。
3. 数据类型:Oracle支持多种数据类型,包括数字、字符、日期、大对象(LOB)等。
不同的数据类型用于存储不同类型的数据,可以根据需求选择合适的数据类型。
4. 表操作:在Oracle中,表用于存储数据。
可以使用CREATE TABLE语句创建表,使用INSERT语句插入数据,使用SELECT语句查询数据,使用UPDATE语句更新数据,使用DELETE语句删除数据。
5. 索引:索引是一种用于提高查询性能的数据结构。
在Oracle中,可以使用CREATE INDEX语句创建索引,通过索引可以快速定位到需要查询的数据,提高查询效率。
6. 数据约束:数据约束是用于保证数据的完整性和有效性的规则。
在Oracle中,可以使用约束来限制数据的取值范围、保证数据的唯一性等。
常见的约束类型包括主键约束、外键约束、唯一约束、非空约束等。
7. 视图:视图是一种虚拟表,它是从一个或多个表中获取数据的查询结果。
在Oracle中,可以使用CREATE VIEW语句创建视图,通过视图可以简化复杂的查询操作,提高数据的安全性。
8. 存储过程:存储过程是一组预先编译的SQL语句,存储在数据库中,并可以通过调用来执行。
在Oracle中,可以使用CREATE PROCEDURE语句创建存储过程,通过存储过程可以实现复杂的数据处理逻辑。
9. 事务控制:事务是一组逻辑操作,要么全部执行成功,要么全部回滚。
在Oracle中,可以使用BEGIN/END语句或者显式的事务语句(如COMMIT和ROLLBACK)来控制事务的提交或回滚。
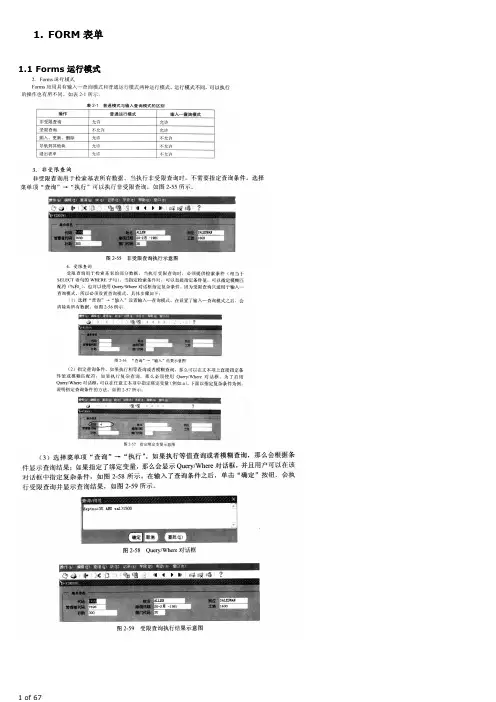
1.FORM表单1.1 Forms运行模式1.1 Form表单模块属性1.2 Form挂默认菜单及工具条即Menu Module处用:DEFAULT&SMARTBAR 1.3 Form表单之多表单应用1.4 多表单间传递参数1.4 Form参数详细使用—一个窗体使用前一窗体参数参数提供了一种简便的机制,它用来设置Form启动时所需要的输入值。
参数的变量类型可以是CHAR、NUMBER或DATE,在设计Form时定义。
在应用程序执行CALL_FORM、OPEN_FORM、RUN_PRODUCT等内部子程序时,可以向一个FORM传送参数。
参数也可以由操作员在启动Form时,从命令行输入。
参数提供了一种简便的机制,它用来设置Form启动时所需要的输入值。
参数的变量类型可以是CHAR、NUMBER或DATE,在设计Form时定义。
在应用程序执行CALL_FORM、OPEN_FORM、RUN_PRODUCT等内部子程序时,可以向一个FORM传送参数。
参数也可以由操作员在启动Form时,从命令行输入。
1.4.1创建并引用参数在对象导航器中点中“参数”(PARAMETER),然后在工具条中点击“创建”图标,即可创建参数。
创建后要在其属性窗口中设置属性。
Data Type 设置为CHAR、NUMBER或DATE。
Default 参数的缺省值,必须与参数的数据类型和长度一致。
Length 参数可存贮的最长字符数。
它只对 CHAR型参数有效,最大为64K。
NUMBER型参数的缺省值为23字节,DATE型参数的缺省值为7字节。
Name 参数的名称。
在PL/SQL中,可以引用参数,或给参数赋值,方法是将保留字PARAMETER置于参数名之前,如::PARAMETER.P_NAME1 :=’Qilu _Rubber’;或:block.item := :PARAMETER.P_NAME1;除了在PL/SQL中直接引用参数外,你也可以在某些内部子程序中,或者在对象属性中引用参数。
华东师范大学学校代码:10269学 号:63041500015基于O r a c l e E R P系统的F o r mB u i l d e r开发方法院、 系: 软件学院专 业: 软件工程研 究 方 向: 软件项目管理指 导 教 师: 余青松姓 名: 程序2006年3月Oracle ERP二次开发实用技术系列:之一:基于O r a c l e E R P系统的R e p o r t B u i l d e r开发方法之二:基于O r a c l e E R P系统的F o r m B u i l d e r开发方法之三:基于O r a c l e E R P系统的C o n c u r r e n t P r o g r a m开发方法之四:基于O r a c l e E R P系统的A l e r t开发方法之五:基于O r a c l e E R P系统的X M L P u b l i s h e r开发方法摘要摘要内容:Report Builder是Oracle ERP展示数据最重要的方式,也是二次开发中,工作量最多的一个部分。
对于Oracle ERP的二次开发来说,Report的开发与一般CS结构的Report开发,是有区别的,市面上有很多关于Report的书籍,但是相信看过任何一本的人都知道,在你实际开发ERP Report的过程中,还是问题不断,而且这些问题通常是书本上无法解决的。
就算是Oracle的标准培训文档,也只能给你一个大概的蓝图。
本篇文章,就是将一些实际开发过程中的步骤、策略、技巧、疑难杂症展现出来。
本文通过步骤、安装、策略、疑难四个方面讲解Report的开发,通过最通俗的语言讲解,其中一些技巧,是公司同事经验积累的成果,只是由我将它记录下来,其中难免有一些错误,或者疑难问题上不够准确的地方,但是只要能给你的开发和学习一些帮助,就是作者最大的欣慰了。
本文第二章引用了itpub上一位网友的文章,他写的很详细了,也是很基础很重要的,我就直接引用了,不用太麻烦去写了。
power builder 字符串下载温馨提示:该文档是我店铺精心编制而成,希望大家下载以后,能够帮助大家解决实际的问题。
文档下载后可定制随意修改,请根据实际需要进行相应的调整和使用,谢谢!并且,本店铺为大家提供各种各样类型的实用资料,如教育随笔、日记赏析、句子摘抄、古诗大全、经典美文、话题作文、工作总结、词语解析、文案摘录、其他资料等等,如想了解不同资料格式和写法,敬请关注!Download tips: This document is carefully compiled by the editor. I hope that after you download them, they can help you solve practical problems. The document can be customized and modified after downloading, please adjust and use it according to actual needs, thank you!In addition, our shop provides you with various types of practical materials, suchas educational essays, diary appreciation, sentence excerpts, ancient poems, classic articles, topic composition, work summary, word parsing, copy excerpts, other materials and so on, want to know different data formats and writing methods, please pay attention!探究PowerBuilder中的字符串处理技术在现代软件开发中,字符串处理技术是至关重要的一部分,特别是在诸如数据清洗、文本分析、报表生成等方面。
OracleWorkflowBuilder工作流工具培训教程工作流培训教程修改记录签名职务姓名签字日期内容索引1简介 (1)1.1目标 (1)1.2范围 (1)2WORKFLOW BUILDER 安装 (1)2.1安装过程 (1)2.1.1安装 (1)2.1.2更改字符集 (1)2.2安装注意事项 (3)3WORKFLOW BUILDER使用 (3)3.1菜单介绍 (3)3.1.1File (3)3.1.2Edit (3)3.1.3View (3)3.1.4Window (3)3.1.5help (4)3.2工具栏介绍 (4)4工作流组成 (5)4.1工作流(I TEM T YPE) (5)4.2活动(A CTIVITY) (5)4.3流程(P ROCESS) (5)4.4消息(M ESSAGE) (5)4.5函数(F UNCTION) (5)4.6事件(E VENTS) (6)4.7通知(N OTIFICATION) (6) 4.8查找类型(L OOKUP T YPE) (6) 5工作流开发 (6)5.1创建流程定义 (6)5.1.1从下往上定义 (6)5.1.2从上往下定义 (7)5.1.3打开保存单据类型 (7)5.2定义工作流组件 (8)5.2.1单据类型(Item Type) (8) 5.2.2查找类型(Lookup Type) (11) 5.2.3消息(Message) (13)5.2.4活动(Activities) (15)5.3定义一个流程图 (18)5.3.1增加一个节点 (19)5.3.2定义一个节点 (19)5.3.3定义活动属性值 (20)6CCMIS中的工作流开发 (21)6.1 .......................................................................................... 错误!未定义书签。
第1章 PowerBu i l der概述教学提示:PowerBuilder是美国Powersoft公司推出的一种使用方便、功能强大的数据库应用系统的前端开发工具。
最新的PowerBuilder 9.0版本扩展并改进了许多功能,增加了对.NET、PBDOM、XML DataWindow、RAD JavaServer Pages和PBNI的支持。
PowerBuilder 可以实现与多种大型数据库管理系统的连接,是一个高度集成的数据库应用系统开发工具。
教学要求:本章首先介绍PowerBuilder的主要特点,重点使读者掌握PowerBuilder 9.0集成开发环境的组成和基本用法,学会使用PowerBuilder 9.0开发简单应用程序的基本过程。
1.1 PowerBuilder简介PowerBuilder是著名的数据库应用开发工具生产厂商Sybase Inc.的子公司PowerSoft 公司于1991年6月推出的产品。
它基于客户机/服务器体系结构研制设计,用于数据库应用程序的客户端开发。
PowerBuilder采用了面向对象和可视化技术,提供可视化的应用开发环境,利用PowerBuilder可以方便、快捷地开发出利用后台服务器中的数据库管理系统的数据库应用系统。
这些应用系统既可以运行于单机上,也可以运行于局域网或因特网平台上。
PowerBuilder自投放市场以来,以其独特的体系结构和强大的功能受到广大开发人员的好评和欢迎,在数据库前端开发工具市场占据了很大的份额。
自1991年6月PowerBuilder 1.0投放市场以来,PowerBuilder经历了多次升级换代,其性能大大增强和改善,使用效率大大提高。
特别是随着因特网的发展,PowerBuilder开始与Internet相结合,分别于1997年12月和1998年11月推出PowerBuilder 6.0和PowerBuilder 7.0,提供了Internet开发环境所需要的组件、库和工具,增强了Internet的应用能力,并提供了更加高效的数据窗口对象。
Oracle Warehouse Builder Quick Start GuideJean-Pierre Dijcks, Igor Machin,March 9, 2004What Can You Expect from this Starter Kit?First and foremost, you can expect a helping hand in navigating through the extensive functionality of Warehouse Builder. After reading this starter kit you should understand which activities you are supposed to do - in which order - to complete a Warehouse Builder project from start to finish.All chapters in this starter kit are a maximum of 2 pages long. Therefore, this starter kit will focus on the main steps you must perform to (for example) install the product. The kit is most definitely not trying to explain every possible installation screen and step.In general, the overview of activities to complete a Warehouse Builder project is in this specific order:• Install client and server software• Install client and server software• Set up the runtime platform• Set up the design repository• Create a Project• Create the modules (sources and targets)• Create mappings (data flows to transform and load data)• Create process flows to manage the data loads• Generate the code from the design• Deploy the code to the database• Execute the process flows to load dataThese activities are discussed in the following chapters.Installation steps for a new installThis kit assumes that you are installing version 10g of Warehouse Builder.Step 1: Installing the software You can install the product from a CD or from a download. In either case, launch the setup program, which launches the Universal Installer. Then use the following list of actions:• Install Warehouse Builder in a separate Oracle home• First install the client software; when this is completed go to the next install • Now install the server side software (this must be done!)• If you are installing client and server on the same machine, use the same home • Otherwise use a new server home for the server side software• The server side install launches the Runtime Assistant, with which you must create: • A runtime repository => the user that will deploy and run your jobs Suggestedschema name: RTRepos• A runtime access user => a security user to access the runtime repository Suggested schema name: RTAccess• At least one target user => your actual data warehouse schema(s) Suggested schema name: RTTargetSetting up the Design RepositoryYou have now successfully installed the software and set up the runtime platform and users. The next step is to create your Design Repository.• Go to the new Warehouse Builder program group and find the entry named OWB Repository Assistant• Launch this and create the actual repository that you connect to with the design client software Suggested schema name: OWB10You are now set up to start working with Warehouse Builder.Your First Steps in Warehouse BuilderAfter starting the design client using the OWB Client entry in the Warehouse Builder program group, you will perform a couple of steps to define your working environment. Create a ProjectThe first thing to do is create a Project in Warehouse Builder. This project holds the metadata you will be defining and importing for your project. The project stores metadata in modules, which you need to create as a second step.Create a Set of ModulesThe second thing to create is a set of modules in your new project. Do this according to the following rules:• Create one database/Oracle module for each target schema you are expectingto use in your data warehouse.• Be sure to specify a ‘location’ while creating each module. Locations are theobjects that will be registered to hold the physical schema and machineinformation.For example:• I am creating a module called WH for my warehouse.• I will add a location called WH_LOC to this module, and pick Oracle 10g for database.• Later in the process, when registering this WH_LOC location, I specify the following information for it:- Machine name where the data warehouse database is located- Database information (Service Name, Port)- Schema in which I want my target warehouse objects to reside• Create one database module for each database source schema from which youwill be extracting metadata and data. Again, make sure to specify a location for each of these modules. For example:• I am creating a module called OE_SRC that holds my order entry tables• I will create a location for this module called OE_SRC_LOC• When registering this location later I will use:• Machine name where the source database is located• Database information for the source database (Service name and Port)• Schema in which these source objects are found• Create one flat file module for each directory in which you will have source files • You can ignore the process node for now• You can ignore the applications node for now (if you have SAP create one ofthese, too)Creating a Runtime Repository ConnectionThe last step is to connect your design repository (OWB10 user) to the runtime repository so you can deploy objects into your actual warehouse. Find the Runtime Repository Connection node at the bottom of your project navigation tree (expand your project for this). Give the connection a logical name like RTRepos_Connection.This allows you to provide multiple runtime systems for the same metadata. So if you want development and production systems, create two of these objects.Specify the connection information for the runtime repository and the runtime access user in the Runtime Repository Connection.You are now ready to start working on your project!Working with Source ModulesA source module contains the metadata definitions for your source schema objects. This module will have the table and column names for the tables you will be extracting from.Now that you have a module, you must first import metadata definitions into it. Do the following:For Oracle modules:• Use the Project > Import menu item, to invoke the wizard for finding your sourcetables, views, external tables etc…• Import these definitions (note that you are not importing any data) For File modules: • Locate your file(s)• Sample the file(s) to make the file definition know to Warehouse Builder• Import the file(s) (note that you are not importing any data even as you sampledata to define the file!)You are now ready to work with sources in Warehouse Builder!Working with your Target ModulesTarget modules are mainly used to define your warehouse structures. In these you will define the target tables, dimensions, and cubes. The target will also hold the ETL processes in the form of mappings.Working in a target module involves defining the objects you require. Follow this typical sequence when defining objects:1. Supporting tables, views, or external tables2. Dimensions3. Cubes4. Mappings (more about these in the next chapter)5. Materialized views for summary managementOnce you have completed your design, make sure to validate the design and let Warehouse Builder take a look at the logical validity. Warehouse Builder will catch things like foreign key inconsistencies and datatype mismatches.Once you have defined and validated your design, you are set with the target preparation!Working with ETLIn Warehouse Builder ETL (extraction, transformation, and load) consists of two main areas:• Mappings (or data flow diagrams)• Processes (or process flow diagrams – these can contain multiple mappings)In this section we will cover mappings, which do the bulk of the work for the ETL process.Mapping ConceptsThere are several key concepts to understand about mapping:• Sources and targets => the target object receives data that is extracted from the source • Operators => are used to design a mapping. These are atomic operations such as a join of several tables• Groups => are a part of an operator and group together a row set with a singlecardinality• Attributes => are the granular objects that you move data from or into• Configuration => allows you to change the physical implementation of the generated code• Operating mode (or Set based vs. Row based) => the way Warehouse Builderprocesses your data. Set based is fast, row based is slow but controlled• Audit level => is the level of detail you want to get from tracing the data load• Debugger => allows you to view test data flowing through the mapping• Generate => create the code that will be placed on the database• Deployment => compiles the code and stores it on the database• Execution => runs the stored packaged procedures you deployedCreate MappingsAt a high conceptual level, these are the tasks you should perform to create mappings in the target module:• Know what you want in your target• Investigate/inspect your source data•Set up the object grants or create external tables for files to guarantee access for themapping execution• Determine the grain of delivered data• Might require aggregations• Map out the transformations in your head or on paper• Start defining the mappings using operators; as a guideline use atomic operations in operators• Validate the mappings• Use debugger to verify your data flow for correctness• Do this at the end when you have a “completed” mapping• Use test data to test, or when all source data is not available• Fix your mappings based on debug results to ensure correct transformations• Validate the mappings againMapping Best PracticesThere are a few hints or guidelines to ensure that you create scalable and logical mappings in Warehouse Builder:• Typically you will create one mapping for one entity on the target schema. Forexample: one mapping will load into one dimension• Do not join across remote databases; rather stage both in the target via separatemappings and join in the target• Use atomic operations in an operator; do not code a lot of logic in a view as you will lose the data lineage and impact analysis that Warehouse Builder provides• Aim for set based processing => it is faster• Use correlated commit in multi-target situations• Aim for explicit error handling => know your data!After you have completed your mappings, you are ready for the next step in the design process.Working with ProcessesProcess flows are the finalizing component of the ETL process. A process flow ensures that a set of mappings is executed in the correct order and handles exceptions and notifications in an automated way.Process Flow ConceptsSome of the things you will need to understand in process flows are:• Process flow module => holds all process flows (compare to target module holding all target objects)• Process flow package => executable unit of work in Warehouse Builder• Process flow => handles dependencies for many activities• Activity => a single unit of work for the process, for example a mapping or the FTP activity• Status => return status of an activity; can be success, warning, or errorCreate a Process FlowA process flow is a chain of events modeled in a diagram. Here the user can consolidate multiple mappings and other external activities in a single processing entity, taking care of the dependencies and the sequentiality as well as the error handling of the process. So the things you conceptually do to create a process flow are:• Know the dependency and sequence of activities• Determine what to do for every status for each activity• Set the statuses and ensure you cannot run into a loop• Model atomic activities, and model activities such as FTP or FILECHECK in theprocess, not the mapping• Model explicit Success, error and if need be warning END activities• Validate the process flowProcess Flow Best PracticesSome things to take note of when creating process flows:• Use process flows to record and process inter-mapping dependencies• Implement one process flow per load, for example one flow for loading staging tables and one flow for loading the warehouse• Implement composite process flows to manage the entire warehouse load• Use status to route the process flow and beware of SUCCESS / WARNING / ERROR processing• Beware of AND / OR behavior in a processIf you have designed your process flows you are ready to deploy the system to the various database schemas.Generate and Deploy the SystemAfter working on the design for quite a while, you are now ready to place that design onto the database. This process involves two separate logical steps:• Generate the code• Deploy the codeWithin Warehouse Builder these steps are bundled together, so the generate step is a result of deploying if you use Warehouse Builder’s Deployment Manager. Deployment ConceptsThere is only one concept that you will need to understand and that is what deployment does:• The deployment step (and ‘generate’ within it) creates code from the logical modelsand stores this code in the Oracle database. For objects you get DDL scripts, formappings you get (mostly) PL/SQL and for process flows you get XPDL• Apart from storing the code in the database, the same code is also made known in the runtime repository so you can use Warehouse Builder to execute it (see next chapter) • Locations => the physical place where you will be deploying the code. The logicallocation from the design will be made physical in deployment• Registering a location => the process of making a location physical by providing themachine and database information including the physical schema• Connector => the way one location (or schema) is connected to another location (orschema/directory) owned by the target location. These connectors can become:a. Schema reference (from target schema to source schema)b. Database link (from target schema to source schema)c. Oracle Directory (from target database to source directory)Deploying your ObjectsTo ensure that your deployment step goes well, follow the list below exactly in its order: • Register all locations first (all targets and all sources)Note: if you do not register the source, your code will not deploy!• Deploy all connectors in all modules• Within a location, deploy in this sequence:•Follow your data flowSRC => STG => WHNote: There is nothing to deploy for any source location! Note 2: YouMUST register the source even if you do not deploy to it.• Within a module:a. Data objects go first (tables, views, dimensions, cubes, etc…)b. Mapping objectsc. Process flowsDealing with Errors in DeploymentIf you get an error follow these rules: (Note: you have to open up the message you see, the top error is a PL/SQL stack error!)• Verify your privileges on the source objects. For example, if you want to select from an object in the OE schema, you must give “grant select on object” to the RT Target user • Verify all location registrations. For example, source locations must be registered to the source machine and the schema in which the actual tables reside.• Verify connectors are deployed :a.Is the directory object for the external table deployed?b. If you look into the code for the mapping, do you have schema references ordblinks => if not verify location registration and connectorsCommon ErrorsThis is a list of common errors in deployment, and the most common causes for them: • ORA-00942 => You have not given explicit grants on the source object to the RTTarget user => You have registered the source location incorrectly• ORA-00902 => You are missing a dependent construct while creating a PL/SQLpackage; deploy the dependent object first, then redeploy this objectExecuting the CodeExecution of code is only relevant to:• Mappings• ProcessesThe reason for this is that these are components that can be run and that spawn off jobs that perform your ETL and actually load data. Executing your Code In all but the simplest cases and in test scenarios you should be executing process flowsrather than mappings. Follow these rules on executing your code:• Determine which objects must be executed (if you have more, create a process flow and embed in there)• Choose the execution mechanism and understand what to do here• Execute the process flows• Verify the loads using the administration tools of either:• The scheduler• Warehouse Builder After executing your code, you are all set to run yourwarehouse loads on a regular basis.More InformationFor more detailed information take a look at these additional resources:• Oracle white papers on OTN for detailed information about specific functionality • The OTN forum on Warehouse Builder where you can ask questions. The site is monitored by Oracle Warehouse Builder Product Management(/forums/forum.jsp?forum=57)• The Warehouse Builder documentation:a. User Guideb. Installation and Configuration Guidec. Scripting Guided. Transformation GuideFor any feedback or enhancements to this Quick Start Guide, please do use the Warehouse Builder OTN forum as well.SummaryTo reiterate, you have just completed a set of steps using Warehouse Builder, which have allowed you to go from nothing to a working data warehouse. These steps were:• Installed client and server software• Set up the runtime platform• Set up the design repository• Created a Project• Created the modules (sources and targets)• Created mappings (data flows to transform and load data)• Created processes to manage the data load• Generated the code from the design• Deployed the code to the database• Executed the process flows and loaded dataNow you are ready to create many more projects using the same flow.。
ORALCE8.0.5+PowerBuilder6.5数据库学习笔记作者:一位超级老菜鸟版权所有,随便拷贝!说明:初学Oracle+Powerbuild,本文档可能还有很多问题,请大家多批评指正。
目录一、运行环境 (2)二、Oracle 安装 (2)三、Oracle :建立数据库 (2)四、查看监听状态(Listener),配置服务名(Service Name) (5)(一)在windows里查看监听状态 (5)(二)使用Oracle Net8 Assistant 查看、修改监听 (7)(三)注册一个Service Name以访问数据库 (8)五、建立访问数据库的用户账号 (12)六、使用用户账号连接数据库,创建表 (14)七、测试连接库,操作数据表 (17)(一)使用sqlplus连接数据库 (17)(二)使用服务器自带的sql plus 操作界面 (20)八、使用PowerBuilder6.5 连接Oracle数据库 (21)(一)专属连接 (21)(二)使用Odbc连接 (24)九、结束语 (28)一、运行环境操作系统:Windows Xp Or windows server 2003,Win7的32为没有试过,反正64位不行。
安装版本:Oracle 8.0.5测试连接:PowerBuilder 6.5为什么版本这么低呢?以前别人的程序就这样开发的,需要在上面改,同事们说必须、只能用这样的版本,O了没?O 了。
二、Oracl e 安装安装服务器,不需要安装客户端,服务器端含有类似客户端的操作功能,学会服务器操作客户端也就会了。
三、Oracl e :建立数据库1、「开始」菜单\程序\Oracle for Windows NT\ Oracle Database Assistant可以创建数据库、删除数据库,编辑数据库环境2、创建数据库3、选择默认的,如果有想慢慢研究一下的话,可以选择custom。
4、Next,这个默认就可以了5、建立一个空库。
如图:然后点击Finish,后面遇到提示就点击OK就行了。
注意下面的提示,数据库的名称(SID)为orc1 。
好像系统默认建立的都叫Orc什么的,如果要自己创建开始用Custom 。
进度条到100% 后就OK了。
完成。
本例为orc1,oracle安装路径为d:\orant如果要删除数据库的话,还是使用Oracle Database Assistant。
选择delete database 。
选中后会提示你输入密码。
默认密码是oracle(小写)。
中途会有提示,选中YES就好了。
把不需要的删除完就选中CANCEL 。
所以的库都会现成windows的服务,也会占用空间,消耗硬盘和CPU、内存的资源。
四、查看监听状态(Listener),配置服务名(Service Name)(一)在windows里查看监听状态1、在计算机中运行(开始菜单)命令cmd进入DOS命令行,输入:netstat –na之前我有三个库:orcL 、orc0和orc1 ,显示结果如下:C:\Documents and Settings\Administrator>netstat -naActive ConnectionsProto Local Address Foreign Address StateTCP 0.0.0.0:111 0.0.0.0:0 LISTENINGTCP 0.0.0.0:135 0.0.0.0:0 LISTENINGTCP 0.0.0.0:445 0.0.0.0:0 LISTENINGTCP 0.0.0.0:1025 0.0.0.0:0 LISTENINGTCP 0.0.0.0:1026 0.0.0.0:0 LISTENINGTCP 0.0.0.0:1027 0.0.0.0:0 LISTENINGTCP 0.0.0.0:1028 0.0.0.0:0 LISTENINGTCP 0.0.0.0:7937 0.0.0.0:0 LISTENINGTCP 0.0.0.0:36890 0.0.0.0:0 LISTENINGTCP 127.0.0.1:1037 0.0.0.0:0 LISTENINGTCP 127.0.0.1:1521 0.0.0.0:0 LISTENINGTCP 192.168.152.131:139 0.0.0.0:0 LISTENINGTCP 192.168.152.131:1045 192.168.152.131:1521 ESTABLISHEDTCP 192.168.152.131:1046 192.168.152.131:1521 ESTABLISHEDTCP 192.168.152.131:1047 192.168.152.131:1521 ESTABLISHEDTCP 192.168.152.131:1048 192.168.152.131:1521 ESTABLISHEDTCP 192.168.152.131:1521 0.0.0.0:0 LISTENINGTCP 192.168.152.131:1521 192.168.152.131:1045 ESTABLISHEDTCP 192.168.152.131:1521 192.168.152.131:1046 ESTABLISHED TCP 192.168.152.131:1521 192.168.152.131:1047 ESTABLISHED TCP 192.168.152.131:1521 192.168.152.131:1048 ESTABLISHED TCP 192.168.152.131:1526 0.0.0.0:0 LISTENING UDP 0.0.0.0:111 *:*UDP 0.0.0.0:445 *:*UDP 0.0.0.0:500 *:*UDP 0.0.0.0:4500 *:*UDP 127.0.0.1:123 *:*UDP 127.0.0.1:1900 *:*UDP 192.168.152.131:123 *:*UDP 192.168.152.131:137 *:*UDP 192.168.152.131:138 *:*UDP 192.168.152.131:1900 *:*2、当我把orcL和orc0库删除后,再运行:C:\Documents and Settings\Administrator>netstat -naActive ConnectionsProto Local Address Foreign Address StateTCP 0.0.0.0:111 0.0.0.0:0 LISTENING TCP 0.0.0.0:135 0.0.0.0:0 LISTENING TCP 0.0.0.0:445 0.0.0.0:0 LISTENING TCP 0.0.0.0:7937 0.0.0.0:0 LISTENING TCP 0.0.0.0:36890 0.0.0.0:0 LISTENING TCP 127.0.0.1:1037 0.0.0.0:0 LISTENING TCP 127.0.0.1:1521 0.0.0.0:0 LISTENING TCP 192.168.152.131:139 0.0.0.0:0 LISTENING TCP 192.168.152.131:1521 0.0.0.0:0 LISTENING TCP 192.168.152.131:1526 0.0.0.0:0 LISTENING UDP 0.0.0.0:111 *:*UDP 0.0.0.0:445 *:*UDP 0.0.0.0:500 *:*UDP 0.0.0.0:4500 *:*UDP 127.0.0.1:123 *:*UDP 127.0.0.1:1900 *:*UDP 192.168.152.131:123 *:*UDP 192.168.152.131:137 *:*UDP 192.168.152.131:138 *:*UDP 192.168.152.131:1900 *:*C:\Documents and Settings\Administrator>3、这里需要注意的是TCP协议端口 1521 和 1526 ,这个是后面连接数据库需要使用的,记下来。
这是监听端口,对于windows开启的服务(可以在控制面板中服务中查看):同时看到orc1的服务也自动启动了。
(二)使用Oracle Net8 Assistant 查看、修改监听启动:Oracle Net8 Assistant ,选择YES现在需要看的是Service Names和ListenerListener :也可以查看到TCP端口1521(默认的),后面选项卡还有个1526 。
说明:使用客户端的时候,也是用这个 Net8 Assistant 。
(三)注册一个Service Name以访问数据库Service Name和SID的区别(下面两段转自互联网):自从Oracle 8i之后,Oracle就推荐使用service name而不是SID来连接数据库了,SID是数据库的唯一的名字,要连接使用SID连接同一个数据库的话就只能用这一个名字,别无他法。
service name是连接数据库的时候使用的别名,你可以在listener.ora中静态的设置好service name,启动listener之后这个service name会被注册到listener,然后就可以使用service name替代SID来连接数据库了。
使用service name有以下几个好处: SID有长度的限制,只能允许最长8个字符,而service name最长可达到255字节,还可以自己取名字,所以完全可以取一个易于读懂的service name,比SID方便多了,比如下面这个。
要改SID是一件很难的事情,而修改service name的话就简单多了,这就使得我们可以非常简单的在不修改客户端应用的情况下将应用从一个数据库切换到另外一个数据库上面去。
可以将多个service name指向同一个数据库,这样我们可以通过不同的service name来去不同功能的客户端应用,比如说sales应用使用sales.mycompany的service name,purchase应用则使用purchase.mycompany这样的service name。
服务名自己取吧,但是建议有一定含义,并且要记住。
我这里仅为实验示例,自己取一熟悉的。
1、Host Name可以为本机名称(服务器名称),也可以为IP地址(本例中的IP地址为:192.168.152.131)2、端口就是上面那个1521,好像还可以使1526 (前面看到过得)。