蓝牙聊天程序代码解析
- 格式:pdf
- 大小:183.71 KB
- 文档页数:15
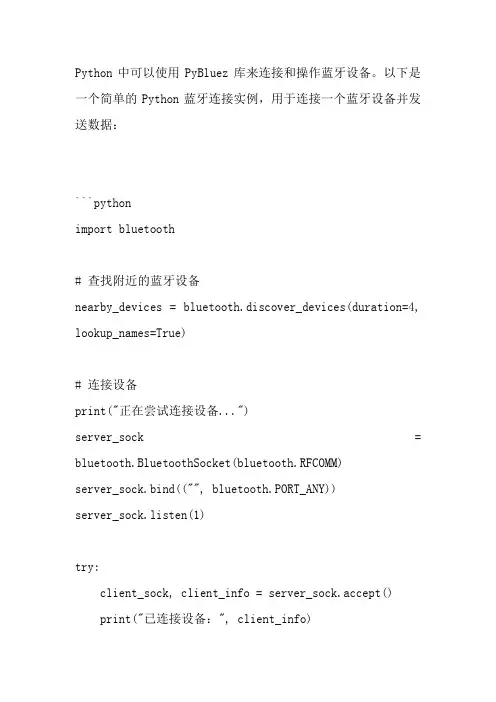
Python中可以使用PyBluez库来连接和操作蓝牙设备。
以下是一个简单的Python蓝牙连接实例,用于连接一个蓝牙设备并发送数据:```pythonimport bluetooth# 查找附近的蓝牙设备nearby_devices = bluetooth.discover_devices(duration=4, lookup_names=True)# 连接设备print("正在尝试连接设备...")server_sock = bluetooth.BluetoothSocket(bluetooth.RFCOMM)server_sock.bind(("", bluetooth.PORT_ANY))server_sock.listen(1)try:client_sock, client_info = server_sock.accept()print("已连接设备:", client_info)while True:data = client_sock.recv(1024)if not data:breakprint("收到数据:", data)finally:print("已关闭连接")client_sock.close()server_sock.close()```在上面的代码中,我们首先使用`bluetooth.discover_devices()`函数查找附近的蓝牙设备,并返回一个包含附近设备的列表。
然后,我们使用`bluetooth.BluetoothSocket()`函数创建一个蓝牙套接字,并将其绑定到空地址和任意端口上。
接着,我们使用`server_sock.listen(1)`方法使套接字进入监听状态,等待客户端连接。
一旦有客户端连接,我们使用`server_sock.accept()`方法接受连接请求,并返回客户端套接字和客户端信息。
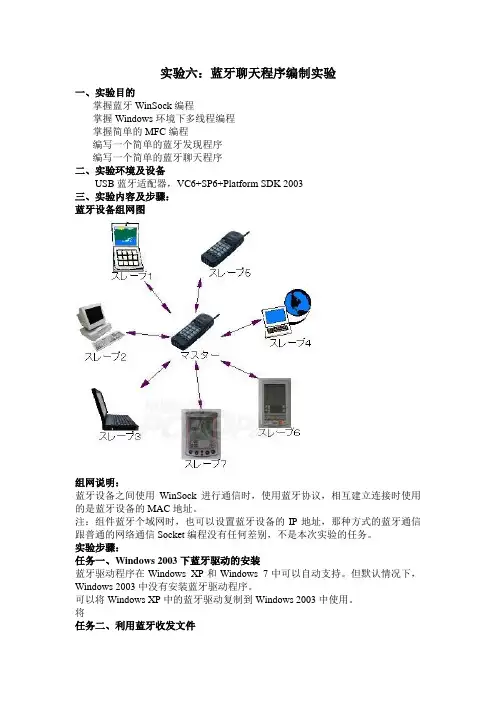
实验六:蓝牙聊天程序编制实验一、实验目的掌握蓝牙WinSock编程掌握Windows环境下多线程编程掌握简单的MFC编程编写一个简单的蓝牙发现程序编写一个简单的蓝牙聊天程序二、实验环境及设备USB蓝牙适配器,VC6+SP6+Platform SDK 2003三、实验内容及步骤:蓝牙设备组网图组网说明:蓝牙设备之间使用WinSock进行通信时,使用蓝牙协议,相互建立连接时使用的是蓝牙设备的MAC地址。
注:组件蓝牙个域网时,也可以设置蓝牙设备的IP地址,那种方式的蓝牙通信跟普通的网络通信Socket编程没有任何差别,不是本次实验的任务。
实验步骤:任务一、Windows 2003下蓝牙驱动的安装蓝牙驱动程序在Windows XP和Windows 7中可以自动支持。
但默认情况下,Windows 2003中没有安装蓝牙驱动程序。
可以将Windows XP中的蓝牙驱动复制到Windows 2003中使用。
将任务二、利用蓝牙收发文件任务三、利用蓝牙编写简单的聊天程序1、VC6开发环境的搭建使用VC++开发蓝牙应用程序需要Platform SDK 2003的支持,另外需要在项目目录中添加Platform SDK 2003的include、lib。
2、蓝牙设备的设置选中选项中的“允许Bluetooth设备查找此计算机”3、Windows自带的蓝牙通信支持右键蓝牙图标,可以发现其它Bluetooth设备,可以收发文件五、蓝牙编程要点蓝牙发现使用到的WinSock函数有:BluetoothFindFirstRadio()、BluetoothFindNextRadio()、BluetoothFindRadioClose(),以上三个函数用于枚举自己的蓝牙设备的发射信道;BluetoothFindFirstDevice()、BluetoothFindNextDevice()、BluetoothFindDeviceClose(),以上三个函数用于枚举其它蓝牙设备,关键是要获取对方的MAC地址。
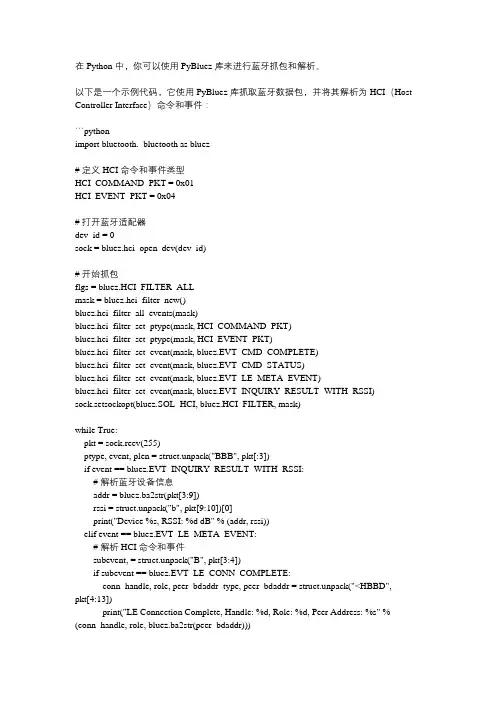
在 Python 中,你可以使用 PyBluez 库来进行蓝牙抓包和解析。
以下是一个示例代码,它使用 PyBluez 库抓取蓝牙数据包,并将其解析为 HCI(Host Controller Interface)命令和事件:```pythonimport bluetooth._bluetooth as bluez# 定义 HCI 命令和事件类型HCI_COMMAND_PKT = 0x01HCI_EVENT_PKT = 0x04# 打开蓝牙适配器dev_id = 0sock = bluez.hci_open_dev(dev_id)# 开始抓包flgs = bluez.HCI_FILTER_ALLmask = bluez.hci_filter_new()bluez.hci_filter_all_events(mask)bluez.hci_filter_set_ptype(mask, HCI_COMMAND_PKT)bluez.hci_filter_set_ptype(mask, HCI_EVENT_PKT)bluez.hci_filter_set_event(mask, bluez.EVT_CMD_COMPLETE)bluez.hci_filter_set_event(mask, bluez.EVT_CMD_STATUS)bluez.hci_filter_set_event(mask, bluez.EVT_LE_META_EVENT)bluez.hci_filter_set_event(mask, bluez.EVT_INQUIRY_RESULT_WITH_RSSI)sock.setsockopt(bluez.SOL_HCI, bluez.HCI_FILTER, mask)while True:pkt = sock.recv(255)ptype, event, plen = struct.unpack("BBB", pkt[:3])if event == bluez.EVT_INQUIRY_RESULT_WITH_RSSI:# 解析蓝牙设备信息addr = bluez.ba2str(pkt[3:9])rssi = struct.unpack("b", pkt[9:10])[0]print("Device %s, RSSI: %d dB" % (addr, rssi))elif event == bluez.EVT_LE_META_EVENT:# 解析 HCI 命令和事件subevent, = struct.unpack("B", pkt[3:4])if subevent == bluez.EVT_LE_CONN_COMPLETE:conn_handle, role, peer_bdaddr_type, peer_bdaddr = struct.unpack("<HBBD",pkt[4:13])print("LE Connection Complete, Handle: %d, Role: %d, Peer Address: %s" % (conn_handle, role, bluez.ba2str(peer_bdaddr)))elif subevent == bluez.EVT_LE_ADVERTISING_REPORT:num_reports = struct.unpack("B", pkt[4:5])[0]for i in range(num_reports):# 解析蓝牙广告数据data_len = struct.unpack("B", pkt[12:13])[0]data = pkt[13:13+data_len]print("Advertising Report, Data: %s" % data)# 关闭蓝牙适配器sock.close()```在这个示例中,我们首先使用 `hci_open_dev` 函数打开蓝牙适配器,并使用`hci_filter_new` 和相关函数设置过滤器以捕获 HCI 命令和事件。
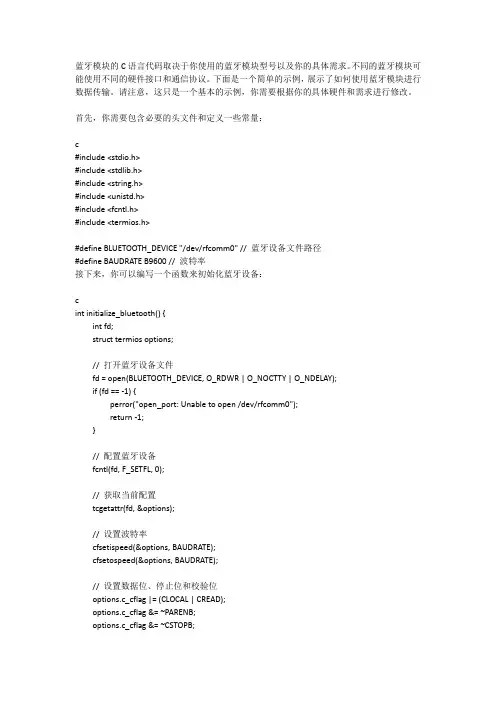
蓝牙模块的C语言代码取决于你使用的蓝牙模块型号以及你的具体需求。
不同的蓝牙模块可能使用不同的硬件接口和通信协议。
下面是一个简单的示例,展示了如何使用蓝牙模块进行数据传输。
请注意,这只是一个基本的示例,你需要根据你的具体硬件和需求进行修改。
首先,你需要包含必要的头文件和定义一些常量:c#include <stdio.h>#include <stdlib.h>#include <string.h>#include <unistd.h>#include <fcntl.h>#include <termios.h>#define BLUETOOTH_DEVICE "/dev/rfcomm0" // 蓝牙设备文件路径#define BAUDRATE B9600 // 波特率接下来,你可以编写一个函数来初始化蓝牙设备:cint initialize_bluetooth() {int fd;struct termios options;// 打开蓝牙设备文件fd = open(BLUETOOTH_DEVICE, O_RDWR | O_NOCTTY | O_NDELAY);if (fd == -1) {perror("open_port: Unable to open /dev/rfcomm0");return -1;}// 配置蓝牙设备fcntl(fd, F_SETFL, 0);// 获取当前配置tcgetattr(fd, &options);// 设置波特率cfsetispeed(&options, BAUDRATE);cfsetospeed(&options, BAUDRATE);// 设置数据位、停止位和校验位options.c_cflag |= (CLOCAL | CREAD);options.c_cflag &= ~PARENB;options.c_cflag &= ~CSTOPB;options.c_cflag &= ~CSIZE;options.c_cflag |= CS8;// 设置流控制options.c_lflag &= ~(ICANON | ECHO | ECHOE | ISIG);// 设置输入模式options.c_iflag &= ~(IXON | IXOFF | IXANY);// 设置输出模式options.c_oflag &= ~OPOST;// 应用配置tcsetattr(fd, TCSANOW, &options);return fd;}然后,你可以编写一个函数来发送数据:cint send_data(int fd, const char *data) {int bytes_written = write(fd, data, strlen(data));if (bytes_written < 0) {perror("send_data: Error writing to socket");return -1;}return 0;}最后,你可以编写一个函数来接收数据:cint receive_data(int fd, char *buffer, int buffer_size) { int bytes_read = read(fd, buffer, buffer_size - 1);if (bytes_read < 0) {perror("receive_data: Error reading from socket");return -1;}buffer[bytes_read] = '\0'; // 添加字符串结束符return bytes_read;}现在,你可以在main函数中使用这些函数:cint main() {int fd;char buffer[256];// 初始化蓝牙设备fd = initialize_bluetooth();if (fd == -1) {printf("Failed to initialize bluetooth\n");return 1;}// 发送数据if (send_data(fd, "Hello, bluetooth!") == -1) {printf("Failed to send data\n");close(fd);return 1;}// 接收数据if (receive_data(fd, buffer, sizeof(buffer)) == -1) {printf("Failed to receive data\n");close(fd);return 1;}printf("Received data: %s\n", buffer);// 关闭蓝牙设备close(fd);return 0;}这个示例展示了如何使用蓝牙模块进行简单的数据传输。
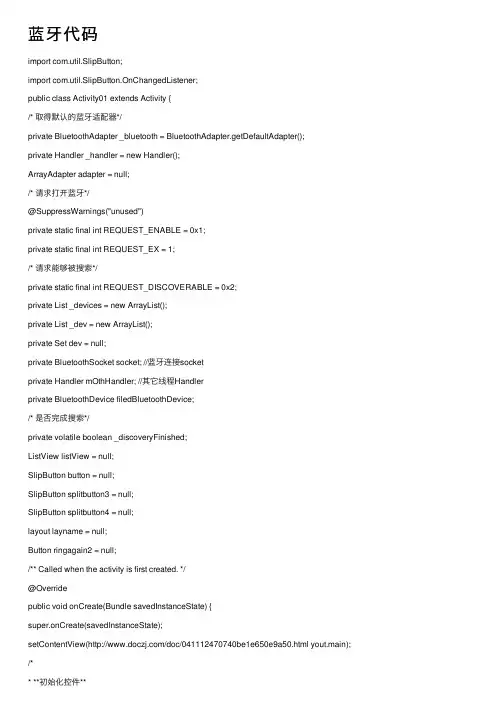
蓝⽛代码import com.util.SlipButton;import com.util.SlipButton.OnChangedListener;public class Activity01 extends Activity {/* 取得默认的蓝⽛适配器*/private BluetoothAdapter _bluetooth = BluetoothAdapter.getDefaultAdapter();private Handler _handler = new Handler();ArrayAdapter adapter = null;/* 请求打开蓝⽛*/@SuppressWarnings("unused")private static final int REQUEST_ENABLE = 0x1;private static final int REQUEST_EX = 1;/* 请求能够被搜索*/private static final int REQUEST_DISCOVERABLE = 0x2;private List _devices = new ArrayList();private List _dev = new ArrayList();private Set dev = null;private BluetoothSocket socket; //蓝⽛连接socketprivate Handler mOthHandler; //其它线程Handlerprivate BluetoothDevice filedBluetoothDevice;/* 是否完成搜索*/private volatile boolean _discoveryFinished;ListView listView = null;SlipButton button = null;SlipButton splitbutton3 = null;SlipButton splitbutton4 = null;layout layname = null;Button ringagain2 = null;/** Called when the activity is first created. */@Overridepublic void onCreate(Bundle savedInstanceState) {super.onCreate(savedInstanceState);setContentView(/doc/0411********be1e650e9a50.html yout.main); /** **初始化控件*** *****/findView();/** **控件设置事件*** ****/setListener();}/*** 初始化控件*/private void findView() {button = (SlipButton) findViewById(R.id.splitbutton1); splitbutton3 = (SlipButton) findViewById(R.id.splitbutton3); splitbutton4 = (SlipButton) findViewById(R.id.splitbutton4); ringagain2 = (Button) findViewById(R.id.ringagain2); listView = (ListView) findViewById(R.id.lvListid);// 蓝⽛没有被打开时,可发现按钮不可⽤/** **客户端**\l* *******/splitbutton3.setEnabled(false);splitbutton4.setEnabled(false);Log.e("ringagain2", "_bluetooth");ringagain2.setText(_bluetooth.getName());}/** 事件监听器*/private void setListener() {button.SetOnChangedListener(new OnChangedListener() { @Overridepublic void OnChanged(boolean CheckState) {// TODO Auto-generated method stub// 滑动按钮打开时的动作if (CheckState) {// 打开蓝⽛_bluetooth.enable();// 按钮使能splitbutton3.setEnabled(true);splitbutton4.setEnabled(true);} else {// 滑动按钮关闭时的动作_bluetooth.disable();splitbutton3.setEnabled(false);splitbutton4.setEnabled(false);}}});splitbutton3.SetOnChangedListener(new OnChangedListener() { @Overridepublic void OnChanged(boolean CheckState) {// TODO Auto-generated method stubif (CheckState) {Intent enabler = new Intent(BluetoothAdapter.ACTION_REQUEST_DISCOVERABLE); startActivityForResult(enabler, REQUEST_DISCOVERABLE); }}});splitbutton4.SetOnChangedListener(new OnChangedListener() { @Overridepublic void OnChanged(boolean CheckState) {// TODO Auto-generated method stub/* 注册接收器*/dev = _bluetooth.getBondedDevices();_dev.clear();for (BluetoothDevice device : dev) {_dev.add(device);}if (CheckState) {_discoveryFinished = false;_devices.retainAll(_devices);_devices = _dev;IntentFilter discoveryFilter = new IntentFilter( BluetoothAdapter.ACTION_DISCOVERY_FINISHED); registerReceiver(_discoveryReceiver, discoveryFilter); IntentFilter foundFilter = new IntentFilter( BluetoothDevice.ACTION_FOUND); registerReceiver(_foundReceiver, foundFilter);/* 显⽰⼀个对话框,正在搜索蓝⽛设备*/ SamplesUtils.indeterminate(Activity01.this, _handler, "Scanning...", _discoveryWorkder,new OnDismissListener() {public void onDismiss(DialogInterface dialog) {for (; _bluetooth.isDiscovering();) {_bluetooth.cancelDiscovery();}_discoveryFinished = true;}}, true);} else {_discoveryFinished = true;_devices.retainAll(_devices);_devices = _dev;showDevices();}}});ringagain2.setOnClickListener(new OnClickListener() { @Overridepublic void onClick(View v) {// TODO Auto-generated method stub// new// AlertDialog.Builder(Activity01.this).setView(layname).show();AlertDialog.Builder builder = new AlertDialog.Builder(Activity01.this);final EditText editText = new EditText(Activity01.this);builder.setTitle("请输⼊").setIcon(android.R.drawable.ic_dialog_info).setView(editText).setPositiveButton("确定",new DialogInterface.OnClickListener() {@Overridepublic void onClick(DialogInterface dialog,int which) {// TODO Auto-generated method stubString devName = editText.getText().toString();ringagain2.setText(devName);_bluetooth.setName(devName);}}).setNegativeButton("取消", null).show();}});listView.setOnItemClickListener(itemClickListener);}/*** 接收器当搜索蓝⽛设备完成时调⽤*/private BroadcastReceiver _foundReceiver = new BroadcastReceiver() { public void onReceive(Context context, Intent intent) {/* 从intent中取得搜索结果数据*/BluetoothDevice device = intent.getParcelableExtra(BluetoothDevice.EXTRA_DEVICE);/* 将结果添加到列表中*/if(device.getBondState() == BluetoothDevice.BOND_NONE){_devices.add(device);}/* 显⽰列表*/showDevices();}};private BroadcastReceiver _discoveryReceiver = new BroadcastReceiver() {@Overridepublic void onReceive(Context context, Intent intent) {/* 卸载注册的接收器*/unregisterReceiver(_foundReceiver);unregisterReceiver(this);_discoveryFinished = true;}};/* 显⽰状态列表*/protected void showDevices() {List list = new ArrayList();for (int i = 0, size = _devices.size(); i < size; ++i) {StringBuilder b = new StringBuilder();BluetoothDevice d = _devices.get(i);b.append(d.getName());b.append('\n');if(d.getBondState() == BluetoothDevice.BOND_NONE){b.append("未配对");}else if(d.getBondState() == BluetoothDevice.BOND_BONDED){b.append("已配对");}else if(d.getBondState() == BluetoothDevice.BOND_BONDING){b.append("正在配对");}String s = b.toString();list.add(s);}adapter = new ArrayAdapter(this,/doc/0411********be1e650e9a50.html yout.simple_list_item_1, list);_handler.post(new Runnable() {public void run() {listView.setAdapter(adapter);}});}private Runnable _discoveryWorkder = new Runnable() {public void run() {/* 开始搜索*/_bluetooth.startDiscovery();for (;;) {if (_discoveryFinished) {break;}try {Thread.sleep(100);} catch (InterruptedException e) {}}}};private ListView.OnItemClickListener itemClickListener = new ListView.OnItemClickListener() { @Overridepublic void onItemClick(AdapterView arg0, View arg1, int arg2,long arg3) {//Toast.makeText(Activity01.this, "adfasfsadf", Toast.LENGTH_SHORT).show();final int index = arg2;final BluetoothDevice dev = _devices.get(index);filedBluetoothDevice = dev;if(dev.getBondState() == BluetoothDevice.BOND_NONE){AlertDialog.Builder dialog= new AlertDialog.Builder(Activity01.this);dialog.setTitle("是否配对").setIcon(android.R.drawable.ic_dialog_info).setPositiveButton("配对", new DialogInterface.OnClickListener() {@Overridepublic void onClick(DialogInterface dialog, int which) {// TODO Auto-generated method stubtry {Method createBondMethod = BluetoothDevice.class.getMethod("createBond"); Toast.makeText(Activity01.this, "开始配对", Toast.LENGTH_SHORT).show(); createBondMethod.invoke(dev);BluetoothDevice dv = null;dv = _bluetooth.getRemoteDevice(dev.getAddress());_dev.set(index, dv);showDevices();} catch (SecurityException e) {// TODO Auto-generated catch blocke.printStackTrace();} catch (NoSuchMethodException e) {// TODO Auto-generated catch blocke.printStackTrace();} catch (IllegalArgumentException e) {// TODO Auto-generated catch blocke.printStackTrace();} catch (IllegalAccessException e) {// TODO Auto-generated catch blocke.printStackTrace();} catch (InvocationTargetException e) {// TODO Auto-generated catch blocke.printStackTrace();}}}).setNegativeButton("关闭",null)// .setNegativeButton("配对完成",null).show();}else{AlertDialog.Builder dialog = new AlertDialog.Builder(Activity01.this); dialog.setTitle("取消配对或连接").setIcon(android.R.drawable.ic_dialog_info).setPositiveButton("取消配对", new DialogInterface.OnClickListener() {@Overridepublic void onClick(DialogInterface dialog, int which) {// TODO Auto-generated method stubtry {Method removeBondMethod = BluetoothDevice.class.getMethod("removeBond"); Toast.makeText(Activity01.this, "取消配对", Toast.LENGTH_SHORT).show(); removeBondMethod.invoke(dev);BluetoothDevice dv = null;dv = _bluetooth.getRemoteDevice(dev.getAddress());_dev.set(index, dv);showDevices();} catch (SecurityException e) {// TODO Auto-generated catch blocke.printStackTrace();} catch (NoSuchMethodException e) {// TODO Auto-generated catch blocke.printStackTrace();} catch (IllegalArgumentException e) {// TODO Auto-generated catch blocke.printStackTrace();} catch (IllegalAccessException e) {// TODO Auto-generated catch blocke.printStackTrace();} catch (InvocationTargetException e) {// TODO Auto-generated catch blocke.printStackTrace();}}}).setNegativeButton("连接",new DialogInterface.OnClickListener() {@Overridepublic void onClick(DialogInterface dialog, int which) {// TODO Auto-generated method stubtry {//connect(dev);showFileChooser();} catch (SecurityException e) {// TODO Auto-generated catch blocke.printStackTrace();}}}).setNeutralButton("关闭", null).show();}}};private void connect(BluetoothDevice btDev) {BluetoothSocket btSocket;final UUID SPP_UUID = UUID.fromString("00001101-0000-1000-8000-00805F9B34FB"); UUID uuid = SPP_UUID;try {btSocket = btDev.createRfcommSocketToServiceRecord(uuid);Log.d("BlueToothTestActivity", "开始连接...");btSocket.connect();} catch (IOException e) {// TODO Auto-generated catch blocke.printStackTrace();}}/** ***/private void showFileChooser() {Intent intent = new Intent();intent.putExtra("explorer_title",getString(R.string.dialog_read_from_dir));intent.setDataAndType(Uri.fromFile(new File("/sdcard")), "*/*");intent.setClass(this, ExDialog.class);startActivityForResult(intent, REQUEST_EX);}protected void onActivityResult(int requestCode, int resultCode,Intent intent) {if (resultCode == RESULT_OK) {if (requestCode == REQUEST_EX) {Uri uri = intent.getData();Toast.makeText(this, "select: " + uri, Toast.LENGTH_SHORT).show();initSocket(filedBluetoothDevice);doSendFileByBluetooth(uri,filedBluetoothDevice);}}}/*** 通过蓝⽛发送⽂件*/private void doSendFileByBluetooth(Uri uir,final BluetoothDevice dev) { //取得⽂件全路径final String filePath = uir.toString();if(!filePath.equals("null")){if(null == mOthHandler){HandlerThread handlerThread = new HandlerThread("other_thread"); handlerThread.start();mOthHandler = new Handler(handlerThread.getLooper());}mOthHandler.post(new Runnable() {@Overridepublic void run() {//调⽤系统程序发送⽂件ContentValues cv = new ContentValues();String uri = "" + filePath;cv.put("uri", uri);cv.put("destination", dev.getAddress());cv.put("direction", 0);Long ts = System.currentTimeMillis();cv.put("timestamp", ts);getContentResolver().insert(Uri.parse("content://com.android.bluetooth.opp/btopp"), cv);try {if(null != socket){socket.close();}} catch (Exception e) {e.printStackTrace();}}});}else {Toast.makeText(this, "请选择要发送的⽂件!", Toast.LENGTH_LONG).show();}}/*** 取得BluetoothSocket*/private void initSocket(BluetoothDevice dev) {BluetoothSocket temp = null;try {// temp = mTouchObject.bluetoothDevice.createRfcommSocketToServiceRecord(UUID.fromString(CONNEC T_UUID)); //以上取得socket⽅法不能正常使⽤,⽤以下⽅法代替Method m = dev.getClass().getMethod("createRfcommSocket", new Class[] {int.class});temp = (BluetoothSocket) m.invoke(dev, 1);//怪异错误:直接赋值给socket,对socket操作可能出现异常,要通过中间变量temp赋值给socket} catch (SecurityException e) {e.printStackTrace();} catch (NoSuchMethodException e) {e.printStackTrace();} catch (IllegalArgumentException e) {e.printStackTrace();} catch (IllegalAccessException e) {e.printStackTrace();} catch (InvocationTargetException e) {e.printStackTrace(); }socket = temp;}}。
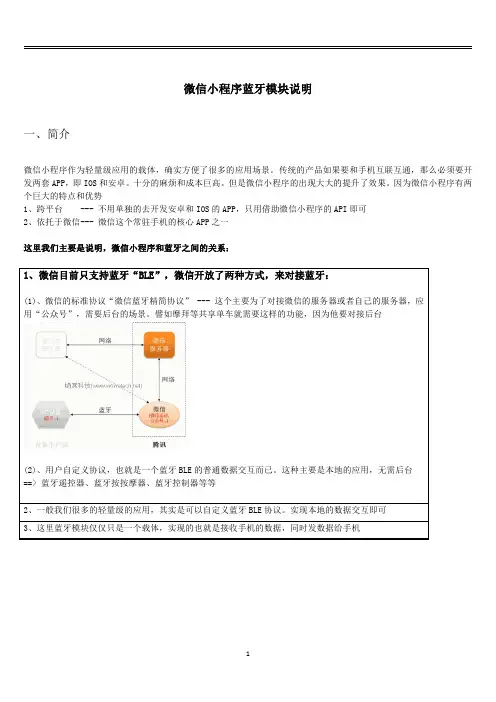
微信小程序蓝牙模块说明
一、简介
微信小程序作为轻量级应用的载体,确实方便了很多的应用场景。
传统的产品如果要和手机互联互通,那么必须要开发两套APP,即IOS和安卓。
十分的麻烦和成本巨高。
但是微信小程序的出现大大的提升了效果。
因为微信小程序有两个巨大的特点和优势
1、跨平台---不用单独的去开发安卓和IOS的APP,只用借助微信小程序的API即可
2、依托于微信---微信这个常驻手机的核心APP之一
这里我们主要是说明,微信小程序和蓝牙之间的关系:
1、微信目前只支持蓝牙“BLE”,微信开放了两种方式,来对接蓝牙:
(1)、微信的标准协议“微信蓝牙精简协议”---这个主要为了对接微信的服务器或者自己的服务器,应
用“公众号”,需要后台的场景。
譬如摩拜等共享单车就需要这样的功能,因为他要对接后台
(2)、用户自定义协议,也就是一个蓝牙BLE的普通数据交互而已。
这种主要是本地的应用,无需后台
==>蓝牙遥控器、蓝牙按按摩器、蓝牙控制器等等
2、一般我们很多的轻量级的应用,其实是可以自定义蓝牙BLE协议。
实现本地的数据交互即可
3、这里蓝牙模块仅仅只是一个载体,实现的也就是接收手机的数据,同时发数据给手机
二、微信小程序关于蓝牙API
1、其实原理比较容易理解,只需要按照官方给出的参考例程即可。
2、具体的步骤如下:
打开蓝牙-->搜索周边的设备-->过滤周边的设备-->指定设备连接-->再进行数据交互即可
三、微信小程序的操作说明
四、微信小程序对接的蓝牙模块介绍
BT401蓝牙模块,同时还支持播放音乐,双模5.0。
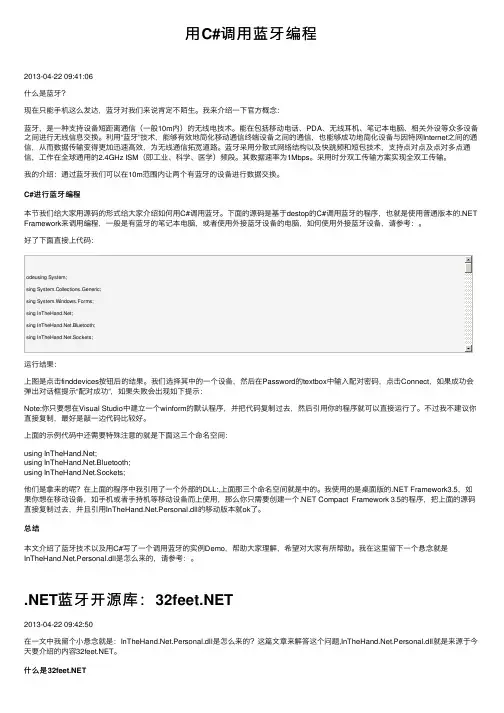
⽤C#调⽤蓝⽛编程2013-04-22 09:41:06什么是蓝⽛?现在只能⼿机这么发达,蓝⽛对我们来说肯定不陌⽣。
我来介绍⼀下官⽅概念:蓝⽛,是⼀种⽀持设备短距离通信(⼀般10m内)的⽆线电技术。
能在包括移动电话、PDA、⽆线⽿机、笔记本电脑、相关外设等众多设备之间进⾏⽆线信息交换。
利⽤“蓝⽛”技术,能够有效地简化移动通信终端设备之间的通信,也能够成功地简化设备与因特⽹Internet之间的通信,从⽽数据传输变得更加迅速⾼效,为⽆线通信拓宽道路。
蓝⽛采⽤分散式⽹络结构以及快跳频和短包技术,⽀持点对点及点对多点通信,⼯作在全球通⽤的2.4GHz ISM(即⼯业、科学、医学)频段。
其数据速率为1Mbps。
采⽤时分双⼯传输⽅案实现全双⼯传输。
我的介绍:通过蓝⽛我们可以在10m范围内让两个有蓝⽛的设备进⾏数据交换。
C#进⾏蓝⽛编程本节我们给⼤家⽤源码的形式给⼤家介绍如何⽤C#调⽤蓝⽛。
下⾯的源码是基于destop的C#调⽤蓝⽛的程序,也就是使⽤普通版本的.NET Framework来调⽤编程,⼀般是有蓝⽛的笔记本电脑,或者使⽤外接蓝⽛设备的电脑,如何使⽤外接蓝⽛设备,请参考:。
好了下⾯直接上代码:是shared-source的项⽬,⽀持 2.0以及桌⾯版本.NET framework,提供短距离领域(personal area networking technologie)的通信功能,⽀持bluetooth,Infrared(IrDA)红外等.想了解更多的信息可以参考其,其项⽬的安装包和源码是放在微软的开源⼯程⽹站CodePlex上⾯的,作为.NET开发⼈员我们必须要上的⽹站就是CodePlex,本⽂的主要内容是,所以就不过多的介绍CodePlexle ,更多CodePlex信息请参考。
下载的安装包和源码下载的安装包以及实例代码请,下载的源码请。
对于想了解如何使⽤的⼈员来说我们直接仅仅下载安装包即可;如果想了解是如何实现的那就必须要下载其源代码了。
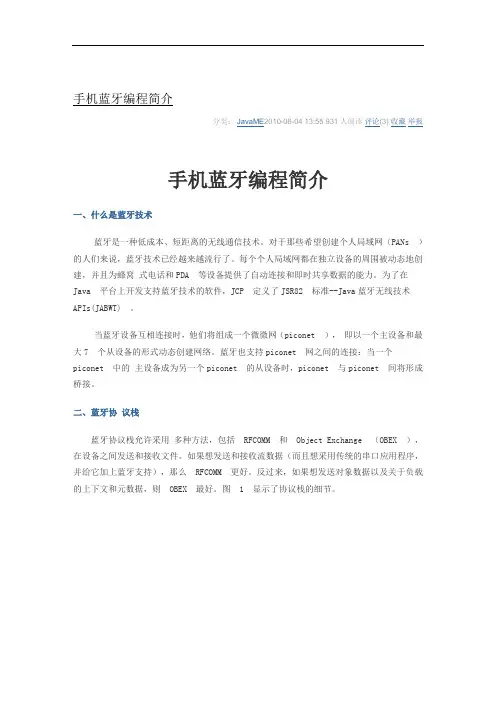
手机蓝牙编程简介分类:JavaME2010-06-04 13:55 931人阅读评论(3) 收藏举报手机蓝牙编程简介一、什么是蓝牙技术蓝牙是一种低成本、短距离的无线通信技术。
对于那些希望创建个人局域网(PANs )的人们来说,蓝牙技术已经越来越流行了。
每个个人局域网都在独立设备的周围被动态地创建,并且为蜂窝式电话和PDA 等设备提供了自动连接和即时共享数据的能力。
为了在Java 平台上开发支持蓝牙技术的软件,JCP 定义了JSR82 标准--Java蓝牙无线技术APIs(JABWT) 。
当蓝牙设备互相连接时,他们将组成一个微微网(piconet ),即以一个主设备和最大7 个从设备的形式动态创建网络。
蓝牙也支持piconet 网之间的连接:当一个piconet 中的主设备成为另一个piconet 的从设备时,piconet 与piconet 间将形成桥接。
二、蓝牙协议栈蓝牙协议栈允许采用多种方法,包括 RFCOMM 和 Object Exchange (OBEX ),在设备之间发送和接收文件。
如果想发送和接收流数据(而且想采用传统的串口应用程序,并给它加上蓝牙支持),那么 RFCOMM 更好。
反过来,如果想发送对象数据以及关于负载的上下文和元数据,则 OBEX 最好。
图 1 显示了协议栈的细节。
图1 蓝牙协议栈,如下:∙栈的最底层是 HCI ,即主机控制器接口(Host Controller Interface )。
这一层顾名思义就是主机(计算机)和控制器(蓝牙设备)之间的接口。
可以看到,其他所有的层都要经过 HCI 。
∙HCI 上面的一层是L2CAP ,即逻辑链接控制器适配协议(Logical Link Controller Adaptation Protocol )。
这一层充当其他所有层的数据多路复用器。
∙接下来一层是 BNEP ,即蓝牙网络封装协议(Bluetooth Network Encapsulation Protocol )。
AndroidSDK⽬录具体结构及Android源码的具体结构Android SDK⽬录具体结构1. add-ons:这⾥⾯保存着附加库,⽐如Google Maps,当然你如果安装了OphoneSDK,这⾥也会有⼀些类库在⾥⾯。
2. docs:这⾥⾯是Android SDK API参考⽂档,所有的API都可以在这⾥查到。
3. market_licensing:作为AndroidMarket版权保护组件,⼀般发布付费应⽤到电⼦市场可以⽤它来反盗版。
4. platforms:是每个平台的SDK真正的⽂件,⾥⾯会根据API Level划分的SDK版本,这⾥就以Android 2.2来说,进⼊后有⼀个android-8的⽂件夹,android-8进⼊后是Android 2.2 SDK的主要⽂件,其中ant为ant编译脚本,data保存着⼀些系统资源,images是模拟器映像⽂件,skins则是Android模拟器的⽪肤,templates是⼯程创建的默认模板,android.jar则是该版本的主要framework⽂件,tools⽬录⾥⾯包含了重要的编译⼯具,⽐如aapt、aidl、逆向调试⼯具dexdump和编译脚本dx。
5. platform-tools:保存着⼀些通⽤⼯具,⽐如adb、和aapt、aidl、dx等⽂件,这⾥和platforms⽬录中tools⽂件夹有些重复,主要是从android 2.3开始这些⼯具被划分为通⽤了。
6. samples:是Android SDK⾃带的默认⽰例⼯程,⾥⾯的apidemos强烈推荐初学者运⾏学习,对于SQLite数据库操作可以查看NotePad这个例⼦,对于游戏开发Snake、LunarLander都是不错的例⼦,对于Android主题开发Home则是android m5时代的主题设计原理。
7. tools:作为SDK根⽬录下的tools⽂件夹,这⾥包含了重要的⼯具,⽐如ddms⽤于启动Android调试⼯具,⽐如logcat、屏=幕截图和⽂件管理器,⽽draw9patch则是绘制android平台的可缩放png图⽚的⼯具,sqlite3可以在PC上操作SQLite数据库,⽽monkeyrunner则是⼀个不错的压⼒测试应⽤,模拟⽤户随机按键,mksdcard则是模拟器SD映像的创建⼯具,emulator是android模拟器主程序,不过从android1.5开始,需要输⼊合适的参数才能启动模拟器,traceview作为android平台上重要的调试⼯具。
Python蓝牙编程示例1.引言蓝牙技术是一种无线通信技术,经常用于设备之间的数据传输和通信。
Python作为一种流行的编程语言,提供了多种库和模块来支持蓝牙编程。
本文将介绍如何使用Python进行蓝牙编程,并通过示例代码解释其使用方法和注意事项。
2.Python蓝牙编程环境配置在开始编写蓝牙程序之前,我们需要先配置Python蓝牙编程环境。
以下是一些常用的Python蓝牙库和模块,您可以选择其中之一来完成配置:2.1 BlueZ BlueZ是Linux上广受认可的蓝牙协议栈,可以在终端中使用命令行工具进行操作。
您可以使用pip命令安装pybluez库来实现对BlueZ的Python编程访问。
2.2 PyBluez PyBluez是一个用于Python的蓝牙开发库,它提供了在各种操作系统上访问蓝牙功能的接口。
您可以使用pip命令安装PyBluez库。
2.3 LightBlue LightBlue是一个基于Python的跨平台蓝牙库,它提供了易于使用的API,用于与蓝牙设备进行交互。
您可以使用pip命令安装LightBlue库。
3.连接到蓝牙设备一旦环境配置完成,我们可以开始编写程序以连接到蓝牙设备。
以下是一个简单的示例代码,演示如何连接到一个蓝牙设备并与其进行通信:import bluetoothbd_addr = "00:01:02:03:04:05" # 蓝牙设备的区域信息sock = bluetooth.BluetoothSocket(bluetooth.RFCOMM)sock.connect((bd_addr, 1)) # 打开蓝牙设备区域信息并连接print("连接成功")# 在此处添加与设备进行通信的代码sock.close() # 关闭与蓝牙设备的连接在上述示例代码中,我们首先指定了要连接的蓝牙设备的区域信息。
我们使用bluetooth.BluetoothSocket()函数创建了一个蓝牙套接字,并使用sock.connect()函数连接到指定的蓝牙设备。
本文我们将通过学习Android的蓝牙聊天示例应用程序来介绍蓝牙开发包的使用,该示例程序完整的包含了蓝牙开发的各个部分,将实现两个设备通过蓝牙进行连接并聊天。
AndroidManifest.xml前面我们说过,在使用蓝牙API时就需要开启某些权限,同时我们还可以从And roidManifest.xml文件中找到应用程序启动时所进入的界面Activity等信息,因此下面我们首先打开AndroidManifest.xml文件,代码如下:1.<manifest xmlns:android="/apk/res/android"package="com.example.android.BluetoothChat"android: versionCode="1"android:versionName="1.0"> <!-- 最小的sdk 版本 -->> <uses-sdk minSdkVersion="6" /> <!-- 权限申明 -->> <uses-permission android:name="android.permission.BLUETOOTH_ADMIN" /> <uses-permission android:name="android.perm ission.BLUETOOTH" /> <application android:label="@string/app_n ame"android:icon="@drawable/app_icon" > <!-- 默认Activity -->> <activity android:name=".BluetoothChat"android:labe l="@string/app_name"android:configChanges="orientation|keybo ardHidden"> <intent-filter> <action android:name="android.i ntent.action.MAIN" /> <category android:name="android.intent.c UNCHER" /> </intent-filter> </activity> <!-- 用于显示蓝牙设备列表的Activity --> <activity android:name=".Dev iceListActivity"android:label="@string/select_device"android: theme="@android:style/Theme.Dialog"android:configChanges="o rientation|keyboardHidden" /> </application> </manifest>首先minSdkVersion用于说明该应用程序所需要使用的最小SDK版本,这里设置为6,也就是说最小需要使用android1.6版本的sdk,同时Ophone则需要使用o ms2.0版本,然后打开了BLUETOOTH和BLUETOOTH_ADMIN两个蓝牙操作相关的权限,最后看到了两个Activity的声明,他们分别是BluetoothChat(默认主Activity)和DeviceListActivity(显示设备列表),其中DeviceListActivity风格被定义为一个对话框风格,下面我们将分析该程序的每个细节。
毕业论文开题报告题目:基于Android手机蓝牙通讯系部:信息技术与工程系姓名:张兴文学号: 114106219 专业:嵌入式系统工程年级班级:11级 (2)班指导教师:刘新(讲师)2014 年 5 月 5 日一、论文题目题目来源基于Android手机蓝牙通讯自拟二、选题的目的和意义1、目的蓝牙即时通讯也就是安卓平台下的即时通讯。
随着android系统的发展成熟,在即时通讯这一版块逐渐发展成一个综合化的信息平台。
在Android 平台上开发即时通讯系统,它能够使用户在移动客户端上登录服务器,方便、迅捷地收发即时消息。
随着研究的深入,可以在该系统上实现图片的传输和接收,以及其他一些功能,这样可以使该系统功能更加多样化。
通讯系统架构采用 C /S 模式,即客户端/服务器的体系结构。
客户端是基于Android 平台进行开发,通过蓝牙建立连接,通过服务器实现Android 客户端之间的即时通讯。
2、意义(1)理论意义①随着技术的发展,蓝牙技术越来越成熟,那么蓝牙通讯将被使用的越来越广泛②通过蓝牙通讯,是人与人之间的交流越来越方便快捷。
(2)实际意义①在短距离内,两个人可以通讯聊天和发送文件.②在一个团体合作时,可以多个人一起交流三、选题的国内、外研究概况和趋势自从1998年提出蓝牙技术以来,蓝牙技术的发展异常迅速。
蓝牙Bluetooth作为一种新的短距离无线通信技术标准,受到全世界越来越多工业界生产厂家和研究机构的广泛关注。
成立了世界蓝牙组织Bluetooth SIG,采用技术标准公开的策略来推广蓝牙技术,现已发展成为一个相当大的工业界高新技术标准化组织,全球支持蓝牙技术的2000多家设备制造商都已经成为它的会员,一项公开的、全球统一的技术规范得到了工业界如此广泛的关注和支持在以往是罕见的。
近年来,世界上一些权威的标准化组织,也都在关注蓝牙技术标准的制定和发展。
例如,IEEE的标准化机构,也已经成立了802.15工作组,专门关注有关蓝牙技术标准的兼容和未来的发展等问题。
bluetoothsocket 详解-回复什么是BluetoothSocket?如何使用它?在本篇文章中,我们将通过一步一步的讨论来详细解释BluetoothSocket的含义、工作原理、使用方法以及一些实用示例。
第一部分:什么是BluetoothSocket?BluetoothSocket是一种用于在蓝牙设备之间进行数据传输的Socket (套接字)。
它允许应用程序在蓝牙设备之间创建一种虚拟的通信通道,从而实现数据的双向传输。
BluetoothSocket有两种类型:分别是基于RFComm (串口)和L2CAP (逻辑链路控制和适应层协议)。
RFComm型BluetoothSocket提供了一种类似于串口通信的数据传输方式,而L2CAP型BluetoothSocket则提供了更灵活的数据传输通道。
第二部分:如何使用BluetoothSocket?第一步:获取蓝牙适配器在使用BluetoothSocket之前,我们需要获取Android设备上的蓝牙适配器。
可以通过BluetoothAdapter类来完成这一操作。
以下是获取BluetoothAdapter的示例代码:BluetoothAdapter bluetoothAdapter =BluetoothAdapter.getDefaultAdapter();第二步:使用BluetoothDevice类建立连接在使用BluetoothSocket之前,我们需要通过BluetoothDevice类来表示目标蓝牙设备,并通过该设备建立连接。
以下是建立连接的示例代码:BluetoothDevice device =bluetoothAdapter.getRemoteDevice(deviceAddress); BluetoothSocket socket =device.createRfcommSocketToServiceRecord(uuid);socket.connect();在上述示例代码中,我们首先使用蓝牙适配器的getRemoteDevice()方法来获取目标设备的BluetoothDevice对象,其中参数deviceAddress是目标设备的物理地址。
Windows系统中使⽤C#编写蓝⽛通信程序的简单实例public partial class Form1 : Form{BluetoothRadio radio = null;//蓝⽛适配器string sendFileName = null;//发送⽂件名BluetoothAddress sendAddress = null;//发送⽬的地址ObexListener listener = null;//监听器string recDir = null;//接受⽂件存放⽬录Thread listenThread, sendThread;//发送/接收线程public Form1(){InitializeComponent();radio = BluetoothRadio.PrimaryRadio;//获取当前PC的蓝⽛适配器CheckForIllegalCrossThreadCalls = false;//不检查跨线程调⽤if(radio == null)//检查该电脑蓝⽛是否可⽤{MessageBox.Show("这个电脑蓝⽛不可⽤!", "提⽰", MessageBoxButtons.OK, rmation);}recDir = Environment.GetFolderPath(Environment.SpecialFolder.Desktop);labelRecDir.Text = recDir;}private void buttonSelectBluetooth_Click(object sender, EventArgs e)//选择远程蓝⽛设备{SelectBluetoothDeviceDialog dialog = new SelectBluetoothDeviceDialog();dialog.ShowRemembered = true;//显⽰已经记住的蓝⽛设备dialog.ShowAuthenticated = true;//显⽰认证过的蓝⽛设备dialog.ShowUnknown = true;//显⽰位置蓝⽛设备if(dialog.ShowDialog() == DialogResult.OK){sendAddress = dialog.SelectedDevice.DeviceAddress;//获取选择的远程蓝⽛地址labelAddress.Text = "地址:"+ sendAddress.ToString() + " 设备名:"+ dialog.SelectedDevice.DeviceName;}}private void buttonSelectFile_Click(object sender, EventArgs e)//选择要发送的本地⽂件{OpenFileDialog dialog = new OpenFileDialog();if(dialog.ShowDialog() == DialogResult.OK){sendFileName = dialog.FileName;//设置⽂件名labelPath.Text = Path.GetFileName(sendFileName);}}private void buttonSend_Click(object sender, EventArgs e)//发送按钮{sendThread = new Thread(sendFile);//开启发送⽂件线程sendThread.Start();}private void sendFile()//发送⽂件⽅法{ObexWebRequest request = new ObexWebRequest(sendAddress, Path.GetFileName(sendFileName));//创建⽹络请求WebResponse response = null;try{buttonSend.Enabled = false;request.ReadFile(sendFileName);//发送⽂件labelInfo.Text = "开始发送!";response = request.GetResponse();//获取回应labelInfo.Text = "发送完成!";}catch(System.Exception ex){MessageBox.Show("发送失败!", "提⽰", MessageBoxButtons.OK, MessageBoxIcon.Warning);labelInfo.Text = "发送失败!";finally{if(response != null){response.Close();buttonSend.Enabled = true;}}}private void buttonselectRecDir_Click(object sender, EventArgs e)//选择接受⽬录 {FolderBrowserDialog dialog = new FolderBrowserDialog();dialog.Description = "请选择蓝⽛接收⽂件的存放路径";if(dialog.ShowDialog() == DialogResult.OK){recDir = dialog.SelectedPath;labelRecDir.Text = recDir;}}private void buttonListen_Click(object sender, EventArgs e)//开始/停⽌监听{if(listener == null|| !listener.IsListening){radio.Mode = RadioMode.Discoverable;//设置本地蓝⽛可被检测listener = new ObexListener(ObexTransport.Bluetooth);//创建监听listener.Start();if(listener.IsListening){buttonListen.Text = "停⽌";labelRecInfo.Text = "开始监听";listenThread = new Thread(receiveFile);//开启监听线程listenThread.Start();}}else{listener.Stop();buttonListen.Text = "监听";labelRecInfo.Text = "停⽌监听";}}private void receiveFile()//收⽂件⽅法{ObexListenerContext context = null;ObexListenerRequest request = null;while(listener.IsListening){context = listener.GetContext();//获取监听上下⽂if(context == null){break;}request = context.Request;//获取请求string uriString = Uri.UnescapeDataString(request.RawUrl);//将uri转换成字符串 string recFileName = recDir + uriString;request.WriteFile(recFileName);//接收⽂件labelRecInfo.Text = "收到⽂件"+ uriString.TrimStart(new char[] { '/'});}}private void Form1_FormClosed(object sender, FormClosedEventArgs e){if(sendThread != null){sendThread.Abort();}if(listenThread != null)listenThread.Abort();}if(listener != null&& listener.IsListening) {listener.Stop();}}}。