NView NNM V5.0 安装部署手册
- 格式:pdf
- 大小:1.17 MB
- 文档页数:36
MySQL 5.5Installation and Configuration Guide(for Windows)Part number: 5998-1361Software version: iMC PLAT 5.1 (E0202)Document version: 5P103-20111222Legal and notice information© Copyright 2010-2011 Hewlett-Packard Development Company, L.P.No part of this documentation may be reproduced or transmitted in any form or by any means without prior written consent of Hewlett-Packard Development Company, L.P.The information contained herein is subject to change without notice.HEWLETT-PACKARD COMPANY MAKES NO WARRANTY OF ANY KIND WITH REGARD TO THIS MATERIAL, INCLUDING, BUT NOT LIMITED TO, THE IMPLIED WARRANTIES OF MERCHANTABILITY AND FITNESS FOR A PARTICULAR PURPOSE. Hewlett-Packard shall not be liable for errors contained herein or for incidental or consequential damages in connection with the furnishing, performance, or use of this material.The only warranties for HP products and services are set forth in the express warranty statements accompanying such products and services. Nothing herein should be construed as constituting an additional warranty. HP shall not be liable for technical or editorial errors or omissions contained herein.Support and other resourcesContacting HPFor worldwide technical support information, see the HP support website:/supportBefore contacting HP, collect the following information:•Product model names and numbers•Technical support registration number (if applicable)•Product serial numbers•Error messages•Operating system type and revision level•Detailed questionsSubscription serviceHP recommends that you register your product at the Subscriber's Choice for Business website:/go/wwalertsAfter registering, you will receive email notification of product enhancements, new driver versions, firmware updates, and other product resources.Related informationDocumentsTo find related documents, browse to the Manuals page of the HP Business Support Center website:/support/manuals•For related documentation, navigate to the Networking section, and select a networking category.•For a complete list of acronyms and their definitions, see HP A-Series Acronyms. Websites• •HP Networking /go/networking•HP manuals /support/manuals•HP download drivers and software /support/downloads•HP software depot ConventionsThis section describes the conventions used in this documentation set. GUI conventionsConvention DescriptionBoldface Window names, button names, field names, and menu items are in bold text. For example, the New User window appears; click OK.> Multi-level menus are separated by angle brackets. For example, File > Create > Folder./ Multi-level menus are separated by forward slashes. For example, [File/Create/Folder]. SymbolsConvention DescriptionNOTE An alert that contains additional or supplementary information.ContentsOverview (1)MySQL server installation (2)MySQL client installation (2)Configuration (7)Configuring the MySQL server instance (7)Creating a database user (15)Startup and Stop (16)Uninstallation (17)Removing the MySQL server instance (17)Uninstalling the MySQL server (19)FAQ (21)OverviewThis document describes how to install and configure the MySQL server when it is used with iMC, and the installation and configuration guidelines. This document is applicable to the MySQL 5.1 and MySQL5.5 editions. The installation is slightly different from that for other editions. This document takes theMySQL 5.5 edition for example.NOTE:Install the MySQL server and start the MySQL service before installing the iMC.MySQL server installationBefore installing the MySQL server, obtain the MySQL installation program that is applicable to the Windows operating system. This document takes mysql-5.5.5-win32.msi installation program for example. Double click the program to start the setup wizard.Figure 1MySQL server setup wizardClick Next.Figure 2 License agreement pageSelect I accept the terms in the License Agreement and click Next.Figure 3 Select a setup typeTo use the default installation path, select Typical or Complete.To customize the installed components and installation path, select Custom. In this example, select Typical and click Next.Figure 4Ready to install the MySQL serverClick Install to install the MySQL server to the host.Figure 5 Installation progressAfter the installation is complete, click Next.Figure 6 Installation is completeSelect Launch the MySQL Instance Configuration Wizard and click Finish.MySQL client installationIf an iMC server uses a separate database, you must install the MySQL client program on the iMC server.When you configure the database for iMC on the iMC deployment wizard, select Other server for Database location and enter the database server IP address.Before installing the MySQL client, obtain the MySQL installation program that is applicable to the Windows operating system. This document takes mysql-5.5.5-win32.msi installation program for example. Double click the program to start the setup wizard.Figure 7MySQL server setup wizardClick Next.Figure 8 License agreement pageSelect I accept the terms in the License Agreement and click Next. Figure 9 Select setup typeClick Customto customize installed components and installation path.Figure 10 Customize the installationSelect MySQL Server > Client Programs . To change the installation path, click Browse . Click Next.Figure 11 Ready to install the MySQL clientClick Install to install the MySQL client to the host. Figure 12 Installation progressAfter the installation is complete, click Next. Figure 13 Installation is completeDo not select Launch the MySQL Instance Configuration Wizard and click Finish.ConfigurationConfiguring the MySQL server instanceYou must configure the instance for the MySQL server but not for the MySQL client. You can continue to configure the MySQL server upon finishing the installation, or you can open the MySQL server configuration wizard by selecting Start > All Programs > MySQL 5.5 > MySQL Server Instance Configuration Wizard.Open the MySQL Server Instance Configuration Wizard page.Figure 14MySQL server instance configuration wizardClick Next.Figure 15 Select a configuration typeSelect Detailed Configuration and click Next. Figure 16 Select a server typeSelect Server Machine and click Next.Figure 17 Select the database usageSelect Transactional Database Only and click Next. Figure 18 Choose the directory for the databaseSet the directory for installing the database and click Next.Figure 19 Set the number of concurrent connections to the MySQL serverSelect Manual Setting and type 200 (recommended) for Concurrent connections . Click Next. Figure 20 Set the networking optionsSet the port number to 3306 and select Add firewall exception for this port . Click Next.Figure 21 Select the default character setSelect Manual Selected Default Character Set/Collation and set the character set according to the language of your operating system, for example, latin1 for English. Click Next. Figure 22 Set the Windows optionsSelect Install As Windows Service, and type a name for the service name, MySQL in this example. Select Include Bin Directory in Windows PATH, and click Next.Figure 23Set the security optionsSelect Modify Security Settings, set the root password, and select Enable root access from remote machines. Click Next.IMPORTANT:For iMC to correctly identify the root user password during installation, make sure that the password does not contain any of the following characters:` ' \ " ! ( ) & | \\ $ ; @ < > / ^ \t.If you do not want to change the password of the root user, create a user with root user privileges and make sure that the password does not contain any of the previous characters. For more information about creating a database user, see “Creating a database user.”Figure 24Ready to execute the settingsClick Execute to execute the MySQL server instance settings. Figure 25Configuration is completeClick Finish to complete the MySQL server instance configuration.Configure the privilege settings for the remote root user with the following commands:mysql –uroot –pmysqlgrant all privileges on *.* to root@’%’ identified by ‘mysql’ with grant option; mysql is the password for user root.Figure 26Configure the privilege settings for the remote root userThen configure the max_allowed_packet size.1.Open file my.ini in the MySQL installation path.Figure 27Configuration file path2.Add the max_allowed_packet parameter under [mysqld]. If the parameter already exists, youcan change its value.[mysqld]max_allowed_packet = 200M3.Save the changes and restart MySQL.Creating a database userYou can create new users rather than use the default user (root user) and grant them privileges to manage and operate the database.CAUTION:You can create a user on the MySQL server but not on the MySQL client.Creat a database user and grant privileges to the user with the following commands:mysql -uroot -pmysqlgrant all privileges on *.* to roottest@’%’ identified by ‘passwordtest’ with grant option;mysql is the password of the root user and passwordtest is the password of the new user roottest.Figure 28Add a database userStartup and StopOpen the Windows service management page on the MySQL server to start or stop the MySQL service.Figure 29Start or stop MySQL serviceUninstallationTo uninstall the MySQL server from the Windows operating system, remove the MySQL server instance first. You can uninstall the MySQL client from the Windows operating system directly. Removing the MySQL server instanceSelect Start > All Programs > MySQL 5.5 > MySQL Server Instance Configuration Wizard to enter the MySQL server instance configuration wizard page.Figure 30MySQL server instance configuration wizardClick Next.Figure 31 Select a maintenance optionSelect Remove Instance and click Next. Figure 32 Remove the instanceClick Execute to remove the instance.Figure 33Instance is removedUninstalling the MySQL serverSelect Control Panel > Add or Remove Programs to enter the Add or Remove Programs page where you can uninstall the MySQL server.Figure 34Uninstall the MySQL server from WindowsFAQGarbled Characters Appear in the Database TableCorrectly set the character set when you install the MySQL server. If not, garbled characters appear inthe database table. Table 1 describes the character sets for different languages. For instruction on howto set the character set, see Figure 21.Table 1Character sets for different languagesset Language CharacterEnglish latin1Japanese sjisHow can I update database passwords for iMC?The usernames and passwords used by the iMC modules are stored in cipher text in file\common\conf\ server-addr.xml in the installation path. You can use the pwdmgr.bat command toobtain passwords in clear text or update the latest passwords to the file.Usually, a user can use the database management tool to change the database password of a certainiMC module. To ensure communication between iMC and the database, use the pwdmgr.bat commandto update the corresponding password in file server-addr.xml. If iMC is deployed in distributed mode,you must update the password for every iMC server, as shown in Figure 35.Figure 35Update database passwords for iMCIn the preceding commands, dbpasswd represents the latest database password of the user imc_config,config_db represents the database name, and 192.168.20.107 represents the IP address of the database.To obtain the IP address and name of a MySQL database, view the settings of the corresponding user infile $IMCROOT/common/conf/server-addr.xml.21。
VMware-vShield 5.0 安装与部署vShield 产品包括:VMware vShield App:保护虚拟数据中的应用程序免受网络威胁的侵扰VMware vShield App with Data Security:跨虚拟化资源增强了 vShield App Sensitive Data Discovery 的功能VMware vShield Edge:增强对虚拟数据中心外围的保护VMware vShield Endpoint:通过将重要的防病毒和防恶意软件功能负载卸载到安全虚拟机上,消除了防病毒代理在虚拟机中占用空间的必要,从而提高了性能VMware vShield Manager:所有 vShield 产品均包含此安全管理框架VMware vShield 套件: 包括所有的vShield产品– vShield App with Data Security, vShield Edge, vShield Endpoint 和 vShield ManagervShield Manager 5.0vShield App 5.0vShield Edge 5.0vShield Endpoint 5.0基于VMware vSphere构建的虚拟数据中心部署vShield安全产品共包括以下四个步骤:下载vShield、登录vSphere Client安装vShield Manager、配置vShield Manager,现在我们来看看如何安装配置vShield。
从网站上下载的是一个ova的虚拟机文件。
点击‘文件’部署虚拟机模版选择ova文件默认下一步选择存储开始部署模版部署成功后,会自动启动启动好后输入用户名:admin 密码:adfault进入编辑模式:enable设置IP地址:setup输入IP地址,子网掩码,网关和DNS选择y来确定之后esxi退出admin登录生效通过IE连接manage可以看到登录界面用户名:admin密码:default首先要绑定vc。

VMware-vShield 5.0 安装与部署vShield 产品包括:VMware vShield App :保护虚拟数据中的应用程序免受网络威胁的侵扰VMware vShield App with Data Security :跨虚拟化资源增强了vShield App Sen sitive Data Discovery 的功能VMware vShield Edge :增强对虚拟数据中心外围的保护VMware vShield En dpoi nt :通过将重要的防病毒和防恶意软件功能负载卸载到安全虚拟机上,消除了防病毒代理在虚拟机中占用空间的必要,从而提高了性能VMware vShield Manager :所有vShield 产品均包含此安全管理框架VMware vShield 套件:包括所有的vShield 产品 -vShield App with Data Security,vShield Edge, vShield Endpoint 和vShield ManagervShield Man ager 5.0vShield App 5.0vShield Edge 5.0vShield En dpoi nt 5.0基于VMware vSphere 构建的虚拟数据中心部署vShield安全产品共包括以下四个步骤:下载vShield、登录vSphere Client 安装vShield Manager 、配置vShield Manager ,现在我们来看看如何安装配置vShield。
从网站上下载的是一个ova的虚拟机文件。
点击’文件’部署虚拟机模版7 H ________________________________________________________________________ I 2J 选择ova文件默认下一步冈盘莫目虑从机文畔押2¥<何竝】[匚品槌畅订曲1楚量臣和城;丙也边事粘和^舌^FKSfetatert 隔濃时11■radi*"i*"»4iRiriTcflK 解酬瞅脚国怦M昭甜誥声即1芒章ess可叫宅E胃R<M!!E 虹3・r?0*他皿就矍<i«^i站型m vwn曼芟博J EK1 1* 550L% TB 2Jin l ife i« VWSJ(4 fVCt J2* S5D 3.m TB 3_W IB 2.93 m VMF55(j KVO.-I* SSD10:l,7LGB lAi K常3血菌VMF5311皿芒* ®JK17< 6B 1J7T&3&3.71 3 vf¥S3tL1J pSF「霉辭炸勺j可宙當自|土却[辐对M *11. ■ 1 ■・声1■ 1幾恤I 选择存储r M戏脅呵曲冋冲囲和isitii开始部署模版|^ r c sx i~12d .』:丄 f « KiaJ«-r. E «« 1:的 < ■SLi «1 4 Bui«<«r HI®! Ei jj 踽时 «|CW<Z ■ « |V © 0 』:Binput 1 1 H PS/7 Qk'niMr ic. rlnns^ ccK^pt i ril^inpik m i ta ] lz i ny notuork drop MOH i tar ^oruic^kj d u J ik s 1<«rt t ni{ .Cd wi i t i lit ervd j 5 duel s KXT3- f s ! HDI ]ntc^rl f iPH uil h nr-lrrnd 十H hu>riE . JFS ;Mumit E 4 ycietf j lesy^tttn) r^AdDL)Jy 口n dev ice tf ;?, Fr0e iunused kf*r HC I Menory : 1 reed 4r i tc pr(H ect i t he herflt I text i 3^BOk ^lr Mu prat i nt^ t ho k^r na I reftd.-aFi ly id.t a : 162ykJ H I T :ears Ion 2. B8 haulingIWdlng 1253 吧酣 主〜p nn /斡* 屛由.FrlqrLi^ '.・ “•.】|Vi|||i iff I : mini FA c kI n n A . S P A ( 1 hue i*e1 if t rtdKT CO HF iC_Hr_CT_ACCT Is deprac«ted &nd Hi 11 be renaMd SOOI I H P 沽”軒 use lit cot^ntra^K, ncct = 1 hfirnfi I pflrnnfEt er , Licet = I rf cnnutrdch noflu J « apt ion nr SJ ^EC I 1 nc*t. fl L t er, nl CGnmt rstk acet =L to enftb I o It, conn-trAck U4) irtat or liuok rcy Lst^rod Lp_t«ibld£- (CJ 1 Itcrr Cure T 甘GH tiLes : (Cl ZHB2 DakjH 3. NL 1 lt>r TCP tulilu 「胡 I ii i t ia I i Xf HM net I hik sejek^tI ttT : Rug I^t«red protvevI f en i17 Is i tig [PI No Shurtcut 村皿吐 'ey ir ;1 orud Id^kst A f E vur?i :i on 1 inpul : flf T r<*ns I Ati*d Sot 2 kny/bD^ rd ns /"占鞋^ 竹十{口rn 扌i HR 昌?/y(ir iuPFi nput 』inpti 部署成功后,会自动启动 启动好后输入用户名: 密码:adfault adm in。
MySQL图文安装教程双击运行Setup.exe安装程序点击“next”安装类型选择,typical(典型安装),complete(完全安装),custom(自定义安装),如无特殊需要选择typical典型安装,单击“next”点击“install”,进入点击“next”点击“next”点击“finish”进入配置界面点击“next”配置类型选择,detailed configuration(手动配置),standard configuration(标准配置),选择detailed configuration手动配置,点击“next”服务类型选择,developer machine(开发测试类),server machine(服务器类),dedicated mysql server machine(专门数据库服务),选择developer machine(开发测试类),点击“next”数据库类型选择,multifunctional database(通用数据库类型),transactional database only(专注类数据库类型),non-transactional database only(简单数据库类型),选择multifunctional database(通用数据库类型),点击“next”点击“next”网站数据库访问量配置,decision support(20人左右),online transaction processing(500人左右),manual setting(自定义人数),根据自己的需要进行选择,这里暂时选择decision support(20人左右),点击“next”可以在此对话框配置数据库访问端口,这里可以选择默认的3306端口,如果安装数据库的机器开启windows防火墙,点选项,和都要选上,点击“next”编码一定要选择utf8,点击“next”和都要勾选,点击“next”勾选,在new root password文本框中输入root用户的新密码,在confirm文本框中,在此输入新密码确认,点击“next”点击“next”点击“finish”mysql数据库安装完成。
mysql5.0安装使用教程手册描述:mysql5.0安装mysql5.0教程mysql5.0的安装mysql5.0使用教程mysql5.0安装手册双击Setup.exe文件,开始mysql5.0的安装。
出现下面的窗口点击Next开始下一步安装。
默认是Typical,建议改成Custom,因为Typical模式不允许改变安装路径,只能安装在C盘。
之后这里需要选择组件和更改文件夹位置,组件可以默认的,位置要选择Change来改变接下看..注意:安装mysql的路径中,不能含有中文!如果没有需要更改的话,,那点击Install开始安装吧~~。
如下是[安装过程],您能看到安装进度条...待待吧..当安装完成时,您便能看到下面的[注册]了。
当然,我们选择[跳过],即[SkipSign-Up]。
之后点“Next”进行再如下面。
点击Finish继续现在开始配置的工作了。
点击Next继续选择Detailed Configuration,点Next继续下面这个选项是选择mysql应用于哪种类型,(第一种是开发服务器,将只用尽量少的内存,第二种是普通WEB服务器,将使用中等数量内存,最后一种是这台服务器上面只跑mysql 数据库,将占用全部的内存,)这里示例选择开发服务器,占用尽量少的内存,用户可根据自己的需求,选择其他选项,点Next继续下面是选择数据库用途,(第一种是多功能用途,将把数据库优化成很好的innodb存储类型和高效率的myisam存储类型,第二种是只用于事务处理类型,最好的优化innodb,但同时也支持myisam,最后一种是非事务处理类型,适合于简单的应用,只有不支持事务的myisam类型是被支持的。
)一般选择第一种多功能。
点Next继续,下面是选择InnodDB的数据存放位置,一般默认好了,不需要改动下面是选择mysql允许的最大连接数,第一种是最大20个连接并发数,第二种是最大500个并发连接数,最后一种是自定义,你可以根据自己的需要选择点Next继续,下面是选择数据库监听的端口,一般默认是3306,如果改成其他端口,以后连接数据库的时候都要记住修改的端口,否则不能连接mysql数据库,比较麻烦,这里不做修改,用mysq的默认端口:3306点Next继续,这一步设置mysql的默认编码,默认是latin1这里可以根据需要,把它改成gb2312,过gbk注意:如果要用原来数据库的数据,最好能确定原来数据库用的是什么编码,如果这里设置的编码和原来数据库数据的编码不一致,在使用的时候可能会出现乱码。
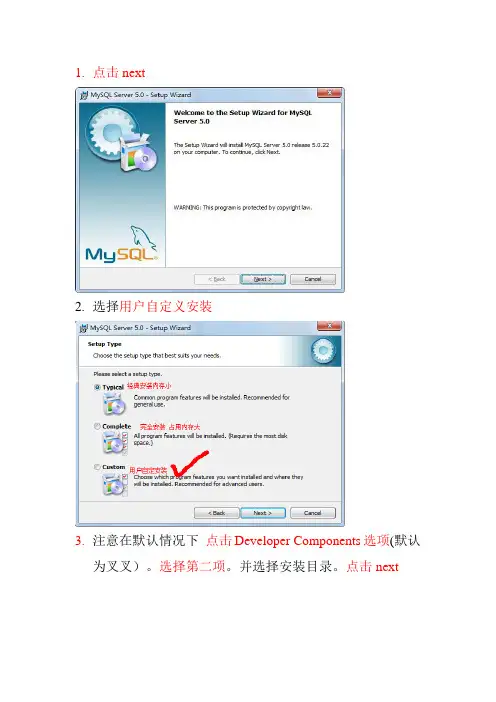
1.点击next2.选择用户自定义安装3.注意在默认情况下点击Developer Components选项(默认为叉叉)。
选择第二项。
并选择安装目录。
点击next4.点击安装5.选择第三个,这个是关于官网注册什么云云的。
直接跳过。
点击next6.到此安装完毕---点击finish开始配置mysql7.点击next8.选择第一项。
按细节方式配置点击next9.选择第一项程序员开发模式点击next10.选择第一个选项点next11.点击next12.这里选择第三项填入并发访问的用户数作为独立开发填小一点就ok了。
13.这里默认的就ok了。
Mysql服务端口一般都为3306 点击next14.配置字符集当选择第一个时,中文就无法使用。
因为我们要用utf8的编码。
所以选择第二个或者选择第三个选择utf8字符集。
点击next 点击nextStandard Character Set:Latin1为默认的字符集。
主要用于西方欧洲国家的语言。
Best Support For Multilingualism:UTF8为默认的字符集。
Manual Selected Default Character Set / Collation:个人设定。
(如果你希望数据库支持汉字,请选择gb2312)。
选择缺省的“Standard Character Set”,下一步(Next)。
15.启动方式。
这里两个都选第一个表示启动windows时就启动mysql服务。
第二个表示可以通过dos命令窗口启动mysql。
点击next16.设置管理员密码,允许其他机器也可以访问本机mysql数据库(在密码下面的框框打钩)。
点击next17.点击执行,当全部都正确时,表示配置成功。
若有失败的。
停掉mysql服务。
删除安装文件夹,重新安装。
18.点击finish安装完成。
测试一下:在dos环境中输入mysql –uroot –proot 回车出现如上图表示正确安装。

桌面虚拟化VMware View 5.0安装实战2011-10-08 23:04:271 -环境准备篇原创作品,允许转载,转载时请务必以超链接形式标明文章原始出处、作者信息和本声明。
否则将追究法律责任。
/345374/683058安装view环境之前,需要准备好vsphere环境。
整个实验环境所需要的虚拟机机器列表,包括机器名称、IP和所安装所需软件如下表:1、准备vSphere(ESX/ESXi)准备vSphere,在View 5中强烈建议使用ESXi 5,并安装vCenter Server。
vSphere 5中的vCenter Server需要Windows 2003/2008 64bit的支持,建议使用2vCPUs、3G内存。
本次测试环境如下:ESXi IP:192.168.1.10 DNS:192.168.1.201vCenter IP:192.168.1.203 DNS:192.168.1.2012、准备域环境VMware View环境中必须使用域,如果您已经具备域的环境可以直接使用不必再建立。
如果没有请参考以下步骤搭建域环境。
本次测试域环境如下:域名: 域控制器: IP:192.168.1.201 DNS:127.0.0.1步骤1:准备一台Windows 2003/2008安装光盘或ISO,插入到系统中,创建第一台域控制器。
设置固定IP地址,并请将DNS设置为“127.0.0.1”。
步骤2:开始安装域环境,点击“开始/运行”输入“dcpromo”,在出现的AD安装向导中点击“下一步”,开始配置域。
步骤3:在域控制器类型中选择“新域的域控制器”,点击“下一步”并在创建一个新域中选择“在新林中的域”。
步骤4:根据测试的环境,输入新的域名。
如ABC公司,输入。
输入完成后点击“下一步”,系统将自动生成域的NETBIOS名称点击“下一步”。
步骤5:设置“目录服务还原模式的管理员密码”,点击下一步直到完成域的创建。
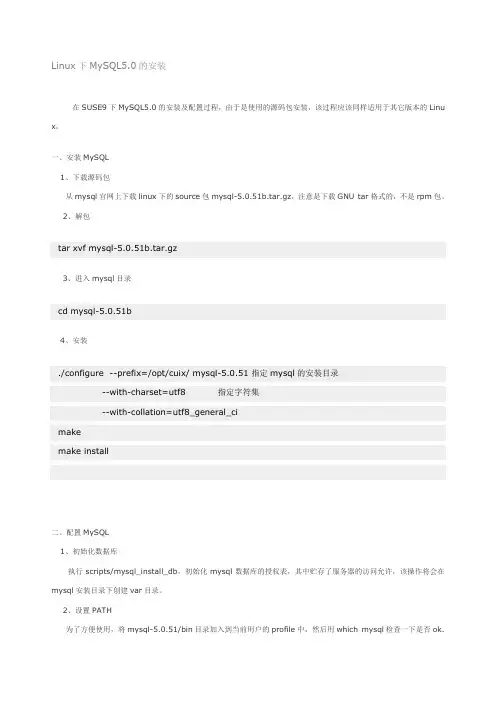
Linux下MySQL5.0的安装在SUSE9下MySQL5.0的安装及配置过程,由于是使用的源码包安装,该过程应该同样适用于其它版本的Linu x。
一、安装MySQL1、下载源码包从mysql官网上下载linux下的source包mysql-5.0.51b.tar.gz,注意是下载GNU tar格式的,不是rpm包。
2、解包tar xvf mysql-5.0.51b.tar.gz3、进入mysql目录cd mysql-5.0.51b4、安装./configure --prefix=/opt/cuix/ mysql-5.0.51 指定mysql的安装目录--with-charset=utf8 指定字符集--with-collation=utf8_general_cimakemake install二、配置MySQL1、初始化数据库执行scripts/mysql_install_db,初始化mysql数据库的授权表,其中贮存了服务器的访问允许,该操作将会在mysql安装目录下创建var目录。
2、设置PATH为了方便使用,将mysql-5.0.51/bin目录加入到当前用户的profile中,然后用which mysql检查一下是否ok.3、设置f配置文件在support-files目录下有三个预设置的文件可供选择,选择一个适合你的,我这里选择的是f,复制这个文件到你的安装目录下:cp support-files/f /opt/cuix/mysql-5.0.51/f注意f的使用方法,这个配置文件的路径可以在启动mysql时通过命令行参数给出,比如:./mysqld_safe --defaults-file=f &4、赋予my.conf权限chmod 744 f5、修改my.conf文件查找[client]:添加user=root,去掉password前的注释并设定root账户的密码,设定port,使用netstat –atln | grep “端口号”查看你自己的端口是否被占用,更改socket,默认/tmp/mysql.sock可能和其他的mysql服务器冲突,修改到当前mysql安装目录下。
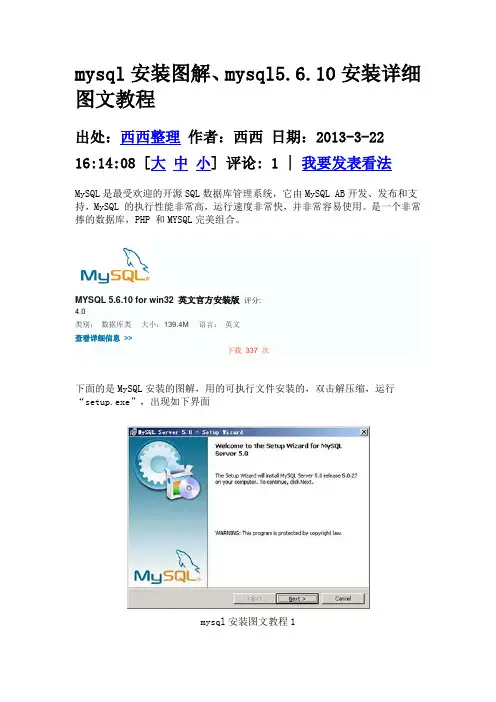
mysql安装图解、mysql5.6.10安装详细图文教程出处:西西整理作者:西西日期:2013-3-22 16:14:08 [大中小] 评论: 1 | 我要发表看法MySQL是最受欢迎的开源SQL数据库管理系统,它由MySQL AB开发、发布和支持,MySQL 的执行性能非常高,运行速度非常快,并非常容易使用。
是一个非常捧的数据库,PHP 和MYSQL完美组合。
MYSQL 5.6.10 for win32 英文官方安装版评分:4.0类别:数据库类大小:139.4M 语言:英文查看详细信息>>下载337 次下面的是MySQL安装的图解,用的可执行文件安装的,双击解压缩,运行“setup.exe”,出现如下界面mysql安装图文教程1mysql安装向导启动,按“Next”继续mysql图文安装教程2选择安装类型,有“Typical(默认)”、“Complete(完全)”、“Custom(用户自定义)”三个选项,我们选择“Custom”,有更多的选项,也方便熟悉安装过程:mysql图文安装教程3在“Developer Components(开发者部分)”上左键单击,选择“This feature, and all subfeatures, will be installed on local hard drive.”,即“此部分,及下属子部分内容,全部安装在本地硬盘上”。
在上面的“MySQL Server (mysql服务器)”、“Client Programs(mysql客户端程序)”、“Documentation(文档)”也如此操作,以保证安装所有文件。
点选“Change...”,手动指定安装目录。
mysql图文安装教程4填上安装目录,我的是“F:\Server\MySQL\MySQL Server 5.0”,也建议不要放在与操作系统同一分区,这样可以防止系统备份还原的时候,数据被清空。
Installation GuideTable of ContentsChapter 1. Overview (1)Chapter 2. Hardware And Software Requirements (2)2.1. Hardware Requirements (2)2.2. Software Requirements (2)Chapter 3. Installation (3)3.1. Downloading NVSHMEM (3)3.2. Building And Installing NVSHMEM (3)3.3. Using NVSHMEM In Your Applications (4)3.3.1. Using NVSHMEM With Your C Or C++ Program (4)3.3.2. Using NVSHMEM With Your MPI Program (5)3.4. Running Performance Tests (5)3.5. "Hello World" Example (6)Chapter 4. Support (8)Chapter 1.OverviewNVIDIA® NVSHMEM™ is a programming interface that implements a Partitioned Global Address Space (PGAS) model across a cluster of NVIDIA GPUs. NVSHMEM provides an easy-to-use interface to allocate memory that is symmetrically distributed across the GPUs. In addition to a CPU-side interface, NVSHMEM also provides a CUDA kernel-side interface that allows CUDA® threads to access any location in the symmetrically-distributed memory.Chapter 2.Hardware And SoftwareRequirementsNVIDIA® NVSHMEM™ has the following hardware and software requirements.2.1. Hardware RequirementsNVSHMEM requires the following hardware:‣The x86_64 or ppc64leCPU architecture.‣NVIDIA® Data Center GPU of NVIDIA Volta™ GPU architecture or later.Refer to https:///cuda-gpus for a complete list.‣All GPUs must be P2P-connected via NVLink/PCIe or via GPUDirect RDMA over InfiniBand/ RoCE with a Mellanox adapter (CX-4 or later).Support for atomics requires a NVLink connection or a GPUDirect RDMA connection and GDRCopy. See Software Requirements for more information.2.2. Software RequirementsNVSHMEM requires the following software:‣64-bit Linux.For a complete compatibility matrix, see the NVIDIA CUDA Installation Guide for Linux .‣CUDA 10.1 or later.‣Mellanox OFED.‣nv_peer_mem for GPUDirect RDMA.‣PMI-1 (for example, Hydra), PMI-2 (for example, slurm), or a PMIx compatible launcher.‣(Optional)GDRCopy v2.0 or newer.This software is required for atomics support on non-NVLink connections.Chapter 3.Installation3.1. Downloading NVSHMEMProcedureTo download NVSHMEM, go to NVSHMEM Downloads.The extracted directory contains the following files and subdirectories:3.2. Building And Installing NVSHMEM Procedure1.Set the CUDA_HOME environment variable to point to the CUDA Toolkit.2.Set the GDRCOPY_HOME environment variable to point to the GDRCopy installation.To build without GDRCopy, set the environmental variable to NVSHMEM_USE_GDRCOPY=0.Note: Without GDRCopy, atomics are only supported across NVLink connections.3.If MPI and/or SHMEM support is required, set NVSHMEM_MPI_SUPPORT=1 and/or NVSHMEM_SHMEM_SUPPORT=1.4.Set the MPI_HOME and SHMEM_HOME environment variables to point to the MPI andOpenSHMEM installations, respectively.5.If NCCL will be used for host-initiated collectives, set NVSHMEM_USE_NCCL=1 and NCCL_HOME to point to the NCCL installation.You can use any NCCL 2.x version, and NVSHMEM hast been tested with NCCL 2.8.3-1.6.If the MPI library is neither OpenMPI nor its derivative, set NVSHMEM_MPI_IS_OMPI=0.Note: Here is some additional information:‣When using OpenMPI and OSHMEM, the paths are the same.To use OSHMEM, OpenMPI needs to be built with UCX support.‣NVSHMEM has been tested with OpenMPI 4.0.1 and UCX 1.8.0.‣Other MPI and OpenSHMEM installations should also work.‣By default, MPI support is enabled, and OpenSHMEM support is disabled.7.If PMIx support is required, set NVSHMEM_PMIX_SUPPORT=1 and PMIX_HOME to point to thePMIx installation.Note:‣PMI-1 and PMI-2 support is always included in the build, and PMI-1 is the default PMI.To change the default PMI NVSHMEM_DEFAULT_PMIX=1 (to select PMIx)or NVSHMEM_DEFAULT_PMI2=1 (to select PMI-2) can be set. At runtime,NVSHMEM_BOOTSTRAP_PMI can be used to override the default. The possible values arePMIX, PMI-2, and PMI.‣OpenMPI ships with its own copy of PMIx.To avoid conflicting PMIx shared libraries, we recommend that you build a standalonePMIx and configure OpenMPI with --with-pmix=external to point to that installation.8.To specify the location where NVSHMEM will be installed, set NVSHMEM_PREFIX.9.To change the directory where NVSHMEM will be built, set NVSHMEM_BUILDDIR.The default is NVSHMEM_DIR/build.10.To build and install the library, run make -j8 install.3.3. Using NVSHMEM In Your Applications 3.3.1. Using NVSHMEM With Your C Or C++ProgramProcedure1.Include nvshmem.h and nvshmemx.h from include/.2.Point to the include/ and lib/ paths.3.NVSHMEM users: If your C or C++ program only uses NVSHMEM, install Hydra ProcessManager using the bash script install_hydra.sh under the scripts/ directory. Provide the download and install location as arguments, for example:./install_hydra.sh <download_path> <install_path>Use nvshmrun launcher under bin/ (of the Hydra install path) to run the NVSHMEM job. 3.3.2. Using NVSHMEM With Your MPI Program About this taskNote: The only MPI library currently tested is OpenMPI, however, derivatives of OpenMPI suchas SpectrumMPI as well as MPICH derivatives are expected to work.To run a Hybrid MPI + NVSHMEM program, use the mpirun launcher available in the MPI installation.Similarly, NVSHMEM can be used from OpenSHMEM programs. In this case, you cannot use the launchers that are in the NVSHMEM package. The only OpenSHMEM version that has been tested is OSHMEM in OpenMPI. Other OpenSHMEM implementations such as Sandia OpenSHMEM (SOS) should also work. To run the hybrid OpenSHMEM/NVSHMEM job, usethe oshrun launcher in the OpenMPI installation or follow the launcher specification of your OpenSHMEM library.3.4. Running Performance TestsBefore you can run performance tests, you first must build them.Procedure1.Set the CUDA_HOME, NVSHMEM_HOME and MPI_HOME (if the NVSHMEM library was built with NVSHMEM_MPI_SUPPORT=1) environment variables to build NVSHMEM performance tests: CUDA_HOME=<path to supported CUDA installation>NVSHMEM_HOME=<path to directory where NVSHMEM is installed>MPI_HOME=<path to MPI installation>Configuring OpenMPI using the -with-ucx option is required for OpenMPI/OSHMEMinteroperability. If you have built NVSHMEM with MPI and OpenSHMEM support(NVSHMEM_MPI_SUPPORT=1 and NVSHMEM_SHMEM_SUPPORT=1), building perftest/ also requires MPI and OpenSHMEM support to be enabled.Build without SHMEM interoperability: To build NVSHMEM performance tests without SHMEM interoperability, set the environment variable NVSHMEM_SHMEM_SUPPORT to 0. By default, performance tests are installed under perftest/perftest_install. To install toa different path, set NVSHMEM_PERFTEST_INSTALL to point to the desired path.2.Update LD_LIBRARY_PATH to point to $CUDA_HOME/lib64 and $MPI_HOME/lib.3.Run performance tests as NVSHMEM jobs (assuming Hydra is installed under HYDRA_HOME), hybrid MPI+NVSHMEM jobs, or hybrid OpenSHMEM+NVSHMEM jobs with the following commands (using perftest/device/pt-to-pt/put.cu as an example):NVSHMEM job using Hydra (PM-1):$HYDRA_HOME/bin/nvshmrun -n <up to number of P2P or InfiniBandNIC accessible GPUs>$NVSHMEM_PERFTEST_INSTALL/device/pt-to-pt/shmem_put_bwNVSHMEM job using slurm:srun -n <up to number of P2P or InfiniBand NIC accessible GPUs>$NVSHMEM_PERFTEST_INSTALL/device/pt-to-pt/shmem_put_bwNote: When slurm was built with a PMI that does not match the default of NVSHMEM, forexample, if slurm was built with PMIx support and NVSHMEM_DEFAULT_PMIX=1 was not setwhen building NVSHMEM, NVSHMEM_BOOTSTRAP_PMI can be used to override the default.Possible values are PMIX, PMI-2, and PMI.Hybrid MPI/NVSHMEM job:$MPI_HOME/bin/mpirun -n <up to number of GPUs accessible by P2Por InfiniBand NIC> -x NVSHMEMTEST_USE_MPI_LAUNCHER=1$NVSHMEM_PERFTEST_INSTALL/device/pt-to-pt/shmem_put_bwHybrid OpenSHMEM/NVSHMEM job:$MPI_HOME/bin/oshrun -n <up to number of GPUs accessible by P2Por InfiniBand NIC> -x USE_SHMEM_IN_TEST=1$NVSHMEM_PERFTEST_INSTALL/device/pt-to-pt/shmem_put_bw3.5. "Hello World" ExampleProcedure1.Save the following code as nvshmemHelloWorld.cu:#include <stdio.h>#include <cuda.h>#include <nvshmem.h>#include <nvshmemx.h>__global__ void simple_shift(int *destination) {int mype = nvshmem_my_pe();int npes = nvshmem_n_pes();int peer = (mype + 1) % npes;nvshmem_int_p(destination, mype, peer);}int main(void) {int mype_node, msg;cudaStream_t stream;nvshmem_init();mype_node = nvshmem_team_my_pe(NVSHMEMX_TEAM_NODE);cudaSetDevice(mype_node);cudaStreamCreate(&stream);int *destination = (int *) nvshmem_malloc(sizeof(int));simple_shift<<<1, 1, 0, stream>>>(destination);nvshmemx_barrier_all_on_stream(stream);cudaMemcpyAsync(&msg, destination, sizeof(int), cudaMemcpyDeviceToHost, stream);cudaStreamSynchronize(stream);printf("%d: received message %d\n", nvshmem_my_pe(), msg);nvshmem_free(destination);nvshmem_finalize();return 0;}2.Build nvshmemHelloWorld.cu with the following command:nvcc -rdc=true -ccbin g++ -gencode=$NVCC_GENCODE -I $NVSHMEM_HOME/includenvshmemHelloWorld.cu -o nvshmemHelloWorld.out -L $NVSHMEM_HOME/lib -lnvshmem -lcudaWhere arch=compute_70,code=sm_70 is the value of NVCC_GENCODE for V100 GPUs.3.Run the nvshmemHelloWorld sample with one of the following commands:When running on a single host with 2 GPUs (connected by PCI-E, NVLink or Infiniband): $HYDRA_HOME/bin/nvshmrun -n 2 -ppn 2 ./nvshmemHelloWorld.outWhen running on two hosts with 1 GPU per host (connected by InfiniBand):$HYDRA_HOME/bin/nvshmrun -n 2 -ppn 1 –-hosts hostname1,hostname2 ./nvshmemHelloWorld.outChapter 4.SupportReport bugs and submit feature requests using NVONLINE or by emailing ******************.NoticeThis document is provided for information purposes only and shall not be regarded as a warranty of a certain functionality, condition, or quality of a product. NVIDIA Corporation (“NVIDIA”) makes no representations or warranties, expressed or implied, as to the accuracy or completeness of the information contained in this document and assumes no responsibility for any errors contained herein. NVIDIA shall have no liability for the consequences or use of such information or for any infringement of patents or other rights of third parties that may result from its use. This document is not a commitment to develop, release, or deliver any Material (defined below), code, or functionality.This document is provided for information purposes only and shall not be regarded as a warranty of a certain functionality, condition, or quality of a product. NVIDIA Corporation (“NVIDIA”) makes no representations or warranties, expressed or implied, as to the accuracy or completeness of the information contained in this document and assumes no responsibility for any errors contained herein. NVIDIA shall have no liability for the consequences or use of such information or for any infringement of patents or other rights of third parties that may result from its use. This document is not a commitment to develop, release, or deliver any Material (defined below), code, or functionality.Customer should obtain the latest relevant information before placing orders and should verify that such information is current and complete.NVIDIA products are sold subject to the NVIDIA standard terms and conditions of sale supplied at the time of order acknowledgement, unless otherwise agreed in an individual sales agreement signed by authorized representatives of NVIDIA and customer (“Terms of Sale”). NVIDIA hereby expressly objects to applying any customer general terms and conditions with regards to the purchase of the NVIDIA product referenced in this document. No contractual obligations are formed either directly or indirectly by this document.NVIDIA products are not designed, authorized, or warranted to be suitable for use in medical, military, aircraft, space, or life support equipment, nor in applications where failure or malfunction of the NVIDIA product can reasonably be expected to result in personal injury, death, or property or environmental damage. NVIDIA accepts no liability for inclusion and/or use of NVIDIA products in such equipment or applications and therefore such inclusion and/or use is at customer’s own risk. NVIDIA makes no representation or warranty that products based on this document will be suitable for any specified use. Testing of all parameters of each product is not necessarily performed by NVIDIA. It is customer’s sole responsibility to evaluate and determine the applicability of any information contained in this document, ensure the product is suitable and fit for the application planned by customer, and perform the necessary testing for the application in order to avoid a default of the application or the product. Weaknesses in customer’s product designs may affect the quality and reliability of the NVIDIA product and may result in additional or different conditions and/or requirements beyond those contained in this document. NVIDIA accepts no liability related to any default, damage, costs, or problem which may be based on or attributable to: (i) the use of the NVIDIA product in any manner that is contrary to this document or (ii) customer product designs.VESA DisplayPortDisplayPort and DisplayPort Compliance Logo, DisplayPort Compliance Logo for Dual-mode Sources, and DisplayPort Compliance Logo for Active Cables are trademarks owned by the Video Electronics Standards Association in the United States and other countries.HDMIHDMI, the HDMI logo, and High-Definition Multimedia Interface are trademarks or registered trademarks of HDMI Licensing LLC.OpenCLOpenCL is a trademark of Apple Inc. used under license to the Khronos Group Inc.TrademarksNVIDIA, the NVIDIA logo, and CUDA, CUDA Toolkit, GPU, Kepler, Mellanox, NVLink, NVSHMEM, and Tesla are trademarks and/or registered trademarks of NVIDIA Corporation in the United States and other countries. Other company and product names may be trademarks of the respective companies with which they are associated.Copyright© 2019-2021 NVIDIA Corporation. All rights reserved.。

RevMan5:0中文使用指南RevMan 5:0中文使用指南一、前言1.1简介本文档是RevMan 5:0的中文使用指南,旨在帮助用户快速掌握RevMan 5:0的功能和操作方法。
1.2 目标读者本文档适用于初学者和有一定基础的用户,希望能够帮助用户快速上手RevMan 5:0。
二、安装与配置2.1 RevMan 5:0用户可以从官方网站()RevMan 5:0的安装包。
2.2 安装RevMan 5:0用户可以按照安装包内的安装向导来完成RevMan 5:0的安装。
2.3 配置RevMan 5:0用户在首次运行RevMan 5:0时,可以根据自己的需求进行简单的配置,如选择语言和设置默认保存路径等。
三、创建项目3.1 新建项目用户可以通过菜单栏中的“文件”-“新建项目”来创建一个新的项目。
3.2 导入项目用户可以通过菜单栏中的“文件”-“导入项目”来导入已有的项目。
四、数据输入与编辑4.1 添加研究用户可以通过项目结构树中的“研究”来添加一个新的研究。
4.2 添加研究特征用户可以在研究属性编辑窗口中填写研究的相关特征,如作者、年份、出版物等。
4.3 添加人口特征用户可以在人口特征编辑窗口中填写参与研究的人口特征信息,如年龄、性别、地域等。
4.4 添加干预措施用户可以在干预措施编辑窗口中填写研究中使用的干预措施信息。
4.5 添加结果用户可以在结果编辑窗口中填写研究的结果,包括主要结局和次要结局等。
五、分析与合成5.1 数据提取用户可以通过菜单栏中的“分析”-“数据提取”来提取研究中的相关数据。
5.2 数据分析用户可以通过菜单栏中的“分析”-“数据分析”来进行统计分析。
5.3 数据合成用户可以通过菜单栏中的“分析”-“数据合成”来合成研究的结果。
六、结果展示与导出6.1 结果报告用户可以通过菜单栏中的“报告”-“结果报告”来结果报告。
6.2 报告导出用户可以通过菜单栏中的“报告”-“报告导出”来导出结果报告为Word或PDF格式。
第一步:安装前准备A:知道安装管理平台的服务器IP地址B:卸载掉服务器上原有杀毒软件并重启第二步:管理平台服务器的安装A:点击 era-server-nt32的安装文件启动安装直接点击下一步点同意直接下一步下一步。
直到出现以下界面点击浏览添加LIC文件后继续下一步注意:LIC文件在安装关盘里可以找到或者其他方式提供点击打开后继续下一步直到出现以下界面在这里添加更新用户名和点击设置更新密码注意:更新密码和用户名在软件授权书上可以找到或者经销商提供填写好后直接一路下一步安装完毕。
第三步:管理平台的安装:点击启动一路下一步。
不做更改安装完成后。
直接启动管理界面。
点击管理工具出现以下界面:点击确定启动管理界面到这一步管理平台就算搭建完成了。
第二部分:管理平台的病毒库更新在管理平台最上面一排菜单里找到工具菜单点击工具服务器选项点击更新选项卡调出以下界面把清除更新缓存创建更新镜像通过部HTTP服务器提供更新文件等都打上勾选后点击立即更新注意:第一次更新需要花费较长时间为了快速更新。
可以手动填写更新服务器。
操作如下在这里选择用户定义更新服务器填写入以下地址:并在下面的用户名和密码填写上去后把清除更新缓存的勾打上后点击立即更新。
第三部分:客户端安装包的制作点击立即更新后看到进度条读取读取后。
可以关掉这个页面。
开始制作安装包。
这里制作的是32位的安装包。
64位的按照同样的步骤操作。
注意:NOD网络版客户端部署是不区分工作站还是服务器的操作系统的。
他是区分32位还是64位的操作系统。
所以我们要制作两个安装包。
一个32位一个64位点击管理平台右下角的远程安装然后在空白处右键调出快捷菜单选择管理程序包调出以下界面点击添加点击打开出现以下界面点击创建出现以下界面点击编辑出现以下界面然后逐层打开以下选线把10改为1然后选择主服务器地址选项填入服务器的IP地址假设本次安装的服务器地址为168.0.0.1.则按照这个格式填写然后在选择下面的许可证密钥。
VMWare vSphere 5安装及基本设置本次桌面虚拟化(VDI)测试采用了100%虚拟化的方案,即不仅仅是虚拟化的桌面,View 5环境所需要的管理服务器也都是虚拟机。
作为虚拟化环境的运行平台,服务器的选择与配置无疑是重中之重。
本文介绍了服务器选择中需要注意的一些关键因素,测试的参考配置,以及部署View 5之前必须做的准备工作——包括设置连接外部共享存储设备的接口。
摘要:本次桌面虚拟化(VDI)测试采用了100%虚拟化的方案,即不仅仅是虚拟化的桌面,View 5环境所需要的管理服务器也都是虚拟机。
作为虚拟化环境的运行平台,服务器的选择与配置无疑是重中之重。
本文介绍了服务器选择中需要注意的一些关键因素,测试的参考配置,以及部署View 5之前必须做的准备工作——包括设置连接外部共享存储设备的接口。
内容:∙服务器的选择与介绍;∙安装vSphere 5.0;∙为iSCSI存储配置网络;∙添加iSCSI适配器并设置。
注意:选择适用的ESXi 5.0与vCenter Server 5.0。
服务器的选择及参考配置本次VMware View 5.0测试的目标是完整的解决方案,而不是单一的产品,力求给用户一个完整的体验与功能展示。
因此我们采用了完全虚拟化的环境。
整个VDI环境要用到的服务器,全部运行在VMware最新的vSphere 5.0虚拟化平台上,包括:∙VMware vCenter虚拟化管理平台软件(含View Composer)∙VMware View Connection服务器∙微软Active Directory服务器(AD,域控制器)∙VMware View Transfer服务器而根据目前市场上有关虚拟桌面应用的特点与客户的态度,本次评测的目标方案为可支持200个桌面的VDI解决方案,因为这一规模比较适中,再大的规模基本上都会自行测试;而低于这一规模的企业,往往没有能力自己做系统性的评估。
Vmware Vsphere 5.0安装手记VMware ESXi 5.0.0 安装基本设置vSphere 是VMware公司推出一套服务器虚拟化解决方案,目前的最新版本为5.0 。
vSphere5 中的核心组件为 VMware ESXi 5.0.0(取代原ESX), ESXi与Citrix 的XenServer 相似,它是一款可以独立安装和运行在祼机上的系统,因此与他我们以往见过的VMware Workstation 软件不同的是它不再依存于宿主操作系统之上。
在ESXi安装好以后,我们可以通过vSphere Client 远程连接控制,在ESXi 服务器上创建多个VM(虚拟机),在为这些虚拟机安装好Linux /Windows Server 系统使之成为能提供各种网络应用服务的虚拟服务器,ESXi 也是从内核级支持硬件虚拟化,运行于其中的虚拟服务器在性能与稳定性上不亚于普通的硬件服务器,而且更易于管理维护。
本手记所要演示的项目:1.在一台祼机上架设安装VMware ESXi 5.0.02.在一台windows2008的机器上安装vSphere Client 5.0 连接配置ESXi,并创建一台虚拟机在虚拟机上安装Win7系统。
因此我们至少需要两台机器(演练时可以用VMware Workstation 建两台虚拟机)安装开始:VMware ESXi 5.0.0 的安装文件可以从VMware的官方网站上直接下载(注册时需提供一个有效的邮箱),下载得到的是一个VMware-VMvisor-Installer-5.0.0-469512.x86_64.iso 文件,可以刻录成光盘或量产到U 盘使用,由于ESXi 本身就是一个操作系统(Linux内核),因此在初次安装时要用它来引导系统;用ESXi5光盘引导启动后,会自动加载安装向导;如下图:默认选择第一项... (Installer)文件加载中...等待文件加载中...等待回车继续F11 同意协议选择安装目标盘;最好是用祼机安装,全盘都会被清空...默认语言,推荐用英文设置管理员密码,两次确认...F11 开始安装安装中,请等待...安装完成,把光盘取出来,回车自动重启本机...重启之后,刚才祼机硬盘中的已经了系统,如上图即是ESXi5启动后的界面;ESXi5服务器的界面非常简洁全字符,因为真实的环境下我们平常基本很少需要在这台服务器上进行操作,你可以把它锁在机房老里面通上电不再管它,有关的操作如创建管理虚拟服务器等,都可以在vSphere Client上进行;不过在此之前,我们需要对ESXi的网络进行一些配置,vSphere Client对其的控制也是通过网络进行的,我们必须事先为ESXi配置好访问IP按F2 进入配置,输入管理员密码,密码就是刚才在安装过程中设定的那个。
MySQL5 绿色版安装教程MySQL5 绿色版安装教程内容提要:mysql-noinstall-5.0.67-win32.zip的安装教程一、下载,这里使用绿色解压缩版/Downloads/MySQL-5.0/mysql-noinstall-5.0.67-win32.zip二、配置MySQL5的参数1、解压缩绿色版软件到D:\mysql-5.0.67-win322、修改D:\mysql-5.0.67-win32\my-small.ini文件内容,添加红色内容[client]#password = your_passwordport = 3306socket = /tmp/mysql.sockdefault-character-set=gbk[mysqld]port = 3306socket = /tmp/mysql.sockdefault-character-set=gbkskip-lockingkey_buffer = 16Kmax_allowed_packet = 1Mtable_cache = 4sort_buffer_size = 64Kread_buffer_size = 256Kread_rnd_buffer_size = 256Knet_buffer_length = 2Kthread_stack = 64K3、安装MySQL5的服务,服务名自己定义为MySQL5.1)、在DOS窗口下进入D:\mysql-5.0.67-win32\bin目录2)、执行安装MySQL服务名的命令:D:\mysql-5.0.67-win32\bin>mysqld --install MySQL5 --defaults-file=D:\mysql-5.0.67-win32\my-small.iniService successfully installed.3)、启动MySQL5服务D:\mysql-5.0.67-win32\bin>net start mysql5MySQL5 服务正在启动.MySQL5 服务无法启动。
MySQL5.0安装过程图解09计算机 CafeNokia09101029简单说明:我安装的MySQL版本源文件名称是:mysql-essential-5.0.22-win32.msi,属于MySQL5.0。
一、安装MySQL1. 双击源文件,进行安装:2、选择自定义安装:3、选择安装路径:4、安装:5、下图选择最后一个,跳过注册,当然你也可去注册一下,应该也挻好玩的:6、完成:点击完成之后,就要进行一些简单的配置了。
二、MySQL简单配置1、到MySQL开始菜单打开配置界面:2、下面这一步默认即可:3、下面这个也是默认,由于QQ截图问题所以图片和实际有点出入,而我也用红圈圈出来了。
4、这一步也是默认,之所以圈出来也是QQ截图工具的问题。
5、设置MySQL数据存放的位置,如果你觉得位置不太适合就改改吧。
6、下面是设置服务器连接数的界面,第一个默认连接数为20个左右;第二主要用于联机事务处理,默认连接数为500个;最后一个是手动设置连接数。
这里选择默认的吧。
7、下面是设置网络和SQL Mode界面。
Prot Number设置端口号,Enable Strict Mode选项设置SQL Mode为严格格式,可控制MySQL的安全性,勾上。
8、接下来这里是字符集设置界面,第一我圈出来的那个是默认的字符集,默认值为Latin1;第二个能支持大部分语系的字符,默认字符是UTF-8;最后一个是手动设置字符集,如果要使用我们伟大的中文语系的话,我们还是选择最后一个手动设置字符集,并将字符集设置为GBK或是GB2312,如下图所示。
9、在接下来的这个界面中,我们可以设置Service Name(服务名称),默认为MySQL,此设置的名字会出现在Windows服务列表中。
最后一个我圈起来的就是将MySQL的应用程序的目录添加到Windows系统的Path中,这样就可以直接在DOS窗口中访问MySQL,看个人喜欢吧。
锐起无盘网络系统V5.0 80用户破解版(98系统)说明前段时间因工作需要,要安装一个无盘操作系统,本人对于无盘也是新手上路,一窍不通,后来查看了一些资料,终于完成安装,现在机房运行正常,现写锐起无盘网络系统V5.0 80用户破解版(98系统)手记如下:安装准备:服务器:要做服务器的配置这里就不多说了,主板要好一点的,显卡可以集成,但考虑性能,网卡最好用独立的,内存要大,具体情况要看资金预算了。
特别要注意的是服务器操作系统个人推荐用win2003的,这个系统稳定,主板驱动程序要安装好。
工作站:网卡若干,启动芯片若干(个人认为相当于工作站的硬盘),注:本教程只支持PXE的启动芯片,现在市面上大部分都是2种启动类型的芯片集成到一起的。
即PEX和RPL的,安装启动芯片时要注意,网卡上面安装启动芯片的插槽和启动芯片上面都有一个小缺口,要对应,安装反了可能烧掉芯片。
硬件工作准备完毕后下面进入安装正题了:(win2k服务器版本示例,我当时没去找win2003,所以就用win2000 sever)1、服务器操作系统安装:安装win2k server SP2版本操作系统,强烈建议单独用一个40G硬盘来安装系统,分三个区:C盘装系统,D盘存放工作站映象包等,E盘存放C盘的克隆备份及常用软件驱动等;安装过程中除了要设置“每服务器同时连接数:为N(N大于实际工作站电脑数量即可)”之外,其它默认即可!如果是大于120G的硬盘还要安装硬盘补丁。
2 、配置网络协议:除了Tcp/Ip协议之外,还要添加上IPX/SPX及NETBUT协议,其它默认即可;接着配置计算机名、工作组及IP地址等:例如:计算机名:server ,工作组:xdl,服务器IP地址为:192.168.0.1 ,子网掩码:255.255.255.0 ,网关为服务器本机IP地址:即192.168.0.1 按提示重起电脑。
(在系统未调试好做好备份之前尽量避免接入Internet或是潜伏有病毒的内部局域网,以免感染上可恶的病毒)3、锐起无盘服务端的安装与设置1、调整时间:安装之前要把服务器电脑时间调到2010年到2037年之间!!!2、安装锐起无盘管理器:安装装锐起管理器,用SETUP.EXE安装(而不是SETUPMAN),装好后先不要重启,把破解文件拷过去(即“锐起80用户carck”文件里的:RbsMan及RbsServs 两个文件 )替换掉原来的文件,在D盘新建三个文件夹分别命名为:system,client及user,然后再重启电脑。