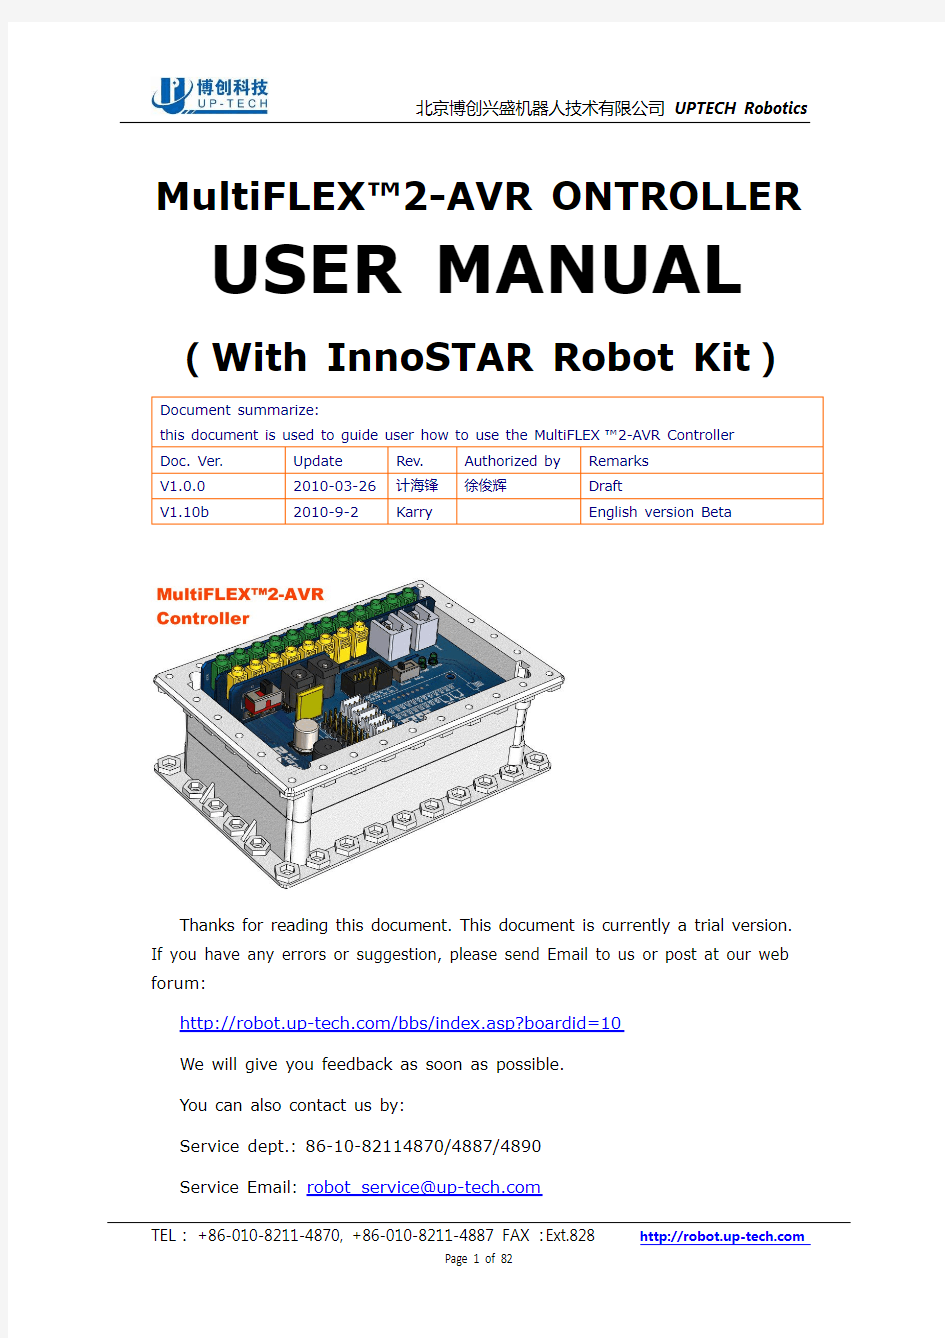
北京博创兴盛机器人技术有限公司 UPTECH Robotics
MultiFLEX?2-AVR ONTROLLER
USER MANUAL
(With InnoSTAR Robot Kit)
Document summarize: this document is used to guide user how to use the MultiFLEX?2-AVR Controller Doc. Ver. V1.0.0 V1.10b Update 2010-03-26 2010-9-2 Rev. 计海锋 Karry Authorized by 徐俊辉 Remarks Draft English version Beta
Thanks for reading this document. This document is currently a trial version. If you have any errors or suggestion, please send Email to us or post at our web forum: https://www.doczj.com/doc/2219038674.html,/bbs/index.asp?boardid=10 We will give you feedback as soon as possible. You can also contact us by: Service dept.: 86-10-82114870/4887/4890 Service Email: robot_service@https://www.doczj.com/doc/2219038674.html, TEL: +86-010-8211-4870, +86-010-8211-4887 FAX: Ext.828
Page 1 of 82 https://www.doczj.com/doc/2219038674.html,
北京博创兴盛机器人技术有限公司 UPTECH Robotics
1 General Description ...............................................................................................................3 1.1 summary........................................................................................................................3 1.2 controller configuration ............................................................................................3 1.3 External interface and electrical specification .................................................4 1.4 battery and DC adapter ...........................................................................................5 1.5 Sensor interface..........................................................................................................7 1.6 R/C servo and robot servo interface ...................................................................9 2. Rapid develop with MultiFLEX?2-AVR ...........................................................................9 2.1 Starting work ...............................................................................................................9 2.1.1 Install the NorthSTAR software.................................................................9 2.1.2 Connecting UP-Debugger debugger ......................................................10 2.1.3 Power supply ..................................................................................................10 2.1.4 Controller.........................................................................................................11 2.2 The first flowchart program..................................................................................13 2.3 I/O ports ......................................................................................................................15 2.4 A/D ports .....................................................................................................................20 2.5 Servo ports .................................................................................................................23 2.6 summarize...................................................................................................................26 3. Write code for MultiFLEX?2-AVR..................................................................................26 3.1 use MultiFLEX?2-AVR controller’s I/O interface ..........................................26 3.2 use MultiFLEX?2-AVR controller‘s servo interface ......................................33 3.3 use AD interface of MultiFLEX?2-AVR controller .........................................48 3.4 use R/C servo interface of MultiFLEX?2-AVR controller ...........................66 3.5 call interface function to develop the MultiFLEX?2-AVR progam..........75
TEL: +86-010-8211-4870, +86-010-8211-4887 FAX: Ext.828
Page 2 of 82
https://www.doczj.com/doc/2219038674.html,
北京博创兴盛机器人技术有限公司 UPTECH Robotics
1 General Description
MultiFLEX?2-AVR controller is a controller in common designed for small robots. It uses ATmega128 MCU of AVR series as the main processor. ATmega128 can run normally under the rate of 16MHz. For Light weight automatic control system, it has enough data-handling capacity. MultiFLEX?2-AVR controller can handle IO、AD and serial bus data,control R/C servo、digital servo. It is the best choice of building small robots.
1.1 summary
MultiFLEX?2-AVR is a highly integrated controller with 12 channel I/O, 8 channel 10 bit resolution A/D. It can control R/C servos,robot servos, and also has RS-232 interface and RS-422 bus interface. It is competent enough to general robot control. With the MultiFLEX?2-AVR controller, it will be easy to develop your own robot applications, by using corresponding inteqrated graphical development environment - NorthStar,you only need to program logical flowchart then the sofrware can generate C code automatically. After compiling and download to controller, various control functions of controller can be achieved. In addition, the controller can also support AVRStudio, Eclipse, and other IDE development environments. We prepared a complete functional service program template for MultiFLEX?2-AVR, and packaging all hardware related functions, providing a convenient call of API interface. If you are familiar with C-language, you can call these functions interface straightly when codding. You don’t need to concentrate your efforts on codding, testing the MCU’s low-level program, contrarily, pay your attention to the robot‘s upper levels control algorithm.
1.2 controller configuration
Shown in the figure 1.2.1, the MultiFLEX?2-AVR controller’s configuration is as the l l l l l l l l following: CPU: ATmega128@16MHz; co-pocessor: ATmega8@16MHz; 6 x robot servo port, compatible with Robotis Dynamixel AX12+; 8 x R/C servo port; 12 x TTL level bi-directional I/O port,GND/VCC/SIGthree-wire system; 8 x AD converter port(0—5V); 2 x RS-422 bus interface(can connect up to 127 RS-422device); 1 x passive buzzer; Communicate with the host computer via RS-232 port, (ZigBee wireless
https://www.doczj.com/doc/2219038674.html,
TEL: +86-010-8211-4870, +86-010-8211-4887 FAX: Ext.828
Page 3 of 82
北京博创兴盛机器人技术有限公司 UPTECH Robotics communication module optional);
Figure 1.2.1 MultiFLEX?2-AVR controller interface figure
1.3 External interface and electrical specification
MultiFLEX?2-AVR controller external interface and electrical specifications as the following figure:
Figure 1.1 MultiFLEX?2-AVR controller’s interface and electrical specifications item battery voltage Data 6.5~8.4VDC Specifications Recommend using two LiPro batteries or six Ni-MH batteries, the voltage range should be 6.5V~8.4V, battery’s discharge capacity should be 5A~10A. charging voltage —— Intelligent charger and battery are matched, during charging process; the controller will cut off battery output automatically. external supply protection Reverse connection protection Over current protection Static Protection current I/O level power 0.5W 6~8A consumption Long-time reversed power supply will result in controller’s damage. After over current protection activated, it could only working again after reset. static power consumption when no external device connected IF exceed the current limit, the controller will shut down automatically. It will be able to power on again about 10secs later. Low level < GND + 1.5V https://www.doczj.com/doc/2219038674.html, power 8V AC switch adapter. Available voltage range is between 7~12V, Normal using current is between 0~5A.
TEL: +86-010-8211-4870, +86-010-8211-4887 FAX: Ext.828
Page 4 of 82
北京博创兴盛机器人技术有限公司 UPTECH Robotics
high level > VCC – 1.5V Digital communication interface Digital input/output Analog input Robot interface servo 8 numbers 6 numbers 12 numbers GND/VCC/SIG three-wire system(SIG can configured as input or output) GND/VCC/SIG three-wire system,10-bit resolution. This interface uses an up to 1Mbps half-duplex serial bus. can be connected with 200+ of robot servo in theory, due to the restrain of capacity of power supply, no more than 30 numbers at one time is recommended. Servo working voltage is the same with controller working voltage. R/C interface ISP function Wireless communication support support servo 8 numbers GND/VCC/SIG three-wires system ( SIG is signal ISP output),working voltage is 5V. GND/RST/MOSI/MISO/SCK five-wires, providing programming cable completely. ZigBee wireless communication module can be chose, 57.6KBps. RS-232 interface TX,RX,GND three-wire system
1.4 battery and DC adapter
MultiFLEX?2-AVR controller can be putted a group of LiPro battery of 7.2V 2.5Ah inside, using the battery power supply on normally. When the electric quantity of battery is not enough to work, you can use AC switch adapter to provide power to controller.
1. Battery
As the figure 1.4.1, using the LiPro battery pack of 7.2V or Ni-MH battery pack of 7.2V is recommended on “InnoSTAR kit”. During using battery procedures, you need to pay attention to followings: l While battery electric quantity drops, battery output voltage drops. When the battery was full charged, voltage is about 8.4V; druing using procedures maybe drop to 6.5V. l While battery voltage is low (lower than 6.5V) ,controller power supply’s indicator light will flicker around of 2s and buzzer will make a sound of urgently. Now please cutting off the power supply, giving the battery charging, if you keep on using will resulted in over discharged, the damage of battery will be permanence. You also can choose external AC switch adapter for controller’s power supply. l Please using “InnoSTAR kit” and battery are matched charger for battery charging ,non-standard charger maybe resulted in electric quantity can not be full charged or battery’s broken. l Battery has been installed inside of controller, Please not removing it by TEL: +86-010-8211-4870, +86-010-8211-4887 FAX: Ext.828
Page 5 of 82 https://www.doczj.com/doc/2219038674.html,
北京博创兴盛机器人技术有限公司 UPTECH Robotics your self. If you need a larger capacity of battery, after you making sure the battery is conformed to requirement (specified voltage is between 6.5 and 8.4V), please connect battery on round power jack which is used to connect with external AC switch adapter. l Caution: Charging interface and AC switch adapter interface are separated, their interfaces are differences, don’t make a mistake when you are going to connect plug.
Figure 1.4.1 LiPro battery
2. AC switch adapter
As the figure 1.4.2, the “InnoSTAR kit” equipped an AC switch adapter. Output of the adapter is 8V/5A; current of peak value can be reached at ~8A. You can also use the power supply adapter of 12V/5~10A. During using procedures of this AC switch adapter, you need to pay attention to followings: l The capacity of normal output of power supply is 8V/5A, peak value can be reached at 8A, but if long-time working over 5A will be resulted in power supply is overheating, and its working life will be shortened. l While you using your own external power supply, Please ensure that the range of power supply output voltage is between 6.5V and 10V, when it is lower than 6.5V, controller will give an alarm of under voltage, while higher than 10.5V, it will give an alarm of over voltage. l The alarm symptom of under voltage is that buzzer sounded shortly, controller power supply indicator light will flicker around of 2s. The alarm symptom of over voltage is that buzzer sounded shortly, controller power supply indicator light will flicker around of 200ms.
Figure 1.4.2 AC switch adapter
TEL: +86-010-8211-4870, +86-010-8211-4887 FAX: Ext.828
Page 6 of 82
https://www.doczj.com/doc/2219038674.html,
北京博创兴盛机器人技术有限公司 UPTECH Robotics
1.5 Sensor interface
The definition of MultiFLEX?2-AVR controller’s IO、AD interface shows in the figure 1.5.1. In order to convenient for sensor’s inserting or moving, here all interfaces are using standard of 3.5mm headphone socket, 12 green headphone sockets are I/O input\output interfaces of controller, these ports can support the switch sensor; 8 yellow headphone sockets are AD input interface of controller, they can support analog sensor.
Figure 1.5.1 3.5mm headphone socket
If you want to put your own digital or analog sensor in MultiFLEX?2-AVR controller, Please put in 3.5mm headphone plug according to the definition of figure 1.5.2. The GND is digital ground, SIG is signal, and the VCC is power supply. For analog sensors, SIG pin should be connected to an input voltage value between 0-5V, when controller’s corresponding output is 0-1023. For digital sensors, it just has two conditions that while SIG and VCC break over, SIG is high-level, and controller ‘s corresponding input value is 1; while SIG and GND break over, SIG is low level,and controller’s corresponding output value is 0.
figure1.5.2 3.5mmheadphoneplug
TEL: +86-010-8211-4870, +86-010-8211-4887 FAX: Ext.828
Page 7 of 82
https://www.doczj.com/doc/2219038674.html,
北京博创兴盛机器人技术有限公司 UPTECH Robotics It has necessary to explain that I/O interface can be used to output. For example, controlling a LED by I/O interface, you can put in controller according to figure1.5.3, now if control I/O interface output value is 1(high-level),LED light off, if output value is 0(low-level),LED light on.
VCC R2 1K D3 IO1 LED
Figure 1.5.3 I/O interface as outputting’s circuit diagram
RS422 interface use RJ11 interface socket, corresponding RJ11 plug as figure 1.6.4, Twist-pair’s definition as figure 2.1 .
Figure 1.5.4 RS-422 used wire Figure 1.2 RS-422 Twist-pair Connector Twist-pair 1、 2、 3、 4、 5、 6、 VCC GND 422_A 422_B 422_Y 422_Z White Black Red Green Yellow Blue Definition Color
Figure 1.3 interface board port definition and Mega128pin mapping figure Port NO. IO0 I01 IO2 IO3 IO4 IO5 IO6 IO7 IO8 IO9 M128_INT5/PE5 M128_INT4/PE4 M128_INT7/PE7 M128_INT6/PE6 M128_PB5/OC1A M128_PB6/OC1B M128_PE3/AIN1 M128_PE2/AIN0 M128_PD4/ICP1 M128_INT1/PD1 7 6 9 8 15 16 5 4 29 26 Pin definition Pin NO. Port NO. IO10 1011 AD0 AD1 AD2 AD3 AD4 AD5 AD6 AD7 M128_PB7/0C1C M128_PD6/T1 M128_ADC7 M128_ADC0 M128_ADC1 M128_ADC2 M128_ADC3 M128_ADC4 M128_ADC5 M128_ADC6 17 31 54 61 60 59 58 57 56 55 Pin definition Pin NO.
TEL: +86-010-8211-4870, +86-010-8211-4887 FAX: Ext.828
Page 8 of 82
https://www.doczj.com/doc/2219038674.html,
北京博创兴盛机器人技术有限公司 UPTECH Robotics
1.6 R/C servo and robot servo interface
MultiFLEX?2-AVR controller has 8 channel R/C servo interface, as figure 1.6.1, on the left side, black 3-pin contact pin is R/C servo interface, port definition is that GND/VCC/SIG. Voltage VCC is 5V, signal SIG act 20ms round, pulse length is pulse signal between the range of 0.5ms~2.5ms. MultiFLEX?2-AVR controller has robot servo bus interface, can use no more than 32 channel CDS series robot servo. As figure 1.6.1, white terminal on the right side is robot servo bus interface, port definition is that GND/VCC/SIG, voltage VCC is the same with controller’s, if controller using 8V AC switch adapter power supply, VCC is amount to 8V. Signal SIG is UART signal of TTL.
Figure 1.6.1 R/C servo and robot servo interface
2. Rapid develop with MultiFLEX?2-AVR
2.1 Starting work
You can use NorthSTAR graphic oriented development tool to develop MultiFLEX?2-AVR controller’s programming. NorthSTAR is a graphic oriented programming tool which is special developed for “InnoSTAR kit” robot. Before development, you need to do some preparation work.
2.1.1 Install the NorthSTAR software
The NorthSTAR graphic oriented integration development environment except can be used to develop graphic oriented programming, in addition to support C-language programming mode, user can choose either of them according to their requirements. Before using controller, Please install NorthSTAR. Please find the install file of NorthSTAR in CD-ROM and install. You also can TEL: +86-010-8211-4870, +86-010-8211-4887 FAX: Ext.828
Page 9 of 82 https://www.doczj.com/doc/2219038674.html,
北京博创兴盛机器人技术有限公司 UPTECH Robotics 从 download and install the latest edition of NorthSTAR on the website: https://www.doczj.com/doc/2219038674.html,/en/ProductView.asp?ID=61(English) https://www.doczj.com/doc/2219038674.html,/ch/ProductView.asp?ID=61(Chinese)
2.1.2 Connecting UP-Debugger debugger
UP-Debugger debugger is a downloading and debugging tool for InnoSTAR kit’s MultiFLEX?2-AVR controller. As figure 2.1.1 is a real UP-Debugger’s photo show. UP-Debugger debugger has Servo mode, AVRISP mode and RS232 mode. MultiFLEX?2-AVR controller mostly uses AVRISP mode and RS232 mode. Debugger’s working mode can be switched from RS232, AVRISP and SERVO by mode selector button. Specific function and interface definition as figure 2.1.1:
Figure 2.1.1 UP-Debugger debugger
While download programming, you need to press the mode selector button to make debugger switched to AVRISP mode ( now AVRISP mode light on);While debug programming, if you need to make a serial communication with controller, please changed to RS232 mode, detail use directions please referencing the UP-Debugger USER manual.
2.1.3 Power supply
By default, controller get power supply from inside battery, if controller battery voltage is insufficiently, user need to prepare corresponding AC switch adapter. After the AC adapter connected, controller will change AC adapter power supply automatically. While battery voltage is insufficiently, please using the attached intelligent charger for charging when controller is not working. TEL: +86-010-8211-4870, +86-010-8211-4887 FAX: Ext.828
Page 10 of 82 https://www.doczj.com/doc/2219038674.html,
北京博创兴盛机器人技术有限公司 UPTECH Robotics
2.1.4 Controller
Link PC, UP-Debugger debugger and MultiFlex2-AVR controller, switch on controller power supply. Starting NorthSTAR, Create a project, controller model select the“Multiflex2-AVR”, others keep default parameter, as figure 2.1.2:
Figure 2.1.2 select controller model
select menu” Tools”->”Query AD/IO”, popup inquiry sensor dialog box, as figure 2.1.3:
Figure 2.1.3 inquiry sensor dialog box
Let UP-Debugger debugger switch to “AVRISP” mode, then click “Start Service” button. Starting download service program to the controller, shown as figure 2.1.4. After download finished, the prompt of” Output Window” as figure 2.1.5:
TEL: +86-010-8211-4870, +86-010-8211-4887 FAX: Ext.828
Page 11 of 82
https://www.doczj.com/doc/2219038674.html,
北京博创兴盛机器人技术有限公司 UPTECH Robotics
Figure 2.1.4 download service progam
Figure 2.1.5 download finished
Switch UP-Debugger debugger to“RS232” mode, input correct port NO.in “COM”, click “Open”button unfold serial, then click “Query IO”. Controller will return the value of current IO channel ——if no I/O channel , no put in device, all lights in the window will turn red, as figure 2.1.6:
TEL: +86-010-8211-4870, +86-010-8211-4887 FAX: Ext.828
Page 12 of 82
https://www.doczj.com/doc/2219038674.html,
北京博创兴盛机器人技术有限公司 UPTECH Robotics
Figure 2.1.6 inquiry I/O sensor
Click “Query AD”, can return sensor value of AD pass, while without put in AD device, value is 0. Now, it can be approved that controller running is normally.
2.2 The first flowchart program
Now through a simple example to introduce the process of develop controller programming by NorthSTAR. 1. Create a project Running the NorthSTAR graphical IDE, click “ process programming development to setting. new project” icon, in popup In the “Select Controller”
of the project configuration window, according to controller model which need to column, select “MultiFLEX2-AVR”, as figure 2.2.1. Due to here is not a specific corresponding of a robot configuration, so select “Customized” in the “Select Robot” column. Click “next” button, get into the next page.
TEL: +86-010-8211-4870, +86-010-8211-4887 FAX: Ext.828
Page 13 of 82
https://www.doczj.com/doc/2219038674.html,
北京博创兴盛机器人技术有限公司 UPTECH Robotics
Figure 2.2.1 project configuration
In this simple example, without use any sensor and servo, so use all default on the others configuration pages, continue to click “next”button, until project create has been finished, as figure 2.2.2.
Figure 2.2.2 project create finished
After project creation has been finished, connect the “START” and the “END” icon in the flow chart window, you get a simplest (blank) program, as figure 2.2.3.
TEL: +86-010-8211-4870, +86-010-8211-4887 FAX: Ext.828
Page 14 of 82
https://www.doczj.com/doc/2219038674.html,
北京博创兴盛机器人技术有限公司 UPTECH Robotics
Figure 2.2.3 simple programming example
2. Compile download Click toolbar’s” compile” prompt, click “download” download has been finished. This program does nothing, so it will not have any reaction while the program running. 3. Summarize This example introduced the process of using NorthSTAR to develop MultiFLEX?2-AVR controller. The details of NorthSTAR, please click the help menu of this software. , wait program compile finished. If without fault download the programming which has been
compiling finished to controller. It will perform automatically after programming
2.3 I/O ports
1. preparation before doing this experiment Now introduce the way of use controller I/O interface. In this experiment, we will use a bumper switch to control light on or light off the LED, finished a function that control the I/O output according to the I/O input. Connect the LED to IO0, and then connect the touch switch to IO1. Controller connects to PC by UP-Debugger, switch on controller power supply. 2. building a project Building a new project in” Select Controller” column, select
“MultiFLEX2-AVR”. Others please select default setting, click “next ”until display I/O attribute dialog box,” Number of I/O channels you are using” set up as“2”, in list box “IO information in your robot”, change mode of“Channel-0” to “Output”, Mode of“Channel-1” keep defaulting “Input”, as figure2.3.1. Others configuration options all use default value.
TEL: +86-010-8211-4870, +86-010-8211-4887 FAX: Ext.828
Page 15 of 82
https://www.doczj.com/doc/2219038674.html,
北京博创兴盛机器人技术有限公司 UPTECH Robotics
Figure 2.3.1 I/O configuration
After built a project, first make initialize, drafting a I/O Output to flow chat from the control list Function Widget, double-click this control, popup attribute dialog box, select “Channel 0 ” in” channel”, in Output column, setting “Current channel value” as 0, light on LED by output low voltage, as the signal of initialize finished, as figure2.3.2.
Figure 2.3.2 IO’s attribute
Before logic design, need to take some measures to ensure that program logical keep executing. Drafting a While control from controls column’s Syntax Widget, that will create an attached Loop-end control. While control’s default condition is 1, don’t need to be changed, that means while condition always be TEL: +86-010-8211-4870, +86-010-8211-4887 FAX: Ext.828
Page 16 of 82 https://www.doczj.com/doc/2219038674.html,
北京博创兴盛机器人技术有限公司 UPTECH Robotics true, in this way, between these two controls’ progam flow will loop execute at all times. Now start to design program logic, first add a variable to store an I/O input. Draft a Variable control from controls list. as figure2.3.3. Double click this control, popup attribute dialog box, “Variable Class” select “int”, “Variable Name” set as“SW_1”,
Figure 2.3.3 variable attribute
Then ,draft an I/O Input control , select “Channel 1” in “Choose channel”, build a corresponding connection with touch switch, “Current channel value” set as“SW_1”, as figure2.3.4.
Figure 2.3.4 I/O input attributes
TEL: +86-010-8211-4870, +86-010-8211-4887 FAX: Ext.828
Page 17 of 82
https://www.doczj.com/doc/2219038674.html,
北京博创兴盛机器人技术有限公司 UPTECH Robotics Next, need to judge the input value, drafting a IF control from controls list Syntax Widget, build a “If-else“ branch, double click and drag IF control , popup attribute dialog box, fill the judgment condition“SW_1 == 0”in“Condition1”, that means I/O input is low voltage, also means it’s the condition of switch on touch switch, as figure2.3.5.
x c Figure 2.3.5 condition judgement attributes
Then draft two I/O Output controls from control column, each connect to branch of IF control. The left side of If control means the condition is TURE, the right side means the condition is NOT TURE. First, double click I/O Output control of the left branch, select “Channel 0” in “Choose channel”, Output input“1”,that means when switch be pressed down, IO0 output low voltage, turn off LED, as figure2.3.6. Secondly, double click I/O Output control of right branch,中 select “Channel 0” in “Choose channel”, Output input“0”, that means when switch be unlashed, light on LED again. Connect all controls according to logic; a simple I/O control program has been finished, as figure2.3.7.
TEL: +86-010-8211-4870, +86-010-8211-4887 FAX: Ext.828
Page 18 of 82
https://www.doczj.com/doc/2219038674.html,
北京博创兴盛机器人技术有限公司 UPTECH Robotics
Figure 2.3.6 IOoutput attribute
Figure 2.3.7 control progam
3. download and run Click “compile” in tool column, waiting program compiling finished. If , download the program which has been
no fault prompt, click “download”
compiled to controller. After download, the program will run automatically. Now you will find that after program starting, LED connoted to IO0 turn on. Press switch on IO1, you can see LED turn off; unlock the switch, LED turn on again. 4. summarize
TEL: +86-010-8211-4870, +86-010-8211-4887 FAX: Ext.828
Page 19 of 82
https://www.doczj.com/doc/2219038674.html,
北京博创兴盛机器人技术有限公司 UPTECH Robotics In this experiment, through the MultiFLEX?2-AVR controller’s I/O port to get a switching value’s input, at the same time output switching value to control to turn on or turn off the LED.
2.4 A/D ports
1. preparation before doing this experiment Now introduce the way of operate controller AD interface. In this experiment, use an infra-red ranging sensor to control a digital servo’s moving. To control servo‘s rotation angle by infrared detector get the distance value is big or small. In this experiment, need an AD measure’s infrared detector sensor, a CDS55 series servo. Put the infrared sensor in controller’s AD0 interface. Set servoID as1, and connect to controller’s Robot Servo interface. Connect controller and PC by UP-Debugger, switch on controller power supply. 2. building a project Create a project, select “MultiFLEX2-AVR” in” Select Controller” column, click “next ”. In” Servo” dialog box,” Number of servos you are using” set as“1”, in the list of ”Servo info in your robot” will create servo of“ID-1”automatically,“Mode”is“Servo Mode”, no need to modify it, as figure 2.4.1. Click “next ”, in AD dialog box,” Number of AD channels you are using” set as 1, in the list of “AD information in your robot” will creat“Channel-0” automatically, no need to modify it, as figure 2.4.2.
Figure 2.4.1 Servo attribute
TEL: +86-010-8211-4870, +86-010-8211-4887 FAX: Ext.828
Page 20 of 82
https://www.doczj.com/doc/2219038674.html,