c#_ms_chart_控件使用方法汇总(附统计图)
- 格式:doc
- 大小:190.50 KB
- 文档页数:21
碘量法测定维生素C碘量法测定维生素C原理维生素C又称抗坏血酸Vc,分子式C6H8O6。
Vc具有还原性,可被I2定量氧化,因而可用I2标准溶液直接测定。
其滴定反应式:C6H8O6+I2= C6H6O6+2HI用直接碘量法可测定药片,注射液,饮料,蔬菜,水果等的V含量。
I2微溶于水而易溶于KI溶液,但在稀的KI溶液中溶解得很慢,所以配制I2溶液时不能过早加水稀释,应先将I2和KI混合,用少量水充分研磨,溶解完全后再加水稀释。
I与KI间存在如下平衡:I2+I-=I3-游离I2容易挥发损失,这是影响碘溶液稳定性的原因之一。
因此溶液中应维持适当过量的I-离子,以减少I2的挥发。
空气能氧化I-离子,引起I2浓度增加:4 I-+O2+4H+=2I2+2H2O此氧化作用缓慢,但能为光,热,及酸的作用而加速,因此I2溶液应处于棕色瓶中置冷暗处保存。
I2能缓慢腐蚀橡胶和其他有机物,所以I应避免与这类物质接触。
I2溶液的标定用Na2S2O3标定。
而Na2S2O3一般含有少量杂质,在PH=9-10间稳定,所以在Na2S2O3溶液中加入少量的Na2CO3,Na2S2O3见光易分解可用棕色瓶储于暗处。
碘量法的基本反应式:2S2O32-+I2=S4O62-+2I-由于Vc的还原性很强,较容易被溶液和空气中的氧氧化,在碱性介质中这种氧化作用更强,因此滴定宜在酸性介质中进行,以减少副反应的发生。
考虑到I2在强酸性中也易被氧化,故一般选在PH为3-4的弱酸性溶液中进行滴定。
三、试剂配制I2溶液:6.6g I2和18.5g KI,置于研钵中加少量水,在通风橱中研磨。
待I2全部溶解后,将溶液转入棕色试剂瓶,加水稀释至250ML,摇匀,放置暗处保存。
Na2S2O3溶液(0.1mol·dm-3)的配制:称取26g硫代硫酸钠(Na2S2O3·5H2O)(或无水硫代硫酸钠16g),加入1000ml新煮沸并冷却的蒸馏水,溶解后,加入约0.2g 的Na2CO3 ,(浓度为0.02%)贮存于棕色试剂瓶中,取上层清液标定。

排列组合c怎么算
A上3下3是3的全排名,C上2下4是4选2的排列。
排列组合c的公式:C(n,m)=A(n,m)/m!=n!/m!(n-m)!与
C(n,m)=C(n,n-m)。
(n为下标,m为上标)。
例如,
C(4,2)=4!/(2!2!)=43/(21)=6;C(5,2)=C(5,3)。
排列组合是组合学最基本的概念。
所谓排列,就是指从给定个数的元素中取出指定个数的元素进行排序。
组合则是指从给定个数的元素中仅仅取出指定个数的元素,不考虑排序。
排列组合的中心问题是研究给定要求的排列和组合可能出现的情况总数。
排列组合与古典概率论关系密切。
排列组合c的公式:C(n,m)=A(n,m)/m!=n!/m!(n-m)!与
C(n,m)=C(n,n-m)。
(n为下标,m为上标)。
例如,
C(4,2)=4!/(2!2!)=43/(21)=6;C(5,2)=C(5,3)。
计算概率组合C:从8个中任选3个:C上面写3下面写8,表示从8个元素中任取3个元素组成一组的方法个数,具体计算是:876/321;如果是8个当中取4个的组合就是:8765/4321。

词汇表(C-D ): cabbage n.洋白菜,卷心菜 cabin n.小屋;船舱,机舱 cabinet n.橱,柜;内阁 cable n.缆,索;电缆;电报 cafe n.咖啡馆;小餐厅 cafeteria n.自助食堂 cage n.笼;鸟笼,囚笼 cake n.饼,糕,蛋糕 calculate vt.计算;估计;计划 calculation n.计算,计算结果 calculator n.计算器,计算者 calendar n.日历,历书;历法 call vt.把…叫做;叫,喊 calm a.静的,平静的 camel n.骆驼camera n.照相机,摄影机camp n.野营,营地,兵营campaign n.战役;运动 campus n.校园,学校场地 can aux.v.能,会,可能 can n.罐头,听头;容器 Canada n.加拿大Canadian a.加拿大的 canal n.运河;沟渠;管 cancel vt.取消,撤消;删去cancer n.癌,癌症,肿瘤candidate n.候选人;投考者candle n.蜡烛;烛形物;烛光candy n.糖果;砂糖结晶cannon n.大炮,火炮;榴弹炮canoe n.独木舟,皮艇,划子canteen n.小卖部;临时餐室canvas n.粗帆布;一块油画布cap n.帽子,便帽;帽状物 capable a.有能力的,有才能的capacity n.容量;能力;能量 capital n.资本,资金;首都 captain n.陆军上尉;队长 captive n.俘虏,被监禁的人 capture vt.捕获,俘获;夺得 car n.汽车,小汽车,轿车carbon n.碳 card n.卡,卡片,名片 care vi.关心,介意 n.小心 career n.生涯,职业,经历 careful a.仔细的;细致的 careless a.粗心的,漫不经心的 cargo n.船货,货物 carpenter n.木工,木匠 carpet n.地毯,毡毯,毛毯 carriage n.客车厢;四轮马车carrier n.运输工具;运载工具 carrot n.胡罗卜carry vt.携带;运载;传送 cart n.二轮运货马车 carve vt.刻,雕刻;切开case n.情况;事实;病例case n.箱(子),盒(子),套 cash n.现金,现款cassette n.盒式录音带;盒子 cast vt.投,扔,抛;浇铸castle n.城堡;巨大建筑物casual a.偶然的;随便的cat n.猫,猫科,猫皮 catalog n.目录,目录册catch vt.捉住;赶上;领会 cathedral n.总教堂;大教堂 cattle n.牛;牲口,家畜cause n.原因,理由;事业cave n.山洞,洞穴,窑洞cease vi.&vi.&n.停止,停息 ceiling n.天花板,顶蓬 celebrate vt.庆祝;歌颂,赞美cell n.细胞;小房间 cellar n.地窑,地下室cement n.水泥;胶泥 vt.粘结cent n.分;分币;百 centigrade a.百分度的 centimetre n.公分,厘米 central a.中心的;主要的 centre n.中心;中枢 vt.集中 century n.世纪,百年 ceremony n.典礼,仪式;礼节 certain a.确实的;肯定的 certainly ad.一定,必定;当然 certainty n.必然;肯定 certificate n.证书,证件,执照 chain n.链,链条,项圈chair n.椅子;主席 chairman n.主席;议长,会长chalk n.白垩;粉笔 challenge n.挑战;要求,需要 chamber n.会议室;房间;腔 champion n.冠军,得胜者 chance n.机会,机遇;可能性change n.改变,变化;零钱channel n.海峡;渠道;频道chapter n.章,回,篇 character n.性格;特性;角色characteristic a.特有的 n.特性charge vt.索价;控告 n.费用 charity n.施舍;慈善事业 charming a.迷人的,可爱的chart n.图,图表;海图 chase n.追逐,追赶,追求cheap a.廉价的;劣质的cheat vt.骗取;哄 vi.行骗 check vt.检查;制止 n.检查 cheek n.面颊,脸蛋cheer vt.使振作;欢呼 cheerful a.快乐的,愉快的cheese n.乳酪,干酪 chemical a.化学的 n.化学制品 chemist n.化学家;药剂师chemistry n.化学cheque n.支票 cherry n.樱桃;樱桃树 chess n.棋;国际象棋 chest n.胸腔,胸膛;箱子 chew vt.咀嚼,嚼碎 chicken n.小鸡,小鸟;鸡肉 chief a.主要的;首席的 child n.小孩,儿童;儿子 childhood n.童年,幼年;早期 childish a.孩子的;幼稚的 chill vt.使变冷 n.寒冷 chimney n.烟囱,烟筒;玻璃罩chin n.颏,下巴China n.中国china n.瓷器,瓷料 Chinese a.中国的 n.中国人 chocolate n.巧克力;巧克力糖 choice n.选择,抉择 choke vt.使窒息;塞满 choose vt.选择,挑选;情愿chop vt.砍,劈;切细vi.砍Christian n.基督教徒;信徒 Christmas n.圣诞节 church n.教堂,礼拜堂;教会cigarette n.香烟,纸烟,卷烟cinema n.电影院;电影,影片 circle n.圆,圆周;圈子 circuit n.电路;环行;巡行 circular a.圆的;循环的 circulate vt.使循环 vi.循环circumference n.圆周,周长,圆周线 circumstance n.情况,条件;境遇citizen n.公民;市民,居民city n.城市,都市 civil a.公民的;文职的 civilization n.文明,文化;开化civilize vt.使文明;教育 claim vt.声称,主张;索取 clap vi.拍手 vt.拍,轻拍 clarify vt.澄清,阐明 clasp n.扣子,钩子;别针class n.班,班级;阶级classical a.古典的;经典的 classification n.分类;分级;分类法 classify vt.把…分类 classmate n.同班同学 classroom n.教室,课堂 claw n.爪,脚爪,螯 clay n.粘土,泥土;肉体 clean a.清洁的;纯洁的 clear a.清晰的 vt.清除 clearly ad.明白地,清晰地 clerk n.店员;办事员,职员 clever a.聪明的;机敏的cliff n.悬崖,峭壁 climate n.气候;风土,地带 climb vi.攀登,爬 vt.爬 cloak n.斗篷;覆盖(物) clock n.钟,仪表 close vt.关,闭;结束 closely ad.紧密地,接近地cloth n.布;衣料;桌布 clothe vt.给…穿衣服 clothes n.衣服,服装;被褥 clothing n.衣服,被褥 cloud n.云;云状物;阴影cloudy a.多云的;云一般的club n.俱乐部,夜总会 clue n.线索,暗示,提示 clumsy a.笨拙的;愚笨的coach n.长途公共汽车 coal n.煤,煤块 coarse a.粗的,粗糙的 coast n.海岸,海滨(地区)coat n.外套,上衣;表皮cock n.公鸡;雄禽;旋塞code n.准则;法典;代码coffee n.咖啡,咖啡茶 coil n.(一)卷;线圈 vt.卷coin n.硬币;铸造(硬币)cold a.冷的;冷淡的 n.冷collapse vi.倒坍;崩溃,瓦解 collar n.衣领,项圈colleague n.同事,同僚collect vt.收集 vi.收款 collection n.搜集,收集;收藏品 collective a.集体的;集合性的 college n.学院;大学 collision n.碰撞;冲突 colonel n.陆军上校;中校 colony n.殖民地;侨居地 color n.颜色,彩色;颜料 column n.柱,支柱,圆柱 comb n.梳子 vt.梳理 combination n.结合,联合;化合 combine vt.使结合;兼有 come vi.来,来到;出现comfort n.舒适;安慰 vt.安慰comfortable a.舒适的,安慰的command vt.命令,指挥;控制commander n.司令官,指挥员comment n.评论,意见;注释commerce n.商业,贸易;社交commercial a.商业的;商品化的commission n.委任状;委员会commit vt.犯(错误);干(坏事) committee n.委员会;全体委员 common a.普通的;共同的 commonly ad.普通地,一般地 communicate vi.通讯;传达;传播 communication n.通讯;传达;交通 communism munist 主义 communistmunistparty 员 community n.社区;社会;公社 companion n.同伴;共事者;伴侣 company n.公司,商号;同伴 comparative a.比较的,相对的compare vt.比较,对照;比作comparison n.比较,对照;比似 compass n.罗盘,指南针;圆规 compel vt.强迫,迫使屈服 compete vi.比赛;竞争;对抗 competent a.有能力的;应该做的 competition n.竞争,比赛 compile vt.编辑,编制,搜集 complain vi.抱怨,拆苦;控告 complaint n.抱怨;怨言;控告 complete a.完整的;完成的 completely ad.十分,完全地 complex a.结合的;复杂的 complicate vt.使复杂;使陷入 complicated a.复杂的,难懂的 component n.组成部分;分;组件 compose vt.组成,构成;创作 composition n.构成;作品;写作 compound n.化合物;复合词 comprehension n.理解,理解力;领悟 comprehensive a.广泛的;理解的 compress vt.压紧,压缩 comprise vt.包含,包括;构成 compromise n.妥协,和解compute vt.计算,估计,估算computer n.计算机,电脑comrade n.同志,亲密的同伴conceal vt.把…隐藏起来concentrate vt.集中;聚集;浓缩concentration n.集中;专注;浓缩concept n.概念,观念,设想concern n.关心,挂念;关系concerning prep.关于 concert n.音乐会,演奏会conclude vt.推断出;结束conclusion n.结论,推论;结尾 concrete n.混凝土;具体物 condemn vt.谴责,指责;判刑 condense vt.压缩,使缩短 condition n.状况,状态;环境 conduct n.举止,行为;指导 conductor n.售票员;(乐队)指挥 conference n.会议,讨论会 confess vt.供认,承认;坦白 confidence n.信任;信赖;信心 confident n.确信的,自信的 confine vt.限制;禁闭 confirm vt.证实,肯定;批准conflict n.争论;冲突;斗争confuse vt.使混乱,混淆confusion n.混乱;骚乱;混淆congratulate vt.祝贺,向…道喜congratulation n.祝贺;祝贺词congress n.大会;国会,议会conjunction n.接合,连接;连接词connect vt.连接,连结;联系connection n.连接,联系;连贯性conquer vt.征服,战胜;破除conquest n.攻取,征服;克服 conscience n.良心,道德心 conscious a.意识到的;有意的 consciousness n.意识,觉悟;知觉 consent n.同意,赞成vi.同意 consequence n.结果,后果 consequently ad.因此,因而,所以 conservation n.保存,保护;守恒 conservative a.保守的 n.保守的人 consider vt.认为;考虑;关心 considerable a.相当大的;重要的 considerate a.考虑周到的;体谅的 consideration n.考虑,思考;体贴 consist vi.由…组成;在于 consistent a.坚持的,一贯的 constant a.经常的;永恒的 constitution n.章程;体质;构造 construct vt.建造;建设;构筑 construction n.建造;建筑;建筑物 consult vt.请教,查阅 consume vt.消耗,消费;消灭 consumption n.消耗量;消耗 contact vt.使接触;与…联系contain vt.包含,容纳;等于container n.容器;集装箱contemporary a.当代的,同时代的contempt n.轻蔑;藐视;受辱content n.内容,目录;容量content a.满意的,满足的contest vt.争夺,争取;辩驳continent n.大陆;陆地;洲continual a.不断的;连续的 continue vt.继续,连续;延伸 continuous a.连续不断的,持续的 contract n.契约,合同;婚约 contradiction n.矛盾,不一致;否认 contrary a.相反的 n.相反 contrast n.对比,对照,悬殊 contribute vt.捐献,捐助;投稿 control vt.控制,克制n.控制 convenience n.便利,方便;厕所 convenient a.便利的;近便的 convention n.习俗,惯例;公约conventional a.普通的;习惯的conversation n.会话,非正式会谈 conversely ad.相反地 conversion n.转变,转化;改变 convert vt.使转变;使改变 convey vt.传送;运送;传播 convince vt.使确信,使信服 cook vt.烹调,煮 vt.烧菜 cool a.凉的,冷静的 cooperate vi.合作,协作;配合 coordinate vt.使协调,调节cope vi.对付,应付 copper n.铜;铜币,铜制器 copy n.抄件 vt.抄写,复制cord n.细绳,粗线,索 cordial a.真诚的,诚恳的core n.果实的心,核心 corn n.谷物;(英)小麦 corner n.角;犄角;边远地区corporation n.公司,企业;社团correct a.正确的 vt.纠正correction n.改正,纠正,修改correspond vi.相符合;相当 correspondent n.通信者;通讯员 corresponding a.相应的;符合的corridor n.走廊,回廊,通路 cost n.价格,代价;成本costly a.昂贵的;价值高的 cottage n.村舍,小屋 cotton n.棉;棉线;棉布cough vi.咳,咳嗽 n.咳嗽could aux.v.(can 的过去式)council n.理事会,委员会count vt.计算 vi.数,计数counter n.柜台;计数器country n.国家,国土;农村countryside n.乡下,农村county n.英国的郡,美国的县 couple n.夫妇;(一)对;几个 courage n.勇气,胆量,胆识 course n.课程;过程;一道菜 court n.法院,法庭;庭院 cousin n.堂(或表)兄弟(姐妹) cover vt.盖,包括 n.盖子 cow n.母牛,奶牛;母兽 coward n.懦夫;胆怯者 crack n.裂缝,裂纹 vi.爆裂 craft n.工艺;手艺,行业 crane n.起重机,摄影升降机 无效 vi.碰撞,坠落 n.碰撞 crawl vi.爬,爬行crazy a.疯狂的,荒唐的 cream n.奶油,乳脂;奶油色create vt.创造;引起,产生creative a.创造性的,创作的creature n.生物,动物,家畜credit n.信用贷款;信用creep vi.爬行;缓慢地行进 crew n.全体船员cricket n.板球;蟋蟀 crime n.罪,罪行;犯罪 criminal n.犯人,罪犯,刑事犯 cripple n.跛子;残废的人crisis n.危机;存亡之际 critic n.批评家,爱挑剔的人critical a.决定性的;批评的criticism n.批评;批判;评论criticize vt.批评;评论;非难crop n.农作物,庄稼;一熟cross vt.穿过;使交叉 crow n.鸦,乌鸦 vi.啼crowd n.群;大众;一伙人 crown n.王冠,冕;花冠crude a.简陋的;天然的cruel a.残忍的,残酷的crush vt.压碎,碾碎;镇压 crust n.面包皮;硬外皮 cry vi.哭,哭泣;叫喊 crystal n.水晶,结晶体;晶粒 cube n.立方形;立方 cubic a.立方形的;立方的cucumber n.黄瓜 cultivate vt.耕;种植;培养 culture n.文化,文明;教养 cunning a.狡猾的,狡诈的 cup n.杯子;(一)杯;奖杯 cupboard n.碗柜,碗碟橱;食橱 cure vt.医治;消除 n.治愈 curiosity n.好奇,好奇心;珍品curious a.好奇的;稀奇古怪的curl n.卷毛;螺旋 vi.卷曲current a.当前的;通用的curse n.诅咒,咒骂;天谴curtain n.帘,窗帘;幕(布)curve n.曲线;弯 vt.弄弯cushion n.垫子,坐垫,靠垫custom n.习惯,风俗;海关customer n.顾客,主顾 cut vt.切,割,剪;减少 cycle n 自行车,循环。
维生素c_百度百科我的百科我的贡献草稿箱百度首页| 登录新闻网页贴吧知道MP3 图片视频百科帮助设置首页自然文化地理历史生活社会艺术人物经济科学体育春节维他命C在百度百科中为本词条的同义词,已为您做自动跳转。
编辑词条维生素c百科名片维生素C图片维生素C(Vita min C,Asc orbicAci d)又叫L-抗坏血酸,是一种水溶性维生素。
食物中的维生素C被人体小肠上段吸收。
一旦吸收,就分布到体内所有的水溶性结构中,正常成人体内的维生素C代谢活性池中约有1500mg维生素C,最高储存峰值为3000mg维生素C。
正常情况下,维生素C绝大部分在体内经代谢分解成草酸或与硫酸结合生成抗坏血酸-2-硫酸由尿排出;另一部分可直接由尿排出体外。
目录[隐藏]基本性质物理性质化学性质发展历程功效适宜人群富含食物正常需求生理功能防病作用药物作用吸收代谢缺乏表现过量表现注意人工合成维生素C片说明书基本性质物理性质化学性质发展历程功效适宜人群富含食物正常需求生理功能防病作用药物作用吸收代谢缺乏表现过量表现注意人工合成维生素C片说明书[编辑本段]基本性质物理性质外观:无色晶体熔点:190 -192℃沸点:(无)紫外吸收最大值:245nm荧光光谱:激发波长-无nm,荧光波长-无nm;溶解性:水溶性维生素化学性质分子式:C6H8O6分子量:176.12uCAS号:50-81-7酸性,具有较强的还原性,加热或在溶液中易氧化分解,在碱性条件下更易被氧化。
构成:一个维生素分子由六个碳原子、八个氢原子和六个氧原子构成。
C开头的单词发音[K]carn.汽车,小汽车,轿车case n.情况;事实;病例cas e n.箱(子),盒(子),套casu ala.偶然的;随便的cancern.癌,癌症,肿瘤card n.卡,卡片,名片carevi.关心,介意n.小心cas h n.现金,现款can aux.v.能,会,可能can n.罐头,听头;容器c ab le n.缆,索;电缆;电报cal l vt.把…叫做;叫,喊caken.饼,糕,蛋糕ca fe n.咖啡馆;小餐厅cal cula tor n.计算器,计算者calend arn.日历,历书;历法calm a.静的,平静的Ca nada n.加拿大camera n.照相机,摄影机ca ncel vt.取消,撤消;删去can didat e n.候选人;投考者car gon.船货,货物c atalog n.目录,目录册ca tch vt.捉住;赶上;领会carr y vt.携带;运载;传送cap aci ty n.容量;能力;能量c apita l n.资本,资金;首都carpent er n.木工,木匠carpet n.地毯,毡毯,毛毯c arriage n.客车厢;四轮马车c arriern.运输工具;运载工具c arrot n.胡罗卜ca rt n.二轮运货马车carv evt.刻,雕刻;切开cassett e n.盒式录音带;盒子cast vt.投,扔,抛;浇铸castlen.城堡;巨大建筑物ca t n.猫,猫科,猫皮c abbagen.洋白菜,卷心菜c abin n.小屋;船舱,机舱cab inet n.橱,柜;内阁came ln.骆驼ca fet eria n.自助食堂cag e n.笼;鸟笼,囚笼cal cul ate vt.计算;估计;计划ca lculation n.计算,计算结果camp n.野营,营地,兵营ca mpaignn.战役;运动c ampu s n.校园,学校场地Ca nadian a.加拿大的ca na l n.运河;沟渠;管candle n.蜡烛;烛形物;烛光candyn.糖果;砂糖结晶c annon n.大炮,火炮;榴弹炮ca noe n.独木舟,皮艇,划子cant een n.小卖部;临时餐室canvas n.粗帆布;一块油画布cap n.帽子,便帽;帽状物capablea.有能力的,有才能的captai n n.陆军上尉;队长ca ptiv e n.俘虏,被监禁的人cap tu re vt.捕获,俘获;夺得car bon n.碳ca reer n.生涯,职业,经历ca re ful a.仔细的;细致的ca rele ss a.粗心的,漫不经心的cathe dra l n.总教堂;大教堂cattle n.牛;牲口,家畜cause n.原因,理由;事业c ave n.山洞,洞穴,窑洞[K]co ffeen.咖啡,咖啡茶c olo r n.颜色,彩色;颜料comevi.来,来到;出现computer n.计算机,电脑cook vt.烹调,煮vt.烧菜c ool a.凉的,冷静的co ld a.冷的;冷淡的n.冷co py n.抄件v t.抄写,复制c oncert n.音乐会,演奏会co at n.外套,上衣;表皮coden.准则;法典;代码coin n.硬币;铸造(硬币)col leag ue n.同事,同僚comfor ta ble a.舒适的,安慰的comm on a.普通的;共同的competevi.比赛;竞争;对抗compl ain t n.抱怨;怨言;控告co mplet e a.完整的;完成的co ncern n.关心,挂念;关系co nfidencen.信任;信赖;信心confirm vt.证实,肯定;批准c ongratu lat ion n.祝贺;祝贺词con nectvt.连接,连结;联系c ontactvt.使接触;与…联系containe r n.容器;集装箱contentn.内容,目录;容量contrac t n.契约,合同;婚约c ontro lvt.控制,克制n.控制co nvenien ta.便利的;近便的conventi on n.习俗,惯例;公约costn.价格,代价;成本costlya.昂贵的;价值高的co rrect a.正确的vt.纠正co rre ction n.改正,纠正,修改c otton n.棉;棉线;棉布cou gh vi.咳,咳嗽n.咳嗽co un t vt.计算vi.数,计数cou n ter n .柜台;计数器 c ountr y n .国家,国土;农村 court n .法院,法庭;庭院 c over vt.盖,包括 n.盖子 c o nsider v t .认为;考虑;关心c onsid e rab l e a.相当大的;重要的 c onsid e ra t e a.考虑周到的;体谅的 co n s ideratio n n.考虑,思考;体 coach n .长途公共汽车 c o a l n.煤,煤块 c o arse a .粗的,粗糙的 c oast n.海岸,海滨(地区) c ock n.公鸡;雄禽;旋塞 c o i l n.(一)卷;线圈 vt.卷 c o llapse v i .倒坍;崩溃,瓦解 c ollar n .衣领,项圈 c o lle c t vt .收集 v i .收款 colle c ti o n n.搜集,收集;收藏品 co l l ective a .集体的;集合性的 c ollege n .学院;大学 co l l i sion n .碰撞;冲突 co l one l n.陆军上校;中校 co l ony n .殖民地;侨居地 c o l u mn n.柱,支柱,圆柱 comb n.梳子 vt.梳理 combina t i on n.结合,联合;化合 co m bi n e vt.使结合;兼有 co m fort n.舒适;安慰 v t .安慰 comma n d vt.命令,指挥;控制 comma n der n.司令官,指挥员 comm e n t n.评论,意见;注释 com m er c e n.商业,贸易;社交 c o mmer c ial a.商业的;商品化的 comm i s s ion n.委任状;委员会 com m it vt.犯(错误);干(坏事) c o mmittee n .委员会;全体委员 c ommon l y a d .普通地,一般地c omm u nicat e v i .通讯;传达;传播 commun i c ation n.通讯;传达;交通c o mmunism n .Communi s t 主义 comm u ni s t n.C o mmu n istp a rty 员 com m unity n.社区;社会;公社 c ompanio n n.同伴;共事者;伴侣 compan y n.公司,商号;同伴 compa r a t ive a.比较的,相对的c o mpa r e vt .比较,对照;比作 compa r is o n n.比较,对照;比似 com p a ss n.罗盘,指南针;圆规 com p el vt.强迫,迫使屈服贴co m p e tent a .有能力的;应该做的 co m peti t ion n .竞争,比赛 co m pi l e vt.编辑,编制,搜集 co m p lain vi.抱怨,拆苦;控告 c o mpletely a d.十分,完全地 c omplex a.结合的;复杂的 co m plic a te v t .使复杂;使陷入 c om p licate d a .复杂的,难懂的 componen t n.组成部分;分;组件 compo s e vt.组成,构成;创作 com p os i tion n .构成;作品;写作 com p oun d n.化合物;复合词comp r e h ension n .理解,理解力;领悟comprehe n sive a.广泛的;理解的 co m p r ess vt .压紧,压缩 co m pri s e vt .包含,包括;构成 compr o mi s e n.妥协,和解 comput e vt.计算,估计,估算 comrad e n.同志,亲密的同伴 conce a l vt.把…隐藏起来conce n tra t e vt .集中;聚集;浓缩 conce n tr a tion n .集中;专注;浓缩 c o ncept n.概念,观念,设想 c o ncerning p rep.关于 c o n clude v t.推断出;结束 con c lusi o n n.结论,推论;结尾 c o nc r ete n.混凝土;具体物 co n d emn vt.谴责,指责;判刑co n dense vt .压缩,使缩短 c o n d ition n .状况,状态;环境 co n duct n.举止,行为;指导con d uc t or n.售票员;(乐队)指挥 c o nference n.会议,讨论会 c onfess v t .供认,承认;坦白 c onfide n t n .确信的,自信的c onfi n e vt .限制;禁闭 con f li c t n.争论;冲突;斗争 con f u se vt.使混乱,混淆 confu s ion n.混乱;骚乱;混淆 co n g r atulat e v t .祝贺,向…道喜 c ongr e ss n .大会;国会,议会c on j unctio n n .接合,连接;连接词 connec t ion n.连接,联系;连贯性co n q uer vt.征服,战胜;破除 c on q uest n .攻取,征服;克服 con s cie n ce n.良心,道德心con s c i ous a.意识到的;有意的 co n sciousnes s n.意识,觉悟;知觉 conse n t n.同意,赞成 v i .同意 c o nse q uenc e n.结果,后果 conse q ue n tly ad .因此,因而,所以 c o nservati o n n.保存,保护;守恒 conse r v ative a .保守的 n.保守的人 c onsis t vi .由…组成;在于 c o nsi s tent a .坚持的,一贯的 c o n stant a .经常的;永恒的 c o nstitutio n n.章程;体质;构造 const r u c t vt.建造;建设;构筑 c o nst r ucti o n n.建造;建筑;建筑物 c on s ult vt .请教,查阅 con s u me vt.消耗,消费;消灭 con s umption n .消耗量;消耗 c o n tain v t .包含,容纳;等于 co n temp o rary a.当代的,同时代的 c o ntempt n .轻蔑;藐视;受辱 convenie n ce n.便利,方便;厕所cont e n t a.满意的,满足的cont e st vt.争夺,争取;辩驳 co n tine n t n .大陆;陆地;洲 c ontinu a l a.不断的;连续的 continu e vt.继续,连续;延伸 conti n u ous a.连续不断的,持续的 c on t radic t ion n.矛盾,不一致;否认c o ntrar y a .相反的 n.相反 contras t n.对比,对照,悬殊 contrib u te vt.捐献,捐助;投稿 co n v e ntiona l a .普通的;习惯的c o nver s atio n n.会话,非正式会谈 c onvers e l y ad.相反地c onversio n n.转变,转化;改变 conver t vt.使转变;使改变 conve y v t .传送;运送;传播 conv i nce v t.使确信,使信服 co o perate v i .合作,协作;配合 coordin a te vt.使协调,调节cope v i .对付,应付c o p per n.铜;铜币,铜制器 c ord n.细绳,粗线,索 cor d ial a .真诚的,诚恳的 c o r e n.果实的心,核心 corn n .谷物;(英)小麦 c orner n.角;犄角;边远地区 c o rporat i on n.公司,企业;社团 cor r espo n d v i .相符合;相当c orresp o n d ent n.通信者;通讯员 cor r esponding a.相应的;符合的 corrido r n .走廊,回廊,通路 could aux .v.(c a n 的过去式) c o usin n .堂(或表)兄弟(姐妹)council n .理事会,委员会 cottage n .村舍,小屋 co u n tryside n .乡下,农村 c ou n ty n.英国的郡,美国的县 coup l e n .夫妇;(一)对;几个 cour a g e n.勇气,胆量,胆识 cours e n.课程;过程;一道菜 cow n .母牛,奶牛;母兽 c o ward n .懦夫;胆怯者 [K]cut v t.切,割,剪;减少 cup n.杯子;(一)杯;奖杯 cultur e n.文化,文明;教养 custom n .习惯,风俗;海关 custome r n .顾客,主顾 cu b e n.立方形;立方 cub i c a.立方形的;立方的 c u cu m ber n.黄瓜cultiva t e vt.耕;种植;培养 cunnin g a.狡猾的,狡诈的 cupboa r d n.碗柜,碗碟橱;食橱 cur e vt .医治;消除 n.治愈 cu r iosit y n .好奇,好奇心;珍品 curiou s a.好奇的;稀奇古怪的 curl n .卷毛;螺旋 vi .卷曲 curre n t a.当前的;通用的 curse n.诅咒,咒骂;天谴 cu r tai n n.帘,窗帘;幕(布) cu r v e n.曲线;弯 v t.弄弯 cus h ion n.垫子,坐垫,靠垫 [S ]cent n.分;分币;百cer t ainl y ad.一定,必定;当然 c e nt r e (cent e r ) n.中心;中枢 vt.集中ce n tury n.世纪,百年celeb r a te vt.庆祝;歌颂,赞美 c e ll n.细胞;小房间c erem o ny n .典礼,仪式;礼节 c er t ificat e n .证书,证件,执 cease vi .&vi.&n.停止,停息 ceili n g n.天花板,顶蓬 cellar n.地窑,地下室 cem e nt n .水泥;胶泥 vt .粘结 ce n ti g rade a .百分度的 cent i m etre n.公分,厘米 centr a l a.中心的;主要的照 cert a i n a.确实的;肯定的 cert a int y n.必然;肯定 [S]c ity n.城市,都市cigare t te n.香烟,纸烟,卷烟cin e m a n.电影院;电影,影片 ci r cle n.圆,圆周;圈子 cit i zen n .公民;市民,居民 c i r cuit n.电路;环行;巡行 c i rcular a.圆的;循环的 ci r c ulate v t .使循环 vi.循环 c ircum f ere n ce n .圆周,周长,圆周线circ u ms t ance n .情况,条件;境遇 c ivil a.公民的;文职的civ i lization n .文明,文化;开化 civili z e v t.使文明;教育 [S]c ycle n 自行车,循环 [ t ʃ ]China n .中国 china n .瓷器,瓷料 C h i nese a .中国的 n.中国人 ch e ck v t .检查;制止 n .检查 ch o co l ate n.巧克力;巧克力糖 c h i cken n.小鸡,小鸟;鸡肉 ch e ap a.廉价的;劣质的 chee r v t.使振作;欢呼 (cheer s :干杯)che a t vt .骗取;哄 vi.行骗 c h oice n .选择,抉择 cho o s e vt.选择,挑选;情愿 chai r man n.主席;议长,会长cha l l e nge n.挑战;要求,需要 c ham p ion n .冠军,得胜者 c hance n.机会,机遇;可能性 change n .改变,变化;零钱 charity n .施舍;慈善事业 c h art n.图,图表;海图 ch e qu e n.支票chi l d n.小孩,儿童;儿子 c hief a .主要的;首席的 c h a in n.链,链条,项圈 char m ing a.迷人的,可爱的chair n .椅子;主席c h a lk n.白垩;粉笔cham b er n .会议室;房间;腔 cha n nel n .海峡;渠道;频道 c h a pter n.章,回,篇 char g e vt.索价;控告 n.费用 ch a s e n.追逐,追赶,追求 che e k n .面颊,脸蛋 ch e erfu l a.快乐的,愉快的 che e se n.乳酪,干酪 c herry n .樱桃;樱桃树 ch e ss n.棋;国际象棋 chest n .胸腔,胸膛;箱子 c hew vt .咀嚼,嚼碎ch i ldh o od n .童年,幼年;早期 childi s h a.孩子的;幼稚的 chill v t .使变冷 n.寒冷chimney n .烟囱,烟筒;玻璃罩 chin n .颏,下巴 cho k e v t .使窒息;塞满 c h op v t.砍,劈;切细v i.砍 ch u r c h n.教堂,礼拜堂;教会[K] Christ m as n.圣诞节 C hristia n n .基督教徒;信徒 c harac t er n .性格;特性;角色 cha r acter i st i c a.特有的 n .特性 che m i cal a.化学的 n.化学制品 c h emist n.化学家;药剂师 c h e m istry n .化学[ʃ]c h ef n .厨师长;大师傅 C hicag o n .芝加哥 [K ]cl u b n.俱乐部,夜总会 c l ass n .班,班级;阶级 c l e a n a.清洁的;纯洁的 clock n.钟,仪表 cl o se vt.关,闭;结束 clot h e s n.衣服,服装;被褥 cle v er a .聪明的;机敏的 c lou d n.云;云状物;阴影 clo u d y a.多云的;云一般的 cloth i ng n.衣服,被褥claim v t .声称,主张;索取 c lassic a l a .古典的;经典的 c lear a.清晰的 vt .清除 cl e ar l y ad.明白地,清晰地 cle r k n.店员;办事员,职员clap v i .拍手 vt.拍,轻拍 clari f y vt.澄清,阐明 c lasp n .扣子,钩子;别针cl a ssi f icati o n n .分类;分级;分类法 class i f y vt.把…分类 classmat e n.同班同学c l assroom n .教室,课堂 c la w n.爪,脚爪,螯 clay n.粘土,泥土;肉体cl i ff n.悬崖,峭壁c limate n .气候;风土,地带 climb vi.攀登,爬 vt.爬 c loak n.斗篷;覆盖(物) c lo s ely a d .紧密地,接近地 clot h n.布;衣料;桌布 c l othe v t .给…穿衣服 cl u e n.线索,暗示,提示 clumsy a.笨拙的;愚笨的 [K]c r y v i.哭,哭泣;叫喊 crea m n.奶油,乳脂;奶油色 c r az y a.疯狂的,荒唐的 credi t n.信用贷款;信用 create v t .创造;引起,产生 crisis n .危机;存亡之际 cr i me n.罪,罪行;犯罪 c r oss v t.穿过;使交叉 c ry s tal n.水晶,结晶体;晶粒c r i tic n.批评家,爱挑剔的人 cr i tical a.决定性的;批评的 c r i ticism n.批评;批判;评论 c r ack n .裂缝,裂纹 v i .爆裂c r af t n.工艺;手艺,行业 cran e n.起重机,摄影升降机 无效 vi.碰撞,坠落 n.碰撞crawl v i .爬,爬行cre a ti v e a.创造性的,创作的c r eatu r e n .生物,动物,家畜 creep v i .爬行;缓慢地行进crew n.全体船员 cricke t n.板球;蟋蟀c riminal n .犯人,罪犯,刑事犯 cripp l e n .跛子;残废的人 c r iti c ize v t .批评;评论;非难 c r op n.农作物,庄稼;一熟 cr o w n.鸦,乌鸦 v i.啼 crow d n.群;大众;一伙人 crown n.王冠,冕;花冠cr u de a .简陋的;天然的c ruel a .残忍的,残酷的 c r u sh vt.压碎,碾碎;镇压 cr u st n.面包皮;硬外皮 字母y是一个非常特殊的字母。
carbon的化学符号
碳元素是一种非金属元素,在化学元素周期表中位于第6位。
碳元素的化学符号为C,是一种常见且重要的元素之一。
碳元素在自然界以多种形式存在,包括金刚石、石墨、无定形碳(如煤和木炭)以及富勒烯和碳纳米管等碳纳米材料。
碳元素在
工业和科技领域中也有广泛的应用,例如作为燃料、催化剂、塑料、橡胶、电子元件等的原料。
碳元素的化学性质非常稳定,可以形成多种键型,如单键、双键、叁键等。
这些化学性质使得碳元素在各种化学反应中起到关键
作用,例如有机化学反应、高分子合成、自由基反应等。
此外,碳元素也是生物体内一种重要的元素,在生物体内以多种形式存在,如蛋白质、核酸、碳水化合物等。
碳元素在生命活动
中也起着重要的作用,例如作为生物分子结构的组成部分、能量传
递等。
总之,碳元素是一种非常重要的元素,在化学、工业、科技和生命科学等领域中有着广泛的应用和重要性。
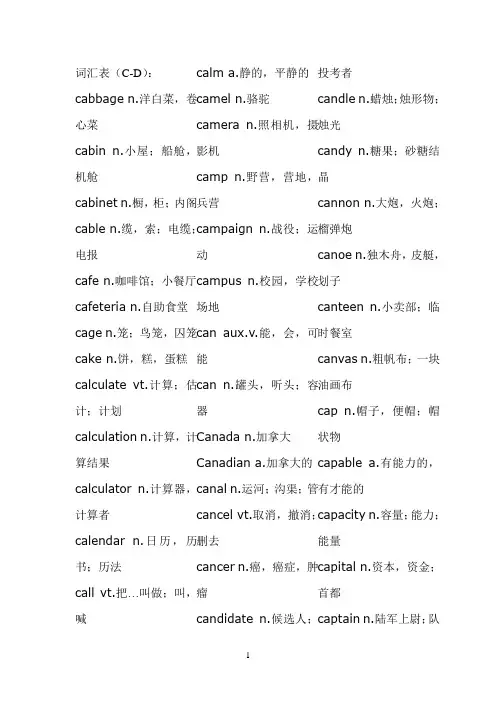
c字母开头的单词
C字母开头的单词有很多,比如:cat(猫)、camel(骆驼)、car(汽车)、cow(牛)、cake(蛋糕)、city(城市)、cloud(云)、cup(杯子)、computer(电脑)、clock (钟)、cry(哭)、candy(糖果)等等。
C字母开头的单词不仅有动物,还有交通工具、食物、家具、用具等等,它们的出现让我
们的生活更加丰富多彩。
比如说,car不仅可以让我们出行更加便捷,还可以带来快乐的
旅行体验;computer让我们的工作效率更高,也可以为我们提供更多的娱乐方式;cake是一种美味可口的食物,也可以成为欢庆的象征。
C字母开头的单词丰富了我们的生活,让我们的生活更加精彩。
词汇表(C-D ): cabbage n.洋白菜,卷心菜 cabin n.小屋;船舱,机舱 cabinet n.橱,柜;内阁 cable n.缆,索;电缆;电报 cafe n.咖啡馆;小餐厅 cafeteria n.自助食堂 cage n.笼;鸟笼,囚笼 cake n.饼,糕,蛋糕 calculate vt.计算;估计;计划 calculation n.计算,计算结果 calculator n.计算器,计算者 calendar n.日历,历书;历法 call vt.把…叫做;叫,喊 calm a.静的,平静的 camel n.骆驼camera n.照相机,摄影机camp n.野营,营地,兵营campaign n.战役;运动 campus n.校园,学校场地 can aux.v.能,会,可能 can n.罐头,听头;容器 Canada n.加拿大Canadian a.加拿大的 canal n.运河;沟渠;管 cancel vt.取消,撤消;删去cancer n.癌,癌症,肿瘤candidate n.候选人;投考者candle n.蜡烛;烛形物;烛光candy n.糖果;砂糖结晶cannon n.大炮,火炮;榴弹炮canoe n.独木舟,皮艇,划子canteen n.小卖部;临时餐室canvas n.粗帆布;一块油画布cap n.帽子,便帽;帽状物 capable a.有能力的,有才能的capacity n.容量;能力;能量 capital n.资本,资金;首都 captain n.陆军上尉;队长 captive n.俘虏,被监禁的人 capture vt.捕获,俘获;夺得 car n.汽车,小汽车,轿车carbon n.碳 card n.卡,卡片,名片 care vi.关心,介意 n.小心 career n.生涯,职业,经历 careful a.仔细的;细致的 careless a.粗心的,漫不经心的 cargo n.船货,货物 carpenter n.木工,木匠 carpet n.地毯,毡毯,毛毯 carriage n.客车厢;四轮马车carrier n.运输工具;运载工具 carrot n.胡罗卜carry vt.携带;运载;传送 cart n.二轮运货马车 carve vt.刻,雕刻;切开case n.情况;事实;病例case n.箱(子),盒(子),套 cash n.现金,现款cassette n.盒式录音带;盒子 cast vt.投,扔,抛;浇铸castle n.城堡;巨大建筑物casual a.偶然的;随便的cat n.猫,猫科,猫皮 catalog n.目录,目录册catch vt.捉住;赶上;领会 cathedral n.总教堂;大教堂 cattle n.牛;牲口,家畜cause n.原因,理由;事业cave n.山洞,洞穴,窑洞cease vi.&vi.&n.停止,停息 ceiling n.天花板,顶蓬 celebrate vt.庆祝;歌颂,赞美cell n.细胞;小房间 cellar n.地窑,地下室cement n.水泥;胶泥 vt.粘结cent n.分;分币;百 centigrade a.百分度的 centimetre n.公分,厘米 central a.中心的;主要的 centre n.中心;中枢 vt.集中 century n.世纪,百年 ceremony n.典礼,仪式;礼节 certain a.确实的;肯定的 certainly ad.一定,必定;当然 certainty n.必然;肯定 certificate n.证书,证件,执照 chain n.链,链条,项圈chair n.椅子;主席 chairman n.主席;议长,会长chalk n.白垩;粉笔 challenge n.挑战;要求,需要 chamber n.会议室;房间;腔 champion n.冠军,得胜者 chance n.机会,机遇;可能性change n.改变,变化;零钱channel n.海峡;渠道;频道chapter n.章,回,篇 character n.性格;特性;角色characteristic a.特有的 n.特性charge vt.索价;控告 n.费用 charity n.施舍;慈善事业 charming a.迷人的,可爱的chart n.图,图表;海图 chase n.追逐,追赶,追求cheap a.廉价的;劣质的cheat vt.骗取;哄 vi.行骗 check vt.检查;制止 n.检查 cheek n.面颊,脸蛋cheer vt.使振作;欢呼 cheerful a.快乐的,愉快的cheese n.乳酪,干酪 chemical a.化学的 n.化学制品 chemist n.化学家;药剂师chemistry n.化学cheque n.支票 cherry n.樱桃;樱桃树 chess n.棋;国际象棋 chest n.胸腔,胸膛;箱子 chew vt.咀嚼,嚼碎 chicken n.小鸡,小鸟;鸡肉 chief a.主要的;首席的 child n.小孩,儿童;儿子 childhood n.童年,幼年;早期 childish a.孩子的;幼稚的 chill vt.使变冷 n.寒冷 chimney n.烟囱,烟筒;玻璃罩chin n.颏,下巴China n.中国china n.瓷器,瓷料 Chinese a.中国的 n.中国人 chocolate n.巧克力;巧克力糖 choice n.选择,抉择 choke vt.使窒息;塞满 choose vt.选择,挑选;情愿chop vt.砍,劈;切细vi.砍Christian n.基督教徒;信徒 Christmas n.圣诞节 church n.教堂,礼拜堂;教会cigarette n.香烟,纸烟,卷烟cinema n.电影院;电影,影片 circle n.圆,圆周;圈子 circuit n.电路;环行;巡行 circular a.圆的;循环的 circulate vt.使循环 vi.循环circumference n.圆周,周长,圆周线 circumstance n.情况,条件;境遇citizen n.公民;市民,居民city n.城市,都市 civil a.公民的;文职的 civilization n.文明,文化;开化civilize vt.使文明;教育 claim vt.声称,主张;索取 clap vi.拍手 vt.拍,轻拍 clarify vt.澄清,阐明 clasp n.扣子,钩子;别针class n.班,班级;阶级classical a.古典的;经典的 classification n.分类;分级;分类法 classify vt.把…分类 classmate n.同班同学 classroom n.教室,课堂 claw n.爪,脚爪,螯 clay n.粘土,泥土;肉体 clean a.清洁的;纯洁的 clear a.清晰的 vt.清除 clearly ad.明白地,清晰地 clerk n.店员;办事员,职员 clever a.聪明的;机敏的cliff n.悬崖,峭壁 climate n.气候;风土,地带 climb vi.攀登,爬 vt.爬 cloak n.斗篷;覆盖(物) clock n.钟,仪表 close vt.关,闭;结束 closely ad.紧密地,接近地cloth n.布;衣料;桌布 clothe vt.给…穿衣服 clothes n.衣服,服装;被褥 clothing n.衣服,被褥 cloud n.云;云状物;阴影cloudy a.多云的;云一般的club n.俱乐部,夜总会 clue n.线索,暗示,提示 clumsy a.笨拙的;愚笨的coach n.长途公共汽车 coal n.煤,煤块 coarse a.粗的,粗糙的 coast n.海岸,海滨(地区)coat n.外套,上衣;表皮cock n.公鸡;雄禽;旋塞code n.准则;法典;代码coffee n.咖啡,咖啡茶 coil n.(一)卷;线圈 vt.卷coin n.硬币;铸造(硬币) cold a.冷的;冷淡的 n.冷 collapse vi.倒坍;崩溃,瓦解collar n.衣领,项圈 colleague n.同事,同僚 collect vt.收集 vi.收款 collection n.搜集,收集;收藏品 collective a.集体的;集合性的 college n.学院;大学 collision n.碰撞;冲突 colonel n.陆军上校;中校 colony n.殖民地;侨居地 color n.颜色,彩色;颜料 column n.柱,支柱,圆柱 comb n.梳子 vt.梳理 combination n.结合,联合;化合 combine vt.使结合;兼有 come vi.来,来到;出现 comfort n.舒适;安慰 vt.安慰comfortable a.舒适的,安慰的command vt.命令,指挥;控制commander n.司令官,指挥员comment n.评论,意见;注释commerce n.商业,贸易;社交commercial a.商业的;商品化的commission n.委任状;委员会commit vt.犯(错误);干(坏事) committee n.委员会;全体委员 common a.普通的;共同的commonly ad.普通地,一般地 communicate vi.通讯;传达;传播 communication n.通讯;传达;交通 communismmunist 主义 communistmunistparty 员 community n.社区;社会;公社 companion n.同伴;共事者;伴侣 company n.公司,商号;同伴 comparative a.比较的,相对的compare vt.比较,对照;比作comparison n.比较,对照;比似compass n.罗盘,指南针;圆规 compel vt.强迫,迫使屈服 compete vi.比赛;竞争;对抗 competent a.有能力的;应该做的 competition n.竞争,比赛 compile vt.编辑,编制,搜集 complain vi.抱怨,拆苦;控告 complaint n.抱怨;怨言;控告 complete a.完整的;完成的 completely ad.十分,完全地 complex a.结合的;复杂的 complicate vt.使复杂;使陷入 complicated a.复杂的,难懂的 component n.组成部分;分;组件 compose vt.组成,构成;创作 composition n.构成;作品;写作 compound n.化合物;复合词 comprehension n.理解,理解力;领悟 comprehensive a.广泛的;理解的 compress vt.压紧,压缩 comprise vt.包含,包括;构成 compromise n.妥协,和解compute vt.计算,估计,估算computer n.计算机,电脑comrade n.同志,亲密的同伴conceal vt.把…隐藏起来concentrate vt.集中;聚集;浓缩concentration n.集中;专注;浓缩concept n.概念,观念,设想concern n.关心,挂念;关系concerning prep.关于 concert n.音乐会,演奏会conclude vt.推断出;结束conclusion n.结论,推论;结尾 concrete n.混凝土;具体物 condemn vt.谴责,指责;判刑 condense vt.压缩,使缩短 condition n.状况,状态;环境 conduct n.举止,行为;指导 conductor n.售票员;(乐队)指挥 conference n.会议,讨论会 confess vt.供认,承认;坦白 confidence n.信任;信赖;信心 confident n.确信的,自信的 confine vt.限制;禁闭 confirm vt.证实,肯定;批准conflict n.争论;冲突;斗争confuse vt.使混乱,混淆confusion n.混乱;骚乱;混淆congratulate vt.祝贺,向…道喜congratulation n.祝贺;祝贺词congress n.大会;国会,议会conjunction n.接合,连接;连接词connect vt.连接,连结;联系connection n.连接,联系;连贯性conquer vt.征服,战胜;破除conquest n.攻取,征服;克服 conscience n.良心,道德心 conscious a.意识到的;有意的 consciousness n.意识,觉悟;知觉 consent n.同意,赞成vi.同意 consequence n.结果,后果 consequently ad.因此,因而,所以 conservation n.保存,保护;守恒 conservative a.保守的 n.保守的人 consider vt.认为;考虑;关心 considerable a.相当大的;重要的considerate a.考虑周到的;体谅的 consideration n.考虑,思考;体贴 consist vi.由…组成;在于 consistent a.坚持的,一贯的 constant a.经常的;永恒的 constitution n.章程;体质;构造 construct vt.建造;建设;构筑 construction n.建造;建筑;建筑物 consult vt.请教,查阅 consume vt.消耗,消费;消灭 consumption n.消耗量;消耗 contact vt.使接触;与…联系contain vt.包含,容纳;等于container n.容器;集装箱contemporary a.当代的,同时代的contempt n.轻蔑;藐视;受辱content n.内容,目录;容量content a.满意的,满足的contest vt.争夺,争取;辩驳continent n.大陆;陆地;洲continual a.不断的;连续的 continue vt.继续,连续;延伸 continuous a.连续不断的,持续的 contract n.契约,合同;婚约 contradiction n.矛盾,不一致;否认 contrary a.相反的 n.相反 contrast n.对比,对照,悬殊 contribute vt.捐献,捐助;投稿 control vt.控制,克制n.控制 convenience n.便利,方便;厕所 convenient a.便利的;近便的 convention n.习俗,惯例;公约conventional a.普通的;习惯的conversation n.会话,非正式会谈 conversely ad.相反地 conversion n.转变,转化;改变 convert vt.使转变;使改变 convey vt.传送;运送;传播 convince vt.使确信,使信服 cook vt.烹调,煮 vt.烧菜 cool a.凉的,冷静的 cooperate vi.合作,协作;配合 coordinate vt.使协调,调节cope vi.对付,应付 copper n.铜;铜币,铜制器 copy n.抄件 vt.抄写,复制 cord n.细绳,粗线,索 cordial a.真诚的,诚恳的core n.果实的心,核心 corn n.谷物;(英)小麦 corner n.角;犄角;边远地区corporation n.公司,企业;社团correct a.正确的 vt.纠正correction n.改正,纠正,修改correspond vi.相符合;相当 correspondent n.通信者;通讯员 corresponding a.相应的;符合的corridor n.走廊,回廊,通路cost n.价格,代价;成本costly a.昂贵的;价值高的 cottage n.村舍,小屋 cotton n.棉;棉线;棉布cough vi.咳,咳嗽 n.咳嗽could aux.v.(can 的过去式)council n.理事会,委员会count vt.计算 vi.数,计数counter n.柜台;计数器country n.国家,国土;农村countryside n.乡下,农村county n.英国的郡,美国的县couple n.夫妇;(一)对;几个 courage n.勇气,胆量,胆识 course n.课程;过程;一道菜 court n.法院,法庭;庭院 cousin n.堂(或表)兄弟(姐妹) cover vt.盖,包括 n.盖子 cow n.母牛,奶牛;母兽 coward n.懦夫;胆怯者 crack n.裂缝,裂纹 vi.爆裂 craft n.工艺;手艺,行业 crane n.起重机,摄影升降机 无效 vi.碰撞,坠落 n.碰撞crawl vi.爬,爬行 crazy a.疯狂的,荒唐的 cream n.奶油,乳脂;奶油色create vt.创造;引起,产生creative a.创造性的,创作的creature n.生物,动物,家畜credit n.信用贷款;信用creep vi.爬行;缓慢地行进 crew n.全体船员cricket n.板球;蟋蟀 crime n.罪,罪行;犯罪 criminal n.犯人,罪犯,刑事犯 cripple n.跛子;残废的人 crisis n.危机;存亡之际 critic n.批评家,爱挑剔的人critical a.决定性的;批评的criticism n.批评;批判;评论criticize vt.批评;评论;非难crop n.农作物,庄稼;一熟cross vt.穿过;使交叉 crow n.鸦,乌鸦 vi.啼crowd n.群;大众;一伙人 crown n.王冠,冕;花冠crude a.简陋的;天然的cruel a.残忍的,残酷的 crush vt.压碎,碾碎;镇压 crust n.面包皮;硬外皮 cry vi.哭,哭泣;叫喊 crystal n.水晶,结晶体;晶粒 cube n.立方形;立方 cubic a.立方形的;立方的cucumber n.黄瓜 cultivate vt.耕;种植;培养 culture n.文化,文明;教养 cunning a.狡猾的,狡诈的 cup n.杯子;(一)杯;奖杯 cupboard n.碗柜,碗碟橱;食橱 cure vt.医治;消除 n.治愈curiosity n.好奇,好奇心;珍品curious a.好奇的;稀奇古怪的curl n.卷毛;螺旋 vi.卷曲current a.当前的;通用的curse n.诅咒,咒骂;天谴curtain n.帘,窗帘;幕(布) curve n.曲线;弯 vt.弄弯cushion n.垫子,坐垫,靠垫custom n.习惯,风俗;海关customer n.顾客,主顾 cut vt.切,割,剪;减少 cycle n 自行车,循环。

互联网的英文缩写为C
互联网在当今社会中扮演着极其重要的角色,已经成为人们日常生活中不可或缺的一部分。
而互联网这个词汇的英文缩写即为C。
C代表着连接,沟通和共享信息的方便与迅速。
在互联网时代,信息的传播速度达到了前所未有的高度。
借助互联网,人们之间的信息传递不再受地域和时空的限制。
在这个无处不在的网络中,人们可以交流想法、分享知识、开展合作,从而极大地促进了人类社会的发展和进步。
互联网的C同时也代表着沟通。
通过互联网,人们可以随时随地与全球各地的人们进行交流,建立起一种全新的沟通方式。
无论是文字、图片、音频还是视频,都能通过互联网快速传递,拉近了人与人之间的距离。
共享是互联网C的另一重要含义。
在互联网上,人们可以轻松地分享自己的观点、经验、技能甚至是经济资源。
共享经济的兴起,更是推动了互联网共享文化的发展,让人们能够更加方便地共享各种资源,实现资源的优化配置。
然而,互联网的C也存在着一些问题。
信息传播的速度过快,导致了信息真假难辨,甚至可能给人们的思想观念带来负面影响。
而在互联网沟通中,面对屏幕,人们的交流也可能变得更加冷冰冰,缺乏真实的情感体验。
同时,在共享文化的背景下,个人隐私和数据安全也面临着严峻的挑战。
无论是连接、沟通还是共享,互联网的C都深刻影响着我们的生活。
对于这个世界来说,C代表着一种连接全球的力量,促进人类社会的不断发展。
然而同时也需要我们认识到互联网所带来的挑战和问题,并寻找解决之道,以保证互联网的C 能够更好地造福人类。
c的原子相对原子质量C的原子相对原子质量C是化学元素周期表中的第6个元素,其原子序数为6,原子量为12.01。
在化学中,原子相对原子质量是指一个元素的原子质量与碳-12同位素的原子质量之比。
因此,C的原子相对原子质量为12.01。
物理类原子相对原子质量是一个物理量,它是由原子的质量和质子数决定的。
在C的原子中,有6个质子和6个中子,因此其质量为12。
但是,由于同位素的存在,C的原子相对原子质量并不等于12。
同位素是指原子核中质子数相同,但中子数不同的原子。
C的同位素有两种,分别是碳-12和碳-13。
碳-12的原子质量为12,而碳-13的原子质量为13.003。
化学类C是化学中非常重要的元素之一,它在有机化学和生物化学中都有广泛的应用。
在有机化学中,C是构成有机物的基本元素之一。
有机物是指含有C和H元素的化合物,如烷烃、烯烃、芳香烃等。
在生物化学中,C是构成生命体的基本元素之一。
生命体中的有机物包括蛋白质、核酸、多糖等,它们都含有C元素。
历史类C的原子相对原子质量的确定是一个历史悠久的过程。
早在18世纪,化学家就开始研究元素的相对原子质量。
当时,他们使用化学反应的质量变化来确定元素的相对原子质量。
但是,这种方法存在很大的误差,因为化学反应的质量变化受到很多因素的影响。
直到20世纪初,科学家才开始使用质谱仪来测量元素的原子质量,从而确定元素的相对原子质量。
质谱仪是一种能够测量原子和分子的质量的仪器,它通过将原子或分子加速到高速后,利用磁场将它们分离出来,从而测量它们的质量。
总结C的原子相对原子质量是一个重要的物理量,它是由原子的质量和质子数决定的。
在化学中,C是一个非常重要的元素,它在有机化学和生物化学中都有广泛的应用。
C的原子相对原子质量的确定是一个历史悠久的过程,科学家们通过不断的研究和探索,最终确定了C的原子相对原子质量为12.01。
维c与铜离子维生素C与铜离子的那些事儿维生素C,大家都不陌生吧,就是那个对我们身体特别好的营养素。
那铜离子呢,可能听起来有点陌生,但它在我们身体里也有着重要的作用哦。
维生素C是一种水溶性维生素,在我们日常吃的很多水果和蔬菜里都有,像橙子、柠檬、草莓,还有西兰花、青椒这些。
它对我们人体的健康有着好多贡献呢。
比如说,它可以增强我们的免疫力,让我们不容易生病。
还能促进胶原蛋白的合成,这胶原蛋白可是对我们的皮肤、骨骼、牙齿这些都很重要的东西哦。
铜离子呢,在我们的身体里也是一个小小的“大忙人”。
它参与了很多生理过程,比如在一些酶的活性中心就有铜离子的身影。
这些酶就靠着铜离子才能好好地工作,像参与铁的代谢,要是没有铜离子,铁的吸收和利用都会出问题呢。
那维生素C和铜离子之间有啥联系呢?这可就有趣了。
维生素C是一种强还原剂,而铜离子具有氧化性。
当它们在一定的条件下相遇时,就会发生化学反应。
这个反应可有点复杂,简单来说呢,维生素C会把铜离子还原。
这种还原反应在一些生化研究里或者在我们身体内部某些特殊的微观环境里是有意义的。
从健康的角度看,如果我们在饮食中摄入了含有维生素C的食物,同时也摄入了铜元素(铜离子的来源),那在我们的肠胃等消化器官里,就可能会发生这种维生素C 和铜离子的反应。
不过正常情况下,我们身体是能够处理这种反应的,不会有啥大问题。
但是如果摄入的量特别不正常,比如说大量地补充维生素C片,同时又通过一些特殊的补充剂摄入了过多的铜元素,那就可能会让这种反应变得有点“失控”。
可能会影响到铜元素在身体里正常的生理功能,也可能会让维生素C过度消耗,不能很好地发挥它自己的那些健康作用。
在实验室研究里,科学家们对维生素C和铜离子的反应也很关注。
因为这个反应可以用来做一些检测或者分析。
比如说,可以利用这个反应的特点来检测维生素C的含量。
而且这个反应在一些药物研发或者疾病研究里也有潜在的意义。
比如说,在研究某些和氧化还原失衡有关的疾病时,维生素C和铜离子之间的这种反应就可能成为一个研究的切入点。
化学c是什么意思
C在化学中有两种含义:1、表示浓度,单位为mol/L,计算式为:C=n/V.C=1000ρω/M。
2、表示碳元素。
碳是一种非金属元素,位于元素周期表的第二周期IVA族。
是一种很常见的元素,它以多种形式广泛存在于大气和地壳和生物之中。
1、表示浓度,单位为mol/L,计算式为:
C=n/V.C=1000ρω/M。
含义:用1升溶液中所含溶质的摩尔数表示的浓度。
用单位体积内溶质的量(摩尔数)表示的溶液组成的物理量称为溶质的摩尔浓度,也称为溶质的量浓度。
溶质含量越多,浓度越大。
浓度可以通过一定溶液中溶质的克数、分子数或当量数来计算。
一般用单位溶液中所含溶质的重量百分比来表示。
2、表示碳元素。
碳是一种非金属元素,位于元素周期表的第二周期IVA族。
拉丁语为Carbonium,意为“煤,木炭”。
碳是一种很常见的元素,它以多种形式广泛存在于大气和地壳和生物之中。
碳单质很早就被人认识和利用,碳的一系列化合物——有机物更是生命的根本。
碳是生铁、熟铁和钢的成分之一。
碳能在化学上自我结合而形成大量化合物,在生物上和商业上是重要的分子。
生物体内绝大多数分子都含有碳元素。
组合c的计算方法组合C的计算方法组合C是组合数学中的一个重要概念,用于计算从n个元素中取出k个元素的组合数。
在实际应用中,组合C的计算方法有多种,下面将介绍几种常见的计算方法。
1. 公式法:组合C的计算可以使用数学公式来实现。
组合C的公式为C(n, k) = n! / (k! * (n-k)!),其中n!表示n的阶乘,即n! = n * (n-1) * (n-2) * ... * 2 * 1。
通过计算n的阶乘和k的阶乘以及(n-k)的阶乘,然后将它们相除,即可得到组合C的值。
这种方法适用于小规模的计算,但对于大规模的计算会出现溢出问题。
2. 递归法:递归法是一种常用的计算组合C的方法。
递归法的思想是将组合C的计算问题分解为更小规模的子问题。
具体而言,可以将问题分为两种情况:一种是选择第一个元素作为组合中的元素,然后从剩余的n-1个元素中选择k-1个元素;另一种情况是不选择第一个元素,然后从剩余的n-1个元素中选择k个元素。
通过递归调用这两种情况,最终可以得到组合C的值。
3. 动态规划法:动态规划法是一种更高效的计算组合C的方法。
动态规划法的基本思想是将问题分解为多个子问题,并缓存子问题的解,以避免重复计算。
具体而言,可以使用一个二维数组dp来存储组合C的值,其中dp[i][j]表示从i个元素中选择j个元素的组合C的值。
根据组合C的递推关系C(n, k) = C(n-1, k-1) + C(n-1, k),可以通过动态规划的方式计算出组合C的值。
4. Lucas定理:Lucas定理是一种利用数论思想来计算组合C的方法。
Lucas定理的基本思想是将组合C的计算转化为模素数的运算。
具体而言,可以将n和k分别表示为p进制数,并计算它们对p的模。
然后使用Lucas定理的公式C(n, k) = C(n mod p, k mod p) * C(n div p, k div p) mod p,其中div表示整除运算。
c开头的单词大全集以内cacography(书写错误)、cacophony(嘈杂之声)、calamity (灾祸)、caliphate(哈里发)、calligraphy(书法)、callow(幼稚)、calumniate(诽谤)、calumny(诽谤)、calvary(十字军)、calvary(十字架)、camaraderie(友谊)、canard(谣言)、candescent(发白的)、candid(坦白的)、canker(溃疡)、cantata(管弦乐)、canticle(圣诗)、canto(诗篇)、capacious(宽敞的)、capitulate(投降)、caricature (漫画)、carnage(大屠杀)、carousal(狂欢)、cartographer(制图者)、castigation(惩罚)、castigate(惩罚)、casualty(受害者)、casuistry(诡辩)、cataclysm(灾变)、catalyze(催化)、catamaran(双体船)、catastrophe(灾难)、catechism(信条)、cautionary(警告性的)、cavil(苛求)、celestial(天体)、censor(审查人)、censure(谴责)、centurion(百夫长)、ceremony(仪式)、chimera(幻想)、choleric(怒火中烧的)、chronic(长期的)、circumlocution(回绕)、cipher(凯弗)、circumscribe(限定)、circumspect(谨慎的)、circumvent(谋避)、clairvoyance(透视)、clamor(叫嚣)、clarity(清晰)、classic(经典)、coercion(强制)、cogent(有力的)、commemorate(纪念)、commendable(值得称赞的)、commodious(宽敞的)、commute (改变)、compendium(汇编)、complacency(满足)、concession(让步)、concoct (捏造)、concord(调和)、condescension(屈尊)、condign(应有的)、confederacy(联盟)、conflagration(烈火)、conquest(征服)、consensus(共识)、contempt(蔑视)、contiguous(相邻的)、contingent(不确定的)、contiguity(接近)、contrite(悔悟的)、controversy(争论)、conundrum(谜语)、convenient(便利的)、convivial(快乐的)、convoluted(曲折的)、convolvulus(绑草)、copious(浩繁的)、corporeal(肉体的)、correlate(相关的)、correspondence(相似)、cosmopolitan(国际性的)、coterie(私密伙伴)、courtier(宰相)、covenant(公约)、covert(秘密的)、credence(信任)、credulous(易受骗的)、crescendo(增强)、criterion(标准)、crucible(考验)、crystallize(结晶)、culpable(有罪的)、cupidity(贪心)、curmudgeon(讨厌鬼)、curriculum(课程)、cynicism(愤世嫉俗态度)。
数学中c代表什么
数学中c代表复数集合,C还表示周长,组合会以C表示,在对称元素中,C表示旋转轴等一些数学符号。
数学是研究数量、结构、变化、空间以及信息等概念的一门学科,从某种角度看属于形式科学的一种。
数学透过抽象化和逻辑推理的使用,由计数、计算、量度和对物体形状及运动的观察而产生。
数学已成为许多国家及地区的教育范畴中的一部分。
它应用于不同领域中,包括科学、工程、医学、经济学和金融学等。
数学家也研究纯数学,就是数学本身的实质性内容,而不以任何实际应用为目标。
c开头的汉字C开头的汉字,是指拼音中以“c”为声母的汉字。
在汉语中,以“c”为声母的汉字并不多,但每一个字都有着独特的含义和用法。
在本文中,我们将会介绍一些常见的C开头的汉字,以及它们的用法和意义。
一、草草,是一种植物,也是汉字中常用的字。
草在汉语中有着丰富的含义和用法。
在汉字中,草的意义非常广泛,可以用来表示草地、植物、草稿等等。
同时,草也是汉字中的一个部首,常用于组成一些与植物有关的汉字,例如花、茶、苗等等。
二、城城,是指城市或城墙。
城在汉语中也有着丰富的含义和用法。
城可以用来表示一个城市或城镇的名称,也可以用来表示城市的建筑物或城墙。
在中国的历史中,城是一个非常重要的概念,它代表了一个国家或地区的文化和政治中心。
三、春春,是一年四季之一,也是汉字中常用的字。
春在汉语中有着丰富的含义和用法。
春可以用来表示一个季节,也可以用来表示新的开始和希望。
在中国文化中,春是一个非常重要的概念,它代表了新的开始和希望,同时也是一个重要的节日——春节的主题。
四、厕厕,是指厕所或公共厕所。
厕在汉语中也有着丰富的含义和用法。
厕可以用来表示一个厕所或公共厕所的名称,也可以用来表示厕所的建筑物或设施。
在现代社会中,厕所是一个非常重要的设施,它代表了卫生和公共卫生的重要性。
五、猫猫,是一种哺乳动物,也是汉字中常用的字。
猫在汉语中有着丰富的含义和用法。
猫可以用来表示一种动物,也可以用来表示一种态度或行为。
在中国文化中,猫是一个非常重要的动物,它代表了灵性和自由,同时也是一个非常受欢迎的宠物。
六、菜菜,是指食品中的蔬菜,也是汉字中常用的字。
菜在汉语中有着丰富的含义和用法。
菜可以用来表示一种食品,也可以用来表示一种文化或生活方式。
在中国文化中,菜是一个重要的元素,它代表了饮食文化和生活方式的重要性。
七、车车,是指交通工具中的车辆,也是汉字中常用的字。
车在汉语中有着丰富的含义和用法。
车可以用来表示一种交通工具,也可以用来表示一种文化或生活方式。
c# ms chart 控件使用方法第一个简单的chart:创建曲线图chart1.Series.Clear();Series series = new Series("Spline");series.ChartType = SeriesChartType.Spline;series.BorderWidth = 3;series.ShadowOffset = 2;// Populate new series with dataseries.Points.AddY(67);series.Points.AddY(57);series.Points.AddY(83);series.Points.AddY(23);series.Points.AddY(70);series.Points.AddY(60);series.Points.AddY(90);series.Points.AddY(20);// Add series into the chart's series collectionchart1.Series.Add(series);同时显示2条曲线// Populate series with random dataRandom random = new Random();for (int pointIndex = 0; pointIndex < 10;pointIndex++){Chart1.Series["Series1"].Points.AddY(random.Next(45, 95)); Chart1.Series["Series2"].Points.AddY(random.Next(5, 75)); }// Set series chart typeChart1.Series["Series1"].ChartType = SeriesChartType.Line; Chart1.Series["Series2"].ChartType = SeriesChartType.Spline;// Set point labelsChart1.Series["Series1"].IsValueShownAsLabel = true;Chart1.Series["Series2"].IsValueShownAsLabel = true;// Enable X axis marginChart1.ChartAreas["ChartArea1"].AxisX.IsMarginVisible = true;// Enable 3D, and show data point marker linesChart1.ChartAreas["ChartArea1"].Area3DStyle.Enable3D = true; Chart1.Series["Series1"]["ShowMarkerLines"] = "True";Chart1.Series["Series2"]["ShowMarkerLines"] = "True";显示column类型图,柱状图// Create new data series and set it's visual attributesChart1.Series.Clear();Series series = new Series("FlowRead");series.ChartType = SeriesChartType.Column;series.BorderWidth = 3;series.ShadowOffset = 2;// Populate new series with dataseries.Points.AddY(67);series.Points.AddY(57);series.Points.AddY(83);series.Points.AddY(23);series.Points.AddY(70);series.Points.AddY(60);series.Points.AddY(90);series.Points.AddY(20);// Add series into the chart's series collectionChart1.Series.Add(series);很多点,效率还可以// Fill series datadouble yValue = 50.0;Random random = new Random();for (int pointIndex = 0; pointIndex < 20000;pointIndex++){yValue = yValue + (random.NextDouble() * 10.0 - 5.0);Chart1.Series["Series1"].Points.AddY(yValue);}// Set fast line chart typeChart1.Series["Series1"].ChartType = SeriesChartType.FastLine;日期,xy类型// Create a new random number generatorRandom rnd = new Random();// Data points X value is using current date DateTime date = DateTime.Now.Date;// Add points to the stock chart seriesfor (int index = 0; index < 10; index++){Chart1.Series["Series1"].Points.AddXY( date, // X value is a daternd.Next(40,50)); //Close Y value// Add 1 day to our X valuedate = date.AddDays(1);int-int的xy数据绘图// Create a new random number generatorRandom rnd = new Random();// Add points to the stock chart seriesfor (int index = 0; index < 10; index++){Chart1.Series["Series1"].Points.AddXY(rnd.Next(10,90), // X value is a date rnd.Next(40,50)); //Close Y value数据库数据,datetime-int类型Chart1.Series.Clear();OleDbConnection conn = new OleDbConnection("Provider=Microsoft.Jet.OLEDB.4.0;Data Source=" +Application.StartupPath + @"\db.mdb" + ";Persist Security Info=False");OleDbCommand cmd = conn.CreateCommand();conn.Open();mandText = "select 时间,序号from pub_log_read order by 序号asc";//DataSet ds = new DataSet();//OleDbDataAdapter da = new OleDbDataAdapter();//da.SelectCommand = cmd;//da.Fill(ds, "tbscore");OleDbDataReader dr = cmd.ExecuteReader(CommandBehavior.CloseConnection);Chart1.DataBindTable(dr, "时间");dr.Close();数据库数据2,string-int类型Chart1.Series.Clear();OleDbConnection conn = new OleDbConnection("Provider=Microsoft.Jet.OLEDB.4.0;Data Source=" +Application.StartupPath + @"\db.mdb" + ";Persist Security Info=False");OleDbCommand cmd = conn.CreateCommand();conn.Open();mandText = "select 账号,count(账号) as 次数from pub_log_read group by 账号order by 账号asc";//DataSet ds = new DataSet();//OleDbDataAdapter da = new OleDbDataAdapter();//da.SelectCommand = cmd;//da.Fill(ds, "tbscore");OleDbDataReader dr = cmd.ExecuteReader(CommandBehavior.CloseConnection);Chart1.DataBindTable(dr, "账号");dr.Close();数据库绑定3-string-int型Chart1.Series.Clear();Chart1.Series.Add("Series1");OleDbConnection conn = new OleDbConnection("Provider=Microsoft.Jet.OLEDB.4.0;Data Source=" +Application.StartupPath + @"\db.mdb" + ";Persist Security Info=False");OleDbCommand cmd = conn.CreateCommand();mandText = "select 账号,count(账号) as 次数from pub_log_read group by 账号order by 账号asc";conn.Open();DataSet ds = new DataSet();OleDbDataAdapter da = new OleDbDataAdapter();da.SelectCommand = cmd;da.Fill(ds, "tbscore");Chart1.DataSource = ds;Chart1.Series["Series1"].XValueMember = "账号";Chart1.Series["Series1"].YValueMembers = "次数";// Data bind to the selected data sourceChart1.DataBind();conn.Close();数据库4,只绑定yChart1.Series.Clear();Chart1.Series.Add("序号");OleDbConnection conn = new OleDbConnection("Provider=Microsoft.Jet.OLEDB.4.0;Data Source=" +Application.StartupPath + @"\db.mdb" + ";Persist Security Info=False");OleDbCommand cmd = conn.CreateCommand();conn.Open();mandText = "select 序号from pub_log_read order by 序号asc";//DataSet ds = new DataSet();//OleDbDataAdapter da = new OleDbDataAdapter();//da.SelectCommand = cmd;//da.Fill(ds, "tbscore");OleDbDataReader dr = cmd.ExecuteReader(CommandBehavior.CloseConnection);Chart1.Series[0].Points.DataBindY(dr);dr.Close();数据库5,绑定xyChart1.Series.Clear();Chart1.Series.Add("序号");OleDbConnection conn = new OleDbConnection("Provider=Microsoft.Jet.OLEDB.4.0;Data Source=" +Application.StartupPath + @"\db.mdb" + ";Persist Security Info=False");OleDbCommand cmd = conn.CreateCommand();conn.Open();mandText = "select 账号,count(账号) as 次数from pub_log_read group by 账号order by 账号desc";//DataSet ds = new DataSet();//OleDbDataAdapter da = new OleDbDataAdapter();//da.SelectCommand = cmd;//da.Fill(ds, "tbscore");OleDbDataReader dr = cmd.ExecuteReader(CommandBehavior.CloseConnection);Chart1.Series[0].Points.DataBindXY(dr,"账号",dr,"次数");dr.Close();数据库6,支持显示参数Chart1.Series.Clear();Chart1.Series.Add("S1");OleDbConnection conn = new OleDbConnection("Provider=Microsoft.Jet.OLEDB.4.0;Data Source=" +Application.StartupPath + @"\db.mdb" + ";Persist Security Info=False");OleDbCommand cmd = conn.CreateCommand();conn.Open();mandText = "SELECT * FROM REPSALES WHERE Year=2004";//DataSet ds = new DataSet();//OleDbDataAdapter da = new OleDbDataAdapter();//da.SelectCommand = cmd;//da.Fill(ds, "tbscore");OleDbDataReader dr = cmd.ExecuteReader(CommandBehavior.CloseConnection);Chart1.Series[0].Points.DataBind(dr, "name", "sales", "Tooltip=Year,Label=Commissions{C2}");dr.Close();数据库7,支持多lineChart1.Series.Clear();Chart1.Series.Add("S1");OleDbConnection conn = new OleDbConnection("Provider=Microsoft.Jet.OLEDB.4.0;Data Source=" +Application.StartupPath + @"\db.mdb" + ";Persist Security Info=False");OleDbCommand cmd = conn.CreateCommand();conn.Open();mandText = "SELECT * FROM REPSALES";//DataSet ds = new DataSet();//OleDbDataAdapter da = new OleDbDataAdapter();//da.SelectCommand = cmd;//da.Fill(ds, "tbscore");OleDbDataReader dr = cmd.ExecuteReader(CommandBehavior.CloseConnection);Chart1.DataBindCrossTable(dr, "Name", "Year", "Sales", "Label=Commissions{C}");dr.Close();数据库8,按照行添加数据// Resolve the address to the Access databasestringfileNameString = this.MapPath(".");fileNameString += "..\\..\\..\\data\\chartdata.mdb";//Initialize a connectionstringstringmyConnectionString = "PROVIDER=Microsoft.Jet.OLEDB.4.0;DataSource=" + fileNameString;// Definethe databasequerystringmySelectQuery="SELECT * FROM SALESCOUNTS;";// Createa database connection object using the connectionstringOleDbConnection myConnection = newOleDbConnection(myConnectionString);// Create adatabase command on the connection usingqueryOleDbCommandmyCommand = new OleDbCommand(mySelectQuery, myConnection);// Open theconnectionmyCommand.Connection.Open();//Initializes a new instance of the OleDbDataAdapter classOleDbDataAdapter myDataAdapter = new OleDbDataAdapter();myDataAdapter.SelectCommand = myCommand;//Initializes a new instance of the DataSet classDataSetmyDataSet = new DataSet();// Addsrows in the DataSetmyDataAdapter.Fill(myDataSet,"Query");foreach(DataRow row in myDataSet.Tables["Query"].Rows){// For each Row add a new seriesstring seriesName = row["SalesRep"].ToString();Chart1.Series.Add(seriesName);Chart1.Series[seriesName].ChartType = SeriesChartType.Line;Chart1.Series[seriesName].BorderWidth = 2;for(int colIndex = 1; colIndex <myDataSet.Tables["Query"].Columns.Count; colIndex++) {// For each column (column 1 and onward) add the value as apointstring columnName =myDataSet.Tables["Query"].Columns[colIndex].ColumnName; int YVal = (int) row[columnName];Chart1.Series[seriesName].Points.AddXY(columnName, YVal);}}DataGrid.DataSource = myDataSet;DataGrid.DataBind();// Closesthe connection to the data source. This is the preferred// method ofclosing any open connection.myCommand.Connection.Close();使用xml数据// resolve the address to the XML documentstringfileNameString = this.MapPath(".");stringfileNameSchema = this.MapPath(".");fileNameString += "..\\..\\..\\data\\data.xml";fileNameSchema += "..\\..\\..\\data\\data.xsd";//Initializes a new instance of the DataSet classDataSetcustDS = new DataSet();// Read XMLschema into the DataSet.custDS.ReadXmlSchema( fileNameSchema );// ReadXML schema and data into the DataSet.custDS.ReadXml( fileNameString );//Initializes a new instance of the DataView classDataViewfirstView = new DataView(custDS.Tables[0]);// Sincethe DataView implements and IEnumerable, pass the reader directlyinto// theDataBindTable method with the name of the column used for the Xvalue.Chart1.DataBindTable(firstView, "Name");使用excel数据// resolve the address to the Excel filestringfileNameString = this.MapPath(".");fileNameString += "..\\..\\..\\data\\ExcelData.xls";// Createconnection object by using the preceding connection string.string sConn= "Provider=Microsoft.Jet.OLEDB.4.0;Data Source=" +fileNameString + ";Extended Properties="Excel8.0;HDR=YES"";OleDbConnection myConnection = new OleDbConnection( sConn );myConnection.Open();// Thecode to follow uses a SQL SELECT command to display the data fromthe worksheet.// Createnew OleDbCommand to return data from worksheet.OleDbCommandmyCommand = new OleDbCommand( "Select * From[data1$A1:E25]",myConnection );// createa databasereaderOleDbDataReader myReader=myCommand.ExecuteReader(CommandBehavior.CloseConnection);//Populate the chart with data in the fileChart1.DataBindTable(myReader, "HOUR");// closethe reader and the connectionmyReader.Close();myConnection.Close();使用csv数据// Filename of the CSV filestring file= "DataFile.csv";// Getthe path of the CSV filestring path= this.MapPath(".");path +="..\\..\\..\\data\";// Createa select statement and a connection string.stringmySelectQuery = "Select * from " + file;stringConStr = "Provider=Microsoft.Jet.OLEDB.4.0;Data Source="+path+ ";Extended Properties="Text;HDR=No;FMT=Delimited"";OleDbConnection myConnection = new OleDbConnection(ConStr);// Createa database command on the connection using queryOleDbCommandmyCommand = new OleDbCommand(mySelectQuery, myConnection);// Openthe connection and create the readermyCommand.Connection.Open();OleDbDataReader myReader=myCommand.ExecuteReader(CommandBehavior.CloseConnection);// Column1 is a time value, column 2 is a double// Databindthe reader to the chart using the DataBindXY methodChart1.Series[0].Points.DataBindXY(myReader, "1", myReader,"2");// Closeconnection and data readermyReader.Close();myConnection.Close();数组绘图// Initialize an array of doublesdouble[] yval = { 2, 6, 4, 5, 3 };// Initialize an array of stringsstring[] xval = { "Peter", "Andrew", "Julie", "Mary", "Dave" };// Bind the double array to the Y axis points of the Default dataseriesChart1.Series["Series1"].Points.DataBindXY(xval, yval);数据库9,dataview// Resolve the address to the Access databasestringfileNameString = this.MapPath(".");fileNameString += "..\\..\\..\\data\\chartdata.mdb";//Initialize a connectionstringstringmyConnectionString = "PROVIDER=Microsoft.Jet.OLEDB.4.0;DataSource=" + fileNameString;// Definethe databasequerystringmySelectQuery="SELECT * FROM REPS;";// Createa database connection object using the connectionstringOleDbConnection myConnection = newOleDbConnection(myConnectionString);// Create adatabase command on the connection usingqueryOleDbCommandmyCommand = new OleDbCommand(mySelectQuery, myConnection);// Open theconnectionmyCommand.Connection.Open();//Initializes a new instance of the OleDbDataAdapter classOleDbDataAdapter custDA = new OleDbDataAdapter();custDA.SelectCommand = myCommand;//Initializes a new instance of the DataSet classDataSetcustDS = new DataSet();// Addsrows in the DataSetcustDA.Fill(custDS, "Customers");//Initializes a new instance of the DataView classDataViewfirstView = new DataView(custDS.Tables[0]);// Sincethe DataView implements IEnumerable, pass the dataview directlyinto// the DataBind method with thename of the Columns selected in thequeryChart1.Series["Default"].Points.DataBindXY(firstView,"Name",firstView, "Sales");// Closesthe connection to the data source. This is the preferred// method of closing any openconnection.myCommand.Connection.Close();指定坐标轴的数据显示范围// Create a new random number generatorRandom rnd = new Random();// Add points to the stock chart seriesfor (int index = 0; index < 10; index++){Chart1.Series["Series1"].Points.AddXY(rnd.Next(10,90), // X value is a daternd.Next(40,50)); //Close Y value}Chart1.ChartAreas[0].AxisY.Minimum = 40;Chart1.ChartAreas[0].AxisY.Maximum = 50;数据排序// Use point index for drawing the chartChart1.Series["Series1"].IsXValueIndexed = true;// Sortseries points by second Y valueChart1.DataManipulator.Sort(PointSortOrder.Ascending, "Y2","Series1");查找数据最大值和最小值// Find point with maximum Y value and change colorDataPointmaxValuePoint =Chart1.Series["Series1"].Points.FindMaxValue(); maxValuePoint.Color = Color.FromArgb(255, 128, 128);// Findpoint with minimum Y value and change colorDataPointminValuePoint =Chart1.Series["Series1"].Points.FindMinValue(); minValuePoint.Color = Color.FromArgb(128, 128, 255);pie显示交互private void Page_Load(object sender, System.EventArgs e){// Addseries to the chartSeriesseries = Chart1.Series.Add("My series");// Setseries and legend tooltipsseries.ToolTip = "#VALX: #VAL{C} million";series.LegendToolTip = "#PERCENT";series.PostBackValue = "#INDEX";series.LegendPostBackValue = "#INDEX";// Populateseries datadouble[] yValues = {65.62, 75.54, 60.45, 34.73, 85.42, 32.12, 55.18, 67.15,56.24, 23.65};string[] xValues = {"France", "Canada", "Germany", "USA", "Italy", "Russia","China", "Japan", "Sweden", "Spain" };series.Points.DataBindXY(xValues, yValues);// Setseries visual attributesseries.Type= SeriesChartType.Pie;series.ShadowOffset = 2;series.BorderColor = Color.DarkGray;series.CustomAttributes = "LabelStyle=Outside";}protected void Chart1_Click(object sender, ImageMapEventArgse){intpointIndex = int.Parse(e.PostBackValue);Seriesseries = Chart1.Series["My series"];if(pointIndex >= 0 &&pointIndex < series.Points.Count){series.Points[pointIndex].CustomProperties +="Exploded=true";}}chart点击事件/// <summary>/// Page Load event handler./// </summary>protected void Page_Load(object sender, System.EventArgs e){this.Chart1.Click += new ImageMapEventHandler(Chart1_Click);// directusing of PostBackValueforeach(Series series in this.Chart1.Series){series.PostBackValue = "series:" + + ",#INDEX";}// transferof click coordinates. getCoordinates is a javascriptfunction.stringpostbackScript =ClientScript.GetPostBackEventReference(this.Chart1,"chart:@");this.Chart1.Attributes["onclick"] = postbackScript.Replace("@'", "'+ getCoordinates(event)"); }/// <summary>/// Handles the Click event of the Chart1 control./// </summary>/// <param name="sender">The sourceof the event.</param>/// <paramname="e">The<seecref="System.Web.UI.WebControls.ImageMapEventArgs"/>instance containing the eventdata.</param>protected void Chart1_Click(object sender, ImageMapEventArgse){this.Chart1.Titles["ClickedElement"].Text = "Nothing";string[]input = e.PostBackValue.Split(':');if(input.Length == 2){string[] seriesData = input[1].Split(',');if (input[0].Equals("series")){this.Chart1.Titles["ClickedElement"].Text = "Last Clicked Element:" + seriesData[0] + " - Data Point #" + seriesData[1];}else if (input[0].Equals("chart")){// hit test of X and Y click pointHitTestResult hitTestResult=this.Chart1.HitTest(Int32.Parse(seriesData[0]),Int32.Parse(seriesData[1]));if (hitTestResult != null){this.Chart1.Titles["ClickedElement"].Text = "Last Clicked Element:" + hitTestResult.ChartElementType.ToString();}}}}。