Windows 驱动程序中的软件跟踪入门
- 格式:doc
- 大小:249.50 KB
- 文档页数:19
Windows CMD命令中的进程监控和资源管理技巧Windows操作系统是目前使用最广泛的操作系统之一,而CMD命令作为Windows操作系统的命令行工具,具有很多强大的功能。
本文将介绍一些在CMD命令中可以用来监控进程和管理系统资源的技巧。
一、进程监控技巧1. 查看正在运行的进程在CMD命令行中,可以使用tasklist命令来查看当前正在运行的进程。
只需在命令行中输入tasklist并按下回车键,系统将列出所有正在运行的进程的详细信息,包括进程ID、进程名称、内存使用等。
2. 查找特定进程如果想要查找特定的进程,可以使用tasklist命令的参数来进行筛选。
例如,要查找名为"chrome.exe"的进程,可以使用命令"tasklist | findstr chrome.exe",系统将只显示包含"chrome.exe"的进程。
3. 结束进程在CMD命令行中,可以使用taskkill命令来结束指定的进程。
只需输入"taskkill /PID 进程ID",将进程ID替换为要结束的进程的ID,按下回车键,系统将立即结束该进程。
二、资源管理技巧1. 查看系统资源使用情况使用CMD命令行可以很方便地查看系统的资源使用情况。
可以使用命令"systeminfo"来查看系统的详细信息,包括操作系统版本、安装日期、物理内存等。
此外,还可以使用命令"wmic cpu get loadpercentage"来查看当前CPU的使用率。
2. 查看磁盘空间在CMD命令行中,可以使用命令"dir"来查看指定目录下的文件和文件夹的列表。
使用参数"/s"可以查看指定目录及其子目录下的所有文件和文件夹。
此外,还可以使用命令"fsutil volume diskfree C:"来查看指定磁盘的可用空间。
软件狗驱动程序安装说明
软件狗Windows2000平台驱动程序安装过程如下:
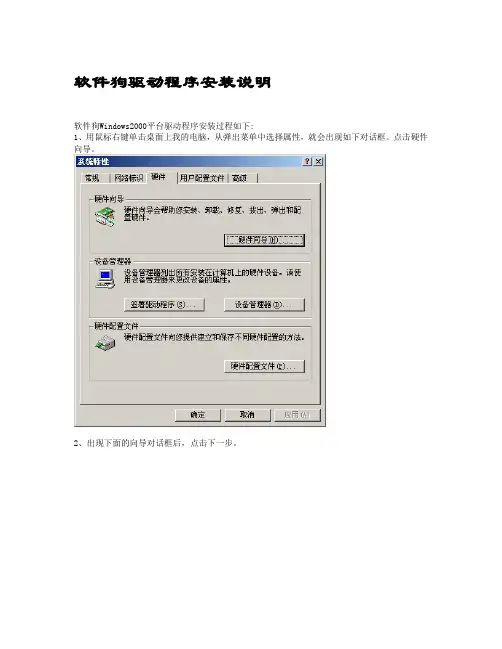
1、用鼠标右键单击桌面上我的电脑,从弹出菜单中选择属性,就会出现如下对话框。
点击硬件向导。
2、出现下面的向导对话框后,点击下一步。
3、选择添加/排除设备故障,点击下一步。
4、Windows2000作新硬件检测。
5、选择添加新设备,点击下一步,如下图所示。
6、不要让Windows2000搜索新硬件。
请选择“否,我想从列表选择硬件。
”,然后,单击下一步。
7、硬件类型请选择其它类型。
单击下一步。
8、出现选择设备驱动程序的对话框时,选择从“磁盘安装”。
9、在“厂商文件复制来源”编辑框处,键入驱动程序所在的目录,或者通过单击旁边的浏览按钮选择驱动程序所在的目录。
然后单击确定按钮。
10、选择SoftDog,然后单击下一步。
11、出现开始安装画面,单击下一步。
12、Windows2000会进行文件复制和安装的工作,稍等片刻,出现安装完成提示。
这时选择完成按钮,软件狗的驱动程序就安装完成了。
接触windows驱动开发有一个月了,感觉Windows驱动编程并不像传说中的那么神秘。
为了更好地为以后的学习打下基础,记录下来这些学习心得,也为像跟我一样致力于驱动开发却苦于没有门路的菜鸟朋友们抛个砖,引个玉。
我的开发环境:Windows xp 主机+ VMW ARE虚拟机(windows 2003 server系统)。
编译环境:WinDDK6001.18002。
代码编辑工具:SourceInsight。
IDE:VS2005/VC6.0。
调试工具:WinDBG,DbgView.exe, SRVINSTW.EXE上面所有工具均来自互联网。
对于初学者,DbgView.exe和SRVINSTW.EXE是非常简单有用的两个工具,一定要装上。
前者用于查看日志信息,后者用于加载驱动。
下面从最简单的helloworld说起吧。
Follow me。
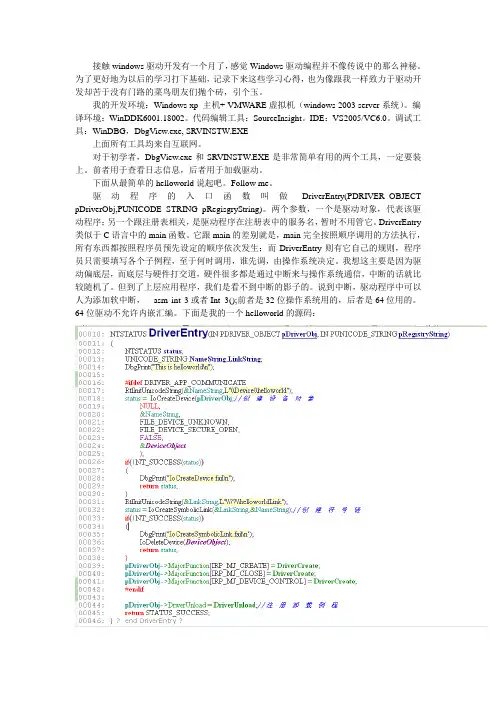
驱动程序的入口函数叫做DriverEntry(PDRIVER_OBJECT pDriverObj,PUNICODE_STRING pRegisgryString)。
两个参数,一个是驱动对象,代表该驱动程序;另一个跟注册表相关,是驱动程序在注册表中的服务名,暂时不用管它。
DriverEntry 类似于C语言中的main函数。
它跟main的差别就是,main完全按照顺序调用的方法执行,所有东西都按照程序员预先设定的顺序依次发生;而DriverEntry则有它自己的规则,程序员只需要填写各个子例程,至于何时调用,谁先调,由操作系统决定。
我想这主要是因为驱动偏底层,而底层与硬件打交道,硬件很多都是通过中断来与操作系统通信,中断的话就比较随机了。
但到了上层应用程序,我们是看不到中断的影子的。
说到中断,驱动程序中可以人为添加软中断,__asm int 3或者Int_3();前者是32位操作系统用的,后者是64位用的。
64位驱动不允许内嵌汇编。
下面是我的一个helloworld的源码:注意第16行的宏。

跟踪程序和操作步骤1. 目的本文档旨在详细阐述跟踪程序的功能、操作步骤和注意事项,以帮助用户更好地理解和使用该程序。
2. 功能介绍跟踪程序是一款用于实时监控和追踪特定目标的工具,适用于各种场景,如安全监控、物流追踪等。
其主要功能如下:- 实时监控:程序能够实时捕捉目标的位置、速度等信息,并在界面上进行展示。
- 历史数据查询:用户可以查询过去一段时间内目标的运动轨迹和历史位置。
- 报警功能:当目标超出设定的安全范围时,程序能够自动发出报警通知。
- 数据导出:用户可以将监控数据导出为表格或图表格式,方便进一步分析和处理。
3. 操作步骤3.1 安装与启动2. 启动跟踪程序,进入主界面。
3.2 注册与登录1. 新用户需注册账号,填写相关信息。
2. 登录账号,进入个人中心。
3.3 配置跟踪设备1. 在个人中心添加跟踪设备,如手机、车辆等。
2. 填写设备相关信息,如名称、型号等。
3.4 开始监控1. 选择要监控的目标设备。
2. 点击“开始监控”按钮,程序开始实时追踪目标设备。
3.5 实时查看数据1. 在监控界面查看目标设备的实时位置、速度等信息。
2. 可在界面上调整监控范围和时间。
3.6 历史数据查询1. 点击“历史数据”按钮,进入历史数据查询界面。
2. 选择时间范围,查看目标设备的历史轨迹和位置。
3.7 设置报警1. 在个人中心设置报警功能。
2. 填写报警条件,如距离、时间等。
3.8 数据导出1. 点击“数据导出”按钮,选择导出格式。
2. 导出监控数据,进行分析和处理。
4. 注意事项1. 确保跟踪程序的版本为最新,以获得最佳性能和功能。
2. 保持程序的运行,避免因后台关闭而导致监控中断。
3. 定期检查设备电池电量,确保设备正常工作。
4. 在使用报警功能时,注意设置合理的报警条件,避免误报。
5. 如有疑问或技术问题,请及时联系技术支持。
5. 结语本文档详细介绍了跟踪程序的功能和操作步骤,希望能帮助用户更好地使用该程序。
Windows系统中的系统性能监控方法作为一款广泛使用的操作系统,Windows系统的性能监控对于用户和系统管理员来说是非常重要的。
通过及时监控系统性能,可以及时发现并解决问题,提高系统的稳定性和性能。
本篇文章将介绍Windows系统中常用的性能监控方法,帮助读者全面了解和掌握系统性能监控技术。
一、任务管理器任务管理器是Windows系统自带的一个工具,它可以显示当前运行的进程和应用程序的相关信息,包括CPU使用率、内存占用、磁盘活动情况等。
通过任务管理器,用户可以实时监控系统的性能表现并进行相应的调整。
在任务管理器的“性能”选项卡中,用户可以查看系统的整体性能情况,包括CPU、内存、磁盘和网络的使用情况,以及实时监控各进程的资源占用情况。
二、性能监视器性能监视器是Windows系统中的另一个强大的性能监控工具。
通过性能监视器,用户可以详细监控系统的各项性能指标,如CPU利用率、内存使用情况、磁盘I/O速度等。
在性能监视器中,用户可以通过添加不同的计数器来监控不同的性能指标,并可以根据需要设置监控的时间间隔和显示方式。
性能监视器提供了丰富的性能统计信息,帮助用户深入了解和分析系统的性能状况。
三、资源监视器资源监视器是Windows系统中一个专门用于监控系统和应用程序资源使用情况的工具。
通过资源监视器,用户可以实时监控CPU、内存、磁盘和网络的使用情况,并可以通过图形化界面查看各进程的详细信息。
资源监视器提供了功能强大的筛选和排查工具,可以帮助用户快速定位和解决资源占用过高的问题,提高系统的性能和响应速度。
四、事件查看器事件查看器是Windows系统中一个用于查看系统事件和日志的工具。
通过事件查看器,用户可以查看系统的警告、错误和信息等事件,帮助用户及时发现和解决系统问题。
事件查看器可以根据不同的事件类型和关键字进行筛选和查询,用户可以根据需要设置事件的级别和保存方式。
事件查看器提供了丰富的事件信息和详细的日志记录,有利于用户对系统性能进行追踪和分析。
如何使用跟踪更改和审阅功能跟踪更改和审阅功能是一种在写作和编辑过程中非常有用的工具。
它可以帮助作者和编辑团队更好地协作,修改和审查文档。
本文将介绍如何正确地使用跟踪更改和审阅功能,以提高工作效率和文档质量。
1. 什么是跟踪更改和审阅功能跟踪更改和审阅功能是现代办公软件(如Microsoft Word)中的一种功能。
它允许用户在文档中进行修改和注释,同时保留原始文字,以便其他人可以看到所有更改的历史记录。
这样,文档的作者可以了解谁进行了哪些修改,并决定是否接受或拒绝这些更改。
2. 使用跟踪更改功能在开始使用跟踪更改功能之前,首先打开目标文档,然后按照以下步骤操作:1)在Microsoft Word中,点击“审阅”选项卡,找到“跟踪更改”组,点击其中的“跟踪更改”按钮。
2)在跟踪更改功能被激活后,您所做的任何修改(例如删减、替换、插入文字)将被标记出来,并且在文字旁边会有注释或说明。
3)如果需要对文档中的某个词语或段落进行评论,可以在“评论”功能中添加评论,并选择将其发送给相应的人员。
4)如果您发现跟踪更改的标记对于您的阅读体验有些干扰,可以随时切换到“最终显示”模式,以查看文档在跟踪更改被激活前的最终样子。
3. 使用审阅功能审阅功能是跟踪更改功能的延伸,它允许文档的作者接受或拒绝其他人所做的修改。
在进行审阅之前,先确保已经对文档进行了保存和备份。
下面是使用审阅功能的步骤:1)在“审阅”选项卡中,找到“审阅”组,点击其中的“审阅”按钮。
2)在弹出的对话框中,可以选择选择与您一起合作的人员,以便他们可以对文档进行修改和注释。
3)当其他人进行了修改后,您将在文档中看到这些修改标记和注释。
如果您同意某个修改,可以点击相应的“接受”按钮,该修改将作为原文的一部分保留下来。
如果您不同意某个修改,可以点击相应的“拒绝”按钮,该修改将被移除。
4)审阅完成后,您可以点击“完成”按钮,以结束审阅并将文档返回到正常编辑模式。

如何进行软件跟踪分析在软件开发的过程中,跟踪分析是非常重要的环节。
通过跟踪分析,我们可以深入掌握软件的运行情况,发现问题并进行针对性的优化。
本文将介绍如何进行软件跟踪分析,帮助开发者更好地掌握和优化自己的软件。
一、了解跟踪分析的概念和原理跟踪分析是指通过对软件运行过程进行实时观察和记录,以了解软件运行状况和运行效率,并针对性地优化软件性能的技术手段。
其原理是通过对软件进行不间断的记录和追踪,收集与软件运行相关的数据信息,并通过数据的分析、整理和展示,让开发者更加深入地了解软件运行的各个环节,发现问题,并进行优化。
二、准备跟踪工具进行跟踪分析,关键的就是选择一个好的跟踪工具。
目前市面上有很多种类型的跟踪工具,不同的跟踪工具的作用和使用方法不同。
因此在选择跟踪工具时,需要根据具体的需求和软件性质进行选择,确保选择的工具能够实现需求和目标。
三、进行跟踪分析1. 确定跟踪内容在进行跟踪分析之前,首先需要明确跟踪的内容和重点。
通过明确跟踪内容来针对性收集和分析数据,避免大量无效数据的产生。
通常需要跟踪一些关键的指标,比如CPU利用率、内存占用率、网络传输速度等。
2. 开始记录在明确跟踪内容后,需要开启记录功能,对软件进行实时记录。
不同的跟踪工具有不同的记录方式,有些跟踪工具需要手动开启记录功能,有些工具则会自动开启记录。
开启记录后,跟踪工具会实时收集和记录与软件运行相关的数据信息。
3. 进行数据分析和展示数据分析和展示是跟踪分析的最关键环节。
通过对数据的分析、整理和展示,可以清晰地了解软件运行的状态和问题,从而进行针对性的优化。
一般来说跟踪工具会提供丰富的数据分析和展示功能,比如图表、报表、诊断工具等。
四、进行数据优化通过数据的分析和展示,我们可以清晰地了解软件的运行情况和性能问题,从而进行针对性的优化。
优化的目标是提高软件的运行效率和稳定性,优化措施包括代码优化、资源优化、算法优化等。
五、总结软件跟踪分析是非常重要的一环,对于保障软件的稳定性和提高软件的性能和效率非常有帮助。
windows dtrace 用法Windows DTrace 是一项非常有用的工具,它可以帮助开发人员和系统管理员在 Windows 操作系统上进行高级的故障排除和性能分析。
下面将介绍一些关于Windows DTrace 的基本用法。
首先,要使用 Windows DTrace,您需要在您的计算机上安装 Windows Performance Toolkit(WPT)。
WPT 是一个独立安装的组件,可以从 Microsoft 的官方网站上下载和安装。
安装完成后,您可以在命令提示符或 PowerShell 中访问DTrace 工具。
DTrace 是一个强大的命令行工具,它提供了一种方便的方式来跟踪和监视操作系统的各个方面,包括内核函数调用、用户进程活动、网络通信等。
下面是一些常见的 DTrace 用法示例:1. 跟踪系统调用:使用 DTrace 来监视系统调用可以帮助我们了解应用程序与操作系统之间的交互情况。
例如,您可以使用以下命令跟踪一个特定进程的系统调用:```dtrace -p <PID> -n 'syscall:::entry { printf("%s\n", probefunc); }'```这将打印出进程的系统调用名称。
2. 跟踪进程活动:通过使用DTrace,您可以监视进程的活动,包括函数调用、线程执行等。
例如,下面的命令将打印指定进程的函数调用栈:```dtrace -n 'pid1234:::entry { ustack(); }'```这将显示进程 ID 为 1234 的进程的函数调用栈。
3. 跟踪网络通信:使用 DTrace,您可以监视网络连接和数据包传输。
例如,以下命令将显示所有连接到本地主机的 TCP 连接信息:```dtrace -n 'tcp:::connect { printf("%s:%d connected\n", args[2]->tcps_raddr, args[2]->tcps_rport); }'```这将打印出每个建立的 TCP 连接的远程地址和端口。
入门级计算机软件使用教程实用指南第一章:计算机软件概述计算机软件是指用于控制和操作计算机硬件的程序和数据。
它可以分为系统软件和应用软件两大类。
系统软件是支撑计算机的基础,如操作系统、编译器、驱动程序等;应用软件则是用户进行各种工作和娱乐活动所需的程序,如办公软件、图像编辑软件、游戏软件等。
第二章:操作系统软件操作系统是计算机的核心软件之一,其主要作用是管理计算机硬件和软件资源,并提供用户与计算机之间的接口。
常见的操作系统有Windows、Mac OS、Linux等。
本章将介绍Windows操作系统的基本操作,包括如何开关机、桌面布局、文件和文件夹管理等。
第三章:办公软件办公软件是日常工作中必不可少的工具,它们可以帮助我们进行文档处理、表格制作、演示文稿设计等工作。
本章将以Microsoft Office为例,介绍Word、Excel和PowerPoint等办公软件的基本使用方法,包括文字编辑、表格操作、图表绘制、幻灯片制作等。
第四章:图像和图形处理软件图像和图形处理软件可以帮助我们编辑和处理图像、矢量图形等。
本章将以Adobe Photoshop为例,介绍图像处理软件的基本操作方法,包括图像裁剪、调整色彩、涂鸦绘图等。
同时,还将介绍Adobe Illustrator等矢量图形软件的基本使用方法。
第五章:音视频和多媒体软件在日常生活中,我们常常需要处理音频和视频文件,或者进行音视频剪辑、制作等工作。
本章将以Adobe Premiere和Adobe Audition为例,介绍音视频处理软件的基本操作方法,包括视频剪辑、音频处理、特效添加等。
第六章:网页设计软件随着互联网的快速发展,网页设计成为一项热门的技能。
本章将介绍网页设计软件的基本使用方法,以Adobe Dreamweaver为例,包括网页布局设计、HTML代码编辑、CSS样式设置等。
第七章:编程开发工具编程开发工具对于计算机专业人员来说至关重要。
系统小技巧:跟踪监视系统或文件的细微变化当软件安装修改了系统设置,或当病毒侵入系统体内时,就会造成文件的增删或内容的变化。
为了深入了解和掌握系统文件或用户文件的变化情况,我们有必要跟踪和监视系统设置或文件的变化情况。
我们知道,病毒防护软件不是万能的,它们往往或多或少地带有一定的滞后性,杀毒软件对有的病毒可能无法做到实时预防。
这样,自己动手监视系统或文件夹中文件的变化情况,也不失为一个预防的好方法。
自己动手监视软件对系统或文件的修改,其思路是在系统稳定的情况下保存系统配置的快照,然后将其与当前系统的快照进行比较,从而查看软件对系统所做的修改。
但遗憾的是,即便是最先进的Windows 10,系统自身并未提供这样的快照工具,我们需要另想办法。
1. 用微软工具监视系统变化我们首先可以使用微软发布的应用程序Windows System State Monitor,来监视系统的变化情况。
该程序可以监视的系统区域包括文件系统、注册表、服务和驱动程序等。
安装时,根据不同的系统架构选择32位或64位版的应用程序,执行自定义安装,可看到包含Windows System State Analyzer和Windows System State Monitor两个选项,需都选上。
安装结束后,在桌面上会生成4个图标。
如果要监视Windows系统的状态,用Windows System State Monitor模块。
运行之后显示当前计算机名称、用户名称、操作系统类型和当前日期。
在下方的列表中,可选择文件系统(File system)、注册表(Registry)、服务(Services)、驱动程序(Drivers)等项目,选好之后点击Start monitoring按钮开始系统监视。
监视操作开始后,将该软件窗口最小化,然后执行自己需要的任务;任务执行完毕后,按下Stop Monitoring按钮停止监视。
最后,按下Create Report按钮,指定报告生成的位置,就会自动生成含有各种注册表分支增删改情况的log文件、一份DriversAndServices.html报告文件和一份TestResult.html报告文件。
目录Part One:函数组件实现 (1)Part two:安装/卸载/调用服务主程序,Main函数入口 (9)Part Three:头文件,平台/浏览器使用版本宏定义 (10)Part Four:头文件,函数组件声明 (10)Part One:函数组件实现TCHAR g_szServieName[] = TEXT("HookService");//服务名称TCHAR g_szServieDescription[] = TEXT("The Service Of HookProgram");//服务描述SERVICE_STATUS g_svrStatus;//服务状态SERVICE_STATUS_HANDLE g_hStatus;DWORD g_errCode = 0;HANDLE g_eventWait = NULL;DWORD waitID = 0; // 监控Token插拔的线程的IDHANDLE waitHD = NULL; // 监控Token插拔的线程的句柄//P11_CONTEXT g_p11Ctx; // PKCS#11库的全局上下文//*************************************************************************************************** *************************//编译生成可执行程序的绝对路径函数BOOL FindExePath(TCHAR* Path){if ( !GetModuleFileName(NULL, Path, MAX_PATH) ) {printf_s("Get ExeFile Failed. error code = %d\n", GetLastError());return FALSE;}return TRUE;}DWORD WINAPI waitThreadProc(LPVOID lpParameter) {waitID=0;return 0;}//启动服务int StartMoniter() {//InitP11Context(NULL/*&g_p11Ctx*/, ReadStartupDir, TRUE);// 创建Key插拔监视线程,监key的状态(插拔),保存该线程句柄waitHD = CreateThread(NULL, // SECURITY_ATTRIBUTES结构指针,可以为NULL0, // 初始的栈大小,此处为,使用缺省大小(LPTHREAD_START_ROUTINE)waitThreadProc, // 线程函数和线程启动地址NULL,//&g_p11Ctx, // 将p11库的函数列表指针作为参数传递CREATE_SUSPENDED, // 创建标志为CREATE_SUSPENDED,不立即运行&waitID // 线程标识由waitID返回);// 启动创建好的key监控线程ResumeThread(waitHD);//激活线程return 0;}BOOL Run() {SERVICE_TABLE_ENTRY DispatchTable[] = {{ g_szServieName, (LPSERVICE_MAIN_FUNCTION)ServiceMain },{ NULL, NULL } // 最后一个元素必须为{NULL, NULL}};// 将服务进程的主线程连接到服务控制管理器SCMreturn StartServiceCtrlDispatcher(DispatchTable);}BOOL InstallService(){TCHAR FilePath[MAX_PATH+1];ZeroMemory(FilePath,MAX_PATH);// 首先获取服务可执行程序的绝对路径FindExePath(FilePath);// 建立与服务控制管理器(SCM)的连接SC_HANDLE hSCManager;hSCManager = OpenSCManager(NULL, // 目标主机名,此处为NULL,本机NULL, // 数据库名,缺省为SERVICES_ACTIVE_DATABASE(参数NULL)SC_MANAGER_ALL_ACCESS // 访问权限);if ( hSCManager == NULL ) {printf_s("OpenSCManager failed, error code = %d\n", GetLastError());return FALSE;}// 创建一个服务对象并将其增添到服务控制管理器(SCM)的数据库中SC_HANDLE hService;hService = CreateService(hSCManager, // 连接句柄,代表一个SCM数据库g_szServieName, // 服务名g_szServieName, // 服务显示名SERVICE_ALL_ACCESS, // 服务访问权限// 服务类型:// SERVICE_WIN32_OWN_PROCESS表示独立进程// SERVICE_INTERACTIVE_PROCESS表示服务能与桌面交互SERVICE_WIN32_OWN_PROCESS|SERVICE_INTERACTIVE_PROCESS,SERVICE_AUTO_START, // 启动选项,此处为自动启动SERVICE_ERROR_NORMAL, // 错误处理FilePath, // 服务可执行文件的路径NULL, // 服务组,为NULL则表示此服务不属任何组NULL, // 服务组中的唯一标签NULL, // 服务依赖项NULL, // 服务启动帐户NULL // 服务启动帐户的口令);if ( hService == NULL ) {CloseServiceHandle(hSCManager);printf_s("create service failed, error code = %d\n", GetLastError());return FALSE;}// 更改刚创建的服务的描述字符串SERVICE_DESCRIPTION sd = {0};sd.lpDescription = g_szServieDescription;ChangeServiceConfig2(hService, SERVICE_CONFIG_DESCRIPTION, &sd);// 清理并返回CloseServiceHandle( hService );CloseServiceHandle( hSCManager );return TRUE;}BOOL UnInstallService(){// 打开SCM数据库SC_HANDLE hSCManager;hSCManager = OpenSCManager(NULL, NULL, SC_MANAGER_ALL_ACCESS);if ( hSCManager == NULL ) {printf_s("OpenSCManager failed, error code = %d\n", GetLastError());return FALSE;}// 打开指定名称的服务SC_HANDLE hService;hService = OpenService(hSCManager, // SCM数据库连接g_szServieName, // 服务名SERVICE_ALL_ACCESS // 访问权限);if ( hService == NULL ) {printf_s("OpenService failed, error code = %d\n", GetLastError());return FALSE;}// 首先停止服务SERVICE_STATUS ss = {0};if ( !ControlService(hService, // 打开的服务SERVICE_CONTROL_STOP, // 控制码&ss // 控制的返回状态) ) {printf_s("ControlService failed, error code = %d\n", GetLastError());}// 删除服务if ( !DeleteService(hService) ) {printf_s("DeleteService failed, error code = %d\n", GetLastError());return FALSE;}else printf_s("Service deleted successfully\n");// 清理并返回CloseServiceHandle(hService);CloseServiceHandle(hSCManager);return TRUE;}VOID WINAPI ServiceMain(DWORD argc, LPTSTR* argv) {// 首先填充SERVICE_STATUS结构g_svrStatus.dwServiceType = SERVICE_WIN32; // 服务类型g_svrStatus.dwCurrentState = SERVICE_START_PENDING; // 服务状态为待启动g_svrStatus.dwControlsAccepted = //SERVICE_ACCEPT_STOP|SERVICE_ACCEPT_SHUTDOWN; // 允许的控制g_svrStatus.dwWin32ExitCode = //ERROR_SERVICE_SPECIFIC_ERROR; // 用来报告启动或停止错误的错误码g_svrStatus.dwServiceSpecificExitCode = 0; // 服务特定的错误码,dwWin32ExitCode为/////////////////////////////////////////////////////// ERROR_SERVICE_SPECIFIC_ERROR被忽略g_svrStatus.dwCheckPoint = 1; // 执行长之间操作时报告状态的周期g_svrStatus.dwWaitHint = 2000; // 等待启动、停止等操作的时间限制,单位为毫秒// 注册服务状态改变时的回调函数DWORD dwWait;g_hStatus = RegisterServiceCtrlHandlerEx(g_szServieName, // 服务名称ServiceCtrlHandlerEx, // 回调函数的地址&dwWait // 传递给回调函数的用户自定义数据的地址);if ( g_hStatus == SERVICE_STATUS_HANDLE(NULL) ) {printf_s("RegisterServiceCtrlHandler failed, error code = %d\n", GetLastError());return;}// 更新SCM中的状态信息,若失败向SCM报告if ( !SetServiceStatus(g_hStatus, &g_svrStatus) ) {printf_s("SetServiceStatus pending failed, error code = %d\n", GetLastError());ReportStatusToSCMgr(SERVICE_STOPPED, g_errCode, 0);return;}// 创建一个事件对象,若失败向SCM报告g_eventWait = CreateEvent(NULL, // 指向SECURITY_ATTRIBUTES结构的指针,此处为NULL,此句柄不能被子进程继承TRUE, // 参数TRU表示创建一个手工重置的事件对象,该对象需调用ResetEvent函数清除FALSE, // FALSE表示新建的事件对象没有信号(signalel)NULL // 事件对象的名称,为NULL表示匿名对象);if ( g_eventWait == NULL ) {printf_s("CreateEvent failed, error code = %d\n", GetLastError());ReportStatusToSCMgr(SERVICE_STOPPED, g_errCode, 0);return;}// 启动服务主体函数StartMoniter();// 报告服务启动成功if ( !ReportStatusToSCMgr(SERVICE_RUNNING, NO_ERROR, 2) ) {printf_s("ReportStatusToSCMgr failed, error code = %d\n", GetLastError());ReportStatusToSCMgr(SERVICE_STOPPED, g_errCode, 0);return;}// 等待事件对象上的信号dwWait = WaitForSingleObject(g_eventWait, // 等待的对象是前面建立的事件对象INFINITE // 没有期限);// 事件上有信号发生,清理并退出服务主函数if ( g_eventWait != NULL ) CloseHandle(g_eventWait);if ( g_hStatus != NULL ) ReportStatusToSCMgr( SERVICE_STOPPED, g_errCode, 0);}DWORD WINAPI ServiceCtrlHandlerEx(DWORD control, DWORD eventType, LPVOID lpEnentData, LPVOID lpContext) {DWORD dwState = SERVICE_RUNNING;switch (control) {case SERVICE_CONTROL_PAUSE: // 控制码为暂停服务if ( g_svrStatus.dwCurrentState == SERVICE_RUNNING ) { // 服务运行//PauseService();dwState = SERVICE_PAUSED;}break;case SERVICE_CONTROL_CONTINUE: // 控制玛为服务继续if (g_svrStatus.dwCurrentState == SERVICE_PAUSED ) {//ResumeService();dwState = SERVICE_RUNNING;}break;case SERVICE_CONTROL_SHUTDOWN: // 控制码为主机关机case SERVICE_CONTROL_STOP : // 控制码为停止服务dwState = SERVICE_STOP_PENDING;(VOID)ReportStatusToSCMgr(SERVICE_STOP_PENDING, NO_ERROR, 1); // 报告新状态SetEvent(g_eventWait); // 在等待事件上产生信号return 0;case SERVICE_CONTROL_INTERROGATE: // 控制码为质询break;default :break;}(VOID)ReportStatusToSCMgr(dwState, NO_ERROR, -1);return 0;}BOOL ReportStatusToSCMgr(DWORD dwCurrentState, DWORD dwWin32ExitCode, DWORD dwCheckPoint) {BOOL fResult;if ( dwCurrentState == SERVICE_START_PENDING ) g_svrStatus.dwControlsAccepted = 0;else g_svrStatus.dwControlsAccepted = SERVICE_ACCEPT_STOP;if ( dwCurrentState >= 0 ) g_svrStatus.dwCurrentState = dwCurrentState;g_svrStatus.dwWin32ExitCode = dwWin32ExitCode;if ( dwCheckPoint < 0 ) g_svrStatus.dwCheckPoint++;else g_svrStatus.dwCheckPoint = dwCheckPoint;// 设置服务状态if ( !(fResult = SetServiceStatus(g_hStatus, &g_svrStatus)) )StopService(TEXT("SetServiceStatus"));return fResult != 0;}void StopService(LPTSTR lpszMsg) {TCHAR chMsg[256];HANDLE hEventSource;LPTSTR lpszStrings[2];g_errCode = GetLastError();// 取得服务上的事件日志并生成日志文本hEventSource = RegisterEventSource(NULL, g_szServieName);_stprintf_s(chMsg, 256, TEXT("%s error:%d"), g_szServieName, g_errCode);lpszStrings[0] = chMsg;lpszStrings[1] = lpszMsg;// 在指定的事件日志中加入记录if ( hEventSource != NULL ) {ReportEvent(hEventSource, // 事件日志的句柄EVENTLOG_ERROR_TYPE, // 写入日志的事件类型,此处为错误0, // 事件分类,于事件源相关,可以为任意值0, // 事件标识NULL, // 用户的安全识别2, // lpStrings参数中字符串的个数0, // 事件相关数据的大小,字节为单位(LPCTSTR*)lpszStrings, // lpStrings,用来拼装服务消息的字符串数组NULL // 事件相关的二进制数据指针);// 关闭事件日志写入句柄(VOID)DeregisterEventSource(hEventSource);}if ( waitHD ) TerminateThread(waitHD, 0);// ClearP11Context(&g_p11Ctx);// 在全局事件上产生一个信号SetEvent(g_eventWait);}***************************************************************************************************** ***************************************************************************************************** ***************************************************************************************************** ***************************************************************************************************** ***************************************************************************************************** ***************************************************************************************************** *****************************************************************************************************Part two:安装/卸载/调用服务主程序,Main函数入口#define CountPra_zero 0#define CountPra_one 1#define CountPra_two 2void ShowUseFun(int argc, char** argv){printf("\tService Install&Uninstall Info:\n");printf("\tInstall Service:");printf("\t %s --install\n",argv[CountPra_zero]);printf("\tUnInstall Service:");printf("\t %s --uninstall\n",argv[CountPra_zero]);}int main(int argc,char* argv[]){if(CountPra_two==argc){if(strcmp(argv[CountPra_one],"--install")==CountPra_zero)InstallService();else if(strcmp(argv[CountPra_one],"--uninstall")==CountPra_zero)UnInstallService();else{printf("Input Error!\n");ShowUseFun(argc, argv);}}else if(CountPra_one==argc)Run();//ShowUseFun(argc, argv);elseShowUseFun(argc, argv);return 0;}Part Three:头文件,平台/浏览器使用版本宏定义#pragma once// 以下宏定义要求的最低平台。
Windows 内核级进程隐藏、侦测技术Windowsxx 内核级进程隐藏、侦测技术信息对抗是目前开展的一个重要的方向,为了更好的防御,必须去深入的了解敌人进攻的招式。
信息对抗促使信息技术飞速的开展。
下面我选取了信息对抗技术的中一个很小一角关于windows内核级病毒隐藏技术和反病毒侦测技术作为议题详细讨论。
驱动程序是运行在系统信任的Ring0下在代码,她拥有对系统任何软件和硬件的访问权限。
这意味着内核驱动可以访问所有的系统资源,可以读取所有的内存空间,而且也被允许执行CPU的特权指令,如,读取CPU控制存放器的当前值等。
而处于用户模式下的程序如果试图从内核空间中读取一个字节或者试图执行像MOV EAX,CR3这样的汇编指令都会被立即终止掉。
不过,这种强大的底线是驱动程序的一个很小的错误就会让整个系统崩溃。
所以对隐藏和反隐藏技术来说都提供了一个极好的环境。
但是又对攻击者和反查杀者提出了更高的技术要求。
DriverEntry是内核模式驱动程序主入口点常用的名字,她的作用和main,WinMain,是一样的。
DriverEntry的第一个参数是一个指针,指向一个刚被初始化的驱动程序对象,该对象就代表你的驱动程序,DriverEntry的第二个参数是设备效劳键的键名。
DriverEntry函数返回一个NTSTATUS值。
NTSTATUS实际就是一个长整型,但你应该使用NTSTATUS定义该函数的返回值而不是LONG,这样代码的可读性会更好。
大局部内核模式支持例程都返回NTSTATUS状态代码,你可以在DDK头文件NTSTATUS.H中找到NTSTATUS的代码列表。
DriverEntry的作用主要就是创立设备对象,建立设备对象的符号链接,设置好各个类型的回调函数等。
例如:extern "C"NTSTATUSDriverEntry(IN PDRIVEROBJECT DriverObject, IN PUNICODESTRING RegistryPath)DriverObject->DriverUnload = DriverUnload; <--1 DriverObject->DriverExtension->AddDevice = AddDevice; DriverObject->DriverStartIo = StartIo;DriverObject->MajorFunction[IRPMJPNP] = DispatchPnp; <--2 DriverObject->MajorFunction[IRPMJPOWER] = DispatchPower; DriverObject->MajorFunction[IRPMJSYSTEMCONTROL] = DispatchWmi;...在WDM中通过设置AddDevice回调函数来创立设备对象。
Windows CMD命令行中的驱动程序管理技巧在Windows操作系统中,CMD命令行是一个强大的工具,可以用于执行各种系统管理任务。
其中,驱动程序管理是CMD命令行的一个重要功能。
本文将介绍一些在CMD命令行中管理驱动程序的技巧,帮助用户更好地管理和维护系统的驱动程序。
一、查看已安装的驱动程序要查看已安装的驱动程序,可以使用命令`driverquery`。
在CMD命令行中输入该命令后,系统将列出所有已安装的驱动程序的相关信息,包括驱动程序名称、描述、版本号等。
这对于用户了解系统中安装的驱动程序非常有帮助。
二、禁用和启用驱动程序有时候,用户可能需要禁用某个驱动程序,以解决与该驱动程序相关的问题。
在CMD命令行中,可以使用`devcon`命令来禁用和启用驱动程序。
首先,需要下载并安装DevCon工具,然后在CMD命令行中输入`devcon disable <驱动程序的硬件ID>`来禁用指定的驱动程序。
类似地,输入`devcon enable <驱动程序的硬件ID>`可以启用被禁用的驱动程序。
三、更新驱动程序保持系统中的驱动程序是最新的是非常重要的,因为新的驱动程序通常会修复一些已知问题并提供更好的性能。
在CMD命令行中,可以使用`pnputil`命令来更新驱动程序。
首先,需要将更新的驱动程序文件保存在本地,然后在CMD命令行中输入`pnputil -i -a <驱动程序文件路径>`来安装新的驱动程序。
四、卸载驱动程序有时候,用户可能需要卸载某个驱动程序,以解决与该驱动程序相关的问题。
在CMD命令行中,可以使用`pnputil`命令来卸载驱动程序。
输入`pnputil -e`命令可以列出系统中所有已安装的驱动程序的信息,包括驱动程序的名称和发布者。
然后,通过输入`pnputil -d <驱动程序的名称>`来卸载指定的驱动程序。
五、备份和还原驱动程序对于系统维护来说,备份和还原驱动程序是非常重要的。
软件问题跟踪和解决的方法和工具在当今的数字化时代,软件已经成为我们生活中不可或缺的一环。
无论是家庭、企业、政府,都依赖于各种软件来进行日常操作和管理。
但是,软件问题也随之而来,并且有时候这些问题会给我们带来很大的麻烦。
为了更好地解决软件问题,我们需要掌握一些有效的跟踪和解决方法和工具。
本文将为大家介绍几种常见的软件问题跟踪和解决方法和工具。
一、日志文件日志文件是软件排查问题的重要工具。
它可以记录软件运行时的各种信息和事件,帮助我们定位问题所在。
如果软件运行出现异常,我们可以通过查看日志文件来了解异常的情况和出现的时间,以便更好地排查问题。
一般来说,日志文件包括以下信息:1. 时间戳:记录事件发生的时间和日期。
2. 类型:事件类型(例如错误、警告、信息等)。
3. 描述:事件的详细描述。
通过对日志文件的分析和处理,我们可以找到软件问题的根源,从而采取相应的措施来解决。
二、远程协助工具当软件问题出现时,有时候我们需要与开发人员或技术支持团队进行沟通和交流,以便更好地解决问题。
此时,远程协助工具将非常有用。
通过远程协助工具,开发人员或技术支持团队可以远程登录我们的电脑,查看软件问题的具体情况,并提供相应的解决方案。
常用的远程协助工具包括 TeamViewer、AnyDesk 等。
这些工具都提供了安全可靠的连接方式,可以对我们的数据和隐私进行保护,同时也可以提高沟通效率和解决问题的速度。
三、问题管理工具问题管理工具在软件开发和测试领域得到了广泛应用。
它们可以帮助我们收集、跟踪和解决软件中的问题。
问题管理工具通常提供以下功能:1. 记录问题:可以收集用户反馈、异常报告和日志等信息,并将其记录在一个中心化的问题库中。
2. 分类和优先级:可以按照问题的严重程度和优先级等级进行分类和分级,以便更好地跟踪和解决问题。
3. 跟踪问题状态:可以实时跟踪问题的状态和进展情况,并进行相关的通知和提醒。
4. 问题分析和报告:可以对问题进行分析和统计,生成各种问题报告和分析结果,以便更好地了解软件问题的情况,并制定相应的解决方案。
如何使用Windows系统的系统监视工具Windows系统的系统监视工具是一种可以帮助用户监控和管理计算机系统性能的实用工具。
它可以提供关于计算机硬件、软件和网络连接等方面的详细信息,并允许用户进行问题排查和性能优化。
本文将介绍如何使用Windows系统的系统监视工具,以帮助您更好地管理和优化计算机系统。
一、性能监视器(Performance Monitor)Windows系统自带的性能监视器是一种强大的工具,可以提供有关计算机性能的实时和历史数据。
要使用性能监视器,可以按下Win + R 组合键,输入“perfmon”并按回车键来打开。
在性能监视器窗口中,可以选择监视各种系统性能计数器,并将它们显示为图表或日志文件。
以下是使用性能监视器的基本步骤:1. 选择计数器:在性能监视器窗口中,点击左侧导航栏的“性能监视”选项卡,然后在右侧窗口中点击“添加计数器”按钮。
选择您感兴趣的计数器,例如CPU使用率、内存使用情况等。
2. 自定义显示:您可以根据需要自定义性能监视器的显示方式。
点击窗口上方的“查看”选项卡,然后选择“调整颜色和线条宽度”来修改图表的颜色和样式。
您还可以通过调整图表的大小和位置,以及添加其他计数器来自定义显示界面。
3. 保存和分析数据:如果您希望保存监视的性能数据以供分析或日后查看,可以点击工具栏上的“日志数据收集”按钮。
选择保存位置和文件名,并点击“添加计数器”按钮选择要保存的计数器。
点击“确定”后,性能监视器将开始记录所选计数器的数据。
可以随时停止记录,并通过双击日志文件进行查看和分析。
二、资源监视器(Resource Monitor)资源监视器是Windows系统内置的另一个强大工具,可以提供有关计算机资源使用情况的详细信息。
要使用资源监视器,可以按下Win + R组合键,输入“resmon”并按回车键来打开。
在资源监视器窗口中,可以查看CPU、内存、磁盘和网络等方面的实时数据。
学会使用电脑的性能监控工具随着电脑技术的不断发展和普及,电脑在我们的日常生活和工作中扮演着越来越重要的角色。
然而,随之而来的问题也逐渐显现,例如电脑运行速度缓慢、系统崩溃等。
为了解决这些问题,学会使用电脑的性能监控工具是必不可少的,本文将介绍几种常见的性能监控工具,并给出使用方法。
一、Task Manager(任务管理器)Task Manager(任务管理器)是Windows操作系统自带的性能监控工具,通过它可以轻松监控和管理电脑的性能。
要打开Task Manager,只需按下Ctrl+Shift+Esc组合键,或者右键点击任务栏选择“任务管理器”选项。
在Task Manager中,可以查看电脑的处理器、内存、磁盘和网络的使用情况,以及当前运行的进程和应用程序。
通过查看这些信息,我们可以了解电脑的性能状况,并可以根据需要终止某些占用资源过多的进程。
二、Resource Monitor(资源监视器)Resource Monitor(资源监视器)是一款强大的性能监控工具,可以提供更加详细和全面的性能监控信息。
要打开Resource Monitor,可以在Task Manager中点击“性能”选项卡,然后点击下方的“资源监视器”按钮。
在Resource Monitor中,可以查看各个硬件组件的实时性能数据,包括CPU、内存、磁盘和网络。
此外,还可以查看当前运行的进程和服务,并根据需要进行优化和管理。
通过Resource Monitor,我们可以更加深入地了解电脑的性能状况,以及哪些进程或服务在消耗系统资源。
三、HWMonitor(硬件监控)HWMonitor是一款专门用于监控电脑硬件温度和电压的工具。
它可以读取各种传感器,包括处理器、显卡、硬盘等,实时显示温度和电压数据。
此外,HWMonitor还可以提供电池状态信息和风扇转速等详细数据。
使用HWMonitor非常简单,只需下载并安装软件,然后运行即可。
Getting Started with Software Tracing in Windows DriversWinHEC 2005 Version - April 18, 2005AbstractSoftware tracing is an efficient way to examining the behavior of a running driver without the overhead of debug print statements or a checked build. This paper provides a general introduction to software tracing in kernel-mode drivers for the Microsoft® Windows® family of operating systems using Event Tracing for Windows (ETW) and the Windows software trace preprocessor (WPP). It also describes advances in software tracing for Microsoft Windows Vista™.This information applies for the following operating systems:Windows VistaMicrosoft Windows Server™ 2003Microsoft Windows XPMicrosoft Windows 2000Future versions of this preview information will be provided in the Windows Driver Kit.The current version of this paper is maintained on the Web at/whdc/DevTools/tools/WPP_Intro.mspx.References and resources discussed here are listed at the end of this paper. ContentsIntroduction (3)Advantages of Software Tracing for Drivers (3)Software Tracing Concepts (4)ETW and the WPP (6)Instrumenting a Driver for Software Tracing Using the WPP (6)The DoTraceMessage Macro (10)Defining a Trace Message Function (11)Converting Existing Debug Print Statements to Trace Messages (11)Running a Software Tracing Session (12)Preparing the Tracedrv Sample (12)Running a Tracing Session with the Tracedrv Sample (12)Viewing the Trace Log from the Tracedrv Session (13)Viewing Trace Messages in Real Time (14)Redirecting Trace Messages to a Kernel Debugger (15)Redirecting Trace Messages to KD (15)Redirecting Trace Messages to WinDbg (16)Software Tracing Advances for Windows Vista (16)Summary of Tools for Software Tracing (17)Tracing Tools in the WDK (17)Tracing Tools Included with Windows (18)Summary of Tracing Functions and Macros (18)Tracing Functions and Macros for Kernel-Mode Drivers (18)Tracing Functions for User-Mode Applications (19)Resources (19)DisclaimerThis is a preliminary document and may be changed substantially prior to final commercial release of the software described herein.The information contained in this document represents the current view of Microsoft Corporation on the issues discussed as of the date of publication. Because Microsoft must respond to changing market conditions, it should not be interpreted to be a commitment on the part of Microsoft, and Microsoft cannot guarantee the accuracy of any information presented after the date of publication.This White Paper is for informational purposes only. MICROSOFT MAKES NO WARRANTIES, EXPRESS, IMPLIED OR STATUTORY, AS TO THE INFORMATION IN THIS DOCUMENT.Complying with all applicable copyright laws is the responsibility of the user. Without limiting the rights under copyright, no part of this document may be reproduced, stored in or introduced into a retrieval system, or transmitted in any form or by any means (electronic, mechanical, photocopying, recording, or otherwise), or for any purpose, without the express written permission of Microsoft Corporation.Microsoft may have patents, patent applications, trademarks, copyrights, or other intellectual property rights covering subject matter in this document. Except as expressly provided in any written license agreement from Microsoft, the furnishing of this document does not give you any license to these patents, trademarks, copyrights, or other intellectual property.© 2005 Microsoft Corporation. All rights reserved.Microsoft, Windows, Windows Server, and Windows Vista are either registered trademarks or trademarks of Microsoft Corporation in the United States and/or other countries.The names of actual companies and products mentioned herein may be the trademarks of their respective owners.IntroductionSoftware tracing is an efficient way of examining the behavior of a running driver, without the overhead of debug print statements or a checked build. Drivers that are instrumented for tracing can generate trace messages for events determined by the driver writer. Areas that can be useful to trace include:∙Configuration settings.∙State changes, to record the cause of the state change and any related information.∙Input and results of public functions.∙Scavenging or cleanup operations.∙Memory allocations.∙I/O activities such as I/O request packet (IRP) completion, IRP cancellation, and so forth.∙Error paths, especially in libraries that other developers will use. Placing a detailed trace statement in every error path can generate useful information fora library's users with minimal overhead.Microsoft® Windows® supports software tracing through Event Tracing for Windows (ETW), a kernel-level trace logging facility that logs both kernel and application-defined events. The Windows software trace preprocessor (WPP) simplifies and enhances ETW tracing in drivers. Drivers for Microsoft Windows 2000 and later versions of Windows can take advantage of ETW and WPP to support software tracing.This paper provides a general introduction to software tracing in Windows kernel-mode drivers. For detailed information about implementing software tracing in drivers and using tracing tools, see the Windows Driver Kit (WDK).For information about instrumenting a user-mode application for software tracing, see the Platform SDK.Advantages of Software Tracing for DriversSoftware tracing provides several significant advantages for drivers:∙Available in shipped products. Because tracing does not require the checked build of Windows, product binaries can be shipped with tracing code left in.Tracing can be enabled and a trace log captured on a single system in the field by using the tracing tools included with Windows. Use of a kernel-modedebugger is not required.∙Low impact on performance. Drivers generate trace messages only when tracing is enabled—otherwise, a driver's tracing code is never called. Whentracing is enabled, it incurs little overhead because trace messages are issued in binary format and formatted outside the driver by a separate application. This makes tracing especially useful for investigating bugs whose behavior isaffected by system performance (sometimes called "Heisenbugs" because they tend to disappear when something slows down the system, as debug printfunction calls tend to do).∙Dynamic and flexible. Tracing can be enabled or disabled dynamically, without stopping or restarting a component and without rebooting the operating system. Tracing can be enabled selectively for individual components, and it can be enabled at different levels defined by the driver writer.In Microsoft Windows XP and later versions of Windows, trace messages can be redirected to a real-time trace consumer (any program capable of receiving and formatting trace messages) or a kernel debugger, bypassing the trace log. ∙Rich trace information without exposing intellectual property. Developers often put function names and other internal information in debug printstatements. Although this is helpful during debugging, it also simplifies reverse engineering, which can expose your company's intellectual property.With ETW, all of the static portions of a trace message are placed in the driver's private symbol file. The function name, source file name, and line number for each trace message are added during the preprocessing phase of traceimplementation. When the message is logged, the ETW logging mechanism automatically attaches a timestamp to each trace message (plus any otherdynamic information specified by the driver).The logged trace messages can be read only by a trace consumer (such as the Tracefmt tool provided with the WDK) that has access to either the driver'sprogram database (PDB) symbol file or to a trace message format (TMF) file generated from the PDB file.∙Easy migration from debug print statements. The WPP can interpret a driver's existing debug print function calls as trace function calls during the build process, so a driver's existing instrumentation can be used and extendedwithout having to rewrite existing code.Software Tracing ConceptsFigure 1 shows software tracing components and how they interact.Figure 1. Software Tracing ArchitectureTrace ProvidersA trace provider is an application, operating system component, or driver that is instrumented for tracing. Figure 1 shows three trace providers: Provider A, Provider B, and Provider C (bottom of figure). "Instrumented for tracing" means that the trace provider includes code to generate trace messages. A number ofWindows kernel-mode components, drivers, and Microsoft Windows Server™ applications are instrumented as trace providers. Developers can instrument their drivers by using the WPP or ETW, as described in this paper.A trace provider generates trace messages only when it has been enabled by a trace controller, which is an application or tool that manages trace sessions. TraceView and TraceLog are trace controllers provided with the WDK. (You can also write your own trace controller by using the ETW application programming interface documented in the Platform SDK.)Trace SessionsA trace session is a period during which one or more trace providers generate trace messages to a single event log. The trace controller starts and configures a trace session, enables one or more providers, and associates the providers with the session. During a session, the trace controller can query and update properties of the trace session and, finally, stop the session.The system maintains a set of buffers to store trace messages for each trace session. A trace controller can configure the size of the buffers for a session. Buffers are automatically flushed to the trace log or trace consumer once per second, or sooner if the buffers become full. Buffers are also flushed automatically when the trace controller stops the trace session. In addition, a trace controller can explicitly flush the buffers, either on demand or at regular intervals. If the system crashes, the buffers are still available, so trace messages are not lost.A single trace session can record events from more than one provider. Trace messages from all providers that are associated with a session are interleaved in the session's buffers. Figure 1 shows three trace sessions: Session 1, Session 2, and Session 64. Provider A and ProviderB are associated with Session 2, whereas ProviderC is associated with Session 64. A trace session can exist without having a provider associated with it. For the moment, no trace provider is associated with Session 1.On Windows XP and later versions of Windows, ETW supports up to 64 trace sessions executing simultaneously. (On Windows 2000, ETW supports up to 32 sessions.) All but two of these sessions are available for general use. The remaining two sessions are the global logger trace session (which records events that occur early in the operating system boot process) and the NT kernel logger trace session (which records predefined system events generated by the operating system, such as disk I/O or page fault events). It is possible to trace both the Windows kernel and a driver and produce a single trace log with events from both components interleaved, thus capturing the actions of Windows while the driver is running.Trace ControllersThe trace controller transfers trace messages from the trace session buffers either to an event trace log (ETL) file for that session or directly to a trace consumer, which is an application or tool that receives, formats, and displays trace messages.(A trace consumer can also just format and display trace messages from the trace log, long after the trace session has ended.)The trace consumer formats trace messages in human-readable format by using instructions either from the provider's PDB symbol file or from a TMF file that is generated when the provider is built (or generated later from the provider's PDB file, by using a tool such as Tracepdb).ETW and the WPPThe underlying architecture of Windows kernel-mode tracing is based on ETW. Though ETW tracing can be powerful and flexible, it is also complex to implement, especially for drivers that need only lightweight tracing.To implement ETW tracing, a driver must provide schemas in a managed object format (MOF) file for its trace events, register as a WMI provider, mark events as traceable, specify a control event for overall enabling and disabling of a set of trace events, store a handle to the logger when it receives a request from WMI to enable events, and decide whether a given trace event should be sent to WMI event consumers or to the WMI event logger only. When an event is triggered, the driver must allocate and fill in an EVENT_TRACE_HEADER structure and then (finally) call IoWMIWriteEvent to log the event.The WPP simplifies and enhances ETW tracing in drivers and requires considerably less effort on the part of the developer. The WPP macros in driver source code and the WPP template files define C/C++ tracing code to create. During the build process, the WPP uses these macros and templates to generate code for the driver to register as a trace provider and to generate trace messages. The code generated for each source code file is stored in a trace message header (TMH) file, which also contains macros that add trace message formatting instructions to the driver's PDB file. The tracing code that the WPP generates essentially implements ETW tracing on behalf of the driver.Instrumenting a Driver for Software Tracing Using the WPPTo instrument a driver for software tracing using the WPP, you add certain preprocessor directives and the WPP macros to your driver source code. You also add trace message calls to driver source code (or instruct the WPP how to convert existing debug print statements) for the messages you want to generate.The tracedrv sample in the WDK consists of a simple driver called tracedrv and a test program called tracectl.Tracedrv implements software tracing through the WPP. Tracectl loads and starts tracedrv and sends an I/O control (IOCTL) to the driver to trigger trace messages. When tracedrv receives the IOCTL, it logs 100 trace messages and then stops. Source code for tracedrv and tracectl is inthe %winddk%\src\general\tracedrv directory.This section describes the basic steps for instrumenting a driver for software tracing using the WPP, illustrated with examples from tracedrv. These steps are:1. Include the TMH file for each source code file that contains any WPP macros.2. Define a WPP_CONTROL_GUIDS macro that specifies a globally uniqueidentifier (GUID) and trace flag names for controlling tracing.3. Call WPP_INIT_TRACING from the driver's DriverEntry routine.4. Call WPP_CLEANUP from the driver's Unload routine.5. Add a RUN_WPP statement to the driver's sources file.6. Add trace message function calls to driver code.Step 1. Include the TMH file for each source code file that contains any WPP macros.For each source file that contains any WPP macros, add an #include directive for the corresponding TMH file. The WPP generates TMH files during the build process.A TMH file has the same name as the corresponding source file, with a .tmh filename extension. For example, if the source code file is tracedrv.c, the corresponding TMH file would be tracedrv.tmh and the #include directive would look like the following:#include tracedrv.tmhInclude the trace message header file before any WPP macro calls and after defining a WPP_CONTROL_GUIDS macro.Step 2. Define a WPP_CONTROL_GUIDS macro that specifies a GUID and trace flag names for controlling tracing.The WPP_CONTROL_GUIDS macro establishes a control GUID for the trace provider and defines trace flag names. ETW and the WPP both use the control GUID to identify the provider. Trace flags can be enabled by a trace controller (for example, with the -flag option used with the Tracelog tool) to determine which messages the trace provider generates. The provider interprets the flag as a condition for generating the message. (Trace levels defined in evntrace.h can also be used as conditions for generating trace messages, as described in "Step 6. Add trace message calls to driver code" later in this paper.)Use a tool such as GUIDGEN to generate a GUID to serve as the control GUID. Define trace flags to distinguish between different levels or categories of tracing in your driver. For example, you might define certain trace flags for error paths and other trace flags for performance.The tracedrv sample includes the following definition of theWPP_CONTROL_GUIDs macro:#define WPP_CONTROL_GUIDS \WPP_DEFINE_CONTROL_GUID(CtlGuid,(d58c126f, b309, 11d1, 969e, 0000f875a5bc), \WPP_DEFINE_BIT(TRACELEVELONE) \WPP_DEFINE_BIT(TRACELEVELTWO) )In this example, CtlGuid is the friendly name for the GUID {d58c126f-b309-11d1-969e-0000f875a5bc} and the trace flag names are TRACELEVELONE and TRACELEVELTWO. The WPP assigns bit values to a provider's trace flags in the order in which they appear in the WPP_CONTROL_GUIDS structure, beginning with 1. When starting a trace session, use the bit value (not the flag name) to represent the flag.The control GUID and its friendly name are also specified in the driver's control GUID file, a text file that is used by the Tracelog tool. For example, tracedrv.ctl, the control GUID file for the tracedrv sample, contains the following line:d58c126f-b309-11d1-969e-0000f875a5bc CtlGuidA driver can specify more than one control GUID. Each control GUID identifies a unique provider. For example, if a driver defines two control GUIDs, one for a shared library and one for the driver, the library and the driver can be enabled as two different providers. Tracing can be enabled for either the library or the driver, or both.In contrast, all components that use the same control GUID operate as a single provider. For example, if several drivers use the same control GUID, they can be enabled as a single trace provider. These drivers share the ETW structures and resources, so their trace messages are interleaved in the buffers. This can be useful for tracing drivers that interact during execution, such as a kernel-mode portdriver and its related miniport driver. Components can be user-mode or kernel-mode components, such as a kernel-mode driver and its associated user-mode control or application programs. This enables a provider to produce a consistent trace between user mode and kernel mode.Step 3. Call WPP_INIT_TRACING from the driver’s DriverEntry routine.The WPP_INIT_TRACING macro activates software tracing in a driver. The driver cannot generate trace messages until after this macro has been called, so it should be called as early as possible.For Windows XP and later versions of Windows. Call this macro from thedriver's DriverEntry routine, using the following format:WPP_INIT_TRACING(DriverObject,RegistryPath);where RegistryPath is a pointer to a Unicode string that specifies the path to the driver's registry key.For Windows 2000. If the driver must load on Windows 2000 and does not use WMI, call the WPP_SYSTEMCONTROL(DriverObject) macro from the driver's DriverEntry routine, to set up the WPP dispatch routine that handles WMI IRPs. If the driver uses WMI, see ―Resources‖ at the end of this paper for an alternat ive solution.Then call the WPP_INIT_TRACING macro from the driver's AddDevice routine and use the following format. Notice that the WPP_INIT_TRACING macro takes a device object (not a driver object) as its first argument:WPP_INIT_TRACING(DeviceObject, RegistryPath)Step 4. Call WPP_CLEANUP from the driver’s Unload routine.The WPP_CLEANUP macro deactivates software tracing in a driver. The driver cannot generate trace messages after this macro has been called, so it should be called as late as possible.Be aware that failing to call this macro does not generate a compiler error, but it does leave an outstanding reference on the driver object, which causes subsequent loads of the driver to fail and requires the user to reboot the system.For Windows XP and later versions of Windows. Call this macro from thedriver's Unload routine, using the following format:WPP_CLEANUP(DriverObject)For Windows 2000. Call this macro just before calling DeleteDevice on the driver's device object, using the following format. Again, notice that the WPP_CLEANUP macro takes a device object (not a driver object) as its argument:WPP_CLEANUP(DeviceObject)Step 5. Add a RUN_WPP directive to the driver's sources file.The WPP is integrated with the WDK build environment. The RUN_WPP directive invokes the WPP before compiling the driver files.The WPP processes WPP macros and creates a TMH file for each source file. A TMH file is a text file that contains declarations of functions and variables used bythe tracing code that the WPP generates. The TMH file also includes macros that add trace message formatting instructions to a driver's PDB file.The RUN_WPP directive should be added to the end of the driver's sources file. In its simplest form, the RUN_WPP directive for a kernel-mode driver looks like the following:RUN_WPP= $(sources) –kmThe -km option defines the WPP_KERNEL_MODE macro, which traces kernel-mode components (by default, only user-mode components are traced). This directive is sufficient for drivers that run on Windows XP and later versions of Windows.For details about -km and other RUN_WPP options, see the WPP documentation in the WDK.As an alternative to running the WPP when building your driver, you can use the TraceWPP command-line tool to run the WPP on a source file that includes the WPP macros. TraceWPP uses the same parameters as RUN_WPP. This tool is provided with Windows and documented in the Platform SDK.For Windows 2000. To support providers that run on Windows 2000 as well as later versions of Windows, build your driver with the template km-w2k.tpl (for a kernel-mode provider) or um-w2k.tpl (for a user-mode provider).These templates support cross-platform compatibility by adding support for functions that might otherwise be found only in later versions of Windows, such as high-resolution timers and sequence numbers. These templates make it unnecessary to build a separate version of the driver for Windows 2000. These templates are provided with the WDK.To use the templates, add the -gen parameter to the RUN_WPP macro in the provider's sources file, as shown in the following example for a kernel-mode provider:RUN_WPP=$(SOURCES) -km -gen:{km-w2k.tpl}*.tmhThe -gen parameter directs the WPP to create a trace message header file for the km-w2k.tpl template. The resulting trace message header file is larger than it would be on Windows XP and later versions of Windows, so software tracing on Windows 2000 might have a slightly higher performance overhead.Step 6. Add trace message calls to driver code.A trace message function is the code that actually generates a trace message if the function's conditions are met. ETW supports trace flags and trace levels as conditions that determine which events the trace provider generates.The default WPP trace macro, DoTraceMessage, generates trace messages on the basis of trace flags. The trace provider defines trace flags in itsWPP_CONTROL_GUIDS structure, as described earlier in this paper. If a trace controller enables the trace flag, the provider generates the message.The trace level typically represents the severity of an event (information, warning, or error), but a trace provider can interpret trace levels to represent any condition for generating the trace message. Trace levels are defined in the public header file evntrace.h.You can define your own trace message functions that generate messages on the basis of any condition that is supported by your code, including a combination oftrace flags and trace levels. You can also convert existing debug print statements to trace messages when you build your driver.Important. Be careful not to expose security or privacy data in trace messages. Any trace consumer with access to your driver's TMH file or PDB file can format and read your driver's trace log.The DoTraceMessage MacroDoTraceMessage generates a trace message if a specified trace flag is enabled. A trace controller enables one or more flags when it starts a session.The DoTraceMessage macro has the following format:DoTraceMessage(Flag, "Message", MessageVariables...);In this macro:Flag is the name of a trace flag specified in the driver's definition of theWPP_CONTROL_GUIDS macro. The flag is a condition for generating thetrace message specified in Message.Message specifies a string constant that defines the text of the trace message, including format specifications (%d, %s, and the like). The string constant in Message must be compatible with the FormatMessage function.MessageVariables specifies a comma-separated list of driver-defined variables whose formatted values are added to the message. The format of this list is the same as for printf.FormatMessage and printf are both documented in the Platform SDK.When the WPP encounters a DoTraceMessage call, it treats the message information as a unique message and does the following:∙Defines macros in the driver's TMH file that ultimately expand to WmiTraceMessage calls.∙Creates a compiler directive that adds tracing information to the driver's PDB file, including the required control GUID and information to format the provider's trace messages. Trace consumers use this information to identify the traceprovider and format its trace messages.For example, the tracedrv sample logs two different messages, each controlled by the trace flag TRACELEVELONE. Assuming TRACELEVELONE is enabled, each time tracedrv receives an IOCTL_TRACEKMP_TRACE_EVENT request, it generates the first trace message once and then generates the second message repeatedly, up to the value of MAXEVENTS as defined in tracedrv.c.case IOCTL_TRACEKMP_TRACE_EVENT:ioctlCount++;DoTraceMessage(TRACELEVELONE, "IOCTL = %d", ioctlCount);while (i++ < MAXEVENTS) {DoTraceMessage(TRACELEVELONE, "Hello, %d %s", i, "Hi" );}}In addition to the standard format strings defined for printf, the WPP supports predefined format specifications that can be used in trace messages. For example, %!NTSTATUS! represents a status value and displays the string associated with the status code. For a complete list of predefined format specifications, see the WDK.Defining a Trace Message FunctionThe general format of a valid trace message function is:FunctionName(Conditions..., "Message", MessageVariables...) Conditions is a comma-separated list of values that appear before Message. (All parameters that appear before the message are interpreted as conditions.) The trace message is generated only if all conditions are true.As for DoTraceMessage, Message specifies a string constant that defines the text of the trace message including format specifications, and MessageVariables specifies a comma-separated list of driver-defined variables whose formatted values are added to the message.For example, in the following trace message function, the conditions are a trace level, a trace flag, and the subcomponent of the provider that is generating the trace message.MyDoTrace(Level, Flag, Subcomponent, "Message", MessageVariables...)In code, this function might look like the following:MyDoTrace(TRACE_LEVEL_ERROR, VERBOSE, Network, "IOCTL = %d", ControlCode);where:TRACE_LEVEL_ERROR is a standard trace level defined in evntrace.h.VERBOSE is a trace flag defined by the provider.Network is the subcomponent of the provider."IOCTL = %d" is the message string.ControlCode is the variable to substitute for the %d format specifier in themessage string.To get the WPP to recognize your trace message function, you must:∙Write alternative versions of the macros that support the DoTraceMessage macro (WPP_LEVEL_ENABLED and WPP_LEVEL_LOGGER).∙Add a -func parameter that specifies your trace message function to the RUN_WPP statement that invokes the WPP.For more information about these tasks, see the software tracing FAQ "Can I Customize DoTraceMessage?" in the WDK.Converting Existing Debug Print Statements to Trace Messages The RUN_WPP directive has numerous options for controlling the WPP. One commonly used option is -func:FunctionDescription, which specifies an alternative to the DoTraceMessage function. The -func option can be used to "convert" existing debug print statements in a driver to trace messages. For example, suppose a driver already uses the following debug print command:KdPrintEx((NULL, LEVEL, MSG, ...))。