danjiwrf201210
- 格式:doc
- 大小:61.00 KB
- 文档页数:15
honeywelldc1020说明书Honeywell DC1020 Digital Controller User ManualTable of Contents1Introduction ................................................... ................................................................ . (1)2 ProductOverview ....................................................... (3)2.1 Product Features........................................................ (3)2.2 ProductSpecifications ................................................. . (4)3.1 Wiring andConnections .................................................... (7)DC1020 ......................................................... .. (10)4 Configuring theDC1020 ......................................................... (15)4.1 Setting the InputType ........................................................... (15)4.2 Setting the OutputType ........................................................... (17)4.3 Setting theFunction ....................................................... . (19)5 Operating theDC1020 ......................................................... .. (23)5.1 DisplaySetup .......................................................... .. (23)DC1020 ......................................................... (25)6 Troubleshooting andMaintenance .................................................... (30)6.1Troubleshooting ................................................ .. (30)6.2Maintenance .................................................... (3)27Glossary ....................................................... ................................................................ .. (34)1 IntroductionThe Honeywell DC1020 is a digital controller designed to provide precise control of a process variable such as temperature, pressure, flow, or level. It can be used in a wide range of applications such as HVAC, industrial process control, and chemical process control.The DC1020 features an easy-to-use interface, which allows you to quickly and accurately set up and adjust the controller. The controller features a large backlit LCD display, which makes the information easier to read in all lighting conditions.The DC1020 can be configured for a variety of input, output, and control functions. It can be used in single-loop (with one control output) or dual-loop (with two control outputs) applications. It also supports various control strategies including ON-OFF, PID, On-Shift, Pump Control, and Bang-Bang.The DC1020 has been designed to provide reliable performance, consistent measurements, and long-term stability. The controller features advanced self-diagnostics that helps you quicklypinpoint system problems.The Honeywell DC1020 is designed for use in hazardous areas and is approved for UL, CSA, and ATEX hazardous locations (Class I, Div 1, Group A).2 Product Overview2.1 Product Features• Intuitive user interface with menu-driven programming• 4-digit backlit LCD display for clear readability• Supports a variety of input, output, and control functions • Single-loop or dual-loop control• Advanced self-diagnostics for quick system problem pinpointing• Approved for hazardous areas (UL, CSA, ATEX, Class I, Div 1, Group A)• Includes self-diagnostics, limit alarms, and control output delay2.2 Product SpecificationsInputs• Thermocouple: Types J, K, L, N, S, R, B, T, E•RTD:Pt100,Pt100E,Pt100S,Pt1000• Voltage Input: 0-10V, 0-5V, 0-1V• Current Input: 4-20mA, 0-20mA• Differential Input: 0-20mA• Frequency Input: 0-5KHz• 2-Wire TransmitterOutputs• Relay: 240V AC, 5A•SSR:24VDC,100mA• Voltage: 0-10V, 0-5V, 0-1V• Current: 4-20mA, 0-20mA• Frequency: 0-5KHz• 2-Wire TransmitterControl• ON-OFF, PID, On-Shift, Pump Control, Bang-Bang Accuracy• ±0.1% of Full ScaleAmbient Temperature• 0 to 50°C (32 to 122°F)Power Supply• 100 to 240V AC, 50/60HzDisplay• 4-digit backlit LCDDimensions• W x H x D: 110 x 110 x 54mm (4.3" x 4.3" x 2.1")。
windows2012 server技术参数
Windows Server 2012的技术参数主要包括以下几个方面:
1. 处理器:Windows Server 2012对处理器的最低要求为主频,建议配置更高主频的处理器,如Intel酷睿i5或更高版本的处理器。
2. 内存:最少要有512MB的内存,如果需要处理大量数据或高负载应用,建议配置更多内存。
3. 存储:需要至少32GB的磁盘空间,建议使用SSD或高性能机械硬盘来提高系统性能。
4. 网络:需要具备稳定的网络连接,建议配置千兆网卡以获得更好的网络性能。
5. 虚拟化:Windows Server 2012支持虚拟化技术,可以创建和管理虚拟机,以提高服务器的利用率和灵活性。
6. 安全:Windows Server 2012提供了多种安全功能,如防火墙、入侵检测和修复、加密等,以保护服务器的安全。
7. 管理:Windows Server 2012提供了强大的管理工具,如Server Manager、PowerShell等,可以帮助管理员方便地管理服务器。
这些技术参数是Windows Server 2012的基本要求和性能指标,根据实际需求和业务规模,可能需要进行相应的调整和优化。
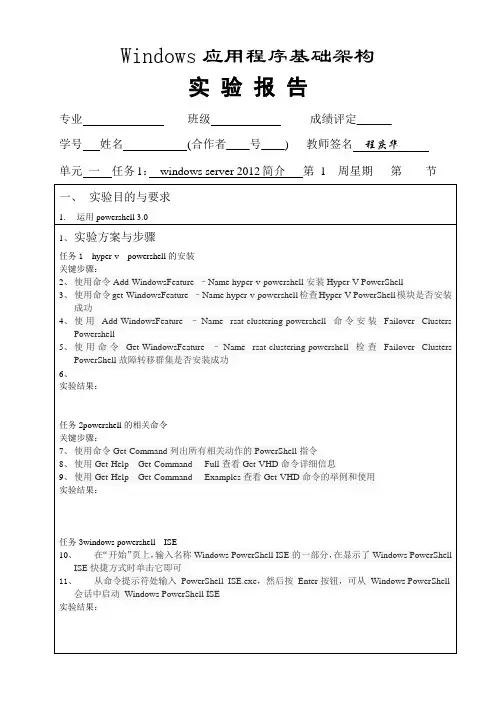

About the T utorialWindows Server 2012 codenamed Windows Server 8 is the most recent version of the operating system from Microsoft regarding server management, but not the last one which is Windows Server 2016. Officially it was released on August 1, 2012 and is just a commercial version as of now.Windows Server 2012 has four editions: Foundation, Essentials, Standard and Datacenter. Each one of them has their own limitations except the Datacenter version, which is also the most expensive one.This is an introductory tutorial that explains all the fundamentals of Windows Server 2012.AudienceThis tutorial has been designed for all those readers who want to learn the features of Windows Server 2012. It is especially going to be useful for all those professionals who are required to install and use this operating system to perform various duties in their respective organizations.PrerequisitesWe assume the readers of this tutorial have a practical experience of handling a Windows-based Servers. In addition, it is going to help if the readers have a basic knowledge of how to install and use an operating system.Disclaimer & CopyrightCopyright 2018 by Tutorials Point (I) Pvt. Ltd.All the content and graphics published in this e-book are the property of Tutorials Point (I) Pvt. Ltd. The user of this e-book is prohibited to reuse, retain, copy, distribute or republish any contents or a part of contents of this e-book in any manner without written consent of the publisher.We strive to update the contents of our website and tutorials as timely and as precisely as possible, however, the contents may contain inaccuracies or errors. Tutorials Point (I) Pvt. Ltd. provides no guarantee regarding the accuracy, timeliness or completeness of our website or its contents including this tutorial. If you discover any errors on our website or inthistutorial,******************************************T able of ContentsAbout the Tutorial (1)Audience (1)Prerequisites (1)Disclaimer & Copyright (1)Table of Contents (2)1.WINDOWS SERVER 2012 – OVERVIEW (5)Improvements in Windows Server 2012 (5)2.WINDOWS SERVER 2012 – INSTALLATION (8)System Requirements (8)3.WINDOWS SERVER 2012 – SERVER ROLES (15)4.WINDOWS SERVER 2012 − POWERSHELL (22)PowerShell ISE (24)PowerShell Basic Commands (27)5.WINDOWS SERVER 2012 − REMOTE MANAGEMENT (29)Adding a Server for Remote Management (30)6.WINDOWS SERVER 2012 − WINDOWS FIREWALL (33)How to Create a New Firewall Rule? (36)7.WINDOWS SERVER 2012 − REMOTE DESKTOP MANAGEMENT (45)8.WINDOWS SERVER 2012 − RESOURCE MON ITOR (49)9.WINDOWS SERVER 2012 − ACTIVE DIRECTORY (51)10.WINDOWS SERVER 2012 − DC ACCOUNTS (61)11.WINDOWS SERVER 2012 − FILE SYSTEM (65)12.WINDOWS SERVER 2012 − GROUP MANAGED SERVICE ACCOUNTS (67)13.WINDOWS SERVER 2012 − GROUP POLICY OVERVIEW (70)14.WINDOWS SERVER 2012 − DHCP ROLE (73)Post-deployment Configuration (79)Scope Implementation of DHCP (81)15.WINDOWS SERVER 2012 − DNS ROLE (91)16.WINDOWS SERVER 2012 − PRIMARY ZONES (96)17.WINDOWS SERVER 2012 − MANAGE RECORDS (100)18.WINDOWS SERV ER 2012 − IIS OVERVI EW (105)19.WINDOWS SERVER 2012 − IIS SECURITY (111)20.WINDOWS SERVER 2012 − HYPER-V (119)21.WINDOWS SERVER 2012 − ADVANCED CONFIGURATION (124)22.WINDOWS SERVER 2012 − CONFIGURE WSUS ROLE (130)23.WINDOWS SERVER 2012 – WSUS POLICIES & TUNING (134)24.WINDOWS SERVER 2012 − SHARING OF FILES (144)25.WINDOWS SERVER 2012 − FILE MANAGER (151)26.WINDOWS SERVER 2012 − PRINT SERVER (160)27.WINDOWS SERVER 2012 − EASY PRINTING (163)28.WINDOWS SERVER 2012 − CONFIGURE PRINT DRIVERS (166)29.WINDOWS SERVE R 2012 − NETWORK SER VICES (168)30.WINDOWS SERVER 2012 − BACKUP MANAGEMENT (176)Windows Server 2012 Windows Server 2012 codenamed Windows Server 8 is the most recent version of the operating system from Microsoft regarding server management. But it is not the last one, as the last one is Windows Server 2016. Officially it was released on August 1st, 2012 and is being sold as a commercial version only.Improvements in Windows Server 2012The major Improvements on this version are as follows:∙It is ready to be integrated with cloud systems and it still can maintain the classic features of local datacenters as a result Hyper-V Virtualization has new features Hyper-v replicas, it allows you to create virtual machines replications between clusters and storage systems.∙The Storage migration virtual disks can be moved to different physical storages, Virtual machine snapshots, virtual machines can be deleted from the Hyper-v and also from the virtual disks and it can be used directly without the need to shut down the virtual machine.∙The Core server installation easily switches to GUI installation without the need of reinstallation.∙The file server and storage service improvement is that it eliminates identical copies in the same volumes as such and saves space.∙The Storage pools and storage spaces allows you to group the hard disks to one or more storage pools then it allows to create virtual disks. It can add other disks to the storage pools and make available to the users without impacting them.∙The iSCSI Target Server can offer block storage to other servers and applications on the network using the iSCSI standard.∙Active Directory cloning can deploy additional domain controllers by cloning an existing virtual domain controller.Windows Server 2012 – OverviewThe Windows Server 2012 has four editions: Foundation, Essentials, Standard and Datacenter. Each one of them has their own limitation accept the Datacenter version which is also the most expensive one.The following table will show what is the right one for your business needs:For finding out the cost of licensing you can click on the following link:https:///en-us/server-cloud/products/windows-server-2012-r2/purchasing.aspxWindows Server 2012 – InstallationWindows Server 2012In this chapter, we will discuss regarding the requirements and prerequisites of the Windows Server 2012.System RequirementsAlthough most of the servers nowadays probably have the necessary requirements for Windows Server 2012. It will certainly be useful to know them in case you want to upgrade from an older system.The main requirements are:∙CPU socket minimum 1.4 GHz (64-bit processor) or faster for single core and Microsoft recommends is 3.1 GHz (64-bit processor) or faster multi-core.∙RAM memory minimum is 2GB, but Microsoft recommends 8GB.∙160 GB hard disk with a 60 GB system partition space in your hard disk.One important thing to note here is that the installation process itself will verify your computer hardware and let you know if it qualifies for a Windows Server 2012 installation. If not, then you will need to upgrade your hardware.InstallationThe following steps are to be adhered for the installation of Windows Server 2012.Step 1: We can download the evaluation ISO of Windows Server 2012 R2 from the following link:https:///en-us/evalcenter/evaluate-windows-server-2012-r2But you will need to sign in first with a Microsoft account like Hotmail for example in order to complete the download and the good thing is that the evaluation period will last for 180 days, so you will have enough time to know if it will be the right product for you or not.At the end, if you decide to buy the license of your Windows server 2012 R2. You can purchase it online via a Microsoft online store found in –/store/msusa/en_US/list/Windows-Server/categoryID.70676900?icid=BusinessR_Software_80_Windows_Server_112315 For the Enterprise solution, I would recommend to purchase it via a Microsoft partner that is found in your country.Step 2: After downloading the ISO of Microsoft, create a boot USB driver which can be created with the Microsoft tool called Windows USB/DVD Download Tool and can be downloaded from the following link:https:///en-us/download/windows-usb-dvd-download-toolAfter downloading the EXE file, open it and select the ISO file location and then click next like in the following screenshot, and wait up to the end when the Boot USB is created.Step 3: After completing the above given steps, plug-in the USB to the server and wait for a while till it loads the files. This will continue for about a couple of minutes as shown in the following screenshot.Step 4: After the files are loaded, you will see the screen of language settings of installation, keyboard, time and currency format. Generally, all the default ones are also good enough to start with. Click Next.Step 5: Click “Install now”.Step 6: Once you have clicked on Install Now, the setup will start and it will load all the files and the screen will look as shown in the following screenshot.Step 7: Wait until the files are loaded and then you will see the following screen. Let’s select Windows Server 2012 DataCenter Evaluation (Server with GUI) and click Next.Step 8:Click “I accept the license terms” and the n click on the Next button as shown in the following screenshot.Step 9:The following screen will appear. In “Driver Options” you can create a new partition, delete or format the Hard disk. After you have done this process then you can select the partition where the Windows server 2012 R2 will be installed in our case we have one partition. Once all this is done, then click on Next.Step 10:Let’s wait until this process finishes during this ti me and then the server will reboot.Step 11: Once the reboot is done the following screen will appear. Set the password for the server and then click on “Finish”.Step 12: It will take some minutes until the setup finishes completely.Step 13: Once all this is done, you have completed the installation process and the following screen will appear.CongratulationsWindows Server 2012Like the previous version, Windows Server 2012 has the following roles which can be used and in the subsequent chapter, we will see how to install and configure the most important ones.The following picture shows all the roles. A small reminder! – Roles and Features are the tools that you need to install or activate in order to complete your IT Administration duties, without their installation you cannot do anything.To add a role in the server we should adhere to the following steps:Windows Server 2012 – Server RolesStep 1: Click with the mouse on Server Manager which is found in the task bar as shown in the following screenshot.Step 2: After opening the “Server Manager”, click on the second option “Add roles and features”.Step 3: The following screen will appear, then you can Click on the Next button.Step 4:Select the Role-based or feature-based installation and then click on the Next button.In the next screen that appears, you will have the following two options:Option 1: Select a server from the server pool. This option is –if you want to install the services in the physical server like being done in the following screenshot.Option 2: Select a virtual Hard disk if you want to install the services in a virtual disk that can be somewhere in the network storage. Take a look at the following screenshot for better understanding.Step 5:The last step will be to check the service that you want to install, but in the upcoming chapters we will continue this setup for each and every important services.Windows Server 2012Windows PowerShell is a command-line shell and scripting language designed especially for system administration. It ’s analogue in Linux is called as Bash Scripting. Built on the .NET Framework, Windows PowerShell helps IT professionals to control and automate the administration of the Windows operating system and applications that run on Windows Server environment.Windows PowerShell commands, called cmdlets , let you manage the computers from the command line. Windows PowerShell providers let you access data stores, such as the Registry and Certificate Store, as easily as you access the file system.In addition, Windows PowerShell has a rich expression parser and a fully developed scripting language. So in simple words you can complete all the tasks that you do with GUI and much more.PowerShell Icon can be found in the task bar and in the start menu. Just by clicking on the icon, it will open.To open it, just click on the icon and then the following screen will open and it means that PowerShell is ready for you to work on.Windows Server 2012 − PowerShellThe latest version of PowerShell is 5.0 and to check what is installed in our server we type the following command –:$PSVersionTable as shown in the following screenshot and from the screen we also know that we have PSVersion 4.0To update with the latest version where it has more Cmdlets we have to download Windows Management Framework 5.0 from the following link –https:///en-us/download/details.aspx?id=50395 and install it.PowerShell ISEThe Windows PowerShell Integrated Scripting Environment (ISE) is a host application for Windows PowerShell. In Windows PowerShell ISE, you can run commands and write, test, and debug scripts in a single Windows-based graphic user interface with multiline editing, tab completion, syntax coloring, selective execution, context-sensitive help, and support for right-to-left languages.You can use menu items and keyboard shortcuts to perform many of the same tasks that you would perform in the Windows PowerShell console. For example, when you debug a script in the Windows PowerShell ISE, to set a line breakpoint in a script, right-click the line of code, and then click Toggle Breakpoint.To open it you just go to Start –Search and then Type –PowerShell as shown in the following screenshot.Then click on Windows PowerShell ISE. Or click on the downward Arrow as shown in the following screenshot.It will list all the applications installed on the server and then click on Windows PowerShell ISE.The following table will be open –It has three sections, which include –The PowerShell Console with number 1, then Scripting File number 2 and the third is the Command Module where you can find the module.End of ebook previewIf you liked what you saw…Buy it from our store @ https://。

2012最新网络游戏标题:2012最新网络游戏第一部分:引言(100-150字)网络游戏在现代社会中已经成为一种热门的娱乐方式。
每年,游戏开发商都会推出各种新的网络游戏,以满足不同玩家的需求。
2012年,也有许多令人兴奋的网络游戏问世。
本文将介绍一些2012年最新的网络游戏,以及它们所带来的创新与乐趣。
第二部分:游戏1(300-400字)在2012年,有一款游戏备受瞩目,名为《星际争霸II:虫族之心》。
这款游戏是暴雪娱乐开发的即时战略游戏,继续了《星际争霸II》系列的故事。
这款游戏引入了虫族作为全新玩家种族,并为玩家提供了一个新的挑战。
游戏中的虫族战斗单位以其独特的特性和战术而闻名,使得游戏玩法更加多样化和刺激。
此外,游戏的图形和音效也经过了全面升级,为玩家呈现出逼真的战场体验。
《星际争霸II:虫族之心》无论在单人模式还是在线对战中都备受赞誉,成为2012年网络游戏界的一颗耀眼明星。
第三部分:游戏2(300-400字)另外一款备受瞩目的网络游戏是《暗黑破坏神III》。
作为暴雪娱乐的又一力作,该游戏是一款动作角色扮演游戏。
《暗黑破坏神III》继承了前作的经典元素,并在玩法和画面上进行了全面升级。
玩家可以选择不同的职业,并通过冒险、完成任务和战斗来提升角色的能力。
游戏中的剧情引人入胜,带有浓厚的奇幻色彩。
同时,游戏还引入了多人合作游戏模式,玩家可以与好友合作完成挑战。
《暗黑破坏神III》的视觉效果惊人,丰富多样的角色和道具也为玩家提供了无数的选择。
这款游戏在2012年的发布后迅速成为热门话题,吸引了众多玩家的关注。
第四部分:游戏3(300-400字)除了暴雪娱乐的作品,2012年还有其他一些令人兴奋的网络游戏。
例如,开心网推出的《开心消消乐》是一款休闲益智游戏,拥有可爱的卡通形象和简单的游戏规则,吸引了大量玩家的参与。
该游戏在社交网络平台上广受欢迎,并为玩家提供了与好友竞争的机会。
此外,在2012年,腾讯推出了《王者荣耀》,这是一款多人在线战斗竞技游戏。
安裝指南SolidWorks Enterprise PDM2012SolidWorks Enterprise PDM 2012內容法律注意事項 (vi)1SolidWorks Enterprise PDM安裝指南 (8)2安裝概要 (9)必要安裝元件 (9)可選安裝元件 (10)Enterprise PDM部署案例 (10)系統需求 (12)安裝摘要 (12)安裝協助 (13)3安裝與組態SQL Server (14)安裝SQL Server2008 (14)安裝SQL Server2008之前 (14)執行SQL Server2008安裝 (15)安裝SQL Server2008之後 (19)確認是否正確安裝SQL Server2008 (20)升級至SQL Server2008 (20)執行升級至SQL Server2008 (20)升級至SQL Server2008之後 (22)安裝SQL Server2005 (22)安裝SQL Server2005之前 (22)執行SQL Server2005安裝 (22)安裝SQL Server2005之後 (25)確認是否正確安裝SQL Server2005 (26)升級至SQL Server2005 (26)升級至SQL Server2005之前 (26)執行升級至SQL Server2005 (26)升級至SQL Server2005之後 (29)安裝SQL Server2005Service Pack (29)決定目前安裝的SQL Server2005版本 (29)取得SQL Server2005Service Pack (30)準備安裝SQL Server2005Service Pack (30)安裝SQL Server2005Service Pack (30)SQL Server疑難排解 (31)客戶端無法在檔案資料保險箱中工作 (31)Enterprise PDM管理功能發生故障 (32)Enterprise PDM無法連接至伺服器 (32)變更Enterprise PDM使用的SQL Server登入帳戶 (32)產生新的SQL登入帳戶 (33)在Enterprise PDM保存檔上使用新的SQL登入: (33)給予SQL使用者對現有Enterprise PDM檔案資料保險箱資料庫的db_owner存取權限 (33)不足的SQL權限 (34)4安裝SolidWorks Enterprise PDM (35)初始化Enterprise PDM的安裝 (35)安裝SolidWorks Enterprise PDM資料庫伺服器 (36)安裝資料庫伺服器之前 (37)執行資料庫伺服器安裝 (37)安裝SolidWorks Enterprise PDM保存檔伺服器 (38)安裝保存檔伺服器之前 (39)執行保存檔伺服器安裝 (39)開啟客戶端/伺服器通訊的連接埠 (43)在Windows XP SP2及Windows Vista上執行保存檔伺服器 (44)在WAN環境中新增保存檔伺服器 (44)安裝SolidWorks Enterprise PDM Web伺服器 (45)安裝SolidWorks Enterprise PDM客戶端 (46)安裝客戶端之前 (46)使用安裝精靈安裝客戶端 (47)啟用記錄以排解安裝問題 (48)產生Enterprise PDM客戶端管理安裝點 (48)使用Windows Active Directory部署客戶端 (49)在部署Enterprise PDM時啟用記錄 (51)編寫Enterprise PDM的無訊息安裝指令碼 (51)5產生與發送檔案資料保險箱視圖 (53)產生檔案資料保險箱 (53)使用視圖設定精靈產生檔案資料保險箱視圖 (53)在有Windows防火牆時啟用廣播 (55)將共用檔案資料保險箱視圖與多個使用者設定檔搭配使用 (56)在終端機伺服器上使用Enterprise PDM (56)產生檔案資料保險箱視圖設定檔案 (57)編寫檔案資料保險箱視圖設定指令碼 (58)使用Microsoft Windows Active Directory散發Enterprise PDM檔案資料保險箱視圖 (58)尋找Enterprise PDM資料保險箱ID (59)接收發送的檔案資料保險箱視圖 (60)在WAN環境中散發檔案資料保險箱視圖 (60)手動組態向Enterprise PDM客戶端宣告的保存檔伺服器 (60)手動指定SolidWorks Enterprise PDM設定群組原則 (61)SolidWorks Enterprise PDM設定原則選項 (62)6組態內容搜尋 (65)內容搜尋概要 (65)建議的電腦組態 (65)在SQL Server系統上組態索引服務 (66)確認Microsoft索引服務的安裝 (66)監控及微調Microsoft編制索引的服務 (66)編制Enterprise PDM檔案資料保險箱保存檔的索引 (66)在非SQL Server系統上組態索引服務 (67)使用索引伺服器名稱更新檔案資料保險箱資料庫 (67)變更資料庫伺服器登入帳戶 (68)變更SQL Server登入帳戶 (68)新增索引伺服器濾器 (69)壓縮保存檔(gzip)濾器 (69)Microsoft索引濾器 (70)管理檔案資料保險箱索引目錄 (70)移除檔案資料保險箱索引 (70)7備份與回復檔案資料保險箱 (71)備份檔案資料保險箱資料庫 (71)備份Enterprise PDM主資料庫 (72)備份保存檔伺服器設定 (72)備份保存檔案 (72)使用維護計劃排定資料庫備份 (73)啟動SQL Server Agent (73)設定資料庫備份的維護計劃 (73)回復檔案資料保險箱 (76)回復SQL Server檔案資料保險箱資料庫 (76)確認ConisioMasterDb回復 (76)回復保存檔伺服器與檔案資料保險箱保存檔 (77)8升級Enterprise PDM (78)關於Enterprise PDM升級 (78)從Conisio6.2之前的版本升級 (78)升級Enterprise PDM Web伺服器 (78)客戶端授權 (78)Visual Basic6附加程式 (79)升級之前 (79)判斷目前版本 (79)決定已被套用的更新 (80)移除Visual Basic6附加程式 (80)升級保存檔伺服器 (80)升級資料庫伺服器 (81)升級檔案資料保險箱 (82)升級檔案資料保險箱資料庫 (82)升級檔案資料保險箱保存檔 (84)升級在Enterprise PDM中的Toolbox (87)9升級SolidWorks檔案 (89)升級SolidWorks檔案 (89)所需的升級公用程式軟體 (90)系統需求 (90)安裝檔案版本升級公用程式 (91)準備升級 (91)選擇版本設定 (92)產生檔案的新版本 (93)覆寫檔案的現有版本 (96)執行一試做的檔案升級 (108)執行升級公用程式 (108)產生及使用工作指示檔案 (109)完成中斷的升級 (109)升級之後 (110)升級記錄檔的檔案名稱格式 (110)管理備份檔案 (110)備份檔案的產生 (111)從備份中復原一被不正確升級的版本 (111)找出及移除備份檔案 (112)10其他組態 (113)管理SQL交易記錄檔大小 (113)變更為簡單復原模式 (113)壓縮交易記錄檔 (113)組態Enterprise PDM以便僅使用IP位址進行通訊 (114)更新保存檔伺服器以使用IP位址進行通訊 (114)更新SQL Server以使用IP位址進行通訊 (114)更新Enterprise PDM客戶端以使用IP位址進行通訊 (114)確認IP位址通訊 (115)將伺服器元件移至其他系統 (115)將檔案複製到新伺服器 (115)組態移動的SQL檔案資料保險箱資料庫 (116)組態移動的保存檔伺服器 (116)更新客戶端登錄機碼 (117)更新複製的設定 (117)確認伺服器移動 (118)法律注意事項©1995-2011,Dassault Systèmes SolidWorks Corporation,a Dassault Systèmes pany,175Wyman Street,Waltham,Mass.02451USA.All Rights Reserved.本文件中提及的資訊和軟體如有更改,恕不另行通知,Dassault Systèmes SolidWorks Corporation (DS SolidWorks)不負任何責任。
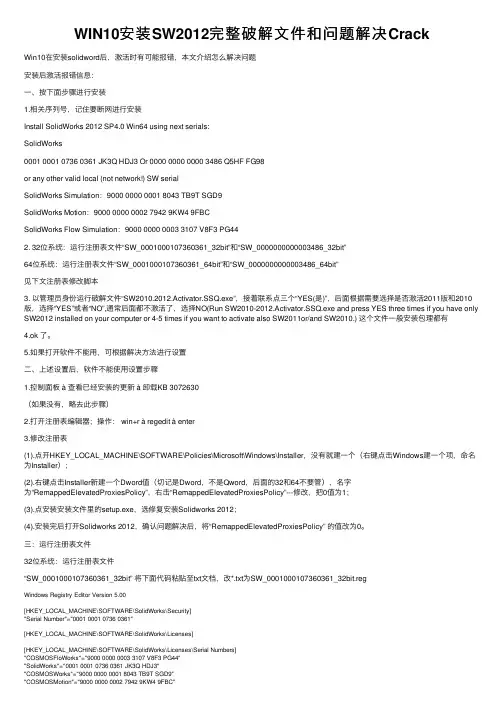
WIN10安装SW2012完整破解⽂件和问题解决CrackWin10在安装solidword后,激活时有可能报错,本⽂介绍怎么解决问题安装后激活报错信息:⼀、按下⾯步骤进⾏安装1.相关序列号,记住要断⽹进⾏安装Install SolidWorks 2012 SP4.0 Win64 using next serials:SolidWorks0001 0001 0736 0361 JK3Q HDJ3 Or 0000 0000 0000 3486 Q5HF FG98or any other valid local (not network!) SW serialSolidWorks Simulation:9000 0000 0001 8043 TB9T SGD9SolidWorks Motion:9000 0000 0002 7942 9KW4 9FBCSolidWorks Flow Simulation:9000 0000 0003 3107 V8F3 PG442. 32位系统:运⾏注册表⽂件“SW_0001000107360361_32bit”和“SW_0000000000003486_32bit”64位系统:运⾏注册表⽂件“SW_0001000107360361_64bit”和“SW_0000000000003486_64bit”见下⽂注册表修改脚本3. 以管理员⾝份运⾏破解⽂件“SW2010.2012.Activator.SSQ.exe”,接着联系点三个“YES(是)”,后⾯根据需要选择是否激活2011版和2010版,选择“YES”或者“NO”,通常后⾯都不激活了,选择NO(Run SW2010-2012.Activator.SSQ.exe and press YES three times if you have only SW2012 installed on your computer or 4-5 times if you want to activate also SW2011or/and SW2010.) 这个⽂件⼀般安装包理都有4.ok 了。
Netcomm NF12 For Windows 10To ensure your Network Card is ready for this, please follow the following steps:A. C lick Start -> Settings -> Network and Internet -> Ethernet ->Change adapter optionsB. Right click on Ethernet, and then click PropertiesC. U nder Ethernet properties, select Internet Protocol Version 4TCP/IP v4 and then click PropertiesD. Ensure “Obtain an IP address automatically” is selectedE. Ensure “Obtain DNS server address automatically” is selectedF. Click OK3. CONFIGURING ROUTERA. O pen your browser and in the address bar typehttp://192.168.1.1 and press EnterB. E nter admin for both the username and password andclick OK. If you have changed the login credentials, pleaseenter the current username and password for your router interface.C. C lick Quick Setup under Basic Setup in the left hand panelD. T ype in your own TPG username and password, andclick Next.E. Y ou can change your Wi-Fi settings in this step. By default,the router is configured with the following Wi-Fi security settings: SSID (name for the Wi-Fi connection): TPG-xxxx (xxxx isa random 4 digit alpha numeric code)Authentication Type: WPA-PSK/WPA2-PSK Encryption: TKIP/AESWPA/WAPI passphrase: Initially configured to be the same as your TPG password. You can enter your own text asan option.Click Next to continue.F. T he final step is to change the password to log into yourrouter configuration page. It is recommended that you choose a unique password.Click Finish to complete the Quick Setup Wizard.4. CONFIGURING WI-FITo use Wi-Fi, ensure that you have already setup your wirelessadapter on your PC/laptop.A. C lick Start -> Settings -> Network and Internet C. E nsure Connect Automatically is ticked,and then Click Connect.B. C lick Wi-Fi and then find the SSID (Network name) of yourmodem. By default, the network name should be TPG-xxxx(xxxx is a random 4 digit alpha numeric code).D. Y ou will now be prompted to enter your network securitykey/ Wireless password. This is the same as your TPGpassword if you did not change it on the modem.E. Click NEXT to finish .Note: You’ll see an option that says “share this network withmy contacts”. We recommend you don’t tick this box.F . You should now see your status as ‘Connected ’.5. CHANGE OF PASSWORDFor security purposes we highly recommend that you change yourpassword if you are using your default orif you believe your password security has been compromised.To change your password, first please visit .au/passwordYour new password will take approximately 10-15 minutes to take effect,after which you must reconfigure your new password in your router.。
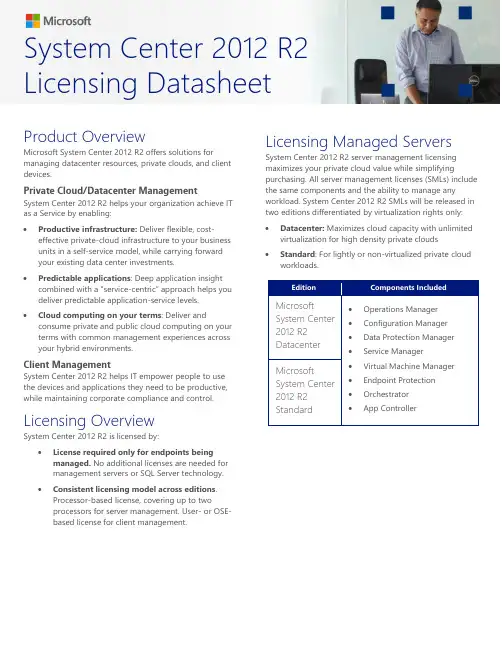
System Center 2012 R2 Licensing DatasheetProduct OverviewMicrosoft System Center 2012 R2 offers solutions for managing datacenter resources, private clouds, and client devices.Private Cloud/Datacenter Management System Center 2012 R2 helps your organization achieve IT as a Service by enabling:∙Productive infrastructure: Deliver flexible, cost-effective private-cloud infrastructure to your business units in a self-service model, while carrying forwardyour existing data center investments.∙Predictable applications: Deep application insight combined with a “service-centric” approach helps you deliver predictable application-service levels.∙Cloud computing on your terms: Deliver and consume private and public cloud computing on your terms with common management experiences across your hybrid environments.Client ManagementSystem Center 2012 R2 helps IT empower people to use the devices and applications they need to be productive, while maintaining corporate compliance and control. Licensing OverviewSystem Center 2012 R2 is licensed by:∙License required only for endpoints being managed. No additional licenses are needed formanagement servers or SQL Server technology.∙Consistent licensing model across editions.Processor-based license, covering up to twoprocessors for server management. User- or OSE-based license for client management. Licensing Managed Servers System Center 2012 R2 server management licensing maximizes your private cloud value while simplifying purchasing. All server management licenses (SMLs) include the same components and the ability to manage any workload.System Center 2012 R2 SMLs will be released in two editions differentiated by virtualization rights only:∙Datacenter: Maximizes cloud capacity with unlimited virtualization for high density private clouds∙Standard: For lightly or non-virtualized private cloud workloads.Server ML Edition Comparison:separately.Determining the Number of Licenses NeededServer MLs are required for managed devices that run server Operating System Environments (OSEs). Licenses are processor-based, with each license covering up to two physical processors. The number of Server MLs required for each managed server is determined by the number of physical processor in the server for Datacenter Edition and either number of physical processors in the server or number of OSEs being managed for Standard Edition (whichever is greater). If you choose the Standard Server ML, you can add more licenses to a server to manage a greater number of virtual OSEs.Multiple System Center 2012 R2 Standard licenses may be assigned to the same server to license the number of managed OSEs. Components included in the Server MLs are not available separately.Flexibility to License Managed OSEs Running on Public Cloud PlatformsAll System Center 2012 R2 Server Management Licenses with active Software Assurance qualify for License Mobility through Software Assurance benefits. With the License Mobility through Software Assurance benefit, you can assign Server MLs to manage applications running on a public cloud infrastructure.For more information, see the Microsoft License Mobility through Software Assurance Customer Guide .Transitioning to the New Server Licensing ModelIf you have Software Assurance coverage on your current System Center licenses at the time of System Center 2012 R2 General Availability, you will receive the following System Center 2012 R2 Server ML grants listed below:You may migrate from System Center 2012 R2 Standard to System Center 2012 R2 Datacenter by purchasing a Step-Up License.Licensing Managed ClientsClient Management Licenses (MLs) are required for managed devices that run non-server OSEs. There are three System Center 2012 R2 Client ML offerings:Client MLs are available on a per-OSE or per-user basis. Components included in the Client MLs are not available separately.Transitioning to the New Client Licensing ModelIf you have Software Assurance coverage on your current System Center licenses at the time of System Center 2012 R2 General Availability, you will receive the following System Center 2012 R2 Client ML grants listed in the following table:Planning for System Center 2012 R2If you are planning to deploy System Center 2012 R2, either through upgrades or new licenses, please remember: ∙Renewing Software Assurance (SA) is the best way to protect investments and provide access to newversions as well as Deployment Planning Services and technical assistance.∙Select your edition of System Center 2012 R2 based on virtualization rights:o Datacenter Edition for highly virtualizedprivate clouds o Standard Edition for lightly or non-virtualizedprivate clouds∙Core CAL and Enterprise CAL Suites will continue to be the most cost effective way to purchase client management products.∙Find out how flexible payments can help you get the IT you need and stay on budget.Visit /financing for program details or to learn more. Or contact your Microsoft Solution Partner directly or by calling 1-800-936-3500 in the United States and Canada.Frequently Asked Questions (FAQ)System Center 2012 R2 Server ManagementQ: What's new in System Center 2012 R2 server management licensing?A: System Center 2012 R2 server management licensing does not change from System Center 2012. Q: Can you describe the product editions offered with System Center 2012 R2?A: Same as System Center 2012, System Center 2012 R2 server management licenses will be released in 2 editions differentiated by virtualization rights only:∙Datacenter: Maximizes cloud capacity with unlimited Operating System Environments (OSEs) for high density private clouds∙Standard: For lightly or non-virtualized private cloud workloads.There is no differentiation between the types of workloads you can manage with either edition. The only difference between the editions is the number of Operating System Environments (OSEs) that you can manage per license. Datacenter Edition allows the management of an unlimited number of OSEs per license. Standard Edition allows the management of up to two OSEs per license.Q: How do I determine the number of Server Management Licenses (MLs) I need?A: Server MLs are required for managed devices that run server OSEs. Licenses are processor-based, with each license covering up to two physical processors. The number of Server MLs required for each managed server is determined by the number of physical processors in the server for Datacenter Edition and either number of physical processors in the server or number of OSEs being managed for Standard Edition (whichever is greater).∙System Center 2012 R2 DatacenterEach license covers up to two physical processors, so you must count the number of physicalprocessors on the server, divide that number by two, round up to the nearest whole number,and acquire and assign that number of licenses to your server.Provided you acquire and assign to your server the required number of Datacenter editionserver management licenses, as described above, you may manage any number of OSEs onthat server.∙System Center 2012 R2 StandardFor each managed server count the number of physical processors and the number ofmanaged OSE's. You need the number of licenses to cover the greater number (processors orOSE's).device. In that case, you only count the number of virtual OSEs you will manage on the server, divide that number by two, and round up to the nearest whole number.Examples:*Multiple System Center 2012 R2 Standard licenses may be assigned to the same server to license the number of managed OSEs.Q: Can I purchase each of the System Center 2012 R2 Server Management License components separately?A: No. The System Center 2012 R2 Server Management components are part of an integrated offering to create and manage private cloud environments and are available only as part of System Center 2012 R2 Standard and System Center Datacenter MLs.Q: Can I split 2012 R2 Server MLs across multiple servers?A: No, a single Server ML may not be used to license two one-processor servers.Q: Can I assign more than one System Center 2012 R2 Standard license to the same server to increase the number of OSEs I may manage?A: Yes. The breakeven point for moving to SC 2012 R2 Datacenter is 7 VMs per host.Q: How much do the Server MLs cost?A: The Microsoft Volume Licensing Open License No Level (NL) U.S. Estimated Retail Price (ERP) is $1,323 for System Center 2012 R2 Standard and $3,607 for System Center 2012 R2 Datacenter. For your specific pricing, contact your Microsoft reseller. Actual prices may vary. Microsoft does not determine pricing or payment terms for licenses acquired through resellers.Q: Can I extend a Server ML to manage applications running on the public cloud?A: Yes, with the License Mobility through Software Assurance benefit, you can assign Server ML to manage applications running on a public cloud infrastructure. System Center 2012 R2 Standard licenses allow you to manage two virtual OSE in a public cloud, while System Center 2012 R2 Datacenter licenses allow you to manage up to eight virtual OSEs in a public cloud. When managing applications running on Azure, each Azure instance is considered to be one virtual OSE. For more information, see the Microsoft License Mobility through Software Assurance Customer Guide.。
Microsoft Windows Server 2012 R2 For Dell EMC PowerEdge SystemsInstallation Guide註、警示與警告註: 「註」表示可以幫助您更有效地使用產品的重要資訊。
警示: 「警示」表示有可能會損壞硬體或導致資料遺失,並告訴您如何避免發生此類問題。
警告: 「警告」表示有可能會導致財產損失、人身傷害甚至死亡。
版權所有© 2017 Dell Inc. 或其子公司。
版權所有,翻印必究。
Dell、EMC 與其他商標均為 Dell Inc. 或其子公司的商標。
其他商標為其各自所有者的商標。
2017 - 06Rev. A021 Introduction (4)設定預先安裝的 Microsoft Windows Server 2012 R2 作業系統 (4)2 安裝和重新安裝 Microsoft Windows Server 2012 R2 (6)Using the Dell OpenManage 7.4 (6)使用 Dell LifeCycle Controller 安裝 Windows Server 2012 R2 (8)使用作業系統媒體安裝 Windows Server 2012 R2 (9)附錄—分割磁碟機 (11)主開機記錄配置 (11)GUID 分割區表格配置 (11)選擇分割區配置 (11)Dell EMC PowerEdge 系統的作業系統支援矩陣 (11)適用於 Dell EMC PowerEdge 系統的受支援 Microsoft Windows 影片 (12)3 獲得幫助 (13)聯絡 Dell EMC (13)說明文件資源 (13)下載驅動程式和韌體 (15)說明文件意見反應 (15)Contents3IntroductionThis document provides information about installing the Microsoft Windows Server 2012 R2 operating system for Datacenter, Standard, Foundation, and Essentials edition.設定預先安裝的 Microsoft Windows Server 2012 R2 作業系統本節提供完成設定預先安裝於您系統之 Microsoft Windows Server 2012 R2 作業系統的必要程序。
2012十大经典单机游戏时至2012年年末,以下10款为玩家最青睐的流行经典单机,看一看,你都玩过吗?1、红警——风靡一时的网吧流行游戏玩家通常简称其为红警或RA。
、游戏背景为苏联发动第二次世界大战。
属于标准的采集资源,升级建筑,造兵攻打的即时战略游戏模式。
极其简单的操作和良好的可玩性,受到了许多玩家的喜爱。
该游戏有许多语言版本,包括简繁体中文版。
红色警戒可指《红色警戒》、《红色警戒2》以及其资料片《尤里的复仇》。
在其续篇《红色警戒2》的资料片《红色警戒2:尤里的复仇》中,苏军拥有了其自己的英雄单位-鲍里斯(Boris)。
《红色警戒2:尤里的复仇》比前几款游戏有着较大的改变。
红色警戒22、帝国时代——微软PC平台即时战略的帝国时代这款可以让玩家操纵历史上某个真实民族的游戏,由于它的各种优点(低配备需求,变化性,趣味性)常常使玩家乐此不疲,受到电玩市场热烈的欢迎,后来有许多公司也竞相推出类似的游戏,像地球争霸、王国的兴起和微软再推出的神话世纪等,但也无法创造帝国时代的空前成功。
帝国时代也在2003年推出了掌上型电脑版。
帝国时代这个词有时也泛指整个帝国时代系列的游戏与资料片。
由于帝国时代的风行,之后陆续推出续作与扩充数据片,形成了帝国时代系列游戏,包括:《帝国时代》及其资料片《帝国时代:罗马复兴》、《帝国时代II:帝王世纪》及其资料片《帝国时代II:征服者》、与《帝国时代III:探索时代》及其资料片《帝国时代III:酋长》和《帝国时代III:亚洲王朝》。
帝国时代3、星际争霸——开创了电子竞技平台的大门《星际争霸》是1998年最畅销的电脑游戏。
同年,暴雪发布了它的扩展包(通常也叫做资料片)《星际争霸:母巢之战》(Starcraft: Brood War)。
暴雪已声称他们正在制作一款以星际争霸为背景的第三人称视角射击(third person shooter,TPS)类游戏《星际争霸:幽灵》(Starcraft: Ghost),并宣称将在2006年发行。
使用Windows Server 2012 R2对您的业务进行云优化产品概述白皮书目录目录 (2)版权信息 (3)趋势 (4)Windows Server 2012 R2 功能概述 (8)服务器虚拟化 (8)存储 (10)网络 (13)服务器管理与自动化 (15)Web 与应用平台 (17)信息访问与保护 (19)虚拟桌面基础架构(VDI) (21)总结 (22)Windows Server 2012 R2 的后续工作 (24)版权信息© 2013 Microsoft Corporation. 保留所有权利。
本文档“依原样”提供。
本文档所表达的信息与观点,包括URL 与引用的其他网站,若有改动恕不另行通知。
您应自担使用风险。
本文档并未赋予您任何微软产品中所包含知识产权的任何法律权利。
您可基于内部参考用途复制并使用本文档。
您可基于内部参考用途修改本文档。
趋势IT 世界的发展速度很快,传统方法很快就会过时。
微软针对 IT 新领域的愿景是为您的基础架构、应用,以及数据提供一套一致的平台–名为 Cloud OS –这个平台涵盖了客户的数据中心,服务供应商的数据中心,以及微软公共云。
Windows Server 2012 R2 是微软 Cloud OS 的核心,提供了独一无二的服务器与数据中心平台,可供您用简单且具成本效益的方式对您的业务进行云优化。
整个产业正在受到几个主要 IT 趋势的影响,不仅创造出新机遇,而且受到企业与服务供应商组织的驱动:新的应用程序:业务创新与敏捷度推动着部署、系统,以及集成工作对灵活性提出了更多要求。
这样的灵活性要求以组件式应用程序架构为特点的全新应用程序与服务架构具备更好的连接性,以新的应用程序框架为基础构建而来,能提供更丰富的通用服务集,可快速充分地利用熟悉的生产力、协作,以及社交网络工具所提供的优势。
设备的扩张:消费类计算设备领域的创新为企业提供了新的机遇,通过让用户以新的方式工作,例如在家或者在路上工作,可进一步提升生产力。
XXX职业技术学院实训任务书(课程设计)教务处制《Windows 网络操作系统》集中实训任务书一、项目实施目的通过一个以企业为背景的网络项目的实训,综合运用本课程知识和技术,使学生学会在Windows Server 2012 R2环境下,掌握搭建一个小型企业网的设计细节和实施流程,为今后构建和实施综合性网络系统平台、大数据应用平台和云计算数据中心打下基础。
二、项目施工方式与要求1.项目实训前必须仔细阅读《综合项目施工任务书》,明确实训的目的、要求和任务,制订好上机步骤。
2.每人配备一台笔记本电脑(至少16GB内存容量)。
3.本项目任务适合在本课程结束后,采用集中安排不少于24课时或两个实训周实施。
三、项目施工规划与环境本项目(必作题部分)中,由一台物理机(能接入互联网)、5台虚拟机及4台虚拟交换机构成一个独立的网络,设备及IP地址分配见表15-1。
表15-1 设备及IP地址分配注:由于表格空间有限,表中Win2012指Windows Server 2012 R2,Win7/8指Windows7/8中小型企业网络施工示意图(拓扑结构)如图15-2所示。
图15-2 中小型企业网络施工示意图(拓扑结构)四、项目施工任务任务1:配置网络和软路由器,实现四个内部子网及外网的互联互通(1)在虚拟机①~虚拟机④上按表15-1或图15-2添加所需数量的网卡并将各网卡连接至相应的虚拟交换机,配置各网卡的IP 地址和子网掩码等参数。
(2)在虚拟机①上,安装“远程访问”服务角色,设置“配置并启用路由和远程访问”中的“LAN 路由”服务项目,添加静态路由使其数据包能到达子网4和外网(目标网络号和子网掩码均为0.0.0.0时表示是默认路由,此处将到达外网的路由设为默认路由)。
(3)在虚拟机②上,安装“远程访问”服务角色,设置“配置并启用路由和远程访问”中的“LAN 路由”服务项目,添加静态路由使其数据包能到达子网1、子网2和外网(其中,将到达外网的路由设为默认路由)。
Windows Phone 2012年度精品Xbox游戏推荐年尾已到,小编很高兴和大家度过整个末日年,而一年间,不少著名作品都借Xbox Live游戏身份登陆Windows Phone。
在许多网站都会在年尾挑选年度大作,眼看2013快将来临的时候,为各位献上新锋网2012年度编辑Xbox Live游戏推介!Angry Birds Star Wars 在继Angry Birds Space以后,再度证明了Rovio当家品牌制作的出色质量。
即使今次和星战Crossover,Angry Birds Star Wars仍然能在忠实的呈现星战的经典场面和人物之余,还在自成一格的游戏玩法上更上一层楼。
除了本身的愤怒鸟有着更强大的附加能力,例如红色的天行者愤怒鸟能以激光剑斩开目标、黑色的欧比王愤怒鸟能使用原力外,,而作为敌人的风暴白猪兵及战机猪,都不会只站着等你来打倒,前者甚至会以死光枪阻止你,在策略上更显挑战性。
对比Angry Birds Space,你更需要准确的计算好发射路线和时间,以确保没有让你浪费任何机会。
结合Angry Birds Space的零重力形式和陆地地形的80多个关卡,Angry Birds Star Wars可说是Rovio对Windows Phone的诚意之作。
Ubisoft亲自发行的Windows Phone作品Babel Rising 3D,参考着《圣经.创世记》中巴比伦塔的故事。
在多达15个关卡的章节式故事模式中,你要利用天神的自然技能,消灭建造巴比伦塔的人民,阻止他们登上塔顶,同时亦可能要破坏尝试登陆的船只。
你亦能够在生存模式选择关卡设定来持续对抗无知人类。
Babel Rising 3D除了有着独特的画面,耐玩的升级设定,以及新类的游戏玩法,可说是相当易入口的塔防式游戏。
可惜的是,Babel Rising 3D暂时未支持Windows Phone 8,新入手的WP8用家唯有望门轻叹了。
我的安装步骤:tab键自动补全安装wordyum groupinstall "Office/Productivity"安装csh1、全拼中文输入法SCIM安装$su root(切换到root用户)#yum install scim#yum install scim-pinyin安装完成之后重启电脑,修改热键,方法如下:打开system - Preference - Input Method 选择USE SCIM,点击Input Method Preference ,在全局设置里面,首先选择键盘布局为english-us;进入切换热键的设置,选择Control+space,然后一路确定。
重启输入法(systerm中摁log out chlian1987)即可。
fedora8在右键增加打开终端yum install *open-terminal*1安装c++suyum install *gcc* 安装c++yum install * libstdc++*yum install *libstdc++5*yum install *glibc*yum install *libgcc*Linux下libstdc++.so.5找不到解决方案[root@chlian1987 chlian1987]# yum install compat-libstdc++-33-3.2.3-68.i686首先修改/etc/sysconfig/selinux ,将SELINUX=enforcing修改成"SELINUX=disabled"。
然后重启。
chmod -R 700*vi /etc/sysconfig/selinux环安装jasper-1.900.1a)#unzip jasper-1.900.1.zipb)#./configure --prefix=/usr/local/jasperc)#make#make install环境配置export JASPERINC=/home/.../jasper/includeexport JASPERLIB=/home/.../jasper/lib装c++[root@chlian1987 ifort]# chmod -R 700 *[root@chlian1987 ifort]# ./install.shStep no: 1 of 7 | Welcome--------------------------------------------------------------------------------Welcome to the Intel(R) Fortran Compiler Professional Edition for Linux* version 11.1.Intel(R) Fortran Compiler Professional Editions include not only thehigh-performance Intel Fortran Compiler, but also Intel(R) Debugger and Intel(R) Math Kernel Library (Intel(R) MKL) to create a strong foundation for building robust, high performance parallel code at significant price savings.--------------------------------------------------------------------------------Y ou will complete the steps below during this installation:Step 1 : WelcomeStep 2 : License agreementStep 3 : Activation optionStep 4 : Installation configurationStep 5 : Configuration summaryStep 6 : InstallationStep 7 : Installation completePress "Enter" key to continue or "q" to quit:Step no: 2 of 7 | License agreementTo continue with the installation, you must accept the terms and conditions of the End User License Agreement (EULA). The EULA will be displayed with the "more" utility. While viewing the EULA, press the spacebar to page down or press the "q" key to quit viewing the EULA. After viewing the EULA, you will have the choice to either accept or decline the terms and conditions of the EULA.1. V iew the license agreement (required) [default]h. Helpb. Back to the previous menuq. QuitPlease type a selection or press "Enter" to accept default choice [1]: 1Step no: 3 of 7 | Activation optionsY ou can also choose to install the software for evaluation purposes or activateat a later time. The software will time out in 30 days.--------------------------------------------------------------------------------1. Use existing license [default]2. I want to activate and install my product3. I want to evaluate my product or activate later4. Alternative activation - necessary if you plan to activate remotely ( becausethis system may not be set for successful Internet connection), or use alicense file, or use a license server5. V iew additional information about software activationh. Helpb. Back to the previous menuq. Quit--------------------------------------------------------------------------------Please type a selection or press "Enter" to accept default choice [1]:4Y ou can also choose to install the software for evaluation purposes or activateat a later time. The software will time out in 30 days.1. Use a serial number on a different computer which has access to theinternet [default]2. Use a license file - choose this option if you already have a licensefile for this product3. Use a license server - choose this option if you connect to a licenseserver to obtain a license for this product4. V iew additional information about software activation5. How do I find my serial number?6. Where can I purchase a serial number?h. Helpb. Back to the previous menuq. Quit-----------------------------------------------------------------------------Please type a selection or press "Enter" to accept default choice [1]: 2Step no: 3 of 7 | Activation Options - Use a License FileIn order to activate this system using a license file, the license file shouldbe a text file, it should be a valid license for this product, and it should bein a location to which you have access.1. Provide the full path to the license file(s) [default]2. V iew additional information about software activation3. How do I find my license file?h. Helpb. Back to the previous menuq. QuitPlease type a selection or press "Enter" to accept default choice [1]: 1Note: Press "Enter" key to back to the previous menu./home/chlian1987/systerm/piler.Professional.v11.1.069.LINUX.ISO-TBE/cr ackStep no: 4 of 7 | Installation T ype-------------------------------------------------------------------------------Congratulations! Y our software has been activated. Please continue theinstallation by choosing Typical Install (default installation options) orCustom Install to change the default installation options.--------------------------------------------------------------------------------1. Typical Install (Recommended) [default]2. Custom Install (For Advanced Users)h. Helpb. Back to the previous menuq. Quit--------------------------------------------------------------------------------Please type a selection or press "Enter" to accept default choic e [1]: 1安装完配置环境变量(一会和ifort一起)2安装ifort1、首先修改/etc/sysconfig/selinux ,将SELINUX=enforcing修改成"SELINUX=disabled"。