锐捷基本命令大全
- 格式:doc
- 大小:119.00 KB
- 文档页数:23

锐捷路由器命令全集锐捷路由器命令全集一、基本配置命令1.登录命令1.1.登录路由器:login1.2.切换用户:su [用户名]1.3.修改用户密码:passwd2.接口配置命令2.1.查看接口信息:show interface2.2.配置接口IP地质:ip address [接口名称] [IP地质] [子网掩码]2.3.启用/禁用接口:shutdown / no shutdown [接口名称]2.4.配置接口描述:description [接口名称] [描述]3.静态路由配置命令3.1.添加静态路由:ip route [目标网络地质] [子网掩码] [下一跳地质]3.2.删除静态路由:no ip route [目标网络地质] [子网掩码] [下一跳地质]3.3.查看静态路由表:show ip route static4.动态路由配置命令4.1.启用/禁用动态路由:router ospf [进程号] / no router ospf [进程号]4.2.配置OSPF路由:network [网络地质] [子网掩码] area [区域号]4.3.查看OSPF邻居状态:show ip ospf neighbor5.NAT配置命令5.1.配置静态NAT:ip nat inside source static [内部地质] [外部地质]5.2.配置动态NAT:ip nat inside source list [访问控制列表] [外部地质池] overload5.3.查看NAT转换表:show ip nat translations6.VLAN配置命令6.1.创建VLAN:vlan database / vlan [VLAN号] name [VLAN名称]6.2.将接口加入VLAN:interface [接口名称] /switchport mode trunk / switchport mode access / switchport access vlan [VLAN号]6.3.查看VLAN配置信息:show vlan brief7.安全配置命令7.1.配置登录密码:enable password [密码]7.2.配置Telnet/SSH登录:line vty 0 [最小号] [最大号] / transport input telnet / transport input ssh7.3.配置访问控制列表:access-list [序号] permit [源地质] [目标地质] [协议]7.4.应用访问控制列表:interface [接口名称] / ip access-group [序号] in / out8.系统管理命令8.1.查看系统信息:show version8.2.配置系统时钟:clock set [时间]8.3.保存配置:write memory二、附件:无三、法律名词及注释:1.IP地质:Internet Protocol Address,互联网协议地质,用于唯一标识网络上的设备。

锐捷路由器命令大全Enable 进入特权模式#Ex IT返回上一级操作模式#del flash:config.text 删除配置文件(交换机及1700系列路由器)#erase startup-config 删除配置文件(2500系列路由器)#write memory 或copy running-config startup-config 保存配置#Configure terminal 进入全局配置模式(config)# hostname routerA 配置设备名称为routerA(config)#banner motd & 配置每日提示信息&为终止符(config)# enable secret star 或者:enable password star设置路由器的特权模式密码为star;secret 指密码以非明文显示,password 指密码以明文显示查看信息#show running-config 查看当前生效的配置信息#show interface fastethernet 0/3 查看F0/3端口信息#show interface serial 1/2 查看S1/2端口信息#show ip interface brief 查看端口信息#show version 查看版本信息#show running-config 查看当前生效的配置信息#show controllers serial 1/2 查看该端口信息 , 用于R2501#show ip route 查看路由表信息#show access-lists 1 查看标准访问控制列表1的配置信息远程登陆(telnet)(config)# line vty 0 4 进入线路0~4的配置模式,4为连续线路最后一位的编号,线路为0~4(conifg-line)#login(config-line)#password star 配置远程登陆密码为star(config-line)#end 返回上层端口的基本配置(config)#Interface fastethernet 0/3 进入F0/3的端口配置模式(config)#interface range fa 0/1-2 进入F01至F0/2的端口配置模式(config-if)#speed 10 配置端口速率为10M,可选10,100,auto(config-if)#duplex full 配置端口为全双工模式,可选full(全双工),half(半双式),auto(自适应)(config-if)#no shutdown 开启该端口(config)# interface serial 1/2 进入端口S1/2的配置模式(config-if)# ip address 1.1.1.1 255.255.255.0 配置端口IP及掩码(config-if)# clock rate 64000 配置时钟频率(单位为K , 仅用于DCE 端)(config-if)# bandwidth 512 配置端口带宽速率为512KB(单位为KB) (config-if)# no shutdown 开启该端口(config-if)#encapsulation PPP 定义封装类型为PPP,可选项:Frame-relay 帧中继Hdlc 高级数据链路控制协议lapb X.25的二层协议PPP PPP点到点协议X25 X.25协议路由协议(config)# ip route 172.16.1.0 255.255.255.0 172.16.2.1 配置静态路由注:172.16.1.0 255.255.255.0 为目标网络的网络号及子网掩码172.16.2.1 为下一跳的地址,也可用接口表示,如ip route 172.16.1.0 255.255.255.0 serial 1/2(172.16.2.0所接的端口)(config)# router rip 开启RIP协议进程(config-router)# network 172.16.1.0 申明本设备的直连网段信息(config-router)# version 2 开启RIP V2,可选为version 1(RIPV1)、version 2(RIPV2)(config-router)# no auto-summary 关闭路由信息的自动汇总功能(只有在RIPV2支持)(config)# router ospf 开启OSPF路由协议进程(针对1762,无需使用进程ID)(config)# router ospf 1 开启OSPF路由协议进程(针对2501,需要加OSPF进程ID)(config-router)# network 192.168.1.0 0.0.0.255 area 0申明直连网段信息,并分配区域号(area0为骨干区域)注意:如果是Rip Version1,那么在不连续的子网中,需要为中间网段的两个路由器都配置子接口!!!RA(config)#int serial0RA(config-if)#ip address 172.16.2.1 255.255.255.0 secondaryRB(config)#int serial0RB(config-if)#ip address 172.16.2.2 255.255.255.0 secondaryPAP路由器Ra为被验证方、 Rb为验证方;两路由器用V.35线连接(串口线),分别配置各端口的IP及时钟频率后:Rb(config)# username Ra password 0 star 验证方配置被验证方的用户名,密码Rb(config)# intterface serial 1/2 进入S1/2端口Rb(config-if)# encapsulation ppp 定义封装类型为PPPRb(config-if)# ppp authentication pap PPP启用PAP认证方式Ra(config)# itnterface serial 1/2 进入S1/2端口Ra(config-if)# encapsulation ppp 定义封装类型为PPPRa(config-if)# ppp pap sent-username Ra password 0 star 设置用户名为ra 密码为star,用于发送到验证方进行验证#debug ppp authentication 可选命令:观察PAP验证过程(如果没看到验证消息,则将端口shutdown,然后再no shutdown,即可看到验证过程的相关信息)CHAP路由器Ra、 Rb, 两路由器用V.35线连接(串口线),分别配置各端口的IP 及时钟频率后:被验证方配置:Ra(config)# username Rb password 0 star 以对方的主机名作为用户名,密码和对方的路由器一致Ra(config)# interface serial 1/2 进入S1/2端口Ra(config-if)# encapsulation PPP 定义封装类型为PPP验证方配置:Rb(config)# username Ra password 0 star 以对方的主机名作为用户名,密码和对方的路由器一致Rb(config)# interface serial 1/2 进入S1/2端口Rb(config-if)# encapsulation PPP 定义封装类型为PPPRb(config-if)# ppp authentication chap PPP启用CHAP方式验证PAP与CHAP的区别:1. PAP:被验证方发送用户名、密码到验证方进行身份验证,所以需要在端口模式下设置Ra(config)#ppp pap sent-username Ra password 0 star;验证方需要定义用户和密码配对数据库记录,所以要定义命令:Rb(config)# username Ra password 0 star2. Chap:CHAP由验证方主动发起挑战,由被验证方应答进行验证(三次握手),所以验证方要配置命令:Rb(config-if)# ppp authentication chap。
锐捷路由器配置命令大全(一)引言概述:锐捷路由器是一款常用于企业网络的设备,它具有强大的性能和丰富的功能。
本文将介绍锐捷路由器的配置命令大全,帮助用户更有效地管理和配置路由器。
正文:1. 硬件配置命令:a. 管理接口配置命令:用于配置路由器管理接口的IP地址、子网掩码、网关等参数。
b. 接口配置命令:用于配置路由器各个接口的类型、速率、全双工模式等参数。
c. VLAN配置命令:用于配置VLAN(虚拟局域网)并进行VLAN间的映射和绑定。
d. NAT配置命令:用于配置网络地址转换(NAT)功能,实现内网IP地址和公网IP地址的映射。
e. 静态路由配置命令:用于配置静态路由,指定路由器在转发数据包时的路径。
2. 动态路由配置命令:a. OSPF配置命令:用于配置开放最短路径优先(OSPF)协议,实现自治系统内路由的计算和传播。
b. BGP配置命令:用于配置边界网关协议(BGP),实现自治系统间的路由通告和选择。
c. RIP配置命令:用于配置路由信息协议(RIP),实现小型网络的路由选择。
d. EIGRP配置命令:用于配置增强内部网关路由协议(EIGRP),实现路由选择和距离矢量路由计算。
e. IS-IS配置命令:用于配置中间系统到中间系统(IS-IS)协议,实现自治系统内的路由传播。
3. 安全配置命令:a. 访问控制列表(ACL)配置命令:用于配置ACL,限制允许通过路由器的流量。
b. VPN配置命令:用于配置虚拟专用网络(VPN),实现远程接入和安全通信。
c. 防火墙配置命令:用于配置路由器上的防火墙策略,保护网络安全。
d. AAA配置命令:用于配置AAA(认证、授权、计费)功能,加强网络访问控制和管理。
e. 802.1X配置命令:用于配置IEEE 802.1X认证协议,提供网络用户的身份验证和访问控制。
4. 网络服务配置命令:a. DHCP配置命令:用于配置动态主机配置协议(DHCP)服务器,提供自动分配IP地址的功能。
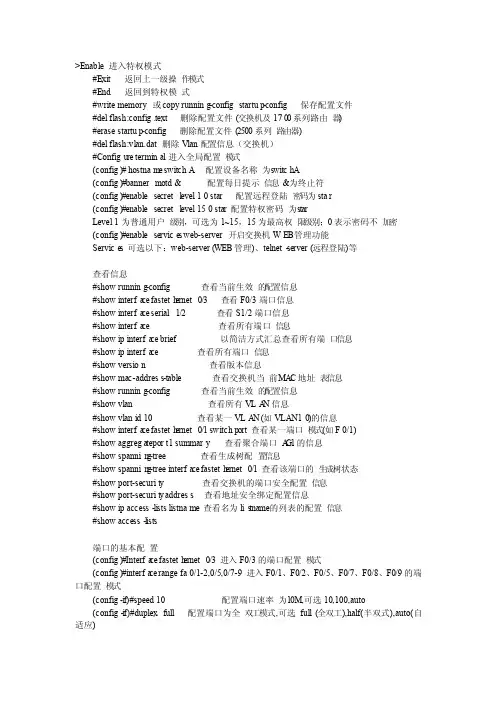
>Enable进入特权模式#Exit 返回上一级操作模式#End 返回到特权模式#write memory或copy running-configstartup-config保存配置文件#del flash:config.text 删除配置文件(交换机及1700系列路由器)#erase startup-config删除配置文件(2500系列路由器)#del flash:vlan.dat 删除Vlan配置信息(交换机)#Configu re terminal进入全局配置模式(config)# hostnam e switchA配置设备名称为switchA(config)#banner motd & 配置每日提示信息&为终止符(config)#enablesecret l evel 1 0 star 配置远程登陆密码为star(config)#enablesecret l evel 15 0 star 配置特权密码为starLevel 1为普通用户级别,可选为1~15,15为最高权限级别;0表示密码不加密(config)#enableservice s web-server开启交换机WEB管理功能Service s 可选以下:web-server(WEB管理)、telnet-server(远程登陆)等查看信息#show running-config查看当前生效的配置信息#show interfa ce fasteth ernet 0/3 查看F0/3端口信息#show interfa ce serial 1/2 查看S1/2端口信息#show interfa ce 查看所有端口信息#show ip interfa ce brief 以简洁方式汇总查看所有端口信息#show ip interfa ce 查看所有端口信息#show version查看版本信息#show mac-address-table 查看交换机当前MA C地址表信息#show running-config查看当前生效的配置信息#show vlan 查看所有VLA N信息#show vlan id 10 查看某一VLA N (如VLAN10)的信息#show interfa ce fasteth ernet 0/1 switchp ort 查看某一端口模式(如F 0/1)#show aggrega teport 1 summary查看聚合端口A G1的信息#show spannin g-tree 查看生成树配置信息#show spannin g-tree interfa ce fasteth ernet 0/1 查看该端口的生成树状态#show port-securit y 查看交换机的端口安全配置信息#show port-securit y address查看地址安全绑定配置信息#show ip access-li sts listname 查看名为lis tname的列表的配置信息#show access-l ists端口的基本配置(config)#Interfa ce fasteth ernet 0/3 进入F0/3的端口配置模式(config)#interfa ce range fa 0/1-2,0/5,0/7-9 进入F0/1、F0/2、F0/5、F0/7、F0/8、F0/9的端口配置模式(config-i f)#speed 10 配置端口速率为10M,可选10,100,auto(config-i f)#duplexfull 配置端口为全双工模式,可选full(全双工),half(半双式),auto(自适应)(config-i f)#no shutdown开启该端口(config-i f)#switchp ort accessvlan 10 将该端口划入V LAN10中,用于VLAN(config-i f)#switchp ort mode trunk 将该端口设为t runk模式,用于Tag vlan可选模式为ac cess , trunk(config-i f)#port-group 1 将该端口划入聚合端口AG1中,用于聚合端口聚合端口的创建(config)# interfa ce aggrega teport 1 创建聚合接口A G1(config-i f)# switchp ort mode trunk 配置并保证AG1为trunk 模式(config)#int f0/23-24(config-i f-range)#port-group 1 将端口(端口组)划入聚合端口A G1中生成树(config)#spannin g-tree 开启生成树协议(config)#spannin g-tree mode stp 指定生成树类型为stp可选模式stp , rstp , mstp(config)#spannin g-tree priorit y 4096 设置交换机的优先级为4096 , 优先级值小为高。
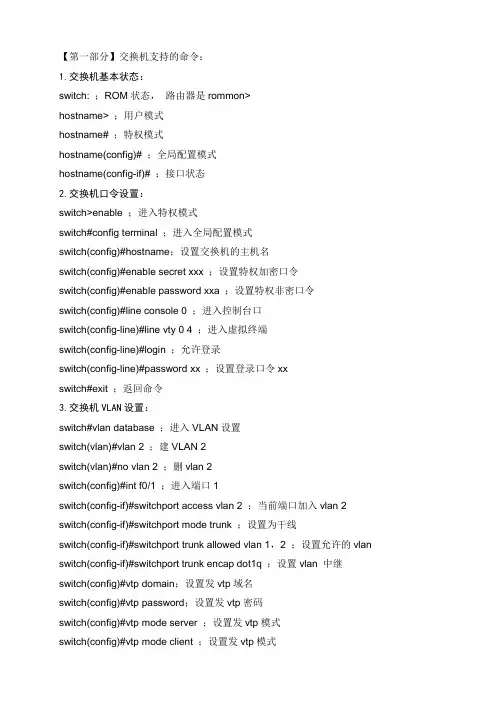
【第一部分】交换机支持的命令:1.交换机基本状态:switch: ;ROM状态,路由器是rommon>hostname> ;用户模式hostname# ;特权模式hostname(config)# ;全局配置模式hostname(config-if)# ;接口状态2.交换机口令设置:switch>enable ;进入特权模式switch#config terminal ;进入全局配置模式switch(config)#hostname;设置交换机的主机名switch(config)#enable secret xxx ;设置特权加密口令switch(config)#enable password xxa ;设置特权非密口令switch(config)#line console 0 ;进入控制台口switch(config-line)#line vty 0 4 ;进入虚拟终端switch(config-line)#login ;允许登录switch(config-line)#password xx ;设置登录口令xxswitch#exit ;返回命令3.交换机VLAN设置:switch#vlan database ;进入VLAN设置switch(vlan)#vlan 2 ;建VLAN 2switch(vlan)#no vlan 2 ;删vlan 2switch(config)#int f0/1 ;进入端口1switch(config-if)#switchport access vlan 2 ;当前端口加入vlan 2 switch(config-if)#switchport mode trunk ;设置为干线switch(config-if)#switchport trunk allowed vlan 1,2 ;设置允许的vlan switch(config-if)#switchport trunk encap dot1q ;设置vlan 中继switch(config)#vtp domain;设置发vtp域名switch(config)#vtp password;设置发vtp密码switch(config)#vtp mode server ;设置发vtp模式switch(config)#vtp mode client ;设置发vtp模式4.交换机设置IP地址:switch(config)#interface vlan 1 ;进入vlan 1switch(config-if)#ip address;设置IP地址switch(config)#ip default-gateway;设置默认网关switch#dir flash: ;查看闪存5.交换机显示命令:switch#write ;保存配置信息switch#show vtp ;查看vtp配置信息switch#show run ;查看当前配置信息switch#show vlan ;查看vlan配置信息switch#show interface ;查看端口信息switch#show int f0/0 ;查看指定端口信息【第二部分】路由器支持的命令:1.路由器显示命令:router#show run ;显示配置信息router#show interface ;显示接口信息router#show ip route ;显示路由信息router#show cdp nei ;显示邻居信息router#reload ;重新起动2.路由器口令设置:router>enable ;进入特权模式router#config terminal ;进入全局配置模式router(config)#hostname;设置交换机的主机名router(config)#enable secret xxx ;设置特权加密口令router(config)#enable password xxb ;设置特权非密口令router(config)#line console 0 ;进入控制台口router(config-line)#line vty 0 4 ;进入虚拟终端router(config-line)#login ;要求口令验证router(config-line)#password xx ;设置登录口令xx router(config)#(Ctrl+z) ;返回特权模式router#exit ;返回命令3.路由器配置:router(config)#int s0/0 ;进入Serail接口router(config-if)#no shutdown ;激活当前接口router(config-if)#clock rate 64000 ;设置同步时钟router(config-if)#ip address;设置IP地址router(config-if)#ip address second ;设置第二个IProuter(config-if)#int f0/0.1 ;进入子接口router(config-subif.1)#ip address;设置子接口IProuter(config-subif.1)#encapsulation dot1q;绑定vlan中继协议router(config)#config-register 0x2142 ;跳过配置文件router(config)#config-register 0x2102 ;正常使用配置文件router#reload ;重新引导4.路由器文件操作:router#copy running-config startup-config ;保存配置router#copy running-config tftp ;保存配置到tftprouter#copy startup-config tftp ;开机配置存到tftprouter#copy tftp flash: ;下传文件到flashrouter#copy tftp startup-config;下载配置文件ROM状态:Ctrl+Break ;进入ROM监控状态rommon>confreg 0x2142 ;跳过配置文件rommon>confreg 0x2102 ;恢复配置文件rommon>reset;重新引导rommon>copy xmodem: flash: ;从console传输文件rommon>IP_ADDRESS=10.65.1.2 ;设置路由器IP rommon>IP_SUBNET_MASK=255.255.0.0 ;设置路由器掩码rommon>TFTP_SERVER=10.65.1.1 ;指定TFTP服务器IP rommon>TFTP_FILE=c2600.bin ;指定下载的文件rommon>tftpdnld ;从tftp下载rommon>dir flash: ;查看闪存内容rommon>boot ;引导IOS5.静态路由:ip route;命令格式router(config)#ip route 2.0.0.0 255.0.0.0 1.1.1.2 ;静态路由举例router(config)#ip route 0.0.0.0 0.0.0.0 1.1.1.2 ;默认路由举例6.动态路由:router(config)#ip routing ;启动路由转发router(config)#router rip ;启动RIP路由协议。

锐捷路由器配置命令锐捷路由器配置命令本文档为锐捷路由器配置命令的详细说明,包括配置网络基本设置、构建静态路由、配置动态路由协议、设置访问控制列表等内容。
1·网络基本设置1·1 设置主机名命令:set hostname [hostname]说明:用于设置路由器的主机名。
1·2 设置管理口IP地质命令:set interface ip [interface] [ip_address/mask]说明:用于给指定接口设置IP地质。
1·3 设置网关命令:set ip route default [gateway]说明:用于配置默认网关。
2·静态路由配置2·1 添加静态路由命令:set ip route [destination_network] [mask] [nexthop]说明:用于手动添加静态路由。
2·2 删除静态路由命令:delete ip route [destination_network] [mask] [nexthop]说明:用于删除已配置的静态路由。
3·动态路由协议配置3·1 开启动态路由协议命令:router [protocol]说明:用于开启指定的动态路由协议。
3·2 配置邻居命令:set neighbor [interface] [ip_address]说明:用于配置与指定接口连接的邻居路由器的IP地质。
3·3 设置网络区域命令:set area [area_id]说明:用于设置本路由器所属的区域ID。
4·访问控制列表配置4·1 创建访问控制列表命令:access-list [acl_number] [permit/deny][source_address/mask] [destination_address/mask]说明:用于创建访问控制列表,并设置允许或禁止指定源地质和目的地质的流量通过。
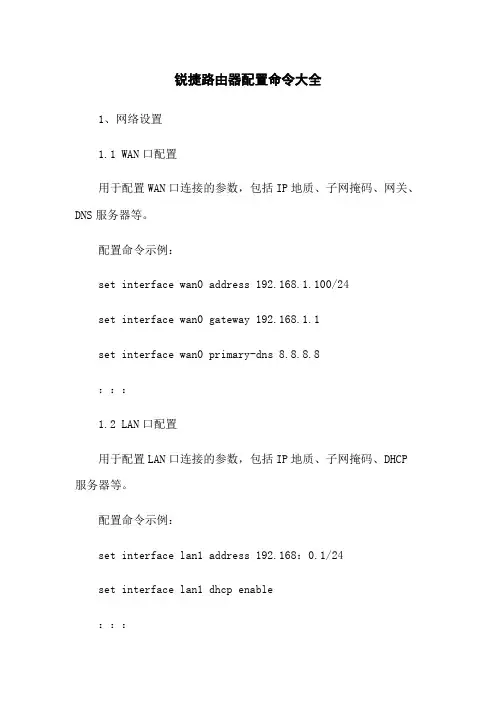
锐捷路由器配置命令大全1、网络设置1.1 WAN口配置用于配置WAN口连接的参数,包括IP地质、子网掩码、网关、DNS服务器等。
配置命令示例:set interface wan0 address 192.168.1.100/24set interface wan0 gateway 192.168.1.1set interface wan0 primary-dns 8.8.8.8:::1.2 LAN口配置用于配置LAN口连接的参数,包括IP地质、子网掩码、DHCP 服务器等。
配置命令示例:set interface lan1 address 192.168:0.1/24set interface lan1 dhcp enable:::1.3 VLAN配置用于配置VLAN,将不同的LAN口划分成不同的虚拟网络。
配置命令示例:set vlan vlan1 ports allset vlan vlan2 ports lan1,lan2:::2、安全设置2.1 密码设置用于设置路由器登录密码和特权密码。
配置命令示例:set system login user admin password encrypted 123456 set system login enable-password encrypted 654321:::2.2 ACL配置用于设置访问控制列表,限制某些IP地质或端口的访问。
配置命令示例:set access-list 1 permit ip 192.168:0:0/24 anyset access-list 2 deny tcp any any eq 22:::3、路由配置3.1 静态路由用于设置静态路由,手动指定下一跳地质。
配置命令示例:set static-route 0:0:0:0/0 next-hop 192.168.1.1:::3.2 动态路由用于配置动态路由协议,如RIP、OSPF、BGP等。
精!锐捷路由器配置命令大全,有案例分析一、路由器基本配置命令由远程终端登录路由器Red-Giant>enable ——由用户模式进入特权模式Password:****** ——输入密码Red-Giant#configure ——由特权模式进入全局配置模式Configuring from terminal, memory, or network [terminal]? t ——输入t继续Red-Giant(config)#hostname Router ——修改路由器名称配置接口IP地址Router(config)#interface fastethernet 0 ——进入以太网口0接口模式Router(config-if)#ip address 192.168.1.1 255.255.255.0 ——为其配置IP地址Router(config-if)#no shutdown ——启用配置Router(config-if)#exit ——退至配置模式Router(config)#interface fastethernet 1 ——进入以太网口0接口模式Router(config-if)#ip address 192.168.2.1 255.255.255.0 ——为其配置IP地址Router(config-if)#no shutdown ——启用配置Router(config-if)#exit ——退至配置模式Router(config)#interface serial 0 ——进入Serial 0 接口模式Router(config-if)#ip address 192.168.3.1 255.255.255.0 ——为其配置IP地址Router(config-if)#no shutdown ——启用配置Router(config-if)#exit ——退至配置模式Router(config)#interface serial 1 ——进入 Serial 1 接口模式Router(config-if)#ip address 192.168.4.1 255.255.255.0 ——为其配置IP地址Router(config-if)#no shutdown ——启用配置Router(config-if)#end ——退至特权模式Router#write ——保存配置信息Router(config)#interface loopback 0 ——新建Loopback 0Router(config-if)#ip add 10.10.1.1 255.255.255.0 ——为其配置IP地址Router(config-if)#int loopback 1 ——新建Loopback 1Router(config-if)#ip add 10.10.2.1 255.255.255.0 ——为其配置IP地址Router(config-if)#end——退至特权模式查看路由器相关配置信息Router#show ip interface brief ——查看配置状态Router#show version ——显示路由器版本信息Router#show ip interface fastethernet 0 ——查看以太网口0接口配置状态Router#show running-config——显示当前运行的配置参数Router#show startup-config——显示 NVRAM中中配置参数的副本Router#copy running-config startup-config ——将当前运行的配置参数复制到NVRAMRouter#erase startup-config——清空NVRAM中的配置参数Router#reload——重新启动路由器配置console 登陆密码Router(config)#line console 0Router(config-line)#loginRouter(config-line)#password star配置VTY登陆密码Router(config)#line vty 0 4Router(config-line)#loginRouter(config-line)#password star配置特权模式登录密码Router(config)#enable password star——配置明文密码Router(config)#enable secret star——配置的密码不能与 password 密码相同二、路由器密码丢失的处理方法1.关闭路由器,重新登录超级终端,按默认方法设置;2.启动路由器,不停地按Ctrl+Pause Break,直至出现Boot:提示符,输入 Setup-Reg;Boot:Setup-Reg3.出现如下提示信息,按“ Y”回车确认:Do you wish to change the configuration?y/n[n]:4.出现提示如下信息,按“ Y”回车确认:Enable“bypass the system configure file”y/n[n]:5.出现提示如下信息,按“ N”回车确认:Enable“debug mode?”y/n[n]:6.出现提示如下信息,按“ N”回车确认:Enable“user break/abort enabled?”y/n[n]:7.出现提示如下信息,按“ N”回车确认:Change console speed?y/n[n]:8.出现提示如下信息,按“ N”回车确认:Do you wish to change the configuration?y/n[n]:9.出现提示符“Boot:”,输入Reset;Boot:reset10.出现提示如下信息,按“ N”回车确认:Would you like to enter the initial configuration dialog?[Yes]: 此时密码及路由器信息被清除,你就可以顺利进入路由器了⋯⋯可以归纳为“Setup-Reg,两个Y五个N,Reset”。

[第一部分]交换机支持的命令:1.交换机基本状态:switch: ;ROM状态,路由器是rommon>hostname> ;用户模式hostname# ;特权模式hostname<config># ;全局配置模式hostname<config-if># ;接口状态2.交换机口令设置:switch>enable ;进入特权模式switch#config terminal ;进入全局配置模式switch<config>#hostname;设置交换机的主机名switch<config>#enable secret xxx ;设置特权加密口令switch<config>#enable password xxa ;设置特权非密口令switch<config>#line console 0 ;进入控制台口switch<config-line>#line vty 0 4 ;进入虚拟终端switch<config-line>#login ;允许登录switch<config-line>#password xx ;设置登录口令xxswitch#exit ;返回命令3.交换机VLAN设置:switch#vlan database ;进入VLAN设置switch<vlan>#vlan 2 ;建VLAN 2switch<vlan>#no vlan 2 ;删vlan 2switch<config>#int f0/1 ;进入端口1switch<config-if>#switchport access vlan 2 ;当前端口加入vlan 2switch<config-if>#switchport mode trunk ;设置为干线switch<config-if>#switchport trunk allowed vlan 1,2 ;设置允许的vlan switch<config-if>#switchport trunk encap dot1q ;设置vlan 中继switch<config>#vtp domain;设置发vtp域名switch<config>#vtp password;设置发vtp密码switch<config>#vtp mode server ;设置发vtp模式switch<config>#vtp mode client ;设置发vtp模式4.交换机设置IP地址:switch<config>#interface vlan 1 ;进入vlan 1switch<config-if>#ip address;设置IP地址switch<config>#ip default-gateway;设置默认网关switch#dir flash: ;查看闪存5.交换机显示命令:switch#write ;保存配置信息switch#show vtp ;查看vtp配置信息switch#show run ;查看当前配置信息switch#show vlan ;查看vlan配置信息switch#show interface ;查看端口信息switch#show int f0/0 ;查看指定端口信息[第二部分]路由器支持的命令:1.路由器显示命令:router#show run ;显示配置信息router#show interface ;显示接口信息router#show ip route ;显示路由信息router#show cdp nei ;显示邻居信息router#reload ;重新起动2.路由器口令设置:router>enable ;进入特权模式router#config terminal ;进入全局配置模式router<config>#hostname;设置交换机的主机名router<config>#enable secret xxx ;设置特权加密口令router<config>#enable password xxb ;设置特权非密口令router<config>#line console 0 ;进入控制台口router<config-line>#line vty 0 4 ;进入虚拟终端router<config-line>#login ;要求口令验证router<config-line>#password xx ;设置登录口令xx router<config>#<Ctrl+z> ;返回特权模式router#exit ;返回命令3.路由器配置:router<config>#int s0/0 ;进入Serail接口router<config-if>#no shutdown ;激活当前接口router<config-if>#clock rate 64000 ;设置同步时钟router<config-if>#ip address;设置IP地址router<config-if>#ip addresssecond ;设置第二个IP router<config-if>#int f0/0.1 ;进入子接口router<config-subif.1>#ip address;设置子接口IProuter<config-subif.1>#encapsulation dot1q;绑定vlan中继协议router<config>#config-register 0x2142 ;跳过配置文件router<config>#config-register 0x2102 ;正常使用配置文件router#reload ;重新引导4.路由器文件操作:router#copy running-config startup-config ;保存配置router#copy running-config tftp ;保存配置到tftprouter#copy startup-config tftp ;开机配置存到tftprouter#copy tftp flash: ;下传文件到flashrouter#copy tftp startup-config;下载配置文件ROM状态:Ctrl+Break ;进入ROM监控状态rommon>confreg 0x2142 ;跳过配置文件rommon>confreg 0x2102 ;恢复配置文件rommon>reset;重新引导rommon>copy xmodem: flash: ;从console传输文件rommon>IP_ADDRESS=10.65.1.2 ;设置路由器IPrommon>IP_SUBNET_MASK=255.255.0.0 ;设置路由器掩码rommon>TFTP_SERVER=10.65.1.1 ;指定TFTP服务器IPrommon>TFTP_FILE=c2600.bin ;指定下载的文件rommon>tftpdnld ;从tftp下载rommon>dir flash: ;查看闪存内容rommon>boot ;引导IOS5.静态路由:ip route;命令格式router<config>#ip route 2.0.0.0 255.0.0.0 1.1.1.2 ;静态路由举例router<config>#ip route 0.0.0.0 0.0.0.0 1.1.1.2 ;默认路由举例6.动态路由:router<config>#ip routing ;启动路由转发router<config>#router rip ;启动RIP路由协议.router<config-router>#network;设置发布路由router<config-router>#negihbor;点对点帧中继用.7.帧中继命令:router<config>#frame-relay switching ;使能帧中继交换router<config-s0>#encapsulation frame-relay ;使能帧中继router<config-s0>#fram-relay lmi-type cisco ;设置管理类型router<config-s0>#frame-relay intf-type DCE ;设置为DCE router<config-s0>#frame-relay dlci 16 ;router<config-s0>#frame-relay local-dlci 20 ;设置虚电路号router<config-s0>#frame-relay interface-dlci 16 ;router<config>#log-adjacency-changes ;记录邻接变化router<config>#int s0/0.1 point-to-point ;设置子接口点对点router#show frame pvc ;显示永久虚电路router#show frame map ;显示映射8.基本访问控制列表:router<config>#access-listpermit|denyrouter<config>#interface;default:deny anyrouter<config-if>#ip access-groupin|out ;defaultut例1:router<config>#access-list 4 permit 10.8.1.1router<config>#access-list 4 deny 10.8.1.0 0.0.0.255router<config>#access-list 4 permit 10.8.0.0 0.0.255.255 router<config>#access-list 4 deny 10.0.0.0 0.255.255.255 router<config>#access-list 4 permit anyrouter<config>#int f0/0router<config-if>#ip access-group 4 in9.扩展访问控制列表:access-listpermit|deny icmp[type]access-listpermit|deny tcp[port]例3:router<config>#access-list 101 deny icmp any 10.64.0.2 0.0.0.0 echorouter<config>#access-list 101 permit ip any anyrouter<config>#int s0/0router<config-if>#ip access-group 101 in例3:router<config>#access-list 102 deny tcp any 10.65.0.2 0.0.0.0 eq 80router<config>#access-list 102 permit ip any anyrouter<config>#interface s0/1router<config-if>#ip access-group 102 out10.删除访问控制例表:router<config>#no access-list 102router<config-if>#no ip access-group 101 in11.路由器的nat配置Router<config-if>#ip nat inside ;当前接口指定为内部接口Router<config-if>#ip nat outside ;当前接口指定为外部接口Router<config>#ip nat inside source static [p] [port]Router<config>#ip nat inside source static 10.65.1.2 60.1.1.1Router<config>#ip nat inside source static tcp 10.65.1.3 80 60.1.1.1 80Router<config>#ip nat pool p1 60.1.1.1 60.1.1.20 255.255.255.0Router<config>#ip nat inside source list 1 pool p1Router<config>#ip nat inside destination list 2 pool p2Router<config>#ip nat inside source list 2 interface s0/0 overloadRouter<config>#ip nat pool p2 10.65.1.2 10.65.1.4 255.255.255.0 type rotaryRouter#show ip nat translationrotary 参数是轮流的意思,地址池中的IP轮流与NAT分配的地址匹配.overload参数用于PAT 将内部IP映射到一个公网IP不同的端口上.12.外部网关协议配置:routerA<config>#router bgp 100routerA<config-router>#network 19.0.0.0routerA<config-router>#neighbor 8.1.1.2 remote-as 20013.配置PPP验证:RouterA<config>#usernamepasswordRouterA<config>#int s0RouterA<config-if>#ppp authentication {chap|pap}[第三部分]PIX防火墙命令Pix525<config>#nameif ethernet0 outside security0 ;命名接口和级别Pix525<config>#interface ethernet0 auto ;设置接口方式Pix525<config>#interface ethernet1 100full ;设置接口方式Pix525<config>#interface ethernet1 100full shutdownPix525<config>#ip address inside 192.168.0.1 255.255.255.0Pix525<config>#ip address outside 133.0.0.1 255.255.255.252Pix525<config>#global <if_name> natid ip-ip ;定义公网IP区间Pix525<config>#global <outside> 1 7.0.0.1-7.0.0.15 ;例句Pix525<config>#global <outside> 1 133.0.0.1 ;例句Pix525<config>#no global <outside> 1 133.0.0.1 ;去掉设置Pix525<config>#nat <if_name> nat_id local_ip [netmark]Pix525<config>#nat <inside> 1 0 0内网所有主机<0代表0.0.0.0>可以访问global 1指定的外网.Pix525<config>#nat <inside> 1 172.16.5.0 255.255.0.0内网网段的主机可以访问global 1指定的外网.Pix525<config>#route if_name 0 0 gateway_ip [metric] ;命令格式Pix525<config>#route outside 0 0 133.0.0.1 1 ;例句Pix525<config>#route inside 10.1.0.0 255.255.0.0 10.8.0.1 1 ;例句Pix525<config>#static <inside, outside> 133.0.0.1 192.168.0.8表示内部ip地址,访问外部时被翻译成全局地址.Pix525<config>#static <dmz, outside> 133.0.0.1 172.16.0.8中间区域ip地址,访问外部时被翻译成全局地址.。


命令描述Access-enable 创建一条临时的访问控制列表条目Access-template 创建一条临时的访问控制列表条目Appn 向APPN子系统发送一条命令Atmsig 执行有关ATM信令的命令B 手动引导操作系统Bandwidth 设置接口的带宽Banner motd 指定日期信息标语Bfe 设置手工紧急模式Boot system 指定路由器启动时加载的系统映象Calendar 管理硬件的日志Cd 改变妆当前的设备Cdp enable 允许接口运行CDP协议Clear 将变量清空Clear counters 消除接口计数器Clock 管理系统的时钟Clock rate 设置串口硬件接口连接时钟速率,如:网络接口模块、处理器能接收的速率Cmt 启动和停止FDDI连接管理Config-register 修改配置寄存器设置Configure 进入全局配置模式Configure memory 从NVRAM加载配置信息Configure terminal 从终端进行手动配置Connect 打开一个终端连接Copy 拷贝配置或映像数据Copy startup-config running-config 从NVRAM加载配置信息Copy flash ftp 备份系统映象文件到TFTP服务器Copy running-config startup-config 将RAM中的当前配置存储到NVRAMCopy running-config tftp 将RAM中的当前配置存储到网络TFTP服务器上Copy tftp flash 从TFTP服务器上下载新映象到FlashCopy tftp running-config 从TFTP服务器上下载配置文件Debug 使用调试功能(与unduebug相反)Delete 删除一个文件Dir 列出给定设备上的文件Disable 退出特模式Disconnect 关闭一个已经存在的网络连接Enable 进入特许模式Enable password 设置本地口令控制不同特权级别的访问Enable secret 为enable password命令定义额外一层的安全性Erase 擦除闪存(Flash)或存放配置文件的存储器中的内容Erase startup-config 删除NVRAM中的内容Exit 退出EXECFormat 格式化某个设备Help 获得关于IOS交互式帮助系统的描述History 查看历史记录Interface 配置接口类型和进入接口配置模式Ip address 设置一个接口地址和子网掩码并开始IP处理Ip default-network 建立一条缺省路由Ip domain-lookup 允许路由器缺省使用DNSIp host 定义静态主机名到IP地址映射Ip name-server 指定至多6个进行名字-地址解析的服务器地址Ip route 建立一条静态路由Lat 打开一个LAT连接Line 确定一个特定的线路和开始线路配置Lock 锁定终端Login 用特定的用户登录Logout 退出EXECMedia-type 定义介质类型Mbranch 沿树枝向下跟踪组播路由Mrbranch 沿树枝向上跟踪反向的组播路由Mrinfo 向组播路由器询问邻居和版本的信息Mstat 显示多次组播路由跟踪的统计信息Mtrace 跟踪从目的到源的反向组播路径Name-connection 为已经存在的连接命名Nica 启动/停止NCIA服务器Network 指定一个和路由器直接相连的网络地址段No shutdown 打开一个关闭的接口Pad 打开一个X.29 PAD连接Ping 发送echo消息Ppp 启动IETF点到协议(ppp)Pwd 显示当前的设备Reload 关机并执行冷启动Resume 继续一个活动的连接Rlogin 打开一个rlogin连接Router 由第一项的IP路由协议作为路由器进程,例如:router rip 是选择RIP作为路由协议Rsh 执行一个远程命令Sdlc 发送SDLC测试帧Send 在tty连接上发送消息Service password-encryption对所有的口令进行加密Setup 启动setup命令配置工具Show 显示运行系统的信息Show arp 显示路由器的IP到MAC(接口的)地址映射Show buffers 显示有关路由器缓冲空间统计信息Show cdp entry 显示CDP表中所列相邻设备的信息Show cdp interface 显示打开的CDP接口信息Show cdp neighbors 显示CDP查找进程的结果Show config Cisco IOS 13.0以前版本,现在由show startup-config 命令替换Show flash 显示闪存的布局和内容信息Show hosts 显示主机名和地址的缓存列表Show interface 显示路由器上进行了配置的所有端口的统计信息Show ip interface 列出接口的状态和全局参数Show ip protocols 显示活动路由协议进程的参数和当前状态Show ip route 显示IP路由表的信息Show memory 显示有关路由器内存的统计信息,包括空闲内存的大小Show processes 显示有关活动进程的信息Show protocols 显示已经配置的协议。
锐捷路由器命令全集锐捷路由器命令全集一、登录与基本设置1.1 登录路由器1.2 修改登录密码1.3 设置路由器主机名1.4 配置路由器IP地质1.5 设置路由器系统时钟二、网络接口配置2.1 查看接口信息2.2 配置接口IP地质2.3 激活接口2.4 关闭接口2.5 配置接口MTU2.6 绑定VLAN到接口三、静态路由配置3.1 添加静态路由3.2 查看静态路由3.3 删除静态路由四、动态路由配置4.1 配置OSPF路由4.2 配置BGP路由4.3 配置RIP路由五、ACL配置5.1 创建ACL规则5.2 绑定ACL到接口5.3 搜索并显示ACL规则5.4 删除ACL规则5.5 清除接口绑定的ACL规则六、NAT配置6.1 配置静态NAT6.2 配置动态NAT6.3 配置PAT6.4 查看NAT配置七、VPN配置7.1 配置IPSec VPN 7.2 配置L2TP VPN 7.3 配置PPTP VPN7.4 查看VPN连接八、QoS配置8.1 配置QoS策略8.2 查看QoS配置8.3 删除QoS配置九、系统与日志管理9.1 设置SSH登录9.2 设置Telnet登录9.3 配置SNMP9.4 配置日志记录9.5 查看系统状态9.6 查看日志信息9.7 清除日志信息附件:本文档涉及附件包括其他参考文档、配置示例文件等,详情请参见附件文件。
法律名词及注释:1、ACL (Access Control List):访问控制列表,用于控制网络中的访问权限。
2、NAT (Network Address Translation):网络地质转换,用于将内部网络的私有IP地质转换为公网IP地质。
3、VPN (Virtual Private Network):虚拟专用网络,用于建立安全的远程访问连接。
4、QoS (Quality of Service):服务质量,用于优化网络流量和资源分配。
5、OSPF (Open Shortest Path First):开放最短路径优先,一种内部网关协议用于路由选择。
(完整版)锐捷交换机命令大全【第一部分】交换机支持的命令:1.交换机基本状态:switch: ;ROM状态,路由器是rommon>hostname> ;用户模式hostname# ;特权模式hostname(config)# ;全局配置模式hostname(config-if)# ;接口状态2.交换机口令设置:switch>enable ;进入特权模式switch#config terminal ;进入全局配置模式switch(config)#hostname;设置交换机的主机名switch(config)#enable secret xxx ;设置特权加密口令switch(config)#enable password xxa ;设置特权非密口令switch(config)#line console 0 ;进入控制台口switch(config-line)#line vty 0 4 ;进入虚拟终端switch(config-line)#login ;允许登录switch(config-line)#password xx ;设置登录口令xxswitch#exit ;返回命令3.交换机VLAN设置:switch#vlan database ;进入VLAN设置switch(vlan)#vlan 2 ;建VLAN 2switch(vlan)#no vlan 2 ;删vlan 2switch(config)#int f0/1 ;进入端口1switch(config-if)#switchport access vlan 2 ;当前端口加入vlan 2 switch(config-if)#switchport mode trunk ;设置为干线switch(config-if)#switchport trunk allowed vlan 1,2 ;设置允许的vlan switch(config-if)#switchport trunk encap dot1q ;设置vlan 中继switch(config)#vtp domain;设置发vtp域名switch(config)#vtp password;设置发vtp密码switch(config)#vtp mode server ;设置发vtp模式switch(config)#vtp mode client ;设置发vtp模式4.交换机设置IP地址:switch(config)#interface vlan 1 ;进入vlan 1switch(config-if)#ip address;设置IP地址switch(config)#ip default-gateway;设置默认网关switch#dir flash: ;查看闪存5.交换机显示命令:switch#write ;保存配置信息switch#show vtp ;查看vtp配置信息switch#show run ;查看当前配置信息switch#show vlan ;查看vlan配置信息switch#show interface ;查看端口信息switch#show int f0/0 ;查看指定端口信息【第二部分】路由器支持的命令:1.路由器显示命令:router#show run ;显示配置信息router#show interface ;显示接口信息router#show ip route ;显示路由信息router#show cdp nei ;显示邻居信息router#reload ;重新起动2.路由器口令设置:router>enable ;进入特权模式router#config terminal ;进入全局配置模式router(config)#hostname;设置交换机的主机名router(config)#enable secret xxx ;设置特权加密口令router(config)#enable password xxb ;设置特权非密口令router(config)#line console 0 ;进入控制台口router(config-line)#line vty 0 4 ;进入虚拟终端router(config-line)#login ;要求口令验证router(config-line)#password xx ;设置登录口令xx router(config)#(Ctrl+z) ;返回特权模式router#exit ;返回命令3.路由器配置:router(config)#int s0/0 ;进入Serail接口router(config-if)#no shutdown ;激活当前接口router(config-if)#clock rate 64000 ;设置同步时钟router(config-if)#ip address;设置IP地址router(config-if)#ip address second ;设置第二个IProuter(config-if)#int f0/0.1 ;进入子接口router(config-subif.1)#ip address;设置子接口IProuter(config-subif.1)#encapsulation dot1q;绑定vlan中继协议router(config)#config-register 0x2142 ;跳过配置文件router(config)#config-register 0x2102 ;正常使用配置文件router#reload ;重新引导4.路由器文件操作:router#copy running-config startup-config ;保存配置router#copy running-config tftp ;保存配置到tftprouter#copy startup-config tftp ;开机配置存到tftprouter#copy tftp flash: ;下传文件到flashrouter#copy tftp startup-config;下载配置文件ROM状态:Ctrl+Break ;进入ROM监控状态rommon>confreg 0x2142 ;跳过配置文件rommon>confreg 0x2102 ;恢复配置文件rommon>reset;重新引导rommon>copy xmodem: flash: ;从console传输文件rommon>IP_ADDRESS=10.65.1.2 ;设置路由器IP rommon>IP_SUBNET_MASK=255.255.0.0 ;设置路由器掩码rommon>TFTP_SERVER=10.65.1.1 ;指定TFTP服务器IP rommon>TFTP_FILE=c2600.bin ;指定下载的文件rommon>tftpdnld ;从tftp下载rommon>dir flash: ;查看闪存内容rommon>boot ;引导IOS5.静态路由:ip route;命令格式router(config)#ip route 2.0.0.0 255.0.0.0 1.1.1.2 ;静态路由举例router(config)#ip route 0.0.0.0 0.0.0.0 1.1.1.2 ;默认路由举例6.动态路由:router(config)#ip routing ;启动路由转发router(config)#router rip ;启动RIP路由协议。
锐捷路由器配置命令大全本文档为锐捷路由器配置命令大全,旨在帮助用户详细了解锐捷路由器的各项配置命令。
本文档涉及附件,包括示例配置文件和图示等内容,可供用户参考使用。
以下为锐捷路由器配置命令大全的章节内容:1.系统管理命令1.1 登录和退出命令1.2 配置保存和加载命令1.3 系统信息查看命令2.接口配置命令2.1 物理接口配置命令2.2 逻辑接口配置命令2.3 VLAN配置命令3.路由配置命令3.1 静态路由配置命令3.2 动态路由配置命令3.3 路由策略配置命令4.安全配置命令4.1 访问控制列表(ACL)配置命令 4.2 防火墙配置命令4.3 NAT配置命令5.VPN配置命令5.1 IPsec VPN配置命令5.2 SSL VPN配置命令5.3 L2TP VPN配置命令6.DHCP配置命令6.1 DHCP服务器配置命令6.2 DHCP中继配置命令6.3 DHCP Snooping配置命令7.QoS配置命令7.1 接口限速配置命令7.2 优先级映射配置命令7.3 流量控制配置命令8.网络管理命令8.1 Ping命令8.2 Traceroute命令8.3 Telnet和SSH配置命令9.系统日志命令9.1 日志级别配置命令9.2 日志过滤配置命令9.3 日志查看命令以上是锐捷路由器配置命令大全的详细章节内容。
本文所涉及的法律名词及注释:1.ACL(Access Control List):用于控制网络流量的集中管理机制,通过定义一系列规则,限制网络中特定主机或网络的访问权限。
2.NAT(Network Address Translation):通过将一个IP地质转换为另一个IP地质的技术,将内部网络中的私有IP地质映射为外部网络中的公共IP地质,实现网络通信与资源共享。
3.IPsec(Internet Protocol Security):一种用于确保数据安全传输的协议套件,提供加密、认证和完整性保护等功能。
【第一部分】交换机支持的命令:1.交换机基本状态:switch: ;ROM状态,路由器是rommon>hostname> ;用户模式hostname# ;特权模式hostname(config)# ;全局配置模式hostname(config-if)# ;接口状态2.交换机口令设置:switch>enable ;进入特权模式switch#config terminal ;进入全局配置模式switch(config)#hostname;设置交换机的主机名switch(config)#enable secret xxx ;设置特权加密口令switch(config)#enable password xxa ;设置特权非密口令switch(config)#line console 0 ;进入控制台口switch(config-line)#line vty 0 4 ;进入虚拟终端switch(config-line)#login ;允许登录switch(config-line)#password xx ;设置登录口令xxswitch#exit ;返回命令3.交换机VLAN设置:switch#vlan database ;进入VLAN设置switch(vlan)#vlan 2 ;建VLAN 2switch(vlan)#no vlan 2 ;删vlan 2switch(config)#int f0/1 ;进入端口1switch(config-if)#switchport access vlan 2 ;当前端口加入vlan 2 switch(config-if)#switchport mode trunk ;设置为干线switch(config-if)#switchport trunk allowed vlan 1,2 ;设置允许的vlan switch(config-if)#switchport trunk encap dot1q ;设置vlan 中继switch(config)#vtp domain;设置发vtp域名switch(config)#vtp password;设置发vtp密码switch(config)#vtp mode server ;设置发vtp模式switch(config)#vtp mode client ;设置发vtp模式4.交换机设置IP地址:switch(config)#interface vlan 1 ;进入vlan 1switch(config-if)#ip address;设置IP地址switch(config)#ip default-gateway;设置默认网关switch#dir flash: ;查看闪存5.交换机显示命令:switch#write ;保存配置信息switch#show vtp ;查看vtp配置信息switch#show run ;查看当前配置信息switch#show vlan ;查看vlan配置信息switch#show interface ;查看端口信息switch#show int f0/0 ;查看指定端口信息【第二部分】路由器支持的命令:1.路由器显示命令:router#show run ;显示配置信息router#show interface ;显示接口信息router#show ip route ;显示路由信息router#show cdp nei ;显示邻居信息router#reload ;重新起动2.路由器口令设置:router>enable ;进入特权模式router#config terminal ;进入全局配置模式router(config)#hostname;设置交换机的主机名router(config)#enable secret xxx ;设置特权加密口令router(config)#enable password xxb ;设置特权非密口令router(config)#line console 0 ;进入控制台口router(config-line)#line vty 0 4 ;进入虚拟终端router(config-line)#login ;要求口令验证router(config-line)#password xx ;设置登录口令xx router(config)#(Ctrl+z) ;返回特权模式router#exit ;返回命令3.路由器配置:router(config)#int s0/0 ;进入Serail接口router(config-if)#no shutdown ;激活当前接口router(config-if)#clock rate 64000 ;设置同步时钟router(config-if)#ip address;设置IP地址router(config-if)#ip address second ;设置第二个IProuter(config-if)#int f0/0.1 ;进入子接口router(config-subif.1)#ip address;设置子接口IProuter(config-subif.1)#encapsulation dot1q;绑定vlan中继协议router(config)#config-register 0x2142 ;跳过配置文件router(config)#config-register 0x2102 ;正常使用配置文件router#reload ;重新引导4.路由器文件操作:router#copy running-config startup-config ;保存配置router#copy running-config tftp ;保存配置到tftprouter#copy startup-config tftp ;开机配置存到tftprouter#copy tftp flash: ;下传文件到flashrouter#copy tftp startup-config;下载配置文件ROM状态:Ctrl+Break ;进入ROM监控状态rommon>confreg 0x2142 ;跳过配置文件rommon>confreg 0x2102 ;恢复配置文件rommon>reset;重新引导rommon>copy xmodem: flash: ;从console传输文件rommon>IP_ADDRESS=10.65.1.2 ;设置路由器IP rommon>IP_SUBNET_MASK=255.255.0.0 ;设置路由器掩码rommon>TFTP_SERVER=10.65.1.1 ;指定TFTP服务器IP rommon>TFTP_FILE=c2600.bin ;指定下载的文件rommon>tftpdnld ;从tftp下载rommon>dir flash: ;查看闪存内容rommon>boot ;引导IOS5.静态路由:ip route;命令格式router(config)#ip route 2.0.0.0 255.0.0.0 1.1.1.2 ;静态路由举例router(config)#ip route 0.0.0.0 0.0.0.0 1.1.1.2 ;默认路由举例6.动态路由:router(config)#ip routing ;启动路由转发router(config)#router rip ;启动RIP路由协议。
锐捷交换机命令大全【第一部分】交换机支持的命令:1.交换机基本状态:switch: ;ROM状态,路由器是rommon>hostname> ;用户模式hostname# ;特权模式hostname(config)# ;全局配置模式hostname(config-if)# ;接口状态2.交换机口令设置:switch>enable ;进入特权模式switch#config terminal ;进入全局配置模式switch(config)#hostname;设置交换机的主机名switch(config)#enable secret xxx ;设置特权加密口令switch(config)#enable password xxa ;设置特权非密口令switch(config)#line console 0 ;进入控制台口switch(config-line)#line vty 0 4 ;进入虚拟终端switch(config-line)#login ;允许登录switch(config-line)#password xx ;设置登录口令xxswitch#exit ;返回命令3.交换机VLAN设置:switch#vlan database ;进入VLAN设置switch(vlan)#vlan 2 ;建VLAN 2switch(vlan)#no vlan 2 ;删vlan 2switch(config)#int f0/1 ;进入端口1switch(config-if)#switchport access vlan 2 ;当前端口加入vlan 2 switch(config-if)#switchport mode trunk ;设置为干线switch(config-if)#switchport trunk allowed vlan 1,2 ;设置允许的vlan switch(config-if)#switchport trunk encap dot1q ;设置vlan 中继switch(config)#vtp domain;设置发vtp域名switch(config)#vtp password;设置发vtp密码switch(config)#vtp mode server ;设置发vtp模式switch(config)#vtp mode client ;设置发vtp模式4.交换机设置IP地址:switch(config)#interface vlan 1 ;进入vlan 1switch(config-if)#ip address;设置IP地址switch(config)#ip default-gateway;设置默认网关switch#dir flash: ;查看闪存5.交换机显示命令:switch#write ;保存配置信息switch#show vtp ;查看vtp配置信息switch#show run ;查看当前配置信息switch#show vlan ;查看vlan配置信息switch#show interface ;查看端口信息switch#show int f0/0 ;查看指定端口信息【第二部分】路由器支持的命令:1.路由器显示命令:router#show run ;显示配置信息router#show interface ;显示接口信息router#show ip route ;显示路由信息router#show cdp nei ;显示邻居信息router#reload ;重新起动2.路由器口令设置:router>enable ;进入特权模式router#config terminal ;进入全局配置模式router(config)#hostname;设置交换机的主机名router(config)#enable secret xxx ;设置特权加密口令router(config)#enable password xxb ;设置特权非密口令router(config)#line console 0 ;进入控制台口router(config-line)#line vty 0 4 ;进入虚拟终端router(config-line)#login ;要求口令验证router(config-line)#password xx ;设置登录口令xx router(config)#(Ctrl+z) ;返回特权模式router#exit ;返回命令3.路由器配置:router(config)#int s0/0 ;进入Serail接口router(config-if)#no shutdown ;激活当前接口router(config-if)#clock rate 64000 ;设置同步时钟router(config-if)#ip address;设置IP地址router(config-if)#ip address second ;设置第二个IProuter(config-if)#int f0/0.1 ;进入子接口router(config-subif.1)#ip address;设置子接口IProuter(config-subif.1)#encapsulation dot1q;绑定vlan中继协议router(config)#config-register 0x2142 ;跳过配置文件router(config)#config-register 0x2102 ;正常使用配置文件router#reload ;重新引导4.路由器文件操作:router#copy running-config startup-config ;保存配置router#copy running-config tftp ;保存配置到tftprouter#copy startup-config tftp ;开机配置存到tftprouter#copy tftp flash: ;下传文件到flashrouter#copy tftp startup-config;下载配置文件ROM状态:Ctrl+Break ;进入ROM监控状态rommon>confreg 0x2142 ;跳过配置文件rommon>confreg 0x2102 ;恢复配置文件rommon>reset;重新引导rommon>copy xmodem: flash: ;从console传输文件rommon>IP_ADDRESS=10.65.1.2 ;设置路由器IPrommon>IP_SUBNET_MASK=255.255.0.0 ;设置路由器掩码rommon>TFTP_SERVER=10.65.1.1 ;指定TFTP服务器IP rommon>TFTP_FILE=c2600.bin ;指定下载的文件rommon>tftpdnld ;从tftp下载rommon>dir flash: ;查看闪存内容rommon>boot ;引导IOS5.静态路由:ip route;命令格式router(config)#ip route 2.0.0.0 255.0.0.0 1.1.1.2 ;静态路由举例router(config)#ip route 0.0.0.0 0.0.0.0 1.1.1.2 ;默认路由举例6.动态路由:router(config)#ip routing ;启动路由转发router(config)#router rip ;启动RIP路由协议。
>Enable 进入特权模式#Exit 返回上一级操作模式#End 返回到特权模式#write memory 或copy running-config startup-config 保存配置文件#del flash:config.text 删除配置文件(交换机及1700系列路由器)#erase startup-config 删除配置文件(2500系列路由器)#del flash:vlan.dat 删除Vlan配置信息(交换机)#Configure terminal 进入全局配置模式(config)# hostname switchA 配置设备名称为switchA(config)#banner motd & 配置每日提示信息&为终止符(config)#enable secret level 1 0 star 配置远程登陆密码为star(config)#enable secret level 15 0 star 配置特权密码为starLevel 1为普通用户级别,可选为1~15,15为最高权限级别;0表示密码不加密(config)#enable services web-server 开启交换机WEB管理功能Services 可选以下:web-server(WEB管理)、telnet-server(远程登陆)等查看信息#show running-config 查看当前生效的配置信息#show interface fastethernet 0/3 查看F0/3端口信息#show interface serial 1/2 查看S1/2端口信息#show interface 查看所有端口信息#show ip interface brief 以简洁方式汇总查看所有端口信息#show ip interface 查看所有端口信息#show version 查看版本信息#show mac-address-table 查看交换机当前MAC地址表信息#show running-config 查看当前生效的配置信息#show vlan 查看所有VLAN信息#show vlan id 10 查看某一VLAN (如VLAN10)的信息#show interface fastethernet 0/1 switchport 查看某一端口模式(如F 0/1)#show aggregateport 1 summary 查看聚合端口AG1的信息#show spanning-tree 查看生成树配置信息#show spanning-tree interface fastethernet 0/1 查看该端口的生成树状态#show port-security 查看交换机的端口安全配置信息#show port-security address 查看地址安全绑定配置信息#show ip access-lists listname 查看名为listname的列表的配置信息#show access-lists端口的基本配置(config)#Interface fastethernet 0/3 进入F0/3的端口配置模式(config)#interface range fa 0/1-2,0/5,0/7-9 进入F0/1、F0/2、F0/5、F0/7、F0/8、F0/9的端口配置模式(config-if)#speed 10 配置端口速率为10M,可选10,100,auto(config-if)#duplex full 配置端口为全双工模式,可选full(全双工),half(半双式),auto(自适应)(config-if)#no shutdown 开启该端口(config-if)#switchport access vlan 10 将该端口划入VLAN10中,用于VLAN(config-if)#switchport mode trunk 将该端口设为trunk模式,用于Tag vlan可选模式为access , trunk(config-if)#port-group 1 将该端口划入聚合端口AG1中,用于聚合端口聚合端口的创建(config)# interface aggregateport 1 创建聚合接口AG1(config-if)# switchport mode trunk 配置并保证AG1为trunk 模式(config)#int f0/23-24(config-if-range)#port-group 1 将端口(端口组)划入聚合端口AG1中生成树(config)#spanning-tree 开启生成树协议(config)#spanning-tree mode stp 指定生成树类型为stp可选模式stp , rstp , mstp(config)#spanning-tree priority 4096 设置交换机的优先级为4096 , 优先级值小为高。
优先级可选值为0,4096,8192,……,为4096的倍数。
交换机默认值为32768VLAN的基本配置(config)#vlan 10 创建VLAN10(config-vlan)#name vlanname 命名VLAN为vlanname(config-if)#switchport access vlan 10 将该端口划入VLAN10中某端口的接口配置模式下进行(config)#interface vlan 10 进入VLAN 10的虚拟端口配置模式(config-if)# ip address 192.168.1.1 255.255.255.0 为VLAN10的虚拟端口配置IP及掩码,二层交换机只能配置一个IP,此IP是作为管理IP使用,例如,使用Telnet的方式登录的IP 地址(config-if)# no shutdown 启用该端口端口安全(config)# interface fastethernet 0/1 进入一个端口(config-if)# switchport port-security 开启该端口的安全功能1.配置最大连接数限制(config-if)# switchport port-secruity maxmum 1 配置端口的最大连接数为1,最大连接数为128(config-if)# switchport port-secruity violation shutdown配置安全违例的处理方式为shutdown,可选为protect (当安全地址数满后,将未知名地址丢弃)、restrict(当违例时,发送一个Trap通知)、shutdown(当违例时将端口关闭,并发送Trap通知,可在全局模式下用errdisable recovery来恢复)2.IP和MAC地址绑定(config-if)#switchport port-security mac-address xxxx.xxxx.xxxx ip-address 172.16.1.1接口配置模式下配置MAC地址xxxx.xxxx.xxxx和IP172.16.1.1进行绑定(MAC地址注意用小写)三层路由功能(针对三层交换机)(config)# ip routing 开启三层交换机的路由功能(config)# interface fastethernet 0/1(config-if)# no switchport 开启端口的三层路由功能(这样就可以为某一端口配置IP)(config-if)# ip address 192.168.1.1 255.255.255.0(config-if)# no shutdown三层交换机路由协议(config)# ip route 172.16.1.0 255.255.255.0 172.16.2.1 配置静态路由注:172.16.1.0 255.255.255.0 为目标网络的网络号及子网掩码172.16.2.1 为下一跳的地址,也可用接口表示,如ip route 172.16.1.0 255.255.255.0 serial 1/2(172.16.2.0所接的端口)(config)# router rip 开启RIP协议进程(config-router)# network 172.16.1.0 申明本设备的直连网段信息(config-router)# version 2 开启RIP V2,可选为version 1(RIPV1)、version 2(RIPV2)(config-router)# no auto-summary 关闭路由信息的自动汇总功能(只有在RIPV2支持)(config)# router ospf 开启OSPF路由协议进程(针对1762,无需使用进程ID)(config)# router ospf 1 开启OSPF路由协议进程(针对2501,需要加OSPF进程ID)(config-router)# network 192.168.1.0 0.0.0.255 area 0申明直连网段信息,并分配区域号(area0为骨干区域)IP ACL:交换机采用命名的访问控制列表;分标准(stand)和扩展(extended)两种1.标准ACL(config)#ip access-list stand listname 定义命名标准列表,命名为listname,stand为标准列表(config-std-nacl)#deny 192.168.30.0 0.0.0.255 拒绝来自192.168.30.0网段的IP流量通过注:deny:拒绝通过;可选:deny(拒绝通过)、permit(允许通过)192.168.30.0 0.0.0.255:源地址及源地址通配符;可使用any表示任何IP(config-std-nacl)#permit any(config-std-nacl)#end 返回2.扩展ACL(config)#ip access-list extended listname定义命名扩展列表,命名为listname,extended为扩展(config-ext-nacl)#deny tcp 192.168.30.0 0.0.0.255 192.168.10.0 0.0.0.255 eq www 拒绝源地址为192.168.30.0网段的IP访问目的地址为192.168.10.0网段的WWW服务注:deny:拒绝通过,可选:deny(拒绝通过)、permit(允许通过)tcp: 协议名称,协议可以是udp, ip,eigrp, gre, icmp, igmp, igrp等等。
192.168.10.0 0.0.0.255:源地址及源地址通配符192.168.30.0 0.0.0.255:目的地址及目的地址通配符eq:操作符(lt-小于,eq-等于,gt-大于,neg-不等于,range-包含)www:端口号,可使用名称或具体编号可以使用的协议名称(或编号)和端口名称(或编号)请打?查询。