ios UITextView的placeHolder的设置
- 格式:doc
- 大小:102.05 KB
- 文档页数:15
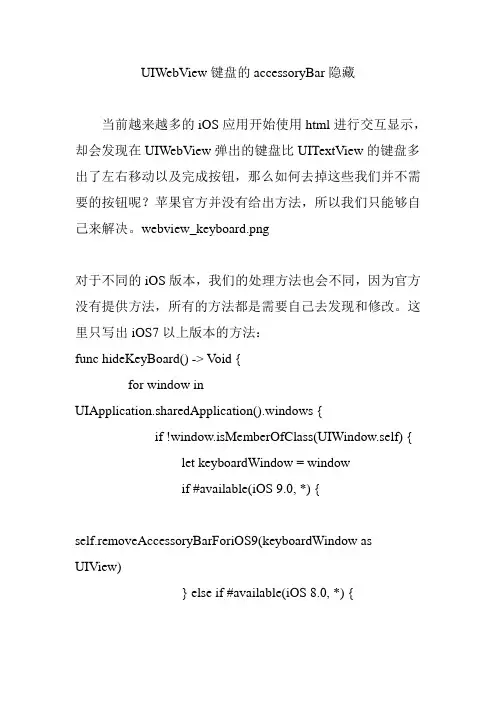
UIWebView键盘的accessoryBar隐藏当前越来越多的iOS应用开始使用html进行交互显示,却会发现在UIWebView弹出的键盘比UITextView的键盘多出了左右移动以及完成按钮,那么如何去掉这些我们并不需要的按钮呢?苹果官方并没有给出方法,所以我们只能够自己来解决。
webview_keyboard.png对于不同的iOS版本,我们的处理方法也会不同,因为官方没有提供方法,所有的方法都是需要自己去发现和修改。
这里只写出iOS7以上版本的方法:func hideKeyBoard() -> V oid {for window inUIApplication.sharedApplication().windows {if !window.isMemberOfClass(UIWindow.self) {let keyboardWindow = windowif #available(iOS 9.0, *) {self.removeAccessoryBarForiOS9(keyboardWindow as UIView)} else if #available(iOS 8.0, *) {self.removeAccessoryBarForiOS8(keyboardWindow as UIView)} else {self.removeAccessoryBarForiOS7(keyboardWindow as UIView)}}}if #available(iOS 9.0, *) {self.removeAccessoryBarForiOS9(UIApplication.sharedApplica tion()st! as UIView)}}funcremoveAccessoryBarForiOS9(keyboardWindow:UIView) ->V oid {for possibleFormView:UIView in keyboardWindow.subviews {ifpossibleFormView.isMemberOfClass(NSClassFromString("UII nputSetContainerView")!) {for subviewOfInputSetContainerView in possibleFormView.subviews {if subviewOfInputSetContainerView.isMemberOfClass(NSClassFr omString("UIInputSetHostView")!) {for subviewOfInputSetHostView in subviewOfInputSetContainerView.subviews {// 隐藏工具条NSClassFromStringif subviewOfInputSetHostView.isMemberOfClass(NSClassFromS tring("UIWebFormAccessory")!) {yer.opacity = 0subviewOfInputSetHostView.frame = CGRectZero} else if (subviewOfInputSetHostView.isMemberOfClass(NSClassFrom String("_UIRemoteKeyboardPlaceholderView")!)) {yer.opacity = 0subviewOfInputSetHostView.frame = CGRectZero// 这里使用了私有方法获取对应的accessorBar,然后进行隐藏var accessory = subviewOfInputSetHostView.performSelector(Selector("placehe ldView")).takeRetainedValue()ifaccessory.isMemberOfClass(NSClassFromString("UIWebForm Accessory")!) {let accessory = accessory as! UIViewyer.opacity = 0accessory.frame = CGRectZero}}// 键盘背景,UIKBInputBackdropView有两个只隐藏上面的else if subviewOfInputSetHostView.isMemberOfClass(NSClassFromS tring("UIKBInputBackdropView")!) && subviewOfInputSetHostView.frame.size.height < 100 {yer.opacity = 0erInteractionEnabled = false}}}}}}}funcremoveAccessoryBarForiOS8(keyboardWindow:UIView) -> V oid {for possibleFormView:UIView in keyboardWindow.subviews {ifpossibleFormView.isMemberOfClass(NSClassFromString("UII nputSetContainerView")!) {for subviewOfInputSetContainerView in possibleFormView.subviews {if subviewOfInputSetContainerView.isMemberOfClass(NSClassFr omString("UIInputSetHostView")!) {for subviewOfInputSetHostView in subviewOfInputSetContainerView.subviews {// 隐藏工具条if subviewOfInputSetHostView.isMemberOfClass(NSClassFromS tring("UIWebFormAccessory")!) {yer.opacity = 0subviewOfInputSetHostView.frame = CGRectZero}// 键盘背景, UIKBInputBackdropView有两个只隐藏上面的else ifsubviewOfInputSetHostView.isMemberOfClass(NSClassFromS tring("UIKBInputBackdropView")!) && subviewOfInputSetHostView.frame.size.height < 100 {yer.opacity = 0erInteractionEnabled = false}}}}}}}funcremoveAccessoryBarForiOS7(keyboardWindow:UIView) -> V oid {for possibleFormView:UIView in keyboardWindow.subviews {ifpossibleFormView.isMemberOfClass(NSClassFromString("UIPeripheralHostView")!) {for subviewOfPeripheralHostView in possibleFormView.subviews {// 隐藏工具条if subviewOfPeripheralHostView.isMemberOfClass(NSClassFrom String("UIWebFormAccessory")!) {yer.opacity = 0subviewOfPeripheralHostView.frame = CGRectZero}// 键盘背景, UIKBInputBackdropView有两个只隐藏上面的else if subviewOfPeripheralHostView.isMemberOfClass(NSClassFrom String("UIKBInputBackdropView")!) && subviewOfPeripheralHostView.frame.size.height < 100 {yer.opacity = 0erInteractionEnabled = false}}}}}实际中,隐藏键盘accessory后的样子如下图:webview_keyboard_hideaccessory.png需要注意的是,在示例代码使用设置layer透明,frame为空来进行隐藏,而不使用removeFromSuperView,是因为使用了removeFromSuperView,在键盘重新布局时会导致crash。
iOS开发中的常用控件介绍与使用一、导语iOS开发中,控件是构建界面的基本单位,它们可以让我们更加方便地与用户进行交互。
本文将介绍iOS开发中常用的控件,以及它们的使用方法和注意事项。
二、标签(Label)标签是iOS界面中最简单的控件之一,用于显示一段文本。
我们通常使用UILabel类来创建和管理标签。
通过设置UILabel的属性,我们可以改变标签的字体、颜色、对齐方式等。
三、按钮(Button)按钮是iOS界面中常见的交互控件,用于响应用户的点击事件。
UIButton类可以创建各种样式的按钮,如矩形按钮、圆形按钮等。
我们可以通过UIButton的监听事件,实现按钮点击后的相应操作。
四、文本框(TextField)文本框用于接收用户输入的文本信息。
我们可以使用UITextField类创建一个文本框,并设置其样式和代理。
通过UITextField的代理方法,我们可以监听文本框的各种事件,如开始编辑、结束编辑等。
五、图片视图(ImageView)图片视图用于显示图片资源,可以通过UIImageView类来创建和管理。
我们可以通过设置UIImageView的属性,实现图片的缩放、旋转等效果。
此外,UIImageView还支持从网络加载图片,并提供了缓存功能。
六、滑动视图(ScrollView)滑动视图是一种特殊的容器控件,可以滚动显示其中的内容。
使用UIScrollView类,我们可以创建一个可滚动的视图,并设置其内容大小和滚动范围。
通过UIScrollView的代理方法,我们可以监听滚动事件,实现自定义的滚动效果。
七、表格视图(TableView)表格视图是iOS中常用的列表控件,适用于展示有序的多条数据。
UITableView类可以创建一个表格视图,并设置其数据源和代理。
我们可以通过UITableView的代理方法,实现表格的行数、样式、编辑等自定义操作。
八、选择器(Picker)选择器用于用户在有限的选项中进行选择,常见的使用场景包括日期选择、城市选择等。
iPhone iOS平台视觉规范说明书目录1.创建优秀的用户界面 (7)2.视图VIEW (5)2.1状态栏STATUS BAR (5)2.2导航栏NAVIGATION BAR (6)2.3页签栏TAB BAR (9)2.4工具栏TOOL BAR (7)2.6分类表格视图TABLE VIEWS .......................................................... 错误!未定义书签。
3.控件CONTROL (14)3.1控制类CONTROLS (14)3.2按钮类BUTTONS ........................................................................... 错误!未定义书签。
3.3选择器类PICKERS (16)3.4搜索类SEARCH (17)3.5提示类ALERTS ............................................................................... 错误!未定义书签。
3.6文本域类TEXT FIELDS (20)4.界面INTERFACE (20)4.1启动图像SPLASH (20)4.2登录页面LOGIN PAGE (22)4.3说明页面TEXT PAGE (24)5.图形GRAPHICS (26)5.1应用程序图标APPLICATION ICON (26)5.2系统图标STANDARD ICON (27)5.3自定义图标CUSTOM ICON (29)6.截图SCREENSHOTS (32)7.命名NAMING RULES (33)8.平台特点 (33)1.引言IntroductioniPhone OS平台应用的视觉设计应遵循相应的平台特性与设计规范,保持不同应用产品在同一平台的整体性与一致性。
此文档作为iPhone OS平台应用开发的视觉基础规范,整体全面的介绍了常用系统控件,规范了演变后的自绘视图尺寸及标准,为视觉设计提供了很好的参考和借鉴。
认识input输⼊框的placeholder属性我们来认识下input输⼊框的placeholder属性。
placeholder 属性提供可描述输⼊字段预期值的提⽰信息。
(placeholder 属性适⽤于以下的 <input> 类型:text, search, url, telephone, email 以及password)该提⽰会在输⼊字段为空时显⽰,并会在字段获得焦点时消失(IE10+获取焦点消失,Chrome,FF等在输⼊有值时消失)。
IE10+,Chrome,Firefox,Safari⽀持placeholder属性(IE6/7/8/9不⽀持)。
在页⾯显⽰类似:html代码:为了让IE6/7/8/9⽀持placeholder属性,我说说⾃⼰解决⽅法。
⾸先判断浏览器是否⽀持placeholder属性。
var isSupport = function(){return 'placeholder' in document.createElement('input');} 如果不⽀持,其中分两种情况: 如果是密码框(type="password"),就创建⼀个类似的input标签并且设置(type="text"),把原来有placeholder属性的input标签隐藏,并且把placeholder的值赋给新建的input标签,最后把新建的input标签插⼊到原来的input标签后⾯。
if(input.type == 'password'){var newInput = document.createElement('input');newInput.type = 'text';newInput.value = input.placeholder;input.style.display = none;input.parentNode.insertBefore(newInput,input.nextSibling);} 如果是⼀般⽂本框(type="text")或者其他类型 search, url, telephone, email,就设置input的值等于placeholder属性的值。
placeholder的使⽤1.定义placeholder 属性提供可描述输⼊字段预期值的提⽰信息该提⽰会在输⼊字段为空时显⽰,并会在字段获得焦点时消失。
注释:placeholder 属性适⽤于以下的 <input> 类型:text, search, url, telephone, email 以及 password。
2.⽤法<input type="password" name="user_search" placeholder="Search W3School" />3.缩进::-webkit-input-placeholder {text-indent: 4px;}:-ms-input-placeholder {text-indent: 4px;}::-moz-placeholder {text-indent: 4px;opacity: 1!important;}input:focus::-webkit-input-placeholder {color: #999;border-color:#999;}4.低版本兼容思路:4.1 判断浏览器是否⽀持该元素return 'placeholder' in document.createElement('input');4.2 遍历⽂档所有带 placeholder 属性的 input$(':input[placeholder]').each(function (index, element) {})4.3 判断是否是 password 类型return type.toLowerCase() === 'password';4.4 针对每个匹配元素绑定事件 focus、blur、keydown...总结:不同浏览器上展现效果不尽相同,模仿达到产品需求即可。
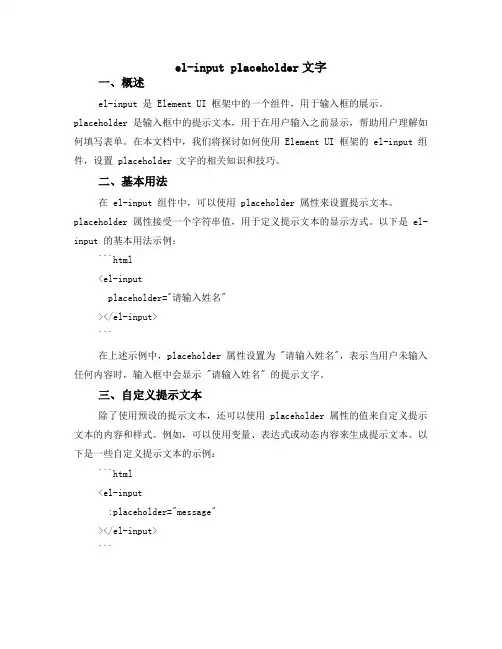
el-input placeholder文字一、概述el-input 是 Element UI 框架中的一个组件,用于输入框的展示。
placeholder 是输入框中的提示文本,用于在用户输入之前显示,帮助用户理解如何填写表单。
在本文档中,我们将探讨如何使用 Element UI 框架的 el-input 组件,设置 placeholder 文字的相关知识和技巧。
二、基本用法在 el-input 组件中,可以使用 placeholder 属性来设置提示文本。
placeholder 属性接受一个字符串值,用于定义提示文本的显示方式。
以下是 el-input 的基本用法示例:```html<el-inputplaceholder="请输入姓名"></el-input>```在上述示例中,placeholder 属性设置为 "请输入姓名",表示当用户未输入任何内容时,输入框中会显示 "请输入姓名" 的提示文字。
三、自定义提示文本除了使用预设的提示文本,还可以使用 placeholder 属性的值来自定义提示文本的内容和样式。
例如,可以使用变量、表达式或动态内容来生成提示文本。
以下是一些自定义提示文本的示例:```html<el-input:placeholder="message"></el-input>```在上述示例中,我们将 placeholder 属性的值绑定到了 Vue 组件的数据对象中的 message 属性上,可以根据实际需求动态更新提示文本。
此外,还可以使用 v-bind 指令或插值表达式来动态设置 placeholder 属性值。
例如:```html<el-input v-bind:placeholder="condition ? '输入内容' : ''"></el-input>```上述示例中,placeholder 属性的值根据条件动态变化,当条件满足时显示"输入内容",否则显示空字符串。
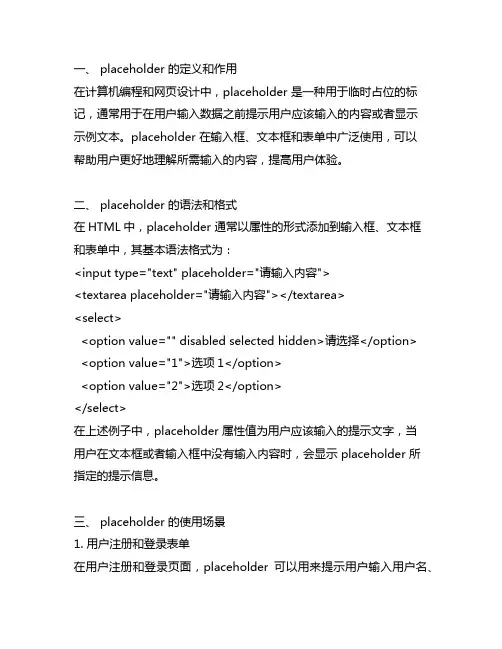
一、 placeholder 的定义和作用在计算机编程和网页设计中,placeholder 是一种用于临时占位的标记,通常用于在用户输入数据之前提示用户应该输入的内容或者显示示例文本。
placeholder 在输入框、文本框和表单中广泛使用,可以帮助用户更好地理解所需输入的内容,提高用户体验。
二、 placeholder 的语法和格式在HTML中,placeholder 通常以属性的形式添加到输入框、文本框和表单中,其基本语法格式为:<input type="text" placeholder="请输入内容"><textarea placeholder="请输入内容"></textarea><select><option value="" disabled selected hidden>请选择</option><option value="1">选项1</option><option value="2">选项2</option></select>在上述例子中,placeholder 属性值为用户应该输入的提示文字,当用户在文本框或者输入框中没有输入内容时,会显示 placeholder 所指定的提示信息。
三、 placeholder 的使用场景1. 用户注册和登录表单在用户注册和登录页面,placeholder 可以用来提示用户输入用户名、密码等信息,为用户提供清晰的输入提示,降低输入错误的概率。
2. 搜索框在搜索框中使用 placeholder 可以提示用户输入搜索关键词,为用户提供搜索建议,提高搜索体验。
3. 联系表单在网页的联系表单中,可以使用 placeholder 对用户输入字段进行提示,帮助用户更好地填写表单信息。
placeholder的实现方式摘要:1.了解placeholder的概念2.placeholder的实现方式3.常见问题和解决方法4.实际应用案例正文:在日常的编程中,placeholder(占位符)是一种非常实用的技术,尤其在网页开发中。
它的主要作用是在用户输入内容之前,提供一个默认的提示信息。
本文将详细介绍placeholder的实现方式,以及在实际开发中可能遇到的问题和解决方法。
一、了解placeholder的概念Placeholder,顾名思义,就是占位符。
在网页开发中,它通常用于input 元素,当用户没有输入任何内容时,显示一个默认的提示信息。
一旦用户开始输入内容,占位符会逐渐消失,直至完全替换为用户输入的内容。
二、placeholder的实现方式在HTML5中,可以使用以下方式实现placeholder属性:```html<input type="text" placeholder="请输入您的名字">```此时,当用户在输入框中没有输入任何内容时,输入框会显示“请输入您的名字”这个提示信息。
三、常见问题和解决方法1.兼容性问题在较旧的浏览器中,如IE8以下,placeholder属性可能无法正常工作。
为了解决这个问题,可以使用JavaScript进行检测和模拟:```javascriptfunction supportsPlaceholder() {return "placeholder" in document.createElement("input").style;}if (supportsPlaceholder()) {// 使用placeholder属性} else {// 使用其他方式,如JavaScript动态设置默认值}```2.输入内容后,占位符不消失的问题在使用placeholder时,可能会遇到用户输入内容后,占位符仍然显示的问题。
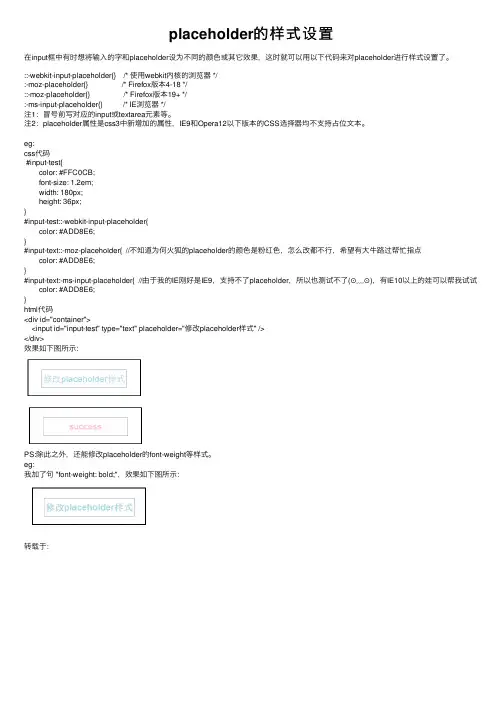
placeholder的样式设置在input框中有时想将输⼊的字和placeholder设为不同的颜⾊或其它效果,这时就可以⽤以下代码来对placeholder进⾏样式设置了。
::-webkit-input-placeholder{} /* 使⽤webkit内核的浏览器 */:-moz-placeholder{} /* Firefox版本4-18 */::-moz-placeholder{} /* Firefox版本19+ */:-ms-input-placeholder{} /* IE浏览器 */注1:冒号前写对应的input或textarea元素等。
注2:placeholder属性是css3中新增加的属性,IE9和Opera12以下版本的CSS选择器均不⽀持占位⽂本。
eg:css代码#input-test{color: #FFC0CB;font-size: 1.2em;width: 180px;height: 36px;}#input-test::-webkit-input-placeholder{color: #ADD8E6;}#input-text::-moz-placeholder{ //不知道为何⽕狐的placeholder的颜⾊是粉红⾊,怎么改都不⾏,希望有⼤⽜路过帮忙指点color: #ADD8E6;}#input-text:-ms-input-placeholder{ //由于我的IE刚好是IE9,⽀持不了placeholder,所以也测试不了(⊙﹏⊙),有IE10以上的娃可以帮我试试 color: #ADD8E6;}html代码<div id="container"><input id="input-test" type="text" placeholder="修改placeholder样式" /></div>效果如下图所⽰:PS:除此之外,还能修改placeholder的font-weight等样式。
IOSUITextField的常用方法// UITextField的常用方法UITextField *oneTextField = [[UIT extField alloc] init];// 最常用oneT extField.frame = CGRectMake(30, 30, 260, 35); //设置位置oneT extField.backgroundColor = [UIColor grayColor]; //设置背景颜色oneT extField.alpha = 1.0; //设置透明度,范围从0.0-1.0之间oneT extField.textColor = [UIColor redColor]; //设置文字的颜色oneT extField.text = @"默认的文字"; //设置默认的文字oneT extField.placeholder = @"这是提示文字"; //显示提示文件,当输入文字时将自动消失oneT extField.font = [UIFont boldSystemFontOfSize:25.0f]; //设置字体的大小oneT extField.textAlignment = NSTextAlignmentCenter; //设置文字的对其方式// 对其的样式如下// typedef NS_ENUM(NSInteger, NSTextAlignment) {// NSTextAlignmentLeft = 0, // Visually left aligned //#if TARGET_OS_IPHONE// NSTextAlignmentCenter = 1, // Visually centered// NSTextAlignmentRight = 2, // Visually right aligned//#else// NSTextAlignmentRight = 1, // Visually right aligned// NSTextAlignmentCenter = 2, // Visually centered //#endif// NSTextAlignmentJustified = 3, // Fully-justified. The last line in a paragraph is natural-aligned.// NSTextAlignmentNatural = 4, // Indicates the default alignment for script// } NS_ENUM_AVAILABLE_IOS(6_0);// 设置oneTextField的样式oneT extField.borderStyle=UITextBorderStyleRoundedRect; //设置oneTextField的样式oneT extField.clearsOnBeginEditing = YES; //再次编辑就清空原有的内容oneT extField.minimumFontSize = 20.0f; //设置自动缩小显示的最小字体大小oneT extField.tag=10001; // 设置oneTextField的标签,主要用在委托方法中oneT extField.secureTextEntry = NO; //设置是否以密码的圆点形式显示oneT extField.autocorrectionType = YES; //设置是否启动自动提醒更新功能oneT extField.returnKeyType = UIReturnKeyDefault; //设置弹出的键盘带形式与带的按键// 以下是弹出的键盘的带按钮的全部样式// typedef NS_ENUM(NSInteger, UIReturnKeyType) {// UIReturnKeyDefault, // 默认的样式// UIReturnKeyGo, // 带一个go按钮// UIReturnKeyGoogle, // 带一个Search按钮,使用google搜索// UIReturnKeyJoin, // 带一个Join按钮,登录时使用// UIReturnKeyNext, // 带一个Next按钮,进入下一个输入框// UIReturnKeyRoute, // 带一个Route按钮// UIReturnKeySearch, // 带一个Search按钮// UIReturnKeySend, // 带一个Send按钮// UIReturnKeyYahoo, // 带一个Search,使用yahoo搜索// UIReturnKeyDone, // 带一个Done按钮// UIReturnKeyEmergencyCall, // 带一个emergency call 按钮// };oneT extField.keyboardType= UIKeyboardTypeNamePhonePad;//弹出的键盘的样式// 以下是所有弹出的键盘的样式// typedef NS_ENUM(NSInteger, UIKeyboardType) {// UIKeyboardTypeDefault, // Default type for the current input method.// UIKeyboardTypeASCIICapable, // Displays a keyboard which can enter ASCII characters, non-ASCII keyboards remain active// UIKeyboardTypeNumbersAndPunctuation, // Numbers and assorted punctuation.// UIKeyboardTypeURL, // A type optimized for URL entry (shows . / .com prominently).// UIKeyboardTypeNumberPad, // A number pad (0-9). Suitable for PIN entry.// UIKeyboardTypePhonePad, // A phone pad (1-9, *, 0, #, with letters under the numbers).// UIKeyboardTypeNamePhonePad, // A typeoptimized for entering a person's name or phone number.// UIKeyboardTypeEmailAddress, // A type optimized for multiple email address entry (shows space @ . prominently).//#if __IPHONE_4_1 <= __IPHONE_OS_VERSION_MAX_ALLOWED// UIKeyboardTypeDecimalPad, // A number pad with a decimal point.//#endif//#if __IPHONE_5_0 <= __IPHONE_OS_VERSION_MAX_ALLOWED// UIKeyboardTypeTwitter, // A type optimized for twitter text entry (easy access to @ #)//#endif//// UIKeyboardTypeAlphabet = UIKeyboardTypeASCIICapable, // Deprecated//// };oneT extField.contentVerticalAlignment= UIControlContentVerticalAlignmentCenter;//输入的对其方法oneT extField.autoresizingMask= UIViewAutoresizingFlexibleHeight;//自动适应高度oneT extField.clearButtonMode= UITextFieldViewModeWhileEditing;//编辑的时候会显示出删除全部的小X// 出现删除全部小X的时间// typedef enum {// UITextFieldViewModeNever // 重不出现// UITextFieldViewModeWhileEditing, // 编辑时出现// UITextFieldViewModeUnlessEditing, // 除了编辑外都出现// UITextFieldViewModeAlways // 一直出现// } UITextFieldViewMode;//首字母是否大写oneT extField.autocapitalizationType= UITextAutocapitalizationTypeNone;// 以下是字母大写的几种情况// typedef enum {// UITextAutocapitalizationTypeNone, // 不自动大写// UITextAutocapitalizationTypeWords, // 单词首字母大写// UITextAutocapitalizationTypeSentences, // 句子的首字母大写// UITextAutocapitalizationTypeAllCharacters, // 所有字母都大写// } UITextAutocapitalizationType;//键盘外观oneT extField.keyboardAppearance=UIKeyboardAppearance Alert;// typedef enum {// UIKeyboardAppearanceDefault, // 默认外观,浅灰色// UIKeyboardAppearanceAlert,// 深灰石墨色// } UIReturnKeyType;//最右侧加图片是以下代码左侧类似UIImageView *image=[[UIImageView alloc] initWithImage:[UIImageimageNamed:@"ic_action_stat_share.png"]];// oneTextField.rightView = image;// oneTextField.rightViewMode = UITextFieldViewModeAlways;oneT extField.leftView = image;oneT extField.leftViewMode= UITextFieldViewModeAlways;// typedef enum {// UITextFieldViewModeNever,// UITextFieldViewModeWhileEditing,// UITextFieldViewModeUnlessEditing,// UITextFieldViewModeAlways// } UITextFieldViewMode;// 要想设置委托,就需要实现协议,需要在.h文件中添加协议oneT extField.delegate = self; //设置委托// 添加到view上,并释放内存[self.view addSubview:oneTextField];[oneTextField release], oneT extField = nil;//当开始点击textField会调用的方法-(void)textFieldDidBeginEditing:(UITextField *)textField {NSLog(@"开始编辑");}//当textField编辑结束时调用的方法-(void)textFieldDidEndEditing:(UITextField *)textField { NSLog(@"结束编辑");}//按下Done按钮的调用方法,我们让键盘消失-(BOOL)textFieldShouldReturn:(UITextField *)textField{ [textField resignFirstResponder];return YES;}。
iOS开发之⾃定义输⼊框(利⽤UITextField及UITextView)最近在做项⽬的时候经常⾃定义⼀些输⼊框,今天在这⾥分享给⼤家。
我的思路就是继承于系统的控件然后利⽤drawRect重画⾥⾯的控件。
那么drawRect是怎么⼯作的呢?drawRect的⼯作原理:⾸先苹果是不推荐我们直接使⽤drawRect进⾏⼯作的,直接调⽤他也是没有任何效果的。
苹果要求我们调⽤UIView类中的setNeedsDisplay⽅法,则程序会⾃动调⽤drawRect⽅法进⾏重绘。
(调⽤setNeedsDisplay会⾃动调⽤drawRect)。
在UIView中,重写drawRect: (CGRect) aRect⽅法,可以⾃⼰定义想要画的图案.且此⽅法⼀般情况下只会画⼀次.也就是说这个drawRect⽅法⼀般情况下只会被调⽤⼀次。
当某些情况下想要⼿动重画这个View,只需要掉⽤[self setNeedsDisplay]⽅法即可.drawRect调⽤是在Controller->loadView, Controller->viewDidLoad 两⽅法被调⽤之后调⽤的.所以不⽤担⼼在控制器中,这些View的drawRect就开始画了.这样可以在控制器中设置⼀些值给View(如果这些View draw的时候需要⽤到某些变量值).1.如果在UIView初始化时没有设置rect⼤⼩,将直接导致drawRect不被⾃动调⽤。
2.该⽅法在调⽤sizeThatFits后被调⽤,所以可以先调⽤sizeToFit计算出size。
然后系统⾃动调⽤drawRect:⽅法。
3.通过设置contentMode属性值为UIViewContentModeRedraw。
那么将在每次设置或更改frame的时候⾃动调⽤drawRect:。
4.直接调⽤setNeedsDisplay,或者setNeedsDisplayInRect:触发drawRect:,但是有个前提条件是rect不能为0.以上1,2推荐;⽽3,4不提倡1.⾸先是可以多⾏输⼊的输⼊框(继承于UITextView,效果如下)#pragma mark -- 初始化时调⽤ --- (instancetype)initWithFrame:(CGRect)frame {if (self = [super initWithFrame:frame]) {/*** 初始化的时候为属性设置默认值*/self.placeholder = @"请输⼊⽂字";self.placeholderColor = [UIColor lightGrayColor];self.placeholderFont = [UIFont systemFontOfSize:14];/*** ⽤textVeiw添加通知,当textView发⽣变化的时候会调⽤textChanged⽅法*/[[NSNotificationCenter defaultCenter] addObserver:self selector:@selector(textChanged:) name:UITextViewTextDidChangeNotification object:nil];}return self;}#pragma mark -- 重绘(为textVeiw加上placeholder) --- (void)drawRect:(CGRect)rect {//如果⽂字消失了就会绘制placeholderif (self.text.length == 0) {CGRect placeholderRect = CGRectZero;placeholderRect.origin.x = 10;placeholderRect.origin.y = 5;placeholderRect.size.width = self.frame.size.width-10;placeholderRect.size.height = self.frame.size.height-5;[self.placeholder drawInRect:placeholderRect withAttributes:@{NSFontAttributeName:_placeholderFont,NSForegroundColorAttributeName:_placeholderColor}];}[super drawRect:rect];}#pragma mark -- ⽂字改变的时候会调⽤该⽅法- (void)textChanged:(NSNotification *)notification {/*** 在⽂字改变的时候就重绘*/[self setNeedsDisplay];}#pragma mark -- 移除通知- (void)dealloc {[[NSNotificationCenter defaultCenter] removeObserver:self];}如果想⾃定义更多样式,可以给attribute多加⼀些属性就可以了2.⾃定义符合要求的输⼊框(继承于UITextField,效果如下)上⾯左视图只有两个圆⾓⽽且离上下左都有1px的间距,并且placeholder是在右边的。
IOS控件布局之UITextField使⽤前⾔:在iOS中使⽤UITextField⽤于外部数据的输⼊,其功能相当于Android中的EditText,这⼏天发现⼀个特别现象,iOS控件的命名特别类似Java swing或者awt这种的命名,⽐如UITextField 在Java中的命名为JTextField,然⽽Android的控件命名居然没有参考本⾝使⽤的开发语⾔Java来进⾏参考,⽐如可以命名为ATextField,哈哈,这点看着还蛮有意思的。
UITextField使⽤1.)初始化//第⼀种UITextField *mTextField=[[UITextField alloc]init];//第⼆种UITextField *mTextField =[[UITextField alloc]initWithFrame:CGRectMake(0, 50, SCREEN_WIDTH, 50)];2.)边框样式设置//设置输⼊框边框样式mTextField.borderStyle=UITextBorderStyleRoundedRect;UITextBorderStyle枚举UITextBorderStyleNone,//⽆框UITextBorderStyleLine,//线框UITextBorderStyleBezel,//bezel风格线框UITextBorderStyleRoundedRect//圆⾓边框3.)背景、字体、对齐⽅式、密码模式设置//设置输⼊框背景颜⾊设置输⼊框的背景颜⾊,此时设置为⽩⾊如果使⽤了⾃定义的背景图⽚边框会被忽略掉mTextField.backgroundColor = [UIColor whiteColor];// 设置⼀开始就输⼊的内容mTextField.text=@"我是总李";// 设置是否是密码模式mTextField.secureTextEntry = NO;//在没有输⼊内容时提⽰输⼊提⽰mTextField.placeholder = @"请输⼊密码";//设置输⼊框字体颜⾊mTextField.textColor=[UIColor brownColor];//设置输⼊框字体⼤⼩mTextField.font=[UIFont systemFontOfSize:17];//设置内容对齐⽅式mTextField.textAlignment = NSTextAlignmentLeft;//设置内容的垂直对齐⽅式mTextField.contentVerticalAlignment = UIControlContentVerticalAlignmentCenter;4.)清除按钮设置//设置再次编辑是否清空mTextField.clearsOnBeginEditing = NO;//设置输⼊框是否有清除按钮什么显⽰mTextField.clearButtonMode = UITextFieldViewModeAlways;UITextFieldViewMode枚举值UITextFieldViewModeNever, //重不出现UITextFieldViewModeWhileEditing, //编辑时出现UITextFieldViewModeUnlessEditing, //除了编辑外都出现UITextFieldViewModeAlways //⼀直出现5.)设置键盘样式//设置键盘样式mTextField.keyboardType = UIKeyboardTypeDefault;UIKeyboardType枚举值UIKeyboardTypeDefault, //默认键盘,⽀持所有字符UIKeyboardTypeASCIICapable, //⽀持ASCII的默认键盘UIKeyboardTypeNumbersAndPunctuation, //标准电话键盘,⽀持+*#字符UIKeyboardTypeURL, //URL键盘,⽀持.com按钮只⽀持URL字符UIKeyboardTypeNumberPad, //数字键盘UIKeyboardTypePhonePad, //电话键盘UIKeyboardTypeNamePhonePad, //电话键盘,也⽀持输⼊⼈名UIKeyboardTypeEmailAddress, //⽤于输⼊电⼦邮件地址的键盘UIKeyboardTypeDecimalPad, //数字键盘有数字和⼩数点UIKeyboardTypeTwitter, //优化的键盘,⽅便输⼊@、#字符6.)设置return键//设置return键变成什么键mTextField.returnKeyType =UIReturnKeyNext;UIReturnKeyType枚举值UIReturnKeyDefault, //默认灰⾊按钮,标有ReturnUIReturnKeyGo, //标有Go的蓝⾊按钮UIReturnKeyGoogle,//标有Google的蓝⾊按钮,⽤语搜索UIReturnKeyJoin,//标有Join的蓝⾊按钮UIReturnKeyNext,//标有Next的蓝⾊按钮UIReturnKeyRoute,//标有Route的蓝⾊按钮UIReturnKeySearch,//标有Search的蓝⾊按钮UIReturnKeySend,//标有Send的蓝⾊按钮UIReturnKeyYahoo,//标有Yahoo的蓝⾊按钮UIReturnKeyYahoo,//标有Yahoo的蓝⾊按钮UIReturnKeyEmergencyCall, //紧急呼叫按钮7.)设置键盘外观//设置键盘外观mTextField.keyboardAppearance=UIKeyboardAppearanceDefault;UIKeyboardAppearance枚举值UIKeyboardAppearanceDefault,//默认外观,浅灰⾊UIKeyboardAppearanceAlert, //深灰⽯墨⾊8.)设置是否纠错//设置是否纠错mTextField.autocorrectionType = UITextAutocorrectionTypeYes;UITextAutocorrectionType枚举值UITextAutocorrectionTypeDefault,// 默认UITextAutocorrectionTypeNo, //不⾃动纠错UITextAutocorrectionTypeYes, //⾃动纠错这个⾃动纠错每个值我都尝试了,结果并没看见实质性的效果。
iOS应⽤开发中的⽂字选中操作控件UITextView⽤法讲解1.创建并初始化创建UITextView的⽂件,并在.h⽂件中写⼊如下代码:复制代码代码如下:#import <UIKit/UIKit.h>@interface TextViewController : UIViewController <UITextViewDelegate>{UITextView *textView;}@property (nonatomic, retain) UITextView *textView;@end在.m⽂件中初始化这个textview,写⼊代码如下:复制代码代码如下:self.textView = [[[UITextView alloc] initWithFrame:self.view.frame]autorelease]; //初始化⼤⼩并⾃动释放self.textView.textColor = [UIColor blackColor];//设置textview⾥⾯的字体颜⾊self.textView.font = [UIFont fontWithName:@"Arial" size:18.0];//设置字体名字和字体⼤⼩self.textView.delegate = self;//设置它的委托⽅法self.textView.backgroundColor = [UIColor whiteColor];//设置它的背景颜⾊self.textView.text = @"Now is the time for all good developers tocome to serve their country.\n\nNow is the time for all good developers to cometo serve their country.";//设置它显⽰的内容self.textView.returnKeyType = UIReturnKeyDefault;//返回键的类型self.textView.keyboardType = UIKeyboardTypeDefault;//键盘类型self.textView.scrollEnabled = YES;//是否可以拖动self.textView.autoresizingMask = UIViewAutoresizingFlexibleHeight;//⾃适应⾼度[self.view addSubview: self.textView];//加⼊到整个页⾯中2. UITextView退出键盘的⼏种⽅式因为你点击UITextView会出现键盘,如果你退出键盘,有如下⼏种⽅式:(1)如果你程序是有导航条的,可以在导航条上⾯加多⼀个Done的按钮,⽤来退出键盘,当然要先实UITextViewDelegate。
IOSUITableView和NavigationBar的常⽤设置详解IOS UITableView和NavigationBar的常⽤设置详解TableView:1.tableview常⽤基本设置// 清除⽗类UIEdgeInsetsself.tableView.contentInset = UIEdgeInsetsMake(0, 0, 0,0);//禁⽌滚动self.tableView.scrollEnabled = NO;// tableview头部视图设置self.tableView.tableHeaderView =⼀个UIView;//tableview尾部视图设置,这样⽤⼀个不占空间的UIView初始化可以清除尾部多余空格self.tableView.tableFooterView = [[UIView alloc]initWithFrame:CGRectZero];//表格背景⾊self.tableView.backgroundColor = [UIColorgrayColor];//取消垂直滚动条self.tableView.showsVerticalScrollIndicator=NO;//设置表格背景图⽚UIView *bgView= [[UIView alloc]initWithFrame:CGRectMake(0,20,SLApplicationW,SLApplicationH)];UIImageView *bgImageView= [[UIImageView alloc]initWithFrame:CGRectMake(0,0,SLApplicationW,SLApplicationH)];[bgImageView setImage:[UIImageimageNamed:@"tree"]];[bgView addSubview:bgImageView];self.tableView.backgroundView= bgView;2.cell常⽤基本设置//表格附件样式,指⽰箭头cell.accessoryType=UITableViewCellAccessoryDisclosureIndicator;//禁⽌点击变⾊cell.selectionStyle=UITableViewCellSelectionStyleNone;3.cell分割线左侧空⽩清除//分割线清偏移if ([cell respondsToSelector:@selector(setSeparatorInset:)]) {[cellsetSeparatorInset:UIEdgeInsetsZero];}//分割线清边界(没啥变化)if ([cell respondsToSelector:@selector(setLayoutMargins:)]) {[cellsetLayoutMargins:UIEdgeInsetsZero];}//清除⽗边界if ([cell respondsToSelector:@selector(setPreservesSuperviewLayoutMargins:)]){[cellsetPreservesSuperviewLayoutMargins:NO];}NavigationBar导航栏:1.常⽤基本设置self.title =@"标题";// 导航栏颜⾊self.navigationBar.barTintColor=[UIColor grayColor];// 导航栏⽂字颜⾊self.navigationBar.tintColor=[UIColor whiteColor];// 导航栏标题颜⾊NSMutableDictionary*textAttrs= [NSMutableDictionary dictionary];textAttrs[NSForegroundColorAttributeName] =[UIColor whiteColor];self.navigationBarsetTitleTextAttributes:textAttrs];//导航栏按钮1UIBarButtonItem*button1= [[UIBarButtonItem alloc]initWithBarButtonSystemItem:UIBarButtonSystemItemAddtarget:selfaction:@selector(function1)];//导航栏按钮2UIBarButtonItem*button2= [[UIBarButtonItem alloc]initWithBarButtonSystemItem:UIBarButtonSystemItemSearchtarget:selfaction:@selector(function2)]; //将按钮添加到导航栏右侧(可以添加多个)self.navigationItem.rightBarButtonItems=@[button1, button2];2.系统⾃带按钮枚举定义及样式解释如下:typedef NS_ENUM(NSInteger, UIBarButtonSystemItem) {UIBarButtonSystemItemDone, //Done英⽂字符UIBarButtonSystemItemCancel, //CancelUIBarButtonSystemItemEdit, //EditUIBarButtonSystemItemSave, //SaveUIBarButtonSystemItemAdd, //图标1(加号图标 )UIBarButtonSystemItemFlexibleSpace, //?空⽩UIBarButtonSystemItemFixedSpace, //?空⽩UIBarButtonSystemItemCompose, //图标2(写字板上⼀⽀笔写字的图标)UIBarButtonSystemItemReply, //图标3UIBarButtonSystemItemAction, //图标4UIBarButtonSystemItemOrganize, //图标5UIBarButtonSystemItemBookmarks, //<span style="font-family: Menlo;">图标6</span>UIBarButtonSystemItemSearch, //<span style="font-family: Menlo;">图标7</span>UIBarButtonSystemItemRefresh, //<span style="font-family: Menlo;">图标8</span>UIBarButtonSystemItemStop, //图标9UIBarButtonSystemItemCamera, //图标10UIBarButtonSystemItemTrash, //图标11UIBarButtonSystemItemPlay, //图标12UIBarButtonSystemItemPause, //图标13UIBarButtonSystemItemRewind, //图标14UIBarButtonSystemItemFastForward, //图标15UIBarButtonSystemItemUndo NS_ENUM_AVAILABLE_IOS(3_0), //RedoUIBarButtonSystemItemRedo NS_ENUM_AVAILABLE_IOS(3_0), //UndoUIBarButtonSystemItemPageCurl NS_ENUM_AVAILABLE_IOS(4_0), //?空⽩};感谢阅读,希望能帮助到⼤家,谢谢⼤家对本站的⽀持!。
iOS关于UITextView计算⽂本⾼度不准确的坑问题: 字段由后端控制,⾥⾯出现换⾏的时候 \r\n是成对出现的 , 转义字符并未纳⼊字符串的计算范围 。
所以导致显⽰不全的bug解决⽅案⼀:由于这个⽅法计算字符串的⼤⼩的通过取得字符串的size来计算, 如果你计算的字符串中包含\r\n 这样的字符,也只会把它当成字符来计算。
但是在显⽰的时候就是\n是转义字符,那么显⽰的计算的⾼度就不⼀样了,所以可以采⽤:计算的⾼度 = boundingRectWithSize计算出来的⾼度 + \r\n转义字符出现的个数 * 单⾏⽂本的⾼度。
///MARK:- 查询字串出现的次数⽅法⼆- (NSInteger)searchSubStringCountWithSubString:(NSString *)subStr{NSUInteger count = 0, length = [subStr length];NSRange range = NSMakeRange(0, length);while(range.location != NSNotFound){range = [self rangeOfString: subStr options:0 range:range];if(range.location != NSNotFound){range = NSMakeRange(range.location + range.length, length - (range.location + range.length));count++;}}return count;}解决⽅案⼆:采⽤UILabel来展⽰⽂本就没有这个坑,主要看⾃⼰选择,毕竟有些特性只有UITextView才有的@implementation NSString (Extension)///MARK:- 查询字串出现的次数⽅法⼀- (NSInteger)countOccurencesOfString:(NSString*)searchString {NSInteger strCount = [self length] - [[self stringByReplacingOccurrencesOfString:searchString withString:@""] length];return strCount / [searchString length];}///MARK:- 查询字串出现的次数⽅法⼆- (NSInteger)searchSubStringCountWithSubString:(NSString *)subStr{NSUInteger count = 0, length = [subStr length];NSRange range = NSMakeRange(0, length);while(range.location != NSNotFound){range = [self rangeOfString: subStr options:0 range:range];if(range.location != NSNotFound){range = NSMakeRange(range.location + range.length, length - (range.location + range.length));count++;}}return count;}//计算单⾏⽂本宽度和⾼度,返回值与`UIFont.lineHeight`⼀致 [⼿动滑稽]⽅块字- (CGSize)singleLineSizeWithText:(UIFont *)font{return [self sizeWithAttributes:@{NSFontAttributeName:font}];}@end项⽬中展⽰控件使⽤的是UITextView ⽂本中包含\r\n来换⾏ 同⼀个PHP后端这种既定的规则应该不会经常变。
我在用UITextView的时候,默认是不能设置placeholder的,于是网上找了一些资料,最后找到了一个别人写的自定义类,拿来用用,顺便分享一下。
CPTextViewPlaceholder.m//// CPTextViewPlaceholder.m// Cassius Pacheco//// Created by Cassius Pacheco on 30/01/13.// Copyright (c) 2013 Cassius Pacheco. All rights reserved.//#import "CPTextViewPlaceholder.h"@interface CPTextViewPlaceholder()@property (nonatomic) UITextAutocorrectionType originalCorrection;@property (nonatomic, strong) UIColor *placeholderColor;@property (nonatomic, strong) UIColor *originalTextColor;@property (nonatomic, getter = isUsingPlaceholder) BOOL usingPlaceholder; @property (nonatomic, getter = isSettingPlaceholder) BOOL settingPlaceholder;@end@implementation CPTextViewPlaceholder#pragma mark -#pragma mark Life Cycle method- (id)initWithCoder:(NSCoder *)aDecoder{if (self = [super initWithCoder:aDecoder]) {self.placeholderColor = [UIColor lightGrayColor];self.originalCorrection = self.autocorrectionType;self.originalTextColor = super.textColor;[[NSNotificationCenter defaultCenter] addObserver:self selector:@selector(didBeginEdit ing) name:UITextViewTextDidBeginEditingNotification object:nil];[[NSNotificationCenter defaultCenter] addObserver:self selector:@selector(didEndEditin g) name:UITextViewTextDidEndEditingNotification object:nil];[[NSNotificationCenter defaultCenter] addObserver:self selector:@selector(textDidChan ge:) name:UITextViewTextDidChangeNotification object:self];}return self;}- (void)dealloc{[[NSNotificationCenter defaultCenter] removeObserver:self name:UITextViewTextDidBeginE ditingNotification object:self];[[NSNotificationCenter defaultCenter] removeObserver:self name:UITextViewTextDidEndEdi tingNotification object:self];[[NSNotificationCenter defaultCenter] removeObserver:self name:UITextViewTextDidChang eNotification object:self];}- (void)layoutSubviews{[super layoutSubviews];//Fixes iOS 5.x cursor when becomeFirstResponderif ([UIDevice currentDevice].systemVersion.floatValue < 6.000000) { if (self.isUsingPlaceholder && self.isFirstResponder) {self.text = @"";}}}#pragma mark -#pragma mark Notifications- (void)didBeginEditing{if (self.isUsingPlaceholder) {[self sendCursorToBeginning];}}- (void)didEndEditing{if (self.text.length == 0) {[self setupPlaceholder];}}- (void)textDidChange:(NSNotification *)notification{//self.text received the placeholder text by CPTex tViewPlaceholder if (self.isSettingPlaceholder) {return;}if (self.text.length == 0) {[self setupPlaceholder];return;}if (self.isUsingPlaceholder) {ingPlaceholder = NO;NSRange range = [self.text rangeOfString:self.placeholder options:NSLiteralSearch];if (range.location != NSNotFound) {NSString *newText = [self.text stringByReplacingCharactersInRange:range withStr ing:@""];super.textColor = self.originalTextColor;super.autocorrectionType = self.originalCorrection;//User pasted a text equals to placeholder or setText was calledif ([newText isEqualToString:self.placeholder]) {[self sendCursorToEnd];//this is necessary for iOS 5.x} else if (newText.length == 0) {[self setupPlaceholder];return;}self.text = newText;}}}- (BOOL)canPerformAction:(SEL)action withSender:(id)sender{if (self.isUsingPlaceholder && action != @selector(paste:)) {return NO;}return [super canPerformAction:action withSender:sender];}#pragma mark - Getters and Setters- (void)setAutocorrectionType:(UITextAutocorrectionType)autocorrectionType {[super setAutocorrectionType:autocorrectionType];self.originalCorrection = autocorrectionType;}- (void)setPlaceholder:(NSString *)placeholder{_placeholder = placeholder;if (self.isUsingPlaceholder || self.text.length == 0) { [self setupPlaceholder];}}- (void)setTextColor:(UIColor *)textColor{[super setTextColor:textColor];self.originalTextColor = textColor;}- (void)setSelectedRange:(NSRange)selectedRange{if (self.isUsingPlaceholder) {[self sendCursorToBeginning];} else {[super setSelectedRange:selectedRange];}}- (void)setSelectedTextRange:(UITextRange *)selectedTextRange {if (self.isUsingPlaceholder) {[self sendCursorToBeginning];} else {[super setSelectedTextRange:selectedTextRange];}}#pragma mark -#pragma mark Utilities methods- (void)setupPlaceholder{super.autocorrectionType = UITextAutocorrectionTypeNo;ingPlaceholder = YES;self.settingPlaceholder = YES;self.text = self.placeholder;self.settingPlaceholder = NO;super.textColor = self.placeholderColor;[self sendCursorToBeginning];}- (void)sendCursorToBeginning{[self performSelector:@selector(cursorToBeginning) withObject:nil afterDelay:0.01]; }- (void)cursorToBeginning{super.selectedRange = NSMakeRange(0, 0);}- (void)sendCursorToEnd{[self performSelector:@selector(cursorToEnd) withObject:nil afterDelay:0.01]; }- (void)cursorToEnd{super.selectedRange = NSMakeRange(self.text.length, 0);}@endCPTextViewPlaceholder.h//// CPTextViewPlaceholder.h// Cassius Pacheco//// Created by Cassius Pacheco on 30/01/13.// Copyright (c) 2013 Cassius Pacheco. All rights reserved. //#import <UIKit/UIKit.h>@interface CPTextViewPlaceholder : UITextView@property (nonatomic, strong) NSString *placeholder;@end。