MPICH2用户指南译文
- 格式:doc
- 大小:89.00 KB
- 文档页数:21

WinXP下并行计算集群的组建(利用MPICH2)梦想Living制作1.什么是MPI?MPI(Message Passing Interface)是目前最重要的一种基于消息传递的并行编程工具,是消息传递并行程序设计的标准之一,用于开发基于消息传递的并行程序,在程序设计语言上支持C/C++和Fortran;其目的是为用户提供一个高效的、可移植的、灵活的消息接口库。
MPI 目前通用的规范是MPI1.1,于1994年推出。
目前最新的规范为MPI2.0,于1997年推出并在不断完善当中,其部分标准已经在各类并行计算机中普遍实现。
要让你的单个PC机或者计算机集群能运行并行程序,就需要用MPI建立实用的并行计算环境。
MPI有多种不同的免费版本,几乎所有的并行计算机厂商都提供了对它的支持,自推出以来已被广泛接受,可以运行在几乎所有的并行计算环境(共享和分布式存储并行机、MPP、机群系统等)和流行的多进程操作系统(Linux/Unix和Windows),因此它已经成为事实上的并行编程标准。
比较著名的免费通用MPI系统就是MPICH和LAM MPI()。
本文用的是MPICH2。
2.搭建MPI并行计算环境2.1 重要注意事项:1.搭建MPI并行计算环境过程中,你需要有管理员的权限,以管理员的身份进行软件的安装和系统参数的配置。
2.未加说明的情况下,所有的输入字符都是英文小写半角输入法下的输入。
请务必注意该点说明,以正确理解输入的字符(包括标点符号与空格)2.2软硬件准备硬件:两台在同一局域网下的普通PC。
建立多台PC节点构成的一个机群计算环境时,还要有必要的路由器、交换机或是集线器等。
软件:1.节点机的操作系统:Microsoft Windows XP Pro SP2(32bit)2.安装MPICH2所需的windows组件(可以在Microsoft网站上下载):Microsoft .NET Framework 2.0Microsoft Visual C++ 2005 SP1(即vcredist_x86.exe)3.组建MPI环境(根据你的操作系统选择合适的文件):mpich2-1.2.1-win-ia32.msi (该安装包适合32bit XP系统)该程序可以在以下站点下载/research/projects/mpich2/ftp:///pub/mpi2.3环境搭建1.在每台节点机上安装Microsoft Windows XP Pro SP2、 Microsoft .NET Framework2.0与Microsoft Visual C++ 2005 SP1。
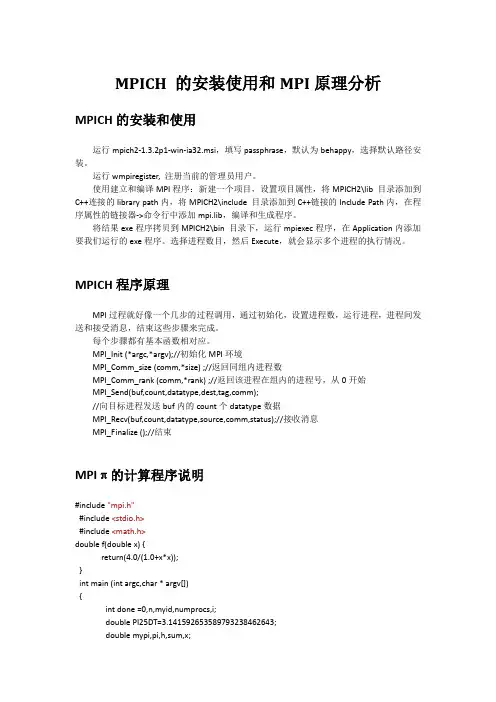
MPICH&PBS使用指南一、MPI编程 (1)二、MPICH下编译和运行 (3)三、PBS环境下运行 (4)一、MPI编程1、MPI编程函数介绍MPI实际上是一个提供并行程序消息传递机制的函数库,有40多个函数,常用的有6个基本函数。
下面以C语言为例简单介绍这些函数。
(1)MPI_Init函数定义:int MPI_Init(int *argc, char ***argv)功能:用命令行参数初始化MPI环境输入:argc、argv—表示命令行参数,同C语言的main()函数参数格式,argv中包含欲并行运行的进程数输出:返回值—非零/零表示初始化是否成功说明:该函数必须为程序中第一个调用的MPI函数示例:MPI_Init(&argc, &argv); // argc、argv引用的是mian()函数的参数(2)MPI_Finalize函数定义:int MPI_Finalize (void)功能:结束MPI程序的运行,指结束MPI环境的使用输入:无输出:返回值—非零/零表示结束MPI环境是否成功说明:该函数必须为程序中最后一个调用的MPI函数示例:MPI_ Finalize ();(3)MPI_Comm_size函数定义:int MPI_Comm_size(MPI_Comm comm, int *size)功能:得到总进程数输入:comm 通信域句柄(系统默认的为MPI_COMM_WORLD,也可自己定义)输出:size,即通信域comm内包括的进程数整数(4)MPI_Comm_rank函数定义:int MPI_Comm_rank(MPI_Comm comm, int *rank)功能:得到本进程的进程号输入:comm,该进程所在的通信域句柄输出:rank,调用进程在comm中的标识号(5)MPI_Send函数定义:int MPI_Send(void* buf, int count, MPI_Datatype datatype, int dest, int tag, MPI_Comm comm) 功能:发送消息给特定的进程输入:buf 发送缓冲区的起始地址(可选类型)count 将发送的数据的个数(非负整数)datatype 发送数据的数据类型(句柄)dest 目的进程标识号(整型)tag 消息标志(整型)comm 通信域(句柄)输出:无(6)MPI_Recv函数定义:int MPI_Recv(void* buf, int count, MPI_Datatype datatype, int source, int tag,MPI_Comm comm,MPI_Status *status)功能:接受别的进程发过来的消息输入:count 最多可接收的数据的个数(整型)datatype 接收数据的数据类型(句柄)source 接收数据的来源即发送数据的进程的进程标识号(整型)tag 消息标识与相应的发送操作的表示相匹配相同(整型)comm 本进程和发送进程所在的通信域(句柄)输出:buf 接收缓冲区的起始地址(可选数据类型)status 返回状态(状态类型MPI_Status)2、MPI程序示例MPI程序中必须包含MPI库的头文件,C语言头文件名为mpi.h,FORTRAN语言头文件名为mpif.h。
MPICH2用户指南V1.4数学与计算科学系阿贡国家实验室此处略去牛人无数2011年6月16日翻译日期:2011/8/23Aozhen目录1介绍 (1)2 MPICH2入门 (1)2.1 默认运行环境 (1)2.2开始并行作业 (1)2.3 Fortran中的命令行 (2)3 快速开始 (2)4 编译和链接 (3)4.1 对C++来说的特殊问题 (3)4.2 对Fortran来说的特殊问题 (3)5 用mpiexec运行程序 (4)5.1 标准mpiexec (4)5.2 所有进程管理环境扩展 (5)5.3 Hydra进程管理器的mpiexec扩展 (5)5.4 SMPD进程管理器环境扩展 (5)5.4.1 关于SMPD的mpiexec参数 (5)5.5 gforker进程管理器环境扩展 (8)5.5.1 gforker的mpiexec参数 (8)5.6 remshell进程管理器环境的限制 (10)5.7 使用SLURM和PBS的MPICH2 (11)5.7.1 OSC mpiexec (11)6 调试 (11)6.1 TotalView (12)7 检查点 (12)8 MPE (13)8.1 MPI日志(MPI Logging) (13)8.2 用户定义日志 (13)8.3 MPI检查 (15)8.4 MPE选项 (15)9 MPICH2的其他工具 (16)10 Windows下的MPICH2 (16)10.1目录 (16)10.2 编译 (17)10.3运行 (17)1介绍本手册假定MPICH2已经安装了。
想知道怎么安装请参见MPICH2 Installer's Guide《MPICH2安装指南》,或MPICH2顶级目录下的README。
本手册介绍如何编译,链接和运行MPI应用程序,并使用MPICH2自带的一些工具。
这是初步版,有些部分还没完成。
但,这已经足够让你步入MPICH2的大门了。
lammps简要使用说明李小椿北京航空航天大学物理科学与核能工程学院更新于:2010年2月1日星期一目录lammps简要使用说明 (1)LAMMPS介绍 (4)文件 (4)1.系统初始化 (4)units lj/real/metal/si/cgs (4)atom_style angle/atomic/bond/charge/dipole/dpd/ellipsoid/full/granular/molecular/hybrid (5)atom_modify map/first (5)dimension N ,N=2/3 (5)boundary x y z, default=boundary p p p (5)newton flag/flag1 flag2 (5)communicate single/multi group/cutoff (5)processors Px Py Pz (5)2.创建模拟晶胞 (6)lattice none/sc/bcc/fcc/hcp/diamond/sq/sq2/hex/custom scale keyword values (6)region ID style block/cylinder/prism/sphere/union/intersect args keyword value (6)group ID region/type/id/molecule/subtract/union/intersect (6)create_box N region−ID (7)create_atoms type box/region/single args keyword values (7)delete_atoms group/region/overlap/porosity args (7)read_restart file (7)set atom/group/region ID keyword values (8)displace_atoms group−ID move/ramp/random args keyword value (8)displace_box group−ID parameter args ... keyword value . (8)change_box ortho/triclinic (9)replicate nx ny nz (9)3.设置 (9)mass I value (9)velocity group−ID create/set/scale/ramp/zero args keyword value (9)timestep dt (9)reset_timestep N (10)neighbor skin bin/nsq/multi (10)neigh_modify keyword values (10)4.输出 (10)dump ID group−ID bond/dcd/xtc/xyz/custom N (10)dump_modify dump−ID format/scale/image/flush/unwrap/every/precision/region/thresh values (11)undump dump−ID (11)thermo_style one/multi/custom(args) (11)thermo_modify lost/norm/flush/line/format/temp/press value (12)thermo N (12)print string (12)restart N root (12)write_restart file (13)echo none/screen/log/both (13)log (13)5.FIX (13)fix ID group−ID style args (13)系综相关 (14)力和速度的控制 (15)计算特定量 (16)模拟晶胞的控制 (17)模拟过程的控制 (18)unfix fix-id (18)PUTE (18)compute ID group−ID style args (18)compute ID group−ID ackland/atom (19)compute ID group−ID centro/atom (19)compute ID group−ID coord/atom cutoff (19)compute ID group−ID damage/atom (19)compute ID group−ID displace/atom fix−ID (19)compute ID group−ID group/group group2−ID (19)compute ID group−ID ke (19)compute ID group−ID ke/atom (20)compute ID group−ID pe (keyword=pair/bond/angle/dihedral/improper/kspace) (20)compute ID group−ID pe/atom (keyword=pair/bond/angle/dihedral/improper) (20)compute ID group−ID pressure temp−ID keyword=ke/pair/bond/angle/dihedral/im proper/kspace/fix (20)compute ID group−ID reduce mode=sum/min/max input1 input2 ... .. (20)compute ID group−ID stress/atom (keyword= ke/pair/bond/angle/dihedral/improper/kspace/fix) (20)compute_modify compute−ID keyword value (20)compute ID group−ID temp (20)compute ID group−ID temp/com (20)compute ID group−ID temp/deform (20)comp ute ID group−ID temp/partial xflag yflag zflag (21)compute ID group−ID temp/ramp vdim vlo vhi dim clo chi keyword value (21)comput e ID group−ID temp/region region−ID (21)uncompute compute-ID (21)7.势函数 (21)pair_style (21)pair_style tersoff (22)kspace_style (23)kspace_modify (23)pair_write itype jtype N r/rsq/bitmap inner outer Qi Qj (23)8.运行 (23)run N upto/start/stop/pre/post/every values (23)run_style verlet/respa(args) (23)minimize etol ftol maxiter maxeval (23)min_style cg/sd (23)min_modify dmax 0.2 (default=0.1) (24)temper (24)clear (24)9.其他 (24)variable name delete/index/loop/world/universe/uloop/equal/atom (24)next variables (25)jump (25)label string (25)if value1 operator value2 then command1 else command2 (26)include (26)shell cd/mkdir/mv/rm/rmdir (26)10.模拟方法论 (26)缺陷的生成 (26)晶格常数 (27)迁移 (27)表面 (27)立方晶系弹性常数.......................................................................................................................... 错误!未定义书签。
MPICH2用户指南(MPICH2 User’s Guide)版本(Version )1.0.8数学与计算机科学部(Mathematics and Computer Science Division)阿贡国家实验室(Argonne National Laboratory)William GroppEwing LuskDavid AshtonPavan BalajiDarius BuntinasRalph ButlerAnthony ChanDavid GoodellJayesh KrishnaGuillaume MercierRob RossRajeev ThakurBrian Toonen2008年10月24日这项工作得到美国能源部科学局高级科学计算研究局Sci-DAC合约编号DE-AC02-06CH11357的规划,数据、信息与计算机科学部的分规划的支持。
1 引言(INTRODUCTION)1.引言MPICH2.本手册假定MPICH2已经安装了。
关于如何安装MPICH2,参见MPICH2安装指南,或者MPICH2顶层目录的README。
本手册解释如何编译、链接及运行MPI应用程序,使用于MPICH2一起的某些工具。
这是个初步的版本,某些节还没完成。
但是,这些应该足以帮你MPICH2 起步的了。
2 从MPICH1升级到MPICH2(Migrating to MPICH2 from MPICH1)如果你一直在使用MPICH 1.2.x (1.2.7p1是最新版本),那么你会发现一些有关MPICH2不同的东西(希望能更好)。
当然了,虽然你的MPI程序不用改变,但是有些关于你运行它们的方式则不同。
MPICH2是MPI标准的一个全新实现,其设计实现了加到MPI-2附件的全部(动态进程管理,片面操作,并行I/O及其他扩充),应用从MPICH1 实现所获得的教训,使得MPICH2更加健壮、有效及便于使用。
MPI的搭建及OpenMP的配置实验指导书1.MPI简介消息传递接口(Message Passing Interface,MPI)是目前应用较广泛的一种并行计算软件环境,是在集群系统上实现并行计算的软件接口。
为了统一互不兼容的的用户界面,1992年成立了MPI委员会,负责制定MPI的新标准,支持最佳的可移植平台。
MPI不是一门新的语言,确切地说它是一个C和Fortran的函数库,用户通过调用这些函数接口并采用并行编译器编译源代码就可以生成可并行运行的代码。
MPI的目标是要开发一个广泛用于编写消息传递程序的标准,要求用户界面实用、可移植,并且高效、灵活,能广泛应用于各类并行机,特别是分布式存储的计算机。
每个计算机厂商都在开发标准平台上做了大量的工作,出现了一批可移植的消息传递环境。
MPI吸收了它们的经验,同时从句法和语法方面确定核心库函数,使之能适用于更多的并行机。
MPI在标准化过程中吸收了许多代表参加,包括研制并行计算机的大多数厂商,以及来自大学、实验室与工业界的研究人员。
1992年开始正式标准化MPI,1994年发布了MPI的定义与实验标准MPI 1,相应的MPI 2标准也已经发布。
MPI吸取了众多消息传递系统的优点,具有很好的可以执行、易用性和完备的异步通信功能等。
MPI事实上只是一个消息传递标准,并不是软件实现并行执行的具体实现,目前比较著名的MPI具体实现有MPICH、LAM MPI等,其中MPICH是目前使用最广泛的免费MPI系统,MPICH2是MPI 2标准的一个具体实现,它具有较好的兼容性和可扩展性,目前在高性能计算集群上使用非常广泛。
MPICH2的使用也非常简单,用户只需在并行程序中包含MPICH的头文件,然后调用一些MPICH2函数接口将计算任务分发到其他计算节点即可,MPICH2为并行计算用户提供了100多个C和Fortran函数接口,表1-1列出了一些常用的MPICH2的C语言函数接口,用户可以像调用普通函数一样,只需要做少量的代码改动就可以实现程序的并行运行,MPICH并行代码结构如图1-1所示。
Ubuntu系统下mpich2的安装。
把老师给的“mpich2-1.3.2p1.tar.gz ”解压到我的用户目录下。
一、首先进入解压后mpich2文件的根目录,运行配置操作:./configure--prefix=/home/<USERNAME>/mpich2-install |& tee info.txt ,结果报错如下:"No Fortran 77 compiler found. If you don't need to build anyFortran programs, you can disable Fortran support using--disable-f77 and --disable-fc. If you do want to buildFortran programs, you need to install a Fortran compiler suchas gfortran or ifort before you can proceed."于是按照提示修改命令,改为./configure --prefix=/home/east/mpich2-install --disable-f77 --disable-fc |& tee info.txt,结果又提示没有找到C++编译器:“configure: error: Aborting because C++ compiler does not work. If you do not need a C++ compiler, configure with –disable-cxx”考虑到以后应该会用到g++,于是根据提示用“sudo apt-get install g++”命令进行了安装。
然后再次运行配置命令,终于成功完成。
二、运行make命令”make |& tee info.txt”,经过了漫长的等待,看到提示”Make completed”的时候,终于松了一口气。
64位机+WIN7+VS2012+Intel.Visual.Fortran.XE2013-SP1+MPICH2并行环境设置实现攻略本人属于电脑菜鸟、编程菜鸟、并行菜鸟级初学者,在没有人指导的基础上,通过网上前辈积累的经验,和无数次撞墙,终于在64位win7台式机(8核,32G内存)上实现VS2012+IVF2013并行程序的编译,并且实现MPICH2下的并行计算。
如果有条件,建议在linux下进行并行运算,这是大牛们的建议。
但是本人计算机不能联网,且只有windows系统,所开展的并行计算规模也不是太大,主要是为了节省时间提高效率。
相信部分朋友还是有在windows下并行计算的需求,请并行大牛们不要鄙视,绕道通过。
IVF本身带MKL,可以开展并行计算,但是我不懂怎么弄,只好忽略。
以下是64位机+WIN7+VS2012+IVF2013-SP1+MPICH2实现的过程:1.设置计算机系统管理员用户名和密码。
这是由于在win7下装mpich2必须要使用管理员进行注册。
2.关掉window自带的防火墙,和安装的杀毒软件。
据说可能会导致mpich2成功启用,我没有严格对照过出现的问题是否是杀毒软件引起的,存疑,建议关闭防火墙和杀毒功能。
3.首先安装VS2012旗舰版。
安装位置默认是C:\Program Files (x86)\Microsoft Visual Studio11.0,但是不影响对64位的支持,前提是安装过程中全部安装(当中包括支持64位的选项),这一步具体可以参考别人的文章,海量。
4.其次安装IVF2013-SP1。
我仍然不确定IVF是否有32位和64位的差别,但是我下载的Intel.Visual.Fortran.XE2013-SP1安装过程中出现的部分语句显示是支持64的。
这一步具体参考别人的文章。
步骤3和步骤4的重点不在安装,而在环境设置中,参考步骤12-13。
5.现在安装MPICH2,我选择的64位:mpich2-1.4.1p1-win-x86-64。
linux并行环境及mpich2安装全过程准备工作:1、设置IP(在这里我们设置c1、c2、c3、c4的ip地址分别为192.168.0.1、192.168.0.2、192.168.03、192.168.0.4)#vi /etc/sysconfig/network-script/ifcfg-eth[0、1、2、3]其中数字与所修改的机器网卡实际编号一致#service network restart每个节点都要进行上面的操作2、更改主机名为c1、c2、c3、c4#vi /etc/sysconfig/networkHOSTNAME=c1c2、c3、c4操作和c1相同例如:[root@c2 ~]# cat /etc/sysconfig/networkNETWORKING=yesHOSTNAME=c2一、创建SSH信任连接(在root目录下)1、更改/etc/hosts文件#vi /etc/hosts 打开hosts文件,更改如下:127.0.0.1 localhost.localdomain localhost192.168.0.1 c1192.168.0.2 c2192.168.0.3 c3192.168.0.4 c4例如:[root@c2 ~]# cat /etc/hosts# Do not remove the following line, or various programs# that require network functionality will fail.127.0.0.1 localhost.localdomain localhost192.168.0.1 c1192.168.0.2 c2192.168.0.3 c3192.168.0.4 c42、在c1生成SSH秘钥对.#ssh-keygen -t rsa 回车即可,产生.ssh文件,口令选为空,生成密钥对,公钥写入/root/.ssh/id_rsa.pub,密钥写入/root/.ssh/id_rsa#ls -a 查看是否有.ssh文件夹3、生成authorized_keys文件建立对c2的信任连接#scp /root/.ssh/id_rsa.pub 192.168.0.2:/root/.ssh/#ssh 192.168.0.2 cat /.ssh/id_rsa.pub>>/root/.ssh/authorized_keys查看c2 是否有authorized_keys文件,有则将id_rsa.pub内容复制进c2该文件#scp /root/.ssh/id_rsa.pub 192.168.0.2 /.ssh/authorized_keys无则将id_rsa.pub复制为远程该文件4、退出到root目录#cd ..5、建立本身的信任连接#ssh c2 按提示输入yes(三个字母要打全)设置c1对c3和c4的方法与c1相同6、对c2、c3和c4进行类似上面的操作7、确认3台机器的信任连接已建立对每个节点执行:#ssh c1#ssh c2#ssh c3#ssh c4在提示处输入yes回车,最后确定无需输入密码并且没有任何提示信息即可登陆("Last login:时间日期"提示信息除外)二、安装MPICH2(在节点root目录下)1、解压缩#tar -zxvf mpich2-1.0.1.tar.gz或者 #gunzip -c mpich2-1.0.1.tar.gz|tar xf mpich2-1.0.1.tar2、创建安装目录#mkdir /usr/MPICH-install3、进入mpich2解压目录#cd mpich2-1.0.14、设置安装目录#./configure --prefix=/usr/MPICH-install5、编译#make6、安装#make install7、退出到root目录#cd ..8、通过编辑.bashrc文件修改环境变量#vi .bashrc修改后的.bashrc文件如下:# .bashrc# User specific aliases and functionsPATH=$PATH:/usr/MPICH-install/bin 新增加的#Source .bashrc9、测试环境变量设置#which mpd#which mpicc#which mpiexec#which mpirun10、修改/etc/mpd.conf文件,内容为secretword=myword#vi /etc/mpd.conf设置文件读取权限和修改时间#touch /etc/mpd.conf#chmod 600 /etc/mpd.conf11、创建主机名称集合文件/root/mpd.hosts#vi mpd.hosts文件内容如下:C1C2C3c4三、测试1、本地测试#mpd & 启动#mpdtrace 观看启动机器#mpdallexit 退出2、通过mpd.hosts运行集群系统#mpdboot -n number -f mpd.hosts number为要起动的机器个数#mpdtrace#mpdallexit3、测试运行MPICH的例子程序#mpdboot -n 4 -f mpd.hosts 启动4台机器#mpiexec -n number /usr/MPICH-install/examples/cpi number为使用的进程数#mpdallexit4、如果测试不能通过,请进行第四步四、问题解决1、通过mpdcheck获得一写帮助信息#mpdcheck -pc2、查错#mpdcheck -l3、通过mpd.hosts文件查错#mpdcheck -f mpd.hosts 如果无错误#mpdcheck -f mpd.hosts -ssh4、如果上述无错误,可略过此步对任意两台机器进行查错m1: #mpdcheck -s 输出主机名host和端口portm2: #mpdcheck -c host port注意:以上四步都是在没有运行mpd的情况下进行的5、mpd查错m1: #mpd -e & 返回使用的端口m2: #mpd -h m1 -p echoed_port_m1 &完成安装。
MPICH2的安装过程经测试MPICH2的性能非常优越:具有方便的管理操作实现对多核的支持(推荐)From: /viewdiary.14672598.htmlMPICH2软件包的安装MPICH2是与MPI-2相对应的MPICH实现版本,包含了MPI-2相对于MPI-1扩充后的一些功能,比如动态任务管理,并行I/O等。
当前最新版本是MPICH2-1.0.2.(1)下载MPICH2源程序包mpich2-1.0.2p1.tar.gz(/mpi/mpich2/)。
(2)解压源程序包到当前目录下:tar zxf mpich2-1.0.2p1.tar.gz,此时会得到一个名为mpich2-1.0的子文件夹。
(3)创建一个安装目录(比如/home/transim/mpich2,默认为/usr/local/bin),为了以后使用方便,可以将此安装目录共享到其他所有将要运行mpich2的节点机上;否则就需要分别在其他机器上安装mpich2。
如果不创建安装目录,则在下面的configure步骤中会自动创建安装目录。
(4)选择一个编译目录,最好将编译目录与源代码目录分离开,以便能保持一个干净的源代码用来在其他机器上重新安装。
比如将源代码拷贝到/tmp/mpich2下。
(5)配置MPICH2,指定安装目录,并在编译目录下运行configure脚本。
如:cd /tmp/mpich2./configure –prefix=/home/transim/mpich2 2>&1 | tee configure.log(6) 编译链接MPICH2:make 2>1& | tee make.log(1)安装MPICH2:make install 2>1& | tee install.log(2)将安装目录中子目录bin加入到环境变量PATH中:setenv PATH /home/transim/mpich2/bin:$PATH (csh或tcsh)export PATH=/home/transim/mpich2/bin:$PATH (bash或sh)用以下命令检查安装是否成功:which mpdwhich mpiccwhich mpiexecwhich mpirun所有以上的命令都应该指向安装目录的bin子目录。
MPICH2简单的安装配置总结来源:CSDN 作者:andy1lee 发布时间:2008-3-26 人气:194MPICH2是MPI(Message-Passing Interface)的一个应用实现,支持最新的MPI-2接口标准,是用于并行运算的工具,在程序设计语言上支持C/C++和Fortran。
最近因为有项目需要的计算量比较大,所以就学习使用了MPICH2,在此根据网络上查询的相关信息和我自己的实际使用经历,分别总结一下MPICH2在windows和linux下基本的安装使用方法。
软件下载MPICH2的主页是/mpi/mpich2/index.htm,在这个页面上就能找到各平台最新版本MPICH2的下载地址,其中还包括源代码,我在开始作这个项目的时候最新版本是windows版mpich2-1.0.5p2,源代码mpich2-1.0.5p4。
我们的项目是一个CentOS版linux下的程序,所以最终是要在linux下运行的,但是又舍不得windows,于是就打算可能的话就在windows下写程序,用MinGW加windows版的MPICH2编译调试,通过后再到wmware虚拟机组成的简单集群作测试。
所以,为避免不必要的麻烦,就要统一一下windows和linux下的MPICH2版本,而且不打算用最新的,因此决定用mpich2-1.0.5版。
但是,如果在主页上找的话是没有以前旧版本下载的链接的(至少我没找到),只有最新版本的http和ftp下载。
这难不住我等有心之人,既然提供了ftp下载,那咱就直接到他ftp服务器上找,最新源代码链接的地址是ftp:///pub/mpi/mpich2-1.0.5p4.tar.gz,把后面文件名去掉就应该是文件的ftp存放路径,把这个路径直接写到浏览器地址栏里回车(偶用的是FireFox2),就能看到他们服务器上这个目录的文件列表,里面就有1.0.5版的windows安装文件和源代码包,分别为ftp:///pub/mpi/mpich2-1.0.5-win32-ia32.msi和ftp:///pub/mpi/mpich2-1.0.5.tar.gz。
MPICH2安装及MPI简介2009-02-16 19:02:38| 分类:HPC | 标签:mpich2的安装 mpi |字号大中小订阅ZHI 2008-12-14MPICH2的安装●下载MPICH2包mpich2.tar.gz●解压缩# tar xfz mpich2.tar.gz●#mkdir /tmp/root/mpich2-1.0.8●#cd /tmp/root/mpich2-1.0.8●#/root/Desktop/mpich2-1.0.8/configure --prefix=/usr/local 2>&1 | tee configure.log//其中root/Desktop/mpich2-1.0.8/为解压后MPICH2路径●#make 2>&1 | tee make.log●#make install PACKAGE=mpich-1.0.8 2>&1 | tee install.log●#make installcheck PACKAGE=mpich-1.0.8 2>&1 | tee installcheck.log测试安装是否成功#which mpiexec#which mpd //默认程序管理命令default process manager#which mpicc#which mpirun注:如果不是安装在/usr/local目录下,则还需设置环境变量。
通过编辑.bashrc文件修改环境变量#vi .bashrc修改后的.bashrc文件如下:# .bashrc# User specific aliases and functionsPATH="$PATH:/usr/MPICH-install/bin" //新增加的#Source .bashrcmpd配置文件中设置密码#cd $HOME#touch .mpd.conf#chmod 600 .mpd.conf //权限设置为只有自己有读写权限在超级用户下:#cd /etc#vi mpd.conf写入secretword=jsi 并保存#chmod 600 /etc/mpd.conf单机测试#mpd &#mpdtrace//显示本机名为成功#mpiexec –n 1 /bin/hostname#mpdallexitSSH配置●修改所有机器上的/etc/hosts文件为如下内容127.0.0.1 localhost.localdomain localhost10.10.1.190 node0110.10.2.190 node02……●创建SSH密钥(root目录)#ssh-keygen –t rsa //其中-t rsa指密钥类型。
linux下安装intel编译器及mpich2的总结linux下安装intel编译器及mpich2的总结 2008年1.fortran编译器从intel网站可以下载免费的fortran,c++等编译器,注意是非商业免费版;AccountID=&ProgramID=&RequestDt=&rm=NCOM&lang= 用可用的邮箱注册,会分配一个序列号,保存此序列号,安装产品时将需要使用它: 我的序列号: NF83-7G8J9JLM联网状态下只需输入序列号就可安装,否则需要使用发送到注册邮箱附件的.lic文件选择要下载的文件我下载了C++和fortran的编译器l_cc_p_10.1.018.tar.gzl_fc_p_10.1.018.tar.gz存放在/usr/src目录下打开终端,进入当前文件夹[root@localhost ~]# cd /usr/src解压[root@localhost src]# tar zxvf l_cc_p_10.1.018.tar.gz[root@localhost src]# tar zxvf l_fc_p_10.1.018.tar.gzIntel 10.x 编译器为了保证和基于 GCC 3.2 的系统兼容, 需要使用标准 C++ 库 /usr/lib/libstdc++.so.5, 但是很多比较新的 Linux 发行版本中开始使用GCC 3.4, 并且提供了全新的标准 C++ 库 /usr/lib/libstdc++.so.6. 所以安装前需先装 compat-libstdc++ rpm包,它包含了 /usr/lib/libstdc++.so.5 库. 否则会提示缺少libstdc++.so.5最简单的方法[root@localhost src]# yum install libstdc++.so.5 按照提示安装即可,也可以自己在网上下载。
Prometheus 2.39.1 基础说明目录1 . prometheus 基础安装 (2)服务安装配置 (2)启动命令 (2)配置说明 (3)2 . prometheus pushgateway 基础安装 (3)A . Pushgateway安装 (3)B . 启动命令 (3)C . 配置说明 (4)D. 历史数据清理 (4)3 . Grafana 基础安装 (5)4 . flink 指标采集设置 (5)5 . prometheus 常用命令 (6)6 . Java API 自定义指标采集 (7)基础概念 (7)采集指标类型 (7)Summary & Histogram (7)Histogram Bucket 范围分位数据统计问题 (8)Summary VS Histogram (8)Java Code (8)1 . prometheus 基础安装服务安装配置prometheus server 默认采集pull 方式从不同客户端拉取采集指标数据过来进行记录查询, 但是这样对于实际环境会有一定的要求, 有些场景无法满足采集要求, 所在在实际使用过程中会采用prometheus server + prometheus gateway 的方法将所有采集指标从客户端push 到prometheus gateway , 然后由prometheus server 统一从prometheus gateway 服务pull 获取所有上传的待采集指标的数据信息, 最后提供记录和查询 .------------------------ prometheus server 示例配置:scrape_configs:- job_name: "prometheus"static_configs:- targets: ["localhost:9090"]- job_name: "prometheus_gw"static_configs:- targets: ['mydomain:9091']honor_labels: trueprometheus server 默认仅有一个prometheus server 自己的指标采集配置(jobName = prometheus) , 等成功安装并启动prometheus gateway 后, 需要在prometheus.yaml 文件中添加prometheus gateway 的相关配置, 指定gateway 地址即可统一从gateway 获取到所有采集客户端push 到gateway 的各种采集指标数据 .[ pushgateway ] - [ honor_labels ] : 该配置用使用设置prometheus server 如何处理从客户端pull 过来的数据与服务端本身同名冲突数据(比如:job&instance完全相同)的策略 .true : 表示以从客户端pull 过来的数据为准, 忽略服务端已有的相同标识的数据 .false : 表示以prometheus server 已有数据的设置为准.启动命令./prometheus \--config.file=/etc/prometheus/prometheus.yml \--storage.tsdb.path=/prometheus \--storage.tsdb.retention.time=60d \--storage.tsdb.retention.size=1024MB \--web.enable-admin-api \--web.enable-lifecycle配置说明config.file : 指定配置文件地址storage.tsdb.path : 指定存储数据位置storage.tsdb.retention.time : 指定存储数据默认保存周期,就是多久会将数据从磁盘删除.(注意:prometheus数据默认是不会永久保存的)storage.tsdb.retention.size : 指定存储数据默认最大大小,就是超过多少数据会被滚动删除.(这个和retention.time可以互选,默认0是禁用)web.enable-admin-api : 开启管理员权限APIweb.enable-lifecycle : 开启热更新,直接使用[POST] [ /-/reload ] 立刻生效2 . prometheus pushgateway 基础安装TIPS:1 . 部分Admin API 可能需要开启Admin 权限才能使用, 所以在启动时需要指定[ --web.enable-admin-api ] 参数 .2 . API 请求成功后会返回202 状态码 .A . Pushgateway安装无需额外处理,直接解压启动即可.B . 启动命令./prometheus-gateway \--log.level=info \--persistence.file="/file_path" \--persistence.interval=5m0s \--web.enable-admin-api\--web.enable-lifecycle \--web.listen-address=":9091" \--web.telemetry-path="/metrics"C . 配置说明log.level : 日志等级persistence.file : 数据持久化目录(默认内存保存,无法持久化)persistence.interval : 数据持久化间隔(默认五分钟)web.enable-admin-api : 是否开启Admin API 权限web.enable-lifecycle : 开启热更新web.listen-address : 监听端口 . ":9091" or "0.0.0.0:9091" .web.telemetry-path : 指标数据访问路径(类似context-path作用) D. 历史数据清理prometheus gateway 历史数据清理: (执行命令先需要确认--web.enable-admin-api 权限已开启)删除指定job & group 的pushgateway 指标数据(也可以选择从Web UI 界面上删除)e.g :groupingKey="group=test2"[ DELETE ] Prometheus_URL:9091/metrics/job/monitor_demo_metrics23afd49bef5f261b15ce4164f4eb4 c18d/group/test2 .e.g : groupingKey="instance=01;type=calc"[ DELETE ] Prometheus_URL:9091/metrics/job/monitor_demo_metrics23afd49bef5f261b15ce4164f4eb4 c18d/instance/01/type=calc .注意: 删除指标数据必须以完整的job + groupingKey 的形式来删除,比如: 以job=test 为条件是无法删除job=test & group1 = test1 , 必须明确指定完整的groupingKey 内容才行完整的groupingKey 可以参见WebUI 显示的内容, 一般WebUI 会显示完整的指标条件 .删除所有的指标数据[ PUT ] Prometheus_URL:9091/api/v1/admin/wipe注意: 这里的删除指的删除pushgateway 组件的收集的指标数据,和prometheus server 无关,如果要删除prometheus server 数据, 参见prometheus 常用命令 .D . Web 访问地址:Prometheus_URL:9091/3 . Grafana 基础安装关于grafana 的配置需要注意, 官方建议从conf 目录下复制sample.ini 文件并命名为custom.ini 文件, 并配置custom.ini 文件以完成对grafana 的实际配置, 不要修改defaults.ini 或sample.ini 文件 .4 . flink 指标采集设置--------------------------------------------------------------- 示例配置: (prometheus-pushgateway)metrics.reporter.promgateway.class:org.apache.flink.metrics.prometheus.PrometheusPushGatewayReportermetrics.reporter.promgateway.host: Pushgateway_URLmetrics.reporter.promgateway.port: 9091# metrics.reporter.promgateway.jobName: myJobmetrics.reporter.promgateway.randomJobNameSuffix: truemetrics.reporter.promgateway.deleteOnShutdown: true# metrics.reporter.promgateway.groupingKey: k1=v1metrics.reporter.promgateway.interval: 10 SECONDS--------------------------------------------------------------- 配置说明:class :标识当前指标的采集汇报实现类host : 指标汇报地址port : 指标汇报端口jobName : 采集任务名称(建议在flink任务提交命令中以"-D"指定) randomJobNameSuffix : 追加采集任务名随机后缀,开启会在jobName参数后追加UUID字符串,测试中发现如果关闭该选项会导致jm & tm汇报的指标数据重叠,所以暂时建议开启.deleteOnShutdown : 关闭flink任务时是否主动删除已汇报的指标数据 . (建议设置成true,否则需要手动清理以汇报的指标历史数据,尽管这个任务已不存在了)groupingKey : 分组键值对,当采集指标任务很多的时候用于区分不同的采集任务主体,多个以";"(分号)分割.(建议在flink任务提交命令中以"-D"指定)interval : 采集指标汇报频率,按需设置5 . prometheus 常用命令TIPS:1 . 部分Admin API 可能需要开启Admin 权限才能使用, 所以在启动时需要指定[ --web.enable-admin-api ] 参数 .2 . API 请求成功后会返回204 状态码 .A . 查询指定时间的接入指标状态为up的采集数据[POST]Prometheus_URL:9090/api/v1/query?query=up&time=2022-10-20T02:10:51.781ZB . 删除指定名称的指标数据 . 删除后数据并不会立刻从磁盘移除,会等到一定时间后(默认15d)后才会从磁盘移除 .[POST]Prometheus_URL:9090/api/v1/admin/tsdb/delete_series?match[]={job="monitor _demo_metrics16b651335bb01fe7ebeebf23b1d58932"}C . 删除所有的time series 采集数据 . (注意: 是双下划线)[POST]Prometheus_URL:9090/api/v1/admin/tsdb/delete_series?match[]={__name__=~". +"}注意: 此处仅仅是删除prometheus server 的历史数据, 如果数据是经过prometheus gateway 拉取过来的, 那虽然删除了prometheus server 的time series 数据, 但是prometheus gateway 仍旧会推送已经下线的metrics 数据给到prometheus server 进行采集, 所以这个删除仅仅是删除prometheus server 数据, 删除过后gateway 仍旧可能推送历史time series 数据过来, 要想grafana 彻底删除历史time series 数据, 则需要清理prometheus gateway 的数据, 详情参见prometheus gateway 章节 .D . 删除磁盘上已经被删除的time series 数据释放空间, 并清理现有的tombstones .[ POST ] Prometheus_URL:9090/api/v1/admin/tsdb/clean_tombstonesE . 制作快照 . (注意: 快照可用于还原当前已存储指标数据)[ POST ] Prometheus_URL:9090/api/v1/admin/tsdb/snapshot?skip_head=false6 . Java API 自定义指标采集基础概念采集方式划分:自定义指标采集可以分为两种采集方式 .1 : 对接prometheus server . 这种需要本地使用simpleclient_httpserver 的支持,然后由prometheus server 定时pull 本地指标到服务中进行显示 .2 : 对接prometheus pushgateway . 这种需要本地使用pushgateway API 将本地采集指标定期push 到pushgateway 服务,然后由prometheus server 定期从pushgateway 来通过pull 方式获取采集指标数据 .采集指标类型prometheus 采集指标格式分为四种 .1 : Counter 格式 .该指标只能递增且重启时会重启当前指标 .2 : Gauge 格式 .该指标能[ 递增/ 递减/ 设置]指标值 .3 : Summary 格式 . (摘要)该指标可以采集时间区间内的指标的统计信息,然后根据预设分位数实时将统计结果叠加到指定分位数分段上去(动态计算分位数). 如:在采集周期内,某个指标的值总和、出现次数、指标分位占比(例如:每个耗时采集点指标数量占总采集数量的比例等).因为是实时计算分位数结果,所以它的分位数结果比较准确.但是效率没有Histogram 高.4 : Histogram 格式 . (累计式柱状图)该指标可以根据预设Bucket 信息,将采集指标的数据按照Bucket 设置分别打入不同的Bucket 中,用于计算单个Bucket 的统计处理.对此结果进行聚合操作可以灵活&快速的得到聚合结果.但是它因为受Bucket 预设限制,所以对分位数的统计可能有时会存在较大误差(视业务情况而定).Summary & HistogramSummary 与Histogram 都是进行复杂数据采集的格式,但是二者在实现和目标上有差距.需要根据业务数据实际情况和目标进行选择.Summary 结构会采集每一个指标数据进行值求和、分位占比计算(动态更新),所以它在分位计算结果上比较准确,它不像Histogram 一样受Bucket 设置的影响会导致指标数据计算结果偏差很大.正因如此,它会有频繁的全局锁操作,对于高并发采集性能存在一定影响,而且不能对Summary 计算结果进行其他处理,比如sum/avg 等.因为它的结果是根据每一个指标数据值实时计算的结果. Summary 的分位设置需要提前在客户端里指定,在服务端下无法获取未指定分位的结果,这也能理解,因为它需要实时计算分位统计值,所以自然是要预设分位设置.Histogram 结构会对指标数据进行预设Bucket 统计,然后将指标数据值按照Bucket 预设范围打入不同的Bucket 中进行计数统计,然后在服务端可以根据自身需要来汇总所有Bucket 的数据进行展示.基于这个原理它的弊端也很明显,就是Bucket 设置范围问题(参见下述Bucket 范围分位数据统计问题列表),所以它对分位数统计很不准确.但是它的优势是在高并发采集下性能优异,因为它只需要每个Bucket 做原子变量计数即可,不需要像Summary 一样实时计算分位数结果.Summary 是基于应用系统层面的计算,它在客户端层面完成,也就说应用一旦重启要重新采集计算.而Histogram 是基于历史数据的计算它是在服务端完成计算结果的.官方推荐如非需要获取精准Summary 数据的场景下尽量使用Histogram 来完成数据统计分析.Histogram Bucket 范围分位数据统计问题TIPS : 这里在忽略业务数据因素单纯从Histogram Bucket 原理层面分析,如果能确定Bucket范围则可以解决该问题.Bucket 上限过大: 可能会形成很多无用Bucket 同时会造成Bucket 数量过多(均匀分布)或严重数据倾斜(不均匀分布).Bucket 上限过小: 可能会丢失超出Bucket 范围的数据.Summary VS Histogram基于上述对Summary & Histogram 的原理、功能、使用方式的分析,在实际业务中如何选取二者就可以参考上述的因素.A . 需要聚合、统计、观察指标值范围和分布情况操作选择Histogram.因为它效率更高.B . 需要获取精准的指标分位数结果选择Summary.因为它的分位数是根据指标值实时计算的.Java Code1.pom.xml<dependency><groupId>io.prometheus</groupId><artifactId>simpleclient</artifactId><version>0.16.0</version></dependency><dependency><groupId>io.prometheus</groupId><artifactId>simpleclient_hotspot</artifactId><version>0.16.0</version></dependency><!-- simpleclient_httpserver(prometheus server) or pushgateway(pushgateway server) --><dependency><groupId>io.prometheus</groupId><artifactId>simpleclient_pushgateway</artifactId><version>0.16.0</version></dependency>引入按需设置 . 如果对接prometheus server 采用[ simpleclient_httpserver ] 依赖, 如果是对接pushgateway 采用[ simpleclient_pushgateay ] 依赖,按需设置 .2 . CodeGauge 格式-- Gauge 无Label 用法final CollectorRegistry registry = new CollectorRegistry();final Gauge ranMetrics1 = Gauge.build().name("metrics_1").help("test_help_1").register(registry);final Gauge ranMetrics2 = Gauge.build().name("metrics_2").help("test_help_2").register(registry);final PushGateway gateway = new PushGateway("Pushgateway_URL:9091");Timer timer = new Timer();timer.schedule(new TimerTask() {@Overridepublic void run() {Random random = new Random();int ranNum1 = random.nextInt(100);int ranNum2 = random.nextInt(100);System.out.println("上传:" + ranNum1 + "\t" + ranNum2);ranMetrics1.set(ranNum1);ranMetrics2.set(ranNum2);Map<String, String> groupingKey = new HashMap<String, String>();groupingKey.put("group", "metrics0");groupingKey.put("instance", "instance0");try {gateway.pushAdd(registry, "self_metrics", groupingKey);} catch (IOException e) {e.printStackTrace();}}}, 2000L, 3000L);-- Gauge 有Label 用法: Label 可以理解为对指标的数据进行更深业务层次的说明的作用 .public static void main(String[] args) {final CollectorRegistry registry = new CollectorRegistry();// 对采集指标指定标签属性.例如:此处指标用于采集"指标类型"+"应用显示"两个标签分组的指标.final Gauge ranMetrics1 = Gauge.build().name("metrics_1").help("test_help_1").labelNames("metrics_type","app_show").register(registry);final PushGateway gateway = new PushGateway("Pushgateway_URL:9091");Timer timer = new Timer();timer.schedule(new TimerTask() {@Overridepublic void run() {Random random = new Random();int ranNum1 = random.nextInt(100);// 已指定标签的指标,采集时必须指定标签的值,也就是对指定标签值进行指标采集.// 例如:此处设置采集标签"metrics_type"的值为"access_cnt",设置采集标签"app_show"的值为"yandex",然后才采集指标的具体值.// 简单理解该此采集就是:采集了"yandex"的"access_cnt"指标值,同样该采集指标依旧可以采集其他的"metrics_type"+"app_show"的指标值.bels("access_cnt", "yandex").set(ranNum1);Map<String, String> groupingKey = new HashMap<String, String>();groupingKey.put("group", "metrics0");groupingKey.put("instance", "instance0");try {gateway.pushAdd(registry, "self_metrics", groupingKey);} catch (IOException e) {e.printStackTrace();}}}, 2000L, 3000L);}Histogram 格式TIPS :1 . +Inf 是系统默认添加的Bucket 的上限值private static void histogram() {final CollectorRegistry registry = new CollectorRegistry();final PushGateway gateway = new PushGateway("Pushgateway_URL:9091");final Histogram histogram = Histogram.build().name("metrics_2").help("test histogram metrics").buckets(10, 20, 30, 40, 50, 60, 70, 80, 90).register(registry);final int base = 100;Timer timer = new Timer();timer.schedule(new TimerTask() {@Overridepublic void run() {Random random = new Random();int ranNum1 = random.nextInt(base);System.out.println("histogram metrics -> " + ranNum1);histogram.observe(ranNum1);Map<String, String> groupingKey = new HashMap<String, String>();groupingKey.put("group", "metrics0");groupingKey.put("instance", "instance0");try {gateway.pushAdd(registry, "self_metrics", groupingKey);} catch (IOException e) {e.printStackTrace();}}}, 2000L, 3000L);}。
MPICH2Installer’s Guide∗Version@VERSION@Mathematics and Computer Science DivisionArgonne National LaboratoryWilliam GroppEwing LuskDavid AshtonPavan BalajiDarius BuntinasRalph ButlerAnthony ChanDave GoodellJayesh KrishnaGuillaume MercierRob RossRajeev ThakurBrian ToonenNovember18,2009∗This work was supported by the Mathematical,Information,and Computational Sci-ences Division subprogram of the Office of Advanced Scientific Computing Research,Sci-DAC Program,Office of Science,U.S.Department of Energy,under Contract DE-AC02-06CH11357.1Contents1Introduction12Quick Start12.1Prerequisites (1)2.2From A Standing Start to Running an MPI Program (2)2.3Compiler Optimization Levels (9)2.4Common Non-Default Configuration Options (11)2.4.1The Most Important Configure Options (11)2.4.2Using the Absoft Fortran compilers with MPICH2..122.5Shared Libraries (12)2.6What to Tell the Users (12)3Migrating from MPICH1133.1Configure Options (13)3.2Other Differences (13)4Choosing the Communication Device145Installing and Managing Process Managers155.1mpd (16)5.1.1Configuring mpd (16)5.1.2System Requirements (16)5.1.3Using mpd (16)5.1.4Options for mpd (17)5.1.5Running MPD on multi-homed systems (17)5.1.6Running MPD as Root (18)i5.1.7Running MPD on SMP’s (18)5.1.8Security Issues in MPD (19)5.2SMPD (20)5.2.1Configuration (20)5.2.2Usage and administration (21)5.3gforker (22)5.4hydra (22)6Testing22 7Benchmarking23 8MPE239Windows Version239.1Binary distribution (23)9.2Source distribution (25)9.3cygwin (26)10All Configure Options26A Troubleshooting MPDs30A.1Getting Started with mpd (30)A.1.1Following the steps (31)A.2Debugging host/network configuration problems (36)A.3Firewalls,etc (38)ii1INTRODUCTION1 1IntroductionThis manual describes how to obtain and install MPICH2,the MPI-2imple-mentation from Argonne National Laboratory.(Of course,if you are reading this,chances are good that you have already obtained it and found this doc-ument,among others,in its doc subdirectory.)This Guide will explain how to install MPICH so that you and others can use it to run MPI applications. Some particular features are different if you have system administration priv-ileges(can become“root”on a Unix system),and these are explained here. It is not necessary to have such privileges to build and install MPICH2.In the event of problems,send mail to mpich-discuss@.Once MPICH2is installed,details on how to run MPI jobs are covered in the MPICH2User’s Guide,found in this same doc subdirectory.MPICH2has many options.We willfirst go through a recommended,“standard”installation in a step-by-step fashion,and later describe alterna-tive possibilities.2Quick StartIn this section we describe a“default”set of installation steps.It uses the default set of configuration options,which builds the sock communication device and the MPD process manager,for languages C,C++,Fortran-77,and Fortran-90(if those compilers exist),with compilers chosen automatically from the user’s environment,without tracing and debugging options.It uses the VPATH feature of make,so that the build process can take place on a local disk for speed.2.1PrerequisitesFor the default installation,you will need:1.A copy of the distribution,mpich2.tar.gz.2.A C compiler.3.A Fortran-77,Fortran-90,and/or C++compiler if you wish to writeMPI programs in any of these languages.2QUICK START24.Python2.2or later version,for building the default process manage-ment system,MPD.Most systems have Python pre-installed,but youcan get it free from .You may assume it is thereunless the configure step below complains.5.Any one of a number of Unix operating systems,such as IA32-Linux.MPICH2is most extensively tested on Linux;there remain some dif-ficulties on systems to which we do not currently have access.Ourconfigure script attempts to adapt MPICH2to new systems.Configure will check for these prerequisites and try to work around defi-ciencies if possible.(If you don’t have Fortran,you will still be able to use MPICH2,just not with Fortran applications.)2.2From A Standing Start to Running an MPI ProgramHere are the steps from obtaining MPICH2through running your own par-allel program on multiple machines.1.Unpack the tarfile.tar xfz mpich2.tar.gzIf your tar doesn’t accept the z option,usegunzip-c mpich2.tar.gz|tar xf-Let us assume that the directory where you do this is/home/you/libraries.It will now contain a subdirectory named mpich2-@VERSION@.2.Choose an installation directory(the default is/usr/local/bin):mkdir/home/you/mpich2-installIt will be most convenient if this directory is shared by all of themachines where you intend to run processes.If not,you will have toduplicate it on the other machines after installation.Actually,if youleave out this step,the next step will create the directory for you.2QUICK START33.Choose a build directory.Building will proceed much faster if yourbuild directory is on afile system local to the machine on which the configuration and compilation steps are executed.It is preferable that this also be separate from the source directory,so that the source directories remain clean and can be reused to build other copies on other machines.mkdir/tmp/you/mpich2-@VERSION@4.Choose any configure options.See Section2.4.1for a description ofthe most important options to consider.5.Configure MPICH2,specifying the installation directory,and runningthe configure script in the source directory:cd/tmp/you/mpich2-@VERSION@/home/you/libraries/mpich2-@VERSION@/configure\-prefix=/home/you/mpich2-install|&tee c.txt where the\means that this is really one line.(On sh and its deriva-tives,use2>&1|tee c.txt instead of|&tee c.txt).Other con-figure options are described below.Check the c.txtfile to make sure everything went well.Problems should be self-explanatory,but if not, send c.txt to mpich-discuss@.Thefile config.log is created by configure and contains a record of the tests that configure performed.It is normal for some tests recorded in config.log to fail.6.Build MPICH2:make|&tee m.txt(for csh and tcsh)ORmake2>&1|tee m.txt(for bash and sh)This step should succeed if there were no problems with the preceding step.Checkfile m.txt.If there were problems,do a make clean and then run make again with VERBOSE=1make VERBOSE=1|&tee m.txt(for csh and tcsh)ORmake VERBOSE=12>&1|tee m.txt(for bash and sh)2QUICK START4and then send m.txt and c.txt to mpich-discuss@.7.Install the MPICH2commands:make install|&tee mi.txtThis step collects all required executables and scripts in the bin subdi-rectory of the directory specified by the prefix argument to configure.(For users who want an install directory structure compliant to GNUcoding standards(i.e.,documentationfiles go to${datarootdir}/doc/${PACKAGE}, architecture independent read-onlyfiles go to${datadir}/${PACKAGE}),replace make install bymake install PACKAGE=mpich2-<versrion>and corresponding installcheck step should bemake installcheck PACKAGE=mpich2-<version>Setting PACKAGE in make install or make installcheck step isoptional and unnecessary for typical MPI users.)8.Add the bin subdirectory of the installation directory to your path:setenv PATH/home/you/mpich2-install/bin:$PATHfor csh and tcsh,orexport PATH=/home/you/mpich2-install/bin:$PATHfor bash and sh.Check that everything is in order at this point bydoingwhich mpdwhich mpiccwhich mpiexecwhich mpirunAll should refer to the commands in the bin subdirectory of yourinstall directory.It is at this point that you will need to duplicate thisdirectory on your other machines if it is not in a sharedfile systemsuch as NFS.2QUICK START59.MPICH2,unlike MPICH,uses an external process manager for scal-able startup of large MPI jobs.The default process manager is called MPD,which is a ring of daemons on the machines where you will run your MPI programs.In the next few steps,you will get this ring up and tested.The instructions given here will probably be enough to get you started.If not,you should refer to Appendix A for troubleshoot-ing help.More details on interacting with MPD can be found by running mpdhelp or any mpd command with the--help option,or by viewing the READMEfile in mpich2/src/pm/mpd.The information provided includes how to list running jobs,kill,suspend,or otherwise signal them,and how to use the gdb debugger via special arguments to mpiexec.For security reasons,MPD looks in your home directory for afile named.mpd.conf containing the linesecretword=<secretword>where<secretword>is a string known only to yourself.It should not be your normal Unix password.Make thisfile readable and writable only by you:cd$HOMEtouch.mpd.confchmod600.mpd.confThen use an editor to place a line like:secretword=mr45-j9zinto thefile.(Of course use a different secret word than mr45-j9z.)10.Thefirst sanity check consists of bringing up a ring of one MPD onthe local machine,testing one MPD command,and bringing the“ring”down.mpd&mpdtracempdallexit2QUICK START6 The output of mpdtrace should be the hostname of the machine you are running on.The mpdallexit causes the mpd daemon to exit.If you encounter problems,you should check Appendix A on trou-bleshooting MPD.11.The next sanity check is to run a non-MPI program using the daemon.mpd&mpiexec-n1/bin/hostnamempdallexitThis should print the name of the machine you are running on.If not, you should check Appendix A on troubleshooting MPD.12.Now we will bring up a ring of mpd’s on a set of machines.Create afile consisting of a list of machine names,one per thisfile mpd.hosts.These hostnames will be used as targets for ssh or rsh, so include full domain names if necessary.Check that you can reach these machines with ssh or rsh without entering a password.You can test by doingssh othermachine dateorrsh othermachine dateIf you cannot get this to work without entering a password,you will need to configure ssh or rsh so that this can be done,or else use the workaround for mpdboot in the next step.13.Start the daemons on(some of)the hosts in thefile mpd.hosts.mpdboot-n<number to start>-f mpd.hostsThe number to start can be less than1+number of hosts in thefile, but cannot be greater than1+the number of hosts in thefile.One mpd is always started on the machine where mpdboot is run,and is counted in the number to start,whether or not it occurs in thefile.By default, mpdboot will only start one mpd per machine even if the machine name appears in the hostsfile multiple times.The-1option can be used2QUICK START7 to override this behavior,but there is typically no reason for a userto need multiple mpds on a single host.The-1option(that’s thedigit one,not the letter el)exists mostly to support internal testing.The--help option explains these as well as other useful options.Inparticular,if your cluster has multiprocessor nodes,you might wantto use the--ncpus argument described in Section5.1.7.Check to see if all the hosts you listed in mpd.hosts are in the outputofmpdtraceand if so move on to the next step.There is a workaround if you cannot get mpdboot to work because ofdifficulties with ssh or rsh setup.You can start the daemons“byhand”as follows:mpd&#starts the local daemonmpdtrace-l#makes the local daemon print its host#and port in the form<host>_<port>Then log into each of the other machines,put the install/bin direc-tory in your path,and do:mpd-h<hostname>-p<port>&where the hostname and port belong to the original mpd that youstarted.From each machine,after starting the mpd,you can dompdtraceto see which machines are in the ring so far.More details on mpdbootand other options for starting the mpd’s are in mpich2-@VERSION@/src/pm/mpd/README.In case of persistent difficulties getting the ring of mpd’s up and run-ning on the machines you want,please see Appendix A.There wediscuss the mpd’s in more detail and describe how you can use thempdcheck utility to diagnose problems with the networking configura-tion of your systems.14.Test the ring you have just created:2QUICK START8mpdtraceThe output should consist of the hosts where MPD daemons are nowrunning.You can see how long it takes a message to circle this ringwithmpdringtestThat was quick.You can see how long it takes a message to go aroundmany times by giving mpdringtest an argument:mpdringtest100mpdringtest100015.Test that the ring can run a multiprocess job:mpiexec-n<number>hostnameThe number of processes need not match the number of hosts in thering;if there are more,they will wrap around.You can see the effectof this by getting rank labels on the stdout:mpiexec-l-n30hostnameYou probably didn’t have to give the full pathname of the hostnamecommand because it is in your path.If not,use the full pathname:mpiexec-l-n30/bin/hostname16.Now we will run an MPI job,using the mpiexec command as specifiedin the MPI-2standard.As part of the build process for MPICH2,a simple program to computethe value ofπby numerical integration is created in the mpich2-@VERSION@/examples directory.If the current directory is the top level MPICH2build di-rectory,then you can run this program withmpiexec-n5examples/cpi2QUICK START9 The number of processes need not match the number of hosts.Thecpi example will tell you which hosts it is running on.By default,the processes are launched one after the other on the hosts in the mpdring,so it is not necessary to specify hosts when running a job withmpiexec.There are many options for mpiexec,by which multiple executablescan be run,hosts can be specified(as long as they are in the mpd ring),separate command-line arguments and environment variables can bepassed to different processes,and working directories and search pathsfor executables can be specified.Dompiexec--helpfor details.A typical example is:mpiexec-n1master:-n19slaveormpiexec-n1-host mymachine master:-n19slaveto ensure that the process with rank0runs on your workstation.The arguments between‘:’s in this syntax are called“argument sets,”since they apply to a set of processes.More argments are described inthe User’s Guide.The mpirun command from the original MPICH is still available,al-though it does not support as many options as mpiexec.You mightwant to use it in the case where you do not have the XML parserrequired for the use of mpiexec.If you have completed all of the above steps,you have successfully in-stalled MPICH2and run an MPI example.2.3Compiler Optimization LevelsMPICH2can be configured with two sets of compilerflags:CFLAGS,CXXFLAGS, FFLAGS,F90FLAGS(abbreviated as xFLAGS)and MPICH2LIB CFLAGS,MPICH2LIB CXXFLAGS, MPICH2LIB FFLAGS,MPICH2LIB F90FLAGS(abbreviated as MPICH2LIB xFLAGS)2QUICK START10 for compilation;LDFLAGS and MPICH2LIB LDFLAGS for linking.All theseflags can be set as part of configure command or through environment variables. (CPPFLAGS stands for C preprocessorflags,which should NOT be set) Both xFLAGS and MPICH2LIB xFLAGS affect the compilation of the MPICH2 libraries.However,only xFLAGS is appended to MPI wrapper scripts,mpicc and friends.MPICH2libraries are built with default compiler optimization,-O2, which can be modified by–enable-fast configure option.For instance,–disable-fast disables the default optimization option.–enable-fast=O¡n¿sets default compiler optimization as-O¡n¿.For more details of–enable-fast,see the output of”configure–help”.Any other complicated optimizationflags for MPICH2libraries have to be set throught MPICH2LIB xFLAGS.CFLAGS and friends are empty by default.For example,to build a”production”MPICH2environment with-O3 for all language bindings,one can simply do./configure--enable-fast=O3or./configure--disable-fast MPICH2LIB_CFLAGS=-O3\MPICH2LIB_FFLAGS=-O3\MPICH2LIB_CXXFLAGS=-O3\MPICH2LIB_F90FLAGS=-O3This will cause the MPICH2libraries to be built with-O3,and-O3will not be included in the mpicc and other MPI wrapper script.There are certain compilerflags that should not be used with MPICH2’s configure,e.g.gcc’s-Werror which would confuse configure and cause certain configure tests to fail to detect the correct system features.To use-Werror in building MPICH2libraries,you can pass the compilerflags during the make step through the Makefile variable,MPICH2MAKE CFLAGS as follows:make VERBOSE=1MPICH2_MAKE_CFLAGS="-Wall-Werror"(assume CC is set to gcc).The content of MPICH2MAKE CFLAGS is ap-pended to the CFLAGS in almost all Makefiles.2QUICK START112.4Common Non-Default Configuration OptionsA list of configure options is found in Section10.Here we comment on some of them.2.4.1The Most Important Configure Options–prefix Set the installation directories for MPICH2.–enable-debuginfo Provide access to the message queues for debuggers such as Totalview.–enable-g Build MPICH2with various debugging options.This is of in-terest primarily to MPICH2developers.The options--enable-g=dbg,mem,logare recommended in that case.–enable-fast Configure MPICH2for fastest performance at the expense of error reporting and other program development aids.This is recom-mended only for getting the best performance out of proven production applications,and for benchmarking.–enable-sharedlibs Build MPICH2with shared libraries.For example,--enable-sharedlibs=gcc for standard gcc on Linux--enable-sharedlibs=osx-gcc for Mac OS X or--enable-sharedlibs=solaris-cc for cc on Solaris–with-pm Select the process manager.The default is mpd;also useful are gforker and hydra.You can build with all three process managers by specifying--with-pm=mpd:gforker:hydra–without-mpe Configure MPICH2without the MPE package of program development tools(including the Jumpshot performance viewer)–with-java Set the location of Java installation.This option is necessary only if the default Java installation in your PATH does not contain a valid Java installation for Jumpshot,e.g.--with-java=/opt/jdk1.6.02QUICK START12 2.4.2Using the Absoft Fortran compilers with MPICH2For best results,it is important to force the Absoft Fortran compilers to make all routine names monocase.In addition,if lower case is chosen(this will match common use by many programs),you must also tell the the Absoft compiles to append an underscore to global names in order to access routines such as getarg(getarg is not used by MPICH2but is used in some of the tests and is often used in application programs).We recommend configuring MPICH2with the following optionssetenv F77f77setenv FFLAGS"-f-N15"setenv F90FLAGS"-YALL_NAMES=LCS-YEXT_SFX=_"./configure....2.5Shared LibrariesShared libraries are currently only supported for gcc on Linux and Mac OS X and for cc on Solaris.To have shared libraries created when MPICH2is built,specify the following when MPICH2is configured:configure--enable-sharedlibs=gcc(on Linux)configure--enable-sharedlibs=osx-gcc(on Mac OS X)configure--enable-sharedlibs=solaris-cc(on Solaris)2.6What to Tell the UsersNow that MPICH2has been installed,the users have to be informed of how to use it.Part of this is covered in the User’s Guide.Other things users need to know are covered here.(For example,whether they need to run their own mpd rings or use a system-wide one run by root.)3MIGRATING FROM MPICH113 3Migrating from MPICH1MPICH2is an all-new rewrite of MPICH1.Although the basic steps for installation have remained the same(configure,make,make install),a number of things have changed.In this section we attempt to point out what you may be used to in MPICH1that are now different in MPICH2. 3.1Configure OptionsThe arguments to configure are different in MPICH1and MPICH2;the Installer’s Guide discusses configure.In particular,the newer configure in MPICH2does not support the-cc=<compiler-name>(or-fc,-c++,or -f90)options.Instead,many of the items that could be specified in the command line to configure in MPICH1must now be set by defining an environment variable.E.g.,while MPICH1allowed./configure-cc=pgccMPICH2requiressetenv CC pgcc(or export CC=pgcc for ksh or CC=pgcc;export CC for strict sh)before ./configure.Basically,every option to the MPICH-1configure that does not start with--enable or--with is not available as a configure option in MPICH2.Instead,environment variables must be used.This is consistent (and required)for use of version2GNU autoconf.3.2Other DifferencesOther differences between MPICH1and MPICH2include the handling of process managers and the choice of communication device.For example,the new mpd has a new format and slightly different se-mantics for the-machinefile option.Assume that you type this data into afile named machfile:bp400:24CHOOSING THE COMMUNICATION DEVICE14 bp401:2bp402:2bp403:2If you then run a parallel job with this machinefile,you would expect ranks0and1to run on bp400because it says to run2processes there before going on to bp401.Ranks2and3would run on bp401,and rank4on bp402, e.g.:mpiexec-l-machinefile machfile-n5hostnameproduces:0:bp4001:bp4002:bp4013:bp4014:bp4024Choosing the Communication DeviceMPICH2is designed to be build with many different communication devices, allowing an implementation to be tuned for different communication fabrics.A simple communication device,known as“ch3”(for the third version of the“channel”interface)is provided with MPICH2and is the default choice.The ch3device itself supports a variety of communication methods. These are specified by providing the name of the method after a colon in the --with-device configure option.For example,--with-device=ch3:ssm selects the socket plus shared memory method.The supported methods include:ch3:nemesis This method is our new,high performance method.It has been made the default communication channel starting the1.1release of MPICH2.It uses shared-memory to send messages between pro-cesses on the same node and the network for processes between nodes.Currently sockets and Myrinet-MX are supported networks.It sup-ports MPI THREAD MULTIPLE and other levels of thread safety.5INSTALLING AND MANAGING PROCESS MANAGERS15 ch3:sock This method uses sockets for all communications between pro-cesses.It supports MPI THREAD MULTIPLE and other levels of thread safety.ch3:ssm This method uses sockets between nodes and shared memory withina node.ch3:shm This method only uses shared memory and only works within a single SMP.It does not support the MPI dynamic process routines such as MPI Comm spawn.Most installations should use the default ch3:nemesis method for best performance.For platforms that are not supported by nemesis,the ch3:sock method is suggested.5Installing and Managing Process Managers MPICH2has been designed to work with multiple process managers;that is,although you can start MPICH2jobs with mpiexec,there are different mechanisms by which your processes are started.An interface(called PMI) isolates the MPICH2library code from the process manager.Currently three process managers are distributed with MPICH2mpd This is the default,and the one that is described in Section2.2.It consists of a ring of daemons.smpd This one can be used for both Linux and Windows.It is the only process manager that supports the Windows version of MPICH2. gforker This is a simple process manager that creates all processes on a single machine.It is useful for both debugging and on shared memory multiprocessors.hydra This is a new process manager tha natively uses the existing daemons on the system such as ssh,slurm,pbs.5INSTALLING AND MANAGING PROCESS MANAGERS16 5.1mpd5.1.1Configuring mpdThe mpd process manager can be explicitly chosen at configure time by adding--with-pm=mpdto the configure argments.This is not necessary,since mpd is the default.5.1.2System Requirementsmpd consists of a number of components written in Python.The configure script should automaticallyfind a version of python in your PATH that has all the features needed to run mpd.If for some reason you need to pick a specific version of Python for mpd to use,you can do so by adding--with-python=<fullpathname of python interpreter>to your configure arguments.If your system doesn’t have Python,you can get the latest version from .Most Linux distribu-tions include a moderately current version of Python.MPD requires release 2.2or later.The mpd process manager supports the use of the TotalView parallel debugger from Etnus.If totalview is in your PATH when MPICH2is con-figured,then an interface module will be automatically compiled,linked, and installed so that you can use TotalView to debug MPICH jobs(See the User’s Guide under“Debugging”.You can also explicitly enable or disable this capability with--enable-totalview or--disable-totalview as arguments to configure.5.1.3Using mpdIn Section2.2you installed the mpd ring.Several commands can be used to use,test,and manage this ring.You canfind out about them by running mpdhelp,whose output looks like this:5INSTALLING AND MANAGING PROCESS MANAGERS17The following mpd commands are available.For usage of any specific one, invoke it with the single argument--help.mpd start an mpd daemonmpdtrace show all mpd’s in ringmpdboot start a ring of daemons all at oncempdringtest test how long it takes for a message to circle the ring mpdallexit take down all daemons in ringmpdcleanup repair local Unix socket if ring crashed badlympdlistjobs list processes of jobs(-a or--all:all jobs for all users) mpdkilljob kill all processes of a single jobmpdsigjob deliver a specific signal to the application processes of a job mpiexec start a parallel jobEach command can be invoked with the--help argument,which prints usage information for the command without running it.So for example,to see a complete list of the possible arguments for mpdboot,you would runmpdboot--help5.1.4Options for mpd–help causes mpd to print a list and description of all optionsIn addition to the cmd-line options,mpd will also check for presence ofthe environment variable MPICH PORT RANGE(note MPICH instead of MPD)and use only the ports in that range for listening sockets.The range is separated by a colon,e.g.,2000:8000.5.1.5Running MPD on multi-homed systemsIf you plan to use one or more multi-homed systems,it is of course useful ifthe default hostname is associated with the interface that mpd will need touse for communications.If not however,you can cause mpd to use a specific interface by using the--ifhn(interface-hostname)option,e.g.:n1%mpd--ifhn=192.168.1.1&5INSTALLING AND MANAGING PROCESS MANAGERS18 If you then run mpiexec on n1connecting to that mpd,the mpiexec will use the same ifhn for communications with remote processes that connect back to it.mpiexec will also accept a-ifhn option(mpiexec–help)in the unlikely event that you wish it to use a separate interface from the mpd.mpdboot can also designate the ifhn to be used by both the local and remote mpds which it starts,e.g.:n1%mpdboot--totalnum=3--ifhn=192.168.1.1where mpd.hosts contains:n2ifhn=192.168.1.2n3ifhn=192.168.1.3will start one mpd locally,one on n2and one on n3.Each will use the respectively designated ifhn.5.1.6Running MPD as RootMPD can run as root to support multiple users simultaneously.To do this, it easiest to simply do the“make install”in the mpd sub-directory as root. This will cause the mpdroot program to be installed in the bin directory with setuid-root permissions.Individual users then have the option of starting and using their own mpd rings,or they can run with a ring started by root. To use root’s ring,they must use an option named MPD USE ROOT MPD.This option may either be set as an environment variable or they can set it in their own.mpd.conffile,e.g.:MPD_USE_ROOT_MPD=1When root starts the mpds in the ring,the procedure is the same as for a regular user except that root’s configurationfile is in/etc/mpd.conf(note that there is no leading dot in thefile name).5.1.7Running MPD on SMP’sTypically one starts one mpd on each host.When a job is started with mpiexec without any particular host specification,the processes are started。
Ubuntu下MPICH2集群系统安装手册(采用建立信任ssh)一、安装配置基本linux系统第一步:IP地址配置:打开终端,启动文本编辑器来编辑Linux网络配置文件,命令如下:sudo gedit /etc/network/interfaces在这里你应该会看到如下内容:auto loiface lo inet loopback这个正是lo回环,我需要让这台运行Ubuntu Server的机子通过DHCP获得IP来加入网络,那么我只需要在上面的lo回环的配置内容下面加入:auto eth0iface eth0 inet staticaddress 192.168.0.30netmask 255.255.255.0gateway 192.168.0.1如果是手动指定IP并且还需要访问互联网,那么还需要设置DNS:$sudo gedit /etc/resolv.conf假如dns地址为192.168.3.2,则向这里添加如下配置内容:nameserver 192.168.3.2保存即可。
重启网络组件让网络配置文件生效:$sudo /etc/init.d/networking restart只要显示Reconfiguring network interfaces... [OK]即成功重启网络组件。
第二步:编辑每台机器的/etc/hosts文件将所有节点名称及其IP地址填入。
如:在每一台机中做如下配置:127.0.0.1 localhost192.168.0.30 node0 server192.168.0.31 node1192.168.0.32 node2192.168.0.33 node3最后,可以通过ping server 或者ssh server进行测试二、安装NFS文件系统$sudo apt-get install nfs-kernel-server nfs-common安装完成之后,在/usr目录下建立文件夹:mkdir cluster,文件夹cluster作为共享文件夹。
MPICH2用户指南(MPICH2 User‘s Guide)版本(Version )1.0.8数学与计算机科学部(Mathematics and Computer Science Division)阿贡国家实验室(Argonne National Laboratory)William GroppEwing LuskDavid AshtonPavan BalajiDarius BuntinasRalph ButlerAnthony ChanDavid GoodellJayesh KrishnaGuillaume MercierRob RossRajeev ThakurBrian Toonen2008年10月24日这项工作得到美国能源部科学局高级科学计算研究局Sci-DAC合约编号DE-AC02-06CH11357的规划,数据、信息与计算机科学部的分规划的支持。
1 引言(INTRODUCTION)1.引言MPICH2.本手册假定MPICH2已经安装了。
关于如何安装MPICH2,参见MPICH2安装指南,或者MPICH2顶层目录的README。
本手册解释如何编译、链接及运行MPI应用程序,使用于MPICH2一起的某些工具。
这是个初步的版本,某些节还没完成。
但是,这些应该足以帮你MPICH2起步的了。
2 从MPICH1升级到MPICH2(Migrating to MPICH2 from MPICH1)如果你一直在使用MPICH 1.2.x(1.2.7p1是最新版本),那么你会发现一些有关MPICH2不同的东西(希望能更好)。
当然了,虽然你的MPI程序不用改变,但是有些关于你运行它们的方式则不同。
MPICH2是MPI标准的一个全新实现,其设计实现了加到MPI-2附件的全部(动态进程管理,片面操作,并行I/O及其他扩充),应用从MPICH1实现所获得的教训,使得MPICH2更加健壮、有效及便于使用。
MPICH2的安装指南提供有关MPICH1 与MPICH2的改变某些信息,配置与安装MPICH的过程。
在MPICH1 及MPICH2之间编译、链接与运行MPI 程序下面描述。
2.1 默认的运行环境(Default Runtime Environment)在MPICH1中,默认的配置使用现在到老的p4可移植编程环境。
进程通过远程shell 启动(rsh 或ssh),发现进程及通过套接字互相连接的必要信息被收集,在启动时(startup)以非可度量的方式发布。
而且,进程管理功能与通讯机制的牵扯在出错时会导致系统混淆的行为。
MPICH2提供进程管理与通信的分离。
默认的运行时环境由一系列的守护进程(daemons)叫mpd的组成,在应用程序启动前建立所用机器之间的通讯,因而在通信不能建立出错时提供了清晰的画面,在并行任务(job)启动时提供一种快速可度量的启动机制。
6.1节详细地描述MPD进程管理系统。
还有其他可用的进程管理器。
2.2 启动并行任务(Starting Parallel Jobs)MPICH1提供了mpirun命令来启动MPICH1任务。
MPI-2论坛推荐一个标准的、可移植为此用途的命令叫做mpiexec。
MPICH2与某些扩充一起实现了mpiexec及其所有的标准的参数(arguments)。
关于mpiexec的标准参数参见5.1节,扩充,尤其是对进程管理系统的扩充,参见第5节的各个子节。
MPICH2还提供一个mpirun命令简单地向前兼容,但是MPICH2的mpirun命令不提供mpiexec的,或者MPICH1的mpirun的全部选项。
2.3 Fortran中的命令行参数(Arguments).MPICH1(更准确地说是MPICH1的mpirun)需要访问所有应用程序中的命令行参数,包括Fortran的,MPICH1的配置,做出了某些努力来找到包含iargc 和getarg的正确版本的库,及链接到MPI程序的mpif77脚本的那些库。
由于MPICH2不要求访问程序的命令行参数,因此这些函数是可选的,配置对它们也就没什么特别的了。
如果在应用程序中你需要它们,那么你不得不确保它们在你所使用的Fortran环境中可用。
3 快速开始(Quick Start)要使用MPICH2,你不得不知道MPICH2安装的目录。
(或者是你自己安装到那,或者是系统管理员安装的。
这种情况下,或许可以查查/usr/local。
如果MPICH2还没安装,那么参见MPICH2安装指南。
)我们建议你放在你安装目录的bin子目录。
这样你可以方便地访问各种各样的MPICH2命令来编译、连接及运行你的应用程序。
这个目录中的其他命令管理运行时环境及执行工具。
或许你首先要运行的命令之一是mpich2version,用来查看你所使用的MPICH2的准确版本和配置。
本手册的某些材料正是依赖于你所使用的MPICH2版本及安装时如何配置的。
现在你应该能够运行MPI程序了。
让我们假定MPICH2安装的目录是/home/you/mpich2-installed,你已经把你的目录添加到路径中,对于tcsh 和csh用setenv PATH /home/you/mpich2-installed/bin:$PATH,或对于bash或sh,用export PATH=/home/you/mpich2-installed/bin:$PATH。
然后,运行一个MPI程序,即使是只在一台机器上,你可以:mpd &cd /home/you/mpich2-installed/examplesmpiexec -n 3 cpimpdallexit这些命令的细节下面提供,但是,如果在这你可以成功地执行它们,那么你就正确地安装了MPICH2,已经运行了一个MPI程序。
编译及链接你的程序,一种方便的方式是用使用编译MPICH2的相同编译器的脚本。
对于C, C++, Fortran 77和Fortran90程序,这些脚本分别是mpicc,mpicxx, mpif77,和mpif90。
如果你缺少这些命令的任何一个,那么意味着MPICH2配置的不支持那类特定的语言。
4 编译与连接(COMPILING AND LINKING 4)4.1 指定编译器(Specifying Compilers)你不需要使用MPICH2建立时相同的编译器,但是并不是所有的编译器都是兼容的。
你也可以指定建立MPICH2自身的编译器,如mpich2version所报告的,只要按前面的节用来编译与连接命令。
环境变量MPICH CC, MPICH CXX, MPICH F77和MPICH F90分别用来指定选择C, C++, Fortran 77和Fortran 90编译器。
4.2 共享库(Shared Libraries)当前的共享库只在Linux 和Mac OSX上测试过,还有限制。
如何编译建立MPICH2作为共享库,参见安装指南。
如果共享库已经建立了,那么当你的程序需要任何MPICH2编译脚本时你可以自动得到它们。
4.3 C++的特殊问题(Special Issues for C++)某些用户也许会得到如下的错误信息:SEEK_SET is #defined but must not be for the C++ binding of MPIThe problem is that both stdio.h and the MPI C++ interface use SEEK SET,SEEK CUR, and SEEK END.这实际上是MPI-2标准的一个缺陷。
你可以在mpi.h 被包含之前尝试添加:#undef SEEK_SET#undef SEEK_END#undef SEEK_CUR或者添加定义:-DMPICH_IGNORE_CXX_SEEK到命令行(这会使得SEEK SET的MPI版本被忽略)。
4.4 Fortran的特殊问题(Special Issues for Fortran)MPICH2对Fortran程序提供两种支持。
对于Fortran77程序员来说,文件mpif.h提供了诸如MPI COMM WORLD这些MPI常量的定义。
Fortran90程序员应该使用MPI模块;这提供了所有的MPI函数定义以及接口定义。
然而,这个MPI模块不提供完全的Fortran90支持;尤其是,对于子程序的接口,诸如MPI Send,―选择‖的参数就不提供。
5 用MPIEXEC 5运行程序(Running Programs with mpiexec)如果你一直使用原来的MPICH,或者任何数目的其他MPI实现,那么你或许会把mpirun作为启动你的MPI程序的一种方式。
MPI-2标准叙述建议mpiexec为运行MPI程序的推荐方式,还提供了某些扩充。
MPICH2提供mpirun时为了向后兼容一些已有的脚本,但是不支持某些或mpiexec那么多选项,或者全部对MPICH1的mpirun的调用。
5.1 标准的mpiexec(Standard mpiexec)下面我们描述标准的mpiexec参数,根据MPI-2标准[1]。
启动一个MPI任务(job)的命令最简单的形式是mpiexec -n 32 a.out启动可执行的a.out,用32进程(在MPI程序内提供一个大小为32 的MPI COMMWORLD)。
其他支持的选项为,要指定运行的主机,搜索执行的路径,工作目录及指定进程数字更一般的方式。
对进程多项设置,对于其参数,可以运行不同的可执行文件和不同的值。
用―:‖隔开进程,如:mpiexec -n 1 -host loginnode master : -n 32 -host smp slave-configfile参数允许在文件中分别的行里指定一个包含进程系列规格说明的文件。
这就使得mpiexec不必用很长的命令行。
(参见,[2]的353页)。
还可以启动一个MPI任务进程(用一个MPI COMMWORLD,其大小为1),而不用mpiexec。
在它调用MPIInit,时,这个进程就成为一个MPI进程,然后它可以调用其他的MPI函数。
目前,MPICH2还不完全支持从不是用mpiexec启动的进程调用MPI-2的动态进程子程序。
(如,MPI Comm spawn 或MPI Comm accep)。
5.2 对所有进程管理环境的扩充(Extensions for All Process Management Environments)有些mpiexec参数是特定于某些特定的通讯子系统(―devices‖)或者进程管理环境的(―processmanagers‖)。
我们的打算是尽可能使得所有的参数跨越设备与进程管理器形式一致。