基于Winpcap编程实现抓包实验
- 格式:docx
- 大小:118.12 KB
- 文档页数:17
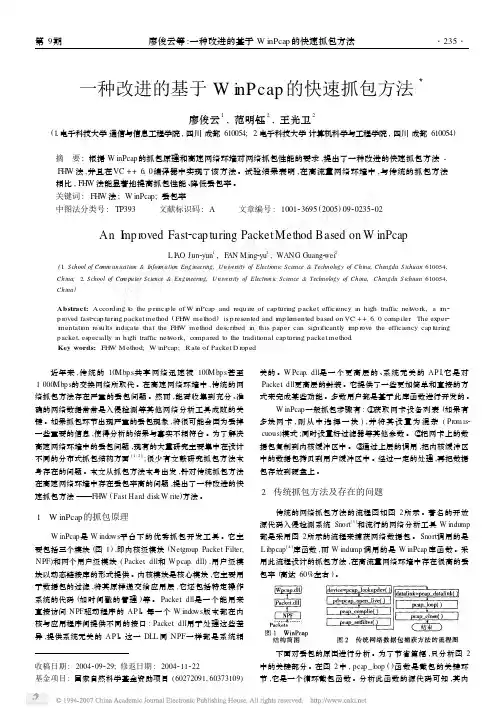
收稿日期:2004209229;修返日期:2004211222基金项目:国家自然科学基金资助项目(60272091,60373109)一种改进的基于W i nPcap 的快速抓包方法3廖俊云1,范明钰2,王光卫2(1.电子科技大学通信与信息工程学院,四川成都610054;2.电子科技大学计算机科学与工程学院,四川成都610054)摘 要:根据W inPcap 的抓包原理和高速网络环境对网络抓包性能的要求,提出了一种改进的快速抓包方法-FH W 法,并且在VC ++6.0编译器中实现了该方法。
试验结果表明,在高流量网络环境中,与传统的抓包方法相比,FHW 法能显著地提高抓包性能、降低丢包率。
关键词:FHW 法;W inPcap;丢包率中图法分类号:TP393 文献标识码:A 文章编号:100123695(2005)0920235202An I m p r oved Fast 2cap turing Packet Method Based on W inPcapL I A O Jun 2yun 1,F AN M ing 2yu 2,WANG Guang 2wei2(1.School of Co mm unication &Infor m ation Engineering,U niversity of Electronic Science &Technology of China,Chengdu S ichuan 610054,China;2.School of Co m puter Science &Engineering,U niversity of Electronic Science &Technology of China,Chengdu S ichuan 610054,China )Abstract:According t o the p rinci p le of W inPcap and require of cap turing packet efficiency in high traffic net w ork,a i m 2p r oved fast 2cap turing packetmethod (FH W method )is p resented and i m p le mented based on VC ++6.0comp iler .The exper 2i m entati on results indicate that the FH W method described in this paper can significantly i m p r ove the efficiency cap turing packet,es pecially in high traffic net w ork,compared t o the traditi onal cap turing packet method .Key words:FH W Method;W inPcap;Rate of Packet D r oped 近年来,传统的10Mbp s 共享网络迅速被100M bp s 甚至1000Mbp s 的交换网络所取代。
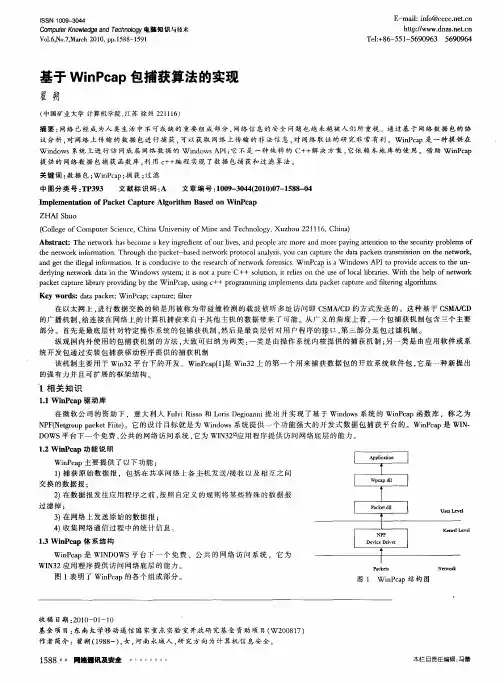
基于WinPcap网络数据包捕获实现赵建勋【期刊名称】《西安文理学院学报(自然科学版)》【年(卷),期】2011(014)004【摘要】日常应用的网络程序都是在ISO七层模型的最高层,即应用层,看不到底层的一些数据.为了减少不必要的网络数据,提高网络性能,用VC++6.0开发了基于WINPCAP的一种网络数据包捕获系统,对底层数据进行了分析和统计,为以后管理网络打下了基础.%Most of the network programs we use daily work on the application layer which is the highest level of seven-layer ISO model.We can not see the network data on the lower level.In order to reduce unnecessary network data and improve network performance,we have developed a data packet capture system based on Winpcap to analyze and compile the data working on the lower level of ISO model.The study is supposed to lay a foundation for the future network management.【总页数】4页(P55-58)【作者】赵建勋【作者单位】西安文理学院计算机科学系,陕西西安710065【正文语种】中文【中图分类】TN915.08【相关文献】1.基于WinPcap的网络数据包捕获系统设计与实现 [J], 黄培花;宋科2.基于Winpcap网络数据包的捕获与存储技术研究 [J], 李星;熊列彬;王昌3.基于Winpcap网络数据包的捕获与存储技术研究 [J], 李星;熊列彬;王昌4.用VC<sup>++</sup>实现基于Winpcap的网络数据包捕获与分析 [J], 阳晓剑;王志刚;汤小康5.基于WinPcap网络数据包捕获程序的设计与实现 [J], 矫健因版权原因,仅展示原文概要,查看原文内容请购买。
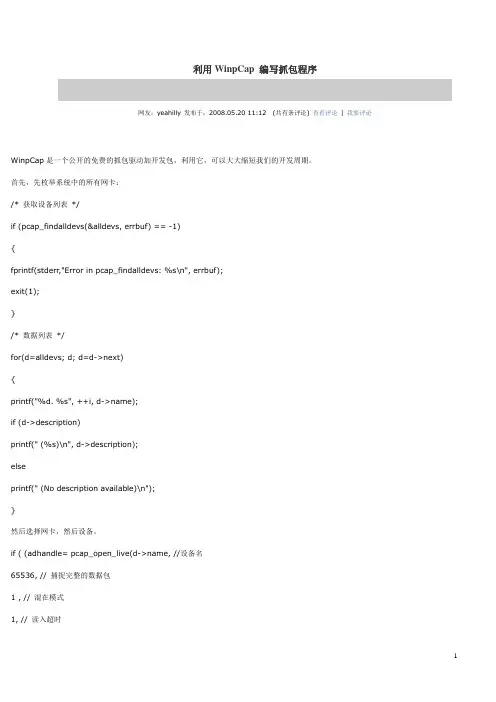
利用WinpCap 编写抓包程序网友:yeahilly 发布于:2008.05.20 11:12(共有条评论) 查看评论| 我要评论WinpCap是一个公开的免费的抓包驱动加开发包,利用它,可以大大缩短我们的开发周期。
首先,先枚举系统中的所有网卡:/* 获取设备列表*/if (pcap_findalldevs(&alldevs, errbuf) == -1){fprintf(stderr,"Error in pcap_findalldevs: %s\n", errbuf);exit(1);}/* 数据列表*/for(d=alldevs; d; d=d->next){printf("%d. %s", ++i, d->name);if (d->description)printf(" (%s)\n", d->description);elseprintf(" (No description available)\n");}然后选择网卡,然后设备。
if ( (adhandle= pcap_open_live(d->name, //设备名65536, // 捕捉完整的数据包1 , // 混在模式1, // 读入超时errbuf // 错误缓冲) ) == NULL){printf("Unable to open the adapter");pcap_freealldevs(alldevs);return;}打开设备之后,我们就可以利用adhandle句柄来正式抓包了,先新建一个回调函数,形如void packet_handler(u_char* packets,const struct pcap_pkthdr *header,const u_char *data){}然后调用pcap_loop(adhandle, 0, packet_handler,NULL);pcap_loop的最后一个参数和packet_handler的packets参数是对应的,用于在函数间传递数据。
实验3:WinPcap技术的使用1实验目的和要求学习使用WinPcap开发包实现网络数据包的捕获、过滤和分析的功能,具体要求如下:1)WinPcap开发包的下载和安装;2)使用WinPcap获取与网络适配器绑定的设备列表;3)使用WinPcap获取网络适配器的高级属性信息;4)使用WinPcap打开网络适配器并实现抓包功能5)使用WinPcap过滤数据包、分析数据包。
2实验设备及材料1)Windows主机2)Visual Studio 2005或Visual Studio 20083实验内容本实验学习WinPcap开发包的使用,利用WinPcap实现网络数据包捕获、过滤和分析的功能,实验内容如下。
3.1 WinPcap开发包的下载和安装下载并安装WinPcap开发包,下载地址:/archive/。
1)4.1.1-WinPcap.exe的安装;2)4.1.1-WpdPack.zip的下载和使用。
3.2获取与网络适配器绑定的设备列表信息pcap_findalldevs_ex()函数的使用。
调用pcap_findalldevs_ex()函数,获取的网络设备信息将存储在结构体pcap_if_t中,然后打印网卡设备列表信息,包括网络适配器名称和描述。
3.3获取网络适配器的高级属性信息在3.2的基础上,除打印本地主机所有网络适配器的名称、描述外,还打印是否回环地址、协议簇类型、协议簇名称、IP地址、子网掩码、广播地址和目标地址等信息。
3.4打开网络适配器并通过事件处理器来捕获数据包pcap_open()函数和pcap_loop()函数的使用。
程序的运行过程如下:1)调用pcap_findalldevs_ex()函数获取并打印本机的网络设备列表。
2)要求用户选择用于捕获数据包的网络设备。
3)使用for语句跳转到选中的网络设备,以便在后面的程序中打开该设备,并在该设备上捕获数据。
4)调用pcap_open()函数打开选择的网络设备。
基于WinPcap的网络数据包捕获与分析一、WinPcap介绍1.WinPcap简介WinPcap是一个在Windows操作系统下的免费、公开的用于直接访问网络的开发工具包(编程API)。
大多数Windows网络应用程序都是通过Winsock API(Windows套接口)这类高级编程接口访问网络的。
这种方法允许在网络上进行简单的数据传送,因为操作系统的TCP/IP协议栈实现软件会处理底层细节(协议操作、流程重组等等),并提供一个类似于读写文件的函数接口。
然而,有时候“简便方法”并不能满足实际需要。
有些程序希望绕过TCP/IP协议栈,直接处理底层网络中的通信数据,它们需要对网络进行底层进行直接访问,即在没有类似协议栈(TCP/IP协议栈)的实体介入条件下对网络进行原始访问。
基于Winsock API编程,应用程序是通过调用操作系统提供的编程接口访问TCP/IP协议栈实现网络通信的。
基于WinPcap编程,网络程序实际上是绕开操作系统的TCP/IP协议栈直接通过底层网络发送数据,因此,网络程序可以实现一些更低级、更灵活的功能。
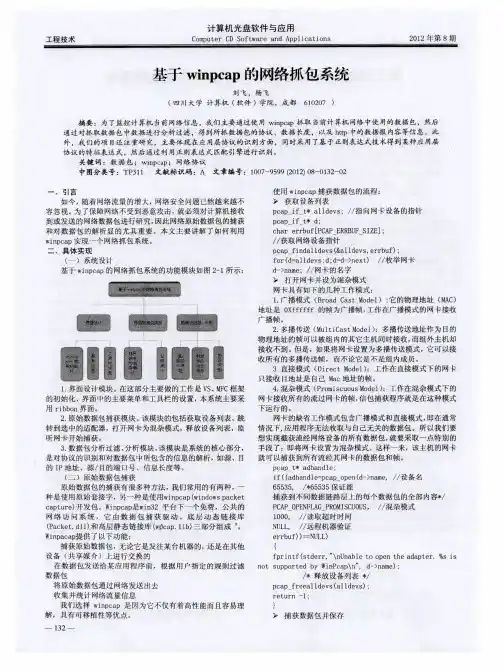
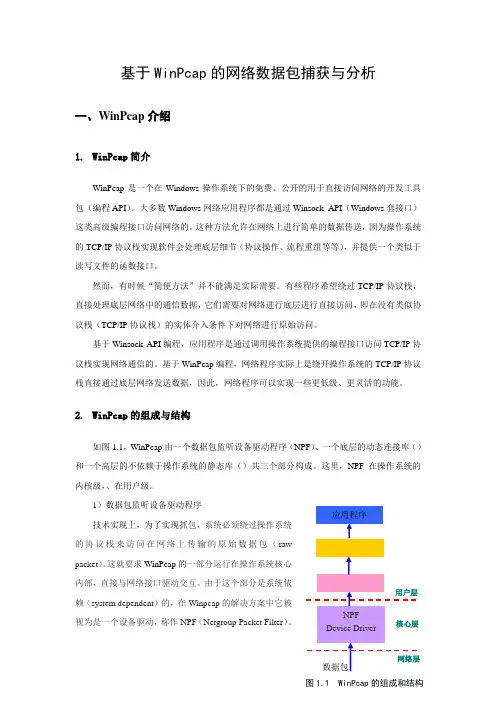
2.WinPcap的组成与结构如图1.1,WinPcap由一个数据包监听设备驱动程序(NPF)、一个底层的动态连接库()和一个高层的不依赖于操作系统的静态库()共三个部分构成。
这里,NPF在操作系统的内核级,、在用户级。
1)数据包监听设备驱动程序Array技术实现上,为了实现抓包,系统必须绕过操作系统的协议栈来访问在网络上传输的原始数据包(rawpacket)。
这就要求WinPcap的一部分运行在操作系统核心内部,直接与网络接口驱动交互。
由于这个部分是系统依赖(system dependent)的,在Winpcap的解决方案中它被视为是一个设备驱动,称作NPF(Netgroup Packet Filter)。
图1.1 WinPcap的组成和结构2)底层的动态连接库()和高层静态库()为了方便编程,WinPcap必须提供一个编程接口(API),这就是WinPcap的底层的动态连接库()和高层静态库()。
实验四编写协议解析器程序一、实验要求及目的使用libpcap/winpcap 进行网络抓包,并解析网络数据包的各层首部字段。
通过编写程序,捕获一段时间内以本机为源地址或者目的地址的IP 数据包,统计IP 数据包的信息,解析首部字段,匡助加深对IP 协议的工作原理和工作过程的认识以及掌握winpcap 抓包原理。
二、实验运行环境本实验是是用winpcap 进行网络抓包,基于windows 系统,下载WpdPack 4.1.2 安装包,在Visio stdio 2022 上配置winpcap 抓包环境,再编写C++代码实现网络抓包。
三、实验原理TCP/IP 协议族的分层结构包括应用层,传输层,互联网络层和主机- 网络层,其结构如图1 所示:应用层Telnet、TFP、SMTP DNS、TFTP、SNMP传输层TCP UDP互联网络层IP主机- 网络层Ethernet,Token Ring,X.25,SLIP,PPP图1 TCP/IP 协议族的分层结构其中IP 协议是保证以太网正常运行的最重要的协议之一,只要用于负责IP 寻址,路由选择和IP 数据报的分割与组装。
IP 协议是直接位于数据链路层之上,负责将源主机的报文分组发送到目的主机。
IP 协议是一种不可靠,无连接的数据报传送服务协议,它提供的是一种“竭力而为”的服务。
为了向传输层屏蔽的通信子网的差异,IP 协议制订了统一的IP 数据报格式。
IP 数据报的长度是可变的,它分为报头和数据两个部份。
基本的IP 报头是20B.选项字段的长度范围是0—40B,所以IP 数据报报头的长度是范围是20-60B。
IPV4 IP 数据报的结构如图2 所示:图2 IP 数据包格式IP 首部封装具体解释如下:(1)版本占 4 位,是指IP 协议的版本。
通信双方使用的IP 协议版本必须一致。
目前广泛使用的IP 协议版本号为4 (即IPv4 )(2)首部长度占 4 位,可表示的最大十进制数值是15。
实验一 wireshark抓包工具使用[实验目的]学习wireshark抓包工具的使用了解wireshark抓包工具的功能通过学习,进一步理解协议及网络体系结构思想[实验原理]Wireshark是网络包分析工具。
网络包分析工具的主要作用是尝试捕获网络包,并尝试显示包的尽可能详细的情况。
主要应用:网络管理员用来解决网络问题网络安全工程师用来检测安全隐患开发人员用来测试协议执行情况用来学习网络协议[实验内容]下载WIRESHARK,学习工具的使用和功能。
[习题与思考题]1、网络工程师能通过WIRESHARK做哪些工作?2书名实验二 WINPCWP编程[实验目的]了解WINPCAP的架构学习WINPCAP编程[实验原理]WinPcap是一个基于Win32平台的,用于捕获网络数据包并进行分析的开源库.大多数网络应用程序通过被广泛使用的操作系统元件来访问网络,比如sockets。
这是一种简单的实现方式,因为操作系统已经妥善处理了底层具体实现细节(比如协议处理,封装数据包等等),并且提供了一个与读写文件类似的,令人熟悉的接口。
然而,有些时候,这种“简单的方式”并不能满足任务的需求,因为有些应用程序需要直接访问网络中的数据包。
也就是说,那些应用程序需要访问原始数据包,即没有被操作系统利用网络协议处理过的数据包。
WinPcap产生的目的,就是为Win32应用程序提供这种访问方式;WinPcap提供了以下功能1.捕获原始数据包,无论它是发往某台机器的,还是在其他设备(共享媒介)上进行交换的2.在数据包发送给某应用程序前,根据用户指定的规则过滤数据包3.将原始数据包通过网络发送出去4.收集并统计网络流量信息章名 3以上这些功能需要借助安装在Win32内核中的网络设备驱动程序才能实现,再加上几个动态链接库DLL。
所有这些功能都能通过一个强大的编程接口来表现出来,易于开发,并能在不同的操作系统上使用。
这本手册的主要目标是在一些程序范例的帮助下,叙述这些编程接口的使用。
基于Winpcap的网络包捕获和分析_通信工程Winpcap是一种Windows平台下的网络包捕获库,它能够拦截网络传输的数据包,分析其内容并提供给程序使用。
在通信工程领域,Winpcap常用于网络协议分析、网络安全检测等方面。
Winpcap的工作原理是通过抓取操作系统内核与网卡之间的输入/输出数据包,从而捕获并分析网络包。
Winpcap将网络接口抽象成一个数据源(即抓包器),并提供一系列API供应用程序进行操作。
这些API包括:1. pcap_open_live():打开网络接口并设置过滤器。
2. pcap_setfilter():设置抓包过滤规则。
3. pcap_next_ex():从网络接口中捕获下一个数据包。
4. pcap_sendpacket():发送数据包到网络。
5. pcap_stats():返回接口的统计信息。
通过调用上述API,可以在应用程序中达到获取、分析网络包的目的,从而实现网络协议的协议分析、网络安全检测等通信工程任务。
在使用Winpcap时需要注意,由于其需要操作系统内核与网卡之间的数据包,因此在使用时需要获得管理员权限。
在基于Winpcap的网络包捕获和分析中,通常需要进行以下步骤:1. 打开网络接口并设置过滤器,过滤掉不必要的数据包。
2. 捕获数据包。
3. 解析数据包的协议头,分离出数据部分。
4. 对数据部分进行处理,如提取HTTP请求、检测网络攻击等。
5. 将处理结果保存或发送到其他模块进行处理。
Winpcap的优势在于其能够让用户获得更加细致的网络数据,通过协议分析和安全检测等手段更好地保障网络安全。
同时,由于其跨平台特性,可应用于多种不同的通信工程场景中。
实验一 wireshark抓包工具使用[实验目的]学习wireshark抓包工具的使用了解wireshark抓包工具的功能通过学习,进一步理解协议及网络体系结构思想[实验原理]Wireshark是网络包分析工具。
网络包分析工具的主要作用是尝试捕获网络包,并尝试显示包的尽可能详细的情况。
主要应用:网络管理员用来解决网络问题网络安全工程师用来检测安全隐患开发人员用来测试协议执行情况用来学习网络协议[实验内容]下载WIRESHARK,学习工具的使用和功能。
[习题与思考题]1、网络工程师能通过WIRESHARK做哪些工作?书名2实验二 WINPCWP编程[实验目的]了解WINPCAP的架构学习WINPCAP编程[实验原理]WinPcap是一个基于Win32平台的,用于捕获网络数据包并进行分析的开源库.大多数网络应用程序通过被广泛使用的操作系统元件来访问网络,比如sockets。
这是一种简单的实现方式,因为操作系统已经妥善处理了底层具体实现细节(比如协议处理,封装数据包等等),并且提供了一个与读写文件类似的,令人熟悉的接口。
然而,有些时候,这种“简单的方式”并不能满足任务的需求,因为有些应用程序需要直接访问网络中的数据包。
也就是说,那些应用程序需要访问原始数据包,即没有被操作系统利用网络协议处理过的数据包。
WinPcap产生的目的,就是为Win32应用程序提供这种访问方式;WinPcap提供了以下功能1.捕获原始数据包,无论它是发往某台机器的,还是在其他设备(共享媒介)上进行交换的2.在数据包发送给某应用程序前,根据用户指定的规则过滤数据包3.将原始数据包通过网络发送出去4.收集并统计网络流量信息章名3以上这些功能需要借助安装在Win32内核中的网络设备驱动程序才能实现,再加上几个动态链接库DLL。
所有这些功能都能通过一个强大的编程接口来表现出来,易于开发,并能在不同的操作系统上使用。
这本手册的主要目标是在一些程序范例的帮助下,叙述这些编程接口的使用。
Winpcap实现一配置项目→属性→配置属性→C/C++→在右边的包含目录里添加你winpcap文件夹里include文件夹所在的位置;项目→属性→配置属性→在点击链接器选项,在右边的附加库目录里添加lib 文件夹所在的位置;项目→属性→配置属性→C/C++→预处理定义,WPCAP;HAVE_REMOTE; 项目→属性→配置属性→链接器→输入,在右边附加依赖项里添加上:? 。
1 获取适配器列表#include <>int _tmain(int argc, _TCHAR* argv[]){pcap_if_t * allAdapters;n" );return 0;}int crtAdapter = 0;for( adapter = allAdapters; adapter != NULL; adapter = adapter->next){s ", ++crtAdapter, adapter->name );printf( "-- %s\n", adapter->description );}printf( "\n" );pcap_freealldevs( allAdapters );n" );return 0;}int crtAdapter = 0;for( adapter = allAdapters; adapter != NULL; adapter = adapter->next){s ", ++crtAdapter, adapter->name );printf( "-- %s\n", adapter->description );}printf( "\n" );n" );n" );return 0;}int crtAdapter = 0;for( adapter = allAdapters; adapter != NULL; adapter = adapter->next){s ", ++crtAdapter, adapter->name );printf( "-- %s\n", adapter->description );}printf( "\n" );n" );// 释放适配器列表pcap_freealldevs( allAdapters );return -1;}adapter = allAdapters;for( crtAdapter = 0; crtAdapter < adapterNumber - 1; crtAdapter++ )adapter = adapter->next;// 打开指定适配器adapterHandle = pcap_open( adapter->name, // name of the adapter65536, // portion of the packet to capture // 65536 guarantees that the whole // packet will be capturedPCAP_OPENFLAG_PROMISCUOUS, // promiscuous mode1000, // read timeout - 1 millisecondNULL, // authentication on the remote machine errorBuffer // error buffer);if( adapterHandle == NULL ){//指定适配器打开失败fprintf( stderr, "\nUnable to open the adapter\n", adapter->name );// 释放适配器列表pcap_freealldevs( allAdapters );return -1;}pcap_freealldevs( allAdapters );//释放适配器列表//创建数据封包// 设置目标的MAC地址为01 : 01 : 01 : 01 : 01 : 01packet[0] = 0x01;packet[1] = 0x01;packet[2] = 0x01;packet[3] = 0x01;packet[4] = 0x01;packet[5] = 0x01;// 设置源的MAC地址为02 : 02 : 02 : 02 : 02 : 02packet[6] = 0x02;packet[7] = 0x02;packet[8] = 0x02;packet[9] = 0x02;packet[10] = 0x02;packet[11] = 0x02;// 设置封包其他部分内容for( int index = 12; index < 20; index++ ){packet[index] = 0xC4;}//发送数据封包if( pcap_sendpacket( adapterHandle, // the adapter handle packet, // the packet20 // the length of the packet) != 0 ){fprintf( stderr,"\nError sending the packet: \n", pcap_geterr( adapterHandle ) );return -1;}system( "PAUSE" );return 0;}运行结果#define _CRT_SECURE_NO_WARNINGS#include ""void packet_handler(u_char *user, const struct pcap_pkthdr *pkt_header, const u_char *pkt_data); int main(){pcap_t *cap_ins_des;pcap_if_t *alldevs;pcap_if_t *d;char source[PCAP_BUF_SIZE];char errbuf[PCAP_ERRBUF_SIZE];int i;u_int netmask;char packet_filter[] = "ip and udp"; // the filterstruct bpf_program fcode; // used in pcap_compile()/* set the source */if (pcap_createsrcstr(source, PCAP_SRC_IFLOCAL, NULL, NULL, NULL, errbuf) == -1) {printf("%s\n", errbuf);exit(-1);}printf("source: %s\n", source);/* find all devices */if (pcap_findalldevs_ex(source, NULL, &alldevs, errbuf) == -1){printf("%s\n", errbuf);exit(-1);}/* choose one devices */d = alldevs;while (d != NULL){printf("%s, %s\n", d->name, d->description);d = d->next;}scanf("%d", &i);d = alldevs;while (--i) d = d->next;printf("selected device: %s\n", d->name);/* open one device */cap_ins_des = pcap_open(d->name, 65536, PCAP_OPENFLAG_PROMISCUOUS, 1000, NULL, errbuf);if (cap_ins_des == NULL){printf("%s\n", errbuf);pcap_freealldevs(alldevs);exit(-1);}/* get the netmask, used at compiling the filter */if (d->addresses != NULL)netmask = ((struct sockaddr_in *)(d->addresses->netmask))->/*@#$%^&*!*/else netmask = 0xffffff;/* */// netmask = 0;/* compile the filter */if (pcap_compile(cap_ins_des, &fcode, packet_filter, 1, netmask) < 0){printf("Error\n");pcap_freealldevs(alldevs);exit(-1);}/* set the filter */if (pcap_setfilter(cap_ins_des, &fcode) < 0){printf("Error\n");pcap_freealldevs(alldevs);exit(-1);}pcap_freealldevs(alldevs);/* start the capture */pcap_loop(cap_ins_des, 30, packet_handler, NULL);return 0;}void packet_handler(u_char *user, const struct pcap_pkthdr *pkt_header, constu_char *pkt_data) {printf("in packet handler\n"); return;}运行结果。
winpcap捕捉⽹络数据包利⽤WIPCAP捕捉IP数据包分析局域⽹流量1、背景知识1.1、IP协议IP(Internet Protocol,互联⽹协议)协议是TCP/IP协议族中最为核⼼的协议,所有的TCP、UDP、ICMP及IGMP数据都以IP 数据报格式传输。
IP协议把传输层送来的消息封装成IP数据包,并把IP数据包传递给数据链路层。
IP协议制定了统⼀的IP数据报格式,向传输层屏蔽了通信⼦⽹的差异,从⽽为消息的收发双⽅提供了⼀条透明的传输通道。
IP数据包结构如图1-1:图1-1 IP包结构1.版本IP数据报的第⼀个域是版本域,其长度为4bit,表⽰所使⽤的IP协议的版本。
通信双⽅使⽤的IP协议的版本必须⼀致。
版本域值为4则表⽰IPv4;版本域值为6则表⽰IPv6。
当前的版本为IPv4。
2.报头长度报头长度域长度为4bit,它以4个字节为计算单位表⽰报头的长度,该长度不包含数据部分。
报头中除了IP选项域与填充域之外,其他各项是定长的。
因为很少使⽤IP选项功能,所以,该域的值⼀般为5,意味着报头的长度是5个4字节,也就是20个字节。
协议规定:IP数据报的报头长度必须是4字节的整数倍。
当IP报头长度不是4字节的整数倍时,必须利⽤最后⼀个填充域“添0”来加以填充。
3.服务类型如图1-2所⽰,该字段占8bit,包括3bit的优先级字段,4bit的服务类型(type of service,TOS)字段和1bit的保留位,保留位必须置0。
该字段⽤于指⽰路由器如何处理该数据报。
图1-2 服务类型字段结构3bit的优先级表⽰数据报的重要性,共分8级,数值越⼤等级越⾼,优先级越⾼则表⽰数据报越重要(该字段值现在已被忽略)。
4bit的TOS字段分别表⽰:最⼩时延(D)、最⼤吞吐量(T)、最⾼可靠性(R)和最⼩费⽤(C)。
每个位都有0或1两个值,但4bit中最多只能有⼀个位的值为1。
如果所有4 bit均为0,那么就意味着是⼀般服务。
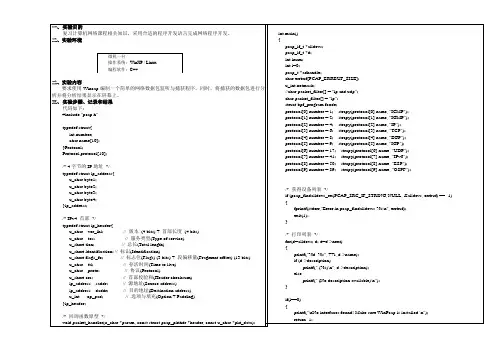
上海电力学院计算机网络安全(1)课程实验报告实验名称:winpcap编程实验基于Winpcap 编程实现抓包实验一. 本设计要达到的目标基于winpcap编程实现对网络数据的捕获,并分析数据类型,对于IP,ICMP,ARP,UDP等,能够自动识别其协议类型并分析帧的构成。
二.实现步骤(1)需要通过资料来了解winpcap抓包的工作原理,熟悉其运行过程Winpcap的内部结构Wincap有三部分组成:一个数据包监听设备驱动程序,一个低级的动态连接库和一个高级的静态连接库。
底层动态链接库运行在用户层,它将应用程序和数据包监听设备驱动程序隔离开来,使得应用程序可以不加修改地在不同的WINDOWS系统上运行。
高级的静态链接库和应用程序编译在一起,它使用低级动态链接库提供的服务,向应用程序提供完善的监听接口。
抓包是WinPcap的基本功能,也是NPF最重要的操作。
在抓包的时候,驱动(例如NIC Driver)使用一个网络接口监视着数据包,并将这些数据包完整无缺地投递给用户级应用程序。
(2)进一步了解winpcap编程所需要的编译环境,下载WpdPack,了解编译环境所需要的库文件.在编译时需要把wpdpack中的include与lib添加进vc的库文件里。
(3)明确整个编程的步骤与具体函数。
刚开始要定义,在主函数中获取设备接口信息,获得网络地址与掩码地址,打开网络接口,还要设置过滤规则。
使用loop函数来回调循环捕获数据包,以便一层一层解析。
(4)还要定义几个以太网,ARP,IP,UDP,TCP,ICMP协议的格式。
需要注意在存储空间中,在存储空间中才能更好的逐层分析,不然很容易出错(5)定义分析协议的函数,定义方式与回调函数相同.常用的函数有:用于获取本机设备列表的pcap_findalldevs_ex函数用于打开设备的pcap_open函数,可以指定为混杂模式打开用于编译数据包过滤器的pcap_compile 函数用于设置数据包过滤器的pcap_setfilter 函数用于从设备读取数据包的pcap_netx_ex 函数用于关闭设备的pcap_close 函数(参数为pcap_open 返回值)用于释放设备列表的pcap_freealldevs 函数(对应pcap_findalldevs_ex)三.系统流程图主函数以太网协议分析函数分析ARP协议函数分析Ip协议函数分析ICMP协议函数判断下层函数分析TCP协议函数分析UDP协议函数16进制数据四.关键代码及其分析主函数void main(){pcap_t *pcap_handle; /* Winpcap句柄 */char error_content[PCAP_ERRBUF_SIZE]; /* 存储错误信息 */char *net_interface; /* 网络接口 */bpf_program bpf_filter; /* BPF过滤规则 */char bpf_filter_string[] = ""; /* 过滤规则字符串 */ bpf_u_int32 net_mask; /* 掩码 */bpf_u_int32 net_ip; /* 网路地址 */net_interface = pcap_lookupdev(error_content); /* 获得可用的网络接口 */ pcap_lookupnet(net_interface, &net_ip, &net_mask, error_content);/* 获得网络地址和掩码地址 */pcap_handle = pcap_open_live(net_interface, BUFSIZ, 1, 1, error_content);/* 打开网路接口 */pcap_compile(pcap_handle, &bpf_filter, bpf_filter_string, 0, net_ip); /*编译BPF过滤规则 */pcap_setfilter(pcap_handle, &bpf_filter); /* 设置过滤规则 */对IP协议的定义class ip_header{ public:#if defined(WORDS_BIGENDIAN)u_int8_t ip_version: 4, /* 版本 */ip_header_length: 4; /* 首部长度 */#elseu_int8_t ip_header_length: 4, ip_version: 4;#endifu_int8_t ip_tos; /* 服务质量 */u_int16_t ip_length; /* 长度 */u_int16_t ip_id; /* 标识 */u_int16_t ip_off; /* 偏移 */u_int8_t ip_ttl; /* 生存时间 */u_int8_t ip_protocol; /* 协议类型 */u_int16_t ip_checksum; /* 校验和 */in_addr ip_souce_address; /* 源IP地址 */in_addr ip_destination_address; /* 目的IP地址 */pcap_loop(pcap_handle, n, ethernet_protocol_packet_callback, NULL); /* 注册回调函数,循环捕获网络数据包,利用回调函数来处理每个数据包 */分析UDP协议的函数代码void udp_protocol_packet_callback(u_char *argument, const pcap_pkthdr *packet_header, const u_char *packet_content){class udp_header *udp_protocol; /* UDP协议变量 */u_short source_port; /* 源端口 */u_short destination_port; /* 目的端口号 */u_short length; //长度udp_protocol = (class udp_header*)(packet_content + 14+20);/* 获得UDP协议内容 */source_port = ntohs(udp_protocol->udp_source_port); /* 获得源端口 */ destination_port = ntohs(udp_protocol->udp_destination_port); /* 获得目的端口 */length = ntohs(udp_protocol->udp_length); /* 获得长度 */cout<<"---------- UDP协议 ----------"<<endl;cout<<"源端口号:"<<dec<<source_port<<endl;cout<<"目的端口号:"<<dec<<destination_port<<endl;switch (destination_port){case 138:cout<<"上层协议为NETBIOS数据报服务"<<endl;break;case 137:cout<<"上层协议为NETBIOS名字服务"<<endl;break;case 139:cout<<"上层协议为NETBIOS会话服务"<<endl;break;case 53:cout<<"上层协议为域名服务"<<endl;break;default:break;}cout<<"长度:"<<length<<endl;cout<<"校验和:"<<setw(4)<<setfill('0')<<hex<<ntohs(udp_protocol->udp_checksum)<<endl;}五.参考文献(1) Winpcap中文文档(2) 网络资料完整源程序#include "pcap.h"#include <iostream>#include <iomanip>#include<string>using namespace std;/*以下是以太网协议格式的定义*/class ether_header{public:u_int8_t ether_dhost[6]; /* 目的以太网地址 */u_int8_t ether_shost[6]; /* 源以太网地址 */u_int16_t ether_type; /* 以太网类型 */};/* 下面是ARP协议格式的定义*/class arp_header{public:u_int16_t arp_hardware_type; /* 硬件类型 */u_int16_t arp_protocol_type; /* 协议类型 */u_int8_t arp_hardware_length; /* 硬件地址长度 */u_int8_t arp_protocol_length; /* 协议地址长度 */u_int16_t arp_operation_code; /* 操作码 */u_int8_t arp_source_ethernet_address[6]; /* 源以太网地址 */u_int8_t arp_source_ip_address[4]; /* 源IP地址 */u_int8_t arp_destination_ethernet_address[6]; /* 目的以太网地址 */ u_int8_t arp_destination_ip_address[4]; /* 目的IP地址 */};/*下面是IP协议格式的定义 */class ip_header{ public:#if defined(WORDS_BIGENDIAN)u_int8_t ip_version: 4, /* 版本 */ip_header_length: 4; /* 首部长度 */#elseu_int8_t ip_header_length: 4, ip_version: 4;#endifu_int8_t ip_tos; /* 服务质量 */u_int16_t ip_length; /* 长度 */u_int16_t ip_id; /* 标识 */u_int16_t ip_off; /* 偏移 */u_int8_t ip_ttl; /* 生存时间 */u_int8_t ip_protocol; /* 协议类型 */u_int16_t ip_checksum; /* 校验和 */in_addr ip_souce_address; /* 源IP地址 */in_addr ip_destination_address; /* 目的IP地址 */};/*下面是UDP协议格式定义*/class udp_header{ public:u_int16_t udp_source_port; /* 源端口号 */u_int16_t udp_destination_port; /* 目的端口号 */u_int16_t udp_length; /* 长度 */u_int16_t udp_checksum; /* 校验和 */};/* 下面是TCP协议格式的定义*/class tcp_header{ public:u_int16_t tcp_source_port; /* 源端口号 */u_int16_t tcp_destination_port; /* 目的端口号 */u_int32_t tcp_sequence_lliiuuwweennttaaoo; /* 序列号 */u_int32_t tcp_acknowledgement; /* 确认序列号 */#ifdef WORDS_BIGENDIANu_int8_t tcp_offset: 4, /* 偏移 */tcp_reserved: 4; /* 未用 */#elseu_int8_t tcp_reserved: 4, /* 未用 */tcp_offset: 4; /* 偏移 */#endifu_int8_t tcp_flags; /* 标记 */u_int16_t tcp_windows; /* 窗口大小 */u_int16_t tcp_checksum; /* 校验和 */u_int16_t tcp_urgent_pointer; /* 紧急指针 */};/* 下面是ICMP协议格式的定义*/class icmp_header{ public:u_int8_t icmp_type; /* ICMP类型 */u_int8_t icmp_code; /* ICMP代码 */u_int16_t icmp_checksum; /* 校验和 */u_int16_t icmp_id; /* 标识符 */u_int16_t icmp_sequence; /* 序列码 */};/* 下面是分析TCP协议的函数,其定义方式与回调函数相同 */void tcp_protocol_packet_callback(u_char *argument, const pcap_pkthdr*packet_header, const u_char *packet_content){class tcp_header *tcp_protocol;/* TCP协议变量 */u_char flags; /* 标记 */int header_length; /* 长度 */u_short source_port; /* 源端口 */u_short destination_port; /* 目的端口 */u_short windows; /* 窗口大小 */u_short urgent_pointer;/* 紧急指针 */u_int sequence; /* 序列号 */u_int acknowledgement; /* 确认号 */u_int16_t checksum; /* 校验和 */tcp_protocol = ( tcp_header*)(packet_content + 14+20); /* 获得TCP协议内容 */source_port = ntohs(tcp_protocol->tcp_source_port); /* 获得源端口 */ destination_port = ntohs(tcp_protocol->tcp_destination_port); /* 获得目的端口 */header_length = tcp_protocol->tcp_offset *4; /* 长度 */sequence = ntohl(tcp_protocol->tcp_sequence_lliiuuwweennttaaoo); /* 序列码 */acknowledgement = ntohl(tcp_protocol->tcp_acknowledgement); /* 确认序列码 */windows = ntohs(tcp_protocol->tcp_windows); /* 窗口大小 */urgent_pointer = ntohs(tcp_protocol->tcp_urgent_pointer); /* 紧急指针*/flags = tcp_protocol->tcp_flags; /* 标识 */checksum = ntohs(tcp_protocol->tcp_checksum); /* 校验和 */cout<<" TCP协议 "<<endl;cout<<"源端口号:"<<dec<< source_port<< endl;cout<<"目的端口号:"<<dec<< destination_port<<endl;switch (destination_port){case 80:cout<<"上层协议为HTTP协议:"<<endl;break;case 21:cout<<"上层协议为FTP协议"<<endl;break;case 23:cout<<"上层协议为TELNET协议"<<endl;break;case 25:cout<<"上层协议为SMTP协议"<<endl;break;case 110:cout<<"上层协议为POP3协议"<<endl;break;default:break;}cout<<"序列码"<<sequence<<endl;cout<<"确认号:"<<acknowledgement<<endl;cout<<"首部长度:"<<dec<<header_length<<endl;cout<<"保留:"<< int(tcp_protocol->tcp_reserved)<<endl;cout<<"标记:";if (flags &0x08)cout<<"PSH "<<endl;if (flags &0x10)cout<<"ACK "<<endl;if (flags &0x02)cout<<"SYN "<<endl;if (flags &0x20)cout<<"URG "<<endl;if (flags &0x01)cout<<"FIN "<<endl;if (flags &0x04)cout<<"RST "<<endl;cout<<endl;cout<<"窗口大小:"<<windows<<endl;cout<<"校验和:"<< setw(4) << setfill('0') << hex <<checksum<<endl;cout<<"紧急指针:"<<urgent_pointer<<endl;}/* 下面是实现UDP协议分析的函数,函数类型与回调函数相同 */void udp_protocol_packet_callback(u_char *argument, const pcap_pkthdr *packet_header, const u_char *packet_content){class udp_header *udp_protocol; /* UDP协议变量 */u_short source_port; /* 源端口 */u_short destination_port; /* 目的端口号 */u_short length; //长度udp_protocol = (class udp_header*)(packet_content + 14+20);/* 获得UDP协议内容 */source_port = ntohs(udp_protocol->udp_source_port); /* 获得源端口 */ destination_port = ntohs(udp_protocol->udp_destination_port); /* 获得目的端口 */length = ntohs(udp_protocol->udp_length); /* 获得长度 */cout<<" UDP协议 "<<endl;cout<<"源端口号:"<<dec<<source_port<<endl;cout<<"目的端口号:"<<dec<<destination_port<<endl;switch (destination_port){case 138:cout<<"上层协议为NETBIOS数据报服务"<<endl;break;case 137:cout<<"上层协议为NETBIOS名字服务"<<endl;break;case 139:cout<<"上层协议为NETBIOS会话服务"<<endl;break;case 53:cout<<"上层协议为域名服务"<<endl;break;default:break;}cout<<"长度:"<<length<<endl;cout<<"校验和:"<<setw(4)<<setfill('0')<<hex<<ntohs(udp_protocol->udp_checksum)<<endl;}/* 下面是实现分析ICMP协议的函数,函数类型与回调函数相同 */void icmp_protocol_packet_callback(u_char *argument, const pcap_pkthdr *packet_header, const u_char *packet_content){class icmp_header *icmp_protocol; /* ICMP协议变量 */icmp_protocol = (icmp_header*)(packet_content + 14+20); /* 获得ICMP协议内容 */cout<<" ICMP协议 "<<endl;cout<<"ICMP类型:"<<icmp_protocol->icmp_type<<endl; /* 获得ICMP类型*/switch (icmp_protocol->icmp_type){case 8:cout<<"ICMP回显请求协议"<<endl;cout<<"ICMP代码:"<<icmp_protocol->icmp_code<<endl;cout<<"标识符:"<<icmp_protocol->icmp_id<<endl;cout<<"序列码:"<<icmp_protocol->icmp_sequence<<endl;break;case 0:cout<<"ICMP回显应答协议"<<endl;cout<<"ICMP代码: "<< icmp_protocol->icmp_code<<endl;cout<<"标识符: "<< setw(4) << setfill('0') << hex<<int(icmp_protocol->icmp_id) << endl;cout<<"序列码: "<< icmp_protocol->icmp_sequence<<endl;break;default:break;}cout<<"ICMP校验和:"<<setw(4) << setfill('0') << hex << ntohs(icmp_protocol->icmp_checksum) << endl; /* 获得ICMP校验和 */ return ;}/*下面是实现ARP协议分析的函数,函数类型与回调函数相同 */void arp_protocol_packet_callback(u_char *argument, const pcap_pkthdr *packet_header, const u_char *packet_content){arp_header *arp_protocol;u_short protocol_type;u_short hardware_type;u_short operation_code;u_char *mac_string;in_addr source_ip_address;in_addr destination_ip_address;u_char hardware_length;u_char protocol_length;cout<<" ARP协议 "<<endl;arp_protocol = (class arp_header*)(packet_content + 14);hardware_type = ntohs(arp_protocol->arp_hardware_type);protocol_type = ntohs(arp_protocol->arp_protocol_type);operation_code = ntohs(arp_protocol->arp_operation_code);hardware_length = arp_protocol->arp_hardware_length;protocol_length = arp_protocol->arp_protocol_length;cout<<"硬件类型: "<<ntohs(arp_protocol->arp_hardware_type)<<endl;cout<<"协议类型: "<< setw(4)<<setfill('0')<<ntohs(arp_protocol->arp_protocol_type)<<endl;cout<<"硬件地址长度: "<< int(arp_protocol->arp_hardware_length)<<endl;cout<<"协议地址长度: "<< int(arp_protocol->arp_protocol_length)<<endl;cout<<"ARP 操作: "<< ntohs(arp_protocol->arp_operation_code)<<endl;switch (operation_code){case 1:cout<<"ARP请求协议"<<endl;break;case 2:cout<<"ARP应答协议"<<endl;break;case 3:cout<<"RARP请求协议"<<endl;break;case 4:cout<<"RARP应答协议"<<endl;break;default:break;}cout<<"源以太网地址: "<<endl;mac_string = arp_protocol->arp_source_ethernet_address;cout<< setw(2) << setfill('0') << hex << int(*mac_string) << "." << setw(2) << setfill('0') << hex << int(*(mac_string + 1)) << "." << setw(2) << setfill('0') << hex << int(*(mac_string + 2)) << "." << setw(2) << setfill('0') << hex << int(*(mac_string + 3)) << "." << setw(2) << setfill('0') << hex << int(*(mac_string + 4)) << "." << setw(2) << setfill('0') << hex << int(*(mac_string + 5)) << endl;memcpy((void*) &source_ip_address, (void*) &arp_protocol->arp_source_ip_address, sizeof( in_addr));cout<<"源IP地址:"<<inet_ntoa(source_ip_address)<<endl;cout<<"目的以太网地址:"<<endl;mac_string = arp_protocol->arp_destination_ethernet_address;cout<< setw(2) << setfill('0') << hex << int(*mac_string) << "." << setw(2)<< setfill('0') << hex << int(*(mac_string + 1)) << "." << setw(2) << setfill('0')<< hex << int(*(mac_string + 2)) << "." << setw(2) << setfill('0') << hex <<int(*(mac_string + 3)) << "." << setw(2) << setfill('0') << hex << int(*(mac_string+ 4)) << "." << setw(2) << setfill('0') << hex << int(*(mac_string + 5)) << endl;memcpy((void*) &destination_ip_address, (void*)&arp_protocol->arp_destination_ip_address, sizeof( in_addr));cout<<"目的IP地址:"<<inet_ntoa(destination_ip_address)<<endl;}/*下面是实现IP协议分析的函数,其函数类型与回调函数相同 */void ip_protocol_packet_callback(u_char *argument, const pcap_pkthdr*packet_header, const u_char *packet_content){ip_header *ip_protocol; /* IP协议变量 */u_int header_length; /* 长度 */u_int offset; /* 偏移 */u_char tos; /* 服务质量 */u_int16_t checksum; /* 校验和 */ip_protocol = ( ip_header*)(packet_content + 14); /* 获得IP协议内容 */ checksum = ntohs(ip_protocol->ip_checksum); /* 获得校验和 */header_length = ip_protocol->ip_header_length *4; /* 获得长度 */tos = ip_protocol->ip_tos; /* 获得服务质量 */offset = ntohs(ip_protocol->ip_off); /* 获得偏移 */cout<<" IP协议 "<<endl;cout<<"版本号:"<<int(ip_protocol->ip_version)<<endl;cout<<"首部长度: "<< header_length<<endl;cout<<"服务质量: "<< int(ip_protocol->ip_tos) <<endl;cout<<"总长度: "<< ntohs(ip_protocol->ip_length)<<endl;cout<<"标识: "<< setw(4)<<setfill('0')<<hex<<ntohs(ip_protocol->ip_id) << endl;cout<<"偏移: "<< (offset &0x1fff) *8<<endl;cout<<"生存时间: "<< int(ip_protocol->ip_ttl)<<endl;cout<<"协议类型: "<<int( ip_protocol->ip_protocol)<<endl;switch (ip_protocol->ip_protocol){case 6:cout<<"上层协议为TCP协议"<<endl;break;case 17:cout<<"上层协议为UDP协议"<<endl;break;case 1:cout<<"上层协议为ICMP协议ICMP"<<endl;break;default:break;}cout<<"校验和:"<<checksum<<endl;cout<<"源IP地址:"<<inet_ntoa(ip_protocol->ip_souce_address)<<endl; /*获得源IP地址 */cout<<"目的IP地址:"<<inet_ntoa(ip_protocol->ip_destination_address)<<endl; /* 获得目的IP地址 */switch (ip_protocol->ip_protocol) /* 根据IP协议判断上层协议 */{case 6:tcp_protocol_packet_callback(argument, packet_header, packet_content); /* 上层协议是TCP协议,调用分析TCP协议的函数,注意参数的传递 */ break;case 17:udp_protocol_packet_callback(argument, packet_header, packet_content); /* 上层协议是UDP协议,调用分析UDP协议的函数,注意参数的传递 */ break;case 1:icmp_protocol_packet_callback(argument, packet_header, packet_content); /* 上层协议是ICMP协议,调用分析ICMP协议的函数,注意参数的传递 */break;default:break;}}/* 下面是分析以太网协议的函数,也是回调函数 */void ethernet_protocol_packet_callback(u_char *argument, const pcap_pkthdr*packet_header, const u_char *packet_content){u_short ethernet_type; /* 以太网类型 */ether_header *ethernet_protocol; /* 以太网协议变量 */u_char *mac_string; /* 以太网地址 */static int packet_number = 1; /* 数据包个数,静态变量 */cout<<" "<<endl;cout<<"捕获第"<< packet_number<<"个网络数据包"<<endl;cout<<"捕获时间:"<<endl;cout<<ctime((const time_t*) &packet_header->_sec)<<endl; /* 获得捕获数据包的时间 */cout<<"数据包长度:"<<endl;cout<<packet_header->len<<endl;cout<<" 以太网协议 "<<endl;ethernet_protocol = (class ether_header*)packet_content; /* 获得以太网协议内容 */ethernet_type = ntohs(ethernet_protocol->ether_type); /* 获得以太网类型 */cout << "以太网类型:" << setw(4) << setfill('0') << hex << ethernet_type << endl;switch (ethernet_type) /* 根据以太网类型判断 */{case 0x0800:cout<<"上层协议为IP协议"<<endl;break;case 0x0806:cout<<"上层协议为ARP协议"<<endl;break;case 0x8035:cout<<"上层协议为RARP协议"<<endl;break;default:break;}mac_string = ethernet_protocol->ether_shost;//****cout << "mac_string帧源地址:" << setw(2) << setfill('0') << hex <<int(*mac_string) << "." << setw(2) << setfill('0') << hex << int(*(mac_string + 1))<< "." << setw(2) << setfill('0') << hex << int(*(mac_string + 2)) << "." << setw(2)<< setfill('0') << hex << int(*(mac_string + 3)) << "." << setw(2) << setfill('0')<< hex << int(*(mac_string + 4)) << "." << setw(2) << setfill('0') << hex <<int(*(mac_string + 5)) << endl;mac_string = ethernet_protocol->ether_dhost;cout << "mac_string帧目的地址:" << setw(2) << setfill('0') << hex <<int(*mac_string) << "." << setw(2) << setfill('0') << hex << int(*(mac_string + 1))<< "." << setw(2) << setfill('0') << hex << int(*(mac_string + 2)) << "." << setw(2)<< setfill('0') << hex << int(*(mac_string + 3)) << "." << setw(2) << setfill('0')<< hex << int(*(mac_string + 4)) << "." << setw(2) << setfill('0') << hex <<int(*(mac_string + 5)) << endl;switch (ethernet_type){case 0x0806:arp_protocol_packet_callback(argument, packet_header, packet_content);/* 上层协议为ARP协议,调用分析ARP协议的函数,注意参数的传递 */ break;case 0x0800:ip_protocol_packet_callback(argument, packet_header, packet_content);/* 上层协议为IP协议,调用分析IP协议的函数,注意参数的传递 */ break;default:break;}cout<<" "<<endl;packet_number++;}/*主函数 */void main(){pcap_t *pcap_handle; /* Winpcap句柄 */char error_content[PCAP_ERRBUF_SIZE]; /* 存储错误信息 */char *net_interface; /* 网络接口 */bpf_program bpf_filter; /* BPF过滤规则 */char bpf_filter_string[] = ""; /* 过滤规则字符串 */bpf_u_int32 net_mask; /* 掩码 */bpf_u_int32 net_ip; /* 网路地址 */net_interface = pcap_lookupdev(error_content); /* 获得可用的网络接口 */ pcap_lookupnet(net_interface, &net_ip, &net_mask, error_content);/* 获得网络地址和掩码地址 */pcap_handle = pcap_open_live(net_interface, BUFSIZ, 1, 1, error_content);/* 打开网路接口 */pcap_compile(pcap_handle, &bpf_filter, bpf_filter_string, 0, net_ip); /*编译BPF过滤规则 */pcap_setfilter(pcap_handle, &bpf_filter); /* 设置过滤规则 */if (pcap_datalink(pcap_handle) != DLT_EN10MB)return ;cout<<"请输入抓包数量:"<<endl;int n;cin>>n;pcap_loop(pcap_handle, n, ethernet_protocol_packet_callback, NULL); /*注册回调函数,循环捕获网络数据包,利用回调函数来处理每个数据包 */ pcap_close(pcap_handle); /* 关闭Winpcap操作 */}。