智能家居魔方盒子详细说明书
- 格式:ppt
- 大小:860.50 KB
- 文档页数:31

重要申明首先感谢您选择本产品。
在使用前,请您仔细阅读本产品的说明书,以避免设备受到不必要的损害。
本公司提醒您正确使用,将得到良好的使用效果和验证速度。
非经本公司书面同意,任何单位和个人不得擅自摘抄、复制本手册内容的部分或全部,并不得以任何形式传播。
本手册中描述的产品中,可能包含本公司及其可能存在的许可人享有版权的软件,除非获得相关权利人的许可,否则,任何人不能以任何形式对前述软件进行复制、分发、修改、摘录、反编译、反汇编、解密、反向工程、出租、转让、分许可以及其他侵权软件版权的行为,但是适用法禁止此类限制的除外。
由于产品的不断更新,本公司不能承诺实际产品与该资料一致,同时也不承担由于实际技术参数与本资料不符所导致的任何争议,任何改动恕不提前通知。
目 录1 概述 (1)1.1产品外观 (1)1.2产品特点 (1)1.3运用场景 (1)2 主要技术参数 (2)3 设备使用 (3)3.1抓拍设置 (3)3.1.1 添加通道 (3)3.1.3 抓拍区域设置 (4)3.1.4 抓拍参数设置 (5)3.2实时预览 (5)3.3数据上传 (7)3.3.1 FTP上传 (7)3.3.2 主动上报 (7)3.4抓拍查询 (8)附件视频预览插件 (10)1 概述XC-IVS8008-01/02是一款基于深度学习算法的智能计算盒。
该产品采用嵌入式设计,集成高性能NPU模块,内嵌成熟稳定的人脸识别算法和周界预警算法,可实现人脸抓拍识别和周界越线告警,适用于小区、校园区等各类出入口场景。
1.1 产品外观1.2 产品特点●人工智能计算能力,高达28.8T算力。
●最高可接入16路符合ONVIF、RTSP标准的高清网络摄像机。
●支持H.264/H.265视频标准,最高可支持800万像素IPC的接入。
●人脸总数最多支持30万张人脸图片,最多支持64个人脸库。
●最多可支持实时16路人脸识别或实时8路周界越线告警。
1.3 运用场景●需要人脸识别的场所,如智慧小区的出入口、办公楼宇的出入口、园区出入口,主要用于人脸布控、人脸识别报警、陌生人识别等。

智能家居产品使用说明手册第一章:产品概述 (2)1.1 产品简介 (3)1.2 产品特点 (3)第二章:开箱与安装 (3)2.1 开箱准备 (3)2.2 设备安装 (4)2.3 连接电源 (4)第三章:设备连接与配置 (4)3.1 连接WiFi (4)3.1.1 准备工作 (4)3.1.2 连接步骤 (5)3.2 配置智能家居系统 (5)3.2.1 添加设备 (5)3.2.2 设置设备名称 (5)3.2.3 设定设备场景 (5)3.3 绑定设备 (5)3.3.1 绑定设备至账户 (5)3.3.2 解绑设备 (6)第四章:基本操作 (6)4.1 智能家居APP使用 (6)4.1.1 与安装 (6)4.1.2 注册与登录 (6)4.1.3 主界面功能介绍 (6)4.1.4 添加设备 (6)4.1.5 控制设备 (6)4.2 语音操作 (6)4.2.1 开启语音 (6)4.2.2 语音唤醒 (7)4.2.3 语音命令 (7)4.3 设备控制 (7)4.3.1 开关控制 (7)4.3.2 调节控制 (7)4.3.3 定时控制 (7)4.3.4 场景控制 (7)4.3.5 联动控制 (7)第五章:场景设置 (7)5.1 创建场景 (7)5.2 添加设备 (8)5.3 触发条件设置 (8)第六章:安全与隐私 (8)6.1 数据加密 (8)6.1.1 加密技术概述 (8)6.1.2 加密算法 (8)6.1.3 加密密钥管理 (8)6.2 账号管理 (9)6.2.1 账号创建与认证 (9)6.2.2 账号权限管理 (9)6.2.3 账号安全保护 (9)6.3 隐私保护 (9)6.3.1 用户信息保护 (9)6.3.2 数据存储与处理 (9)6.3.3 数据共享与使用 (9)6.3.4 用户隐私设置 (9)第七章:智能家居设备维护 (10)7.1 设备保养 (10)7.1.1 清洁保养 (10)7.1.2 定期检查 (10)7.2 软件升级 (10)7.3 故障处理 (10)7.3.1 常见故障及处理方法 (10)7.3.2 故障处理注意事项 (11)第八章:智能家居系统扩展 (11)8.1 添加新设备 (11)8.1.1 设备连接 (11)8.1.2 设备配置 (11)8.1.3 设备调试 (12)8.2 系统兼容性 (12)8.2.1 设备兼容性 (12)8.2.2 系统兼容性升级 (12)8.3 系统升级 (12)8.3.1 升级方式 (12)8.3.2 升级步骤 (12)8.3.3 注意事项 (12)第九章:售后服务 (13)9.1 售后政策 (13)9.2 联系客服 (13)9.3 常见问题解答 (13)第十章:用户反馈与建议 (14)10.1 反馈渠道 (14)10.2 意见收集 (14)10.3 改进与发展 (15)第一章:产品概述1.1 产品简介本智能家居产品是一款集成了现代科技与人性化设计的高科技产品,旨在为用户提供舒适、便捷、安全的居住环境。
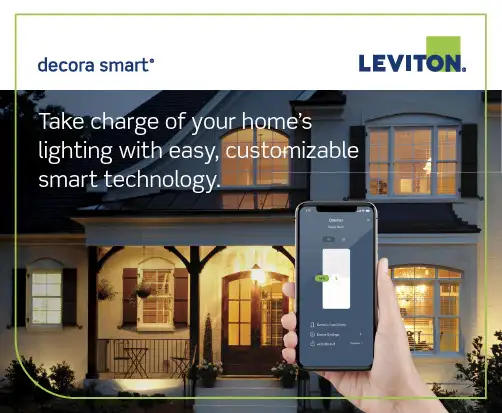
Take charge of your home’s lighting with easy, customizable smart technology.Enhancing your home with smart lighting control is easy.Add the safety and convenience of automated lighting to your home with the Leviton Decora Smart® family of products,so you can take control of your lighting while at home or when away. Use the My Leviton app to create schedules so lights come on automatically or use your voice to dim a light, adjust a ceiling fan, turn off a lamp and more.Leviton Decora Smart has robust solutions using industry-leading technology: Wi-Fi®, Z-Wave Plus® and Zigbee 3.0. Based upon your needs and comfort level, you can start small with a smart dimmer or choose to outfit your entire home. Browsethe different technologies and choose the best fit for you.Choose Your Favorite Technology- Are you an Amazon Alexa™, Google Assistant™, or Apple HomeKit™ enthusiast? Choose Wi-Fi®- Are you currently using a hub such as a Samsung® SmartThings™? Choose Z-Wave®- Do you need a solution that works with Xfinity or your cable provider? Choose Zigbee*Wi-Fi 2nd Gen OnlyTo learn more about the Leviton Decora Smart solution, visit /decorasmart- C ontrol lights from anywhere using the My Leviton app; no hub required- U se your voice – compatible with Amazon Alexa, Google Assistant and Apple HomeKit*- E asily group smart devices into rooms and create scenes to activate multiple lights at once- P lug-in versions provide a wireless option to control lamps, small appliances, holiday lighting and more- V oice Dimmer with Amazon Alexa Built-in available for added conveniencewith Wi-Fi ®* HomeKit works with 2nd Gen models only.See inside back cover for full product listings.- Control lights from anywhere using a compatible Z-Wave controller- C ompatible Z-Wave controllers include Samsung SmartThings ™ and smart security systems including ®- Use your voice − connects to Amazon Alexa or Google Assistant with compatible hub- Plug-in versions provide a wireless option to control lamps, small appliances, holiday lighting and morewith Z-Wave ®- C ontrol lights from anywhere using a compatible Zigbee hub- Use your voice − connects with select Amazon Echo hubs for Alexa voice control- Plug-in versions provide wireless option to control lamps, small appliances, holiday lighting and moreZigbee 3.0 Certifi edDecora Smart Dimmer and Switch Companions are for use in 3-way or multi-location applications where the same set of lights are being controlled from two or more di erent locations such as the top and bottom of a staircase, a long hallway, or open areas with multiple entrances. Companion devices must be paired with a Decora Smart primary dimmer, switch, plug-in orfan speed controller to operate.The chart below indicates which companion device can be used with the primary deviceyou selected.Wired CompanionsWired Dimmer and Switch Companion devices require in-wall wiring and connect with any primary Decora SmartDimmer, Switch or Fan Speed Controller to provide additional control at the base of a staircase, the end of ahallway or open areas with multiple entrances that already have existing 3-way or more control.- P lace in areas where there is existing 3-way/multi-location control available because wiringis required- C ompatible with all Decora Smart Wi-Fi, Z-Wave and Zigbee devices- N o app required for installation- P lace within a 300 ft. range of the primary Decora Smart device to control the same light(s)- P air multiple companion devices with a primary Decora Smart deviceDecora Smart® Solutions for 3-Way/Multi-Can be used with Decora Smart dimmers, switchesand fan speed controllersLocation ApplicationsNEW! Wire-Free Anywhere CompanionsAnywhere Dimmer and Switch Companions pair wirelessly with Decora Smart Wi-Fi 2nd Gen Dimmers,Switches and Mini Plug-Ins to provide additional lighting control wherever you need it most such as atthe base of a staircase, the end of a hallway or open areas with multiple entrances.- P lace anywhere to create wire-free, 3-way/multi-way solutions- N o Wi-Fi or app required for setup or operation- P lace within 50 ft. of the primary Decora Smart Wi-Fi 2nd Gen device to control the same light(s)- P air up to three Anywhere Companions with a Decora Smart Wi-Fi 2nd Gen device- R eplaceable CR2025 batteries included, with 5 year battery life (actual results may vary)Can only be used with Decora SmartWi-Fi 2nd Gen products- R emoveable faceplate makes it easy and a ordable to change color without rewiring - A vailable for dimmers, switches, fan speed controllers, outlets and 4-button controllers - Choose from Black, Gray, White, Light Almond, Ivory and Brown- S imply remove faceplate and snap on new color- P air with color-matched Decora or Decora Plus screwless wallplates, or mix and match colors to customizeDimmer and Fan Speed Controller Color Change Kits 4-Button Controller Color Change KitsOutlet Color Change KitsSwitch Color Change Kits Faceplate Color Change Kits* M ust be used in 3-way or multi-location applications with a primary dimmer, switch or fan speed control Product Ordering Guide The chart below provides the smart products available for your home.SA-11036B Leviton Manufacturing Co., Inc.Tech Line: 1-800-824-3005Mon-Fri 8am-10pm EST, Saturday 9am-7pm EST, Sunday 9am-5pm EST For 24/7 product support visit /supportAll trademarks are the property of their respective owners.Visit our Website at: /decorasmart © 2021 Leviton Manufacturing Co., Inc. All rights reserved.。
ZIPABOX2Modular smart home serverQuick-StartGuidev1.3MEET YOUR ZIPABOX2Zipato Zipabox2 lets you easily monitor, control and secure your home from anywhere in the world. The free Zipato smart home app lets you run your home from your smartphone, get important notifications about what’s happening and control things in every room.CLOUD SERVER24/7MOBILE APPCONNECT EVERYTHINGZIPABOX2 MODULES EXTENSIONWith Zipabox2 you can connect various devices by using various communication protocols and control them from your smartphone, no matter where you are. The Zipabox2 can be expanded with Z-Wave, ZigBee, EnOcean, and other popular home automation protocols.zbm.zw Zipabox - Z-Wave expansion module zbm.zigbee Zipabox - ZigBee expansion module zbm.serial Zipabox - Serial expansion module zbm.security Zipabox - Security expansion module zbm.p1 Zipabox - P1 expansion module zbm.knx Zipabox - KNX expansion module zbm.eno Zipabox - EnOcean expansion module zbm.868 Zipabox - 868Mhz expansion module zbm.433 Zipabox - 433Mhz expansion module zbm.3g Zipabox - 3G expansion module zbm.4g Zipabox - 4G expansion module zbm.power Zipabox - Power expansion module zbm.backupv2Zipabox - Backup expansion module v.2PACKAGING CONTENT- Power adapter 115/230 AC to 12V DC - Ethernet cable- Antenna* for Z-wave network (*optional)1.1. HOW TO FIND THE SERIAL NUMBERYour serial number is located on the left side of the Zipabox2, make a note of it as it will be required when registering your server online.1.2. CONNECT TO ETHERNETConnect your Zipabox2 to your broadband router via Ethernet cable.The Ethernet port is located on the top of the Zipabox2.Zipabox2 queries your DHCP server for an IP address. If you do not have a DHCP server in your local network, after 60 seconds Zipabox2 will auto-configure itself with a link-local IPv4 address (in 169.254.0.0/16 range).1.3. CONNECT TO WiFiThe unit can also be connected to the WiFi. To connect to the WiFi:1. Make sure the unit is powered off (power it off if necessary)2. Connect power cable3. Hold Button 1 until all LEDs start flashing sequentially in green color1.0. | INSTALLATION01 S erial number02Antenna*(865-926MHz)03USB port *optional models04Ethernetport05P owerinput*The unit is now in WiFi AP (access point) mode. Use your mobile phone or PC to connect to this AP. AP name is in this form: Zipabox2-<serial number>.To connect the unit to your WiFi network:- connect to the AP named Zipabox2-<serial number of Zipabox2>- open http://192.168.43.1 in your browser - select the desired AP name, input passwordThe unit will now try to connect to selected WiFi AP. If it succeeds connecting, LED will light up green (red means that there was a connection problem). In this case, reset the unit and try again, making sure the password is correct for the selected WiFi network. Reset the unit by holding Button 2 for 4 seconds.1.2. MOUNT ANTENNA * - screw Z-Wave antenna to antenna connector (*if included)1.3. POWER UPPlug the power adaptor into mains supply wall socket and the other end into server. You should see following LED sequence:01 | Steady blue light: Operating system is loading 02 | Blue light flashing: Zipato application is loading03 | Zipabox2 getting ready or offline: slowly flashing green light04 | Zipabox2 ready: steady green light when stable internet connection is established1.4. POWER DOWNIf the unit is equipped with a battery, to turn it off completely, disconnect the power cable, then hold Button 2 for 4 seconds.1.5. RESETTo reset Zipabox2, hold Button 2 for 4 seconds.2.1. WALL MOUNTINGDrill holes in the wall and insert the wall plugs if fixing into plaster or brick wall. Drill two holes, fix the screws and hook the Zipabox2 onto the screw heads. Make sure swivel antenna is in vertical position.2.1. DIN RAIL MOUNTINGMake enough space for Zipabox2 on your DIN-rail. Hook upper fitters on the back of your Zipabox2 to the DIN rail and press Zipabox2 slightly to snap lower fitters.01H oles for fixingZipabox2 on screw heads2.0. | MOUNTING0102 03Button 1Button 2LED indicatorCAUTIONPlease contact a certified electrician if working with mains powered electrical box.3.1. REGISTER YOUR ACCOUNTOption A) Start with the free Zipato smart home application, click on the “Register” button and create a new account.Option B) Open a browser window on your computer, go to the following URL: and register a new account.To benefit from Zipato Smart Home services you will need to set up your Zipato account, create your Smart Home System and register your Zipabox2.3.0. | ACCOUNT CREATION AND REGISTRATION2.3. TABLE TOPYou can place your Zipabox2 on any table top. Just make sure that swivel antenna is in vertical position (if equipped with).01 02Upper fitters Lower fitters0102 03Button 1Button 2LED indicator3.2. CREATE YOUR SYSTEMGo to System in the main menu and click “+” to create a new System.3.3. REGISTER YOUR ZIPABOX2Once you are logged in to your System, go to Devices and click “+” to register a new server. If you are using the mobile app while you are connected to the same IP network as your Zipabox2, you should be able to see your Zipabox2 with the status “Unregistered” in the list of servers. In this case, you can just click on it to get Register option. Otherwise just enter the serial number of your Zipabox2 manually (see 1.1. How to find the serial number).SYSTEMARM Cortex-A7 Quad-Core1.3GHz CPU256MB RAM4GB FLASHNETWORKEthernet 100BASE-TXWiFi 802.11 bgnBluetooth 4.0Radio module (Z-Wave, ZigBee, EnOcean, 433 MHz, etc...)*OPERATING SYSTEMLinux (4.1x kernel)ACCESSORIESCAT5e UTP patch LAN Cable Antenna (Z-Wave, ZigBee, EnOcean, 433 MHz, etc...)*POWERPower input: 9-12VDCInternal backup battery (900mAh)Power supply input: 100-240VAC,50/60HzPower usage: Idle: 1.2W, Max: 2.4WENVIRONMENTALTemperature Range:Operating: 0°C to 40°C (32°F to 104°F)Storage: -25°C to 70°C (-13°F to 158°F)Humidity: 5% to 95% non-condensingL EDS2 programmable buttons2 programmable green LEDs1 programmable RGB LEDsI/OUSB 2.0 downstream portREGULATORY COMPLIANCESafety: ULEMC: FCC, CERoHSPHYSICAL DIMENSION86 (L) x 86 (W) x 47 (H) millimeters3.4 (L) x 3.4 (W) x 1.9 (H) inchesAUTOMATION OPTIONRemote automation softwareOnline remote control interfaceWARRANTY1 year standard5.0. | SPECIFICATIONS *optional models6.0. | SAFETY6.1. IMPORTANT SAFETY INSTRUCTIONS• Read, keep and follow these instructions.• Heed all warnings.• Do not use this product near water or expose the product to dripping or splashing of water or liquid of any kind.• Clean only with a dry cloth.• Do not install near any heat sources such as radiators, heat registers, stoves or other apparatus (including amplifiers) that produce heat.• Only use attachments and accessories specified by the manufacturer.Disconnect the network cable and power adapter or any other connected peripherals if any of the following conditions exist:• The power cord or connector is damaged or frayed.• The Zipabox2 or cables are exposed to rain, water/fluids, or excessive moisture.• The Zipabox2 power adapter is damaged and you suspect it needs to be serviced.Avoid installing the Zipabox2 near or inside sources of electromagneticinterference.(Waste Electrical & Electronic Equipment)(Applicable in countries with separate collection systems)This marking on the product, accessories or literature indicates that the product and its electronic accessories (e.g. charger, headset, USB cable) should not be disposed of with other household waste. To prevent possible harm to the environment or human health from uncontrolled waste disposal, please separate these items from other types of waste and recycle them responsibly to promote the sustainable reuse of material resources.Household users should contact either the retailer where they purchased this product, or their local government office, for details of where and how they can take these items for environmentally safe recycling.Business users should contact their supplier and check the terms and conditions of the purchase contract. This product and its electronic accessories should not be mixed with other commercial wastes for disposal. (Applicable in countries with separate collection systems)At Zipato, we understand and are committed to reducing any impact our operations and products may have on the environment. To minimize this impact Zipato designs and builds its products to be as environmentally friendly as possible, by using recyclable, low toxic materials in both products and packaging.7.0. | DISPOSING AND RECYCLING YOUR PRODUCTDisclaimerSome content and services accessible through this device belong to third parties and are protected by copyright, patent, trademark and/or other intellectual property laws. Such content and services are provided solely for your personal non-commercial use. You may not use any content or services in a manner that has not been authorised by the content owner or service provider.Without limiting the foregoing, unless expressly authorised by the applicable content owner or service provider, you may not modify, copy, republish, upload, post, transmit, translate, sell, create derivative works, exploit, or distribute in any manner or medium any content or services displayed through this device.Tri plus grupa d.o.o. warrants this product (the “Product”) against defects in materials and/or workmanship under normal use for a period of ONE (1) YEAR from the date of purchase by the original purchaser (“Warranty Period”). If a defect arises and a valid claim is received within the Warranty Period, then as your sole remedy (and Tri plus grupa’ sole liability), Tri plus grupa will at its option either 1) repair the defect at no charge, using new or refurbished replacement parts, or 2) replace the Product with a new product that is functionally equivalent to the original, in each case within 30 days following receipt of the returned Product. A replacement product or part, assumes the remaining warranty of the original Product. When a Product or part is exchanged, any replacement item becomes your property and the replaced Product or part8.0. | ONE (1) YEAR LIMITED WARRANTYbecomes Tri plus grupa’ property. Obtaining Service: To obtain warranty service, visit https:// to open a service request. Please be prepared to describe the Product that needs service and the nature of the problem. A purchase receipt is required. The Product must be insured, and shipped freight prepaid and securely packaged. You must contact support for a Return Material Authorization Number (“RMA Number”) before shipping any Product, and include the RMA Number, a copy of your purchase receipt and a description of the problem you are experiencing with the Product. Any claim under this Limited Warranty must be submitted to Tri plus grupa before the end of the Warranty Period. Exclusions: This warranty does not apply to: a) damage caused by failure to follow instructions relating to the Product’s use or the installation of components; b) damage caused by accident, abuse, misuse, transport, neglect, fire, floods, earthquake or other external causes; c) damage caused by service performed by anyone who is not an authorized representative of Tri plus grupa; d) accessories used in conjunction with a covered Product; e) a Product or part that has been modified to alter functionality or capability; f) items intended to be periodically replaced by the purchaser during the normal life of the Product, including, without limitation, batteries, bulbs or cables; g) a Product that is used commercially or for a commercial purpose, in each case as determined by SmartThings.EXCEPT FOR BODILY INJURY, TRI PLUS GRUPA SHALL NOT BE LIABLE FOR (I) ANY LOST PROF ITS, COST OF PROCUREMENT OF SUBSTITUTE PRODUCTS, OR ANY INCIDENTAL OR CONSEQUENTIAL DAMAGES, OR (II) ANY AMOUNTS IN EXCESS OF THE PURCHASE PRICE FOR THE PRODUCT, IN EACH CASE WHETHER RESULTING F ROM THE USE OF OR INABILITY TO USE THIS PRODUCT, OR ARISING OUT OFANY BREACH OF THIS WARRANTY, EVEN IF COMPANY HAS BEEN ADVISED OF THE POSSIBILITY OF SUCH DAMAGES. SOME STATES DO NOT ALLOW THE EXCLUSION OR LIMITATION OF INCIDENTAL OR CONSEQUENTIAL DAMAGES, SO THE ABOVE LIMITATION AND EXCLUSIONS MAY NOT APPLY TO YOU. TO THE EXTENT PERMITTED BY APPLICABLE LAW, TRI PLUS GRUPA DISCLAIMS ANY AND ALL STATUTORY OR IMPLIED WARRANTIES, INCLUDING WITHOUT LIMITATION, WARRANTIES OF MERCHANTABILITY, F ITNESS F OR A PARTICULAR PURPOSE AND WARRANTIES AGAINST HIDDEN OR LATENT DEF ECTS. IF TRI PLUS GRUPA CANNOT LAWFULLY DISCLAIM STATUTORY OR IMPLIED WARRANTIES, THEN TO THE EXTENT PERMITTED BY LAW, ALL SUCH WARRANTIES SHALL BE LIMITED IN DURATION TO THE WARRANTY PERIOD. SOME STATES DO NOT ALLOW LIMITATIONS ON HOW LONG AN IMPLIED WARRANTY LASTS, SO THE ABOVE LIMITATIONS MAY NOT APPLY TO YOU.This warranty gives you specific legal rights and you may also have other rights, which vary from country to country. To exercise your rights under this warranty, please follow the instructions above under the heading “Obtaining Service”, or contact Zipato at Tri plus grupa d.o.o., Banjavciceva 11, 10000 Zagreb, Croatia. Zipato is a registered trademark of Tri plus grupa d.o.o.Manufacturer / Importer for Croatia:Tri plus grupa d.o.o.Banjavciceva 11, 10000 ZagrebCroatia 9.0. | DECLARATION OF CONFORMITY We, Tri plus grupa d.o.o., Croatia, 10000 Zagreb Banjavciceva 11, declare that the product Zipabox2, is in compliance with all the technical regulations applicable to the product within the scope of Council Directives 2014/53/EU.Sebastian Popovic, CEOManufacturer’s Name: Tri plus grupa d.o.o.Address: Banjavciceva 11, 10000 Zagreb, CroatiaProduct name: Zipabox2Model number: zb2.mainOperating Temperature: -10° C to 35° CThis device in compliance with the essential requirements and other relevant provisions of Directive 2014/53/EU. All essential radio test suites have been carried out.1. CAUTION : RISK OF EXPLOSION IF BATTERY IS REPLACED BY AN INCORRECT TYPE. DISPOSE OF USED BATTERIES ACCORDING TO THE INSTRUCTIONS2. The product shall only be connected to a USB interface of version USB 2.03. Adapter shall be installed near the equipment and shall be easily accessible.4. The plug considered as disconnect device of adapter.5. The device complies with RF specifications when the device used at 0mm from your body.RF output power: This product can be used across EU member states. Changes or modifications not expressly approved by the party responsible for compliance could void the user’s authority to operate the equipment.NOTEThis equipment has been tested and found to comply with the limits for a Class B digital device, pursuant to Part 15 of the FCC Rules. These limits are designed to provide reasonable protection against harmful interference in a residential installation. This equipment generates, uses and can radiate radio frequency energy and, if not installed and used in accordance with the instructions, may cause harmful interference to radio communications. However, there is no guarantee that interference will not occur in a particular installation. If this equipment does cause harmful interference to radio or television reception, which can be determined by turning the equipment off and on, the user is encouraged to try to correct the interference by one or more of the following measures:• Reorient or relocate the receiving antenna.• Increase the separation between the equipment and receiver.• Connect the equipment into an outlet on a circuit different from that to which the receiver is connected.• Consult the dealer or an experienced radio/TV technician for help. To maintain compliance with FCC’s RF Exposure guidelines, this equipment should be installed and operated at distance greater than 20 cm from your body. Use only the supplied antenna.FCC ID 2AAU7-ZBZWUSIC 11391A-ZBZWUS20ZIPABOXQUICK INSTALLATION GUIDE make your home smart。
产品使用手册名目一、概述 (3)、系统概述 (3)、设计概述 (3)二、产品介绍 (3)2.1、产品分类 (3)2.2、1-5键远控器 (4)2.3、15键远控器 (5)2.4、1路开关模块 (6)2.5、5路开关模块 (7)2.6、产品安装步骤及注重事项 (9)一、概述在方便用户的前提下我们为用户和效劳商提供美源智能家居系统?使用手册?。
此手册以更加系统,更加便捷的产品应用及使用为目标制定,使之符合不同用户的实际使用需要。
、系统概述自从有了人类以来,对家居生活的改善与追求就从未停止过。
社会的进步、经济的开展,使得人们的生活水平日新月异;科技与文化的开展,使我们有了更多更高的追求。
因为人类喜爱梦想,因此社会在不断进步。
现在我们关于家居生活,追求的是时尚、讲究的是档次、表达的是品味,最终我们得到是舒适。
例如,早先的住房可能没有什么装修的概念,现在不仅要装修,而且要弄出自己最好的效果,这就表达了人们关于家居生活舒适程度的不断追求。
光有装饰还不够,因为装饰出来的效果是固定的,总有不太方便的地点,比方电灯的开关,最早的时候开关是那种拉绳的,为了方便,后来就出现了双控开关、声控开关等等,这就表达了人们的一种新的需求方向:方便。
从家电的出现与开展也能瞧出这种需求,因为家电的出现确实是基本为生活提供方便的。
为了迎合这种需求,家电都在向着智能化方向开展,举个简单的例子,现在的电视、音响都配备了远控器,确实带来了方便,然而,新的咨询题也随之出现:不断增多的远控器,使用起来非常是烦恼,接着一种系统化的治理手段来通统一操纵家里的用电设备。
美源家居智能产品能够简化人们对家电的操作,能够让人们对家电的操作变得更为便利。
美源家居智能产品能够让居室中的环境轻易的到达用户盼瞧的状态,使您的生活更加随意、舒适。
、设计概述设计以实现简约生活、简化操作、人性化、集成化为目标,满足各种不同用户的需要。
不但适用于新建住而且我们还考虑到了针对对现有家庭的改造,为此,在设计中我们对每一个产品均采纳标准化设计和无线原那么,以便于改造工程的实施。

小米魔方控制器作用介绍经常使用小米设备的人,对小米魔方控制器一定不陌生,不过有的人还不清楚,小米魔方控制器有什么用?以下是店铺为你精心整理的小米魔方控制器作用,希望你喜欢。
小米魔方控制器作用小米魔方外壳采用抗UV材质,采用了魔方的设计概念,长宽高均为45mm,重量仅为73g,通过CR2450纽扣电池进行供电。
通过控制器内部的高精度加速度传感器和陀螺仪,配合小米自主研发的动作算法,能够感应出魔方的六个运行轨迹,并作出预的控制操作。
小米魔方控制器有什么用?小米魔方是一款智能家居控制器,通过智能网关与其他“米家”设备相连,可以通过6种动作控制不同的家庭智能设备。
目前已经支持多功能网关、小米空气净化器、小米电视、yeelight灯泡、小米智能插座、小蚁智能摄像机等。
小米魔方有白、粉、蓝三色可选,相比Google Home、Echo等其他的智能家居中心,在控制方式上更加新颖,外观也更轻巧灵活。
但同时这种方式也可能带来不小的麻烦,比如没记住一种新控制的动作,很可能小伙伴就需要挨个试了。
小米3分屏多窗口打开应用的详细步骤前期准备1、确保您的手机已经Root,也就是说MIUI需要刷开发板系统2、下载并安装WSM Tools给WSM Tools添加Xposed源1、进入WSM Tools,选择左下角的设置,如果没有设置选项请返回到模块界面;在选择软件源一项选上Xposed。
2、进入MIUI的设置界面,选择高级设置→系统下的应用→XMultiWindow→显示悬浮窗打开,都完成后重启手机。
3、回到WSM Tools里面的模块界面,上面选项卡选择下载与更新,跟新一下,然后再搜索栏搜索XMultiWindow,下载并安装,安装成功后如图把这个模块启用。
4、重启后打开该模块,这里很简单,有开启悬浮窗和SideBar Settings,先进入SideBar Settings。
5、下面那里可以设置边栏的宽度,上面是选择边栏里面的应用,触摸进入。
智能家居设备使用操作手册第一章:产品概述 (3)1.1 产品简介 (3)1.2 功能特色 (3)第二章:设备安装与连接 (4)2.1 设备拆箱与组装 (4)2.1.1 拆箱注意事项 (4)2.1.2 设备组装步骤 (4)2.2 设备连接电源 (4)2.2.1 电源连接注意事项 (4)2.2.2 电源连接步骤 (4)2.3 网络连接与配置 (5)2.3.1 网络连接注意事项 (5)2.3.2 网络连接步骤 (5)第三章:智能家居APP使用 (5)3.1 APP与安装 (5)3.1.1 途径 (5)3.1.2 安装流程 (5)3.2 用户注册与登录 (5)3.2.1 用户注册 (5)3.2.2 用户登录 (6)3.3 设备添加与管理 (6)3.3.1 设备添加 (6)3.3.2 设备管理 (6)第四章:灯光控制 (7)4.1 灯光设备接入 (7)4.1.1 设备检查 (7)4.1.2 接入步骤 (7)4.2 灯光场景设置 (7)4.2.1 场景创建 (7)4.2.2 场景编辑 (7)4.3 灯光定时与遥控 (7)4.3.1 定时控制 (7)4.3.2 遥控控制 (8)第五章:窗帘控制 (8)5.1 窗帘设备接入 (8)5.1.1 接入准备 (8)5.1.2 接入流程 (8)5.2 窗帘开关控制 (8)5.2.1 手动控制 (8)5.2.2 语音控制 (8)5.3 窗帘定时与遥控 (8)5.3.2 遥控控制 (9)第六章:环境监测 (9)6.1 环境设备接入 (9)6.1.1 设备连接 (9)6.1.2 设备配置 (9)6.2 环境数据展示 (9)6.2.1 数据展示界面 (9)6.2.2 数据实时更新 (9)6.3 环境预警与控制 (10)6.3.1 预警设置 (10)6.3.2 预警响应 (10)6.3.3 环境控制 (10)第七章:安防监控 (10)7.1 安防设备接入 (10)7.1.1 设备连接 (10)7.1.2 设备注册与绑定 (10)7.1.3 设备配置与调试 (11)7.2 视频监控与回放 (11)7.2.1 实时监控 (11)7.2.2 录像回放 (11)7.2.3 录像与分享 (11)7.3 报警设置与推送 (11)7.3.1 报警条件设置 (11)7.3.2 报警推送设置 (11)7.3.3 报警记录查询 (11)第八章:家电控制 (12)8.1 家电设备接入 (12)8.1.1 接入条件 (12)8.1.2 接入流程 (12)8.2 家电远程控制 (12)8.2.1 控制条件 (12)8.2.2 控制方法 (12)8.3 家电定时与联动 (12)8.3.1 定时控制 (12)8.3.2 联动控制 (13)第九章:智能家居系统联动 (13)9.1 联动场景设置 (13)9.1.1 场景定义 (13)9.1.2 场景设置步骤 (13)9.1.3 注意事项 (13)9.2 联动任务执行 (13)9.2.1 任务执行流程 (13)9.2.2 任务执行注意事项 (14)9.3.1 任务管理功能 (14)9.3.2 任务管理操作步骤 (14)9.3.3 注意事项 (14)第十章:故障排查与售后服务 (14)10.1 常见故障原因 (14)10.1.1 硬件故障 (14)10.1.2 软件故障 (15)10.1.3 网络故障 (15)10.2 故障排查方法 (15)10.2.1 硬件故障排查 (15)10.2.2 软件故障排查 (15)10.2.3 网络故障排查 (15)10.3 售后服务与保障 (15)10.3.1 售后服务承诺 (15)10.3.2 售后服务流程 (15)10.3.3 售后服务保障 (16)第一章:产品概述1.1 产品简介本产品是一款集高科技、智能化、便捷性于一体的智能家居设备。
智能家居产品使用说明书第1章产品概述 (4)1.1 产品介绍 (4)1.2 功能特点 (4)1.3 系统要求 (4)第2章安装与配置 (5)2.1 包装清单 (5)2.2 设备安装 (5)2.2.1 主机安装 (5)2.2.2 传感器设备安装 (6)2.3 网络配置 (6)2.3.1 有线连接 (6)2.3.2 无线连接 (6)2.4 账号注册与登录 (6)第3章基本操作与设置 (6)3.1 主界面介绍 (6)3.1.1 设备列表:显示已添加的所有智能设备,包括设备名称、实时状态和在线情况。
(6)3.1.2 快捷控制:提供常用设备的快捷操作入口,方便用户快速控制设备。
(7)3.1.3 消息通知:显示系统消息、设备告警等信息。
(7)3.1.4 设置入口:进入系统设置,可进行网络、声音、亮度等设置。
(7)3.2 设备添加与管理 (7)3.2.1 添加设备 (7)3.2.2 设备管理 (7)3.3 系统设置 (7)3.3.1 网络设置 (7)3.3.2 声音与亮度设置 (7)3.3.3 通用设置 (7)3.4 用户权限管理 (7)3.4.1 添加用户 (7)3.4.2 修改用户权限 (8)3.4.3 删除用户 (8)第4章环境控制 (8)4.1 空调控制 (8)4.1.1 功能概述 (8)4.1.2 操作方法 (8)4.1.3 注意事项 (8)4.2 灯光调节 (8)4.2.1 功能概述 (8)4.2.2 操作方法 (8)4.2.3 注意事项 (9)4.3 窗帘开关 (9)4.3.2 操作方法 (9)4.3.3 注意事项 (9)4.4 智能插座 (9)4.4.1 功能概述 (9)4.4.2 操作方法 (9)4.4.3 注意事项 (10)第5章家庭安全 (10)5.1 视频监控 (10)5.1.1 设备介绍 (10)5.1.2 安装与配置 (10)5.1.3 功能使用 (10)5.2 门锁控制 (10)5.2.1 设备介绍 (10)5.2.2 安装与配置 (10)5.2.3 功能使用 (11)5.3 烟雾报警 (11)5.3.1 设备介绍 (11)5.3.2 安装与配置 (11)5.3.3 功能使用 (11)5.4 紧急求助 (11)5.4.1 设备介绍 (11)5.4.2 安装与配置 (11)5.4.3 功能使用 (11)第6章娱乐与休闲 (12)6.1 音乐播放 (12)6.1.1 音乐源选择 (12)6.1.2 音乐播放控制 (12)6.1.3 音乐音质调节 (12)6.2 电视控制 (12)6.2.1 电视连接 (12)6.2.2 电视控制操作 (12)6.3 游戏娱乐 (12)6.3.1 游戏与安装 (12)6.3.2 游戏操作 (13)6.3.3 游戏分享 (13)6.4 家庭影院 (13)6.4.1 影院模式设置 (13)6.4.2 影片播放 (13)6.4.3 影片控制 (13)6.4.4 影片推荐 (13)第7章家居互联 (13)7.1 设备共享 (13)7.1.1 登录与注册 (13)7.1.3 管理共享设备 (13)7.2 远程控制 (14)7.2.1 开启远程控制 (14)7.2.2 远程控制操作 (14)7.3 智能场景 (14)7.3.1 创建智能场景 (14)7.3.2 管理智能场景 (14)7.4 语音 (14)7.4.1 连接语音 (14)7.4.2 语音控制操作 (15)第8章健康生活 (15)8.1 睡眠监测 (15)8.1.1 睡眠监测功能 (15)8.1.2 睡眠数据展示 (15)8.2 定时提醒 (15)8.2.1 闹钟提醒 (15)8.2.2 健身提醒 (15)8.2.3 饮水提醒 (15)8.3 健康数据统计 (15)8.3.1 运动数据统计 (15)8.3.2 睡眠数据统计 (16)8.3.3 身体状况监测 (16)8.4 运动计划 (16)8.4.1 运动计划制定 (16)8.4.2 运动计划执行 (16)8.4.3 运动计划调整 (16)第9章能源管理 (16)9.1 用电统计 (16)9.1.1 数据采集 (16)9.1.2 数据展示 (16)9.1.3 用电分析 (16)9.2 水电煤气的远程抄表 (17)9.2.1 远程抄表设备 (17)9.2.2 数据同步 (17)9.2.3 抄表提醒 (17)9.3 节能建议 (17)9.3.1 用电节能建议 (17)9.3.2 用水节能建议 (17)9.3.3 用气节能建议 (17)9.4 环保提醒 (17)9.4.1 用能超标提醒 (17)9.4.2 环保知识普及 (17)9.4.3 节能减排成果展示 (18)第10章售后服务与维护 (18)10.1 常见问题解答 (18)10.1.1 如何重置设备? (18)10.1.2 设备无法连接WiFi怎么办? (18)10.2 联系我们 (18)10.3 维护与保养 (18)10.3.1 定期清洁设备,避免灰尘和污垢影响设备散热。
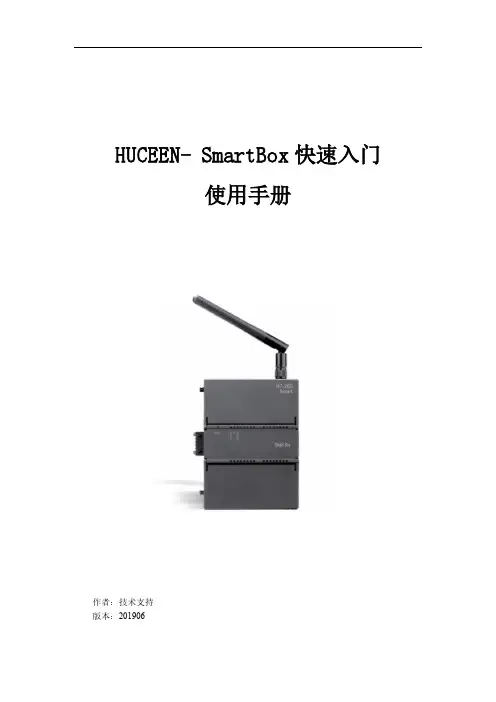
HUCEEN-SmartBox快速入门使用手册作者:技术支持版本:201906版本说明所需的基本知识要理解本手册,需要具备自动化和可编程逻辑控制器的基本知识。
服务与支持除了文档之外,我们还在Internet 的客户支持网站(/jszc/)上提供了专业技术知识。
如需要回答任何技术问题、培训或订购H7 产品方面的帮助,请与汇辰代理商或销售部联系。
因为汇辰销售代表都经过技术培训并掌握有关操作、过程和工业以及有关您使用的各种汇辰产品的最具体的知识,所以他们能够最快最高效地回答您可能遇到的任何问题。
技术数据如有改动,恕不事先通知,请留意网站更新动态。
目录一、SMARTBOX产品 (1)1、【注意事项】 (1)1.1环境要求 (1)二、硬件组态与配置 (1)1.1SmartBox在STEP 7-MicroWIN SMART中的组态 (1)1.2SmartBox在HConfig中的设置 (3)三、云平台组态 (10)SmartBox快速入门使用手册一、SMARTBOX产品概述感谢您购买本公司的产品,使用前请仔细阅读随机手册,以便于您快速掌握SmartBox 的使用方法,详细使用手册请到官网下载;公司网站:/1、【注意事项】不要在以下环境使用1.1环境要求有腐蚀性气体、粉尘等环节;有水、化学物品等液体飞溅到的地方。
1.1.1 配线避免接触高压、大电流的电源及电缆;供电电压DC 9~24V,切勿超压及正负反接;通讯电缆连接正确。
二、硬件组态与配置1.1SmartBox在STEP 7-MicroWIN SMART中的组态硬件安装:SmartBox直接扩展至200 Smart CPU后无需占用CPU宝贵的通讯接口如图1.1-1所示。
背板通讯使得通讯效率更高,响应速度更加及时。
图1.1-1组态设置:打开STEP 7-MicroWIN SMART软件进行硬件组态。
1,双击CPU打开系统块配置窗口;2,在实际槽位选择“EM DP01”模块,如图1.1-2。
What is SMART HOME DONGLE? (3)Application of SMART HOME DONGLE (3)Installation of SMART HOME DONGLE (4)Installing SMART HOME DONGLE (4)Installation of Smart Home App (4)Setting the network (5)Specification of wired/wireless router for Samsung SMART HOME donlge (6)Downloading Samsung Smart Home App (7)Registering Samsung account (7)Downloading Samsung Smart Home App (8)Registering the product ........................................................... 9Specification . (17)Open Source Announcement (17)Safety information (18)Troubleshooting (21)Contents2Installation of SMART HOME DONGLEInstalling SMART HOME DONGLE• Install the dongle at the given position of each Samsung Smart READY appliance.• Refer to the appropriate manual of Samsung Smart READY appliances for the installation position.• Download a manual of each appliance at www. and refer to it.• Refer to an application manual or a user manual of each Smart READY appliance for using the application.Installation of Smart Home App[Setting the network]Connect the wired/wireless router to the SMART HOME DONGLE wirelessly.[Registering Smart Home Service] Register the service using Smart Home appon your Smartphone.4Samsung account login screen(iphone)ab 12d c32ac3bd654e8910f1112g h13Safety informationThese safety precautions are for owner’s safety and preventions of property damage. Therefore, please read this manual thoroughly before using your product.The manufacturer is not responsible for the injury or property damage occurred by not following the safety information.This product is for Samsung Smart READY appliances, and it will not work on other devices.• If the product is getting heat, stop using it.–If your skin gets in contact with the heating product for a long while, a low-temperature burn such as red spots, pigmentation, etc. may occur.• Do not put the product near or in a heater(stove, microwave, etc.), a cooking utensil or a high pressure vessel.–It may supply heat to the product or may cause fire.• Do not drop the product or give external shocks to the product.–Do not put or store the product on a slant.–If the product is dropped, it may get damage and malfunction.• Be careful that children, toddlers or pets do not suck or bite the product.–It may cause damage to the product.18• Do not attempt to repair, disassemble, or modify the product yourself.–If a user attempts to repair, disassemble or modify the product, the user cannot have free repair service, and must contact Samsung Electronics' service center for the repair.• Be careful when cleaning the product.–Clean the product with a soft cloth.–Do not use harsh chemicals or detergent for cleaning the product. It may cause productdiscoloration or corrosion.• This equipment is a EMC device for home use (B grade), and it is intended primarily for using at home and it can be used in all area.20TroubleshootingDownload Samsung Smart Home App cannot be searched on Play store, GALAXY Apps or iPhoneApp Store.Samsung Smart Home app supports android operating system 4.0(ICS) or higher. ForiPhone, iOS 7 or higher supports the App.Sign in Samsung account cannot be accessed.Check your ID and password on Samsung account screen.21Connection After installing Samsung Smart Home App, the Samsung Smart READY appliance cannot be connected to the App.Unplug the Smart READY appliance and plug in it again, and then set Samsung SmartHome app and Wi-Fi again according to the guidance in the manual.The failure message appears when the device is being added.The failure might be temporary due to the distance between the wired or wireless routerand the air conditioner or other problems. Try it again after a while.Unplug the SMART HOME doing and pulg in it again. Try it again after a while. Function The control function of Samsung Smart Home App does not work.• Check whether the Samsung Smart READY appliance is connected to the wired orwireless router correctly.• Check whether the wired or wireless router is connected to the Internet correctly.22Memo。
智能家居产品使用说明书第一章:产品概述 (2)1.1 产品简介 (2)1.2 功能特点 (2)1.2.1 高度集成 (2)1.2.2 智能化 (2)1.2.3 稳定性 (2)1.2.4 易用性 (3)1.2.5 节能环保 (3)1.3 应用场景 (3)1.3.1 家庭应用 (3)1.3.2 办公场景 (3)1.3.3 教育场景 (3)1.3.4 医疗场景 (3)1.3.5 工业生产 (3)1.3.6 农业应用 (3)第二章:设备安装与连接 (3)2.1 安装准备 (3)2.2 设备安装 (4)2.3 设备连接 (4)第三章:智能控制系统 (5)3.1 系统概述 (5)3.2 控制方式 (5)3.3 系统设置 (5)第四章:智能安防 (6)4.1 安防设备介绍 (6)4.2 安防功能设置 (6)4.3 安防系统使用 (7)第五章:智能照明 (7)5.1 照明设备介绍 (7)5.2 照明场景设置 (7)5.3 智能调光 (7)第六章:智能环境监测 (8)6.1 环境监测设备介绍 (8)6.2 环境参数设置 (8)6.3 环境预警 (9)第七章:智能家电控制 (9)7.1 家电设备介绍 (9)7.2 家电控制方式 (10)7.3 智能节能 (10)第八章:智能语音 (10)8.1 语音功能 (11)8.2 语音使用方法 (11)8.3 语音设置 (11)第九章:智能娱乐系统 (12)9.1 娱乐设备介绍 (12)9.2 娱乐场景设置 (12)9.3 智能音效 (13)第十章:智能家居APP (13)10.1 APP与安装 (13)10.2 APP功能介绍 (13)10.3 APP使用指南 (14)第十一章:故障排查与维护 (15)11.1 常见问题解答 (15)11.2 设备维护 (15)11.3 软件升级 (15)第十二章:售后服务与保障 (16)12.1 售后服务政策 (16)12.2 售后服务流程 (16)12.3 用户权益保障 (17)第一章:产品概述1.1 产品简介科技的发展和社会的进步,我国在产品研发与制造领域取得了举世瞩目的成果。
1Welcome!This guide will get you up and running with your igloohome Keybox 3. In the meantime, you should follow igloohome on Facebook and Y outube!Like us on FacebookVisit our Y outubeTable of ContentsInc luded 4What’s5c ationsc ifiSpeFeatures 6QuiGuide 8 Startc kOnboarding 9 Appc essinApp 10 cManagingAc king 11Unloc king 12Loc kInstallation 13 LoBehaviour 15 c kLoJumpstart 16 USB-CAudio and LED Indications 1718 Troubleshoot4What’s IncludedKeybox 3Mounting Screws x2Screws Anchors x2Slim ShackleMounting Seal Rings x2Screwdriver5Model igloohome Smart Keybox 3Battery Type 4 x AAA Alkaline Batteries Battery Life Up to 12 months Emergency Power USB-C Jumpstart Operation Temp -20°C to 50°C IP Rating IP66 Body Material Zinc Alloy, Aluminium Alloy, Acrylic Shackle Material Hardened Steel, Rubber Weight Net: 1kg, Gross: 1.3kg Unlock Mechanism Bluetooth, PIN codeSpecificationsFront* DO NOT USE: Heavy Duty, Eveready, GP, or rechargeable batteries. Duracell & Energizer alkaline batteries recommended. Please note that using better batteries will improve the performance and lifespan of the lock.Storage Depth : 27 mmFront (Opened)114 mmThickness: 53mm30 mm6Low Battery IndicatorThe Status Indic ator shows red light when battery level is 20% and below, followed by a sound alert when the keypad is woken up. The battery level can also be monitored on the app and is updated during Bluetooth Unlock.Battery LifeThe Keybox 3 c an last up to 12 months with 4 AAA Alkaline battery.Emergency Jump StartIf battery power is drained, connect a USB-A to USB-C cable to a power bank then plug it onto the USB-C jumpstart port on the keybox toprovide emergency power.Bluetooth Master KeyThe igloohome Keybox 3 unlocks with Bluetooth via the app.Master PIN CodeThe igloohome Keybox 3 unlocks with a permanent Master PIN Code.User PIN CodeThe igloohome mobile app c an generate multiple types of User Pin c odes, e.g. One-Time, Permanent & Duration.Bluetooth Guest KeyThe igloohome mobile app c an generate and share Bluetooth keys based on duration with guests to unlock the Keybox 3.PIN / Bluetooth UnlockBattery7Masking Security CodeA total of 16 digits inc luding the masking digits c an be entered to prevent the PIN c ode from being exposed.Auto RelockThe Keybox 3 relocks automatically when product is closed. User can deactivate auto-relock function if they prefer manual relock.Keypad Security LockoutLoc k will disallow any PIN entries and sound an alarm when there is a number of incorrect PIN attempt. User c an c onfigure number of in c orre c t attempts to trigger timeout.SecurityWeather ResistantThe Keybox 3 is able to withstand weather conditions with protection against dust and water (IP66).8Loosen the 4 screws and remove battery coverInsert AAA BatteriesSecure battery cover tightly with 4 screwsBattery CoverPlease screw the battery cover tightly after inserting batteries to ensure optimal water resistance.9App OnboardingIn the factory mode (before pairing), the PIN to unlock the lock is 1 2 3 4 5 6 7 8 9 0Test Factory PIN Unlock2Register as a Lock Usera) Download igloohome from the App Store / Play Store b) Create an account and login3Pairinga) Select [Add new igloohome lock]Note: For existing users with other paired locks, go to [Configuration], select [Add Locks] and follow the instructions.Setting Master PIN Code4Before proceeding, turn on your Bluetooth and ensure that you are within Bluetooth range of the lock.Go to [Access] and customize your [Master PIN] by editing it.10Managing Access in AppPIN codes can be generated on the app under [Access], press [+Access] and choose either One-Time, Permanent or Duration PIN.Pin codes will expire if its not use within its activation period. Refer to the table below.Note: Duration PIN code end times can be customised within a 28-day timeframe. Past this timeframe, the end time will automatically be configured to the start time.Creating PIN codes2Bluetooth Guest KeyPIN Type Use PIN within*Permanent PIN 24 hrs of generation One-Time PIN 24hrs of generation Duration PIN24hrs from the start timeBluetooth Guest Key can be shared with other users for mobile access. It allows your guests to unlock the igloohome smart lock via Bluetooth. There are 3 steps to using a Shared Bluetooth Key1. Under [Access], press [+Access] and choose [Bluetooth Key] under [Access Type]. Proceed to share the key after it is created.2. Guest receives the Bluetooth Key by one of these methods: • Clicking the URL given and follow the instructions. • Claiming Bluetooth Key under [Configuration].3. Guest can now use the Bluetooth Key under the Guest Bluetooth Key Section whenever he/she is within range of the lock.Notes: • The owner can revoke the Bluetooth Key in App.•Bluetooth Key must be accepted within 1 hour generation before it expires.UnlockingBluetooth Unlock1. Open your igloohome app2. Tap on the “Bluetooth Unlock” button3. The status indicator will flash green twice with 4 short ascending tone once unlocked.PIN Code1. Press any button on the keypad to wake device up2. Key in a valid PIN code (with or without masking pins) followed by the “Unlock Icon”3. The status indicator will flash green twice with 4 shortascending tone once unlocked.Locking Auto RelockSimple close the keybox in place and Status Indicator will show green with a long beep. Manual Relock Press and hold the Unlock icon on the bottom right of the keypad for 2 seconds until the status indicator will show green with a long beep.Note: Used when Auto Relock is “Off”Secure Keybox on a handle or knob1. Unlock the keybox2. Push the shackle release to the right3. Pull out the shackle4. Secure on a handle or knob5. Insert back the shackleFor door knobs,use Slim Shackle For door handles,use Regular Shackle Lock InstallationMount on a surface1. Unlock the keybox2. Drill holes on a wall3. Hammer the screw anchors into the holes4. Mount the Keybox 3 on the wall with the mounting seal rings and 2 screwsNote: User is able to Enable and Disable Keypad Security Lockout via Bluetooth.Lock Behaviour1. Connect the USB-A to USB-C cable to a power bank then plug it2. While the USB-A to USB-C cable is connected to the power bank,USB-C Jumpstartonto the USB-C jumpstart port on the keybox.key in PIN code on the keypad followed by to unlock.USB-C Jumpstart FeaturePlease unlock by entering a valid PIN code or via the app within 20 seconds after the keybox is powered up.Audio and LED IndicationsTroubleshootI am unable to close the keybox. • Do an unlock via PIN code or Bluetooth and try to close the keybox again.• Note that you might accidentally lock the keybox manually by holding the UNLOCK button for 2 seconds when the keybox is open.• Do a Bluetooth Unlock or sync and try again.• Make sure that the generated PIN codes are activated within the activation period before it expired.I have generated my PINs from the app but it cannot work.• The Keybox is low in battery.• Use an USB-A to USB-C cable connected to a power bank to jumpstart the lock and unlock the Keybox to replace the batteries.• Refer to page 8 to know how to replace batteries.I tried to unlock the Keybox but the keypad went off and came back on with 2 slow and 2 quick beeps. • The Keybox’s battery is flat. • Use an USB-A to USB-C cable connected to a power bank to jumpstart the lock and unlock the keybox to replace the batteries.• Please unlock within 20 seconds. • Refer to page 8 to know how to replace batteries. The lock is not responding at all.• Use the spare QR sticker that is provided in the Keybox box.I can’t scan the QR sticker as it is worned out.• Make sure Auto Relock is ON via the igloohome mobile app.• If Auto Relock is ON and the keybox is still not working, try to lock the keybox manually by holding the UNLOCK button for 2 seconds.I closed the Keybox but it did not relock automatically.• Note that the screws are designed to be retained, therefore cannot be removed. • Please loosen the screws to remove the battery cover. I am unable to remove the battery cover screws.• Keypad Security Lockout is triggered on the Keybox. • Please refer to page 15.The keybox keypad flashes white and LED indicator flashes red when I activate the keypad.• Please ensure USB-C connector is connected to the USB-C slot securely while unlocking it with PIN code or Bluetooth.• Please unlock within 20 seconds.• Please ensure that the Power Bank has sufficient power. I tried to use USB-C to jumpstart the lock but unable to.。
魔方Megcube-B4H系列版本说明书发布日期2022-03-01北京旷视科技有限公司版权所有© 北京旷视科技有限公司2021。
保留一切权利。
非经本公司书面许可,任何单位和个人不得擅自摘抄、复制本文档内容的部分或全部,并不得以任何形式传播。
注意您购买的产品、服务或特性等应受北京旷视科技有限公司商业合同和条款的约束,本文档中描述的全部或部分产品、服务或特性可能不在您的购买或使用范围之内。
除非合同另有约定,北京旷视科技有限公司对本文档内容不做任何明示或默示的声明或保证。
由于产品版本升级或其他原因,本文档内容会不定期进行更新。
除非另有约定,本文档仅作为使用指导,本文档中的所有陈述、信息和建议不构成任何明示或暗示的担保。
数据安全与免责声明请注意,北京旷视科技有限公司(以下简称“旷视”)产品中可能涉及人脸等相关数据的收集、存储与使用。
旷视在合理商业规则下,应旷视客户等相关方(以下简称“相关方”)的明确要求而向其提供相应的设备、产品与功能特性(以下合称“该特性”),用作在目标区域内实现含人脸识别在内的相关功能。
旷视无法单方面开启或使用该特性,也无法自行获取相关方使用或维护该特性的任何有关信息,是否及如何启用、部署、使用、废止该特性均由相关方自行酌情决策。
作为前提,旷视已要求相关方、相关方亦相应承诺,相关方应在使用或维护该特性的过程中,严格遵守所适用的法律法规,切实履行其与特定/不特定第三方之间的有效协议、声明与承诺,尊重被普遍接受的社会伦理与道德,给予相关用户、政府机构等第三方必要的告知,并获得和保留所有必要的同意、许可、授权,以确保相关方对该特性的使用或维护不侵犯第三方的各类合法权益。
在该特性及其他产品的开发中,旷视亦将严格遵守相关法律法规,贯彻个人信息保护原则,遵循旷视已公开发布的《人工智能应用准则》。
为免歧义,旷视不承担亦不应承担相关方在使用和维护该特性的过程中、非因旷视的过错而造成的任何法律责任,包括但不限于:索赔、损失、义务、成本、费用、处罚、禁令及裁决等不利后果。
【V40-2/S30-2】使用说明书西安灵舟通信服务有限公司目录注意事项及使用环境.............................. - 1 -第一章产品介绍................................ - 2 -1. 产品及配件 (2)2. 产品外观及接口说明 (3)3. 遥控器按键图示及功能 (5)第二章首次使用................................ - 7 -1. 复合音频视频连接如图2-1所示 (7)2. 色差分量连接如图2-2所示 (8)3. 数字高清HDMI连接如图2-3所示 (9)4. 开机/关机 (10)5. 网络配置 (10)6. 系统升级 (12)第三章功能描述............................... - 13 -1. 视频播放 (13)2. 播放/暂停 (15)3. 音量控制 (15)4. 选择播放 (16)5. 快进/快退 (16)6. 停止/返回 (17)7. 影片搜索 (18)8. 本地播放 (19)9. 网络下载 (20)10. 我的魔盒 (21)11. 魔盒设置 (21)第四章问题与解决............................. - 22 -第五章产品技术规格及其他..................... - 24 -1. 技术规格 (24)2. 关于说明书 (25)3. 售后服务 (25)4. 联系方式 (25)注意事项及使用环境●请勿在高温潮湿的地方操作魔盒。
●电子设备都是比较脆弱的,请在使用时不要剧烈震动或撞击本产品,也不要使用过大的力度按压本产品的按键。
●为了避免使用时的静电,请避免在特别干燥的环境下操作本产品。
●如本产品出现问题,请拨打客服电话4008166180,或到指定维修点请专业人士维修,切勿自行拆卸本产品以免损坏本产品或造成危险。
如因自行拆卸本产品引起的一切损失,均由客户自行承担。
SecureSmart Home ControllerManualThanks for choosing the Ezlo Secure Y ou’ve taken the first step toward makingyour home smarter and safer.It’s easy to set up your hub. Here is what you have to do.SET UPFor starters, your Ezlo Plus hub operates on the Vera app.Install the Vera app on your mobile device. Just look for the in the iOS App Store or on Google Play. If you already have the Vera app, just log in.If you just downloaded the app, tap on New to Vera and select Ezlo Secure from the list of controllers. If you already have an account, tap Add New Controller and select the Ezlo Secure from the My Controllers list.Next, connect the A/C power adapter to your Ezlo Secure. Once it is powered on, the LED should slowly change from green to blue. Wait for a steady blue light before proceeding.The Ezlo Secure supports both wired andwireless setup. Select your preferred optionand follow the prompts.Congratulations! Y our Ezlo Secure is now connected and its LED will remain steady blue.If you don't already have one, it's time to create your account. The app will walk you through it.Make your home safer. Make your life easier. The Ezlo Secure lets you control Z-Wave™, Zigbee, andWi-Fi devices from a single app. When you add devices such as lights, thermostats, sensors, cameras, and door locks to your Vera system, you’ll be able to enjoy greater comfort and peace of mind with just a touch.Control your home from anywhere.The Vera app offers some key features that help you simplify things at home and help you keep an eye on things when you’re away.ModesModes give you the power to control all your devices with a single tap. There are pre-set modes for Home, Away, Night, and Vacation.ScenesThe true power of home automation is when your home can do things for you. With Scenes you can schedule your lights to turn off when you leave for work in the morning, or to fade up as day turns to night.NotificationsY our Vera system can send push notifications and emails to let you—or other users—know about what’s going on at home.Need help setting up?Y ou can reach our Customer Care team seven days a week at 866.966.2272 between 6am and 10pm US CST/EST* or at Y ou can also purchase our Vera Easy Start service and get one hour of personalized setup assistance through a phone call with one of our most experienced agents. Visit to learn more.To find the complete User Guide, as well as information about the products FCC/IC registration, visit / support and click on “Downloads, Firmware & Manuals.” *******************Inclusion and ExclusionY our Ezlo Secure Controller can work with all Z-Wave devices, such as sensors, alarms, door locks, thermostats, etc. Over a thousand Z-Wave devices are available from many brands. (Z-Wave is a wireless communications system; check the package or specs to see if a device uses Z-Wave.)The Ezlo Secure can be operated in any Z-Wave network with other Z-Wave certified devices from other manufacturers. All mains operated nodes within the network will act as repeaters regardless of vendor to increase reliability of the networkBefore Ezlo Secure can control a device, it must be included into the Vera system.Custom Device WizardsVera are available for select devices that pass stringent Vera Labs testing for compatibility and quality. The Custom Device Wizards make Inclusion/Exclusion easiest, with specific details for each device. A list of these devices is available and updated at https:///device-compatibility/For all other Z-Wave devices, a Generic Device Wizard is used for Inclusion/ Exclusion. A Generic Device Wizard is available for each device category (thermostats, sensors, alarms, etc.)Adding Z-Wave Devices to your Ezlo Secure Before Ezlo Secure can control a device, it must be added into the system.Start using your Ezlo Secure by adding devices like lights, thermostats, sensors, and more. Just tap the menu icon at the top left of the dashboard, select Devices, and then tap the + sign to launch the Device Pairing Wizard.From your Dashboard, go to > tap on the + in the top right corner and select or search the name or type of device that you wish to pair with your Ezlo Plus.Devices1.To add a generic Z-Wave device, select thefrom the device categories.Generic Z-Wave device To add the devicewith your EzloSecure, if thedevice requiresassembly read the manual, follow theassembly instructions there,power the device,and click Next.2.3.Once the blue message at the top of the page says , follow the process as described in the user manual.Add new device nowIf successful, you will get a blue messageat the top of the page sayingand a message.Device wasconfiguredDevice Detected4. 5.To finish, choose aname for the newdevice, add thedevice tofavorites(optional), edit thename, assign it to a room, and clickI’m done addingdevices.Note: If the device was previously included with a different Z-Wave system, you’ll need to exclude it before adding it with your Ezlo Secure. (Y ou may also need to do this if you have problems Inclusion/Exclusion the first time.) Press the Retry button to start the exclusion process. Once thedevice is excluded, add it by following the inclusion steps.6.Adding a Z-Wave Device to Ezlo Secure (SmartStart adding)With SmartStart, you can add Z-Wave devices automatically by scanning their QR codes.From your Dashboard, go to > tap on the + in the top right corner .Devices Select the Z-Wave SmartStart entry. Tap on the Arrow next to the text.1.2.On the box of your device, you should find a QR code, usually labeled with a SmartStart title. When you select "Z-Wave SmartStart" in the iOS app, the camera of your phone will be turned on to scan the QR-code. Once a QR code has been scanned the adding process starts.3.The device is added to the system and you will see a Set Up Device screen. Tocontinue, choose a name for the new device, edit the name, assign it to a room, and click Continue.Select the connection. S2 Access -selected by default 4.5.Select the inclusion type - SmartStart. Tapon the button.Continue 6.Select another connection security type. Enable the toggle to see the list with all connection types available. Once you’ve selected the type of encryption, tap on S2 - Access - Full securitAccess Control - Encrypted connectio S2 - Authenticated - EncryptedconnectioS2 - Unauthenticated - EncryptedconnectioS0 - Encrypted connectionContinueIf the S2 Access is checked, by default all options under Advanced are checked.If the S2 Access is unchecked, all options under Advanced are unchecked.Y ou are able to select whichever options you choose from the Advanced list.7.In the next step, you will see theconfirmation screen that your device is ready.Just turn on your device and it will be added automatically. Y ou can check the SmartStart device state in Settings. Turn on your device. Y ou will get a push notification Tap on the notification and the VeraMobile app is opened to the list of SmartStart devices.New device available.8.9.On the SmartStart devices, you can see all added devices with statuses.10.To manage all SmartStart devices youscanned you need to tap on the side menu, tap on Settings.On the settings screen, tap on SmartStartDevices.If you don't have any device that hasSmartStart support, you will see an empty SmartStart Devices screen. Also, from this screen, you can add a SmartStart device byAdd a SmartStart device tapping the button. If you added at least one Z-Wave device viaSmartStart, you will see a SmartStart Devices screen with a list of devices.Tap on the button and see the deviceInfo Array details in an additional screen.On this screen you can change the device name, the encryption connection, and the inclusion type. To change the encryption connection, tap on the > button.Once you press the > button, the connection security screen will be opened. Y ou will see the list of all available connections types under Advanced optionS2 - Access - Current connectioS2 - Authenticated - Encrypted connectio S2 - Unauthenticated - EncryptedconnectioS0 - Encrypted connectioCSA - Client side authenticatedY ou can select as many options as you like. If S2 Access is checked by default, all options under Advanced are checked. IS2 Access isunchecked, then all options under Advancedare unchecked.To apply the changes, you need to remove and add this device again.Tap on the button. The changes are savedand if there is a new type of connectionselected, you will see in the device details andthe current connection. Below it you will see amessage and the connectiontypes selected previously. These changes will be applied only after you re-include the device.save Please re-include this device to applythe following connectionOn the device details screen you can see the device status IncludePending - Please check if your device is powered on and placed near this controller or another Z-Wave powered deviceFailed - Please remove the device from your system and try again. After you scan the QR code, make sure when you power ON the device, it is placed near thiscontroller or another Z-Wave powered deviceOther system device - To add the device to thiscontroller you have to first delete the SmartStart entry and remove the device from the current controller. After that, you have to add the device to this controllerAdd manually - When Z-Wave classic connection type is used you need to add the device manually.To change the inclusion type tap on > button and select the inclusion typSmartStart: The device will be added via SmartStart floZ-Wave classic: tap the button and add the device via Z-Wave generic flowAdd manuallyIf you were unable to add a SmartStart deviceby scanning the QR code, you can add it manually. Tap on the button Enter DSK code manually.Enter the 40 digits ofthe DSK code shown on the box of your device. Make sure this code belongs to a SmartStart device for automatic inclusion. Once you have entered all 40 digits, tap Continue.The device is added to the system and you will Array see a screen.Set Up DeviceTo continue the flow, follow the previously described steps.How to add S2 only (non-SmartStart) devices via the SmartStart flow From your Dashboard, go to the screen and tap on the + icon in the top right corner . Devices Select the Z-Wave SmartStart entry. Tap on the Arrow next to the text.1.2.On the box of your device, you should find a QR code, usually labeled with a SmartStart title. Use the camera of your phone to scan the QR code. Once the device's QR code has been scanned, the inclusion process begins.3.The device is added to the system and you will be taken to the Set Up Device screen.To continue, choose a name for the newdevice, edit the name, assign it to a room, and click “Continue”.Select the connection. S2 Access is selected by default.4.5.Tap on the button or scan more devices.Add manually now 6.The device will be added to theSmartStart device list.Go to the SmartStart Devices list andselect the device with the status Addmanually and tap on the Rename the device if needed and tap on the button.Add manually Add the device via the Z-Wave generic flow.7.8.9.10.How to remove a Z-Wave device from an Ezlo SecureFrom the list of devices, tap on theselected device and go to that device'ssettings.On the device settings page press delete device.1.2.Select if your device is still connected to yournetwork, and if the device is no longerconnected.unpair delete Unpair Delete will redirect you through the excludingwizard of the device. Y ou need to have physicalaccess to the device as well. will simply delete the device from yourVera dashboard. This is used when the device is no longer present in your network.3.a.b.Note: Please make sure you choose the appropriateremoval procedure based on your scenario. Using on a device that is still powered and present in your network will cause the device to push itself back into your dashboard. This method does not the device's memory. does.The unpairing procedure is usually the same as the pairing procedure, but it requires that you have physical access to that device. For the devices that have a button, it usually involves pressing that button a number of times. Check the device manufacturer manual as well. Sometimes the procedure needs to be repeated a number of times if the device is not paired with your first attempt.Delete reset Unpairing pairing If the unpairing was successful and thedevice was detected, you will get thefollowing confirmation screen:4.How to Connect Ezlo Secure to Another Z-Wave controller (Learn Mode)Add an Ezlo Secure to another Z-Wave network Go to the Settings from the side menu.From the Settings, tap on Learning Mode.1.2.To add this hub as a secondary controller ,tap on Enable Learning mode.Once you press youwill see the Learning mode process is started. It may take a few minutes.Enable Learning mode,Note: Keep the controller powered duringthe inclusion process.3.4.5.On the screen with a Learning mode process, you will see DSK code (contains 5 digits).The Z-Wave S2 DSK PIN 5 digits are located on thebottom of the Ezlo Secure. Y ou can also find the fullDSK on the package box.Z-Wave S2Copy this code and enter in the 3rd partyapp to add your controller as a secondary controller with a secure connection.In the next step, you will see the progresswhile the controller is being added as asecondary controller in case the process didn't finish.6.7.Once the inclusion is successfully finished you can startthe Controller Copying process.Tap on the button.Start discovery "Controller Copying is the process of updating network information from a primary controller to secondary controllers, such as node list and routing information. These steps are usually not required unless you have a multiple controller network. To initiate this process, start the Add Mode on the primary controller and the Learn Mode on the secondary controller . All Z-Wave network relevant information will be updated for the secondary controller ."8.9.The discovery process has been started and you can see how many devices are discovered in the Z-Wave network Discovered devices will appear on the list of discovered devices. Y ou can rename the discovered devices and assign them to a room. If you don’t want to rename orassign to a room, just tap the button.FinishNote: Discovering devices may take afew minutes10.11.To rename a discovered device or assign itto a room, select and tap on the device.Edit the device name in the field To assign to a room, select theroom from the list or create a new one,following the previously discussed process.DeviceName.12.Add another Z-Wave controller to an Ezlo controller’s network Go to side menu → DevicesTo add another controller to the existing Z-Wave network:Tap on the +1.2.Select from the list Controller and tap on it 3.This option allows you to add another controller to yourZ-Wave network. Tap When you tap the countdown of 60 seconds will appear .Ready to include.Ready to Include Follow the instructions to activate the learning mode inside the controller’s application. This function is usually located in the app settings or in the hub settings.Note: Please make sure the controller you want to adddoesn’t have any Z-Wave devices added to it4.If the controller has encryption andauthorization supportedSelect the connection security. S2 Access - selected by default. To add the controllerwith the security connection you need togenerate the DSK code in the controller’sapp or scan the QR code from thecontroller’s box. Then tap on button“Scan QRcode”Y ou can change the type of encryption. Enable toggleyou will see the list of all connection types available. Access Control - Encryption connectio S2-Authenticated - Encryption connectioS2-Unauthenticated - Encryption connectioS0 - Encryption connectioCSA - Client Side Authenticated 5.6.Once you selected the type of encryption tap on the If the S2 Access is checked, by default all options under Advanced are checked.If the S2 Access is unchecked, all options under Advanced are unchecked.Y ou are able to select whatever options you want from the Advanced list.“Scan QR code”On the box of thecontroller , you shouldfind a QR code. Y ouneed to scan the QR code with your phone’s camera. Oncea QR code has beenscanned, the inclusionprocess starts.If you were unable to scan the QR code,you can add it manually.Tap on the button on the Scan Code screen. Enter the first five digits of DSK code shown on the box of the controller . Enter DSK code manually If the controller has not encryption andauthorization supported you will see the including controller process.7.8.The controller is added to the system andyou will see the Set Up Device screen. To continue, edit the name of the controller (by default will be displayed as “Controller”), assign it to a room, and click “I’m done.”If the controller was added withoutencryption you will see the warningmessage on the top of the Set Up Device screen.9.10.Remove Z-Wave controller from Ezlo hub network Go to devices from the menu.Select the controller you want to remove and tap on it.On the Controller settings screen tap on the button Delete 1.2.3.。