AT150称重控制器使用说明
- 格式:doc
- 大小:1.43 MB
- 文档页数:33
AT -150称重控制器V8.01使用说明书目录概述┄┄┄┄┄┄┄┄┄┄┄┄┄┄┄┄┄┄┄┄┄┄┄┄┄┄┄┄┄┄┄┄┄┄┄┄3 功能特点┄┄┄┄┄┄┄┄┄┄┄┄┄┄┄┄┄┄┄┄┄┄┄┄┄┄┄┄┄┄┄┄┄┄┄3 前面板说明┄┄┄┄┄┄┄┄┄┄┄┄┄┄┄┄┄┄┄┄┄┄┄┄┄┄┄┄┄┄┄┄┄┄4 后面板说明┄┄┄┄┄┄┄┄┄┄┄┄┄┄┄┄┄┄┄┄┄┄┄┄┄┄┄┄┄┄┄┄┄┄5 技术规格┄┄┄┄┄┄┄┄┄┄┄┄┄┄┄┄┄┄┄┄┄┄┄┄┄┄┄┄┄┄┄┄┄┄┄6安装┄┄┄┄┄┄┄┄┄┄┄┄┄┄┄┄┄┄┄┄┄┄┄┄┄┄┄┄┄┄┄┄┄┄┄┄8 一般原则┄┄┄┄┄┄┄┄┄┄┄┄┄┄┄┄┄┄┄┄┄┄┄┄┄┄┄┄┄┄┄┄┄┄┄8 传感器的连接┄┄┄┄┄┄┄┄┄┄┄┄┄┄┄┄┄┄┄┄┄┄┄┄┄┄┄┄┄┄┄┄┄8 开关量输入、输出接口的连接┄┄┄┄┄┄┄┄┄┄┄┄┄┄┄┄┄┄┄┄┄┄┄┄┄┄9 系统组成┄┄┄┄┄┄┄┄┄┄┄┄┄┄┄┄┄┄┄┄┄┄┄┄┄┄┄┄┄┄┄┄┄┄┄11 数据输入操作┄┄┄┄┄┄┄┄┄┄┄┄┄┄┄┄┄┄┄┄┄┄┄┄┄┄┄┄┄┄13标定┄┄┄┄┄┄┄┄┄┄┄┄┄┄┄┄┄┄┄┄┄┄┄┄┄┄┄┄┄┄┄┄┄┄┄┄14 标定方法┄┄┄┄┄┄┄┄┄┄┄┄┄┄┄┄┄┄┄┄┄┄┄┄┄┄┄┄┄┄┄┄┄┄┄14 标定参数┄┄┄┄┄┄┄┄┄┄┄┄┄┄┄┄┄┄┄┄┄┄┄┄┄┄┄┄┄┄┄┄┄┄┄15工作参数设置方法┄┄┄┄┄┄┄┄┄┄┄┄┄┄┄┄┄┄┄┄┄┄┄┄┄┄┄16有关说明┄┄┄┄┄┄┄┄┄┄┄┄┄┄┄┄┄┄┄┄┄┄┄┄┄┄┄┄┄┄┄┄┄┄┄16 工作参数设置方法┄┄┄┄┄┄┄┄┄┄┄┄┄┄┄┄┄┄┄┄┄┄┄┄┄┄┄┄┄┄┄16工作参数说明┄┄┄┄┄┄┄┄┄┄┄┄┄┄┄┄┄┄┄┄┄┄┄┄┄┄┄┄┄┄┄┄┄17预设值设置方法┄┄┄┄┄┄┄┄┄┄┄┄┄┄┄┄┄┄┄┄┄┄┄┄┄┄┄┄┄21工作组的选择┄┄┄┄┄┄┄┄┄┄┄┄┄┄┄┄┄┄┄┄┄┄┄┄┄┄┄┄┄┄┄┄┄21 预设值设置方法┄┄┄┄┄┄┄┄┄┄┄┄┄┄┄┄┄┄┄┄┄┄┄┄┄┄┄┄┄┄┄┄21 预设值参数说明┄┄┄┄┄┄┄┄┄┄┄┄┄┄┄┄┄┄┄┄┄┄┄┄┄┄┄┄┄┄┄┄22 输入/输出口测试┄┄┄┄┄┄┄┄┄┄┄┄┄┄┄┄┄┄┄┄┄┄┄┄┄┄┄┄ 23 自动控制过程和功能┄┄┄┄┄┄┄┄┄┄┄┄┄┄┄┄┄┄┄┄┄┄┄┄┄┄24 有斗模式自动控制过程┄┄┄┄┄┄┄┄┄┄┄┄┄┄┄┄┄┄┄┄┄┄┄┄┄┄┄┄┄24 无斗模式自动控制过程┄┄┄┄┄┄┄┄┄┄┄┄┄┄┄┄┄┄┄┄┄┄┄┄┄┄┄┄┄26 自动控制功能┄┄┄┄┄┄┄┄┄┄┄┄┄┄┄┄┄┄┄┄┄┄┄┄┄┄┄┄┄┄┄┄┄28 操作┄┄┄┄┄┄┄┄┄┄┄┄┄┄┄┄┄┄┄┄┄┄┄┄┄┄┄┄┄┄┄┄┄┄┄┄30 切换副显示内容┄┄┄┄┄┄┄┄┄┄┄┄┄┄┄┄┄┄┄┄┄┄┄┄┄┄┄┄┄┄┄┄30 批量数的查询和设置┄┄┄┄┄┄┄┄┄┄┄┄┄┄┄┄┄┄┄┄┄┄┄┄┄┄┄┄┄┄30 启动自动控制过程┄┄┄┄┄┄┄┄┄┄┄┄┄┄┄┄┄┄┄┄┄┄┄┄┄┄┄┄┄┄┄30 暂停自动控制过程┄┄┄┄┄┄┄┄┄┄┄┄┄┄┄┄┄┄┄┄┄┄┄┄┄┄┄┄┄┄┄27 手动清零┄┄┄┄┄┄┄┄┄┄┄┄┄┄┄┄┄┄┄┄┄┄┄┄┄┄┄┄┄┄┄┄┄┄┄31 手动卸料┄┄┄┄┄┄┄┄┄┄┄┄┄┄┄┄┄┄┄┄┄┄┄┄┄┄┄┄┄┄┄┄┄┄┄31 清除累计值┄┄┄┄┄┄┄┄┄┄┄┄┄┄┄┄┄┄┄┄┄┄┄┄┄┄┄┄┄┄┄┄┄┄31 错误及报警信息┄┄┄┄┄┄┄┄┄┄┄┄┄┄┄┄┄┄┄┄┄┄┄┄┄┄┄┄┄32 仪表外形┄┄┄┄┄┄┄┄┄┄┄┄┄┄┄┄┄┄┄┄┄┄┄┄┄┄┄┄┄┄┄┄┄33 开孔尺寸┄┄┄┄┄┄┄┄┄┄┄┄┄┄┄┄┄┄┄┄┄┄┄┄┄┄┄┄┄┄┄┄┄┄33概述AT-150定值控制器,具有精度高、性能稳定、功能强大、操作简便等特点,主要用于自动定量装袋秤测量与控制。
青岛啤酒(长沙)有限公司广昶机械CZ150-2称重检测仪操作说明书广东省佛山市南海广昶机械有限公司目录1概述 (3)1.1 警告标志 (3)1.2 正确使用 (3)1.3 选择合格的操作人员 (3)1.4 安全措施 (4)1.5 有关称重检测仪操作的重要注意事项 (5)2 安装 (7)3 功能 (8)4 称重检测仪的操作 (9)4.1 电气控制柜操作屏的起动运转操作 (9)4.2 人机介面的操作 (10)5 称重检测仪的运行 (16)6 称重检测仪的维护 (16)1概述非常感谢您购买佛山市南海广昶机械有限公司的产品――CZ150系列称重检测仪,在使用该产品前请仔细阅读本说明书。
本《操作说明书》详细介绍了称重检测仪的功能和操作,以及有关参数的设置。
1.1警告标志“注意事项”是指在本手册中需要注意的另外信息,可以帮助你合理的使用称重检测仪,避免一些不必要的错误。
“警告”是指应该特别注意的事项,在操作过程中应该禁止的事情。
防止对人身和第三者造成人身伤害以及对称重检测仪的损坏,因此增加了警告标志。
1.2正确使用原则本设备/系统是综合机械和电气技术并考虑安全原则而设计的。
即使如此,不恰当的使用,也会对人身和第三者造成危害或者损害设备本身和其它财产。
本设备只有在在其技术和安全状态良好的前提下才可以运行,任何可能的失调和问题,尤其是安全问题,必须立即排除。
本设备只用于规定包装物品的称重检测,其它的应用是禁止的,尤其人员的输送。
制造商不能确保由于不正当的使用而造成的破坏和伤害,在此情况下造成的问题用户要自己负责。
用户应该根据操作说明的要求完成日常检查和维护保养。
1.3 选择合格的操作人员只有可靠的员工才可以操作本设备。
使用人员必须经过培训,并且要责任(操作、设置、维护)明确。
确保没有授权的人员不使用本设备。
操作人员责任明确,如第三方的指导影响安全,操作人员有权拒绝。
只有合格的电工可以为设备的电气系统接线,并且电气方面的预防措施必须符合国家安全标准。

自动秤重机调机指南1开机1.1开机前必须彻底检查秤体上无异物,无卡堵现象• 1.2打开电源开关1.3按下启动按钮,皮带开始运转.开机时系统进入自检并执行清零功能,此时皮带上 不应有产品或其他物体通过•1.4当显示屏显示稳定后,重量显示窗口显示为“ 0” .设备进入正常状态,开始工作.2.关机2.1待秤体上产品通过走出秤体后按下停止按钮,皮带停止运转. 2.2关闭电源开关. 3参数调整:Panther2000秤重终端模式的秤重模式由参数 F5.1确定,共有3种模式,分别为: • F5.仁0,动态秤重模式 • F5.1=1分选模式 • F5.仁2检重模式Caseweigher 选用的模式为检重模式,设定 F5.仁2.其参数如下: 1)在正常重量状态下,使用 键选择【RECIPE 菜单,按曰*键进入2) 此时上窗口显示[SP1]菜单名,按丨一 键进入3)此时上窗口显示[P0],下窗口显示P0的数值,按匚":键使此数值闪烁,用- - 键移位,用键输入P0的数值,之后按 —:::::键确认此数值。
方法与P0的数值输入方法相同键可选择[SP2]; [SP3]及[SP4],[SP2],[SP3] 及[SP4]中PO; P1与P2的数值输入方法与[SP1]中P0; P1及P2的数值输入方法相以决定使用SP1~SP 仲的哪一组配方.4参数设定菜单4) 上窗口显示[P0]时,使用F键可选择[P1]及[P2]菜单,P1与P2的数值输入5)上窗口显示[SP1]时,使用 6)上窗口显示[SP1]时,使用 键可选择[SELECT 菜单,通过改变下窗口的数值可2)再按日*键即可进入参数设定菜单。
在进入参数设定状态后上显示器首先显示[F1]组一级菜单二级菜单三级菜单菜单说明操作说明秤接口设定组F1 F1.1 取大称量选择(5~100000)最大称重及分度值的对应键附录F1.2 分度值选择(0.005~10)F1.3 线性标定选择(0/1)0:米用两点米样的标定模式1:采用三点采样的标定模式F1.4 秤零点调整(进行秤零点调整前秤必须先进行标定)E SCAL 注:本功能用于秤的日常零点维修保持空秤状态,按[确认]键进入秤零点采集过程。
AT -150D称重控制器V8.07使用说明书目录概述┄┄┄┄┄┄┄┄┄┄┄┄┄┄┄┄┄┄┄┄┄┄┄┄┄┄┄┄┄┄┄┄┄┄┄┄3 功能特点┄┄┄┄┄┄┄┄┄┄┄┄┄┄┄┄┄┄┄┄┄┄┄┄┄┄┄┄┄┄┄┄┄┄┄3 前面板说明┄┄┄┄┄┄┄┄┄┄┄┄┄┄┄┄┄┄┄┄┄┄┄┄┄┄┄┄┄┄┄┄┄┄4 后面板说明┄┄┄┄┄┄┄┄┄┄┄┄┄┄┄┄┄┄┄┄┄┄┄┄┄┄┄┄┄┄┄┄┄┄5 技术规格┄┄┄┄┄┄┄┄┄┄┄┄┄┄┄┄┄┄┄┄┄┄┄┄┄┄┄┄┄┄┄┄┄┄┄6安装┄┄┄┄┄┄┄┄┄┄┄┄┄┄┄┄┄┄┄┄┄┄┄┄┄┄┄┄┄┄┄┄┄┄┄┄8 一般原则┄┄┄┄┄┄┄┄┄┄┄┄┄┄┄┄┄┄┄┄┄┄┄┄┄┄┄┄┄┄┄┄┄┄┄8 传感器的连接┄┄┄┄┄┄┄┄┄┄┄┄┄┄┄┄┄┄┄┄┄┄┄┄┄┄┄┄┄┄┄┄┄8 开关量输入、输出接口的连接┄┄┄┄┄┄┄┄┄┄┄┄┄┄┄┄┄┄┄┄┄┄┄┄┄┄9 系统组成┄┄┄┄┄┄┄┄┄┄┄┄┄┄┄┄┄┄┄┄┄┄┄┄┄┄┄┄┄┄┄┄┄┄┄11 数据输入操作┄┄┄┄┄┄┄┄┄┄┄┄┄┄┄┄┄┄┄┄┄┄┄┄┄┄┄┄┄┄13 密码管理┄┄┄┄┄┄┄┄┄┄┄┄┄┄┄┄┄┄┄┄┄┄┄┄┄┄┄┄┄┄┄┄┄14 标定┄┄┄┄┄┄┄┄┄┄┄┄┄┄┄┄┄┄┄┄┄┄┄┄┄┄┄┄┄┄┄┄┄┄┄┄15 标定方法┄┄┄┄┄┄┄┄┄┄┄┄┄┄┄┄┄┄┄┄┄┄┄┄┄┄┄┄┄┄┄┄┄┄┄15 标定参数┄┄┄┄┄┄┄┄┄┄┄┄┄┄┄┄┄┄┄┄┄┄┄┄┄┄┄┄┄┄┄┄┄┄┄16工作参数设置┄┄┄┄┄┄┄┄┄┄┄┄┄┄┄┄┄┄┄┄┄┄┄┄┄┄┄┄┄┄17工作参数设置方法┄┄┄┄┄┄┄┄┄┄┄┄┄┄┄┄┄┄┄┄┄┄┄┄┄┄┄┄┄┄┄17工作参数说明┄┄┄┄┄┄┄┄┄┄┄┄┄┄┄┄┄┄┄┄┄┄┄┄┄┄┄┄┄┄┄┄┄18预设值设置┄┄┄┄┄┄┄┄┄┄┄┄┄┄┄┄┄┄┄┄┄┄┄┄┄┄┄┄┄┄┄┄ 21工作组的选择┄┄┄┄┄┄┄┄┄┄┄┄┄┄┄┄┄┄┄┄┄┄┄┄┄┄┄┄┄┄┄┄┄21 预设值设置方法┄┄┄┄┄┄┄┄┄┄┄┄┄┄┄┄┄┄┄┄┄┄┄┄┄┄┄┄┄┄┄┄21 预设值参数说明┄┄┄┄┄┄┄┄┄┄┄┄┄┄┄┄┄┄┄┄┄┄┄┄┄┄┄┄┄┄┄┄22 输入/输出口测试┄┄┄┄┄┄┄┄┄┄┄┄┄┄┄┄┄┄┄┄┄┄┄┄┄┄┄┄ 23 自动控制过程和功能┄┄┄┄┄┄┄┄┄┄┄┄┄┄┄┄┄┄┄┄┄┄┄┄┄┄24 自动控制过程┄┄┄┄┄┄┄┄┄┄┄┄┄┄┄┄┄┄┄┄┄┄┄┄┄┄┄┄┄┄┄┄┄24 自动控制功能┄┄┄┄┄┄┄┄┄┄┄┄┄┄┄┄┄┄┄┄┄┄┄┄┄┄┄┄┄┄┄┄┄24 双秤称重模式┄┄┄┄┄┄┄┄┄┄┄┄┄┄┄┄┄┄┄┄┄┄┄┄┄┄┄┄┄┄┄┄┄26 操作┄┄┄┄┄┄┄┄┄┄┄┄┄┄┄┄┄┄┄┄┄┄┄┄┄┄┄┄┄┄┄┄┄┄┄┄27 批量数的查询和设置┄┄┄┄┄┄┄┄┄┄┄┄┄┄┄┄┄┄┄┄┄┄┄┄┄┄┄┄┄┄27 启动自动控制过程┄┄┄┄┄┄┄┄┄┄┄┄┄┄┄┄┄┄┄┄┄┄┄┄┄┄┄┄┄┄┄27 暂停自动控制过程┄┄┄┄┄┄┄┄┄┄┄┄┄┄┄┄┄┄┄┄┄┄┄┄┄┄┄┄┄┄┄27 手动清零┄┄┄┄┄┄┄┄┄┄┄┄┄┄┄┄┄┄┄┄┄┄┄┄┄┄┄┄┄┄┄┄┄┄┄27 手动拍袋┄┄┄┄┄┄┄┄┄┄┄┄┄┄┄┄┄┄┄┄┄┄┄┄┄┄┄┄┄┄┄┄┄┄┄28 夹/松袋┄┄┄┄┄┄┄┄┄┄┄┄┄┄┄┄┄┄┄┄┄┄┄┄┄┄┄┄┄┄┄┄┄┄┄ 28 清除累计值┄┄┄┄┄┄┄┄┄┄┄┄┄┄┄┄┄┄┄┄┄┄┄┄┄┄┄┄┄┄┄┄┄┄28 错误及报警信息┄┄┄┄┄┄┄┄┄┄┄┄┄┄┄┄┄┄┄┄┄┄┄┄┄┄┄┄┄29 仪表外形┄┄┄┄┄┄┄┄┄┄┄┄┄┄┄┄┄┄┄┄┄┄┄┄┄┄┄┄┄┄┄┄┄30 外形尺寸┄┄┄┄┄┄┄┄┄┄┄┄┄┄┄┄┄┄┄┄┄┄┄┄┄┄┄┄┄┄┄┄┄┄┄30 开孔尺寸┄┄┄┄┄┄┄┄┄┄┄┄┄┄┄┄┄┄┄┄┄┄┄┄┄┄┄┄┄┄┄┄┄┄┄30AT-150D定值控制器,具有精度高、速度快、性能稳定、功能强大、操作简便等特点,主要用于自动定量装袋秤测量与控制。
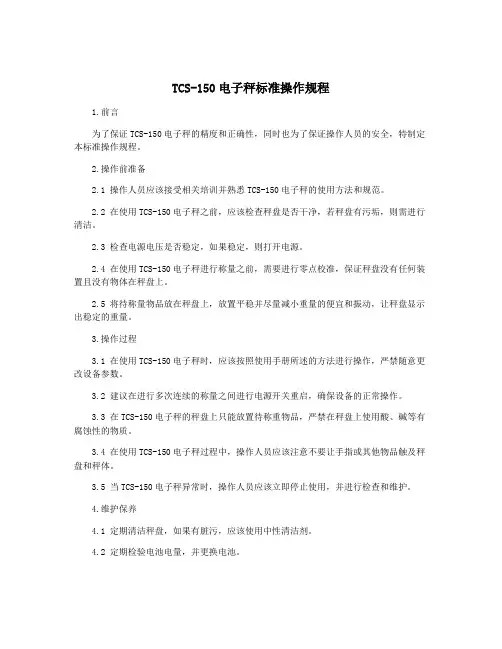
TCS-150电子秤标准操作规程1.前言为了保证TCS-150电子秤的精度和正确性,同时也为了保证操作人员的安全,特制定本标准操作规程。
2.操作前准备2.1 操作人员应该接受相关培训并熟悉TCS-150电子秤的使用方法和规范。
2.2 在使用TCS-150电子秤之前,应该检查秤盘是否干净,若秤盘有污垢,则需进行清洁。
2.3 检查电源电压是否稳定,如果稳定,则打开电源。
2.4 在使用TCS-150电子秤进行称量之前,需要进行零点校准,保证秤盘没有任何装置且没有物体在秤盘上。
2.5 将待称量物品放在秤盘上,放置平稳并尽量减小重量的便宜和振动,让秤盘显示出稳定的重量。
3.操作过程3.1 在使用TCS-150电子秤时,应该按照使用手册所述的方法进行操作,严禁随意更改设备参数。
3.2 建议在进行多次连续的称量之间进行电源开关重启,确保设备的正常操作。
3.3 在TCS-150电子秤的秤盘上只能放置待称重物品,严禁在秤盘上使用酸、碱等有腐蚀性的物质。
3.4 在使用TCS-150电子秤过程中,操作人员应该注意不要让手指或其他物品触及秤盘和秤体。
3.5 当TCS-150电子秤异常时,操作人员应该立即停止使用,并进行检查和维护。
4.维护保养4.1 定期清洁秤盘,如果有脏污,应该使用中性清洁剂。
4.2 定期检验电池电量,并更换电池。
4.3 在TCS-150电子秤存储时,应该将设备放置在干燥通风的地方,避免阳光直射或湿度过高的环境中。
4.4 定期对TCS-150电子秤进行校准,确保其精度和正确性。
5.结束操作5.1 在TCS-150电子秤使用结束后,应该关闭电源,并将秤盘上的物品取走,重新进行零点校准和清洗工作。
6.总结TCS-150电子秤是一种高精度、高可靠性的电子秤,使用起来简单方便。
为了保证其正常使用和长期使用,我们应该遵守本规程和相关使用手册的要求,定期进行维护和保养,确保其精度和正确性,也要时刻注意自身安全。
150T电子汽车衡使用安全操作规程奥通管字[2011]第16号AQ1、称重计量汽车应均速驶上秤台,速度控制在5公里/小时以内,禁止在秤台上紧急刹车,在秤台旁显目位置设限速标志;2、每次称重计量的汽车载重量最大称量不得大于150T;3、每次车辆上秤台前,操作人员观察仪表显示是否为零,打印或记录数据前观察仪表显示是否稳定;4、当秤台上有车辆时,不允许仪表断电,如遇临时断电,车辆应驶下秤台,待恢复通电且仪表恢复零点后,车辆方可重新上秤计量;5、操作人员不得让未接受过专业培训的其他人员操作仪表;6、仪表在每次通电前,应先检查秤台是否灵活晃动;7、电子汽车衡禁止接近最大称重铲车之类的短轴距车辆过衡;8、操作人员下班后必须切断电子汽车衡设备的所有电源,严禁车辆在秤台上长时间停留或过夜;9、进入冬季温度在-10℃及以下时,仪表通电20分钟后再计量;10、电子汽车衡传感器、接线盒必须做好防水保护,严禁受潮,一旦受潮应对其进行检查,并采取干燥措施后方能通电使用;11、电子汽车衡秤台,禁止非计量任何车辆通过;12、秤台上严禁电焊作业,或将秤台作为地线使用;13、在打雷时,不要使用电子汽车衡,同时应关断各设备电源与总电源,并拔下传感器的输入插头,以防雷击损坏;14、操作人员经常检查电子汽车衡秤台周围的间隙,间隙内不得有异物卡死,如有垃圾、石块等异物卡入缝隙内则必须清除干净方可称量;15、电子汽车衡电缆应做好防鼠保护,当电缆线断裂后,重新接头处应做好防水保护,电缆线必须用金属软管套接;16、传感器及秤体的限位间隙必须经常检查,每班使用前检查一次,发现间隙不合适时,操作人员应立即进行调整(间隙控制在3mm左右),间隙不符合要求将严重影响称量值;17、在通电的情况下,严禁插拔仪表后的外接线电缆及传感器电缆线插头,以防损坏接口电路;18、仪表使用的电源应单独、可靠接地,严禁与其他设备共同接地;19、仪表使用220v电源,电源必须稳定,同一电源上无产生干扰的设备;20、电子汽车衡应有法定计量检测部门进行定期检定(每年一次),以确保电子汽车衡计量的合法、准确;21、司称间内严禁堆放杂物,应具有防火等消防保护措施;22、称台要保持卫生清洁,不许有污物,车辆过后随时清理;23、称重人员对待客户要态度和蔼,耐心告知,不许蛮横、强硬。

称重仪操作说明范文一、产品简介称重仪是一种用于测量物体重量的仪器设备,广泛应用于工业生产、物流运输、市场购物等领域。
以下是称重仪的操作说明。
二、准备工作1.打开称重仪电源开关,待仪器显示屏亮起。
2.确保称重仪上无杂物和其他物体,以免影响测量精度。
3.将需要称重的物体放置在称重仪的称盘上。
三、校准仪器1.在称重仪上找到校准按钮或选项。
2.按下校准按钮或选择校准选项,进入校准模式。
3.按照仪器指示,将一组已知重量的物体放置在称盘上。
4.等待称重仪进行自动校准,校准完成后显示屏将显示该物体的准确重量。
5.如需校准其他物体,重复上述步骤。
四、进行称重1.将需要称重的物体放置在称重仪的称盘上。
2.等待仪器进行称重,显示屏将显示该物体的重量。
3.如需连续称重,将上一物体取走后再次放置下一物体。
五、记录结果1.在完成称重后,确认显示屏上的重量数值已稳定。
2.如需记录称重结果,可按下记录按钮或选择记录选项,将结果保存至仪器内存或外部设备。
3.如需打印结果,可连接打印机,按下打印按钮或选择打印选项,将结果打印出来。
六、注意事项1.在使用称重仪之前,请参照仪器的说明书,了解仪器的安全操作方法。
2.在校准仪器时,应使用已知准确重量的物体进行校准,以保证称重结果的准确性。
3.在放置物体时,应避免过重或不平衡的物体,以免对称重仪造成损坏。
4.在进行称重时,应等待称重仪稳定后再记录结果,以保证结果的准确性。
5.如需长时间使用称重仪,应定期对仪器进行维护和保养,确保仪器的正常工作。
七、故障排除1.若称重仪无法正常启动或显示异常,请检查电源是否连接正常,并尝试重新启动仪器。
2.若称重仪显示结果波动较大或不稳定,请检查称盘是否有杂物或不平衡的物体,清理或调整相应位置。
3.若称重仪称重结果明显偏差较大,请尝试重新校准仪器或进行调整。
快速设置指南简体中文使用前,请阅读整个 Astral™ 用户指南或临床指南。
Astral 装置11. 适配器接口可与单管回路适配器、单管回路漏气适配器或双管回路适配器相适应(仅限 Astral 150)2. 把手3. 吸气接口(至患者)4. 以太网接头(仅限于维修使用)5. USB 接头(用于下载至ResScan 以及连接至核准的附件)6. 迷你 USB 接头7. 直流电源线插口8. 装置开/关按钮9. 脉氧饱和度传感器接头10. 远程报警五插脚接头11. 低流量氧气输入口(最多 30 升/分)12. 空气输入口(备有低致敏过滤器)3Astral 装置界面1. 触摸屏2. 供电来源指示符交流电(市电)直流电(外接电池或汽车附件适配器)内置电池3. 治疗开/关指示符装置就绪当装置开启但没有通气时,会出现恒定的绿色显示灯。
装置通气当装置通气时会闪烁蓝灯且通气指示灯设置会呈 “开启”。
否则,会呈 “关闭”。
4. 报警静音/重设按钮在报警触发时会亮起;静音时会闪烁。
5. 报警条触摸屏1. 临床模式访问按钮锁定 解除锁定2. 手动呼吸按钮仅在启用时显示3. 信息条4. 内置电池充电指示器5. 锁定触摸屏按钮6. 菜单条7. 底部条8.开始通气按钮停止通气按钮9. 主屏幕10. 子菜单11. 压力条4患者用管路装配管路适配器连接患者管路之前,必须装配特定于所需管路类型的适配器。
要装上适配器:12345设置管路有关设置管路的详细信息,请参阅《Astral 临床指南》中的组装患者管路。
使用 ResMed 专有管路的带呼气阀的单管回路双管回路(仅限 Astral 150)至患者执行学习管路功能执行学习管路之前,切勿连接患者界面。
1. 从“设置”主菜单,选择“管路”子菜单。
2. 按开始并遵循屏幕上提示。
如果任何测试失败,会显示测试结果屏幕,否则学习管路功能已成功完成且您将返回主要设置页面。
6打开装置电源要开启装置电源,只要按装置背面的绿色电源开启/关闭开关即可。

MPI TS150-AIT | 150 mm Manual Probe SystemIndustry’s first explicitly designed 150 mm probe system providing accurat e tests for mm-wave, THz, and automated impedance tuner applicationsFEATURES / BENEFITSSPECIFICATIONSChuck XY Stage (Standard)Total travel range 180 x 300 mm (7.1 x 11.8 in)Fine-travel range 25 x 25 mm fine micrometer control Fine-travel resolution < 1.0 µm (0.04 mils) @ 500 µm/rev Planarity< 10 µm Theta travel (standard)360°Theta travel (fine)± 5.0°Theta resolution 7.5 x 10⁻³ gradientMovement Puck controlled air bearing stage Chuck Z Stage Travel range 10 mm (0.4 in)Fine-travel resolution< 1.0 µm (0.04 mils) @ 500 µm/rev, with digital indicatorManual Microscope Stage (Linear)Movement range 50 x 50 mm (2 x 2 in) or 80 x 80 mm (3.15 x 3.15 in)Resolution < 5µm (0.2 mils)Scope lift Manual, tilt-back or vertical (depending on microscope type)MovementIndependently controlled X and Y movement with locking screwsVariety of Applications• Seamless integration of any banded, differential or broadband frequency extenders and automated impedance tuners• Novel design of extenders/tuners integration for maximum of measurement dynamic• Maximum on mechanical stability and repeatability combined with convenient and safety operation Ergonomic Design• Unique puck controlled air bearing stage for quick single-handed operation• Rigid and large platen accommodates large area MicroPositioners, holding mmw extenders• Highly repeatable platen lift design with three discrete positions for contact, separation, and loading Upgradability• Optional vibration isolated support for large automated impedance tuners• Dedicated optics for shorting the cables and waveguide’s lengths, for maximum of measurement directivity• Various chuck options, PCB holders and a wide range of accessories such as DC/RF/mmW MicroPositionersSpecifications Design For unsurpassed stability: low profile, four pole support Material Nickel plated steelDimensionLarge area platen, see drawing Chuck top to platen top Min. 28 mmMax. No of MicroPositioners 2x mmW E/W + 2x RF N/S and 4x DC or 2x mmW E/W + 8x DC Platen lift control 3 positions - contact (0), separation (300 µm), and loading (3 mm)Separation repeatability < 1 µm (0.04 mils) by …automated“ control mmW MicroPositioner mounting Bolt downRF MicroPositioner mounting Magnetic with guided rail DC MicroPositioner mountingMagneticProbe Platen design for DC, RF and THz MicroPositionersPROBE PLATENPlaten Lift with Probe Hover Control™MPI Probe Hover Control™ comes with hover heights (50, 100 or 150 µm) for easy and convenient probe to pad alignment.Separation Probe Hover Control™Probe in contactFREQUENCY EXTENDER ADAPTATIONSeamless integration of any frequency extenders for best measurement directivity at 200 mm wafers.To achieve optimum tuning range & highest gammaAUTOMATED IMPEDANCE TUNER INTEGRATIONSCONTACT / OVER-TRAVEL CONTROLMPI offers the worldwide unique and most accurate contact / over-travel control with 1 µm accuracy for easy measurement reproducibility and accuracy.XY digital micrometers are optionally available as well.RF Wafer Chuck Connectivity Coax BNC (f)Diameter 160 mm with 2 integrated AUX areasMaterial Nickel Plated Aluminium (flat with 0.5 mm holes)Chuck surfacePlanar with 0.5 mm diameter holes in centric sections Vacuum holes sections (diameter)3, 27, 45, 69, 93, 117, 141 mmVacuum actuation Manual switch between Center (4 holes), 50, 100, 150 mm (2, 4, 6 in)Supported DUT sizes Single DUTs down to 4 x 4 mm size or wafers 50 mm (2 in) thru 150 mm (6 in)*Surface planarity ≤± 5 µmRigidity< 15 µm / 10 N @edgeNON-THERMAL CHUCKSElectrical Specification Operation voltage In accordance with EC 61010, certificates for higher voltages available upon request Isolation> 2 GΩ*Single DUT testing requires higher vacuum conditions dependent upon testing application.*Single DUT testing requires higher vacuum conditions dependent upon testing application.Auxiliary Chuck Quantity 2 AUX chucksPositionIntegrated to rear side of main chuck Substrate size (W x L)Max. 25 x 25 mm (1 x 1 in)Material Ceramic, RF absorbing material for accurate calibration Surface planarity ≤± 5 µmVacuum controlControlled independently, separate from chucksMP80-DXMPI auxiliary chucks made by ceramicThermal chuck system for testing single ICs The optional MP80-DX MicroPositioner with the integrated digital micrometerenables outstanding simplicity for the multiline TRL.When operating the MP80-DX, the operator simply needs to zero-out the digital micrometer after the initial adjustment of the probes, i.e., on the thru standard. Next, the distance between RF probes can be easily re-adjusted to the required value of ∆l with the precision better than 1 µm.THERMAL CHUCKSSpecifications of MPI ERS Integrated Technology35 °C to 150 °C20 °C to 200 °C25 °C to 150 °CMaximal wafer size 150 mm 150 mm 25 x 25 mm Single ICConnectivityCoax BNC (f)Kelvin Triax (f)Coax BNC (f)Temperature control method Cooling air / Resistance heater Cooling air / Resistance heater Peltier heater CoolantAir (user supplied)Air (user supplied)Air (max. 50 l/min)Smallest temperature selection step 0.1 °C 0.1 °C 0.1 °C Chuck temperature display resolution0.1 °C 0.01 °C 0.1 °C External touchscreendisplay operation N/A Yes N/A Temperature stability ±0.5 °C ±0.08 °C ±0.2 °C Temperature accuracy ±1 °C ±0.1 °C ±1 °C Control method DC/PID Low noise DC/PIDDC/PID InterfacesRS232C RS232C RS232C Chuck surface plating Nickel plated with pinhole surface Nickel plated with pinhole surface Gold plated with pinhole surface Temperature sensor Pt100 1/3DIN Pt100 1/3DIN, 4-line wired Pt100 1/3DIN, 4-line wired Temperature uniformity < ±1 °C < ±0.5 °C < ±0.5 °C Surface flatness and base parallelism < ±15 µm < ±10 µm < ±15 µm Heating and cooling rates 35 to 150 °C < 10 min 150 to 35 °C < 15 min 20 to 200°C < 15 mins 200 to 20°C < 15 mins 25 to 150 °C < 6 min 150 to 25 °C < 6 min Electrical isolation > 0.5 T Ω at 25 °C> 10 T Ω at 25 °C > 300 G Ω at 200 °C> 0.5 T Ω at 25 °CLeakage @ 10 V N/A N/A N/A Capacitance< 750 pF < 750 pF < 750 pF Maximum voltage between chuck top and GND500 V DC500 V DC500 V DCt e m p e r a t u r e [°C ]time [min]AC3 150 mm +35°C to +150°C510152020406080100120140160TYPICAL TRANSITION TIMEThermal Chuck Electrical Supply Electrical SupplyHot only thermal chucks Electrical primary connection 100 to 240 VAC auto switch Frequency50 Hz / 60 HzCompressed Air Supply Operating pressure 6.0 bar (0.6 MPa, 87 psi) at specified flow rate CDA dew point≤ 0 °CController Dimensions / Power and Air Consumption System Type W x D x H (mm)Weight (kg)Power Cons. (VA)max. Air Flow (l/min)35 to 150 °C 300 x 265 x 135 1050020020 to 200 °C 300 x 360 x 135 1270020025 to 150 °C300 x 261 x 1353.310050General Probe System Power 100-240 V AC 50/60 Hz for optical accessories* only Vacuum -0.5 bar (for single DUT) / -0.3 bar (for wafers)Compressed air6.0 bar *e.g. microscope illumination, CCD cameras, monitors.FACILITY REQUIREMENTSWARRANTYPHYSICAL DIMENSIONSStation Platform with Bridge*Dimensions (W x D x H)670 x 680 x 710 mm (26.4 x 26.8 x 28.0 in)Weight~120 kg (265 lb.)• Warranty*: 12 months• Extended service contract: contact MPI Corporation for more information*See MPI Corporation‘s Terms and Conditions of Sale for more details.*Station accessories, such as different microscopes, cameras, or laser cutters, may change the total height.MPI Global PresenceDirect contact:Asiaregion:****************************EMEAregion:******************************Americaregion:********************************MPI global presence: for your local support, please find the right contact here:/ast/support/local-support-worldwide© 2020 Copyright MPI Corporation. All rights reserved.Vibration Isolation TableWeightApprox. 210 kg ( 463 lb.)Approx. 210 kg ( 463 lb.)。
***集团产业升级项目公辅工程[***-***]工程150t电子汽车衡技术规格书总设计师:室审:审核:设计:***省***设计院股份有限公司2011年12月23日150t电子汽车衡技术规格书本技术规格书仅提供有限的技术要求,并未对一切技术细节做出规定,也未充分引述有关标准和规范的详细条文。
卖方提供的设备应能够满足规格书的规定,并保证符合现行国家标准、行业技术规范和标准以及买方提供的技术资料的要求。
卖方应对所提供的设备的安全性、可靠性、适用性、完整性负责。
如有异议,务必在投标前会议上提出澄清。
技术规格书所使用的标准如与卖方所执行的标准发生矛盾,按较高标准执行。
150t电子汽车衡1、设备编号2、设备名称 150t电子汽车衡数量:1台3、技术参数3.1总体技术要求依据总图布局,在厂区原料进口处和成品出口处设置150t电子汽车衡1台。
要求该系统应代表目前国内先进水平,具有容易操作,容易维护,稳定运行等特性并兼顾价格因素。
称重管理系统应具备强大的数据管理功能。
卖方根据买方提供的现场环境、工艺特点及技术要求做出相应的设备配置(包括所有安装附件及连接电缆等),并负责技术服务等工作。
卖方对其所提供的系统配置的完整性、适应性、可靠性、先进性负完全责任。
3.2系统基本数据:卖方根据买方提供的各项技术要求及基本数据,作出相应的系统配置。
3.2.1气象及地质等条件气象:***属***气候,年内变化显著,四季分明,气温较差大,为12℃,多年平均气温为11.7℃,一月气温最低,平均气温为-6.5℃,极端最低气温-24.4℃,七月气温最高,平均气温为25.8℃,极端最高气温40.1℃。
县域雨水稀少,年降水量平均为***㎜,年最大降水量为140mm,最小降水量为20mm。
历年平均降雪量为***㎜,年最大降雪量为26mm,最少年份无降雪,降霜最早出现在11月,最晚终于3月。
***县气候干燥,蒸发量大,年均蒸发量2487mm,县域多年平均风速为2m/s,瞬间最大风速30m/s,风速年变化大,春季(4-6月)较大,平均2.6m/s,夏季次之,冬季最小,平均1.2m/s,风向以西北风为主。
无线塔吊秤操作方法无线塔吊秤是用于测量塔吊在吊运过程中的重量,以确保安全运行和提高工作效率。
无线塔吊秤通常由称重传感器、无线传输装置、显示屏和控制器等部件组成。
在操作无线塔吊秤时,需要注意以下几个方面:1. 安装无线塔吊秤首先,在安装无线塔吊秤时需要确保传感器的位置和固定方式符合要求,以保证测量的准确性。
传感器应该与吊钩连接牢固,不会因为吊运过程中出现晃动而影响测量结果。
同时,需要将无线传输装置、显示屏和控制器等部件按照说明书上的要求安装好,确保设备可以正常工作。
2. 联机测试安装完无线塔吊秤后,需要进行联机测试,确保设备可以正常工作。
首先打开无线塔吊秤的电源开关,然后通过显示屏上的菜单设置无线传输装置和控制器之间的通讯方式,确认无线传输装置与控制器的连接状态良好。
接着在吊钩下方放置一个已知重量的测试物体,测量显示屏上的数值是否与实际重量相符,如果相符则说明无线塔吊秤安装正确。
3. 使用操作手柄无线塔吊秤通常配备有操作手柄,通过操作手柄可以实现对塔吊吊运的控制。
在使用无线塔吊秤时,需要熟练掌握操作手柄的功能和使用方法,以便在吊运过程中可以灵活地控制塔吊的行进和吊运速度。
此外,操作手柄上通常还有一些指示灯和按钮,需要定期检查这些灯和按钮的状态是否正常,确保设备可以正常使用。
4. 定期检测和维护为了确保无线塔吊秤的准确性和安全性,在使用过程中需要定期对设备进行检测和维护。
首先需要检查传感器和连接部件是否有松动或者损坏的情况,确保各部件连接牢固。
然后需要对设备进行校准,确保测量的准确性。
此外,还需要检查设备的电源和电池状态,确保设备可以正常工作。
总之,操作无线塔吊秤时需要注意安装、联机测试、使用操作手柄和定期检测和维护等方面的内容,以确保设备安全并且正常使用。
通过正确操作无线塔吊秤,可以提高工作效率,并且保证塔吊吊运过程的安全性。
Scale with Bluetooth®Model: SC-150®E N G L I S H5666064-4EINTRODUCTION (3)IMPORTANT SAFETY INFORMATION (4)1. KNOW YOUR DEVICE (7)2. BEFORE TAKING A MEASUREMENT (9)3. TAKING A MEASUREMENT (12)4. TRANSFERRING YOUR READING (13)5. RESTORING THE SCALE TO THE DEFAULT SETTINGS (14)6. ERROR MESSAGES AND TROUBLESHOOTING (15)7. MAINTENANCE (17)8. CALIBRATION (18)9. SPECIFICATIONS (19)10. FCC/ISED STATEMENT AND TRADEMARKS (21)11. LIMITED WARRANTY (22)12. GUIDANCE AND MANUFACTURER’S DECLARATION (23)Thank you for purchasing the OMRON SC-150 Scale with Bluetooth®.This product is mainly designed for general household use.Safety InstructionsThis instruction manual provides you with important information about the OMRON SC-150. To ensure the safe and proper use of this product, READ and UNDERSTAND all of these instructions. If you do not understand these instructions or have any questions, contact 1-800-634-4350 before attempting to use this product. For specific information about your own weight, consult with your physician.Intended UseThe OMRON SC-150 Scale with Bluetooth® is intended to measure and display body weight. It is intended for home use only.Receiving and InspectionRemove this product and other components from the packaging and inspect for damage. If this product or any other components are damaged, DO NOT USE and contact 1-800-634-4350. Symbols GlossaryFor symbol information, visit:/symbols-glossaryOmronHealthcare.ca/symbols-glossaryRead the Important Safety Information in this instruction manual before using this device.Follow this instruction manual thoroughly for your safety.• Consult with your physician or healthcare provider before beginning a weight reduction or exercise program.• Stop using the scale and consult your doctor if you experience skin irritation on your foot or feet.• DO NOT use the scale on slippery surfaces, such as a wet floor.• Keep the scale out of the reach of infants, toddlers and children.• DO NOT jump on the scale. Doing so may cause you to fall or slip, resulting in serious injury.• DO NOT use the scale when your body and/or feet are wet, such as after taking a bath or shower.• DO NOT step on the edges or display area of the scale because you may lose your balance and fall, resulting in serious injury.• Persons with disabilities or persons who are physically frail should be assisted by another person when using the scale to prevent falling when stepping on and off the scale.• DO NOT put your fingers into any openings or inside the scale.• Use indoors.• DO NOT use the scale for purposes other than described in this manual.• DO NOT use the scale with other medical electrical (ME) equipment simultaneously. This may result in incorrect operation of the devices and/or cause an inaccurate reading.• DO NOT damage the glass because it may break and result in an injury.Battery Usage• If battery fluid leaks and contacts your eyes, skin or clothing, immediately rinse with plenty of clean water. Contact your physician if battery fluid contacts your eyes or skin.Data Transmission• This product emits radio frequencies (RF) in the 2.4 GHz band. DO NOT use this product in locations where RF is restricted, such as on an aircraft or in hospitals.For further information on potential restrictions refer to documentation on the Bluetooth usage by the FCC/ISED.• DO NOT share the scale with others because your weight data accuracy may be impacted.• Clean the scale before use if it has been used by people with a skin disease on their feet.• DO NOT place the scale against a wall because an injury or malfunction of the scale may occur.• DO NOT attempt to disassemble, modify or repair the scale.• Ensure that the scale has acclimated to room temperature before taking a measurement. Taking a measurement after an extreme temperature change could lead to an inaccurate reading. OMRON recommends waiting for approximately 2 hours for the scale to warm up or cool down when the scale is used in an environment within the temperature specified as operating conditions after it is stored either at the maximum or at the minimum storage temperature. For additional information of operating and storage/transport temperature, refer to section 9.• DO NOT place the scale on a cushioned floor surface such as a carpet or mat because a measurement may not be accurate.• DO NOT submerge the scale or any of the components in water.• DO NOT place the scale near heat sources or below air conditioners.• Avoid exposure to direct sunlight.• Avoid excessive impact, vibration and strong shock to this scale.• DO NOT wash the scale with water.• DO NOT wipe the scale with benzene, gasoline, paint thinner, or other volatile solvents.• DO NOT place the scale where it will be exposed to chemicals or corrosive vapors.• Store the scale on a level surface.• DO NOT store any objects on the scale.Battery Usage• Replace worn batteries with new ones immediately.• DO NOT expose the batteries to flames or fire.• DO NOT insert the batteries with the polarities in the wrong direction.• ONLY use 4 “AAA” manganese or alkaline batteries with the scale. DO NOT use other types of batteries. DO NOT use new and used batteries together. Replace all 4 batteries at the same time.• DO NOT use different types of batteries together.• Dispose of the device, batteries, components according to applicable local regulations. Unlawful disposal may cause environmental pollution.• Remove the batteries if the scale will not be used for three months or more.• DO NOT use batteries after their expiration date.Data Transmission• During measurement, make sure that no mobile device or any other electrical devices that emit electromagnetic fields is within 12 inches (30 cm) of the scale. This may result in incorrect operation of the scale and/or cause an inaccurate reading.• DO NOT replace the battery while your measurement result is being transferred to your smart device. This may result in the incorrect operation of the scale and failure to transfer your measurement result.• DO NOT place integrated circuit cards, magnets, metal objects, or other devices that emit electromagnetic fields near the scale while your measurement result is being transferred to your smart device. This may result in the incorrect operation of the scale and failure to transfer your measurement result.Contents:• Digital Weight Scale • 4 “AAA” Manganese Batteries • Instruction Manual • Quick Start GuideMain Unit:FrontDisplay:ABsymbolDisplay symbols:2.1 Installing Batteries1.2. Install the batteries following the correct polaritiesas shown to the right and inside the batterycompartment.3. Close the battery cover.Note:• When the “ ” symbol and “A1” appear, replace all 4 batteries with new ones. Items stored in memory will be saved even if the batteries are removed.• Place the scale on a hard, flat and level floor immediately after installing the batteries.The scale is calibrated automatically.• Disposal of used batteries should be carried out in accordance with your local regulations for the disposal of batteries.2.2 Selecting the Weight Metric1. When the scale is off, press the [SET] button to select your preferred weight metric“lb” or “kg”. (Weight is set to “lb” as the default metric.)The weight metric will be saved after 10 seconds.The scale will automatically turn off after 3 seconds.2.3 Pairing the Scale with a Smart DeviceIf you want to transfer the reading, follow the below instructions.1. Enable the Bluetooth on your smart device.2. Scan the code on the right with your smart devicecamera or visit /app to find theOMRON compatible app for this product.3. Open the app and follow the pairing instructions shownon your smart device.• Make sure that your scale is within 5 m of your smart device.4. Press the [Bluetooth] button (the side of the scale) formore than 2 seconds to connect to your smart device.The “ ” symbol and “P” symbol flash on the display.5. Confirm that the scale is connected successfully.When the scale is connected successfully to your smartdevice, the “ ” symbol flashes.Note:• When the “Err” appears, follow the instructions in the app.• The scale will automatically turn off after 10 seconds.• Be aware that OMRON will not be responsible for the lossof data and/or information in the app.• This scale can be paired with one smart device and onlyone user can manage the measurement data. Do not use the multiple apps.• Only compatible OMRON apps should be used with this scale to help ensure correct data transfer.It is recommended to measure your weight at the same time each day for consistency.1. Place the scale on a hard, flat and level floor.Note:• This scale is recommended for use by one person.•2.a measurement.will start.Note:•3. When your weight flashes, your measurement iscomplete.4. Step off of the scale.The scale will automatically turn off after 10 seconds.If you want to transfer your reading, refer to section 4.Open the app on your smart device.4.1 Transferring Your Reading AutomaticallyYour reading will be transferred to your smart device automatically within 30 minutes after the scale is turned off.Note:• If your reading is transferred before the scale is turned off, the display shows as below with the “ ” symbol showing on the display during the transfer.The scale will automaticallyturn off.4.2 Transferring Your Reading ManuallyTo transfer the readings manually, press the [Bluetooth] button during the power is off.The “ ” symbol appears from the start of transferring to the end.The scale will automaticallyturn off after 10 seconds.Note:• If the “ ” symbol does not appear, refer to “The data is not being transferred.” in section 6 for more detail.• This scale will store up to 30 readings for one user. Stored readings cannot be viewed on the scaleʼs display. You can view your readings on the app after transferring.• When the “ ” symbol appears on the display, your reading was not transferred. Transfer the readings immediately before the oldest reading is deleted.To delete all information stored in the scale, follow the instructions below. Make sure that the scale is turned off.1. Press the [Bluetooth] button for more than 2 seconds.The display flashes as shown on the right.2. Press the [Bluetooth] button again for more than 5 seconds.The display flashes as shown on the right and the“ ” symbol stops flashing.3. Press the [SET] button.When the display stops flashing, the scale is restored to thedefault settings.Note:• The scale will automatically turn off after 10 seconds.• Restoring to the default setting of the scale does not delete the information in the app.If any of the below problems occur during a measurement, check to make sure that no other electrical device is within 12 inches (30 cm). If the problem persists, refer to the table below.7.1 MaintenanceTo protect your scale from damage, follow the directions below:• Use a soft dry cloth, or a soft cloth moistened with mild (neutral) detergent to clean the scale.• Store the scale in a clean, safe location.• Do not use any abrasive or volatile cleaners, gasoline, thinners or similar solvents to clean the scale.• Do not clean the scale by immersing it in water.7.2 Proper storageThe scale recalibrates automatically when it is not in use.If the automatic calibration does not work, see section 8 for instructions on how to manually calibrate your scale.To help ensure automatic calibration, do not store your scale as shown in images below:The scale is leaning against the wall or other objectsThe scale is placed upside downon the carpet or mat The object is placed on the scaleTo calibrate your scale, follow the instructions below.1. Place the scale on a hard, flat and level floor.2. Press the surface of the scale with your hand to turn on the power.3. When “0.0 lb” (or “0.0 kg”) is displayed, wait for 1 minute to turn the scale off.Then you can take a measurement.®(5 to 150 kg with an increment of 0.1 kg) Weight accuracy11.0 to 330.0 lb : ±(1 %+0.2 lb)(5 to 150 kg : ±(1 %+0.1 kg)) Transmission method Bluetooth® Low EnergyWireless communication Frequency range: 2.4 GHz (2400 - 2483.5 MHz) Modulation: GFSKEffective radiated power: <20 dBmDurable Period 5 yearsIP classification IP21Power supply 4 “AAA” batteriesBattery life Approximately 3 months: using manganese batteriesApproximately 6 months: using alkaline batteries(When each types of batteries are used in two measurement, two datatransfer a day at a room temperature of 73.4 °F (23 °C))Operating conditions+41 to +104 °F (+5 to +40 °C), 30 to 85 % RH (non-condensing),860 to 1060 hPaStorage conditions-4 to +140 °F (-20 to +60 °C), 10 to 95 % RH (non-condensing) Weight Approximately 3.3 lb (1.5 kg)including batteriesExternal dimensions Approximately 10 5/8" (W) × 1 1/32" (H) × 11 27/64" (D)270 (W) × 26.4 (H) × 290 (D) mmContents Digital weight scale, 4 “AAA” manganese batteries, instructionmanual, quick start guideApplied part Type BF (Plate)Notes:• These specifications are subject to change without notice.• IP classification is degrees of protection provided by enclosures in accordance with IEC 60529. This device is protected against solid foreign objects of 0.5 inch (12.5 mm) diameter and greater such as a finger. This device is protected against vertically falling water drops which may cause issues during a normal operation.About a wireless communication interferenceThis product operates in an unlicensed ISM band at 2.4 GHz. In the event this product is used near other wireless devices such as microwave and wireless LAN, which operate on the same frequency band as this product, there is a possibility that interference may occur. If interference occurs, stop the operation of the other devices or relocate this product away from other wireless devices before attempting to use it.FCC CAUTIONChanges or modifications not expressly approved by the party responsible for compliance could void the user’s authority to operate the equipment.This device complies with part 15 of FCC Rules and Innovation, Science and Economic Development Canada’s licence-exempt RSS(s). Operation is subject to the following two conditions: (1) this device may not cause harmful interference, and (2) this device must accept any interference received, including interference that may cause undesired operation.Note:This equipment has been tested and found to comply with the limits for a Class B digital device, pursuant to part 15 of the FCC Rules. These limits are designed to provide reasonable protection against harmful interference in a residential installation. This equipment generates, uses and can radiate radio frequency energy and, if not installed and used in accordance with the instructions, may cause harmful interference to radio communications. However, there is no guarantee that interference will not occur in a particular installation. If this equipment does cause harmful interference to radio or television reception, which can be determined by turning the equipment off and on, the user is encouraged to try to correct the interference by one or more of the following measures:• Reorient or relocate the receiving antenna.• Increase the separation between the equipment and receiver.• Connect the equipment into an outlet on a circuit different from that to which the receiver is connected.• Consult the dealer or an experienced radio/TV technician for help.This transmitter must not be co-located or operated in conjunction with any other antenna or transmitter.This equipment complies with FCC/ISED radiation exposure limits set forth for an uncontrolled environment and meets the FCC radio frequency (RF) Exposure Guidelines and RSS-102 of the ISED radio frequency (RF) Exposure rules as this equipment has very low levels of RF energy.The OMRON SC-150 Scale with Bluetooth® excluding batteries, is warranted to be free from defects in materials and workmanship appearing within 1 year from the date of purchase, when used in accordance with the instructions provided with the scale. The above warranty extends only to the original retail purchaser, and only to products purchased from an Omron authorized seller who is subject to and follows Omron’s quality control standards, unless otherwise prohibited by law. We will, at our option, replace without charge any unit covered by the above warranty. Replacement is our only responsibility and your only remedy under the above warranty.To obtain warranty service contact Customer Service by calling 1-800-634-4350 for the address of the inspection center and the return shipping and handling fee.Enclose the original printed receipt. Include a letter, with your name, address, phone number, and description of the specific problem. Pack the product carefully to prevent damage in transit. Because of possible loss in transit, we recommend insuring the product with return receipt requested.FOREGOING IS THE SOLE WARRANTY PROVIDED BY OMRON IN CONNECTION WITH THIS PRODUCT, AND OMRON HEREBY DISCLAIMS ANY OTHER WARRANTIES, EXPRESS OR IMPLIED, INCLUDING IMPLIED WARRANTIES OF MERCHANTABILITY AND FITNESS FOR A PARTICULAR PURPOSE. IMPLIED WARRANTIES AND OTHER TERMS THAT MAY BE IMPOSED BY LAW, IF ANY, ARE LIMITED IN DURATION TO THE PERIOD OF THE ABOVE EXPRESS WARRANTY.OMRON SHALL NOT BE LIABLE FOR LOSS OF USE OR ANY OTHER SPECIAL, INCIDENTAL, CONSEQUENTIAL OR INDIRECT COSTS, EXPENSES OR DAMAGES.This warranty provides you with specific legal rights, and you may have other rights which vary by jurisdiction. Because of special local requirements, some of the above limitations and exclusions may not apply to you.FOR CUSTOMER SERVICEVisit our web site at:For USA - For Canada - OmronHealthcare.ca Call toll free: 1-800-634-4350OMRON SC-150 Scale with Bluetooth® Information for Accompanying Documents in the Scope of IEC60601-1-2:2014Important information regarding Electromagnetic Compatibility (EMC)SC-150 conforms to IEC60601-1-2:2014 Electromagnetic Compatibility (EMC) standard. Further documentation in accordance with this EMC standard is available at /emc. Refer to the EMC information for SC-150 on the website.The Bluetooth® word mark and logos are registered trademarks owned by Bluetooth SIG, Inc. and any use of such marks by OMRON HEALTHCARE Co., Ltd. is under license. Other trademarks and trade names are those of their respective owners.OMRON HEALTHCARE Co., Ltd.53, Kunotsubo, Terado-choMuko, Kyoto, 617-0002 JAPANDistributed by :OMRON HEALTHCARE, INC.2895 Greenspoint Pkwy. Hoffman Estates, IL 60169 USAFor USA - For Canada - OmronHealthcare.ca© 2021 OMRON HEALTHCARE, INC.Made in ChinaOmron Healthcare helps you make positive lifestyle changes with innovative home health products that you can use safely and accurately at home. OmronHealthcare.ca For questions: 1-800-634-4350 Get general pain info: OmronHealthcare.ca。
华锤智能称重说明书一、产品概述华锤智能称重是一款高精度、多功能的电子称重设备,广泛应用于工业、商业和家庭等领域。
该产品采用先进的称重传感器和智能化的控制系统,能够准确测量物体的重量,并提供多种称重模式和功能,满足不同需求。
二、产品特点1. 高精度称重:华锤智能称重采用精密的称重传感器,能够实现高精度的重量测量,误差控制在合理范围内,确保测量结果的准确性。
2. 多功能应用:该产品具备多种称重模式和功能,可根据不同的使用场景和需求进行选择。
例如,可以选择连续称重模式来快速测量物体的重量,也可以选择累计称重模式来统计多个物体的总重量。
3. 易于操作:华锤智能称重采用简洁的操作界面,配备直观的按钮和显示屏,用户可以轻松地进行各种设置和操作。
同时,该产品还支持语音提示功能,方便用户了解称重状态和结果。
4. 数据记录和导出:该产品具备数据记录和导出功能,可以保存称重数据并导出到计算机或其他设备进行进一步分析和处理。
这为用户提供了更多的数据管理和应用可能性。
5. 耐用可靠:华锤智能称重采用高质量的材料和先进的制造工艺,具备良好的耐用性和可靠性。
经过严格的测试和质量控制,确保产品在各种环境和工作条件下都能正常运行。
三、使用说明1. 开机与关机:按下电源按钮,显示屏亮起,即可开机。
长按电源按钮,显示屏熄灭,即可关机。
2. 称重操作:将待称重物体放置在称重平台上,等待称重值稳定后,即可读取显示屏上的重量数值。
如需连续称重,可直接放置下一个物体进行测量。
3. 称重模式选择:根据需要,选择不同的称重模式。
例如,连续称重模式适用于需要快速连续测量多个物体重量的场景,累计称重模式适用于需要统计多个物体总重量的情况。
4. 单位切换:华锤智能称重支持多种重量单位,如千克(kg)、克(g)、磅(lb)等。
在设置界面中,可根据需要选择合适的重量单位。
5. 数据记录与导出:华锤智能称重具备数据记录功能,测量结果会自动保存在内部存储器中。
装载机称重仪操作方法
装载机称重仪操作方法大致如下:
1. 打开装载机机头上的电源开关。
2. 按照称重仪的使用说明,连接称重仪与装载机的电源插头。
3. 将称重仪控制器的电源开关打开,等待称重仪启动。
4. 确保称重仪与装载机的通讯线缆连接良好。
5. 将装载机驶入需要称重的区域,并保持稳定。
6. 使用称重仪的控制器,选择称重模式和单位。
7. 根据需要,预先设置称重目标值。
8. 使用控制器上的相应按钮,将称重仪的传感器固定在装载机的吊杆或其它合适的部位。
9. 等待称重仪完成称重过程,结果将显示在控制器的显示屏上。
10. 根据需要,将称重结果记录下来或进行进一步处理。
11. 使用完毕后,关闭称重仪的控制器和电源开关。
12. 断开称重仪与装载机的电源插头。
请注意,具体操作方法可能因不同型号的装载机和称重仪而略有差异。
在操作前,建议仔细阅读装载机和称重仪的使用说明书,并遵循安全操作规范。
如果有任何疑问,建议联系设备厂家或专业人士进行指导。
SCH-150称重控制器操作说明一、校称1 准备一个5-20公斤的物体2 按键,显示P- 0000,输入1234后按键,显示JC 00.00。
3 在JC后边输入准备物体的重量,然后在称台上放上准备好的物体。
4 放上物体后不要触碰物体及称体隔3-5秒钟后按键,仪表显示物体重量,校称完成。
注意:严格以上流程操作,否则会出现重量不准或OL闪烁。
二、称重重量设定1 按键,显示L1,将L1 后边的数值改为自己所要的重量值。
(注意,本称为公斤称,所要客户将自己的所需重量值换算为公斤数)2 设定称重值后按键,显示F1 00.00,然后按键,显示C1 00.00,然后按键,显示0.00重量设定完成。
(注意:在操作过程中,若F1、C1显示不为00.00,要设置成00.00)三、使用操作流程1 按键保持0.5秒,显示t r 0.00。
2 套袋、扳动称体上的弹簧开关,装袋机出料,完成出料装袋结束。
3 反复操作2流程。
常见故障处理有报警或故障现象发生后,SCH-150电子称重仪表会自动回到停止状态。
显示窗口显示出相应的错误代码,以便于用户对各种报警的处理。
故障现象引发原因排除措施仪表无显示电源接线不正确测量220V电源是否正确,并确保可靠连接内部故障送本公司维修显示E1传感器接线不正确检查并重新接线传感器故障更换传感器显示E2 称重值设定超过9999个分度数或为零重新输入称重值显示OL 重量显示值超过9999(OL)或者低于-999(-OL)检查分辨率是否匹配并重新校称重量显示值不准确校称不正确重新校称传感器的接线不正确重新接线传感器损坏,输出信号不稳定更换传感器重量显示值不稳定外部电磁干扰或振动连接传感器屏蔽线至独立可靠地线适当增大滤波强度校称不正确重新校称菜单项参数名称输入范围出厂值备注L1 配方值0~9999 0 分度F1 精计量0~9999 0 分度C1 落差-999~9999 0 分度。
AT -150称重控制器V8.01使用说明书目录概述┄┄┄┄┄┄┄┄┄┄┄┄┄┄┄┄┄┄┄┄┄┄┄┄┄┄┄┄┄┄┄┄┄┄┄┄3 功能特点┄┄┄┄┄┄┄┄┄┄┄┄┄┄┄┄┄┄┄┄┄┄┄┄┄┄┄┄┄┄┄┄┄┄┄3 前面板说明┄┄┄┄┄┄┄┄┄┄┄┄┄┄┄┄┄┄┄┄┄┄┄┄┄┄┄┄┄┄┄┄┄┄4 后面板说明┄┄┄┄┄┄┄┄┄┄┄┄┄┄┄┄┄┄┄┄┄┄┄┄┄┄┄┄┄┄┄┄┄┄5 技术规格┄┄┄┄┄┄┄┄┄┄┄┄┄┄┄┄┄┄┄┄┄┄┄┄┄┄┄┄┄┄┄┄┄┄┄6安装┄┄┄┄┄┄┄┄┄┄┄┄┄┄┄┄┄┄┄┄┄┄┄┄┄┄┄┄┄┄┄┄┄┄┄┄8 一般原则┄┄┄┄┄┄┄┄┄┄┄┄┄┄┄┄┄┄┄┄┄┄┄┄┄┄┄┄┄┄┄┄┄┄┄8 传感器的连接┄┄┄┄┄┄┄┄┄┄┄┄┄┄┄┄┄┄┄┄┄┄┄┄┄┄┄┄┄┄┄┄┄8 开关量输入、输出接口的连接┄┄┄┄┄┄┄┄┄┄┄┄┄┄┄┄┄┄┄┄┄┄┄┄┄┄9 系统组成┄┄┄┄┄┄┄┄┄┄┄┄┄┄┄┄┄┄┄┄┄┄┄┄┄┄┄┄┄┄┄┄┄┄┄11 数据输入操作┄┄┄┄┄┄┄┄┄┄┄┄┄┄┄┄┄┄┄┄┄┄┄┄┄┄┄┄┄┄13标定┄┄┄┄┄┄┄┄┄┄┄┄┄┄┄┄┄┄┄┄┄┄┄┄┄┄┄┄┄┄┄┄┄┄┄┄14 标定方法┄┄┄┄┄┄┄┄┄┄┄┄┄┄┄┄┄┄┄┄┄┄┄┄┄┄┄┄┄┄┄┄┄┄┄14 标定参数┄┄┄┄┄┄┄┄┄┄┄┄┄┄┄┄┄┄┄┄┄┄┄┄┄┄┄┄┄┄┄┄┄┄┄15工作参数设置方法┄┄┄┄┄┄┄┄┄┄┄┄┄┄┄┄┄┄┄┄┄┄┄┄┄┄┄16有关说明┄┄┄┄┄┄┄┄┄┄┄┄┄┄┄┄┄┄┄┄┄┄┄┄┄┄┄┄┄┄┄┄┄┄┄16 工作参数设置方法┄┄┄┄┄┄┄┄┄┄┄┄┄┄┄┄┄┄┄┄┄┄┄┄┄┄┄┄┄┄┄16工作参数说明┄┄┄┄┄┄┄┄┄┄┄┄┄┄┄┄┄┄┄┄┄┄┄┄┄┄┄┄┄┄┄┄┄17预设值设置方法┄┄┄┄┄┄┄┄┄┄┄┄┄┄┄┄┄┄┄┄┄┄┄┄┄┄┄┄┄21工作组的选择┄┄┄┄┄┄┄┄┄┄┄┄┄┄┄┄┄┄┄┄┄┄┄┄┄┄┄┄┄┄┄┄┄21 预设值设置方法┄┄┄┄┄┄┄┄┄┄┄┄┄┄┄┄┄┄┄┄┄┄┄┄┄┄┄┄┄┄┄┄21 预设值参数说明┄┄┄┄┄┄┄┄┄┄┄┄┄┄┄┄┄┄┄┄┄┄┄┄┄┄┄┄┄┄┄┄22 输入/输出口测试┄┄┄┄┄┄┄┄┄┄┄┄┄┄┄┄┄┄┄┄┄┄┄┄┄┄┄┄ 23 自动控制过程和功能┄┄┄┄┄┄┄┄┄┄┄┄┄┄┄┄┄┄┄┄┄┄┄┄┄┄24 有斗模式自动控制过程┄┄┄┄┄┄┄┄┄┄┄┄┄┄┄┄┄┄┄┄┄┄┄┄┄┄┄┄┄24 无斗模式自动控制过程┄┄┄┄┄┄┄┄┄┄┄┄┄┄┄┄┄┄┄┄┄┄┄┄┄┄┄┄┄26 自动控制功能┄┄┄┄┄┄┄┄┄┄┄┄┄┄┄┄┄┄┄┄┄┄┄┄┄┄┄┄┄┄┄┄┄28 操作┄┄┄┄┄┄┄┄┄┄┄┄┄┄┄┄┄┄┄┄┄┄┄┄┄┄┄┄┄┄┄┄┄┄┄┄30 切换副显示内容┄┄┄┄┄┄┄┄┄┄┄┄┄┄┄┄┄┄┄┄┄┄┄┄┄┄┄┄┄┄┄┄30 批量数的查询和设置┄┄┄┄┄┄┄┄┄┄┄┄┄┄┄┄┄┄┄┄┄┄┄┄┄┄┄┄┄┄30 启动自动控制过程┄┄┄┄┄┄┄┄┄┄┄┄┄┄┄┄┄┄┄┄┄┄┄┄┄┄┄┄┄┄┄30 暂停自动控制过程┄┄┄┄┄┄┄┄┄┄┄┄┄┄┄┄┄┄┄┄┄┄┄┄┄┄┄┄┄┄┄27 手动清零┄┄┄┄┄┄┄┄┄┄┄┄┄┄┄┄┄┄┄┄┄┄┄┄┄┄┄┄┄┄┄┄┄┄┄31 手动卸料┄┄┄┄┄┄┄┄┄┄┄┄┄┄┄┄┄┄┄┄┄┄┄┄┄┄┄┄┄┄┄┄┄┄┄31 清除累计值┄┄┄┄┄┄┄┄┄┄┄┄┄┄┄┄┄┄┄┄┄┄┄┄┄┄┄┄┄┄┄┄┄┄31 错误及报警信息┄┄┄┄┄┄┄┄┄┄┄┄┄┄┄┄┄┄┄┄┄┄┄┄┄┄┄┄┄32 仪表外形┄┄┄┄┄┄┄┄┄┄┄┄┄┄┄┄┄┄┄┄┄┄┄┄┄┄┄┄┄┄┄┄┄33 开孔尺寸┄┄┄┄┄┄┄┄┄┄┄┄┄┄┄┄┄┄┄┄┄┄┄┄┄┄┄┄┄┄┄┄┄┄33概述AT-150定值控制器,具有精度高、性能稳定、功能强大、操作简便等特点,主要用于自动定量装袋秤测量与控制。
可实现除人工上袋外全部自动控制过程。
功能特点□荧光双显示屏,清晰直观□10路开关量输出可直接驱动电磁阀□8路开关量输入□有斗/无斗模式可设□全自动大、中、小加料,打码、拍袋控制□可编程定时器用于过程时间控制□自动落差修正功能□自动零位跟踪功能□过冲检测及抑制功能□全面板式数字调校及工作参数设置□模拟、数字滤波参数设置□9组预设值设置,适应不同物料及包装规格前面板说明前面板图主显示:六位数字,用于显示称重数据、仪表参数等。
副显示:九位英文字母、数字显示,用于显示累计重量、累计次数、目标值、工作参数及提示等信息。
状态指示灯:▽稳定:当秤斗物料重量稳定在判稳范围内时,该指示灯亮▽零位:当秤斗物料重量处于0±1/4d范围内时,该指示灯亮▽欠差:该灯亮时,表示定量值欠差▽超差:该灯亮时,表示定量值超差▽近零:卸料过程中料斗物料低于零区值时,该指示灯亮▽报警:该灯亮时,表示报警¤运行:该灯亮时,表示仪表处于自动状态¤夹袋: 该灯亮时,表示夹袋信号输出有效¤大投:该灯亮时,表示大投信号输出有效¤中投:该灯亮时,表示中投信号输出有效¤小投:该灯亮时,表示小投信号输出有效¤加料结束:该灯亮时,表示加料结束¤卸料:该灯亮时, 表示卸料信号输出有效键盘:设置键:用于设定仪表工作参数及标定清零/<键:用于称重数据清零,选择参数项,输入数据副显示/>键:切换副显示内容,选择参数项,输入数据工作组/+ 键:用于选择参数组,输入数据及参数设定批次/- 键:用于输入批次数,输入数据及参数设定确认键:用于确认仪表当前功能或结束键盘输入数据操作退出键:用于退出仪表当前工作状态,还用在清除报警后面板说明后面板图说明:1.AC 220V电源输入端子L G N, L火线,G地线,N零线2.传感器连接端子3.串行口(RS-232/485)输出端子4.开关量输入端子5.开关量输出端子技术规格○一般规格电源:AC220V 50HZ±10%电源滤波器:内附工作温度:0~40℃最大湿度:90% R.H不可结露功耗:约20W仪表净重:约1.85kg物理尺寸:170(W)╳165(D)╳90(H)m m○模拟部分传感器电源:DC10V 280m A,可并联4只350Ω传感器输入阻抗:大于10MΩ零点调整范围:0.2~20m V输入灵敏度:0.3µ V/d输入范围:0.2~20m VA/D 转换方式:Σ-ΔA/D 转换速度:120次/秒非线性:0.01% F.S零点漂移:0.1μV/ ℃增益漂移:5ppM/℃内部分辨率:1/1000000(M AX)最高显示精度:1/10000 F.S○数字部分重量显示:主显示六位13mm高亮度荧光数码管状态显示:副显示九位7mm高亮度荧光数码管重量单位:kg负数显示:“—”超载显示:“OFL”小数点位置:5种可选键盘:7键复用轻触键盘安装一般原则AT-150型定值控制器,使用带有保护地的220V交流电源,如果没有保护地,需另外接地线以保证使用安全。
注意不要将地线直接接到其他设备上。
如果电源电压波动大于10%,必须使用稳压器。
仪表安装位置应远离电磁干扰源。
传感器的连接SIG-SIG+EX+EX-SN+SN-EX+EX-SN+SN-SIG+SHSIG-SHSIG+SIG-传感器插座编号 1 2 3 4 5 6 7六线接法EX+ EX- SN+ SN- SIG+ SIG- SH四线接法EX+ EX- EX+ EX- SIG+ SIG- SH EX+:激励正EX-:激励负SN+:感应正SN-:感应负SIG+:信号正SIG-:信号负SH:屏蔽开关量输入、输出接口的连接说明:AT150需外部提供24V直流电源。
输出为集电极开路晶体管输出,可直接驱动24V直流继电器、电磁阀等,驱动电流达1 A。
可用于执行机构的驱动及状态指示。
输入信号外接手动按键,每次只能有一个按健闭合,且闭合时间>100mS。
输入输出开关量可由用户自定义功能,参见工作参数第5项、第6项○输入输出接线表(出厂默认)输入输出1 GND 1 OUT1 运行2 GND 2 OUT2 大投3 IN1 清零 3 OUT3 中投4 IN2 运行 4 OUT4 小投5 IN3 暂停 5 OUT5 打码6 IN4 手动卸料 6 OUT6 卸料7 IN5 夹袋/松袋7 OUT7 夹袋8 IN6 清除报警8 OUT8 报警9 IN7 上料位9 OUT9 暂停10 IN 8 下料位10 OUT10 拍袋11 +24V○输出量说明运行:当仪表处于运行状态时,该输出信号有效。
大投:该信号用于驱动大投加料中投:该信号用于驱动中投加料小投:该信号用于驱动小投加料打码:该信号用于驱动打码机构卸料:该信号用于驱动卸料机构夹袋:该信号用于驱动夹袋机构,该信号有效即夹袋动作报警:用于驱动外接报警器暂停:当仪表处于暂停状态时,该输出信号有效拍袋:该信号用于驱动拍袋机构○输入量说明清零:用于外接清零键运行:用于外接运行键暂停:用于外接暂停键手动卸料:用于外接手动卸料键夹袋/松袋:用于接外部夹袋/松袋开关清除报警:用于外接清除报警按键上料位:用于接外部上料位开关下料位:用于接外部下料位开关系统组成根据称重控制器的工作原理,用户可方便地组成包装控制系统。
为用户能更方便地使用本仪表,这里给出与仪表连接的电控部分参考原理图,供用户使用本仪表时参考。
○输入接口电路○输出接口电路电气控制参考原理图+24V 拍袋暂停报警夹袋卸料打码小投中投大投运行下料位上料位清除报警夹袋/松袋手动卸料暂停运行清零GND GNDAT-150OUT10OUT9OUT8OUT7OUT6OUT5OUT4OUT3OUT2OUT1IN8IN7IN6IN5IN4IN3IN2IN1+24VGND数据输入操作在标定、工作参数设置、批次数输入过程中,需进行数据输入操作,具体操作方法如下:在控制器主显示闪烁位闪烁时,用以下键完成数据输入操作“+”键:闪烁位数据位加1“-”键:闪烁位数据位减1“<”键:闪烁位左移一位,闪烁位为最高时移到最低位“>”键:闪烁位右移一位,闪烁位为最低时移到最高位“确认”键:确认所输入的数据并结束输入操作“退出”键:忽略所输入的数据并结束输入操作标定用户在初次使用定值控制器,或者称重系统的任意部分有所改变,以及当前仪表标定参数不能满足用户使用要求时,应对仪表进行标定,具体说明如下:在暂停状态下,按〖设置〗键,副显示“SET-CAL?”,按〖>〗键,副显示“PASSWORD?”,要求输入密码。
用数字键输入密码,按〖确认〗键。
副显示“CALIB”后,进入标定第一步。