NGINX配置1.6一览表
- 格式:xls
- 大小:34.00 KB
- 文档页数:12

nginx实战操作(常⽤命令及配置)1. nginx介绍2. nginx常⽤命令验证配置是否正确: nginx -t查看Nginx的详细的版本号:nginx -V查看Nginx的简洁版本号:nginx -v启动Nginx:start nginx快速停⽌或关闭Nginx:nginx -s stop正常停⽌或关闭Nginx:nginx -s quit配置⽂件修改重装载命令:nginx -s reload3. nginx配置3.1 配置代码#user nobody;worker_processes 1;events {worker_connections 1024;}http {include mime.types;default_type application/octet-stream;sendfile on;keepalive_timeout 65;#1 startupstream linuxidc {server localhost:7071;server localhost:7072;server localhost:7073;}server {listen 7070;server_name localhost;location / {# root C:/ngtest2;# index index.html index.htm;proxy_pass http://linuxidc;}}# 1 end#2 startserver {listen 7071;server_name localhost;location / {root C:/ngtest1;# index index.html index.htm;#proxy_pass https://tms;#proxy_pass https:///;}}server {listen 7072;server_name localhost;location / {root C:/ngtest2;# index index.html index.htm;#proxy_pass https://tms;}}server {listen 7073;server_name localhost;location / {root C:/ngtest3;# index index.html index.htm;#proxy_pass https://tms;}}# 2 end#3 startserver {listen 8080;server_name localhost;#charset koi8-r;#access_log logs/host.access.log main; #location / {# root C:\ngtest;#index index.html index.htm;#proxy_pass https:///; # }location /baidu {#root html;#index index.html index.htm;proxy_pass https:///; }location /csdn {#root html;#index index.html index.htm;proxy_pass https:///;}error_page 500 502 503 504 /50x.html; location = /50x.html {root html;}# 3 end}}3.2 代码说明及效果图3.2.1 不同端⼝代理不同应⽤#2 startserver {listen 7071;server_name localhost;location / {root C:/ngtest1;# index index.html index.htm;#proxy_pass https://tms;#proxy_pass https:///;}}server {listen 7072;server_name localhost;location / {root C:/ngtest2;# index index.html index.htm;#proxy_pass https://tms;}}server {listen 7073;server_name localhost;location / {root C:/ngtest3;# index index.html index.htm;#proxy_pass https://tms;}}# 2 end3.2.2 效果图3.2.3 同⼀端⼝号代理不同应⽤#3 startserver {listen 8080;server_name localhost;#charset koi8-r;#access_log logs/host.access.log main; #location / {# root C:\ngtest;#index index.html index.htm;#proxy_pass https:///; # }location /baidu {#root html;#index index.html index.htm;proxy_pass https:///; }location /csdn {#root html;#index index.html index.htm;proxy_pass https:///;}error_page 500 502 503 504 /50x.html; location = /50x.html {root html;}# 3 end3.2.4 效果图3.2.5 负载均衡默认采⽤的轮询⽅式#1 startupstream linuxidc {server localhost:7071;server localhost:7072;server localhost:7073;}server {listen 7070;server_name localhost;location / {# root C:/ngtest2;# index index.html index.htm;proxy_pass http://linuxidc;}}# 1 end3.2.6 效果图。

nginx详细配置Nginx内容概览1、nginx简介(1)介绍 nginx的应⽤场景和具体可以做什么事情(2)介绍什么是反向代理(3)介绍什么是负载均衡(4)介绍什么是动静分离2、nginx安装(1)介绍 nginx在 linux系统中如何进⾏安装3、nginx常⽤的命令和配置⽂件(1)介绍 nginx启动、关闭、重新加载命令(2)介绍 nginx的配置⽂件4、nginx配置实例-反向代理5、nginx配置实例-负载均衡6、nginx配置实例-动静分离7、nginx原理与优化参数配置8、搭建 nginx⾼可⽤集群(1)搭建 nginx⾼可⽤集群(主从模式)(2)搭建 nginx⾼可⽤集群(双主模式)第 1 章 Nginx 简介1.1 Nginx 概述Nginx ("engine x") 是⼀个⾼性能的 HTTP 和反向代理服务器,特点是占有内存少,并发能⼒强,事实上 nginx的并发能⼒确实在同类型的⽹页服务器中表现较好,中国⼤陆使⽤ nginx⽹站⽤户有:百度、京东、新浪、⽹易、腾讯、淘宝等1.2 Nginx 作为 web 服务器Nginx 可以作为静态页⾯的 web 服务器,同时还⽀持 CGI 协议的动态语⾔,⽐如 perl、php等。
但是不⽀持 java。
Java程序只能通过与tomcat配合完成。
Nginx专为性能优化⽽开发,性能是其最重要的考量,实现上⾮常注重效率,能经受⾼负载的考验,有报告表明能⽀持⾼达50,000个并发连接数。
1.3 正向代理Nginx 不仅可以做反向代理,实现负载均衡。
还能⽤作正向代理来进⾏上⽹等功能。
正向代理:如果把局域⽹外的 Internet 想象成⼀个巨⼤的资源库,则局域⽹中的客户端要访问Internet,则需要通过代理服务器来访问,这种代理服务就称为正向代理。
1.4 反向代理反向代理,其实客户端对代理是⽆感知的,因为客户端不需要任何配置就可以访问,我们只需要将请求发送到反向代理服务器,由反向代理服务器去选择⽬标服务器获取数据后,在返回给客户端,此时反向代理服务器和⽬标服务器对外就是⼀个服务器,暴露的是代理服务器地址,隐藏了真实服务器 IP地址。
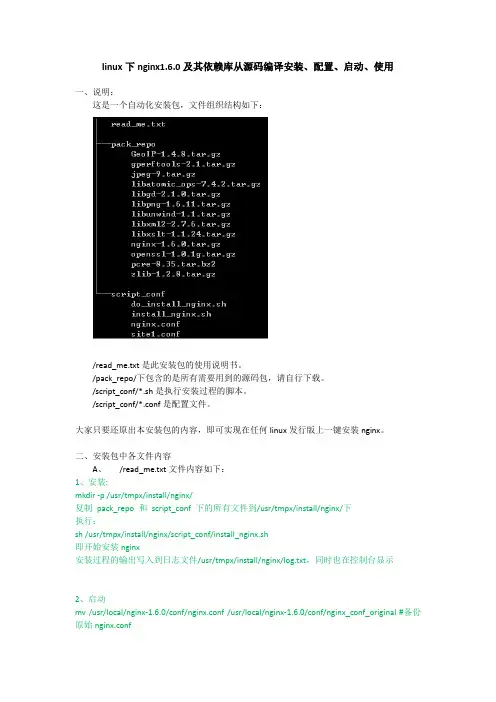
linux下nginx1.6.0及其依赖库从源码编译安装、配置、启动、使用一、说明:这是一个自动化安装包,文件组织结构如下:/read_me.txt是此安装包的使用说明书。
/pack_repo/下包含的是所有需要用到的源码包,请自行下载。
/script_conf/*.sh是执行安装过程的脚本。
/script_conf/*.conf是配置文件。
大家只要还原出本安装包的内容,即可实现在任何linux发行版上一键安装nginx。
二、安装包中各文件内容A、/read_me.txt文件内容如下:1、安装:mkdir -p /usr/tmpx/install/nginx/复制pack_repo 和script_conf 下的所有文件到/usr/tmpx/install/nginx/下执行:sh /usr/tmpx/install/nginx/script_conf/install_nginx.sh即开始安装nginx安装过程的输出写入到日志文件/usr/tmpx/install/nginx/log.txt,同时也在控制台显示2、启动mv /usr/local/nginx-1.6.0/conf/nginx.conf /usr/local/nginx-1.6.0/conf/nginx_conf_original #备份原始nginx.confmv /usr/tmpx/install/nginx/script_conf/nginx.conf /usr/local/nginx-1.6.0/conf/nginx.conf #使用我们的配置mkdir -p /var/web_nginx_site_conf/mv /usr/tmpx/install/nginx/script_conf/site1.conf /var/web_nginx_site_conf/#注意如果nginx.conf中没有包含任何server,则nginx即使启动了,也不会监听80端口,因为没有应用。
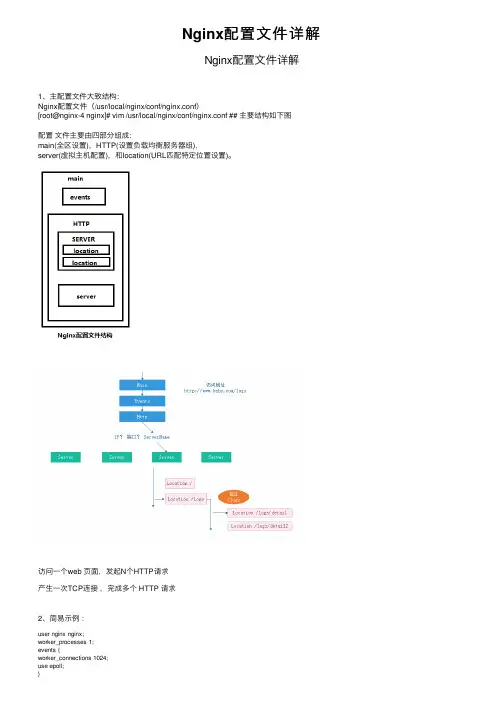
Nginx配置⽂件详解Nginx配置⽂件详解1、主配置⽂件⼤致结构:Nginx配置⽂件(/usr/local/nginx/conf/nginx.conf)[root@nginx-4 nginx]# vim /usr/local/nginx/conf/nginx.conf ## 主要结构如下图配置⽂件主要由四部分组成:main(全区设置),HTTP(设置负载均衡服务器组),server(虚拟主机配置),和location(URL匹配特定位置设置)。
访问⼀个web 页⾯,发起N个HTTP请求产⽣⼀次TCP连接,完成多个 HTTP 请求2、简易⽰例:user nginx nginx;worker_processes 1;events {worker_connections 1024;use epoll;}http{include mime.types;charset utf-8;keepalive_timeout 65;server {ServerName N1location{ }location{ }}server {ServerName N2location{ }location{ }}server {ServerName N3location{ }location{ }}}3、主配置⽂件解析:1)全局变量部分:#user nobody nobody; #Nginx的worker进程运⾏⽤户以及⽤户组worker_processes 1; #Nginx开启的进程数,建议设置为等于CPU总核⼼数。
#worker_processes auto; ## 多核⼼CPU设置。
## [root@server-21 ~]# cat /proc/cpuinfo 查看当前CPU 的信息。
#worker_processes 4 # 4核CPU#worker_cpu_affinity 0001 0010 0100 1000;#亲核##CPU亲核,设置⼯作进程与 CPU 绑定。
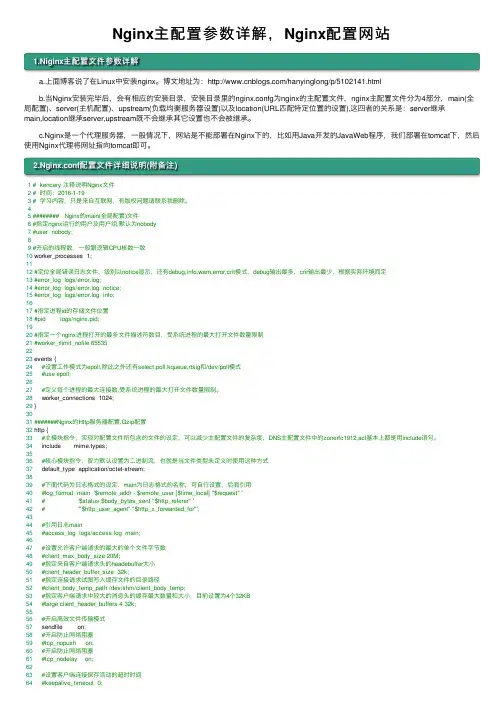
Nginx主配置参数详解,Nginx配置⽹站1.Niginx主配置⽂件参数详解 a.上⾯博客说了在Linux中安装nginx。
博⽂地址为:/hanyinglong/p/5102141.html b.当Nginx安装完毕后,会有相应的安装⽬录,安装⽬录⾥的nginx.confg为nginx的主配置⽂件,nginx主配置⽂件分为4部分,main(全局配置)、server(主机配置)、upstream(负载均衡服务器设置)以及location(URL匹配特定位置的设置),这四者的关系是:server继承main,location继承server,upstream既不会继承其它设置也不会被继承。
c.Nginx是⼀个代理服务器,⼀般情况下,⽹站是不能部署在Nginx下的,⽐如⽤Java开发的JavaWeb程序,我们部署在tomcat下,然后使⽤Nginx代理将⽹址指向tomcat即可。
2.Nginx.conf配置⽂件详细说明(附备注)1# kencery 注释说明Nginx⽂件2# 时间:2016-1-193# 学习内容,只是来⾃互联⽹,有版权问题请联系我删除。
45######## Nginx的main(全局配置)⽂件6#指定nginx运⾏的⽤户及⽤户组,默认为nobody7#user nobody;89#开启的线程数,⼀般跟逻辑CPU核数⼀致10 worker_processes 1;1112#定位全局错误⽇志⽂件,级别以notice显⽰,还有debug,info,warn,error,crit模式,debug输出最多,crir输出最少,根据实际环境⽽定13#error_log logs/error.log;14#error_log logs/error.log notice;15#error_log logs/error.log info;1617#指定进程id的存储⽂件位置18#pid logs/nginx.pid;1920#指定⼀个nginx进程打开的最多⽂件描述符数⽬,受系统进程的最⼤打开⽂件数量限制21#worker_rlimit_nofile 655352223 events {24#设置⼯作模式为epoll,除此之外还有select,poll,kqueue,rtsig和/dev/poll模式25#use epoll;2627#定义每个进程的最⼤连接数,受系统进程的最⼤打开⽂件数量限制。
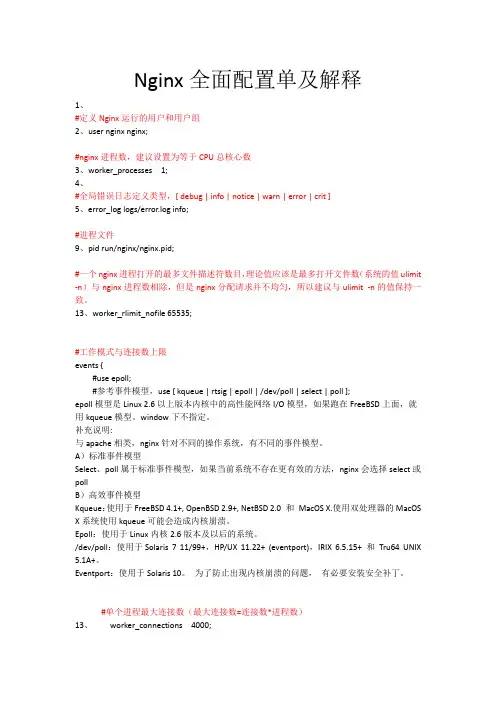
Nginx全面配置单及解释1、#定义Nginx运行的用户和用户组2、user nginx nginx;#nginx进程数,建议设置为等于CPU总核心数3、worker_processes 1;4、#全局错误日志定义类型,[ debug | info | notice | warn | error | crit ]5、error_log logs/error.log info;#进程文件9、pid run/nginx/nginx.pid;#一个nginx进程打开的最多文件描述符数目,理论值应该是最多打开文件数(系统的值ulimit -n)与nginx进程数相除,但是nginx分配请求并不均匀,所以建议与ulimit -n的值保持一致。
13、worker_rlimit_nofile 65535;#工作模式与连接数上限events {#use epoll;#参考事件模型,use [ kqueue | rtsig | epoll | /dev/poll | select | poll ];epoll模型是Linux 2.6以上版本内核中的高性能网络I/O模型,如果跑在FreeBSD上面,就用kqueue模型。
window下不指定。
补充说明:与apache相类,nginx针对不同的操作系统,有不同的事件模型。
A)标准事件模型Select、poll属于标准事件模型,如果当前系统不存在更有效的方法,nginx会选择select或pollB)高效事件模型Kqueue:使用于FreeBSD 4.1+, OpenBSD 2.9+, NetBSD 2.0 和MacOS X.使用双处理器的MacOS X系统使用kqueue可能会造成内核崩溃。
Epoll:使用于Linux内核2.6版本及以后的系统。
/dev/poll:使用于Solaris 7 11/99+,HP/UX 11.22+ (eventport),IRIX 6.5.15+ 和Tru64 UNIX 5.1A+。
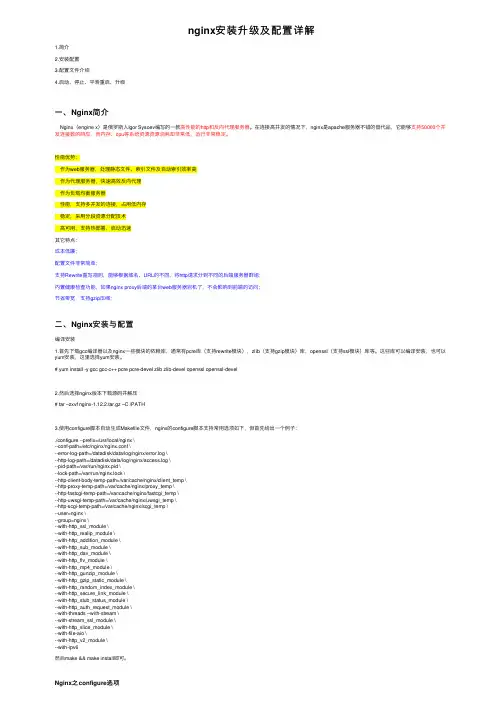
nginx安装升级及配置详解1.简介2.安装配置3.配置⽂件介绍4.启动、停⽌、平滑重启、升级⼀、Nginx简介Nginx(engine x)是俄罗斯⼈Igor Sysoev编写的⼀款⾼性能的http和反向代理服务器。
在连接⾼并发的情况下,nginx是apache服务器不错的替代品,它能够⽀持50000个并发连接数的响应,⽽内存、cpu等系统资源资源消耗却⾮常低,运⾏⾮常稳定。
性能优势:作为web服务器,处理静态⽂件、索引⽂件及⾃动索引效率⾼作为代理服务器,快速⾼效反向代理作为负载均衡服务器性能,⽀持多并发的连接,占⽤低内存稳定,采⽤分段资源分配技术⾼可⽤,⽀持热部署,启动迅速其它特点:成本低廉;配置⽂件⾮常简单;⽀持Rewrite重写规则,能够根据域名、URL的不同,将http请求分到不同的后端服务器群组;内置健康检查功能,如果nginx proxy后端的某台web服务器宕机了,不会影响到前端的访问;节省带宽,⽀持gzip压缩;⼆、Nginx安装与配置编译安装1.⾸先下载gcc编译器以及nginx⼀些模块的依赖库,通常有pcre库(⽀持rewrite模块),zlib(⽀持gzip模块)库,openssl(⽀持ssl模块)库等。
这些库可以编译安装,也可以yum安装,这⾥选择yum安装。
# yum install -y gcc gcc-c++ pcre pcre-devel zlib zlib-devel openssl openssl-devel2.然后选择nginx版本下载源码并解压# tar –zxvf nginx-1.12.2.tar.gz –C /PATH3.使⽤configure脚本⾃动⽣成Makefile⽂件,nginx的configure脚本⽀持常⽤选项如下,但⾸先给出⼀个例⼦:./configure --prefix=/usr/local/nginx \--conf-path=/etc/nginx/nginx.conf \--error-log-path=/datadisk/data/log/nginx/error.log \--http-log-path=/datadisk/data/log/nginx/access.log \--pid-path=/var/run/nginx.pid \--lock-path=/var/run/nginx.lock \--http-client-body-temp-path=/var/cache/nginx/client_temp \--http-proxy-temp-path=/var/cache/nginx/proxy_temp \--http-fastcgi-temp-path=/var/cache/nginx/fastcgi_temp \--http-uwsgi-temp-path=/var/cache/nginx/uwsgi_temp \--http-scgi-temp-path=/var/cache/nginx/scgi_temp \--user=nginx \--group=nginx \--with-http_ssl_module \--with-http_realip_module \--with-http_addition_module \--with-http_sub_module \--with-http_dav_module \--with-http_flv_module \--with-http_mp4_module \--with-http_gunzip_module \--with-http_gzip_static_module \--with-http_random_index_module \--with-http_secure_link_module \--with-http_stub_status_module \--with-http_auth_request_module \--with-threads --with-stream \--with-stream_ssl_module \--with-http_slice_module \--with-file-aio \--with-http_v2_module \--with-ipv6然后make && make install即可。


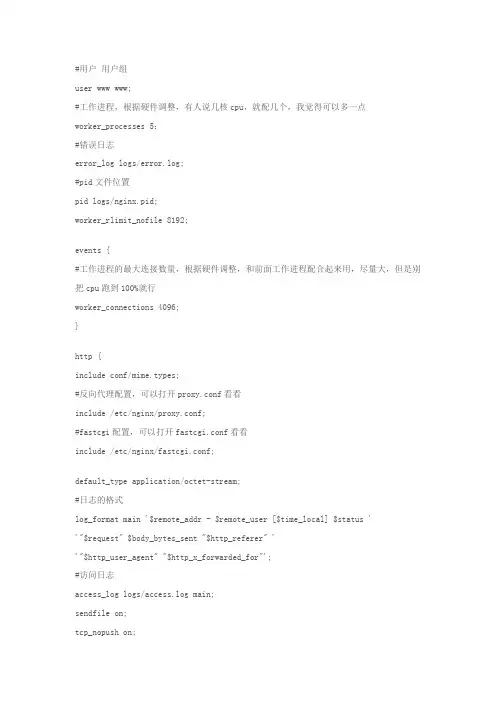
#用户用户组user www www;#工作进程,根据硬件调整,有人说几核cpu,就配几个,我觉得可以多一点worker_processes 5;#错误日志error_log logs/error.log;#pid文件位置pid logs/nginx.pid;worker_rlimit_nofile 8192;events {#工作进程的最大连接数量,根据硬件调整,和前面工作进程配合起来用,尽量大,但是别把cpu跑到100%就行worker_connections 4096;}http {include conf/mime.types;#反向代理配置,可以打开proxy.conf看看include /etc/nginx/proxy.conf;#fastcgi配置,可以打开fastcgi.conf看看include /etc/nginx/fastcgi.conf;default_type application/octet-stream;#日志的格式log_format main '$remote_addr - $remote_user [$time_local] $status ' '"$request" $body_bytes_sent "$http_referer" ''"$http_user_agent" "$http_x_forwarded_for"';#访问日志access_log logs/access.log main;sendfile on;tcp_nopush on;#根据实际情况调整,如果server很多,就调大一点server_names_hash_bucket_size 128; # this seems to be required for some vhosts#这个例子是fastcgi的例子,如果用fastcgi就要仔细看server { # php/fastcgilisten 80;#域名,可以有多个server_name ;#访问日志,和上面的级别不一样,应该是下级的覆盖上级的access_log logs/domain1.access.log main;root html;location / {index index.html index.htm index.php;}#所有php后缀的,都通过fastcgi发送到1025端口上#上面include的fastcgi.conf在此应该是有作用,如果你不include,那么就把fastcgi.conf的配置项放在这个下面。
查看nginx | apache | php | tengine | tomcat版本的信息以及如何隐藏版本信息要操作的信息列表∙nginx版本信息查询及隐藏∙Apache版本信息查询及隐藏∙php版本信息查询及隐藏∙tengine版本信息查询及隐藏∙tomcat版本信息查询及隐藏详细操作步骤1.1、nginx版本信息查询1.2、nginx编译配置参数查询1.3、客户端查看nginx的Response Header信息1.4、如何隐藏nginx的Response Header中返回的版本号信息修改nginx配置文件,在全局配置中添加server_tokens off; 这一行1.[root@zhuima_nginx ~]#2.[root@zhuima_nginx ~]# sed -n '/server_tokens/p'/usr/local/nginx/conf/nginx.conf3.server_tokens off; # 在nginx全局配置文件中添加这行即可4.[root@zhuima_nginx ~]#重启nginx服务然后客户端验证效果1.[root@zhuima_client ~]# curl -I http://218.244.xxx.xxx2.HTTP/1.1200 OK3.Server: nginx4.Date:Sat,19Jul201402:33:11 GMT5.Content-Type: text/html6.Content-Length:16412st-Modified:Mon,07Jul201405:25:22 GMT8.Connection: keep-alive9.Vary:Accept-Encoding10.ETag:"53ba2f42-401c"11.Accept-Ranges: bytes2、Apache版本信息查询及隐藏2.1、apache版本信息查询apache版本信息查询1.[root@zhuima_httpd ~]# apachectl -v2.Server version:Apache/2.2.15(Unix)3.Server built:Apr3201423:56:164.[root@zhuima_httpd ~]#apache编译参数查询1.[root@zhuima_httpd ~]# apachectl -V2.Server version:Apache/2.2.15(Unix)3.Server built:Apr3201423:56:164.Server's Module Magic Number:20051115:255.Server loaded: APR 1.3.9, APR-Util 1.3.9piled using: APR 1.3.9, APR-Util 1.3.97.Architecture:64-bit8.Server MPM:Prefork9.threaded: no10. forked: yes (variable process count)11.Server compiled with....12.-D APACHE_MPM_DIR="server/mpm/prefork"13.-D APR_HAS_SENDFILE14.-D APR_HAS_MMAP15.-D APR_HAVE_IPV6 (IPv4-mapped addresses enabled)16.-D APR_USE_SYSVSEM_SERIALIZE17.-D APR_USE_PTHREAD_SERIALIZE18.-D SINGLE_LISTEN_UNSERIALIZED_ACCEPT19.-D APR_HAS_OTHER_CHILD20.-D AP_HAVE_RELIABLE_PIPED_LOGS21.-D DYNAMIC_MODULE_LIMIT=12822.-D HTTPD_ROOT="/etc/httpd"23.-D SUEXEC_BIN="/usr/sbin/suexec"24.-D DEFAULT_PIDLOG="run/httpd.pid"25.-D DEFAULT_SCOREBOARD="logs/apache_runtime_status"26.-D DEFAULT_LOCKFILE="logs/accept.lock"27.-D DEFAULT_ERRORLOG="logs/error_log"28.-D AP_TYPES_CONFIG_FILE="conf/mime.types"29.-D SERVER_CONFIG_FILE="conf/httpd.conf"30.[root@zhuima_httpd ~]#2.2、apache版本信息隐藏∙客户端验证apahce的Response Headers头信息1.[root@zhuima_client ~]# curl -I http://192.168.xxx.xxx2.HTTP/1.1403Forbidden3.Date:Sat,19Jul201402:41:02 GMT4.Server:Apache/2.2.15(CentOS)5.Accept-Ranges: bytes6.Content-Length:50397.Connection: close8.Content-Type: text/html; charset=UTF-8∙在Apache配置文件中添加ServerTokens ProductOnly1.#ServerTokens OS # 注释掉改行2.Servertokens off # 添加这行屏蔽apache版本信息3.ServerSignature Off# 添加这行屏蔽系统信息重启httpd服务之后客户端再次验证1.[root@zhuima_client ~]# curl -I http://192.168.xxx.xxx2.HTTP/1.1403Forbidden3.Date:Sat,19Jul201402:47:21 GMT4.Server:Apache5.Accept-Ranges: bytes6.Content-Length:50397.Connection: close8.Content-Type: text/html; charset=UTF-83、略4、tengine版本信息查询及隐藏4.1、tengine版本信息查询这里为什么要把tengine单独拿出来说事呢,初装tengine的童鞋肯定会有点迷茫,为毛tengine会显示出那么多的系统版本信息,除此之外其他操作和nginx一样,这里仅说下nginx版本的隐藏相关显示的信息有:∙Server----->服务器名称∙tengine版本信息∙服务器端的时间有图为证:4.2、tengine版本信息隐藏∙在tengine配置文件中添加下面三项即可1.server_tag off;2.server_info off;3.server_tokens off;∙重启tengine服务再次进行验证5、tomcat版本信息查询及隐藏5.1、tomcat版本信息查询tomcat版本信息查询(新接手环境的时候很有必要查看的)1.[root@zhuima_tomcat ~]$ catalina.sh version2................................3.Server version:Apache Tomcat/7.0.424.Server built:Jul2201308:57:415.Server number:7.0.42.06.OS Name:Linux7.OS Version: 2.6.32-431.el6.x86_648.Architecture: amd649.JVM Version: 1.7.0_09-b0510.JVM Vendor:Oracle Corporation客户端验证tomcat版本信息5.2、tomcat版本信息隐藏隐藏tomcat版本信息▪到apache-tomcat安装目录下的lib子文件夹,找到catalina.jar这包,并进行解▪解压之后进度到org/catalina/apache/util/目录下,编辑ServerInfo.properties ▪vim /path/tomcat/lib/org/apache/catalina/util/ServerInfo.properties▪来张修改前后的对比图吧∙再次验证页面显示信息总结:∙新的环境中尽可能多用help指令查看老的环境的部署∙操作之前尽可能做的备份,要不然你懂得后果的∙最主要的还是要了解并掌握大多数常用服务,要不然也是干瞪眼∙本篇文章纯属扯淡,没啥技术含量∙打完收工。
Nginx配置⽂件详解/usr/local/nginx/├── conf # 这是Nginx所有的配置⽂件⽬录│├── fastcgi.conf # fastcgi相关参数的配置⽂件│├── fastcgi.conf.default # fastcgi默认的配置⽂件│├── fastcgi_params # fastcgi的参数⽂件│├── fastcgi_params.default # fastcgi的默认参数⽂件│├── koi-utf # 很少⽤到│├── koi-win│├── mime.types # 媒体类型配置⽂件│├── mime.types.default # 默认媒体类型配置⽂件│├──nginx.conf# 主配置⽂件│├── nginx.conf.default # 默认的nginx的主配置⽂件│├── scgi_params # scgi相关参数⽂件│├── scgi_params.default # scgi默认相关参数⽂件│├── uwsgi_params # uwsgi相关参数⽂件│├── uwsgi_params.default # uwsgi默认相关参数⽂件│└── win-utf[root@service conf]# cat nginx.conf#user nobody;worker_processes 1;#error_log logs/error.log;#error_log logs/error.log notice;#error_log logs/error.log info;#pid logs/nginx.pid;events {worker_connections 1024;}http {include mime.types;default_type application/octet-stream;#log_format main '$remote_addr - $remote_user [$time_local] "$request" '# '$status $body_bytes_sent "$http_referer" '# '"$http_user_agent" "$http_x_forwarded_for"';#access_log logs/access.log main;sendfile on;#tcp_nopush on;#keepalive_timeout 0;keepalive_timeout 65;#gzip on;server {listen 80;server_name localhost;#charset koi8-r;#access_log logs/host.access.log main;location / {root html;index index.html index.htm;}#error_page 404 /404.html;# redirect server error pages to the static page /50x.html#error_page 500 502 503 504 /50x.html;location = /50x.html {root html;}# proxy the PHP scripts to Apache listening on 127.0.0.1:80##location ~ \.php$ {# proxy_pass http://127.0.0.1;#}# pass the PHP scripts to FastCGI server listening on 127.0.0.1:9000##location ~ \.php$ {# root html;# fastcgi_pass 127.0.0.1:9000;# fastcgi_index index.php;# fastcgi_param SCRIPT_FILENAME /scripts$fastcgi_script_name;# include fastcgi_params;#}# deny access to .htaccess files, if Apache's document root# concurs with nginx's one##location ~ /\.ht {# deny all;#}}# another virtual host using mix of IP-, name-, and port-based configuration##server {# listen 8000;# listen somename:8080;# server_name somename alias another.alias;# location / {# root html;# index index.html index.htm;# }#}# HTTPS server##server {# listen 443 ssl;# server_name localhost;# ssl_certificate cert.pem;# ssl_certificate_key cert.key;# ssl_session_cache shared:SSL:1m;# ssl_session_timeout 5m;# ssl_ciphers HIGH:!aNULL:!MD5;# ssl_prefer_server_ciphers on;# location / {# root html;# index index.html index.htm;# }#}}... #全局块events { #events块...}http #http块{... #http全局块server #server块{... #server全局块location [PATTERN] #location块{...}location [PATTERN]{...}}server{...}... #http全局块}全局块:配置影响nginx全局的指令。
Nginx配置⽂件nginx.conf详解Nginx 总的配置⽂件位置 /usr/local/nginx/conf/nginx.confnginx 正则匹配⼀.正则表达式匹配,其中:1. ~ 为区分⼤⼩写匹配2. ~* 为不区分⼤⼩写匹配3. !~和!~*分别为区分⼤⼩写不匹配及不区分⼤⼩写不匹配⼆.⽂件及⽬录匹配,其中:1. -f和!-f⽤来判断是否存在⽂件2. -d和!-d⽤来判断是否存在⽬录3. -e和!-e⽤来判断是否存在⽂件或⽬录4. -x和!-x⽤来判断⽂件是否可执⾏三.rewrite指令的最后⼀项参数为flag标记,flag标记有:1. last 相当于apache⾥⾯的[L]标记,表⽰rewrite。
2. break本条规则匹配完成后,终⽌匹配,不再匹配后⾯的规则。
3. redirect 返回302临时重定向,浏览器地址会显⽰跳转后的URL地址。
4. permanent 返回301永久重定向,浏览器地址会显⽰跳转后的URL地址。
使⽤last和break实现URI重写,浏览器地址栏不变。
使⽤alias指令必须⽤last标记;使⽤proxy_pass指令时,需要使⽤break标记。
Last标记在本条rewrite规则执⾏完毕后,会对其所在server{......}标签重新发起请求break标记则在本条规则匹配完成后,终⽌匹配。
四.NginxRewrite 规则相关指令 1.break指令 使⽤环境:server,location,if; 该指令的作⽤是完成当前的规则集,不再处理rewrite指令。
2.if指令 使⽤环境:server,location 该指令⽤于检查⼀个条件是否符合,如果条件符合,则执⾏⼤括号内的语句。
If指令不⽀持嵌套,不⽀持多个条件&&和||处理。
3.return指令 语法:return code ; 使⽤环境:server,location,if; 该指令⽤于结束规则的执⾏并返回状态码给客户端。
NGINX服务器配置与优化指南第1章 NGINX基础概念与安装 (3)1.1 NGINX简介 (3)1.2 安装NGINX (3)1.2.1 在Debian/Ubuntu系统上安装 (3)1.2.2 在Red Hat/CentOS系统上安装 (3)1.2.3 在macOS上安装 (3)1.3 配置文件结构介绍 (4)第2章基本配置与启动 (4)2.1 配置语法规则 (4)2.2 配置指令概述 (5)2.3 启动、停止与重启NGINX (5)第3章虚拟主机配置 (6)3.1 基于IP的虚拟主机 (6)3.2 基于端口的虚拟主机 (6)3.3 基于域名的虚拟主机 (7)第4章 Location匹配规则 (8)4.1 location指令用法 (8)4.2 正则表达式匹配 (8)4.3 常用匹配规则案例 (9)第5章文件处理与缓存 (10)5.1 静态文件处理 (10)5.1.1 静态文件路径配置 (10)5.1.2 文件类型处理 (10)5.1.3 文件压缩 (10)5.1.4 expires缓存 (10)5.2 文件缓存配置 (10)5.2.1 开启open_file_cache (10)5.2.2 开启open_file_cache_errors (10)5.2.3 开启proxy_cache (10)5.3 expires指令使用 (11)5.3.1 expires指令参数 (11)5.3.2 expires配置示例 (11)第6章反向代理与负载均衡 (11)6.1 反向代理原理与配置 (11)6.1.1 反向代理概述 (11)6.1.2 反向代理的工作原理 (11)6.1.3 NGINX反向代理配置 (11)6.2 负载均衡策略 (12)6.2.1 轮询(Round Robin) (12)6.2.2 最少连接(Least Connections) (12)6.2.3 IP哈希(IP Hash) (12)6.2.4 加权负载均衡 (12)6.3 负载均衡的高级配置 (13)6.3.1 健康检查 (13)6.3.2 负载均衡器故障转移 (13)6.3.3 会话保持 (13)6.3.4 动态负载均衡 (13)第7章 SSL/TLS配置与优化 (13)7.1 SSL/TLS基础概念 (13)7.2 证书与私钥配置 (14)7.3 SSL优化与安全增强 (14)第8章功能优化与压力测试 (15)8.1 功能优化策略 (15)8.1.1 系统层面优化 (15)8.1.2 NGINX配置优化 (15)8.1.3 缓存策略优化 (16)8.2 压力测试工具介绍 (16)8.2.1 Apache Bench (ab) (16)8.2.2 YSlow (16)8.2.3 JMeter (16)8.2.4 LoadRunner (16)8.3 功能调优案例分析 (16)第9章安全性与防护 (17)9.1 常见攻击类型与防护策略 (17)9.1.1 DDoS攻击 (17)9.1.2 SQL注入攻击 (17)9.1.3 XSS攻击 (17)9.2 配置安全头部 (18)9.2.1 HTTP Strict Transport Security(HSTS) (18)9.2.2 Content Security Policy(CSP) (18)9.2.3 XContentTypeOptions (18)9.2.4 XFrameOptions (18)9.3 限制请求速率与连接数 (18)9.3.1 限制请求速率 (18)9.3.2 限制连接数 (19)第10章监控与故障排查 (19)10.1 监控工具与指标 (19)10.1.1 监控工具 (19)10.1.2 关键指标 (19)10.2 日志分析 (20)10.2.1 日志类型 (20)10.2.2 分析方法 (20)10.3 常见故障排查方法与技巧 (20)第1章 NGINX基础概念与安装1.1 NGINX简介NGINX(发音为“EngineX”)是一个高功能的HTTP和反向代理服务器,同时也用于邮件(IMAP/POP3/SMTP)代理服务器。
nginx编译安装之-.configure参数详解参考官⽅⽂档--with开头的,默认是禁⽤的(没启动的,想使⽤的话需要在编译的时候加上)--without开头的,默认是启⽤的(不想启⽤此模块时,可以在编译的时候加上这个参数)编译安装⽰例(从⽣产上贴下来的,nginx-1.16)./configure --prefix=/etc/nginx --conf-path=/etc/nginx/nginx.conf --error-log-path=/var/log/nginx/error.log --http-log-path=/var/log/nginx/access.log --pid-path=/var/run/nginx.pid --lock-path=/var/run/nginx.lock --user=nginx --group=nginx --with-http_ssl_module --with-http_v2_module --with-http_dav_module --with-http_stub_status_module --with-threads --with-file-aio--prefix= 指向安装⽬录。
--sbin-path= 指定执⾏程序⽂件存放位置。
--modules-path= 指定第三⽅模块的存放路径。
--conf-path= 指定配置⽂件存放位置。
--error-log-path= 指定错误⽇志存放位置。
--pid-path= 指定pid⽂件存放位置。
--lock-path= 指定lock⽂件存放位置。
--user= 指定程序运⾏时的⾮特权⽤户。
--group= 指定程序运⾏时的⾮特权⽤户组。
--builddir= 指向编译⽬录。
--with-rtsig_module 启⽤rtsig模块⽀持。
--with-select_module 启⽤select模块⽀持,⼀种轮询处理⽅式,不推荐在⾼并发环境中使⽤,禁⽤:--without-select_module。
一.准备工作系统:CentOS-6.5虚拟机:VMware111.工具1)gcc、gcc-c++、zlib、zlib-devel、openssl-1.0.1j.tar.gz、pcre-8.32.tar.gz、nginx-1.6.2.tar.gz、jdk-7u71-linux-x64.tar.gz、apache-tomcat-7.0.50.tar.gz2)推荐将需要安装的工具都放在一个文件夹中,解压缩后不要删除;2.安装安装前请将用户切换为root用户。
1)gcc、gcc-c++安装yum –y install gcc gcc-c++Tip: 判断是否已经安装gcc或gcc-c++命令:rpm –qa|grep gcc(gcc-c++)2)zlib、zlib-devel安装yum –y install zlib zlib-develTip: 判断是否安装命令同上3.pcre的安装解压缩:tar –zxvf pcre-8.36.tar.gz配置:./configure –prefix=/usr/local/pcre编译:make安装:make install默认安装在/usr/local/pcre4.openssl的安装解压缩:tar –zxvf openssl-1.0.1j.tar.gz配置:./config编译:make安装:make installTip:在make&make install时请耐心等待,openssl默认安装在/usr/local/ssl5.nginx的安装nginx安装前要先安装OpenSSL✓解压缩:tar –zxvf nginx-1.6.2.tar.gz✓配置:./configure--with-http_stub_status_module --with-http_ssl_module --with-openssl=/home/zhao/openssl-1.0.1j --with-http_gzip_static_module --with-pcre=/home/zhao/pcre-8.36Tip:--with-http_stub_status_module :启动nginx Status功能,用来监控Nginx的当前状态--with-http_ssl_module:支持SSL--with-openssl=/home/zhao/openssl-1.0.1j:启动SSL(这里制定源码目录,而不是编译后的安装目录)--with-pcre=/home/zhao/pcre-8.36:启用正则表达式(这里制定源码目录,而不是编译后的安装目录)--with-http_gzip_static_module:启用静态压缩--with-http_memcached_module:启用memcache缓存--with-http_rewrite_module:启用支持URL重写(需要安装pcre,否则configure时报错)✓编译:(编译时间比较长,请耐心等待)make✓安装:make installnginx默认安装路径/usr/local/nginx,以下的配置示例都使用该地址。