手机软件测试工具Robotium使用
- 格式:ppt
- 大小:1.20 MB
- 文档页数:24
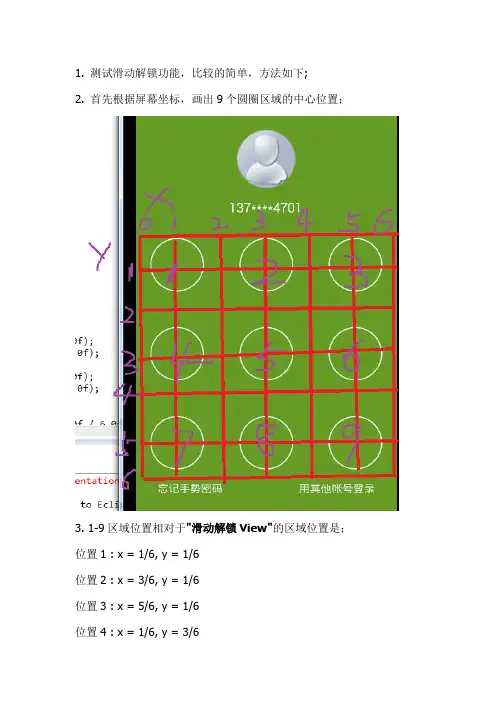
1. 测试滑动解锁功能,比较的简单,方法如下;2. 首先根据屏幕坐标,画出9个圆圈区域的中心位置;3. 1-9区域位置相对于"滑动解锁View"的区域位置是;位置1 : x = 1/6, y = 1/6位置2 : x = 3/6, y = 1/6位置3 : x = 5/6, y = 1/6位置4 : x = 1/6, y = 3/6位置5 : x = 3/6, y = 3/6位置6 : x = 5/6, y = 3/6位置7 : x = 1/6, y = 5/6位置8 : x = 3/6, y = 5/6位置9 : x = 5/6, y = 5/6上面讲了这么多了,来实现一个具体例子吧4. 要实现下图的滑动解锁,就让我们来写代码;5. 创建一个viewFetcher类,具体使用函数,touchLock(String viewID, int ... step )package com.example.abc.test;import java.util.ArrayList;import com.robotium.solo.*;import android.app.Activity;import android.app.Instrumentation; import android.os.SystemClock; import android.util.Log;import android.view.MotionEvent; import android.view.View;import android.view.ViewGroup; import android.widget.EditText; import android.widget.NumberPicker;public class ViewFetcher {Solo solo;private final Instrumentation inst;public ViewFetcher(Solo solo, Instrumentation inst) {this.solo = solo;this.inst = inst;}public View getChildView(View view, int id, String viewClass) { View view1 = null;ArrayList<View> viewList = new ArrayList<View>();if(view != null) {ViewGroup viewGroup = (ViewGroup) view;for(int i = 0; i< viewGroup.getChildCount(); i++) {final View child = viewGroup.getChildAt(i);String temp = child.getClass().getName().toString();temp = temp.substring(stIndexOf(".") +1, temp.length());if(temp.equals(viewClass)) {viewList.add(child);}}if(id>viewList.size()-1) {return view1;} else {view1 = viewList.get(id);}}return view1;}public View getViewById(String id) {View view = null;if( id == "") {return view;}try {Activity act = solo.getCurrentActivity();// 获取当前Activityint id1 = act.getResources().getIdentifier(id, "id",solo.getCurrentActivity().getPackageName());// 获取idview = solo.getView(id1);// 得到View} catch (Exception ex) {Log.e("Exception", ex.getMessage());}return view;}public boolean clickById(String id) {View view = getViewById(id);if( view == null) {return false;}solo.clickOnView(view);return true;}public View getChildViewByID(View view, String ID) {ArrayList<View> viewList = new ArrayList<View>();viewList = solo.getViews(view);for (int i = 0; i < viewList.size(); i++) {final View view1 = viewList.get(i);String temp = view1.toString();int index = stIndexOf("app:id/");if (index > 0) {String id = temp.substring(index + 7, temp.length() - 1);if (ID.equals(id)) {return view1;}}}return null;}public void enterTextById(String id, String text) { solo.enterText((EditText) getViewById(id), text); }public void typeTextById(String id, String text) { solo.typeText((EditText) getViewById(id), text);}public void clickViewByXY(View view) {int[] xyLocation = new int[2];view.getLocationOnScreen(xyLocation);final int viewWidth = view.getWidth();final int viewHeight = view.getHeight();final float x = xyLocation[0] + (viewWidth / 2.0f);float y = xyLocation[1] + (viewHeight / 2.0f);solo.clickOnScreen(x, y);}// area = 0 , 点击减少天数// area = 1 , 点击增加天数public void clickNumberPicker(View view, int area) {int[] xyLocation = new int[2];view.getLocationOnScreen(xyLocation);int viewWidth = view.getWidth();int viewHeight = view.getHeight();float x = xyLocation[0] + (viewWidth / 2.0f);float y ;if(area == 0) {y = xyLocation[1] + (viewHeight / 6.0f);} else if (area == 1) {y = xyLocation[1] + (viewHeight / 6.0f * 5.0f);} else {return;}solo.clickOnScreen(x, y);}public void touchLock(String viewID, int ... step ) { View v = getViewById(viewID);touchLock(v, step);}//滑动解锁中对应的点位//****1****2****3****//****4****5****6****//****7****8****9****public void touchLock(View view, int ... step) { //判断一下,滑动步数,至少要2步if(step.length <2) {return;}for(int i=0; i<step.length; i++) {//如果滑动步骤里出现不是对应9宫格的点位,直接退出if(step[i] < 1 || step[i] > 9) {return;}//把每个移动点位-1,对应X Y的数组;step[i] = step[i] -1;}int[] xyLocation = new int[2];view.getLocationOnScreen(xyLocation);int viewWidth = view.getWidth();int viewHeight = view.getHeight();float[] xPoint = new float[9];float[] yPoint = new float[9];//计算滑动解锁页面中,9个圈的中心位置。
Robotium⾃动化测试框架实⽤教程(图)⼀、简介Robotium是⼀款国外的Android⾃动化测试框架,主要针对Android平台的应⽤进⾏⿊盒⾃动化测试,它提供了模拟各种⼿势操作(点击、长按、滑动等)、查找和断⾔机制的API,能够对各种控件进⾏操作。
Robotium结合Android官⽅提供的测试框架达到对应⽤程序进⾏⾃动化的测试。
另外,Robotium 4.0版本已经⽀持对WebView的操作。
Robotium 对Activity,Dialog,Toast,Menu 都是⽀持的。
⼆、相关下载源码获取:/p/robotium/源API⽂档:/svn/doc/index.htmlrobotium5.1下载和最新API⽂档:/s/1bnlO8MF官⽅例⼦记事本:/s/1qWLVL72重签名⼯具:/s/1i3H0tKD三、常⽤语法1.等待timeout毫秒⼀个名字为name的Activity启动: waitForActivity(String name, int timeout)实例:assertTrue("⽆法启动启动类", solo.waitForActivity ("MainActivity", 30000));2.Robotium将睡眠设置的毫秒数:sleep(int time)实例:solo.sleep(5000)3.清空EditText的内容:clearEditText(android.widget.EditText editText)实例:solo.clearEditText((EditText)solo.getView ("edtInsertName"))4.根据按钮上的⽂字点击按钮:clickOnButton(String text)实例:solo.clickOnButton("^绿⾊$");5.根据⽂字点击控件:clickOnText(String text)实例:solo.clickOnText("控件上显⽰⽂字");6.输⼊内容:enterText(android.widget.EditText editText, String text)solo.enterText((EditText)solo.getView("edtInsertName"), "说些什么好呢?");7.返回:goBack()8.截屏并保存为设置的名字:takeScreenshot(String name)默认保存在: /sdcard/Robotium-Screenshots/9.解锁屏幕:unlockScreen()四、实战-针对APK进⾏的测试被测试项⽬为,下⾯是实战的具体步骤1. 配置ANDROID_HOM E为android sdk的安卓⽬录,例如:D:\android-sdk2. 在path下添加这两个:%ANDROID_HOME%\tools;%ANDROID_HOME%\platform-tools;3. 需要把APK重新签名,因为robotium要求被测应⽤和测试代码要有⼀致的签名, 所以我们需要把下载到的apk,通过re-sign.jar来产⽣debug key的apk,这个重新⽣成的apk就会跟测试项⽬签名⼀致了4. 下载完后,需要配置ANDROID_HOME,就是安卓SDK的位置,然后把APK拉到图标上,就会⾃动⽣成⼀个debug key的apk,如果⽆法直接单击re-sign.jar运⾏,需要切换到放置该jar⽂件的⽬录,cmd执⾏java -jar re-sign.jar产⽣新apk的过程中会弹出⼀个信息框,记得截下图,因为⾥⾯有两个信息我们等会的代码中需要⽤到5. 安装产⽣的apk。
robot framework使用方法Robot Framework使用方法1. 简介Robot Framework是一个开源的自动化测试框架,使用关键字驱动的方法编写测试用例。
它具有简单易学、灵活可扩展和跨平台等特点,被广泛用于软件测试领域。
2. 安装要开始使用Robot Framework,首先需要进行安装。
以下是安装的步骤:1.安装Python:Robot Framework是基于Python开发的,所以需要先安装Python解释器。
2.安装Robot Framework:可以通过pip命令安装RobotFramework,命令为pip install robotframework。
3. 编写测试用例在Robot Framework中,测试用例是通过关键字驱动的方式编写的。
以下是编写测试用例的基本步骤:1.创建测试套件:使用*** Test Cases ***关键字定义一个测试套件,可以包含多个测试用例。
2.添加测试用例:在测试套件中,使用*** Test Case ***关键字定义一个测试用例,然后在下一行写下测试用例的名称。
3.编写关键字:在测试用例中,使用关键字执行不同的操作或断言。
可以使用内置的关键字,也可以自定义关键字。
4.设置变量:使用*** Variables ***关键字定义变量,可以在测试用例中使用这些变量。
4. 运行测试编写完测试用例后,可以通过以下步骤来运行测试:1.在终端中切换到测试套件所在的目录。
2.运行测试套件:使用robot命令,后面跟上测试套件的文件名。
例如,robot。
3.查看测试结果:测试运行完成后,会在终端中显示测试结果摘要,包括测试通过的用例数、失败的用例数等信息。
5. 关键字库关键字库是Robot Framework的一个重要概念,它包含了一组关键字的实现。
可以通过以下方法来使用关键字库:1.导入关键字库:使用Library关键字导入关键字库。
例如,Library ExampleLibrary。
目录第一章概述3 1ROBOGUIDE简介3 2软件安装32.1ROBOGUIDE V8L安装说明32.2新建Work cell 7第二章界面介绍和基本操作15 1界面介绍15 2常用工具条功能介绍16第三章添加设备21 1周边设备的添加211.1Parts 211.2Fixtures 231.3Obstacles 251.4Workers 251.5Machines 262机器人相关设备的添加272.1机器人的添加和更改272.2机器人末端工具的添加282.3机器人DRESSOUT的添加30第四章仿真调试及视频录制32 1Roboguide中的示教盒(TP)32 2Roboguide中示教机器人35 3Roboguide仿真软件中特有的模拟程序(Simulation Program)36 4仿真视频的录制384.1功能按钮394.2Simulation Rate 394.3Display 394.4Control 404.5Collection 404.6AVI Settings 错误!未定义书签。
第一章 概述1ROBOGUIDE简介ROBOGUIDE是发那科机器人公司提供的一款仿真软件,它是围绕一个离线的三维世界进行模拟,在这个三维世界中模拟现实中的机器人和周边设备的布局,通过其中的TP(示教器)进行示教、编程,进一步来模拟它的运动轨迹。
通过这样的模拟可以验证方案的可行性同时获得准确的机器人动作节拍(运动周期时间)。
ROBOGUIDE包括搬运、弧焊、喷涂和点焊等其他子模块。
ROBOGUIDE的仿真环境界面是传统的WINDOWS界面,由菜单栏,工具栏,状态栏等组成。
使用本手册需要对机器人本体及机器人调试有一定基础。
2软件安装2.1ROBOGUIDE 安装说明打开···\Roboguide,双击文件夹下的setup.exe。
首先会弹出如下图的对话框:在安装ROBOGUIDE 前,需要先安装图中所列的组件,点击Install以安装。
robotium工作原理Robotium是一种用于Android应用测试的自动化测试框架,它的工作原理是通过模拟用户在应用界面上的操作来进行自动化测试。
本文将从Robotium的基本原理、工作流程和实现方式等方面介绍其工作原理。
Robotium基于JUnit框架,通过继承TestCase类来进行测试用例的编写。
它提供了一系列的API方法,可以模拟用户在应用界面上的各种操作,如点击按钮、输入文本、滑动屏幕等。
这些操作是通过调用Android系统提供的UI自动化框架Instrumentation来实现的。
在测试开始之前,需要先安装应用程序,并启动测试Activity。
接着,测试框架会根据编写的测试用例代码,模拟用户的操作来执行测试。
测试用例可以通过查找界面上的控件,如按钮、文本框等,然后调用相应的操作方法来进行操作。
例如,可以通过调用clickOnButton()方法来模拟点击按钮的操作。
在执行测试用例时,Robotium会自动等待应用界面加载完毕后再进行操作,以保证测试的准确性。
同时,它还提供了一些断言方法,用于判断测试结果是否符合预期。
例如,可以使用assertEqual()方法来判断两个字符串是否相等。
除了模拟用户操作外,Robotium还可以获取应用界面上的信息,如控件的文本、大小、位置等。
这些信息可以用于验证测试结果或者辅助测试用例的编写。
例如,可以通过getText()方法获取文本框中的文本内容,然后进行判断或者进一步操作。
在整个测试过程中,Robotium会记录用户的操作和应用界面的状态,并生成相应的日志和报告。
这些日志和报告可以帮助开发人员定位问题,并提供测试结果的可视化展示。
此外,Robotium还支持批量执行测试用例,可以节省测试时间并提高测试效率。
总结来说,Robotium的工作原理是通过模拟用户在应用界面上的操作来进行自动化测试。
它基于JUnit框架,通过继承TestCase类来编写测试用例,使用Android系统提供的UI自动化框架Instrumentation来实现操作的模拟。
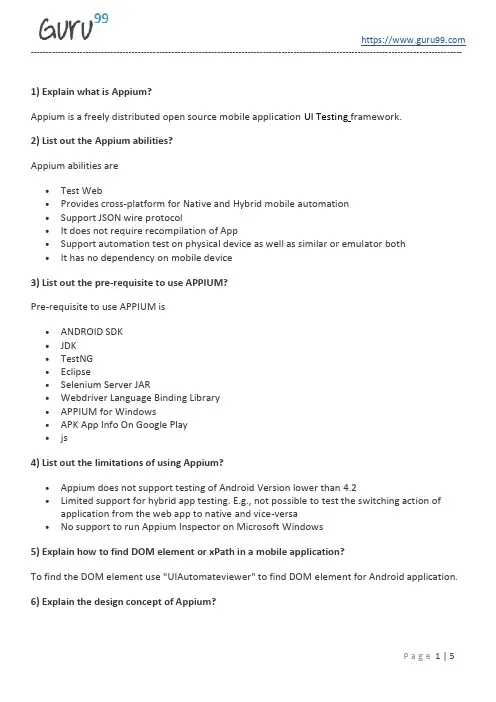
1) Explain what is Appium?Appium is a freely distributed open source mobile application UI Testing framework.2) List out the Appium abilities?Appium abilities are•Test Web•Provides cross-platform for Native and Hybrid mobile automation•Support JSON wire protocol•It does not require recompilation of App•Support automation test on physical device as well as similar or emulator both•It has no dependency on mobile device3) List out the pre-requisite to use APPIUM?Pre-requisite to use APPIUM is•ANDROID SDK•JDK•TestNG•Eclipse•Selenium Server JAR•Webdriver Language Binding Library•APPIUM for Windows•APK App Info On Google Play•js4) List out the limitations of using Appium?•Appium does not support testing of Android Version lower than 4.2•Limited support for hybrid app testing. E.g., not possible to test the switching action of application from the web app to native and vice-versa•No support to run Appium Inspector on Microsoft Windows5) Explain how to find DOM element or xPath in a mobile application?To find the DOM element use "UIAutomateviewer" to find DOM element for Android application.6) Explain the design concept of Appium?•Appium is an "HTTP Server" written using Node.js platform and drives iOS and Android session using Webdriver JSON wire protocol. Hence, before initializing the Appium Server, Node.js must be pre-installed on the system•When Appium is downloaded and installed, then a server is setup on our machine that exposes a REST API•It receives connection and command request from the client and execute that command on mobile devices (Android / iOS)•It responds back with HTTP responses. Again, to execute this request, it uses the mobile test automation frameworks to drive the user interface of the apps. Framework like o Apple Instruments for iOS (Instruments are available only in Xcode 3.0 or later with OS X v10.5 and later)o Google UIAutomator for Android API level 16 or highero Selendroid for Android API level 15 or less7) What language does Appium support?Appium support any language that support HTTP request like Java, JavaScript with Node.js, Python, Ruby, PHP, Perl, etc.8) Explain the pros and cons of Appium?Pros:•For programmer irrespective of the platform, he is automating ( Android or iOS) all the complexities will remain under single Appium server•It opens the door to cross-platform mobile testing which means the same test would work on multiple platforms•Appium does not require extra components in your App to make it automation friendly •It can automate Hybrid, Web and Native mobile applicationsCons:•Running scripts on multiple iOS simulators at the same time is possible with Appium•It uses UIAutomator for Android Automation which supports only Android SDK platform, API 16 or higher and to support the older API's they have used another open source library called Selendroid9) Explain what is APPIUM INSPECTOR?Similar to Selenium IDE record and Playback tool, Appium has an "Inspector" to record and playback. It records and plays native application behavior by inspecting DOM and generates the test scripts in any desired language. However, Appium Inspector does not support Windows and use UIAutomator viewer in its option.10) Mention what are the basic requirement for writing Appium tests?For writing Appium tests you require,•Driver Client: Appium drives mobile applications as though it were a user. Using a client library you write your Appium tests which wrap your test steps and sends to the Appiumserver over HTTP.•Appium Session: You have to first initialize a session, as such Appium test takes place in the session. Once the Automation is done for one session, it can be ended and wait for another session•Desired Capabilities: To initialize an Appium session you need to define certain parameters known as "desired capabilities" like PlatformName, PlatformVersion, Device Name and so on. It specifies the kind of automation one requires from the Appium server.•Driver Commands: You can write your test steps using a large and expressive vocabulary of commands.11) Mention what are the possible errors one might encounter using Appium?The possible errors one might face in Appium includes•Error 1: The following desired capabilities are needed but not provided: Device Name, platformName•Error 2: Could not find adb. Please set the ANDROID_HOME environment variable with the Android SDK root directory path•Error 3: openqa.selenium.SessionNotCreatedException: A new session could not be created •Error 4: How to find DOM element or XPath in a mobile application?12) Do you need a server machine to run tests on Appium?No, you don't need server machine to run tests on Appium. Appium facilitates a 2-tier architecture where a test machine connects to a test server running Appium and automating the whole thing. You can have Appium running on the same machine where your test runs.13) Is it possible to interact with my apps using Javascript while I am testing with Appium?Yes, it is possible to interact with App while using Javascript. When the commands run on Appium, the server will send the script to your app wrapped into an anonymous function to be executed.14) Mention what are the most difficult scenarios to test with Appium?The most difficult scenario to test with Appium is data exchange.15) While using Appium can I run my tests in a multithreaded environment?Yes, you can run the test in a multithreaded environment but you have to ensure that no more than one test runs at the same time against the same Appium server.16) In Android, do you need an app's .apk to automate using Appium or you also need app in my workspace?In Android, you only need .apk file to automate using Appium.17) Explain what is Appium package master? How to create package?Appium package master is a set of tools manage and create appium packages. For example to create package you can use the code# using es7/babe1Gulp create-package –n <package-name>#regular es5Gulp create-package ---nobabe1 –n <package-name>The package will be generated in the out/<package-name>18) Explain how test frameworks are supported by Appium?Appium does not support test framework as such there is no need to support them. Appium can be used with any frameworks you want.Guru99 Provides FREE ONLINE TUTORIAL on Various courses like。

手机兼容性测试方案一、引言手机兼容性测试是为了保证移动应用程序能够在不同的手机设备上正常运行而进行的一项重要测试。
由于不同的手机设备具有不同的操作系统、硬件配置和软件环境,移动应用程序在不同的设备上可能会出现兼容性问题。
因此,进行兼容性测试可以发现并解决这些问题,确保移动应用程序可以在各种手机设备上良好运行。
本文将介绍手机兼容性测试的方案,包括测试目标、测试环境、测试工具、测试用例设计等内容,以帮助测试人员更好地进行手机兼容性测试。
二、测试目标1.确保移动应用程序在主流手机品牌和型号上正常运行;2.发现并解决在特定手机设备上出现的兼容性问题;3.确保移动应用程序在不同的操作系统版本上正常运行;4.验证移动应用程序与手机设备的各种硬件功能的兼容性,如摄像头、GPS、加速度计等;5.确保移动应用程序在各种网络环境下能够正常运行。
三、测试环境1.硬件环境:测试人员需要准备一台或多台具有不同品牌和型号的手机设备,以覆盖主流手机品牌和型号。
同时,还需要准备一台或多台电脑作为测试环境的控制终端,用于远程控制手机设备。
2.软件环境:测试人员需要在测试手机上安装测试工具和测试应用程序,并配置相应的测试环境。
测试工具可以是第三方兼容性测试工具,也可以是自行开发的测试工具。
四、测试工具2. Appium:是一款开源的自动化测试框架,用于测试移动应用程序的兼容性。
3. MonkeyRunner:是由Google官方提供的一款命令行工具,用于测试Android应用程序的兼容性。
4. Selendroid:是一款开源的自动化测试框架,用于测试Android 应用程序的兼容性。
5. Robotium:是一款开源的自动化测试框架,用于测试Android应用程序的兼容性。
以上是一些常用的手机兼容性测试工具,测试人员可以根据具体的测试需求选择合适的工具进行测试。
五、测试用例设计1.硬件功能测试:测试移动应用程序与手机设备的各种硬件功能的兼容性,如摄像头、GPS、加速度计等。

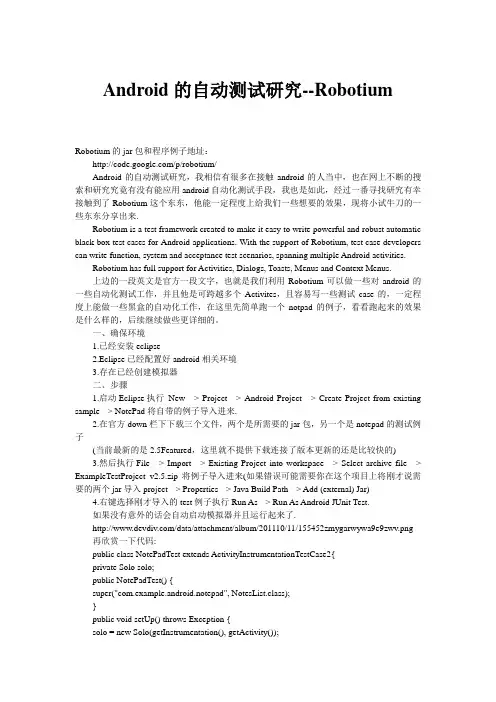
Android的自动测试研究--RobotiumRobotium的jar包和程序例子地址:/p/robotium/Android的自动测试研究,我相信有很多在接触android的人当中,也在网上不断的搜索和研究究竟有没有能应用android自动化测试手段,我也是如此,经过一番寻找研究有幸接触到了Robotium这个东东,他能一定程度上给我们一些想要的效果,现将小试牛刀的一些东东分享出来.Robotium is a test framework created to make it easy to write powerful and robust automatic black-box test cases for Android applications. With the support of Robotium, test case developers can write function, system and acceptance test scenarios, spanning multiple Android activities.Robotium has full support for Activities, Dialogs, Toasts, Menus and Context Menus.上边的一段英文是官方一段文字,也就是我们利用Robotium可以做一些对android的一些自动化测试工作,并且他是可跨越多个Activites,且容易写一些测试case的,一定程度上能做一些黑盒的自动化工作,在这里先简单跑一个notpad的例子,看看跑起来的效果是什么样的,后续继续做些更详细的。
一、确保环境1.已经安装eclipse2.Eclipse已经配置好android相关环境3.存在已经创建模拟器二、步骤1.启动Eclipse执行New --> Project --> Android Project --> Create Project from existing sample --> NotePad将自带的例子导入进来.2.在官方down栏下下载三个文件,两个是所需要的jar包,另一个是notepad的测试例子(当前最新的是2.5Featured,这里就不提供下载连接了版本更新的还是比较快的)3.然后执行File --> Import --> Existing Project into workspace --> Select archive file --> ExampleTestProject_v2.5.zip将例子导入进来(如果错误可能需要你在这个项目上将刚才说需要的两个jar导入project --> Properties --> Java Build Path --> Add (external) Jar)4.右键选择刚才导入的test例子执行Run As --> Run As Android JUnit Test.如果没有意外的话会自动启动模拟器并且运行起来了./data/attachment/album/201110/11/155452zmygarwywa9e9zwv.png 再欣赏一下代码:public class NotePadTest extends ActivityInstrumentationTestCase2{private Solo solo;public NotePadTest() {super("com.example.android.notepad", NotesList.class);}public void setUp() throws Exception {solo = new Solo(getInstrumentation(), getActivity());}@Smokepublic void testAddNote() throws Exception {solo.clickOnMenuItem("Add note");//Assert that NoteEditor activity is openedsolo.assertCurrentActivity("Expected NoteEditor activity", "NoteEditor"); //In text field 0, add Note 1solo.enterText(0, "Note 1");solo.goBack();//Clicks on menu itemsolo.clickOnMenuItem("Add note");//In text field 0, add Note 2solo.enterText(0, "Note 2");//Go back to first activity named "NotesList"solo.goBackToActivity("NotesList");// solo.boolean expected = true;boolean actual = solo.searchText("Note 1") && solo.searchText("Note 2"); //Assert that Note 1 & Note 2 are foundassertEquals("Note 1 and/or Note 2 are not found", expected, actual);}@Smokepublic void testEditNote() throws Exception {// Click on the second list linesolo.clickInList(2);// Change orientation of activitysolo.setActivityOrientation(NDSCAPE);// Change titlesolo.clickOnMenuItem("Edit title");//In first text field (0), add testsolo.enterText(0, " test");solo.goBackToActivity("NotesList");boolean expected = true;// (Regexp) case insensitiveboolean actual = solo.searchText("(?i).*?note 1 test");//Assert that Note 1 test is foundassertEquals("Note 1 test is not found", expected, actual);}@Smokepublic void testRemoveNote() throws Exception {//(Regexp) case insensitive/text that contains "test"solo.clickOnText("(?i).*?test.*");//Delete Note 1 testsolo.clickOnMenuItem("Delete");//Note 1 test & Note 2 should not be foundboolean expected = false;boolean actual = solo.searchText("Note 1 test");//Assert that Note 1 test is not foundassertEquals("Note 1 Test is found", expected, actual);solo.clickLongOnText("Note 2");//Clicks on Delete in the context menusolo.clickOnText("(?i).*?Delete.*");actual = solo.searchText("Note 2");//Assert that Note 2 is not foundassertEquals("Note 2 is found", expected, actual);}@Overridepublic void tearDown() throws Exception {try {//Robotium will finish all the activities that have been opened solo.finalize();} catch (Throwable e) {e.printStackTrace();}getActivity().finish();super.tearDown();}}。

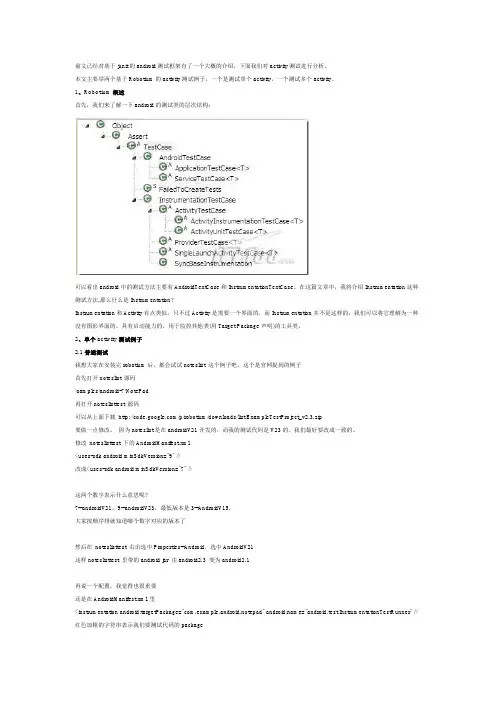
前文已经对基于junit的android测试框架有了一个大概的介绍,下面我们对activity测试进行分析。
本文主要举两个基于Robotium的activity测试例子,一个是测试单个activity,一个测试多个activity。
1、Robotium概述首先,我们来了解一下android的测试类的层次结构:可以看出android中的测试方法主要有AndroidTextCase和InstrumentationTextCase。
在这篇文章中,我将介绍Instrumentation这种测试方法,那么什么是Instrumentation?Instrumentation和Activity有点类似,只不过Activity是需要一个界面的,而Instrumentation并不是这样的,我们可以将它理解为一种没有图形界面的,具有启动能力的,用于监控其他类(用Target Package声明)的工具类。
2、单个activity测试例子2.1普通测试我想大家在安装完robotium后,都会试试noteslist 这个例子吧。
这个是官网提到的例子首先打开noteslist 源码\samples\android-7\NotePad再打开noteslisttest 源码可以从上面下载/p/robotium/downloads/list/ExampleTestProject_v2.3.zip要做一点修改。
因为noteslist是在androidV21开发的,而我的测试代码是V23的。
我们最好要改成一致的。
修改noteslisttest 下的AndroidManifest.xml<uses-sdk android:minSdkVersion="9" />改成<uses-sdk android:minSdkVersion="7" />这两个数字表示什么意思呢?7--androidV21,9--androidV23,最低版本是3--AndroidV15.大家按顺序排就知道哪个数字对应的版本了然后在noteslisttest 右击选中Properties--Android,选中AndroidV21这样noteslisttest 里带的android jar 由android2.3 变为android2.1再说一个配置,我觉得也很重要还是在AndroidManifest.xml 里<instrumentation android:targetPackage="com.example.android.notepad" android:name="android.test.InstrumentationTestRunner" /> 红色加粗的字符串表示我们要测试代码的package这是我们第一个case,主要目的是测试添加文本的功能clickOnMenuItem(String)功能是点击Menu按钮,选择文本描述为String的菜单,如我们的例子是"Add note"assertCurrentActivity(String message,String name)这个是判断当前的activity是否和我预期的一致message是描述性的文字name是指activity的名字关于如何知道activity 名字,我找了半天的文档,目前的方法是得看源码中的AndroidManifest.xml--Application label--Application Nodes,在那里我们可以看到所有的activity的nameenterText(int index,string text)index用来标识写到哪个EditText中。
目录第一章概述3 1ROBOGUIDE简介3 2软件安装32.1ROBOGUIDE V8L安装说明32.2新建Work cell 7第二章界面介绍和基本操作15 1界面介绍15 2常用工具条功能介绍16第三章添加设备21 1周边设备的添加211.1Parts 211.2Fixtures 231.3Obstacles 251.4Workers 251.5Machines 262机器人相关设备的添加272.1机器人的添加和更改272.2机器人末端工具的添加282.3机器人DRESSOUT的添加30第四章仿真调试及视频录制32 1Roboguide中的示教盒(TP)32 2Roboguide中示教机器人35 3Roboguide仿真软件中特有的模拟程序(Simulation Program)36 4仿真视频的录制384.1功能按钮394.2Simulation Rate 394.3Display 394.4Control 404.5Collection 404.6AVI Settings 错误!未定义书签。
第一章 概述1ROBOGUIDE简介ROBOGUIDE是发那科机器人公司提供的一款仿真软件,它是围绕一个离线的三维世界进行模拟,在这个三维世界中模拟现实中的机器人和周边设备的布局,通过其中的TP(示教器)进行示教、编程,进一步来模拟它的运动轨迹。
通过这样的模拟可以验证方案的可行性同时获得准确的机器人动作节拍(运动周期时间)。
ROBOGUIDE包括搬运、弧焊、喷涂和点焊等其他子模块。
ROBOGUIDE的仿真环境界面是传统的WINDOWS界面,由菜单栏,工具栏,状态栏等组成。
使用本手册需要对机器人本体及机器人调试有一定基础。
2软件安装2.1ROBOGUIDE 安装说明打开···\Roboguide,双击文件夹下的setup.exe。
首先会弹出如下图的对话框:在安装ROBOGUIDE 前,需要先安装图中所列的组件,点击Install以安装。
921 Android测试的原理介绍Android常用的自动化测试工具框架:Monkey,MonkeyRunner,UIAutomator,Robotium,Appium,Monkey Talk.Android常用的测试框架如图1所示。
2 测试要求为了实现对Robotium的详细介绍,本文会结合移动端QQ实时聊天工具进行测试,包括登录、聊天、语音等方面的内容。
研究过程中所采用的主要指标包含了以下几点:(1)启动时延,它可以来确认应用程序加载过程中所消耗的时间。
(2)输入时间,用自动化测试工具传到登录界面并输入账号和密码所用的时间。
(3)应用等待时间,即用户在登录成功后进行任意功能所消耗的时间。
(4)网络响应时间,在用户进入聊天发送或语音请求后到达对方的响应时间。
(5)CPU占用百分比。
当Mobile QQ在运行过程中所占据的CPU峰值。
(6)内在占用百分比。
当Mobile QQ在运行过程中所占据的内存数值。
(7)产生流量,运行操作时产生的下行流量。
总的来说,测试中会依据上述步骤进行至少60次的测试操作,最终将其结果保留到相应文件中,这样不仅可以有效了解Mobile QQ的运行稳定性,也能为后续开发者的持续改善与优化提供一些新的思路。
3 测试中的准备工作3.1 签名工具需要测试的程序会以APK文件的形式进行,其签名为re-sign.Jar,而自动化测试工具Robotium的使用需要将测试程序与被测试程序之间的签名保持一致,因此,在测试准备工作中需要对被测试的程序签名进行修改。
当签名被修改之后会形成一项新的APK文件,为后续的测试进行提供支持。
3.2 搭建测试环境在实施测试的过程中,搭建测试环境是其操作准备工作中的主要内容。
本研究中测试环境主要是对JDK以及Android SDK开发工具的安装,确保其运行的稳定性。
测试过程中使用的开发包为是robotium-solo-5.0.1.jar,它是一项能够有效通过控件获取来模拟用户操作的软件,这其中包含了输入、滑动、点击等内容。
[Android] Robotium手机自动化测试(仅需apk安装包版)——环境搭建Robotium的手机自动化测试,很多都是利用app源代码里的Id定义来开发自动化脚本。
而在我开始要为项目中的app写自动化测试脚本的时候,开发的环境还很不稳定,app也还处于开发的状态中,而且,在需要自己搭建Android整个开发环境的时候,也遇到许多需要耗费很多时间去解决的开发问题。
因此,我觉得,在这种情况下,如果自己的自动化脚本环境能和开发完全独立,那么,应该可以更好地展开自动化脚本的开发。
所以,在网上一番探索后,选择了只需要apk安装包的方法。
当然,这样也会遇到问题,比如,在开发还没有完全结束前,app的功能会随时发生变化,而在原有基础上开发好的自动化脚本也就需要很多的rework。
但是,我希望的是,在app的功能还没有完全稳定前,可以根据现有的app,把整个自动化开发框架搭好,此后,便可以在这个框架的基础上,很轻松地去改一些细微的功能变动部分的自动化脚本。
所以,从测试的角度上看,仅需要apk安装包的方式,主要有以下几个优点:1. 测试人员无需在Eclipse中搭建复杂的Android开发环境(基本的Android SDK和Java 环境还是必需的。
)2. 在app还没开发完全的情况下,测试人员可以根据大致的app功能,把自动化开发框架建好,以利于后期对具体功能展开自动化脚本的开发。
3. 在进行自动化测试时,即使不用到持续集成,也可以较为方便地测试迭代中的app——只需要在测试设备上(模拟机或者手机)安装最新的app即可。
下面就来介绍下,这种仅需apk安装包版的Robotium手机自动化开发环境的准备。
1. 从开发人员处获取apk安装包/或者Git等源代码控制工具中获取源代码在我的项目中,是开发的源代码是使用MVN作为项目管理工具,所以,只需要打开命令提示符(cmd),然后进入app的源代码,敲入mvn install,即可得到apk文件例如:1) cd .../TestApp2) mvn install3) Build Success后,在TestApp目录下找到target目录,在target目录中,即可找到最新生成的apk文件。