1296-9410-02 Platewash_洗板机操作说明
- 格式:docx
- 大小:1.32 MB
- 文档页数:74


31.Activate thesetting mode for signal volume•1 step, the Press and +1 step, Set to •Button signalsInformation signalsSet the 1 stepSet the volume**you may need toselect the function several times.2.Set thevolume for ...skippage 10Detergent for main wash,water softener, bleach, stain remover fabric softener, starchdoor handleService flap**If the active Additional functions and options buttons Press WashingCancelling the programmeProgrammes at high temperatures:–Cool washing:–Press Programme selector for switching the machine on and off and for selecting the programme. Can be turned in either direction.All buttons are sensitive and need only to be touched lightly.Press and hold the option button for an automatic run8consumption consumptionTake care not to trap items of laundry between the washing machine door and the rubber seal.Laundry with varying degrees of soilinglight SoakingPour soaking agent/detergent into compartment selector to Starching Starching is possible in all wash programmes if liquid starch is used. Pour starch into the partment in accordance with the manufacturer's instructions (rinse first if necessary).10Cleaning the detergent drawer ...... if it contains detergent or fabric softener residues.ʑʑThis should not be necessary if the correct detergent dosage has been used. If it is necessary, however, proceed according to the descaling agent manufacturer's instructions. Suitable descalers can be obtained via our website or model-dependentDisconnect the mains plug .No solvents.11Detergent solution pumpTurn the programme selector to Drainage hose at the siphonTurn the programme selector to 1.2.Filter in the water supplyProduct number Production numberTrust the manufacturer's competence. Turn to us.You will thereby ensure that the repairs are performed by trained service personnel equipped with original spare parts.en operating instructionsWashing machine WAS32471SNObserve the safety instructions on page 8.Read these instructions and the separate installation instructions before operating the washing machine.page 10Detergent for main wash, water softener, bleach, stain removerfabric softener, starch3door handleService flap**If the active Additional functions and options buttons Press WashingCancelling the programmeProgrammes at high temperatures:–Cool washing:–Press Programme selector for switching the machine on and off and for selecting the programme. Can be turned in either direction.All buttons are sensitive and need only to be touched lightly.Press and hold the option button for an automatic run1.Activate thesetting mode forsignal volume• 1 step, the Press and + 1 step,Set to •Button signals Information signalsSet the 1 step Set the volume**you may need toselect the functionseveral times.2.Set thevolume for ...skipLaundry with varying degrees of soilinglightSoakingPour soaking agent/detergent into compartmentselector toStarchingStarching is possible in all wash programmes if liquid starch is used. Pour starch into thepartment in accordance with the manufacturer's instructions (rinse first if necessary).810Cleaning the detergent drawer ...... if it contains detergent or fabric softener residues.ʑʑThis should not be necessary if the correct detergent dosage has been used. If it is necessary, however, proceed according to the descaling agent manufacturer's instructions. Suitable descalers can be obtained via our website or model-dependentDisconnect the mains plug .No solvents.11Detergent solution pumpTurn the programme selector to Drainage hose at the siphonTurn the programme selector to 1.2.Filter in the water supplyProduct number Production numberTrust the manufacturer's competence. Turn to us.You will thereby ensure that the repairs are performed by trained service personnel equipped with original spare parts.en operating instructionsObserve the safety instructions on page 8.Read these instructions and the separate installationinstructions before operating the washing machine.。

清洗机操作说明手册中文版一:清洗机的概述对于热处理零件,其表面的质量对热理质量会有一定的影响,零件表面越是清洁、无污垢,对热处理质量影响越小。
爱协林多用炉生产线中的清洗机正是为此目的而设计的。
清洗机的清洗可分前清洗与后清洗。
前清洗是零件在热处理前,为去除机加工过程残留的油污、铁屑,净化零件表面而进行的清洗过程;后清洗是零件在热处理后,为清除其表面未淋干的残油而进行的清洗过程。
二:清洗机的工作原理简介爱协林清洗机主要由喷淋室、水槽、升降台、油水分离器等几部分组成。
喷淋室内壁上布满了许多喷淋头,工作时,从喷淋头喷出高速水流再加上喷淋头的旋转从而达到净化零件表面的目的。
水槽又分清水槽与碱水槽,清水槽盛着的是自来水,用来清洗零件表面的碱液;碱水槽内盛着的是自来水和清洗液的混合物,用来清洗零件表面的油污、铁屑。
两个槽子的水温均由杆式恒温器来控制。
升降台在碱水槽和喷淋室之间上下运动,以达到碱水除残油和清水除残碱目的。
油水分离器安装在清洗机的后面,其作用是把碱水槽中碱水和油分离开,使碱水重新流回碱水槽,分离出来的油排入水沟。
清洗机的喷淋室和槽体上另外有控制补水和液位的检测系统,烘干系统、发泡系统、翻板机构等。
行走小车把清洗零件送入喷淋室,关闭炉门,启动程序后,升降台下降入碱水槽,开始碱水清洗。
这时发泡系统启动,靠它吹出的高压空气搅动碱液,使零件表面的油污脱离其表面浮在碱液表面上。
这些油污流入积油槽,通过油泵把它抽到油水分离器中进行油水分离后,分离的碱水依然流回碱水槽,油污则排入水沟。
碱水清洗结束后,升降台上升到淋水位,开始淋碱水。
淋碱水结束后,升降台上升到原始位置,这时清水喷淋泵启动,开始清水喷淋。
高速水流从喷头中喷出,将零件表面未淋干的碱液用清水清洗干净。
喷出的清水则通过翻板机构返回清水槽。
清水喷淋结束后,开始淋清水,烘干系统也同时启动。
通过洪干系统将零件表面的残水烘干。
当升降台回到原始位置,烘干启动后,补水监控系统也启动,这时它检测一下水槽中清水和碱水液位是否下降。
X杜全自动洗板机操作规程
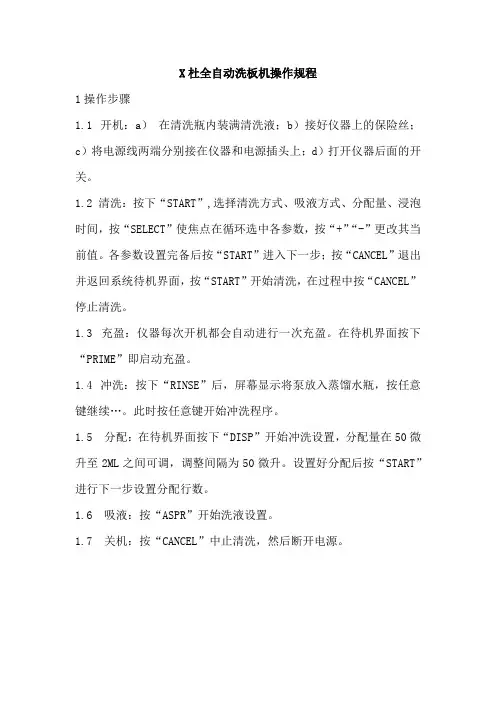
1操作步骤
1.1 开机:a)在清洗瓶内装满清洗液;b)接好仪器上的保险丝;c)将电源线两端分别接在仪器和电源插头上;d)打开仪器后面的开关。
1.2 清洗:按下“START”,选择清洗方式、吸液方式、分配量、浸泡时间,按“SELECT”使焦点在循环选中各参数,按“+”“-”更改其当前值。
各参数设置完备后按“START”进入下一步;按“CANCEL”退出并返回系统待机界面,按“START”开始清洗,在过程中按“CANCEL”停止清洗。
1.3 充盈:仪器每次开机都会自动进行一次充盈。
在待机界面按下“PRIME”即启动充盈。
1.4 冲洗:按下“RINSE”后,屏幕显示将泵放入蒸馏水瓶,按任意键继续…。
此时按任意键开始冲洗程序。
1.5 分配:在待机界面按下“DISP”开始冲洗设置,分配量在50微升至2ML之间可调,调整间隔为50微升。
设置好分配后按“START”进行下一步设置分配行数。
1.6 吸液:按“ASPR”开始洗液设置。
1.7 关机:按“CANCEL”中止清洗,然后断开电源。
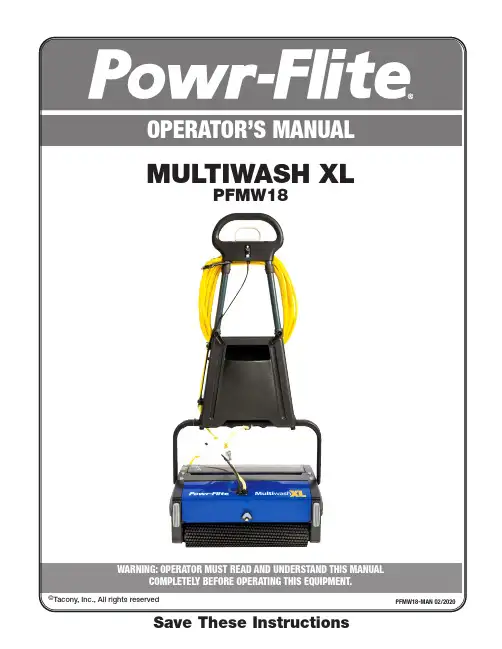
CONTENTSPage Product information . . . . . . . . . . . . . . . . . . . . . . . . . . . . . . . . . . . .3• Important safety advice . . . . . . . . . . . . . . . . . . . . . . . . . . . . . . . . . . . . . . .3• Guidelines for the operator . . . . . . . . . . . . . . . . . . . . . . . . . . . . . . . . . . . . .3• Working principle . . . . . . . . . . . . . . . . . . . . . . . . . . . . . . . . . . . . . . . . . . . .3• Know your machine . . . . . . . . . . . . . . . . . . . . . . . . . . . . . . . . . . . . . . . . . .4 Preparing for use . . . . . . . . . . . . . . . . . . . . . . . . . . . . . . . . . . . . . . . .5• Assembly . . . . . . . . . . . . . . . . . . . . . . . . . . . . . . . . . . . . . . . . . . . . . . . . . . .5• Brush selection guide . . . . . . . . . . . . . . . . . . . . . . . . . . . . . . . . . . . . . . . . .6• Brush identification . . . . . . . . . . . . . . . . . . . . . . . . . . . . . . . . . . . . . . . . . .6 Controls . . . . . . . . . . . . . . . . . . . . . . . . . . . . . . . . . . . . . . . . . . . . . . . . . .7 Operating machine . . . . . . . . . . . . . . . . . . . . . . . . . . . . . . . . . . . . . .8 Care of the machine . . . . . . . . . . . . . . . . . . . . . . . . . . . . . . . . . . . .9 Maintenance . . . . . . . . . . . . . . . . . . . . . . . . . . . . . . . . . . . . . . . . . . . . .9 Accessories . . . . . . . . . . . . . . . . . . . . . . . . . . . . . . . . . . . . . . . . . . . . .10 After sales service . . . . . . . . . . . . . . . . . . . . . . . . . . . . . . . . . . . . .10 Technical specifications . . . . . . . . . . . . . . . . . . . . . . . . . . . . . . .11This symbol is used in this manual to identify particularareas that are essential for your safety . Please pass all safety instructions on to other persons operating this machine . Powr-Flite floor cleaning machines are designed for useon smooth, even floors in indoor areas . They can be used on most floor surfaces including short pile carpet, wood, rubber and stone . They should not be used on rough uneven surfaces . We are confident the machines will give years of trouble free service, coupled with ease of use and minimum maintenance . Equipment must be operated, serviced and maintained in accordance with the manufacturer’s instructions . If in doubt, contact the supplier of your machine .The following instructions contain important information about the machine and safety advice for the operator .• The machine must be unpacked and assembled in accordance with these instructions before connecting to the electrical supply .• This machine should always be connected to a fully grounded power supply of the right voltage and frequency .• Keep the power supply cord away from moving parts . During operation, hazard may occur when running machine over the power cord .• The machine must be disconnected from the power outlet (by pulling the plug out) before changing the brushes, cleaning the machine or performing routine maintenance .• Warning! Only use brushes/accessories as per the instruction manual . Usage of any other brushes/accessories can cause safety problems .• Periodically inspect the cord for possible damage . A damaged cord must be replaced with the proper cord available from the manufacturer or an authorized service agent .• DO NOT leave the machine connected to the power supply when not in use; always remove the plug from the power outlet .• DO NOT use where hazardous dust is present .• DO NOT use machine near flammable liquids .• DO NOT use in an explosive atmosphere .• DO NOT use on a gradient or slopes .GUIDELINES FOR THE OPERATOR •Operators must be fully trained in accordance with theseinstructions, able to perform routine upkeep of the machineand correct selection of brushes .• Operators should be physically capable to maneuver,transport and operate the machine .• DO NOT run the machine dry, as this could damage thefloor surface or the machine itself .• Take adequate care to hold the machine firmly whileinstalling and removing the brushes .• Never use excessive foaming or highly corrosive cleaningsolutions .• While operating on a flooded floor, always ensure that thewater level does not exceed 1/4" or 6 mm .•DO NOT operate this machine on rough uneven surfacese .g . industrial concrete floors .• DO NOT clean the machine using pressure washers orsteam cleaners .• Ensure all parts are fitted properly before operation .ELECTRICAL CONNECTIONSBefore connecting the machine to the power supply, check thatyour supply voltage corresponds with that marked on the ratinglabel on the body of the machine .IMPORTANT!READ THESE INSTRUCTIONS AND RETAIN FOR FUTURE REFERENCE1 . Cleaning liquid, in the solution tank, is applied to the floor byspray jet .2 . The contra rotating brushes scrub the floor and also throw thedirty water on the conveyor drum . The front brush does mostof the scrubbing and drying . The rear brush completes thescrubbing and collects the remaining water off the floor .3 . A blade fitted to the dirty water tank wipes the drum andcollects the dirty water .THE WORKING PRINCIPLE(4)(1)(2)(3)(10)(9)(8)(5)(1) Top handle(2) Solution control handle (3) Solution tank (4) Bottom handle (5) Dirty water tank (6) Inline solution filter(7) Component housing (8) Conveyor drum (9) Brush(10) Handle release p edal(5)(6)(7)PREPARING FOR USE(4)(1)(2)(3)(5)(6)(7)(8)(9)(10)(11)(12)1 . The Powr-Flite Multiwash XL ships with the handle dismantled . To assemble, verify that all of the parts listed are included .2 . Remove the black band, which holds the bottom handle with the machine body, while holding the bottom handle .Warning! Since the bottom handle is spring loaded, care must be taken when removing the hook to avoid sudden springing back, leading to possible injury to personnel .UNPACKASSEMBLY1 . Insert the two tubular handles into the bottom handle and secure them using handle knobs (12) by tightening lightly . Verify that the handles are assembled according to their marked position and the cable holding hooks are pointing towards the rear .2 . Slide the electric cable retainer into the top portion of RH handle .3 . Fit the top handle over the tubular handles and secure them with a washer and screw (2 sets) . Ensure that the label on the top handle is facing the front of the machine . Now firmly tighten both the knobs and screws alternately . Insert the dummy caps provided to cover the screws (2) in the top handle .4 . Pass the free end of the pull cable through the plastic guide in RH Handle . Press and twist clock-wise to firmly secure the cable end to the fitting in the component housing .5 . Fix the solution tank firmly into the bottom handle by holding the top handle .6 . Rotate the knobs to hold the solution tank .7 . The brushes are only loosely packed in the machine for transit . The brush shafts must be fitted before operating the machine . Push the shafts through the brushes from the side of the machine . To remove brushes, push the brush shaft out from the side of the machine and remove the shaft . Normally the standard brush will be supplied with the machine . Brushes should be selected ac-cording to the type of floor surface to be cleaned and the type of dirt to be removed . Please refer Brush Selection Guide . 8 . The machine is now ready for use .RIGHT BOTTOM REAR LEFT BOTTOM REARThis is applicable when the customer has more than one set of brushes of same type . Array Distinct color coding make it easy to separate tools into their correct areas of use .Restroom brushes are kept in the restroom, kitchen brushes are kept in the kitchen -reducing bacteria cross-contamination between high and low-risk areas . RED, BLUE, WHITEand YELLOW brush buttons are packed with the machine . Simply plug the buttons into thehole in the brush as shown .Clear identification, by color coding, helps to prevent cross contamination .(a) Hole provided for plugging button .(b) Brush with button plugged .Release the pedal handle lightly with your foot (1), pull back the handle (2) to start the motor . The brushes and the drum starts rotating . Pulling the handle further without pressing the pedal, lowers the machine and engages the rotating brushes onto the floor . To stop working, take the handle to the vertical position .On/Off ControlInsert the free end of solution cable into the valve body fitted in the solution tank . Press and twist clock-wise to secure the cable end . Similarly, press and twist counter-clockwise to disconnect the cable end .Slide this knob to TOP position (Working Mode) to operate the machine . Slide this knob to BOTTOM position to move the machine and park the machine .Warning! Keeping the knob in the top position (working mode) and moving the machine will damage the brushes .Brush contact with the floor is adjustable in 4 steps, contact is MINIMUM when the knob is fully down and MAXIMUM when it is fully raised . This helps you to compensate for the wear of brushes and also to con-trol the scrubbing effect . If the machine does not move when the handle is lowered, slide the transport/working mode knob up one step .By pulling the solution control handle up, the cleaning solution is dispensed on the floor . The solution stops once the solution control handle is released .In the event of motor getting overloaded due to improper power supply or unexpected obstruction to the brush/drum rotation, the circuit breaker trips and protects the motor from damage . If this happens, identify the cause, correct it and, reset the breaker after minimum of 30 seconds from tripping by pressing the circuit breaker button manually and continue working .(a)(b)(a)(b)(a)(b)(Iv)(a) Recommended pattern for small rooms(b) Recommended pattern for large hallsWarning! Avoid touching the sharp edge of dirty water tank . It may cause injury to hands .1 . Move the Transport / Working mode control knob to BOTTOM (Transport) position (Fig-viii) .2 . Disconnect the power supply by unplugging the electrical plug and wind the cable over cable holders in the handle .3 . Pull out the dirty water tank and wash it completely .4 . To prevent possible clogging of filter, drain cleaning liquid and keep the fresh water tank clean .5 . Remove the brushes by pushing the brush shaft out (Fig-ix) .6 . Wash the brushes either by dipping in a bucket/sink or in running water (Fig-x) .7 . Turn the machine sideways and wipe clean the conveyor and machine body with a dampcloth (Fig-xi) .8 . Re-install the brushes after washing . It is easier to push the brush shaft from the right hand side (identified by the electrical cable) .9 . Store the machine in a dry indoor area only .MAINTENANCE• Power cordRegularly inspect power cord, plug and strain relief for damage or loose connection .• BrushesFor maximum life, wash the brushes regularly . Ensure machine is in Transport mode when not in use . Store additionalbrushes in a vertical position to avoid bending of bristles . Check for permanent bending of bristles in a particular direction . This may occur if the machine is operated for several days without removing the brushes, which is not recommended . If this occurs, reverse the brush so that the bent bristles are automatically straightened .• Wiper BladeAfter years of use the wiper blade may wear . If this occurs the water collection performance will decrease . It should be replaced by an authorized service agent .• Solution tank filterThe filter prevents clogging of the drip holes in the tank . Periodically clean the filter to ensure uniform discharge of liquid . In case of non uniform discharge from the drip holes, back flush the tank in running water . Clean the drip holes using wire or a blunt pin .The transport cart provides for ease of movement when transporting the machine .Transport CartUsing the transport cart1 . With the machine handle in the upright position place the cart centrally alongside the machine .2 . By holding the machine firmly, tilt the handle away from your body . Slide the cart base under the machine and strap it to the machine with the velcro .3 . Ensure that the velcro strap is securely wrapped around the bottom handle .4 . Now the cart is ready to use . The machine can then be maneuvered easily while holding the top handle .Side BrushTo clean up to walls, the side brush may be used . Switch off and unplug the machine before fitting the side brush .Fitting the side brush1 . Remove the front brush and brush shaft .2 . Fix the shield assembly on the side plate .3 . Insert the side brush through the shield and main brush .Using the side brush1 . Tilt the machine at an angle, move forward . This way, the dirty waterthrown by the side brush will be collected by the rear brush .2 . Use side brush only for washing the edges*TheoreticalNote:1 . Noise levels measured at a distance of 3 .28 feet from machine and 5 .25 feet above floor, when washing a hard floor . Measurements recorded using a hand held meter .2 . Handle vibration does not exceed 2 .5 m/s2, when operating on a smooth hard surface .3 . Above dimensions are approx . Since the company’s policy is to continuously improve the product, there could be changes without prior notice .11。
19.04.2016 清洗机使用说明书 自动清洗机说明书All rights reserved未经许可,不得翻印Page 1 of 16 自动清洗机使 用说明书纳金 Nanometals 使用说明书 Operrating InstructionsNJ-QXJ-001 自动清洗机(工业用途) Automatic Cleaning Machine (Industial)感谢使用纳金科技清洗机产品 在安装、使用与维修前请仔细阅读本手册以期发挥最佳性能并维护安全19.04.2016 清洗机使用说明书 自动清洗机说明书All rights reserved未经许可,不得翻印Page 2 of 16 自动清洗机使 用说明书目录●安全注意事项 ●重要信息●清洗机主要规格参数 ●零部件名称和附图说明 ●显示屏附图说明及含义 ∙主界面 ∙手动画面 ∙参数设置 ●使用步骤 ∙触膜屏的设置 ∙锥形瓶的固定 ∙启动程序 ∙其他方面 ●维护及保养明书 All rights reserved未经许可,不得翻印Page 3 of 16 自动清洗机使 用说明书安全注意事项●启动机器前,必须穿实验服,戴手套,带口罩,带上护目眼镜 (否则可能会导致轻微中毒,灼伤皮肤和眼睛) ●禁止将头伸入,通风橱里的机器中,以免发生意外 (否则可能会导致轻微中毒,或者头部会被夹伤) ●启动机器前,必须将通风橱的开关打开(否则可能会导致有害气体不能够及时排出,人体接触会轻微 腐蚀和中毒)●请把放锥形瓶的槽格都装满,装满后务必把固定盖板合上 (否则可能会导致部分强酸强碱,溅出水槽以外,腐蚀部分零 件,机器寿命变短)●严禁不戴手套直接用手触碰固定盖板 (否则可能会导致触碰的部位被轻微腐蚀) ●在机器运行时严禁将通风橱中的开关断开(否则可能会导致清洗中的有害气体不能及时排出实验室外) ●在机器运行时,出现紧急情况,立即断开电源 (否则可能会导致冒烟、起火、触电或腐蚀)明书 All rights reserved未经许可,不得翻印Page 4 of 16 自动清洗机使 用说明书若工作中出现以下异常或故障 ∙喷头结构没有正常的上或下移动 ∙长形喷头没有正常的喷出液体 ∙旋转放置机构没有正常的左右翻转 ∙排液时电磁阀没有按照设定次序打开排液管 ∙电磁阀出现异常,不能止水或同时打开 ∙光电感应器异常亮起 ∙存在其他异常情况或故障请立即按掉显示屏上的“停止”开关,上述任一情况若依 然存在异常则立即按掉总电源,并与客户咨询服务中心联系进 行检查和修理。
洗板机简单操作流程
-、操作原理:凯特科技Kup-IOOMicroplateWASHER洗板机是由清洗液瓶、废液瓶、电子阀、分配头等组成,利用真空抽吸的方法电路控制洗板。
二、操作要求:板上每行需布满孔,没排满需补孔。
三、操作步骤:
1、打开电源,仪器进入“主菜单”,显示:“酶板设置”、“程序设
置”、“系统设置”、“执行程序”
2、检测板板设置---加液高度、吸液高度、清扫高度、清扫幅度、底洗
高度
程序设置--移动循环数、每排上循环、吸液循环数、加液液量、底部洗液量、底部洗循环、浸泡时间
系统设置--洗头设置、起始位设置(8头预设为250;12头预设为415)、泵速设置
3、“执行程序”一上述参数设定好后,设置一个程序号,如1号
4、开始洗板,在“执行程序”中,选定“程序号”,再选“洗排数”,
需洗几排就选数字几。
四、注意事项:
1、洗液尽量保证2天一换,避免花板,洗板时观察洗头是否有堵塞,
要排通
2、废液瓶及时清空,因真空负压,盖要旋紧,洗板时查看出水
量,不要弯折泵上进水管,用消毒液每周擦拭。
德信诚培训网
更多免费资料下载请进: 好好学习社区 fiaid o 洗板机操作规程
1 目的:
规范fiaido 洗板机操作
2 适用范围:
2.1)医院及有关部门的酶免检测中的酶标板`,培养板的洗涤工作。
2.2)化学、生化等方面微量分析的相应清洗工作。
2.2正常工作条件是:
a.环境温度:5-40C
3 职责:
3.1 使用人员:应按使用说明书或操作规程正确使用,并做好记录。
3.2 保管人员:进行日常管理与维护,监督仪器操作是否符合规程。
3.3 科室负责人:负责对仪器的综合管理。
4 开机前的准备:
⑪、将仪器置于阴凉干燥房间并安放在一清洁、稳定的水平操作台上;
⑫、安装洗头:去掉洗头包装保护物,将同洗头包装在一起的吸液连接管(两根中较组一根)的红色连接头连接到洗板机上部对应的红色连接处(旋转拧上),并将另一端套入洗头上红色阀头上;将注液连接管(较细)的蓝色连接头首先连接到洗板机上部对应的蓝色连接处(旋转拧上),观察在蓝色连接处和洗头之间处有突起的圆柱形阀门,按压电磁阀上部黑色的收缩开关,将注液管从阀门内穿过,并将另一端套入洗头蓝色阀头上.最后将洗头安放于洗头支架对应卡中。
⑬、安装洗瓶和废液瓶: 将配备的较大瓶子贴上“wase ”,将一端有红色连接头的管子连接于废液瓶上红色连接阀头,另一端套入仪器背后标有“wase ”处阀头上;将其余4个瓶。
操作程序
1.将洗液瓶、净水瓶和液体管道连接后,分别安装于主机后
方相对应的位置(注意不要让管道拧劲,以保证管道的通畅);
2.液位线分别安在与洗液相对应位置;
3.将洗板机底部废水管道放入废水桶口;
4.配制洗液:配置的洗液浓度要在所使用的洗液配比说明的
基础上稀释一倍,例如:洗液配比要求一瓶药液需配置500mL的洗液,使用本机器时则要配置1000mL(解释权归本公司所有);
5.插上电源,打开电源开关(机器后power键),若没有合
上盖子或者液体瓶内液体不足将有语音提醒;
6.显示屏初始化结束后,可进行下一步操作;
7.放置酶标板:将清洗板放在标有“清洗”标志的酶标板固
定架内,将配重板放在标有“配重”标志的酶标板固定架内,放置分正反面,放板时面向上则为正面放置,相
反则为倒置(注:倒置容易造成卡机),详见说明书;8.设置参数:根据自己所洗板的种类和多少设置孔数、浸泡
时间、清洗时间等,方法为:按设置键光标到所要设参数地方时按“+”或“-”后确定保存;
9.按下运行键执行洗板程序,运行结束后有报警提示此时可
以取出酶标板,关闭电源;
10.若中途或故障要停止,请按复位键。
【洗板机的维护保养】
1.平常不用仪器时,请拔掉电源插头。
2.洗板工作结束后,需对仪器内外进行清洁,用湿抹布擦
洗洗板机的外壁及固定架,以保证其洁净。
3.及时倒弃废液,以免废液瓶过满造成洗板机故障。
4.液体瓶中的管道末端装有过滤装置,需定时(建议一周)
冲洗或用刷子清洗,以避免杂质沉积。
5.保险丝要定期进行更换。

洗板机的标准操作程序(SOP)【目的】规范洗板机的操作程序,保证洗板机的正常状态。
【适用范围】本实验室洗板机的操作。
【操作人员】本实验室实验人员。
【操作步骤】1.拔掉废液瓶口的塞子(接有与洗板机相连的废液管),倒掉废液瓶的废液,再把塞子安紧在废液瓶口上。
注意不要让废液管拧劲,以保证废液管的通畅。
2.拧开洗液瓶的盖子(接有与洗板机相连的洗液管),倒掉前一天洗液瓶里剩余的洗液,倒进新配的洗液。
拧紧盖子,注意不要让洗液管拧劲,以保证洗液管的通畅。
3.保证待洗反应板所有的孔处于同一水平位置,以免孔边缘过高碰到洗板机的吸液针。
4. 开机(开关在仪器后面)(1)打开仪器电源开关,仪器显示:(2)仪器初始化结束后,仪器显示:注意:☆“*”处表示0~15的当前准备就绪的第几号程序。
此时仪器处于待机状态,可进行下一步操作。
5预洗在待机状态下,使预洗槽处于清洗头的下方,按下“预洗/返回”键,清洗头抬起,电磁阀打开,洗液进入预洗槽。
清洗头将对预洗槽洗涤3次,清洗容量为400ul,但清洗时没有暂停和浸泡步骤。
提示:预洗有利于保持清洗管路通畅。
如果不预洗,可在待机状态下直接按“编程”键进入编程步骤,或直接按“运行”键执行清洗。
6.将待洗反应板放在载板台上。
7.根据板条数,按“▲”或“▼”键选择相应程序。
正常情况下,程序已编好,1-8号程序分别对应1-8条板。
8.按下“运行”键,系统将立即按照设定的程序执行。
提示:仪器停止运行两分钟后,仪器将自动关闭气泵。
9.清洗完成后,重新出现4(2)的界面,取下已洗好的反应板。
10.若中途退出,按“预洗/返回”键。
11.最后一次洗板结束后,按后面板POWER键关闭电源,并将酶标板托盘上的预洗槽用蒸馏水装满,使清洗头浸入预洗槽中。
【洗板机的维护保养】1.平常不用时,拔掉电源插头。
长期关机不使用洗板机时,先用蒸馏水冲洗一遍整个系统,再进行日常关机,并且倾倒清洗瓶,保持液体瓶干燥,以免清洗液中的缓冲盐结晶而堵塞清洗头。
洗板作业指导书一、任务背景洗板作业是指在建筑施工过程中,对混凝土板面进行清洗和处理的工作。
这项工作的目的是确保混凝土板面的质量和美观度,同时提供一个干净、平整的工作平台。
本指导书旨在提供洗板作业的详细步骤和要求,确保作业的高效性和安全性。
二、作业准备1. 工具和设备准备:- 高压洗涤机- 清洗刷- 清洗剂- 扫把和簸箕- 水源和排水设施2. 人员准备:- 洗板作业人员:熟悉洗板作业流程和安全要求的工人三、作业步骤1. 安全措施:- 洗板作业人员应佩戴必要的个人防护装备,如安全帽、护目镜、手套和防滑鞋。
- 在作业区域周围设置明显的警示标志,确保他人不会误入作业区域。
- 检查洗涤机和其他设备的安全性能,确保其正常工作。
2. 清扫:- 使用扫把和簸箕清理洗板区域的杂物和灰尘,确保板面干净。
- 将清扫的杂物和灰尘妥善处理,避免对环境造成污染。
3. 涂布清洗剂:- 根据清洗剂的使用说明,将适量的清洗剂均匀涂布在混凝土板面上。
- 确保清洗剂覆盖整个作业区域,并避免过度或不足的涂布。
4. 高压洗涤:- 启动高压洗涤机,根据机器的使用说明进行操作。
- 从作业区域的一侧开始,将高压水流均匀地喷洒在混凝土板面上。
- 按照预定的方向和顺序进行洗涤,确保整个作业区域都得到充分清洗。
- 高压洗涤时,保持适当的距离和角度,避免对混凝土板面造成损坏。
5. 冲洗:- 使用清水冲洗洗板区域,确保清洗剂和污垢被彻底清除。
- 冲洗过程中,可以使用清洗刷进行局部清洗,特别是对于顽固的污渍。
6. 排水和清理:- 确保排水设施畅通,将洗涤过程中产生的污水和废水妥善排放。
- 将洗涤机、清洗刷和其他工具进行清洁和整理,妥善存放。
四、作业要求1. 作业质量:- 混凝土板面应清洁、平整,无明显的污渍和痕迹。
- 洗板作业应确保不对混凝土板面造成损坏,如划痕、磨损等。
2. 安全要求:- 洗板作业人员应严格遵守安全操作规程,确保自身和他人的安全。
- 在洗板作业区域周围设置明显的警示标志,确保他人不会误入作业区域。
洗板程序Procedure需要调用两个子程序:Cycle、Plate。
其中Plate程序是酶标板板子参数程序,用来定义板子的各种参数;Cycle是循环程序,用来定义洗板时吸液注液的量、速度、时间等等。
编程步骤:一、Plate:1)开机后,按左边两个按键找到“Define Plate”,然后按“Enter”;2)“Name”,按对应“Chg”的键后可以更改名字,配合“+、-”输入名字后按“Enter”;3)“Plate formate”,通过“+、-”选择“12-Strip”后按“Enter”;4)“Well shape”直接按“Enter”;5)“Crosswise aspir”通过“+、-”选择“Yes”,按“Enter”;6)“Travel height”等待仪器自动探测高度完成后直接按“Enter”;7)“Side pos front”指前侧吸液的位置,按“Mov”后通过“+、-”调节吸液针在孔内的前后位置(为了方便观察可以按“↓”使洗头下降),调节到合适位置后按“Enter”;8)“Side pos rear”指后侧吸液的位置,操作同上步,调节合适后按“Enter”;9)“Aspiration ht”等待仪器探测完成后直接按“Enter”;10)“Disp pos”指注液时注液针相对于孔的前后位置,操作同7)、8),完成后按“Enter”;11)“Bottom disp ht”直接按“Enter”;12)“Overflow disp ht”指防溢流高度,操作同7)、8)、10),将吸液针调节到高度与孔口平齐即可,然后按“Enter”;二、Cycle:1)按左侧两个键找到“Define Cycle”,按“Enter”;2)“Name”,按对应“Chg”的键后可以更改名字,配合“+、-”输入名字后按“Enter”;3)“Aspiration time”指吸液时间,按“+、-”选择时间(一般设为3.0sec)然后“Enter”;4)“Aspir speed”,按“+、-”选择“low”,按“Enter”;5)“Disp volume”注液量,通过“+、-”调节,完成后按“Enter”;6)“Disp power”,按“+、-”选择“low”,按“Enter”;7)“Wash mode”,选择“Overflow”,按“Enter”8)“shaking time”,振荡时间,通过“+、-”调节,完成后按“Enter”,(若设有振荡时间,将出现“Shaking intens”,选择振荡强度,“Low”或者“Medium”,按“Enter”);9)“Min soak time”,最小浸泡时间,通过“+、-”调节,完成后按“Enter”;三、Procedure:1)按左侧两个键找到“Define Procedure”,按“Enter”;2)“Name”,按对应“Chg”的键后可以更改名字,配合“+、-”输入名字后按“Enter”;3)“Liquid”,按“+、-”选择洗液通道,然后按“Enter”;4)“Cycle 1”洗板第一遍,通过“+、-”选择之前编写的Cycle程序,然后按“Enter”;5)“Cycle 2”洗板第二遍,操作同上;6)如果洗板次数为5遍的话,在“Cycle 6”处不选择Cycle程序,使其显示“---”,按“Enter”;同理,洗板次数为6遍的话,在“Cycle 7”处不选择Cycle程序,使其显示“---”,按“Enter”;7)“Final asp time”,最后一次吸液时间,按“+、-”选择时间(一般设为4.0sec)然后“Enter”;8)“Final asp speed”,最后一次吸液速度,按“+、-”选择“Low”,然后按“Enter”;9)“Processing mode”,选择“Plate”,按“Enter”;10)“Plate”,通过“+、-”选择之前编写的Plate程序,然后按“Enter”;11)“Ask strip Nr.”指是否询问洗板条数,通过“+、-”选择“Yes”,然后按“Enter”;。
X &VX SERIES Pressure WashersEngine exhaust from this product contains chemicals Thank you Thank you for selecting our products. Our personnel have proudly made every effort to ensure that your new pressure washer is of the quality you expect. But things do occasionally go wrong. This is why every pressure washer is covered by a limited warranty. Among other things, this warranty provides for the replacement of parts found to be defective during the operation of your new pressure washer. Please note that the owner/operator has certain obligations under the terms of the warranty. Be sure to read this manual for directions on proper installation, start-up, use, and stor-age of your pressure washer.Your new pressure washer was tested after production for proper pressure and flow.Please note that this process will sometimes leave a water residue in the pump. The dealer you have purchased your new machine from should review with you the prop-er installation, start-up, use, and storage. Most ‘big’problems occur when shortcuts are taken in one of these processes. If a problem occurs that you need some assis-tance with, please feel free to contact us at the listing below:Warranty Service Center520 Brooks RoadIowa Falls, IA 501261.800.648.6007Be familiar with the model plate located on your machine.Have the model and code number with you when you call for service. (Located on motor).Please make note of Model Identification Model #Code #Serial #Always have this information when callingWarranty Service Center.WarningStatement of WarrantyThe manufacturer of this product agrees to repair or replace designated parts that prove defective within the warranty peri-od listed in the chart below. Specific limitations and exclusions apply. This warranty covers defects in material and workmanship and not failure due to normal wear, depreciation, abuse, accidental damage, negligence, improper use, maintenance or storage. To make claim under the terms of the warranty, all parts said to be defective must be returned to a designated Warranty Service Center for warranty inspection. The judgments and decisions of the factory-authorized personnel concerning the validity of war-ranty claims are final.Many components are covered by warranties given by their respective manufacturers. These warranties pass through to the end user. As a factory authorized and trained warranty service center the factory will honor the terms of all component warranties and satisfy claims of the appropriate warranty provisions.Normal wear items include but are not limited to: hoses, nozzles, filter, valves, seals and are not covered by this warranty.This warranty is in lieu of all other warranties, express or implied, including without limitation any warranties of mer-chantability or fitness for a particular purpose and all such warranties are hereby disclaimed and excluded by the Manufacturer. The Manufacturer's warranty obligation is limited to repair and replacement of defective products as provided herein and the Manufacturer shall not be liable for any further loss, damages or expenses, including damages from shipping, accident, abuse, acts of God, misuse or neglect. Neither is damage from repairs using parts not purchased from the Manufacturer or alterations performed by non-factory authorized personnel. Failure to install and operate equipment according to the guidelines put forth inAccessories:Includes tips, guns, wands, hoses, injectors, unloaders, sandblasters, flat surface cleaners, hose reels, turbo nozzles, drain nozzles, brushes, foamers, GFCI units, thermal relief, filters, tanks, etc.90 daysWARNINGThe following warnings must be followed, Failure to follow these warnings could result in serious personal injury or death!Electrical equipment can cause shock and sparks.Do not bypass or remove the grounding prong in any electrical plug.Keep electrical plugs, connections and cords out of water and moisture.Refer to instructions prior to equipment operation.Disconnect from power source before servicing.Inspect and repair damaged or exposed electrical components prior to use.Never splice electrical cords on pressure washers.Never allow children or untrained personnel to operate machinery.High Temperature Water.Wear protective clothing and face shield.Do not direct water stream toward self or others.Do not spray electrical apparatus.High pressure water can cause death or serious injury.High pressure fluid can create a high pressure stream or ruptured vessel.Wear safety face shield.Relieve pressure before servicing.Do not modify/repair/rework vessel or change safety relief or pressure setting.Do not direct stream toward self or others.Pressurized fluid streams and rupturedpressure vessels can cause death or serious injury.Important Safety InstructionsWARNING - when using this product basic precautions should always be followed, including the following:1.Read all the instructions before using the product.2. To reduce the risk of injury, close supervision is necessary when a product is used near children.3.Know how to stop the product and bleed pressure quickly. Be thoroughly familiar with the controls.4.Stay alert - watch what you are doing.5.Do not operate the product when fatigued or under the influence of alcohol or drugs.6.Keep operating area clear of all persons.7.Do not overreach or stand on unstable support. Keep good footing and balance at all times.8.Follow the maintenance instructions specified in the manual.9.“WARNING - Risk of Injection or Injury - Do Not Direct Discharge Stream At Persons.”SAVE THESE INSTRUCTIONSGROUNDING INSTRUCTIONSThis product must be grounded. If it should malfunction or breakdown, grounding provides a path of least resis-tance for electric current to reduce the risk of electric shock. This product is equipped with a cord having an equipment-grounding conductor and a grounding plug. The plug must be plugged into appropriate outlet that is properly installed and grounded in accordance with all local codes and ordinances.DANGER - Improper connection of the equipment-grounding conductor can result in a risk of electrocution. Check with a qualified electrician or service personnel if you are in doubts to whether the outlet is properly grounded. Do not modify the plug provided with the product - if it will not fit the outlet, have a proper outlet installed by a qualified electrician. Do not use any type of adaptor with this product.When you receive your pressure washer be sure you check for concealed freight damage. Any damage should be noted with the delivering carrier. If you have any questions related to freight call the 800 number listed in the front of the manual.Check all oil levels in the pump or engine if applicable. Failure to check all levels will result in equipment damage. Most pump are shipped with oil from factory and the crankcase are sealed,you may have to remove a shipping plug and install a dipstick in the pump. Oil type is stated on the pump breadown and in the engine book.Your water supply must provide water to the equipment that exceeds the Gallon Per Minute {GPM}rate of your machine. You can check your GPM by using a 5 Gallon bucket and a timer. If your machine is 5 GPM or less and the bucket fills in less than a minute you have adequate supply.Some systems are effected by things like washing machines, livestock watering systems and flush-ing of toilets. Be sure the supply is still adequate when these operations are taking place. The water temperature cannot exceed 145 Degrees Fahrenheit on the standard models and 180degrees Fahrenheit on the high temperature models and the pressure should not exceed 60 PSI.Failure to secure adequate water supply will result in pump damage. DO NOT RUN PUMP DRY.Your water should not contain particles larger than 80 microns. Although there are small filters installed on pressure washers that filter the water, they could only filter poor quality water for a short period of time before they clog. This would result in damage to the machine. Therefore you should insure no sand or scale particles are present in the water supply.Hook a garden hose from the hydrant to the machine, when doing this be sure to check the inlet water filter or screen. This hose should be at least 5/8” diameter and a length at least 15 feet. This 15’length helps isolate the water supply from pulsations from the pump. Many states require a Vacuum Break or backflow preventor be installed at the hydrant, before the garden hose, to insure the water source cannot be contaminated. Be sure to check local and state regula-tions upon installation. Turn on the water supply and open the trigger gun, this will purge all the air from the system.Look for water leaks and stop any leak found. Leaks can cause erratic pump behavior.A circuit dedicated only to the pressure washer is recommended. This circuit should be installed by a licensed electrician and checked to supply adequate voltage Under Load.Sometimes the distance from the panel is to long, the wire size is to small or the voltage is initially to low, this will cause the GFCI or Thermal to trip. If the GFCI trips or the thermal overload on the motor trips con-sult factory. Plug your cord into the receptacle. DO NOT USE EXTENSION CORD!Prior to turning on the power switches or your engine check the oil level in the pump.Turn on the power switch. Pull trigger gun and check for adequate pressure.Inspectionfor freightdamage.Inspection of oil levels WaterSupplyWaterQualitySupplyhosePurge AirElectricalSupplyPumpTurn onPower Initial setup and operation of your new pressure washerThe pressure was set at the factory during the testing procedure, no adjustments to the machine should be required for operation. During operation do not leave the machine running for more than 2minutes without the trigger gun being pulled. Although your machine has a by-pass valve on it and may have a thermal relief system, this can cause extensive pump damage. If machine will not be discharging water for more than 2 minutes, shut the machine off.Your machine is supplied with interchangeable spray tips. The black tip lowers your pressure anddrawschemical. The other tips are for high pressure rinse at different spray angles. Red is 0 degree, yellow is 15 degree, green is 25 degree and white is 40 degree. The yellow tip is used for most standard applications. Be sure the quick coupler is fully engaged before pulling the trigger gun. Failure to do may result in the tip becoming a projectile and may be lost or damage to property or persons may occur.Your pressure washer is supplied with a downstream chemical injector with dual chemical selector. The 1/4” clear vinyl tube is to be inserted into the desired chemical to apply. Be sure to use the black, lowpressure nozzle to inject chemical. The chemical injector will only open up and allow chemical into the line when this tip is used. This tip enables the pressure to drop to approximately 250 PSI to draw chemical. The injector can be turned on and off or the rate of injection can also be set by turning the knob that the clear vinyl tube attaches to. See calibration below.Be sure to flush injection system with clear water after use.The chart below is an average ratio observed using water as the test fluid to draw through the injectorand serves only as a guide, your actual ratio will vary.Setting on valveInjection Ratio 96:188:1710:1613:1520:1428:1335:1250:1For better accuracy, calibrate using the following formula:(GPM x 128) ¸ (ounces drawn in 1 minute) = x:1.IE: If a 2.0 GPM machine draws 8 ounces of chemical in 1 minute: (2 x 128)8 = 32:1Factory supplied hoses are sized in length and diameter for best operational performance and sizedwithin the pressure capabilities. Additional hose added to the machine may change the performance of the machine. Consult factory if you have any questions. When replacing or disconnecting the quick couplers be sure the machine is shut off and relieve the pressure from all hoses.DuringOperation Nozzles Chemicalinjector use Hoses and couplersCalibrationLow NozzlePressure SoapInjectorNotWorkingProperly Surging Operation NoticeLow nozzle pressure is a common complaint. In a majority of instances, low nozzle pressure is gener-ally caused by one of the following:1. Plugged nozzle tip.2. Inlet screen plugged.3. Insufficient flow in gallons per minute (not pressure) to the pump.4. Unloader valve stuck open due to debris lodged under the check valve ball.5. Customer use of shut-off-type quick connectors.6. Plugged hose.7. Incorrect nozzle or soap tip installed.Another complaint is that pressure surges.That is, when the trigger is pulled, pressure is satisfactory for a moment then falls off. When the trigger is released, pressure builds up to normal levels. This isgenerally a sign that the water supply cannot provide the flow rate (gallons per minute) required by the pump. Following are some possible solutions:1. Make sure the supply is not restricted; that there are no under-sized fittings and the inlet screen is unobstructed.2. Make sure the flow rate of the water supply is sufficient for the pump. First, find the capacity of your pump in gallons per minute (gpm) as shown in the Water Supply section on Page 5. Then determine the flow rate of your supply by measuring the gallons that can be delivered in one minute. If your supply does not deliver the gpm your pump requires, do not use the pump. It will suck air, causing cavitation that can quickly damage pump components.3. Check for leaks in the supply fittings. Any leak will cause the pump to draw air and perform poorly. When a soap injector is not working properly, the problem is generally fairly easy to isolate. Check the following:1. Make sure the Black, soap tip is installed. Soap injectors will not work when high pressure nozzles are installed.2. Be sure that the soap injector valve is turned on, and turn selector valve to desired setting.3. A piece of debris may be caught in the injector valve, injector ball valve, or orifice. Disassemble and clean the injector.User maintenance procedures include replacing valves and seal. Unloader components are not user serviceable. Repairs involving unloaders and crankcase components should be referred to the factory or a factory authorized repair center.Pop off (515500)Unloader7534)(208/3050X)(MTM18.0155)(2555)(UD UBI22)(3050XS)(GEN YU2140)(4040X)Themo(509306)(AR XWA8629)(208)(UD GD5530S)(2555)(UD MKD5035S)(3050X)(UD MD5030U)(3050XS)(UD MKD4040S)(4040X)(521316) -3 PHASEPressure gauge(520902)Switch(526328)。
1296-9410-022011 年8 月1296-937-11 英文版译本仪器手册1296-026DELFIA Platewash微孔板洗板机Wallac Oy,Mustionkatu 6,FI-20750,Turku, Finland.电话358-2-2678111 传真358-2-2678357 网址:制造商:Wallac Oy地址:Mustionkatu 6 FI-20750, Turku, Finland电话:00358-2-2678 111 传真:00358-2-2678 357产品注册号:国食药监械(进)字2007第2401254号产品标准号:YZB/ FIN 1173-2006售后服务机构:珀金-埃尔默仪器(上海)有限公司注册地址:上海市外高桥保税区希雅路 33 号 14 号楼 3 层 D 部位联系地址:上海市张江高科技园区李冰路 67 弄 4 号楼 201203电话:021-3876 9510 传真:021-5079 1316800免费服务热线:800 820 5046警告本设备的安装和使用必须依照制造商的建议进行。
安装和维护必须由经过专门培训的、经 PerkinElmer 公司授权的技术人员操作。
违反上述规定将使设备保修失效并/或导致设备无法安全运行。
安全信息警告:电击危险本仪器必须与带有保护性地线的插座连接后才能进行操作。
必须能够随时拔出位于仪器后面板的主电源插头,以便于必要时将仪器断电。
虽然本仪器完全绝缘而且接地,所有用户仍必需认识到在电源附近使用液体的潜在危险性。
如果液体溢出,应立即切断仪器电源并排干所有液体。
应尽快清除溢出的液体。
如果液体渗入机箱,可能会对仪器造成严重损害。
在具有资质的维修工程师对仪器进行彻底检查前,必须切断电源。
只有具有资质的维修工程师才能进行维修。
警告:液体溢出某些操作模式下(如分液或系统清洗,特别是在自动控制下),微孔板的板孔可能会出现溢流。
这将会导致液体的溢出和/或危险物质所引起的污染。
应采取措施确保不发生溢出现象。
如果对环境有危害的液体溢出,必须切断仪器的电源,并将其移入通风橱或类似的地方,从而与工作环境隔离。
与最近的维修中心联系,请求援助,同时告诉他们溢出物可能对健康造成的危害。
警告:错误操作如果没有按照手册详述的内容操作该仪器,可能会损害仪器自身具有的防护功能。
不要在打开机壳后使用该仪器,仪器内部可能带有致命的高电压。
不要在未连接保护性地线时使用该仪器。
注意事项不要将手指,铅笔或其它物体插入载板架的入口槽内。
当使用外部计算机控制洗板机时,应注意载板架意外移动以及洗板机泵所发出的噪音。
确保正确连接电源线。
颜色代码如下:欧洲:褐色—火线;蓝色—中性线;绿色/黄色—地线。
美国:黑色—火线;白色—中性线;绿色—地线。
在启动洗板机前,应确保所有连接紧密,且已取出所有填塞用材料(如泡沫塑料等)。
如果对该仪器的安全性还有任何怀疑,请与最近的、经认可的维修中心联系。
安全标识在洗板机上可以找到下列警告与信息标识。
只有具有资质且了解安全步骤的专业人员才能维修本仪器。
请在使用仪器前仔细阅读本手册。
开关注意—请参照配套文件生物危害目录目录1仪器介绍 (1)引言 (1)前面板—键盘—显示屏 (2)外部尺寸(毫米) (3)2安装 (5)打开包装 (5)启动 (6)3 配置 (8)主菜单 (8)洗板机配置 (9)默认设置 (10)4试剂盒与微孔板参数 (11)4.1 定义 (11)4.2 方法 (20)5运行模式 (22)如何使用键盘? (22)载入微孔板 (23)选择试剂盒 (24)洗板中断或停电 (26)5.4.1 洗板中断 (26)5.4.2 停电 (26)6 冲洗 (28)6.1 冲洗 (28)6.2 自动冲洗 (28)7 消毒 (29)7.1 消毒 (29)8 维护 (31)硬件版本与软件版本 (31)访问维护软件的按键编码 (32)日常维护 (32)冲洗头的清洁 (33)错误列表 (33)洗板机的保存条件 (34)8.7 校准 (34)9 编程 (35)试剂盒结构 (35)访问编程模式 (36)编程概要 (37)9.4 添加 (38)添加:试剂盒—在当前试剂盒列表的末尾添加试剂盒 (38)试剂盒编程错误40添加方法—在选定试剂盒的最后一个方法之后添加方法 (41)方法编程中的错误:43目录添加:微孔板—在当前微孔板列表的末尾添加微孔板 (44)微孔板编程中的错误: (47)9.5 插入 (48)插入:试剂盒—在另一个试剂盒之前插入新试剂盒 (48)临时试剂盒48插入:方法—在另一个方法之前插入新的方法 (48)插入:微孔板—在另一个微孔板之前插入新微孔板 (49)9.6 删除 (50)9.6.1. 删除:试剂盒 (50)删除方法50删除:微孔板51删除微孔板时可能出现的错误 (51)9.7 编辑 (52)编辑:试剂盒52编辑:微孔板549.8 复制 (55)复制:试剂盒55复制试剂盒时可能出现的错误: (55)复制:微孔板56复制微孔板时可能出现的错误: (56)微孔板测试 (57)内存的初始化 (58)10 规格 (59)用电数据59物理数据59硬件规格59软件规格59清洗性能60CE 标志一致性声明 (65)PERKINELMER 产品的W EEE 说明 (67)1296-026 DELFIA 洗板机–常规操作 (65)索引 (66)1 仪器介绍1仪器介绍引言1296-026 DELFIA 微孔板洗板机是专为自动清洗微孔板条或微孔板而设计。
它能够独立运行,内置有真空泵与分液泵,而且带有进行操作所需的所有储液瓶与管路。
当用于 DELFIA 分析物时,可以使用即用程序。
1296-026 DELFIA 微孔板洗板机带有容积为2 升的洗液瓶、废液瓶和冲洗液瓶。
通过两个膜式泵在废液瓶中形成真空,从而进行抽吸。
在清洗过程中一直监控瓶内的真空度,以防止洗液溢出微孔板。
如果真空度不足,仪器将不会进行清洗。
通过膜式泵进行分液。
用于分液的套管上装有一个磁性阀门,由它来精确的控制分液量。
该洗板机具有自动冲洗功能。
当洗板机的闲置状态超过预设的时间(默认为 10 分钟),将自动用水进行冲洗,以防止洗液在洗板机的冲洗头上结晶。
通过5 个功能键与一个2*20 字符的液晶显示屏控制洗板机。
洗板机内预设有可供 DELFIA 分析物使用的即用操作步骤协议。
通过选择相应的试剂盒编号,就可以运行DELFIA 试剂盒。
可以通过内置的键盘,或通过运行Windows 操作系统及与洗板机一起提供的Winwash 软件的外部计算机输入新的分析物程序。
也可以为洗板机编程用于其它应用的程序。
1 仪器介绍前面板—键盘—显示屏防尘保护盖 2x20 字符带有背光的液晶显示屏及 5 个功能键8 孔/排或 12 孔/排模式载板架• 可拆卸• 耐热温度达 120°C /250°F图112 通道冲洗头• 可拆卸1 仪器介绍外部尺寸(毫米)图 21 仪器介绍液压回路DELFIA 洗板机废液瓶图 3 液体泵冲洗真空传黄色疏水滤器2 安装2安装打开包装•小心地打开附件与洗板机的包装。
重要:不能通过拉掉包装架从而上提洗板机!•首先,取出位于洗板机顶部与侧面的附件。
•然后,抓住洗板机(而不是包装架),将其上提。
•除去包装架与塑料袋,将洗板机放置在稳定的水平平面上。
•略微打开防尘盖,取走薄层包装材料(将其抽出)。
图 52 安装• 洗板机工作区(图 6&7): — 取下固定载板架下方包装材— 转动(1)并取下(2)冲洗头与前面板顶部之间的上方包装材料。
— 用手上推冲洗头支架。
— 取出(3)冲洗头与载板架之间的下方包装材料。
• 推拉载板架以检查其是否能够自由移动。
• 后面板:连接后面板上的套管(与颜色相匹配)。
如果已安装自动冲洗或者 Multiwash 选择器:使用 15 厘米长的套管连接自动冲洗或 Multiwash 选择器的输出端与洗板机右下角的输入端。
• 真空泵的保护:将黄色套管在废液瓶与洗板机之间的中点处分离,再将疏水滤器(仪器保养组件中提供)装在套管的两个分离端之间。
启动• 连接电源线图 61 2图 7 32 安装安装保险丝:额定电流为 2.5 安培将电源线插头插入带保护性地线的电源插座,该洗板机支持通用的输入切换式电 源(交流电压 85-264 伏;频率 47-440 赫兹)。
• 启动洗板机(电源开关位于后面板上)当载板架与冲洗头移向各自的初始位置时,显示屏上会出现如下信息:初始化完成后:• 将冲洗瓶充满软化水,对整个液压回路进行至少 5 次冲洗操作(参见第 31 页冲洗模式)。
• 随后即可以使用洗板机。
R U N YES OUT↑ ↓ IN SELECT: VERSION: X . X X . X X WALLAC3 配置3 配置主菜单RUN参见 §5 运行模式PRIME / RINSE参见 §6 冲洗DISINFECTION 参见 §7 消毒CONFIGURATION 参见 §3.2 洗板机配置SERVICE / VER 参见 §8 维护按 "↑" 或 "↓"键滚动浏览主菜单。
SELECT: PRIME/RINSE ↑ ↓ IN YES OUTOUTSELECT: DISINFECTION ↑ ↓ IN YESSELECT: SERVICE/VER ↑ ↓ IN YESOUTSELECT: CONFIGURATION↑ ↓ IN YES OUTVACUUM DET3 配置洗板机配置进入“CONFIGURATRION (配置)”菜单MANIFOLDVALVE PARAM. SELECT :在进行自动冲洗之前设定倒记时使用“↑”或“↓”键设定 0 到 240 分钟范围内的倒记时当设定时间为“0”时取消自动冲洗。
启动真空检测使用“↑”与“↓”键来启动(YES )或取消(NO)真空检测。
使用 ESC 键通常可以在任何时间返回到主菜单。
SELECT: CONFIGURATION ↑ ↓ IN YES OUT 返回主菜单返回主菜单AUTO RINSE IN:↑ ↓ YES10mnESC:GENERAL LANG :ENGLISH: Mini PrimeGROUP : SecuredSecur Stop : N VOL : 13 ml默认设置MANIFOLD A : 12INPUT SELECT .: 2INPUT 1 SOL. : WASH R1 INPUT 2 SOL. : RINSE R2 AUTO RINSE IN: 10 mn VACUUM DET ON A : YES BAUDS: 9600 WAKE UP: Y LANG: ENGLISH BEEP: Y Mini Prime: NSecur Stop: N4 试剂盒与微孔板参数4试剂盒与微孔板参数定义根据选择的试剂盒来清洗微孔板。