ZOOM G5N中文说明书
- 格式:pdf
- 大小:54.53 MB
- 文档页数:55

留学 zoom 使用手册(实用版)目录1.留学 zoom 使用手册概述2.zoom 的基本功能和特点3.如何注册和下载 zoom4.如何使用 zoom 进行视频会议5.如何使用 zoom 进行在线教学6.如何使用 zoom 进行远程工作7.zoom 的优点和局限性8.留学 zoom 使用手册的结论正文【留学 zoom 使用手册概述】随着全球化的发展和科技的进步,远程教育和在线学习已经成为了越来越多留学生的选项。
在这种情况下,zoom 成为了一个重要的工具。
本文旨在为留学生提供一本留学 zoom 使用手册,帮助他们更好地使用zoom 进行学习和工作。
【zoom 的基本功能和特点】zoom 是一款视频会议软件,它提供了视频会议、在线教学、远程工作等功能。
它的基本特点包括:高清视频和音频、数据传输安全、易于使用、支持多种设备等。
【如何注册和下载 zoom】要使用 zoom,首先需要在官方网站上注册一个账户,然后下载安装zoom 软件。
注册过程简单快捷,下载软件后即可开始使用。
【如何使用 zoom 进行视频会议】在使用 zoom 进行视频会议时,需要先创建一个会议,然后将会议链接发送给参会人员。
参会人员点击链接即可加入会议。
在会议中,可以进行视频和音频通话、共享屏幕和文件、进行文字聊天等。
【如何使用 zoom 进行在线教学】在使用 zoom 进行在线教学时,教师可以创建一个课堂,然后将课堂链接发送给学生。
学生点击链接即可加入课堂。
在课堂中,教师可以进行视频授课、共享屏幕和文件、进行实时互动等。
【如何使用 zoom 进行远程工作】在使用 zoom 进行远程工作时,员工可以创建一个工作空间,然后将工作空间链接发送给同事。
同事点击链接即可加入工作空间。
在工作空间中,员工可以进行视频和音频通话、共享屏幕和文件、进行文字聊天等。
【zoom 的优点和局限性】zoom 的优点包括:高清视频和音频、数据传输安全、易于使用、支持多种设备等。

ZOOMISOQUICK START GUIDE & FAQINDEXThis document is broken up into a couple sections Before StartingZoomISO versus NDI features in Zoom RoomsOperating SystemM1 Macs vs Intel MacsHow many video feeds can ZoomISO output?Let's Go!Choosing between Syphon and NDISend a Zoom participant to NDI, Syphon, or ScreenSend a Zoom participant to SDIExport individual participants in Gallery ViewGet the Screen Share, Gallery View, or Active Speaker Output TroubleshootingVerifying the received frame rate and resolution from ZoomFixing low frame rate / dropping framesFixing a black / transparent bar on your outputIntegrationsZoomOSCATEM MiniStream DeckBEFORE STARTING ZoomISO versus the newNDI features in ZoomRoomsBEFORE STARTINGThe Logistics - Operating SystemIf you don't need to use Windows, you can skip to the next page.BEFORE STARTINGThe Logistics - Operating System Cont.BEFORE STARTINGThe Logistics - M1 Macs vs Intel Macs If you don't use an M1 Mac, you can skip this page.BEFORE STARTINGHow many video feeds can ZoomISO output?LET'S GO!Choosing between Syphon, NDI 4, and NDI 5Syphon and NDI are often used in similar situations but have vastly different underlying technologies, offering unique advantages and disadvantages depending on use case:Syphon has significantly less latency than NDINDI can be made available across an entire LAN, whereas Syphon only operates within a single computerSyphon is less processor intensive than NDI, utilizing more of the GPU than the CPU (at least compared to NDI 4)Syphon has less overhead and can be used for tasks such as exporting to BlackMagic SDI devices (see Black Syphon)NDI is cross platform whereas Syphon is macOS exclusive technology, although there is a Syphon alternative for Windows called Spout Regarding NDI 4 vs NDI 5:Match encoders and decoders. If using NDI 4 for vMix, for example, use NDI4 for ZoomISO.NDI 5 is native to Apple Silicon, so if using an M1 Mac, NDI 5 is highlysuggested.LET'S GO!Send a Zoom participant to NDI, Syphon, or ScreenJoin a meeting with ZoomISO (Same process as ZoomOSC )In the Outputs Tab of ZoomISO, set the number of outputs to 4, for example. This will create floating windows.In the Participant Column of each ZoomISO Output, select a participant from the drop-down . This will route users to these floating windows.You can leave the resolution to the default size, or you can select a different resolution for each user. You can also select Full Screen and select a Display from the rightmost column to route that user to that screenEnsure “Enable NDI” and/or “Enable Syphon” are checked at the bottom of the application window1.2.3.4.5.Send a Zoom participant to SDIOutput the participant as SyphonUse Black Syphon to route the user to the proper output on a BlackMagic DeckLink.You can connect your DeckLink either via PCI-E if you have a Mac Pro, or you can place it in a TB3 Enclosure. In our testing, a DeckLink Quad 2 attached to a Sonnet Echo Express SE1 with a TB3 connection to an M1 Mac Mini works really well as an SDI output box. Other converters from Syphon / NDI to SDI are available, such as this options from Gallery Sienna 1.2.3.LET'S GO!Export individual participants in Gallery ViewJoin a meeting with ZoomISO (Same process as ZoomOSC )Set ZoomISO to Gallery View in the Zoom UIOpen the Outputs Tab of ZoomISOCheck any of the output options under Gallery OutputsFor each setting checked, an array of outputs will be posted to NDI / Syphon using the identification convention you selected.These feeds are automatically cropped from the Zoom Gallery View, so to maximize the resolution, run this on a high resolution display and make the Gallery View window as large as possible1.2.3.4. a.5.Get the Screen Share, Gallery View, or ActiveSpeaker OutputZoomISO can export it’s primary and (if available) secondary Zoom Window s as Outputs.Setting these windows to the proper views and subscribing to those NDI / Syphon outputs will allow you to access these views in isolation from the other outputs.TROUBLESHOOTINGTROUBLESHOOTING******************INTEGRATIONSZoomOSCZoomISO contains two license key entry boxes . . .One for ZoomISO itself, which will r emove the watermark and unlock the../list OSC outputOne for ZoomOSC Pro, which enables ZoomISO to send and receive all OSC commands in ZoomOSC ProThis flexibility in licensing allows you to consolidate your keys into a single app instance, but also permits you to split them up when multiple clients are desirable, or when you don’t need to license ZoomOSC Pro.ATEM MiniYou can use ZoomISO with an ATEM Mini either by(1) taking the HDMI outputs from the hosting computer directly into theATEM or(2) by using a DeckLink and converting the SDI to HDMI for the ATEMMini to pull in.INTEGRATIONSStream Deck (OSC)ZoomISO can be controlled via Open Sound Control (OSC), which is a protocol supported by most production systems.While ZoomISO contains all of the OSC commands from ZoomOSC Essentials, as well as the ../list output from ZoomOSC Pro, there is a special user action command that is exclusive to ZoomISO:../outputISO TARGET OUTPUT_ID。


Accessing the Virtual Event:When you are ready to access the event, you can click the ‘Go to My Event’ button found either in an email.Logging In:After clicking the link to go to the virtual event, you will be prompted to log in. After entering your first name, last name, and email address, a verification code will be sent to your email or cell phone. Troubleshooting Log In:Ensure you are entering the same email you registered with for the event.Make sure you are not on VPN when accessing the site.Check spam and junk folders for the email.The email or text should be triggered in less than a minute.If you still do not receive the verification code, contact the planner.*Once logged in, if you accept website cookies, you will stay logged into the event for 24 hours. Navigating the Virtual Event:My Event PageThis is the homepage of the virtual event. You will be able to view live and upcoming sessions, and basic event details.You can click into an individual session straight from this page. Additionally, you can access the event website by clicking the ‘visit event website’ link.You also can reference the Home Page Attendee Guide for more specific navigation.All Sessions PageThis tab lists all the sessions available for you to attend during the event. They are listed in the order the occur. The page will appear in the time zone of the event by default, but you are able to adjust the times to the time zone you are viewing in for ease of use. You can click on the session name to access the content of the session.You also can add or remove sessions from your personalized schedule on this page.My Sessions PageThis page shows your personalized schedule based off the sessions you are registered for. You can join the sessions from this page by clicking the join session button or the session name. You can remove sessions from your schedule on this page if you no longer wish to attend. On Fire PageOn this page you can view all the business units and the 100% achievers for each unit.All the business units are listed in alphabetical order, but you have the ability to search and filter.Accessing a Session:When it is time for you to join a session, click the name of the session or the join session button to get to the session page.On the session page, you can view a description of the session, information on who is speaking, and any session documents that were shared. If you are viewing the sessions before it begins, you can add that session to your personal calendar.If the session is live, you can see all the questions being asked during that session.When you are ready to join, s elect the ‘Join Session’ button, which will open the video playerfor you.Asking a questionIf you are in a session that is accepting Q&A, select the ‘ask a question button’ to open a text box. You can ask the question anonymously or include your name.You also have the option to upvote other attendees’ questions.Joining a sessionSelect the ‘Join Now’ button when you are ready to access the content. If the session is a livestream session, then a video will pop open and you will be able to view the content. If you are viewing the session during the time it is aired, you can pause the content, but it will not hold your place. If you are watching a recording, you can pause and play the video like usual.If the session is Microsoft Teams collaborative session, the ‘Join Now’ button will prompt a Microsoft Teams window to open.Booking an AppointmentYou can book an appointment with another attendee or by clicking “schedule appointment” on the homepage.You can choose which type of appointment you would like to make and who you would like to make it with, the time, and add a note. Once you send the invitation, the meeting will appear on your agenda as ‘pending’ until accepted.When it is time for you to join your meeting, you will click on the meeting and then click join to open the Teams meeting.Attendee Support:If you need assistance, please contact the event planner. You can access their information by clicking ‘Visit event website’ or ‘View your registration’ on the event home page. Once on the event website, click ‘contact us.’。
505是一款低档次、适合非专业吉他手用的电吉他合成效果器,关于性能和音色的优劣,早有很多琴友评价过了。
不过你必须要承认这么一个事实,它的销量是世界第一,也就是说,有相当一批吉他手使用过或正在使用ZOOM 505。
说来惭愧,我从开始玩电琴,就用的单块,最多时也不过多串一块,直到前段时间,下决心打算把电琴水平再提高一些,于是,便购买了ZOOM 505,经过这段时间的摸索和体会,积累了一点心得,特整理如下。
(以505第一代为例,第二代大同小异,无非就是多了几个音色而已。
)特别声明两点:1、我只是个业余玩家,很多特定(尤其是电子物理方面的)术语可能说的不够专业,而且由于对电子学领域很陌生,虽然下功夫研究了它的电路图,但仍然多处不甚明白。
希望琴友批评和补充。
2、查询了很多网站,几乎没找到更详细一些的中文说明资料,这也是我下决心写此文的一个原因,请体谅小T写作的艰辛和痛苦,尊重我的知识产权,尽管此文不打算向任何杂志、刊物投稿,但我还是坚持保留一切版权,任何个人或团体转载或传播之前请务必与本人协商!一、简介(这些不说大伙也都知道,比如大体性能和A-F 24种可编辑存储的音色等。
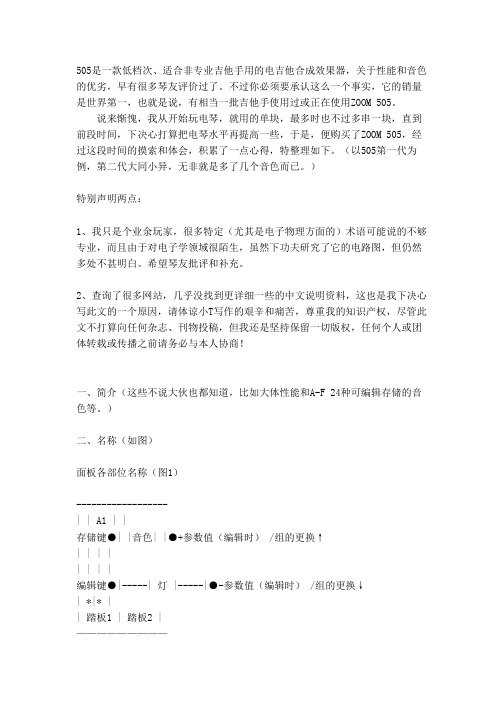
)二、名称(如图)面板各部位名称(图1)------------------| | A1 | |存储键●| |音色| |●+参数值(编辑时) /组的更换↑| | | || | | |编辑键●|-----| 灯 |-----|●-参数值(编辑时) /组的更换↓| *|* || 踏板1 | 踏板2 |—————————后侧各插孔意义(图2)——————————————————| 1 2 3 4 || ◎◎ ZOOM ◎◎ || |——————————————————1、→电吉他2、→9V变压器电源3、→外接踏板4、输出插口→音箱或耳机三、原厂的24种音色尽管鲜有人使用,但还是有必要说明一下,这是你进行各类音色设置的最直接参照,在此基础上修改会事半功倍。
zoomh6+鱼竿麦中文说明书Zoom H6是一款多功能音频录制设备,其设计灵感来源于传奇的H4n。
Zoom H6拥有更强大的功能和更高的音频质量,尤其适合于采访、音乐录制和现场表演。
本文将介绍ZoomH6的详细说明书,包括设备的功能、操作指南和技巧。
一、产品概述Zoom H6是一款便携式音频录制设备,采用了模块化设计,配备了更高性能的麦克风捕捉声音。
它不仅能够录制高质量的音频,还具备了丰富的功能,如多个麦克风输入、内置音频接口、可编辑和传输音频文件等。
二、功能特点1. 麦克风输入:Zoom H6具有四个XLR/TRS组合接口,支持各类麦克风的输入,包括动圈麦克风、电容麦克风和线性麦克风。
2. 多声道录制:Zoom H6支持最高六个声道的同时录制,可满足不同录音需求,如采访、乐队演出和剧院表演等。
3. 模块化设计:Zoom H6可根据不同的应用场景更换不同的麦克风模块,如全向麦克风模块、双电容麦克风模块和MS立体声麦克风模块等。
4. 高保真音质:Zoom H6采用了高品质的预置减益器件和高分辨率的模数转换器,可以录制更真实、细致的音频。
5. 独立音量控制:每个麦克风输入通道都有独立的音量控制,方便用户根据需要调节输入音量。
6. 多功能显示屏:Zoom H6配备了高分辨率的液晶显示屏,可实时显示录音状态、音量指示和音频波形图等信息。
三、操作指南1. 麦克风连接:使用标准的XLR或TRS连接线将麦克风插入Zoom H6的相应接口上,并确保插头插入到底部。
2. 麦克风设置:打开Zoom H6电源,按下麦克风开关并选择所需要的麦克风输入通道。
3. 音频录制:按下录制按钮,开始录制音频。
可以通过音量控制旋钮调节麦克风输入音量。
4. 文件管理:在录音过程中,可以使用Zoom H6的操作按钮进行文件管理,包括新建文件夹、删除文件和重命名文件等操作。
5. 音频传输:通过USB接口连接Zoom H6和计算机,可以将录制好的音频文件传输到计算机中进行编辑和处理。
zoommg50说明书Zoom MG50 是一款多功能电子变焦镜头,适用于各种摄影需求。
它采用先进的技术,具有高精度的变焦功能和清晰的成像效果。
本说明书将详细介绍 MG50 的使用方法、功能特点以及一些常见问题的解决方法,帮助用户更好地了解和使用这款产品。
第一部分:产品介绍MG50是一种具有电子变焦功能的镜头,它适用于单反相机、无反相机以及摄像机。
它的变焦倍数为50倍,可以满足用户在不同拍摄场景下的需求。
1.1功能特点-变焦范围广泛:MG50的变焦倍数为50倍,用户可以通过控制旋钮轻松调整焦距,实现不同拍摄场景下的远近拍摄需求。
-高清晰度成像:MG50采用高精度的光学镜片和先进的成像技术,能够实现高质量的成像效果,提供清晰细腻的画面。
-稳定变焦功能:MG50采用了先进的图像稳定技术,能够在变焦过程中保持画面的稳定,避免因抖动造成的模糊情况。
-兼容性强:MG50具有广泛的兼容性,可以与各种品牌的相机和摄像机配合使用,方便用户进行拍摄。
1.2安全使用注意事项-使用前请阅读本说明书,并按照说明进行正确操作。
-在使用过程中,注意保持干燥、避免接触潮湿环境。
-使用后请将MG50放置在干燥通风的地方。
-不要将MG50暴露在阳光下或高温环境中。
-避免将MG50摔落或受到强烈的震动。
第二部分:使用方法2.1安装MG50-将MG50与相机或摄像机的镜头螺纹对准。
-顺时针旋转MG50,直到固定牢固。
-确保MG50安装稳固后,即可开始使用。
2.2调整焦距-通过MG50上的变焦旋钮控制焦距的调整。
-逆时针旋转变焦旋钮可放大拍摄物体。
-顺时针旋转变焦旋钮可缩小拍摄物体。
2.3拍摄技巧-在拍摄远距离物体时,使用MG50的最大焦距,可以得到清晰的远景效果。
-在拍摄近距离物体时,使用MG50的最小焦距,可以得到清晰的近景效果。
-在变焦过程中,保持相机稳定,可以得到更清晰的图片效果。
第三部分:常见问题解答3.1MG50是否兼容所有相机和摄像机?MG50具有广泛的兼容性,可以与大多数品牌的相机和摄像机搭配使用。