使用BlazeDS实现Java和Flex通信
- 格式:pdf
- 大小:323.33 KB
- 文档页数:9


需要软件:jdk-6u12-windows-i586-p.exe、apachetomcat.exe、myeclipse-8.0.0-win32.exe、blazeds-turnkey-4.0.0.14931.zip、FlashBuilder_4_Plugin_LS10.exe一、安装jdk按照步骤,选择路径安装,安装成功后,在安装路径下有java文件,包含jdk和jre 两个子文件。
二、JDK环境变量配置的步骤如下:1.我的电脑-->属性-->高级-->环境变量.2.配置用户变量:a.新建JAVA_HOMEC:\Program Files\Java\jdk1.5.0(JDK的安装路径)b.新建 PATH%JAVA_HOME%\bin;c.新建CLASSPATH.;%JAVA_HOME%\lib;3.测试环境变量配置是否成功:开始-->运行--〉CMD键盘敲入:JAVAC -version出现jdk版本信息,而不是出错信息,即表示配置成功!环境变量配置的理解:1. PATH环境变量。
作用是指定命令搜索路径,在i命令行下面执行命令如javac编译ja va程序时,它会到PATH变量所指定的路径中查找看是否能找到相应的命令程序。
我们需要把jdk安装目录下的bin目录增加到现有的PATH变量中,bin目录中包含经常要用到的可执行文件如javac/java/javadoc等待,设置好PATH变量后,就可以在任何目录下执行javac/java 等工具了。
2. CLASSPATH环境变量。
作用是指定类搜索路径,要使用已经编写好的类,前提当然是能够找到它们了,JVM就是通过CLASSPTH来寻找类的。
我们需要把jdk安装目录下的lib子目录中的dt.jar和tools.jar设置到CLASSPATH中,当然,当前目录“.”也必须加入到该变量中。
3. JAVA_HOME环境变量。
它指向jdk的安装目录,Eclipse/NetBeans/Tomcat等软件就是通过搜索JAVA_HOME变量来找到并使用安装好的jdk。

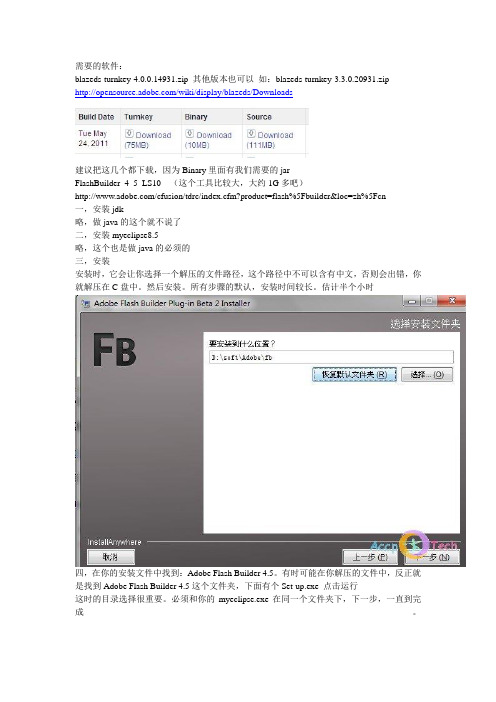
需要的软件:blazeds-turnkey-4.0.0.14931.zip 其他版本也可以如:blazeds-turnkey-3.3.0.20931.zip/wiki/display/blazeds/Downloads建议把这几个都下载,因为Binary里面有我们需要的jarFlashBuilder_4_5_LS10 (这个工具比较大,大约1G多吧)/cfusion/tdrc/index.cfm?product=flash%5Fbuilder&loc=zh%5Fcn一,安装jdk略,做java的这个就不说了二,安装myeclipse8.5略,这个也是做java的必须的三,安装安装时,它会让你选择一个解压的文件路径,这个路径中不可以含有中文,否则会出错,你就解压在C盘中。
然后安装。
所有步骤的默认,安装时间较长。
估计半个小时四,在你的安装文件中找到:Adobe Flash Builder 4.5。
有时可能在你解压的文件中,反正就是找到Adobe Flash Builder 4.5这个文件夹,下面有个Set-up.exe 点击运行这时的目录选择很重要。
必须和你的myeclipse.exe在同一个文件夹下,下一步,一直到完成。
五,到此flex4安装完成。
找到Adobe Flash Builder 4.5\eclipse 下面有两个文件夹features和plugins注意:这一步很重要,如此出错,可能导致你的mycelipse不可用。
继续将这两个文件夹中的内容copy到mycelipse 安装路径下的Common下的features和plugins 文件中记住,只是copy其中的内容到相应的文件夹下,不是整个文件夹Ok,flex开发工具集成到myeclipse完成六,配置tomcat还记得前面下载了blazeds-turnkey吗?里面有个tomcat,其中webapps目录下有三个文件Samples,blazeds,ds-console ,将它们copy到你自己的tomcat对应的wepapps中启动tomcat 运行一下http://localhost:8080/samples如果有页面出现,ok,你成功了七,简单介绍一下下载的这两个文件的作用FlashBuilder:里面包含了flex的类库等。


BlazeDS初始化时用于动态创建services, destinations, and adapters。
SpringRemotingDestinationBootstrapService扩展AbstractBootstrapService。
SpringRemotingDestinationBootstrapService 自动导出包含"@Service标注及以FlexService结尾"的Spring Bean为RemoteObject。
@SuppressWarnings("all")public class SpringRemotingDestinationBootstrapService extends AbstractBootstrapService {public static final String DEFAULT_INCLUDE_END_WITH_BEANS = "FlexService";private static Logger logger =LoggerFactory.getLogger(SpringRemotingDestinationBootstrapService.cla ss);private String destChannel;private String destSecurityConstraint;private String destScope;private String destAdapter;private String destFactory;private String serviceId;private String includeEndsWithBeans;@Override/***初始化入口*/public void initialize(String id, ConfigMap properties) { serviceId = properties.getPropertyAsString("service-id", "remoting-service");destFactory = properties.getPropertyAsString("dest-factory", "spring");destAdapter = properties.getProperty("dest-adapter");destScope = properties.getProperty("dest-scope");destSecurityConstraint =properties.getProperty("dest-security-constraint");destChannel = properties.getPropertyAsString("dest-channel", "my-amf");includeEndsWithBeans =properties.getPropertyAsString("includeEndsWithBeans",DEFAULT_INCLUDE_END_WITH_BEANS);Service remotingService = broker.getService(serviceId);if (remotingService == null)throw createServiceException("not found Service with serviceId:" + serviceId);createSpringDestinations(remotingService);}private ServiceException createServiceException(String message) {ServiceException ex = new ServiceException();ex.setMessage(message);return ex;}/***将Spring的Service Name自动定义为destination*/private void createSpringDestinations(Service remotingService) { WebApplicationContext wac = WebApplicationContextUtils.getWebApplicationContext(broker.getServletContext());List<String> addedBeanNames = new ArrayList();for (String beanName : wac.getBeanDefinitionNames()) {Class type = wac.getType(beanName);logger.debug("{}: {}", new Object[]{beanName,type.getName()});boolean isCreateSpringDestination = !type.isAnnotationPresent(com.grgbanking.platform.core.flex.NoneRemoti ngObject.class)|| beanName.endsWith(includeEndsWithBeans) || isCreateDestination(beanName, type);if (isCreateSpringDestination) {createSpringDestination(remotingService, beanName);addedBeanNames.add(beanName);}}("[Auto Export Spring toRemotingDestination],beanNames={}", addedBeanNames);}protected boolean isCreateDestination(String beanName, Class type) {return false;}/** <!-- 动态生成的配置内容 --> <destination id="sampleVerbose"><channels> <channel* ref="my-secure-amf" /> </channels> <adapter ref="java-object" /> * <security> <security-constraint ref="sample-users" /> </security> * <properties> <source>pany.SampleService</source>* <scope>session</scope> <factory>myJavaFactory</factory></properties>* </destination>*/protected void createSpringDestination(Service service, String destinationId) {flex.messaging.services.remoting.RemotingDestinationdestination = (flex.messaging.services.remoting.RemotingDestination) service.createDestination(destinationId);destination.setSource(destinationId);destination.setFactory(destFactory);if (destAdapter != null) {destination.createAdapter(destAdapter);}if (destScope != null) {destination.setScope(destScope);}if (destSecurityConstraint != null) {destination.setSecurityConstraint(destSecurityConstraint);}if (destChannel != null) {destination.addChannel(destChannel);}service.addDestination(destination);}2)修改SpringFactory并扩展FlexFactory根据destination的id,将Flex的destination映射为Spring的Beanpublic class SpringFactory implements FlexFactory {private static final String SOURCE = "source";/***This method can be used to initialize the factory itself.It is called*with configuration parameters from the factory tag which defines the id*of the factory.*/public void initialize(String id, ConfigMap configMap) {}/***This method is called when we initialize the definition of an instance*which will be looked up by this factory.It should validate that the*properties supplied are valid to define an instance.Any valid properties*used for this configuration must be accessed to avoid warnings about *unused configuration elements.If your factory is only used for *application scoped components,this method can simply return a factory*instance which delegates the creation of the component to the*FactoryInstance's lookup method.*/public FactoryInstance createFactoryInstance(String id, ConfigMap properties) {SpringFactoryInstance instance = new SpringFactoryInstance(this, id, properties);instance.setSource(properties.getPropertyAsString(SOURCE, instance.getId()));return instance;} // end method createFactoryInstance()/***Returns the instance specified by the source and properties arguments.*For the factory,this may mean constructing a new instance, optionally*registering it in some other name space such as the session or JNDI, and*then returning it or it may mean creating a new instance and returning *it.This method is called for each request to operate on the given item*by the system so it should be relatively efficient.*<p>*If your factory does not support the scope property,it report an error*if scope is supplied in the properties for this instance.*/public Object lookup(FactoryInstance inst) {SpringFactoryInstance factoryInstance = (SpringFactoryInstance) inst;return factoryInstance.lookup();}/***Spring工厂实例,执行实际的查找动作.**@author yrliang**/static class SpringFactoryInstance extends FactoryInstance { SpringFactoryInstance(SpringFactory factory, String id, ConfigMap properties) {super(factory, id, properties);}@Overridepublic String toString() {return"SpringFactory instance for id="+ getId() + " source=" + getSource() + " scope=" + getScope();}@Overridepublic Object lookup() {Logger logger =LoggerFactory.getLogger(SpringFactory.class);ApplicationContext appContext = WebApplicationContextUtils .getWebApplicationContext(flex.messaging.FlexContext.getServletCo nfig().getServletContext());String beanName = getSource();try {logger.debug("lookup(): bean id=" + beanName);//flex.messaging.FlexContext.getHttpRequest().getSession().getAttribute (arg0);return appContext.getBean(beanName);} catch (NoSuchBeanDefinitionException nexc) {ServiceException e = new ServiceException();String msg = "Spring service named '"+ beanName + "' does not exist.";e.setMessage(msg);e.setRootCause(nexc);e.setDetails(msg);e.setCode("Server.Processing");logger.error("",nexc);throw e;} catch (BeansException bexc) {ServiceException e = new ServiceException();String msg = "Unable to create Spring service named '" + beanName + "' ";e.setMessage(msg);e.setRootCause(bexc);e.setDetails(msg);e.setCode("Server.Processing");logger.error("",bexc);throw e;}}}}3)配置service-config.xml<?xml version="1.0" encoding="UTF-8"?><services-config><factories><factory id="spring"class="com.grgbanking.platform.core.flex.spring.SpringFactory"/> </factories><services><service-include file-path="remoting-config.xml" /><service-include file-path="proxy-config.xml" /><service-include file-path="messaging-config.xml" /><service id="spring-remoting-service"class="com.grgbanking.platform.core.flex.spring.SpringRemotingDestina tionBootstrapService"><!-- 其它生成的RemotingDestination默认属性<adapters><adapter-definition id="java-object"class="flex.messaging.services.remoting.adapters.JavaAdapter"default="true" /></adapters><default-channels><channel ref="my-amf" /></default-channels>--><properties><!--<service-id></service-id><dest-factory></dest-factory><dest-adapter></dest-adapter><dest-scope></dest-scope><dest-channel></dest-channel><dest-security-constraint></dest-security-constraint><includeEndsWithBeans></includeEndsWithBeans>--></properties></service></services>4)FLEX客户端调用this.blogFlexService = new RemoteObject("blogFlexService");//这里需要指定endpoint,因为是动态的RemotingDestination,而静态的RemotingDestination ,flex编译器会将endpoint编译进源代码.//这个也是flex编译器需要指定配置文件而导致使用flex经常会犯的错误之一.this.blogFlexService.endpoint = '../messagebroker/amf';3.公司应用案例这种整合最早是在2010年的FEEL View 5.0中使用,后台的统一平台,FEEL View5.1中都采用这种方法进行整合。

OGSA-DAI和Flex开发数据网格应用探讨摘要:OGSA-DAI是一个开源的数据网格中间件,用于简化对数据的访问与集成,支持访问关系数据库、XML数据库和文件目录系统等数据源,但是没有提供表现层解决方案。
探讨了利用OGSA-DAI,结合Flex设计了一个实现多源异构数据库集成的框架。
关键词:OGSA-DAI;Flex;异构数据库0 引言实现对分布式异构关系数据库访问与集成时,常常运用OGSA-DAI(Open Grid Service Architecture Data Access And Integration,开放网格服务体系结构数据访问与集成)来开发。
但是,OGSA-DAI没有提供表现层的解决方案,允许应用开发者自由选择表现层解决方案,并通过Web Services方式与OGSA-DAI 交互。
Flex是目前最流行的RIA(Rich Internet Application,富互联网应用程序)解决方案之一,相比于传统网络应用,拥有更加卓越的交互能力和绚丽的表现效果。
因此采用OGSA-DAI结合Flex,充分发挥两者的优势,可以大大提高开发效率。
1 OGSA-DAI和Flex特点分析1.1 FlexFlex的开发模式是基于事件驱动的,为程序开发人员提供了丰富的数据显示或与用户交互的组件库。
Flex组件部署简单、安全性高、扩展灵活、交互表现丰富、编程容易,使程序员从繁重的界面调试中得到解脱,加快了Web应用系统的开发速度。
1.2 OGSA-DAI利用OGSA-DAI可以有效地屏蔽底层平台的异构性,实现异构数据库的统一访问,具体特点有:①可配置性,即实现数据源的“即插即用”;②可扩展性,以提高数据访问的透明性,便于维护和更新;③全局数据库视图。
要求将网格环境下的多个异构数据库的共享信息集成为一个全局数据库视图,用户访问多个异构数据库就如访问单个数据库一样,实现分布式透明访问;④统一的查询模式。
统、运行管理系统、ECP系统、PCP系统、IMS系统、卫星定位系统和时间监控等,通过集成多个系统数据为平台提供基础数据信息。
2.1.2数据存储层该层通过逻辑设定业务数据,抽取数据源层的信息并存储于该层中,为应用设计层或分析展现层提供数据服务。
本平台的数据来源是取自ERP和ECP系统,并新建了数据库,具体分析抽取数据中心数据,实现各功能模块的需求。
数据中心会在规定的时间内自动从ERP和ECP系统中提取更新数据。
2.1.3应用设计层该层是关键环节,位于数据存储层与分析展现层中间,通过数据逻辑的设定,在数据交换中起承上启下的作用。
应用设计层采用Java开发,由Spring框架统一管理,用iBatis 框架实现与数据库的交互,对数据进行业务逻辑处理。
其中,Flex与Java的通讯主要利用BlazeDS组件。
2.1.4分析展现层分析展现层通过WEB形式呈现不同纬度的业务报表和图形,主要功能是接受用户请求,处理用户业务操作。
本系统的分析展现层采用Flex为主,JSP/HTML为辅的方式,实现统一访问入口和单点登录,提供在线的指标监控、预警、分析和辅助决策,结合水晶报表的灵活开发,形成具有可视化、动态的报表展现界面。
2.2物资管理信息系统数据库设计2.2.1数据结构设计数据库系统中的数据概念模型是以用户需求为基础,选用实体-联系图来描述数据库概念结构设计,概念模型转换为DBMS支持的数据模型。
E-R数据模型可以将现实世界的信息数据用于图文属性信息,实物及其发展变化及相关联系一并展现出来,概念数据通常利用CDM图进行建模。
2.2.2数据表设计数据库设计是系统核心部分,必须进行规范性的数据输入。
本文遵循符合第三范式(3NF)设计原则,建立性能好,扩展性和数据完整性俱佳的数据库,其数据表主要有:①业务数据表:详细登记业务的变化,如处理详细过程、结果审批、计划策略、检验结果等。
②基本数据信息表:记录服务器数据基本信息和编码等情况。
OGSA-DAI和Flex开发数据网格应用探讨摘要:OGSA-DAI是一个开源的数据网格中间件,用于简化对数据的访问与集成,支持访问关系数据库、XML数据库和文件目录系统等数据源,但是没有提供表现层解决方案。
探讨了利用OGSA-DAI,结合Flex设计了一个实现多源异构数据库集成的框架。
??关键词:OGSA-DAI;Flex;异构数据库??中图分类号:TP393.09 文献标识码:A 文章编号:1672-7800(2011)05-0094-02?お???0 引言??实现对分布式异构关系数据库访问与集成时,常常运用OGSA-DAI(Open Grid Service Architecture Data Access And Integration,开放网格服务体系结构数据访问与集成)来开发。
但是,OGSA-DAI没有提供表现层的解决方案,允许应用开发者自由选择表现层解决方案,并通过Web Services方式与OGSA-DAI交互。
Flex是目前最流行的RIA(Rich Internet Application,富互联网应用程序)解决方案之一,相比于传统网络应用,拥有更加卓越的交互能力和绚丽的表现效果。
因此采用OGSA-DAI结合Flex,充分发挥两者的优势,可以大大提高开发效率。
??1 OGSA-DAI和Flex特点分析??1.1 Flex??Flex的开发模式是基于事件驱动的,为程序开发人员提供了丰富的数据显示或与用户交互的组件库。
Flex组件部署简单、安全性高、扩展灵活、交互表现丰富、编程容易,使程序员从繁重的界面调试中得到解脱,加快了Web应用系统的开发速度。
??1.2 OGSA-DAI??利用OGSA-DAI可以有效地屏蔽底层平台的异构性,实现异构数据库的统一访问,具体特点有:①可配置性,即实现数据源的“即插即用”;②可扩展性,以提高数据访问的透明性,便于维护和更新;③全局数据库视图。
要求将网格环境下的多个异构数据库的共享信息集成为一个全局数据库视图,用户访问多个异构数据库就如访问单个数据库一样,实现分布式透明访问;④统一的查询模式。
基于Flex的电子商务网站框架设计与实现摘要:该文针对电子商务这样典型的以数据为中心,存在大量用户的系统,为了丰富用户体验、提高互动性,提出了基于Flex+J2EE 框架下的电子商务网站的设计方案与实现方法。
该方案提升了电子商务系统的开发与维护效率,为现有遗留系统引入RIA框架提供了可靠方案。
关键字:RIA Flex 电子商务框架随着电子商务规模的不断扩大,电子商务网站建设的优劣直接影响电子商务的效果。
传统的Web电子商务网站一般都采用页面表现内容、由服务器端传递数据的开发模式。
其客户端是浏览器,主要是靠服务器端程序来处理相关业务程序,这种模式易于管理,安全性高,而且硬件花费较少,但同时也存在着缺乏灵活性、服务器端遇到网络带宽问题、应用程序缺乏丰富的用户界面及高效的多媒体处理性能等缺点。
因此,为了满足用户更高的、更全方位的使用体验要求,就需要功能更加强大的表示层。
于是,被称为富互联网应用(简称RIA)的、具有丰富用户体验和高度互动性的网络应用模式应运而生。
1 Flex技术简介Flex技术由MXML、ActionScript及Flex类库三部分组成。
MXML 是用来描述Flex程序视图部分的基于XML的标记语言,主要用来呈现Flex的用户界面,也包括一些不可见元素,例如数据绑定、访问数据源等。
ActionScript是一种基于ECMAScript的面向对象编程语言,主要负责实现和控制客户端程序逻辑。
Flex还提供了一个丰富的类库,包括了各种Flex容器和控件、行为组件、数据绑定组件及其他功能组件[1]。
这些组件作为辅助,来加快整个开发的进程。
2 电子商务网站功能设计基于Flex技术开发的电子商务网站,彻底改变了以往的交互过程,让顾客可以个性化地配置所选商品,并即时得到商品的最终效果,让顾客的购物过程更方便更快捷,极大的改善了顾客的购物体验。
2.1 需求分析对于电子商务这样的数据流量较大的数据库管理系统类网络管理系统,必须做到使用方便、操作灵活等设计要求。
使用BlazeDS实现Java和Flex通信作者:Liceven,博客: 日期:2008-6-3转载请注明来源。
谢谢合作。
BlazeDS是一个基于服务器的Java 远程控制(remoting)和Web消息传递(messaging)技术,它能够使得后端的Java应用程序和运行在浏览器上的Adobe Flex应用程序相互通信。
这篇文章中,我讲述一种方法(也许不是最好的)使得我能够成功地利用BlazeDS和Flex建立一个简单的程序。
使用的IDE是eclipse,而并非Flex Builder.下面我将逐步介绍怎么实现这个简单的程序。
1.安装JDK 和Tomcat,并且实现成功配置。
详细请见:/u/21684/showart_195064.html2.安装Flex SDK. 详细请见官方文档:/devnet/flex/?navID=gettingstarted3.下载BlazeDS ,下载地址和安装方法请参考:/wiki/display/blazeds/Release+ Builds。
如果你使用的是turnkey 版本(建议下载此版本)里面实际上包含了Tomcat服务器了。
但是本人因为之前已经装好了Tomcat6.0.16了,所以我的安装的是自己手动的了。
如果你使用的是整合Tomcat版本的BlazeDS,那么请参考/wiki/display/blazeds/Installation+Guide。
下面我介绍只安装BlazeDS的web application 版本(但是仍然下载的是Turnkey版本)。
下载的zip包里面包含了: blazeds.war: 主要的BlazeDS war 文件,用来建立你的BlazeDS应用程序。
Sample.war就是BlazeDS例子了。
Ds-console.war,简单的BlazeDS部署管理程序。
每一个war程序都是独立的,假如你使用J2EE的web应用程序选项,那么你必须有一个J2EE应用服务器或者servlet容器。
比如使用Tomcat.而且必须把刚才的三个war文件部署在Tomcat_Home(tomcat安装目录)下的webapps目录下。
然后重启Tomcat服务器,在浏览器输入:http://localhost:8080/samples如果看到显示页面代表就成功了。
如果你的应用程序需要使用HSWLDB数据库,那么也拷贝.zip文件中的sampledb目录到webapps目录下,然后启动数据库。
启动方法很简单:到sampledb目录下,执行startdb.bat就可了(windows OS)。
提示:可以的话,在你的Eclipse目录下,找到eclipse.ini把最大内存数改成512. 4.(可选)配置Tomcat的用户角色。
即在Tomcat_Home/conf/tomat-users.xml添加以下语句:<role rolename="manager"/><user username="abhi" password="abhi" roles="manager"/> 5.利用Eclipse建立Flex Project。
工程名字叫做BlazeApp.Application Type 选择web application, 服务器选择J2EE.关联WTP,至于代码文件保存目录自定义。
Next。
6.设置J2EE服务器。
我们选择Tomcat,可能需要手动配置(new)。
然后选择flex war文件,即我们放在webapps目录下的blazeds.war.然后next.7.接着,默认设置,也可自定义。
接着next.其实到这里已经完成了project建立。
8.接下来你可以在eclipse中可以看到整个工程的所有文件以及配置。
在开发之前,可能需要修改context root配置。
点击BlazeApp右键,选择属性,然后见到如图,修改context root值为BlazeApp.(默认的是WebContent,好像不更改也可以。
自行测试…)。
9.创建Java文件。
点击src文件夹,然后创建java class. 类的包为hello,名字为HelloWorld.package hello;public class HelloWorld {public String sayHelloTo(String str) {System.out.println("Hello " + str);return "Hello " + str; }}10.在BlazeApp.mxml文件中新建一个text和一个按钮,来显示从HelloWorld传回来的信息。
<?xml version="1.0" encoding="utf-8"?><mx:Application xmlns:mx="/2006/mxml" viewSourceURL="srcview/index.html"><mx:Script><![CDATA[ import mx.rpc.events.FaultEvent;import mx.rpc.events.ResultEvent;[Bindable]private var helloResult:String;private function sayHelloTo():void {ro.sayHelloTo(inputText.text);}private function resultHandler(event:ResultEvent):void {helloResult = event.result as String;} ]]> </mx:Script><mx:RemoteObject id="ro" destination="helloworld" result="resultHandler(event)" /><mx:HBox width="100%"><mx:TextInput id="inputText"/><mx:Button label="Submit" click="sayHelloTo()"/> </mx:HBox><mx:Label text="{helloResult}"/></mx:Application>11.现在,我们要定义remote object来是的你的flex程序能够调用java类。
首先来配置/WEB-INF/flex/remoting-config.xml文件,添加以下粗体部分来新增一个destionation—HelloWorld类。
<?xml version="1.0" encoding="UTF-8"?><service id="remoting-service"class="flex.messaging.services.RemotingService"><adapters><adapter-definition id="java-object" class="flex.messaging.services.remoting.adapters.JavaAdapter" default="true"/> </adapters><default-channels><channel ref="my-amf"/></default-channels><destination id="helloworld"><properties><source>hello.HelloWorld</source></properties></destination></service>12.到此,配置结束。
然后选择BlazeApp项目,选择在服务器上执行。
即浏览地址为:http://localhost:8080/BlazedApp/BlazedApp.html如果你能在输入框输入字段之后,点击按钮能返回Hello,XXX的信息,就代表成功了。
如图:(我使用的例子的工程名字叫做DSTest除此之外操作相同,另外附录中的程序也是使用DSTest。
请自行参考。
)13.参考文献:/blojsom/blog/yac/BlazeDS/BlazeDS-avec-Flex-builder-3-Tomcat-6-et-les-webtools?smm=y以及/2008/03/blazeds-for-java-flex-communication.html#sampleCode。