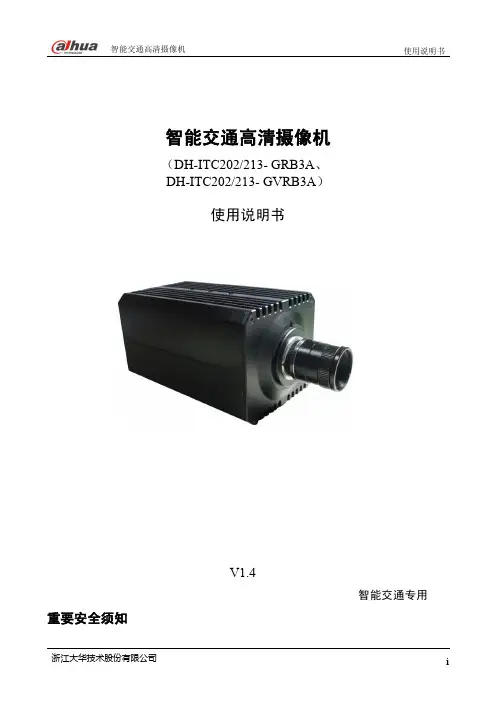
DH智能交通高清摄像机—WEB说明书
- 格式:pdf
- 大小:3.60 MB
- 文档页数:69
Network Traffic Camera • User ManualNetwork Traffic Camera (for Checkpoint and Intersection Violation System)Quick Start Guide© 2020 Hangzhou Hikvision Digital Technology Co., Ltd. All rights reserved.This Manual is the property of Hangzhou Hikvision Digital Technology Co., Ltd. or its affiliates (hereinafter referred to as “Hikvision”), and it cannot be reproduced, changed, translated, or distributed, partially or wholly, by any means, without the prior written permission of Hikvision. Unless otherwise expressly stated herein, Hikvision does not make any warranties, guarantees or representations, express or implied, regarding to the Manual, any information contained herein.About this ManualThe Manual includes instructions for using and managing the Product. Pictures, charts, images and all other information hereinafter are for description and explanation only. The information contained in the Manual is subject to change, without notice, due to firmware updates or other reasons. Please find the latest version of this Manual at the Hikvision website (https:///en/).Please use this Manual with the guidance and assistance of professionals trained in supporting the Product.Trademarks Acknowledgement●and other Hikvision’s trademarks and logos are the properties of Hikvision in various jurisdictions.●Other trademarks and logos mentioned are the properties of their respective owners.LEGAL DISCLAIMER●TO THE MAXIMUM EXTENT PERMITTED BY APPLICABLE LAW, THIS MANUAL AND THE PRODUCT DESCRIBED, WITHITS HARDWARE, SOFTWARE AND FIRMWARE, ARE PROVIDED “AS IS” AND “WITH ALL FAULTS AND ERRORS”.HIKVISION MAKES NO WARRANTIES, EXPRESS OR IMPLIED, INCLUDING WITHOUT LIMITATION, MERCHANTABILITY, SATISFACTORY QUALITY, OR FITNESS FOR A PARTICULAR PURPOSE. THE USE OF THE PRODUCT BY YOU IS AT YOUR OWN RISK. IN NO EVENT WILL HIKVISION BE LIABLE TO YOU FOR ANY SPECIAL, CONSEQUENTIAL, INCIDENTAL, OR INDIRECT DAMAGES, INCLUDING, AMONG OTHERS, DAMAGES FOR LOSS OF BUSINESS PROFITS, BUSINESS INTERRUPTION, OR LOSS OF DATA, CORRUPTION OF SYSTEMS, OR LOSS OF DOCUMENTATION, WHETHER BASED ON BREACH OF CONTRACT, TORT (INCLUDING NEGLIGENCE), PRODUCT LIABILITY, OR OTHERWISE, IN CONNECTION WITH THE USE OF THE PRODUCT, EVEN IF HIKVISION HAS BEEN ADVISED OF THE POSSIBILITY OF SUCH DAMAGES OR LOSS.●YOU ACKNOWLEDGE THAT THE NATURE OF INTERNET PROVIDES FOR INHERENT SECURITY RISKS, AND HIKVISIONSHALL NOT TAKE ANY RESPONSIBILITIES FOR ABNORMAL OPERATION, PRIVACY LEAKAGE OR OTHER DAMAGES RESULTING FROM CYBER-ATTACK, HACKER ATTACK, VIRUS INSPECTION, OR OTHER INTERNET SECURITY RISKS;HOWEVER, HIKVISION WILL PROVIDE TIMELY TECHNICAL SUPPORT IF REQUIRED.●YOU AGREE TO USE THIS PRODUCT IN COMPLIANCE WITH ALL APPLICABLE LAWS, AND YOU ARE SOLELYRESPONSIBLE FOR ENSURING THAT YOUR USE CONFORMS TO THE APPLICABLE LAW. ESPECIALLY, YOU ARE RESPONSIBLE, FOR USING THIS PRODUCT IN A MANNER THAT DOES NOT INFRINGE ON THE RIGHTS OF THIRD PARTIES, INCLUDING WITHOUT LIMITATION, RIGHTS OF PUBLICITY, INTELLECTUAL PROPERTY RIGHTS, OR DATA PROTECTION AND OTHER PRIVACY RIGHTS. YOU SHALL NOT USE THIS PRODUCT FOR ANY PROHIBITED END-USES, INCLUDING THE DEVELOPMENT OR PRODUCTION OF WEAPONS OF MASS DESTRUCTION, THE DEVELOPMENT OR PRODUCTION OF CHEMICAL OR BIOLOGICAL WEAPONS, ANY ACTIVITIES IN THE CONTEXT RELATED TO ANY NUCLEAR EXPLOSIVE OR UNSAFE NUCLEAR FUEL-CYCLE, OR IN SUPPORT OF HUMAN RIGHTS ABUSES.●IN THE EVENT OF ANY CONFLICTS BETWEEN THIS MANUAL AND THE APPLICABLE LAW, THE LATER PREVAILS.Regulatory InformationFCC InformationPlease take attention that changes or modification not expressly approved by the party responsible for compliance could void the user’s authority to operate the equipment.FCC compliance: This equipment has been tested and found to comply with the limits for a Class A digital device, pursuant to part 15 of the FCC Rules. These limits are designed to provide reasonable protection against harmful interference when the equipment is operated in a commercial environment. This equipment generates, uses, and can radiate radio frequency energy and, if not installed and used in accordance with the instruction manual, may cause harmful interference to radio communications. Operation of this equipment in a residential area is likely to cause harmful interference in which case the user will be required to correct the interference at his own expense. FCC ConditionsThis device complies with part 15 of the FCC Rules. Operation is subject to the following two conditions:1. This device may not cause harmful interference.2. This device must accept any interference received, including interference that may cause undesired operation.EU Conformity StatementThis product and - if applicable - the supplied accessories too are marked with "CE" and comply therefore with the applicable harmonized European standards listed under the EMC Directive 2014/30/EU, the LVD Directive 2014/35/EU, the RoHS Directive 2011/65/EU.2012/19/EU (WEEE directive): Products marked with this symbol cannot be disposed of as unsorted municipal waste in the European Union. For proper recycling, return this product to your local supplier upon the purchase of equivalent new equipment, or dispose of it at designated collection points. For more information see: 2006/66/EC (battery directive): This product contains a battery that cannot be disposed of as unsorted municipal waste in the European Union. See the product documentation for specific battery information. The battery is marked with this symbol, which may include lettering to indicate cadmium (Cd), lead (Pb), or mercury (Hg). For proper recycling, return the battery to your supplier or to a designated collection point. For more information see: Industry Canada ICES-003 ComplianceThis device meets the CAN ICES-3 (A)/NMB-3(A) standards requirements.Symbol ConventionsThe symbols that may be found in this document are defined as follows.Safety InstructionsTABLE OF CONTENTSChapter 1 Introduction (6)Overview (6)Key Feature (6)System Requirement (6)Appearance and Interfaces (7)Appearance (7)Interfaces (7)Chapter 2 Construction Solution (9)Construction Solution I (9)Construction Solution II (9)Chapter 3 Installation (11)Install Lens (11)Insert TF card (11)Insert Guard Shield (11)Install Camera on Horizontal Pole (12)Chapter 4 Network Connection (14)Wire over LAN (14)Activate the Camera (15)Activate via SADP Software (15)Activate via Web Browser (17)Login (18)Chapter 1 IntroductionOverviewIntegrated with video collection, smart encoding compression, and network transmission, network traffic camera can capture pictures and recognize vehicle features, such as license plate number, vehicle type, vehicle color, and vehicle brand. It is widely used in highway safety checkpoint, city safety checkpoint, and intersections.Key Feature●Supports H.265/H.264.●Multiple application modes, e.g., checkpoint single I/O, checkpoint vehicle detector, RS-485radar, mixed-traffic lane, and video analysis E-police.●Supports violation detection, e.g., driving on the lane line, red light running, wrong-waydriving, prohibition violation, etc., which can effectively prevent violations.●Supports dual shutters, enabling the camera to capture while video monitoring.●Supports flash light control according to brightness condition and time schedule, enabling thecamera to capture while IO output.●Supports multiple supplement light types, e.g., strobe, burst, etc.●Supports violation image composition, forming full evidence for enforcement.Functions may vary with different models. Please refer to actual product.System Requirement●Operating System: Microsoft Windows XP SP1 and above version/Vista/Win 7/Win 10/Server2003/Server 2008 32bits.●CPU: 1.0 GHz or higher.●RAM: 1 G or higher.●Display: 1024 × 768 resolution or higher.●Web Browser: Internet Explorer 8.0 and above version, Mozilla Firefox 5.0 and above version.Appearance and InterfacesAppearanceAuto Iris Interface LensAppearanceInterfacesThe interfaces are mainly located on the rear panel.Rear PanelRear Panel InterfaceInterface DescriptionLAN1/LAN2 10/100/1000 M Ethernet interfaceTF TF card slotPWR Power indicatorGroundRTG RS-232 interface for debugging and temperature shield control viatransparent channel.D1-D3 RS-485 interface, for transferring RS-485 input information (such asradar, vehicle detector, etc.).SYNC Synchronization inputT1 Input triggerF1-F7 Flash light trigger outputUSB USB interface12VDC 12 VDC power inputThe USB interface can only be connected to USB flash drive. It is not allowed to charge other devices or connect other loads.Chapter 2 Construction SolutionConstruction Solution IThe following construction takes example of 3 MP camera in the scene of bidirectional 4 lanes without speed detection. Pole Height: 6 m 3.75 m 26 mFlash Light 3Network Traffic Camera 2Lane 2Lane 1Lane 3Lane 45 m 5 m 26 m Flash Light 4Flash Light 2Network Traffic Camera 1Flash Light 1Construction Solution for 3 MP Camera● The pole height is 6 m. We recommend that captured position should be 26 m or abovehorizontal distance from the camera to meet LPR requirement.● Flash light is built in the guard shield for light supplement of multiple lanes, improving licenseplate capture and recognition rate.● The camera will capture multiple pictures continuously. To guarantee the second picturequality, the picture bottom in captured position should be 18 to 20 m horizontal distance from the pole.Construction Solution IIThe following construction takes example of 9 MP camera in the scene of bidirectional 6 lanes with radar speed detection.Trigger Position5 m5m 3.m 5 m3.75 m3.75 m3.75 m Lane 3Pole Height: 6 mNetwork Traffic Camera 126 mFlash Light 326 mRadar 35 m3.75 m3.75 m 3.75 m5 mLane 2Lane 1Flash Light 2Radar 2Radar 1Flash Light 1Flash Light 4Radar 4Radar 5Radar 6Flash Light 5Flash Light 6Pole Height: 6 mNetwork Traffic Camera 2Lane 4Lane 5Lane 6Trigger PositionConstruction Solution for 9 MP Camera● The pole height is 6 m. We recommend that captured position should be 26 m or abovehorizontal distance from the camera to meet LPR requirement. ● Flash light is built in the guard shield for light supplement of multiple lanes, improving licenseplate capture and recognition rate. ● The camera will capture multiple pictures continuously. To guarantee the second picturequality, the picture bottom in captured position should be 18 to 20 m horizontal distance from the pole.Radar is used for speed detection.Chapter 3 InstallationInstall LensPull out the sensor protective cover. Install the lens, and rotate it 90 clockwise until it is fixed.Connect the lens cable plug to the auto iris interface.If the camera only supports manual iris, skip step 2.Insert TF cardInstall the TF card according to arrow direction as shown in the Figure 3-1.If you want to take out the TF card, press it inwards lightly to pop it up.TF CardInstall TF CardInsert Guard ShieldPull upward the buckle, and take hook off the guard shield cover. Open the guard shield.Guard ShieldBuckleOpen Guard ShieldTake off the bottom plate from the guard shield, and fix the camera on it by included screws.Fix Camera on Bottom PlateFix the guard shield cover on the camera.Connect the cable with the camera, and thread the cable through the hole in bottom.Connect Camera with CableInstall Camera on Horizontal PoleCardan joint consists of 2 parts. Upper part includes 2 screw holes, and lower part is connected with hoop.Install the hoop.1)Loosen the hoop screws and open the hoop.2)Pull the hoop ring, and shrink the hoop to the thickness of the horizontal pole.3)Install the hoop bracket on the horizontal pole.Install HoopAlign the screw holes at the bottom of the cardan joint with the hoop, screw in, and tighten the screws, to install the cardan joint on the hoop.Install Cardan JointFix the whole camera with sun shield on the horizontal pole with the cardan joint.Fix Camera on Horizontal PoleChapter 4 Network Connection●You shall acknowledge that the use of the product with Internet access might be undernetwork security risks. For avoidance of any network attacks and information leakage,please strengthen your own protection. If the product does not work properly, pleasecontact with your dealer or the nearest service center.●To ensure the network security of the camera, we recommend you to have the cameraassessed and maintained termly. You can contact us if you need such service.Before you start:To view and configure the camera via a LAN, you need to connect the camera in the same subnet with your computer, and install the SADP to search and change the IP address of the camera.Wire over LANThe following figures show the two ways of cable connection between a camera and a computer.●Directly connect the camera to the computer with a network cable.●Set camera over the LAN via a switch or a router.Network CableNetwork Traffic CameraComputerDirect ConnectionSwitchComputerNetwork Traffic CameraConnection via a Switch or a RouterActivate the CameraYou are required to activate the camera first by setting a strong password for it before you can use it. Multiple activation methods are supported. Here we take example of activation via web browser and SADP.Refer to the user manual of client software for the activation via client software.Activate via SADP SoftwareSADP software is used for detecting the online device, activating the camera, and resetting the password.Get the SADP software from the official website, and install the SADP according to the prompts.Run the SADP software to search the online devices.Check the device status from the device list, and select the inactive device.SADP InterfaceCreate a password, and confirm it.Click Activate to activate the device.STRONG PASSWORD RECOMMENDED– We highly recommend you create a strong password of your own choosing (using a minimum of 8 characters, including upper case letters, lower case letters, numbers, and special characters) in order to increase the security of your product. And we recommend you reset your password regularly, especially in the high security system, resetting the password monthly or weekly can better protect your product.Change the device IP address to the same subnet with your computer by either modifying theIP address manually or checking Enable DHCP.Modify Network ParametersInput the password and click Modify to activate your IP address modification.Activate via Web BrowserPower on the camera, and connect the camera to the network.Input the IP address into the address bar of the web browser, and press Enter to enter the activation interface.Activation Interface (Web)Create a password.STRONG PASSWORD RECOMMENDED– We highly recommend you create a strong password of your own choosing (using a minimum of 8 characters, including upper case letters, lower case letters, numbers, and special characters) in order to increase the security of your product. And we recommend you reset your password regularly, especially in the high security system, resetting the password monthly or weekly can better protect your product.Confirm the password.Click OK to save the password and enter the live view interface.LoginYou can log in to the camera via web browser.Open the web browser.In the browser address bar, enter the IP address of the camera, and press the Enter key to enter the login interface.Enter User Name and Password.Click Login.LoginInstall the plug-in before viewing the live video and operating the camera. Follow theinstallation prompts to install the plug-in.You may have to close the web browser to install the plug-in. Please reopen the web browser and log in again after installing the plug-in.0403022000122UD18302B。
Web CameraUser ManualUser ManualThank you for purchasing our product. If there are any questions, or requests, do not hesitate to contact the dealer.This manual may contain several technical mistakes or printing errors, and the content is subject to change without notice. The updates will be added to the new version of this manual. We will readily improve or update the products or procedures described in the manual.01000020221201©2022 Hangzhou Hikvision Digital Technology Co., Ltd. All rights reserved.About this ManualThe Manual includes instructions for using and managing the Product. Pictures, charts, images and all other information hereinafter are for description and explanation only. The information contained in the Manual is subject to change, without notice, due to firmware updates or other reasons. Please find the latest version of this Manual at the Hikvision website (https:///).Please use this Manual with the guidance and assistance of professionals trained in supporting the Product.Trademarksand other Hikvision’s trademarks and logos are the properties of Hikvision in various jurisdictions.Other trademarks and logos mentioned are the properties of their respective owners.DisclaimerTO THE MAXIMUM EXTENT PERMITTED BY APPLICABLE LAW, THIS MANUAL AND THE PRODUCT DESCRIBED, WITH ITS HARDWARE, SOFTWARE AND FIRMWARE, ARE PROVIDED “AS IS” AND “WITH ALL FAULTS AND ERRORS”. HIKVISION MAKES NO WARRANTIES, EXPRESS OR IMPLIED, INCLUDING WITHOUT LIMITATION, MERCHANTABILITY, SATISFACTORY QUALITY, OR FITNESS FOR A PARTICULAR PURPOSE. THE USE OF THE PRODUCT BY YOU IS AT YOUR OWN RISK. IN NO EVENT WILL HIKVISION BE LIABLE TO YOU FOR ANY SPECIAL, CONSEQUENTIAL, INCIDENTAL, OR INDIRECT DAMAGES, INCLUDING, AMONG OTHERS, DAMAGES FOR LOSS OF BUSINESS PROFITS, BUSINESS INTERRUPTION, OR LOSS OF DATA, CORRUPTION OF SYSTEMS, OR LOSS OF DOCUMENTATION, WHETHER BASED ON BREACH OF CONTRACT, TORT (INCLUDING NEGLIGENCE), PRODUCT LIABILITY, OR OTHERWISE, IN CONNECTION WITH THE USE OF THE PRODUCT, EVEN IF HIKVISION HAS BEEN ADVISED OF THE POSSIBILITY OF SUCH DAMAGES OR LOSS.YOU ACKNOWLEDGE THAT THE NATURE OF THE INTERNET PROVIDES FOR INHERENT SECURITY RISKS, AND HIKVISION SHALL NOT TAKE ANY RESPONSIBILITIES FOR ABNORMAL OPERATION, PRIVACY LEAKAGE OR OTHER DAMAGES RESULTING FROM CYBER-ATTACK, HACKER ATTACK, VIRUS INFECTION, OR OTHER INTERNET SECURITY RISKS; HOWEVER, HIKVISION WILL PROVIDE TIMELY TECHNICAL SUPPORT IF REQUIRED. YOU AGREE TO USE THIS PRODUCT IN COMPLIANCE WITH ALL APPLICABLE LAWS, AND YOU ARE SOLELY RESPONSIBLE FOR ENSURING THAT YOUR USE CONFORMS TO THE APPLICABLE LAW. ESPECIALLY, YOU ARE RESPONSIBLE, FOR USING THIS PRODUCT IN A MANNER THAT DOES NOT INFRINGE ON THE RIGHTS OF THIRD PARTIES, INCLUDING WITHOUT LIMITATION, RIGHTS OF PUBLICITY, INTELLECTUAL PROPERTY RIGHTS, OR DATA PROTECTION AND OTHER PRIVACY RIGHTS. YOU SHALL NOT USE THIS PRODUCT FOR ANY PROHIBITED END-USES, INCLUDING THE DEVELOPMENT OR PRODUCTION OF WEAPONS OF MASS DESTRUCTION, THE DEVELOPMENT OR PRODUCTION OF CHEMICAL OR BIOLOGICAL WEAPONS, ANY ACTIVITIES IN THE CONTEXT RELATED TO ANY NUCLEAR EXPLOSIVE ORUNSAFE NUCLEAR FUEL-CYCLE, OR IN SUPPORT OF HUMAN RIGHTS ABUSES.IN THE EVENT OF ANY CONFLICTS BETWEEN THIS MANUAL AND THE APPLICABLE LAW, THE LATTER PREVAILS.Regulatory InformationFCC InformationPlease take attention that changes or modification not expressly approved by the party responsible for compliance could void the user’s authority to operate the equipment.FCC complianceThis product has been tested and found to comply with the limits for a Class B digital device, pursuant to Part15 of the FCC Rules. These limits are designed to provide reasonable protection against harmful interference in a residential installation.This product generates, uses, and can radiate radio frequency energy and, if not installed and used in accordance with the instructions, may cause harmful interference to radio communications. However, there is no guarantee that interference will not occur in a particular installation. If this product does cause harmful interference to radio or television reception, which can be determined by turning the equipment off and on, the user is encouraged to try to correct the interference by one or more of the following measures:—Reorient or relocate the receiving antenna.—Increase the separation between the equipment and receiver.—Connect the equipment into an outlet on a circuit different from that to which the receiver is connected.—Consult the dealer or an experienced radio/TV technician for help.FCC ConditionsThis device complies with part 15 of the FCC Rules. Operation is subject to the following two conditions:1. This device may not cause harmful interference.2. This device must accept any interference received, including interference that may cause undesired operation.EU Conformity StatementThis product and - if applicable - thesupplied accessories too are marked with"CE" and comply therefore with theapplicable harmonized European standards listed under the Low Voltage Directive2014/35/EU, the EMC Directive 2014/30/EU, the RoHS Directive 2011/65/EU.2012/19/EU (WEEE directive): Productsmarked with this symbol cannot bedisposed of as unsorted municipal waste inthe European Union. For proper recycling,return this product to your local supplierupon the purchase of equivalent new equipment, or dispose of it at designated collection points. For more information see: . 2006/66/EC (battery directive): This product contains abattery that cannot be disposed of asunsorted municipal waste in the EuropeanUnion. See the product documentation forspecific battery information. The battery ismarked with this symbol, which may include lettering to indicate cadmium (Cd), lead (Pb), or mercury (Hg). For proper recycling, return the battery to your supplier or to a designated collection point. For more information, see: .Industry Canada ICES -003 ComplianceThis device meets the CAN ICES -3 (A)/NMB -3(A) standards requirements.This device complies with Industry Canadalicence -exempt RSS standard(s). Operation is subject to the following two conditions:1.this device may not cause interference, and2.this device must accept any interference, including interference that may cause undesired operation of the device.Le présent appareil est conforme aux CNR d'IndustrieCanada applicables aux appareils radioexempts de licence. L'exploitation est autorisée aux deux conditions suivantes:1. l'appareil ne doit pas produire de brouillage, et2. l'utilisateur de l'appareil doit accepter tout brouillage radioélectrique subi, même si le brouillage est susceptible d'en compromettre le fonctionnement. WarningThis is a class A product. In a domestic environment this product may cause radio interference in which case the user may be required to take adequate measures.Safety InstructionThese instructions are intended to ensure that user can use the product correctly to avoid danger or property loss.The precaution measure is divided into “Warnings” and “Cautions”.Warnings: Serious injury or death may occur if any of the warnings are neglected.Cautions: Injury or equipment damage may occur if any of the cautions are neglected.Warnings● Installation and use of the product must be in strictcompliance with the local electrical safety regulations.● Use the power adapter provided by qualifiedmanufacturer. Please refer to technical specifications for power adapter requirements.● To avoid fire hazard or electric shock, DO NOT expose the device to rain or extremely damp environments. ● The wiring system of the building should be facilitated with easy -to -use power -off devices.● When the device is mounted on wall or ceiling, the device shall be firmly fixed. (The company is notresponsible for any problems caused by unauthorized modification or maintenance.)Cautions●The device will be charged by specified source which the output circuit comply with LPS/PS 2.●DO NOT drop the product or subject it to physical shock. Keep the device away from magnetic interference. (Otherwise, the product may be damaged.)●DO NOT touch the heat dissipation component to avoid burns.●DO NOT install indoor product where it may get wet by water or other liquid.●DO NOT expose the device to extremely hot, cold, dusty, corrosive, or damp environments. For temperature and humidity requirements, see device specification.●DO NOT aim the lens at the strong light such as sun or laser beam. The strong light can cause fatal damage to the device.●To avoid heat accumulation, good ventilation is required for a proper operating environment.●If necessary, use a soft and wet cloth or other substitutes to clean the sensor gently.●Keep all wrappers after unpacking them for future use. In case of any failure occurred, you need to return the device to the factory with the original wrapper. Transportation without the original wrapper may result in damage on the device and the company shall not take any responsibilities.Mark DescriptionTo achieve a better product experience, please visit https:///sg/support/download/soft ware/hikin/ to download the HIK IN installation package.1Introduction1.1Product FeaturesKey features of the device include:●High-performance CMOS●Sharp and high-quality images●AGC for self-adaptive brightness●Built-in microphone with clear sound●USB interface. Plug-and-play, no need to install driver software●360° horizontal rotation1.2 Overview123452Figure 1-1 Appearance ● For the model with fixed focal length, the indicator in red means the device is standing by, and the indicator in blue means the device is on video call. ● For the models with auto focus function, theindicator flashes in white when powering on, and the indicator is solid white when normally working. ● It is recommended to peel off the protective film before using.2 InstallationBefore you start● Make sure that the device in the package is in good condition and all the assembly parts are included. ● Make sure that all the related equipment is power -off during the installation.● Check the specification of the products for the installation environment.● Check whether the power supply is matched with your power output to avoid damage.● If the product does not function properly, contact your dealer or the nearest service center. DO NOT disassemble the camera for repair or maintenance by yourself.2.1 Angle AdjustmentThe device can be adjusted as shown in Figure 2-1.~180°360° Horizontal RotationFigure 2-1 Angle Adjustment2.2 Mounting Methods2.2.1 Place on the DesktopYou can place the device on the desktop in the following way.Figure 2-2Place the Device on the Desktop2.2.2Clamp on the DisplayYou can clamp the device on the display of different thickness.Figure 2-3Clamp the Device on the Display 2.2.3Install to the BracketYou can also install the device to bracket through1/4-20UNC-2B screw hole.Figure 2-4Install the Device to the Bracket Note:The bracket shall be purchased separately.3FAQFor frequently asked questions of the device, visit /analysisQR/showQR/35 d08787Note that some frequently asked questions only apply to certain models.UD21371B-D。


⼤华⽹络摄像机WEB使⽤说明书⽹络摄像机WEB3.0 使⽤说明书⽹络摄像机WEB3.0使⽤说明书V3.5.3前⾔概述本⽂档详细描述了WEB客户端、预览、云台、设置等内容。
符号约定在本⽂中可能出现下列标志,它们所代表的含义如下:符号说明表⽰有⾼度潜在危险,如果不能避免,会导致⼈员伤亡或严重伤害。
表⽰有中度或低度潜在危险,如果不能避免,可能导致⼈员轻微或中等伤害。
表⽰有潜在风险,如果忽视这些⽂本,可能导致设备损坏、数据丢失、设备性能降低或不可预知的结果。
表⽰能帮助您解决某个问题或节省您的时间。
表⽰是正⽂的附加信息,是对正⽂的强调和补充。
i⽬录前⾔ (i)1 预览........................................................................................................................................ -2 -1.1 编码设置 ............................................................................................................................................. - 3 -1.2 系统菜单 ............................................................................................................................................. - 3 -1.3 视频窗⼝功能选项 .............................................................................................................................. - 3 -1.4 视频窗⼝设置...................................................................................................................................... - 4 -2 云台........................................................................................................................................ - 8 -3 设置...................................................................................................................................... - 11 -3.1 相机设置 ........................................................................................................................................... - 11 -3.1.1 摄像头属性............................................................................................................................... - 11 -3.1.2 视频 .......................................................................................................................................... - 15 -3.1.3 ⾳频 .......................................................................................................................................... - 18 -3.2 ⽹络设置 ........................................................................................................................................... - 19 -3.2.1 TCP/IP ....................................................................................................................................... - 19 -3.2.2 连接 .......................................................................................................................................... - 21 -3.2.3 PPPoE ........................................................................................................................................ - 22 -3.2.4 DDNS ........................................................................................................................................ - 22 -3.2.5 IP权限....................................................................................................................................... - 23 -3.2.6 SMTP邮件 ................................................................................................................................ - 24 -3.2.7 UPnP .......................................................................................................................................... - 25 -3.2.8 SNMP ........................................................................................................................................ - 26 -3.2.9 Bonjour ...................................................................................................................................... - 27 -3.2.10 组播 ........................................................................................................................................ - 28 -3.2.11 ⾃动注册................................................................................................................................. - 28 -3.2.12 WIFI ......................................................................................................................................... - 29 -3.2.13 QoS .......................................................................................................................................... - 31 -3.3 事件管理 ........................................................................................................................................... - 32 -3.3.1 视频检测................................................................................................................................... - 32 -3.3.2 报警设置................................................................................................................................... - 35 -3.3.3 异常处理................................................................................................................................... - 36 -3.4 存储管理 ........................................................................................................................................... - 38 -3.4.1 时间表 ...................................................................................................................................... - 38 -3.4.2 存储 .......................................................................................................................................... - 39 -3.4.3 录像控制................................................................................................................................... - 41 -3.5 系统管理 ........................................................................................................................................... - 42 -3.5.1 本机设置................................................................................................................................... - 42 -3.5.2 ⽤户管理................................................................................................................................... - 43 -3.5.3 云台设置................................................................................................................................... - 47 -3.5.4 出⼚默认设置........................................................................................................................... - 48 -3.5.5 配置导⼊导出........................................................................................................................... - 49 -3.5.6 ⾃动维护................................................................................................................................... - 49 -3.5.7 固件升级................................................................................................................................... - 50 -3.6 系统信息 ........................................................................................................................................... - 50 -3.6.1 版本信息................................................................................................................................... - 50 -3.6.2 系统⽇志................................................................................................................................... - 51 -3.6.3 在线⽤户................................................................................................................................... - 51 -4 报警...................................................................................................................................... - 53 -5 注销...................................................................................................................................... - 54 -插图⽬录图 1 WEB视频预览界⾯............................................................... - 2 - 图 2编码设置⽰意图................................................................. - 3 - 图 3系统菜单⽰意图................................................................. - 3 - 图 4 视频窗⼝功能选项⽰意图 ........................................................ - 3 - 图 5视频窗⼝设置⽰意图............................................................. - 4 - 图 6图像调节⽰意图................................................................. - 4 - 图 7聚焦缩放⽰意图................................................................. - 5 - 图 8鱼眼设备⽰意图................................................................. - 6 - 图 9安装模式⽰意图................................................................. - 7 - 图 10 云台界⾯⽰意图............................................................... - 8 -图 11云台控制台⽰意图.............................................................. - 9 - 图 12云台设置窗⼝⽰意图............................................................ - 9 - 图 13 摄像头属性设置⽰意图........................................................ - 11 - 图 14聚焦缩放⽰意图............................................................... - 14 - 图 15 视频-视频码流设置⽰意图 ..................................................... - 15 - 图 16 视频-图⽚码流设置⽰意图 ..................................................... - 17 - 图 17 视频-视频叠加设置⽰意图 ..................................................... - 17 - 图 18 视频-存储路径设置⽰意图..................................................... - 18 - 图 19 ⾳频设置⽰意图.............................................................. - 19 - 图 20 ⽹络设置-TCP/IP设置⽰意图................................................... - 20 -图 21 ⽹络设置-连接设置⽰意图 ..................................................... - 21 - 图 22⽹络设置-PPPoE设置⽰意图 .................................................... - 22 - 图 23 ⽹络设置-DDNS设置⽰意图..................................................... - 23 - 图 24 ⽹络设置-IP权限设置⽰意图................................................... - 24 - 图 25 ⽹络设置-SMTP邮件设置⽰意图................................................. - 24 - 图 26 ⽹络设置-UPnP设置⽰意图..................................................... - 26 - 图 27 ⽹络设置-SNMP设置⽰意图..................................................... - 26 - 图 28 ⽹络设置-Bonjour设置⽰意图.................................................. - 27 - 图 29 ⽹络设置-组播设置⽰意图 ..................................................... - 28 - 图 30 ⽹络设置-⾃动注册设置⽰意图 ................................................. - 29 - 图 31 ⽹络设置-WIFI设置⽰意图..................................................... - 30 -图 32 ⽹络设置-WIFI连接⽰意图..................................................... - 30 - 图 33⽹络设置-QoS设置⽰意图 ...................................................... - 31 - 图 34 视频检测-动态检测设置⽰意图 ................................................. - 32 - 图 35 布撤防时间段设置⽰意图 ...................................................... - 32 - 图 36 区域设置⽰意图.............................................................. - 33 -图 37 视频检测-视频遮挡设置⽰意图 ................................................. - 34 - 图 38 报警设置-报警联动设置⽰意图 ................................................. - 35 - 图 39 报警设置-报警输出设置⽰意图 ................................................. - 36 - 图 40异常处理设置⽰意图(1)...................................................... - 36 - 图 41 异常处理设置⽰意图(2)..................................................... - 37 - 图 42 异常处理设置⽰意图(3) ..................................................... - 37 - 图 43 异常处理设置⽰意图(4) ..................................................... -37 - 图 44 异常处理设置⽰意图(5) ..................................................... - 38 - 图 45 存储管理-时间表设置⽰意图 ................................................... - 39 - 图 46存储管理-存储设置⽰意图(1)................................................. - 39 - 图 47存储管理-存储设置⽰意图(2)................................................. - 40 - 图 48存储管理-存储设置⽰意图(3)................................................. - 40 - 图 49 存储管理-录像控制⽰意图 ..................................................... - 41 - 图 50 系统管理-本机设置⽰意图(1)................................................ - 42 - 图 51系统管理-本机设置⽰意图(2)................................................. - 42 - 图 52 系统管理-⽤户管理设置⽰意图 ................................................. -44 - 图 53 添加⽤户界⾯⽰意图.......................................................... - 45 - 图 54 修改⽤户界⾯⽰意图.......................................................... - 46 - 图 55系统管理-⽤户组管理设置⽰意图................................................ - 46 - 图 56 添加组界⾯⽰意图............................................................ - 47 - 图 57 修改组界⾯⽰意图............................................................ - 47 - 图58 系统管理-云台设置⽰意图 ..................................................... - 48 - 图 59 系统管理-出⼚默认设置⽰意图 ................................................. - 48 - 图 60 系统管理-配置导⼊导出设置⽰意图 ............................................. - 49 - 图 61 系统管理-⾃动维护设置⽰意图 ................................................. - 49 - 图 62 系统管理-固件升级设置⽰意图................................................. - 50 - 图 63 系统信息-版本信息界⾯⽰意图 ................................................. - 50 -图 64 系统信息-⽇志信息界⾯⽰意图 ................................................. - 51 - 图 65系统信息-在线⽤户界⾯⽰意图.................................................. - 52 - 图 66报警设置界⾯⽰意图........................................................... - 53 - 图 67注销界⾯⽰意图............................................................... - 54 -⽹络摄像机WEB3.0 WEB客户端WEB客户端关于本章本章描述内容如下表所⽰。

网络摄像机Web浏览使用说明书一、产品概述1)网络摄像机是采用先进的视频处理技术,具有网络传输音视频功能;是取代模拟摄像机的新一代网络安防产品。
其CPU采用最新的ARM9嵌入式处理器;采用流行的MPEG4视频硬压缩处理技术和G.726双向语音压缩技术;具有实时图像、语音,实时录像,多种报警功能,PTZ控制功能等;同时支持HTTP、TCP/IP、UDP、SMTP、FTP、DDNS、DNS等多种网络协议。
2)网络摄像机具有安装简易,使用简单的特点:把电源接入网络摄像机的电源接口,网络线接入RJ45网络接口,通过网络浏览器(IE或Netscape)的地址栏输入如:http://192.168.1.126(每个网络摄像机都有自己的IP地址并可以自行修改,可以看成是一台小型的电脑)就可以访问网络摄像机并实时监控。
3)网络摄像机具有设置直观,易于操作的特点:可以自由进行各种配置,可以通过网络对其进行软件升级。
4)网络摄像机的图像质量最高可达D1的优质画面,同时支持CIF,QCIF等图像格式。
5)网络摄像机支持同时20个用户同时访问统一台网络摄像机,支持移动侦测报警,外接报警器GPIO报警,PTZ云台控制包括调整镜头的聚焦和变倍,云台协议支持PELCO-P 和PELCO-D,多种波特率,不同地址(0-255)。
6)网络摄像机适用于广大安防领域:商业监控,交通监控,银行监控,工厂监控,电力监控,楼宇监控,停车场监控等。
二、基本操作说明1)网络摄像机的出厂默认基本配置IP 地址:192.168.1.126子码掩码:255.255.255.0默认网关:192.168.1.12)网络摄像机的基本安装(1)使用与网络机对应的电源,通过电源线连接到网络摄像机机的电源接口。
判断是否接通电源,可查看RJ45网络接口的其中一个指示灯是否常亮。
(2)使用网络设备(交换机、路由器或ADSL),通过网络连接线连接到网络摄像机的RJ45网络接口。
网络摄像机WEB3.0 使用说明书网络摄像机WEB3.0使用说明书V3.5.3前言概述本文档详细描述了WEB客户端、预览、云台、设置等内容。
符号约定在本文中可能出现下列标志,它们所代表的含义如下:符号说明表示有高度潜在危险,如果不能避免,会导致人员伤亡或严重伤害。
表示有中度或低度潜在危险,如果不能避免,可能导致人员轻微或中等伤害。
表示有潜在风险,如果忽视这些文本,可能导致设备损坏、数据丢失、设备性能降低或不可预知的结果。
表示能帮助您解决某个问题或节省您的时间。
表示是正文的附加信息,是对正文的强调和补充。
i目录前言 (i)1 预览........................................................................................................................................ -2 -1.1 编码设置 ............................................................................................................................................. - 3 -1.2 系统菜单 ............................................................................................................................................. - 3 -1.3 视频窗口功能选项 .............................................................................................................................. - 3 -1.4 视频窗口设置...................................................................................................................................... - 4 -2 云台........................................................................................................................................ - 8 -3 设置...................................................................................................................................... - 11 -3.1 相机设置 ........................................................................................................................................... - 11 -3.1.1 摄像头属性............................................................................................................................... - 11 -3.1.2 视频 .......................................................................................................................................... - 15 -3.1.3 音频 .......................................................................................................................................... - 18 -3.2 网络设置 ........................................................................................................................................... - 19 -3.2.1 TCP/IP ....................................................................................................................................... - 19 -3.2.2 连接 .......................................................................................................................................... - 21 -3.2.3 PPPoE ........................................................................................................................................ - 22 -3.2.4 DDNS ........................................................................................................................................ - 22 -3.2.5 IP权限....................................................................................................................................... - 23 -3.2.6 SMTP邮件 ................................................................................................................................ - 24 -3.2.7 UPnP .......................................................................................................................................... - 25 -3.2.8 SNMP ........................................................................................................................................ - 26 -3.2.9 Bonjour ...................................................................................................................................... - 27 -3.2.10 组播 ........................................................................................................................................ - 28 -3.2.11 自动注册................................................................................................................................. - 28 -3.2.12 WIFI ......................................................................................................................................... - 29 -3.2.13 QoS .......................................................................................................................................... - 31 -3.3 事件管理 ........................................................................................................................................... - 32 -3.3.1 视频检测................................................................................................................................... - 32 -3.3.2 报警设置................................................................................................................................... - 35 -3.3.3 异常处理................................................................................................................................... - 36 -3.4 存储管理 ........................................................................................................................................... - 38 -3.4.1 时间表 ...................................................................................................................................... - 38 -3.4.2 存储 .......................................................................................................................................... - 39 -3.4.3 录像控制................................................................................................................................... - 41 -3.5 系统管理 ........................................................................................................................................... - 42 -3.5.1 本机设置................................................................................................................................... - 42 -3.5.2 用户管理................................................................................................................................... - 43 -3.5.3 云台设置................................................................................................................................... - 47 -3.5.4 出厂默认设置........................................................................................................................... - 48 -3.5.5 配置导入导出........................................................................................................................... - 49 -3.5.6 自动维护................................................................................................................................... - 49 -3.5.7 固件升级................................................................................................................................... - 50 -3.6 系统信息 ........................................................................................................................................... - 50 -3.6.1 版本信息................................................................................................................................... - 50 -3.6.2 系统日志................................................................................................................................... - 51 -3.6.3 在线用户................................................................................................................................... - 51 -4 报警...................................................................................................................................... - 53 -5 注销...................................................................................................................................... - 54 -插图目录图 1 WEB视频预览界面............................................................... - 2 - 图 2编码设置示意图................................................................. - 3 - 图 3系统菜单示意图................................................................. - 3 - 图 4 视频窗口功能选项示意图 ........................................................ - 3 - 图 5视频窗口设置示意图............................................................. - 4 - 图 6图像调节示意图................................................................. - 4 - 图 7聚焦缩放示意图................................................................. - 5 - 图 8鱼眼设备示意图................................................................. - 6 - 图 9安装模式示意图................................................................. - 7 - 图 10 云台界面示意图............................................................... - 8 - 图 11云台控制台示意图.............................................................. - 9 - 图 12云台设置窗口示意图............................................................ - 9 - 图 13 摄像头属性设置示意图........................................................ - 11 - 图 14聚焦缩放示意图............................................................... - 14 - 图 15 视频-视频码流设置示意图 ..................................................... - 15 - 图 16 视频-图片码流设置示意图 ..................................................... - 17 - 图 17 视频-视频叠加设置示意图 ..................................................... - 17 - 图 18 视频-存储路径设置示意图 ..................................................... - 18 - 图 19 音频设置示意图.............................................................. - 19 - 图 20 网络设置-TCP/IP设置示意图................................................... - 20 - 图 21 网络设置-连接设置示意图 ..................................................... - 21 - 图 22网络设置-PPPoE设置示意图 .................................................... - 22 - 图 23 网络设置-DDNS设置示意图..................................................... - 23 - 图 24 网络设置-IP权限设置示意图................................................... - 24 - 图 25 网络设置-SMTP邮件设置示意图................................................. - 24 - 图 26 网络设置-UPnP设置示意图..................................................... - 26 - 图 27 网络设置-SNMP设置示意图..................................................... - 26 - 图 28 网络设置-Bonjour设置示意图.................................................. - 27 - 图 29 网络设置-组播设置示意图 ..................................................... - 28 - 图 30 网络设置-自动注册设置示意图 ................................................. - 29 - 图 31 网络设置-WIFI设置示意图..................................................... - 30 -图 32 网络设置-WIFI连接示意图..................................................... - 30 - 图 33网络设置-QoS设置示意图 ...................................................... - 31 - 图 34 视频检测-动态检测设置示意图 ................................................. - 32 - 图 35 布撤防时间段设置示意图 ...................................................... - 32 - 图 36 区域设置示意图.............................................................. - 33 - 图 37 视频检测-视频遮挡设置示意图 ................................................. - 34 - 图 38 报警设置-报警联动设置示意图 ................................................. - 35 - 图 39 报警设置-报警输出设置示意图 ................................................. - 36 - 图 40异常处理设置示意图(1)...................................................... - 36 - 图 41 异常处理设置示意图(2) ..................................................... - 37 - 图 42 异常处理设置示意图(3) ..................................................... - 37 - 图 43 异常处理设置示意图(4) ..................................................... - 37 - 图 44 异常处理设置示意图(5) ..................................................... - 38 - 图 45 存储管理-时间表设置示意图 ................................................... - 39 - 图 46存储管理-存储设置示意图(1)................................................. - 39 - 图 47存储管理-存储设置示意图(2)................................................. - 40 - 图 48存储管理-存储设置示意图(3)................................................. - 40 - 图 49 存储管理-录像控制示意图 ..................................................... - 41 - 图 50 系统管理-本机设置示意图(1) ................................................ - 42 - 图 51系统管理-本机设置示意图(2)................................................. - 42 - 图 52 系统管理-用户管理设置示意图 ................................................. - 44 - 图 53 添加用户界面示意图.......................................................... - 45 - 图 54 修改用户界面示意图.......................................................... - 46 - 图 55系统管理-用户组管理设置示意图................................................ - 46 - 图 56 添加组界面示意图............................................................ - 47 - 图 57 修改组界面示意图............................................................ - 47 - 图 58 系统管理-云台设置示意图 ..................................................... - 48 - 图 59 系统管理-出厂默认设置示意图 ................................................. - 48 - 图 60 系统管理-配置导入导出设置示意图 ............................................. - 49 - 图 61 系统管理-自动维护设置示意图 ................................................. - 49 - 图 62 系统管理-固件升级设置示意图 ................................................. - 50 - 图 63 系统信息-版本信息界面示意图 ................................................. - 50 -图 64 系统信息-日志信息界面示意图 ................................................. - 51 - 图 65系统信息-在线用户界面示意图.................................................. - 52 - 图 66报警设置界面示意图........................................................... - 53 - 图 67注销界面示意图............................................................... - 54 -网络摄像机WEB3.0 WEB客户端WEB客户端关于本章本章描述内容如下表所示。
网络高清摄像机操作手册法律声明版权所有©杭州海康威视数字技术股份有限公司2021。
保留一切权利。
本手册的任何部分,包括文字、图片、图形等均归属于杭州海康威视数字技术股份有限公司或其关联公司(以下简称“海康威视”)。
未经书面许可,任何单位或个人不得以任何方式摘录、复制、翻译、修改本手册的全部或部分。
除非另有约定,海康威视不对本手册提供任何明示或默示的声明或保证。
关于本产品本手册描述的产品仅供中国大陆地区销售和使用。
本产品只能在购买地所在国家或地区享受售后服务及维保方案。
关于本手册本手册仅作为相关产品的指导说明,可能与实际产品存在差异,请以实物为准。
因产品版本升级或其他需要,海康威视可能对本手册进行更新,如您需要最新版手册,请您登录海康威视官网查阅()。
海康威视建议您在专业人员的指导下使用本手册。
商标声明●为海康威视的注册商标。
●本手册涉及的其他商标由其所有人各自拥有。
责任声明●在法律允许的最大范围内,本手册以及所描述的产品(包含其硬件、软件、固件等)均“按照现状”提供,可能存在瑕疵或错误。
海康威视不提供任何形式的明示或默示保证,包括但不限于适销性、质量满意度、适合特定目的等保证;亦不对使用本手册或使用海康威视产品导致的任何特殊、附带、偶然或间接的损害进行赔偿,包括但不限于商业利润损失、系统故障、数据或文档丢失产生的损失。
●您知悉互联网的开放性特点,您将产品接入互联网可能存在网络攻击、黑客攻击、病毒感染等风险,海康威视不对因此造成的产品工作异常、信息泄露等问题承担责任,但海康威视将及时为您提供产品相关技术支持。
●使用本产品时,请您严格遵循适用的法律法规,避免侵犯第三方权利,包括但不限于公开权、知识产权、数据权利或其他隐私权。
您亦不得将本产品用于大规模杀伤性武器、生化武器、核爆炸或任何不安全的核能利用或侵犯人权的用途。
●如本手册内容与适用的法律相冲突,则以法律规定为准。
本节内容的目的是确保用户通过本手册能够正确使用产品,以避免操作中的危险或财产损失。
Lite Series | DH-IPC-HFW2431T-ZS/VFSSystem OverviewThe IR Megapixel Vari-focal camera delivers 4MP resolution with a2.7mm ~ 13.5mm varifocal lens.The camera's elegant blend of aesthetics combined with a range of easy mounting solutions provides an excellent choice for a variety of small to mid-size applications at an affordable price.FunctionsSmart Codec (H.265+ & H.264+)Smart Codec is the optimized implementation of standard video compression (H.265 & H.264) that uses a scene-adaptive encoding strategy, dynamic GOP , dynamic ROI, flexible multi-frame reference structure and intelligent noise reduction to deliver high-quality video without straining the network. Smart Codec technology reduces bit rate and storage requirements by up to 70% when compared to the standard video compression.Intelligent Video analysis (IVS)Dahua camera is equipped with a built-in intelligent analytic algorithm based on video, which can realize intelligent functions like Tripwire and Intrusion, to quickly and accurately respond to monitoring events in specific area, It can enhance monitoring efficiency. In addition, the camera supports intelligent tamper detection, which is to generatewarning message via detecting dramatic scene change and to guarantee effective video surveillance.Wide Dynamic Range (WDR)The camera achieves vivid images, even in the most intense contrast lighting conditions, using industry-leading wide dynamic range (WDR) technology. For applications with both bright and low lighting conditions that change quickly, true WDR (120 dB) optimizes both the bright and dark areas of a scene at the same time to provide usable video.Smart IR TechnologyWith IR illumination, detailed images can be captured in low light or total darkness. The camera's Smart IR technology adjusts the intensity of camera's infrared LEDs to compensate the distance of an object. Smart IR technology prevents IR LEDs from whitening out images as they come closer to the camera. The camera's integrated infrared illuminationprovides high performance in extreme low-light environments up to 60m (197ft).Protection (IP67, wide voltage)The camera allows for ±25% input voltage tolerance, suitable for the most unstable conditions for outdoor applications. Its 2KV lightningrating provides effective protection for both the camera and its structure against lightning. Subjected and certified to rigorous dust and immersion tests (IP67), the camera is the choice for installation in even the most unforgiving environments.EnvironmentalDahua cameras operate in extreme temperature environments, rated for use in temperatures from -30° C to +60° C (-22° F to +140° F) with 95% humidity.Image flipCapturing unnecessary data such as surrounding hallway walls can increase storage requirements without any added value. The image flip feature allows the camera's image to be rotated in 90° increments for better video optimization.InteroperabilityThe camera conforms to the ONVIF (Open Network Video Interface Forum) specifications, ensuring interoperability between network video products regardless of manufacturer.· 1/3” 4Megapixel progressive CMOS · H.265 & H.264 dual-stream encoding· 20fps@4M(2688×1520)&25/30fps@3M(2304×1296)· WDR(120dB), Day/Night(ICR), 3DNR, AWB, AGC, BLC· Multiple network monitoring: Web viewer, CMS(DSS/PSS) & DMSS· Micro SD card slot, up to 128GB · 2.7~13.5mm varifocal lens · Max IR LEDs Length 60m · IP67, IK10(optional), PoE+4Mp60m IRH.265+Dimensions (mm/inch)© 2018 Dahua. All rights reserved. Design and specifications are subject to change without notice.Rev 001.001Accessories Optional:PFA130-E Junction Box PFA152-E Pole Mount。