CMMOHM部件修理操作手册翻修操作手册介绍
- 格式:ppt
- 大小:376.00 KB
- 文档页数:40

工作行为规范系列模具修补机操作流程(标准、完整、实用、可修改)编号:FS-QG-23948模具修补机操作流程Operation process of mold repairing machine说明:为规范化、制度化和统一化作业行为,使人员管理工作有章可循,提高工作效率和责任感、归属感,特此编写。
修补前准备:一.接通电源(220V,单相50HZ)二.连接磁铁:1.用力拧紧磁铁线于主机负极输出接线柱上。
2.两个磁铁必需同时吸附于模具上。
如模具体积过小,也应尽量做到同时吸附。
3.磁铁与模具接触面保持清洁,确保良好的导通。
铜皮表面所吸附杂质应去除,模具表面吸附磁铁处有油污或氧化物用煤油或砂布清理。
4.磁铁吸附点选择:与缺损处直线距离尽可能近,且平整、与磁铁接触面积大。
三、连接焊头:1.将焊头连接线用力拧紧于主机正极输出接线柱。
2.根据缺损面的实际情况选择不同形状的紫铜焊头,并可对紫铜焊头形状进行适量加工,注意加工后形状与模具接触面积不要过大。
(参照模具修补注意问题2)注意:工作过程中,磁铁线和焊枪线的移动会将拧紧的接线柱拉松,造成接线柱烧蚀,影响修补效果,应经常检查、拧紧。
四.插上脚踏控制开关五.调整功率,选择补材:⑴按照每种补材外壳所示功率数据调节主机功率,片状材料功率参照同厚度合金钢.⑵根据不同的模具钢材料选择不同的补材(详见补材表)六、模具修补:基本过程:1)将焊枪按压于补材表面。
2)踩下脚开关。
3)滚压焊枪。
4)松开脚控制开关。
5)将焊头与模具脱离。
注意:如果先后秩序错误机器虽然会报警保护,但也可能偶尔在模具表面烧熔出坑点!注意事项:⑴清理:在需要修补处作简单清理去除油污和杂质,否则在修补过程中有通电不畅和火花飞溅现象。
(2)滚压速率:焊枪转动速度以脉冲输出电流在补材上形成熔结点紧密排列为宜,转动速度不能过快,否则修补抛光后有少量补材剥离和细小气孔现象.(3)焊枪与模具接触点:焊枪与补材之间接触面积越小压贴的越好,瞬间通过的电流密度越大(电流越集中),焊点的热量越大,补材结合程度相对较好。

维修参考手册保密资料仅限内部使用维修手册1目录仪器设备、焊接技巧要求、维修注意事项 (3)CLAA220WA01 PANEL PCB MODULE (4)Connector 接口定义………………………………………………………5~6 PCB Board功能分布图 (7)维修流程图…………………………………………………………………8~10附表一、二、三……………………………………………………………11~14附图一、二、三、四、五…………………………………………………15~19案例一、二、三……………………………………………………………20~21维修手册2仪器设备、焊接技巧要求、维修注意事项1、所需的仪器设备50M以上的示波器(至少50M,波形大致才能看清楚)IC拔焊台防静电温控烙铁静电手环防静电台垫2、焊接技巧要求一定要具备较高的拆、焊接贴片IC、贴片电阻、贴片电容的技术由于IC管脚细小、密集、元器件细小,有些PANEL的元器件是用胶固定在PCB板上,都会增加拆件、焊接的难度焊接工艺要好,焊接的时间过长、频繁,会损坏PCB板,严重者会造成Panel报废3、维修注意事项保内原材不良(可以索赔)的Panel不得维修维修时一定要铺防静电台垫,台垫要清洁干净,防止Panel二次刮伤维修备件的Panel只能是待报废品,如屏裂之类,但MURA、刮伤类不可拆(返厂可再次利用),拆件的Panel要完整的返回,并要在本体上注明已拆件、拆件人、日期等信息。
更换Timing IC时,切记不可用刀片切割,会损坏PCB板。
一定得要使用IC拔焊台去除IC。
维修手册3CLAA220WA01 PANEL PCBMODULEPower supplycircuit5vC o n n e c t o r (30P i n )LVDS receiver 2ch Timing controllerCell1680x3x1050Source Driver(x8)G a t e D r i v e r (x 4)Lamp Unit In Backlight维修手册4PIN NO.SYMOBL FUNCTION 1RXO0-minus signal of odd channel 0(LVDS) 2RXO0+plus signal of odd channel 0(LVDS) 3RXO1-minus signal of odd channel 1(LVDS) 4RXO1+plus signal of odd channel 1(LVDS) 5RXO2-minus signal of odd channel 2(LVDS) 6RXO2+plus signal of odd channel 2(LVDS) 7GND ground8RXOC-minus signal of odd clock channel(LVDS)9RXOC+plus signal of odd clock channel(LVDS)10RXO3-minus signal of odd channel 3(LVDS)11RXO3+plus signal of odd channel 3(LVDS)12RXE0-minus signal of even channel 0(LVDS)13RXE0+plus signal of even channel 0(LVDS)14GND ground15RXE1-minus signal of even channel 1(LVDS) Connector PIN 口定义维修手册5Connector PIN口定义16RXE1+plus signal of even channel 1(LVDS)17GND ground18RXE2-minus signal of even channel 2(LVDS)19RXE2+plus signal of even channel 2(LVDS)20RXEC-minus signal of even clock channel(LVDS)21RXEC+plus signal of even clock channel(LVDS)22RXE3-minus signal of even channel 3(LVDS)23RXE3+plus signal of even channel 3(LVDS)24GND ground25NC NC26NC NC27NC NC28VCC power supply input voltage(5.0V)29VCC power supply input voltage(5.0V)30VCC power supply input voltage(5.0V)维修手册6PCB Board 功能分布图维修手册7时序控制GAMMA 校正控制右半屏测试点位VCOM 微调电位器,DC-DC CONTROL3.3V 稳压管左半屏测试点位Source Driver(x8)To Gate Driver 测试点正面图背面图VCOM 测试点白屏维修流程注:测关键电压可参考附表一测TP128或VIN+5V 的点位是否有5V 供电测到为Source IC 或Gate IC 的负载所引起的故障。
MANUALTABLE OF CONTENTSINTRODUCTION (2)PACKAGE CONTENTS (3)TECHNICAL REQUIREMENTS (3)PRODUCT SUPPORT (3)SPECIFICATIONS (4)INSTALLATION GUIDE (5)DEVICE LAYOUT (6)SOFTWARE GUIDE (7)LEGAL INFORMATION (17)INTRODUCTIONThe CM Storm Mech is the first mechanical keyboard from the new Aluminum series performance peripherals by Cooler Master. This mechanical keyboard has been built with the combined strength of durability, utility, capability, and style. This manual is here to help make you comfortable with both your mechanical keyboard, its available software and to ensure you are getting the most out of what the keyboard has to offer. Cooler Master has a strong history with aluminum. Thanks to case lines like the Cosmos or ATCS, we are very comfortable with aluminum and we know how to form it into high quality designs and high quality products. That same attitude is being brought into the CM Storm line with the Aluminum serie s of peripherals. We’re combining both form and function to make something fantastic.We want to make sure you have the best hardware available to you. The Mech comes with three options of the popular Cherry MX mechanical switches: Blue, Brown, and Red. These switches are rated for millions of key presses and offer the mechanical functionality suited to your needs. With a tough and gorgeous aluminum shell, 64-key rollover, a USB 3.0 and audio/microphone hub, the Mech offers powerful and convenient features.The CM Storm Mech software is robust. Almost every single key on the Mech is customizable to be everything from standard keyboard functions to opening programs to fully programmed macros. You can save up to five button and macro profiles to be active on the keyboard, easily switching with a button combination or in the software so you can have your custom setups for whichever game or spreadsheet you’re working on. If this guide does not answer a question about this device or you have any questions about any other Cooler Master product, do not hesitate to find help atPACKAGE CONTENTS∙CM Storm Aluminum Mech Keyboard∙CM Storm Mech Software∙USB 3.0 Cable∙User manualTECHNICAL REQUIREMENTS∙PC with USB port, USB 2.0 compatible, USB 3.0 required for USB 3.0 speeds ∙Windows 8 / 7 / Vista / XP∙600MB of free disk space∙Internet connection for software and firmware updatesPRODUCT SUPPORT∙ 2 years limited manufacturer warranty∙General and technical support at SPECIFICATIONS∙Part Number: SGK-7000-MBCL1, SGK-7000-MBCM1, SGK-7000-MBCR1 ∙Key Switch: Cherry MX Blue, Brown, Red∙N Key Rollover: 64∙Macro Keys: 15 per profile∙Profiles: 5∙Polling Rate: 1000 Hz / 1ms∙Backlight: White LEDs, All Keys, 5 brightness settings, 3 modes∙Key caps: ABS Plastic, removable∙Output hub: 2x USB 3.0 port, mini-USB port for charging∙Audio: 3.5mm port for audio out and 3.5mm port for microphone∙On-board Memory: 128 KB∙Windows Key Lock: Yes∙Media keys: Yes, Function F keys∙USB Cable: Removable USB 3.0∙Dimensions (mm): 553 L x 267 W x 43 H∙Dimension (in): 21.7 L x 10.5 W x 1.7 H∙Weight: 1686g / 3.71 lbsINSTALLATION GUIDE1. Plug in the CM Storm Mech keyboard into your computer2. Obtain the software at or http://www.coolermaster-3. Run the installer and follow its instructions4. Launch the Mech software and allow it to configure for the first time5. Refer to the Software Guide below for support on use6. Enjoy!DEVICE LAYOUT1. F1-F4 Function controls for LEDs2. F5-F11 Function controls for media and volume3. F12 Function control for Windows Key Lock4. 32bit ARM Processor for profile and macro use5. Sturdy handle for easy transport6. Built-in extra macro keys7. Embedded steel plate with aluminum cover8. LED indicators for Num, Caps, and Scroll locks9. USB 3.0 port in from computer10. Mini-USB port for charging11. Two USB 3.0 ports as added USB 3.0 hub12. 3.5mm Microphone / Audio In port13. 3.5mm Speakers / Headphones / Audio Out portSOFTWARE GUIDEStorm CFG TabThe Storm CFG tab is the default tab when you first open the Mech software. On this page, you can change the functions of nearly every button your keyboard. The top area will show a button that you have clicked/highlighted and what functions you can put on them.The bottom area is where you can choose the button you want to change the function of, which will show up in the top area. Once a button is selected, the upper right will show all of the available functions.You can choose what that button does by clicking the red buttons in the upper right.∙Default Key – The default function of that key as listed on the key itself∙Single Key – Change one key to another∙Macro – Run a programmed macro from the Macro Studio tab∙Advanced – Change to advanced functions like Volume control∙No Function – Turns off all functions of that key∙Launch Program – Key used to run a piece of software on your PCThe colored boxes next to the red buttons allow you to change the highlight color to see what buttons on the keyboard layout have been changed.Once selected, any changes will show up on the right in the All Key List.You can close the software with the X at the top and it will auto-save the new function you selected to the currently selected Profile on the bottom. You can also use this tab to select your currently active profile or use the button default combination of the right FN +1 through 5 on the number bar for the corresponding profile when not viewing the software.Profiles TabThe profiles tab is where you can swap the arrangement of the profiles on your keyboard and transfer profiles between the keyboard and your computer. The top half is the profiles on the keyboard, the bottom half is profiles that are stored on your PC.You can change the names of the profiles by double clicking on the names, bringing up a text box for them to rename. Under the Application column, you can put in a program that, when combined with Auto Switch, will trigger the keyboard to automatically switch to that profile when that program runs on your computer.The buttons on the bottom will also highlight after selecting profiles in the above windows:∙New – Creates a new profile∙Delete – Deletes the selected profile∙Copy – Makes a copy of the selected profile∙Apply – Press this after making changes before minimizing or changing tabs to apply any changes made on this pageMacro Studio TabThe Macro Studio tab is where you manage, create, edit, and erase macro programs for your Mech. There are a few ways to build macros. The easiest method is to click New at the top left, enter the name, and then the Record button on the bottom bar between the Stop square and Play arrow.When you click the record button, you will get a popup menu with a few options: ∙1:1 Mode – This will record the timing between your button presses and releases when you are recording∙Speed Mode – You insert a time delay in the number field (measured in milliseconds) that will happen between every button press and release ∙God mode – No time delays between actionsOnce your time selection is chosen and you select OK, the recording begins. You can put in up to 25 separate button presses in up to 30 seconds per macro. The example below shows some of a macro that will output “hello” when triggered.The next method for making a macro is by once again clicking New in the top left, naming the macro, and then going to the Action dropdown on the upper right. Once clicked, it provides options including key presses and combinations such as Print, Copy, and Paste.Once a command has been selected, you can adjust the Start and End times for the action, then press the Insert button. Once inserted, the key press or combination will show up in the grid below. A virtual keyboard will also pop up for editing purposes, explained below.Regardless of how the macro was created, they can be edited in the same ways. Once you click Save on the upper left and a macro is selected in the dropdown menu, you have major editing options:∙New – Creates a new macro∙Copy – Makes a copy of the selected macro∙Delete – Completely removes the selected macroWhen you have a macro selected, you can click on a button within the grid. This will highlight that action in green and highlight the entire action row. You will also see a virtual keyboard and mouse show up as previously mentioned. You can change the highlighted button action with this virtual keyboard and mouse screen, such as changing the highlighted P to a V to change the macro command above from Print to Paste.The options in the upper right have corner also allow you to change the highlight action. You can change the action to another button combination or set it back to a key press. You can also Copy and Delete the specific action from here as well.Once you have finished building a new macro or editing one, be sure to click the Save button underneath the Select Macro dropdown for the Macro to save.Once saved, the macro will show up on the Storm CFG tab when a button is being selected to run macro. The macro can be run a single time, 2 to 10 times, toggled on a loop, or continue to loop while the macro button is held down according to the buttons on the upper right when assigning the macro. Click OK to assign that macro.LEGAL INFORMATIONCooler Master WarrantyWarranty all (non-networking) products purchased from COOLER MASTER as free from defects in material and workmanship for normal use by the original purchaser for warranty period.The Cooler Master Warranty would like to assure all of the users of Cooler Master Products to be free from any defects as a result of faulty manufacturing or faulty components under the following terms and conditions:COOLER MASTER is not responsible for damage to or loss of any programs, data, or removable storage media. You are responsible for backing up any programs or data on removable storage media.Except for the warranties set forth herein, COOLER MASTER disclaims all other warranties, expressed or implied or statutory, including but not limited to the implied warranties of merchantability or fitness for a particular purpose.Any implied warranties that may be imposed by applicable law are limited to the terms of this limited warranty. In no event shall COOLER MASTER be liable for any incidental, special or consequential damages, including but not limited to loss of business, profits, data or use, whether in an action in contract or tort or based on a warranty, arising out of or in connection with the use or performance of the product, even if COOLER MASTER has been advised of the possibility of such damages.You agree that repair, replacement, as applicable, under the warranty services described herein is your sole and exclusive remedy with respect to any breach of the COOLER MASTER limited warranty set forth herein. if, despite the foregoing limitations, for any reason COOLER MASTER becomes liable to you for damages incurred by you in connection with this agreement, then, the liability of COOLER MASTER will be limited to the amount equal to the latest distributors price.Some states or provinces/jurisdictions do not allow the exclusion or limitation of incidental or consequential damages for consumer products, and some states or provinces/jurisdictions do not allow limitations on how long an implied warranty lasts.In such states or provinces/jurisdictions, the exclusions or limitations of this limited warranty may not apply to you.This limited warranty gives you specific legal rights.You may also have other rights that vary from state to state/jurisdiction to jurisdiction. You are advised to consult applicable state and provincial/local laws.1. Warranty LengthAll products from Cooler Master at least carry 1 year warranty from the date of purchase, with the exception of power supply units which carry a 2-5 year warranty. If no proof of purchase (receipt or invoice of purchase) can be presented upon request, Cooler Master cannot be held responsible for warranty service.2. Who is Protected?The original customer purchasing the Cooler Master Product is covered under the Cooler Master Warranty Program.3. What is and is NOT CoveredIt is important to note that our warranty is not an unconditional guarantee for the duration of the Program. Any replaced parts become the property of Cooler Master. The Program does not apply to the software component of a product or a product which has been damaged due to accident, misuse, abuse, improper installation, usage not in accordance with product specifications and instructions, natural or personal disaster, or unauthorized alterations, repairs or modifications.The Program does not cover any events such as below:∙Any damages unrelated to manufacturing defects.∙Any unsuitable environment or use of the product in Cooler Master Opinion.∙Any product which has been modified without official permission from Cooler Master, or on which the serial number or warranty sticker has been defaced,modified, or removed.Damage, deterioration or malfunction resulting from:∙Accident, abuse, misuse, neglect, fire, water, lightning, or other acts of god, commercial or industrial use, unauthorized product modification or failure tofollow instructions included with the product.∙Third party products using Cooler Master Components will not be covered by warranty. See your vendor or the manufacturer for information about servicing.∙Repair or attempted repair by anyone not authorized by Cooler Master, Inc.∙Any shipment damages (claims MUST be made with the carrier).∙Unauthorized repairs to a Cooler Master product (power supplies) will void the warranty offered by the Program. Cooler Master reserves the right to refuse toservice any product which has been altered, modified or repaired by non-CoolerMaster Service personnel.∙Cooler Master does not warrant that this product will meet your requirements. It is your responsibility to determine the suitability of this product for your purpose.∙Removal or installation charges.∙You are responsible for the cost of shipping the product to Cooler Master. Cooler Master pays the cost of returning a product to you.∙Cooler Master reserves the right to replace the product with a service product at their sole discretion at any time.4. Local Law and Your WarrantyThis warranty gives you specific legal rights. You may also have other rights granted under local law. These rights may vary.5. Limitations of Implied WarrantiesThere are no other oral or written warranties, expressed or implied, including but not limited to those of merchantability or fitness for a particular purpose. The duration of implied warranties is limited to the warranty length specified in Paragraph one.6. To Obtain Technical SupportIf you need help installing or troubleshooting a product please submit a technical support request form here.7. ShippingBased on company policy, customers are responsible for shipping costs to ship back the defective item for RMA repair/replace. Once the item is repaired/replaced, Cooler Master will ship the item back to the customer. Shipping methods will be at Cooler Master's discretion.Cooler Master will not be able to ship repaired/replaced items in the same method as the customer's because not only would this not be efficient, but it may delay the return of the repaired/replaced item. Therefore, Cooler Master reserves the rights to ship according to what it deems the most efficient standard method of shipping.8. Exclusion of Damages (Disclaimer)Cooler Master's sole obligation and liability under this Program is limited to the repair or replacement of a defective product at our discretion. Cooler Master shall not, in any event, be liable to the purchaser or any third party for any incidental or consequential damage, (including, but not limited to, damages resulting from interruption of service and loss of business), or liability in tort relating to this product or resulting from its use or possession.。
手管制的普通机床维修手册以下是一份关于普通机床维修的手册,供参考:一、主轴部件的检修1. 主轴的拆卸和清洗:先拆下主轴各部附件,然后将主轴从传动系统中分离,再彻底清洗各部件。
2. 轴承的检查:检查轴承的磨损情况,若有问题则进行更换。
同时检查主轴的定位锥孔和各螺钉是否有磨损或松动。
3. 齿轮的检查:检查主轴齿轮的啮合情况,确保无磨损或损伤。
4. 油路的检查:清洗油路,确保油路畅通无阻。
二、导轨部件的检修1. 导轨的检查:检查导轨的磨损情况,若有问题则进行修复或更换。
同时检查导轨的润滑情况,确保润滑良好。
2. 滑块的检查:检查滑块的运行情况,确保无卡滞或异响。
三、传动系统的检修1. 皮带传动的检查:检查皮带的张紧度和磨损情况,若有问题则进行调整或更换。
2. 链传动的检查:检查链条的张紧度和磨损情况,若有问题则进行调整或更换。
3. 齿轮传动的检查:检查齿轮的啮合情况和润滑情况,若有问题则进行调整或更换。
四、电气系统的检修1. 电源部分的检查:检查电源线是否完好,是否有松动或破损。
同时检查电源电压是否稳定。
2. 控制部分的检查:检查控制线路是否完好,是否有松动或破损。
同时检查各控制元件是否正常工作。
3. 电机部分的检查:检查电机是否正常工作,是否有异响或过热现象。
同时检查电机的接线是否正确。
五、液压系统的检修1. 油泵的检查:检查油泵是否正常工作,是否有异响或过热现象。
同时检查油泵的供油量是否正常。
2. 油缸的检查:检查油缸的运动是否平稳,是否有泄漏现象。
同时检查油缸的密封件是否完好。
3. 控制阀的检查:检查控制阀是否正常工作,是否有泄漏现象。
同时检查控制阀的调节弹簧是否完好。
六、附件的检查与更换1. 刀具的更换:根据需要更换刀具,并确保刀具安装牢固。
2. 冷却液的更换:根据需要更换冷却液,并确保冷却液清洁无杂质。
3. 防护装置的更换:根据需要更换防护装置,并确保安装牢固、符合安全标准。
冲压(chòngyā)模具维护、保养(bǎoyǎng)教育(jiàoyù)手册(shǒucè)目录一冷冲模的维护保养(bǎoyǎng)规程1)冲模技术状态鉴定2)冲模维护性修理3)冲模的保养4)冲模技术文件治理二冷冲模维护的要紧内容1〕冲模失效的缘故及预防措施2〕冲模爆裂的要紧缘故3〕冲模的维护4〕冲模不良缘故分析及对策汇总三冲压模具平安一冷冲模的维护(wéihù)保养规程总原那么(n àme):设备(sh èb èi)〔模具(m új ù)〕维修保养体系(t ǐx ì)按照设备〔模具〕服役时刻〔磨损老化状况〕划分为三个不同的区域,采纳不同的维修策略;在那个框架下,再依据设备〔模具〕运行状况划分为不同的具体维修策略或者模式。
冷冲模的日常维护与治理工作.对改善冲模的技术状态、保证制件质量和确保生产顺利进行至关重要。
因此,必须认真做好这项工作。
冲模维护与治理的内容:冷冲模日常维护与治理的内容,要紧包括以下几方面:1)冲模技术状态鉴定;磨耗期 磨合期 平稳期2)冲模(chòngmú)维护性修理;3)冲模(chòngmú)的保养;4)冲模技术(jìshù)文件治理;1〕冲模技术(jìshù)状态的鉴定:〔一〕冲模(chòngmú)技术状态鉴定的必要性冷冲模在使用过程中,由于冲模零件的自然磨损,冲模制造工艺不合理,冲模在机床上安装或使用不当以及设备发生故障等缘故,都会使冲模的要紧零部件失往原有的使用性能及精度。
致使冲模技术状态日趋恶化,妨碍生产的正常进行和效率以及制品的质量。
因此,在冲模治理上,必须要主动地把握冲模的这些技术状态变化,并认真地予以处理以使冲模能始终在良好的技术状态下工作。
CM402维修培训1.X—Y AXIS机器原理的介绍✧X—AXIS MOTOR更换及调整✧Y—AXIS MOTOR更换及调整X/Y轴马达更换与调整(MOTOR与BALLSCREW的同心度)。
原点调整:✧开机→使用Service FD→进入Service Mode→Dubeg Parameter→将Exclusive All Orgin选ON✧进入Axis Parameter→Position ctrl gain2和Speed ctrl gain2改为原值的1/3→M/C resonactrl fill 1/2都改0✧Machine parameter→orgin ,offset值都设定为“0”(针对已更换过的马达)✧Axis Move→Y Axis Orgin(以Y轴为例)→挡Orgin Senser 2次→Y轴上的DOG挡住Orgin Senser(Servo off不能关)✧调整DOG使Orgin Senser能正确感应(用治具放在stopper处,以dog挡住org.sensor) ✧恢复修改过的机器参数马达同心度调整治具更换马达后,连轴器拆除,用连轴器治具套在马达输出轴上转(丝杠不能转)感觉滑顺。
锁连轴器时要注意两边间隙要对称(平均用力)2.TABLE的调整✧SUPPORT TABLE平行度的调整✧导轨宽度原点的调整✧SUPPORT PIN 及CONVEYER HEIGH的调整✧CONVEYER WIDTH的原点调整。
3.PARTS CAMERA 更换与调整。
进入Machine Para→Chip Recog→Jig Setting→Camera Angle Teach,机器自动进行检测。
检测值应在±0.05mm。
若达不到此值,对角度调整螺丝进行调整后,再进行上述机器自动检测。
4.PCB CAMERA更换与调整。
焦距检查:Service状况下→Recog Unit Mait→选Camera Select/Front Board→改变Lamp的亮度→将Lamp2改为0(选Light)角度检查:Machine Para菜单→PCB Recog→Camera Angle Teach→进行相机角度的测定(Angle=±0.21°)5.CUTTER的更换与调整。
维修及操作和维修手册(O&M手册)一、维修1.在缺陷责任期内,承包人应免费进行日常的维修工作。
2.所有设备应便于检查、清洁、更换和维修。
设备中相同的部件应具有互换性,设备的互换性应在操作与维修手册中详细描述。
设备的部件(包括印刷电路板等级)应清楚标明组装号、序列号和变更等级。
在进行完工测试时,承包人应给业主代表和监理工程师提供组装件安装在各种设备里的位置记录表。
这种记录表被认为是完工图纸的一部分将用作维修及可靠性评价的基础数据。
设备各部分之间要有可靠的绝缘,这样在维修其中一部分时将不影响其它部分的工作。
二、操作和维修手册(O&M手册)(一)概述1、在系统试运转开始之前1个月内,承包人应提交2份操作和维修手册(初稿)给业主。
并在缺陷责任期开始后不迟于6个星期提交6份操作和维修手册正式稿给业主,但是有些设备的技术资料应事先提供,O&M手册中的重要部分应用中文编写。
2、每种设备应提供2份专用设备手册。
专用设备手册是缩略本,应尽量减少无关的内容,并有详细说明,便于参照使用。
3、操作和维修手册中应对各系统的运行操作做出全面的详细说明。
4、对于系统中的某些设备或部件,如印刷电路板,承包人可直接使用这些设备与部件的生产厂家的资料和手册作为本操作维修手册的一部分,并根据手册的总目录依次汇编,这种文件可保留原有封面。
5、有些设备或部件在本地无法维修,必须送到厂家维修,那么,在O&M手册中应包括这些设备或部件的维修和拆装资料。
6、控制原理图要清楚表示出设备的操作、安装及各部分的连接和各部分间电缆的走向。
全部控制原理图包括部件、接触器的说明、图例和附注,即电流范围、线圈电压等等及继电器的动作线圈、特殊功能的恰当说明。
7、O&M手册应有目录表和专门术语(编写)的章节,为了使用户容易理解O&M手册的内容,应在手册中包括所需的框图、图纸、轮廓图和实际设备或系统的照片,同时,还应包括操作使用该设备的注意事项和设备的安全使用寿命。
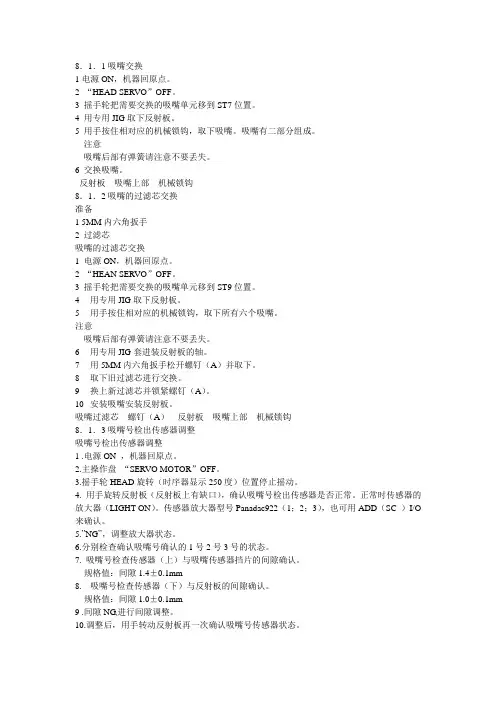
8.1.1吸嘴交换1电源ON,机器回原点。
2 “HEAD SERVO”OFF。
3 摇手轮把需要交换的吸嘴单元移到ST7位置。
4 用专用JIG取下反射板。
5 用手按住相对应的机械锁钩,取下吸嘴。
吸嘴有二部分组成。
注意吸嘴后部有弹簧请注意不要丢失。
6 交换吸嘴。
反射板吸嘴上部机械锁钩8.1.2吸嘴的过滤芯交换准备1 5MM内六角扳手2 过滤芯吸嘴的过滤芯交换1 电源ON,机器回原点。
2 “HEAN SERVO”OFF。
3 摇手轮把需要交换的吸嘴单元移到ST9位置。
4用专用JIG取下反射板。
5用手按住相对应的机械锁钩,取下所有六个吸嘴。
注意吸嘴后部有弹簧请注意不要丢失。
6用专用JIG套进装反射板的轴。
7用5MM内六角扳手松开螺钉(A)并取下。
8取下旧过滤芯进行交换。
9换上新过滤芯并锁紧螺钉(A)。
10安装吸嘴安装反射板。
吸嘴过滤芯螺钉(A)反射板吸嘴上部机械锁钩8.1.3吸嘴号检出传感器调整吸嘴号检出传感器调整1 .电源ON ,机器回原点。
2.主操作盘“SERVO MOTOR”OFF。
3.摇手轮HEAD旋转(时序器显示250度)位置停止摇动。
4. 用手旋转反射板(反射板上有缺口),确认吸嘴号检出传感器是否正常。
正常时传感器的放大器(LIGHT ON)。
传感器放大器型号Panadac922(1;2;3),也可用ADD(SC )I/O 来确认。
5.”NG”,调整放大器状态。
6.分别检查确认吸嘴号确认的1号2号3号的状态。
7. 吸嘴号检查传感器(上)与吸嘴传感器挡片的间隙确认。
规格值:间隙1.4±0.1mm8. 吸嘴号检查传感器(下)与反射板的间隙确认。
规格值:间隙1.0±0.1mm9 .间隙NG,进行间隙调整。
10.调整后,用手转动反射板再一次确认吸嘴号传感器状态。
11主操作盘“SERVO MOTOR”ON。
吸嘴号检出传感器1 吸嘴号检出传感器2 吸嘴号检出传感器3反射板反射板缺口吸嘴传感器挡片吸嘴单元吸嘴单元吸嘴号检出传感器(上)吸嘴号检出传感器(下)8.1.4 吸着压力,装着压力,不良部品排出压力调整准备1 数字式真空压力表吸着压力,装着压力,不良部品排出压力调整注意点1装着压力(吹气)全用吸嘴单元的3号吸嘴进行调整。
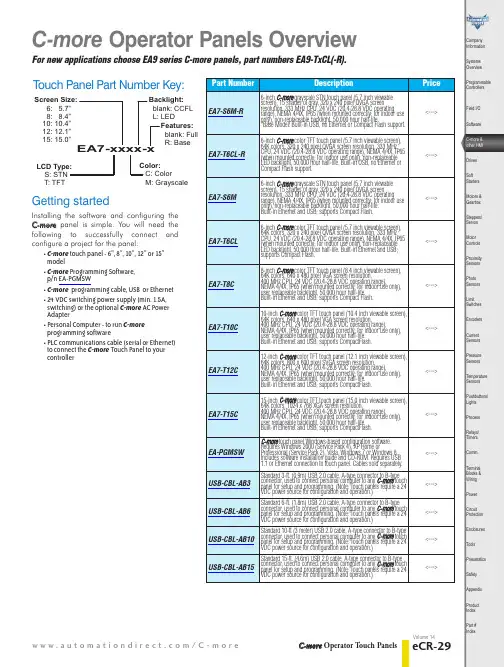
w w w.a u t o m a t i o n d i r e c t .c o m /C -m o r e C -m o r e Operator Touch PanelseCR-29Company Information Systems OverviewProgrammable ControllersField I/O Software C-more & other HMIDrives Soft StartersMotors &Gearbox Steppers/ServosMotor Controls Proximity SensorsPhoto Sensors Limit Switches Encoders Current Sensors Pressure SensorsTemperature Sensors Pushbuttons/LightsProcess Relays/TimersComm.Terminal Blocks & Wiring PowerCircuit Protection EnclosuresTools Pneumatics Safety Appendix Product Index Part #IndexVolume 14C-more Operator Panels OverviewFor new applications choose EA9 series C-more panels, part numbers EA9-TxCL(-R).Volume 14<---><---><---><--->C-more Selection Guide & SpecificationsFor new applications choose EA9 series C-more panels, part numbers EA9-TxCL(-R).1-800-633-0405 eCR-30C-m o r e Operator T ouch PanelsCompany Information Systems Overview Programmable ControllersField I/O SoftwareC-more & other HMIDrives Soft Starters Motors &Gearbox Steppers/Servos Motor Controls Proximity Sensors Photo Sensors Limit Switches Encoders Current Sensors Pressure Sensors Temperature Sensors Pushbuttons/Lights Process Relays/Timers Comm.Terminal Blocks & Wiring PowerCircuit Protection EnclosuresToolsPneumatics SafetyAppendix Product IndexPart #IndexPart No. EA7-T12C<--->PLC DriversSerialCompany InformationSystems OverviewProgrammable ControllersField I/O SoftwareC-more & other HMIDrivesSoft StartersMotors & GearboxSteppers/ ServosMotor ControlsProximity SensorsPhoto SensorsLimit SwitchesEncodersCurrent SensorsPressure SensorsTemperature SensorsPushbuttons/ LightsProcessRelays/ TimersComm.Terminal Blocks & WiringPowerCircuit ProtectionEnclosuresToolsPneumaticsSafetyAppendixProduct IndexPart # Index1-800-633-0405eCR-42C -m o r e Operator T ouch PanelsVolume 14C-more Communication Protocols & CablesNOTE: EZTouch serial PLC communication cables are compatible with C-more touch panels.EA-2CBLEA-2CBL-1For new applications choose EA9 series C-more panels, part numbers EA9-TxCL(-R).w w w.a u t o m a t i o n d i r e c t .c o m /C -m o r eC -m o r e Operator Touch PanelseCR-43Company Information Systems Overview Programmable ControllersField I/O Software C-more & other HMIDrives Soft Starters Motors &Gearbox Steppers/Servos Motor Controls Proximity Sensors Photo Sensors Limit Switches EncodersCurrent Sensors Pressure Sensors Temperature Sensors Pushbuttons/Lights Process Relays/Timers Comm.Terminal Blocks & Wiring PowerCircuit Protection Enclosures Tools Pneumatics Safety Appendix Product Index Part #IndexVolume 14The Ethernet Configuration Kit includes a five-port 10/100 Base-T Ethernet switch,four straight-through cables, and one crossover cable. (The cables are at least five feet in length.) The kit provides a great convenience for configuring systems,demonstration systems or basic control proj-ects using Ethernet.a deviceMessage is sent out only from the port connected to destination devicePart No. SE-SW5UStride™Ethernet SwitchEthernet Configuration KitUSB Programming CablePart No. USB-CBL-AB15C-more Computer Programming Connections<---><--->Other lengths available see USB-CBL-AB3, USB-CBL-AB6,USB-CBL-AB10 on page 9-27Part No. RT -CNFGKIT<--->For new applications choose EA9 series C-more panels, part numbers EA9-TxCL(-R).1-800-633-0405eCR-44C -m o r e Operator T ouch PanelsVolume 14Providing Power to the Touch Panel• Connect a dedicated 24 VDC switching power supply rated for a minimum of 1.5 Amps to the DC connector on the rear of the C-more touch panel. Connect the ground terminal to a proper equipment ground.• or, install a C-more AC Power Adapter (EA-AC) to the rear of the touch panel and connect an AC voltage source of 100-240 VAC,50/60Hertz, to its AC connector.• then, turn on the power source and check the LED status indicators on the rear of the C-more touch panel for proper operation.W o minimize the riskof potential you should follow all applicable and national codes that regulate the installation and operation of your equipment. These codes vary from area to area and it is your responsibility to determine which codes should be followed, and to verify that the equipment, installation, and operation are in compliance with the latest revision of these codes.Equipment damage or serious injury topersonnel can result from the failure to follow all applicable codes and standards.We do not guarantee the products described in this publication are suitable for your particular application, nor do we assume any responsibility for your product design, installation, or operation.If you have any questions concerning the installation or operation of this equipment,or if you need additional information,please call us at 1-800-633-0405 or 770-844-4200.This publication is based on information that was available at the time it was printed.At ®we constantly strive to improve our products and services,so we reserve the right to make changes to the products and/or publications at any time without notice and without obligation.This publication may also discuss features that may not be available in certain revisions of the product.C-more Power Connection WiringFor new applications choose EA9 series C-more panels, part numbers EA9-TxCL(-R).w w w.a u t o m a t i o n d i r e c t .c o m /CCompany Information Systems Overview Programmable ControllersField I/O Software C-more & other HMI Drives Soft Starters Motors &Gearbox Steppers/Servos Motor Controls Proximity SensorsPhoto Sensors Limit Switches Encoders Current Sensors Pressure Sensors Temperature Sensors Pushbuttons/Lights Process Relays/Timers Comm.Terminal Blocks & Wiring PowerCircuit Protection Enclosures ToolsPneumatics Safety Appendix Product Index Part #IndexAccessoriesThe C -m o r e touch panels can be enhanced with the accessories below:NOTE: Refer to the individual product data sheets that are included with the accessories E XPANSION A SSEMBL EA-EXP-OPTM EMORY C ARD EA-CF-CARDAC/DC P OWER A DAPTEREA-ACC -m o r e T OUCH P ANELNOTE: CompactFlash card designations – CF Slot #1is at the top of the panel CF Slot #2 is the Interface Module, p/n EA-CF-IF.CF card plugs into slot #1at top of panel.left slot for future.C-more USB P EN D SDCZ4-2048-A11-800-633-0405eCR-46C -m o r e Operator T ouch PanelsVolume 14C-more AccessoriesAC/DC Power AdapterThe AC/DC Power Adapter provides dedicated DC power to the panel if using 110 VAC as a power source. The AC/DC Power Adapter provides some features that a normal DC power supply cannot provide. The adapter provides a power loss signal to the touch panel that can be used to track power outages. Thissignal also allows the touch panel by way of a timed sequence to stop writing data to CompactFlash memory devices providing a controlled shutdown for increased data logging reliability.Part No. EA-AC Overall Panel Depth w/ EA-AC InstalledDimensionsAC/DC Power Adapter SpecificationsNOTE: The AC/DC Power Adapter is not recommended for use with the EA7-T15C touch panel when operating temperatures are expected to exceed 40 °C [104 °F].NOTE: data being logged to CompactFlash during power must 6.18E or higher for proper operation.<--->For new applications choose EA9 series C-more panels, part numbers EA9-TxCL(-R).Company Information Systems Overview Programmable ControllersField I/O Software C-more & other HMIDrives Soft Starters Motors &Gearbox Steppers/Servos Motor Controls Proximity Sensors Photo SensorsLimit Switches Encoders Current SensorsPressure Sensors Temperature Sensors Pushbuttons/Lights Process Relays/TimersComm.Terminal Blocks & Wiring Power Circuit ProtectionEnclosures Tools Pneumatics SafetyAppendix Product Index Part #Index<---><--->Part No. EA-EXP-OPTPart No. EA-CF-IFOverall Panel Depth w/ EA-EXP-OPT1-800-633-0405eCR-48C -m o r e Operator T ouch PanelsVolume 14<--->EA-CF-CARDUSB Pen DriveC-more AccessoriesPart No.SDCZ4-2048-A10<--->The SanDisk Cruzer Edge is a small 2GB USB Flash Drive (UFD) that connects to a USB port. Users can easily store their logging data, project data, key documents and images on a Cruzer Edge and transfer them to another computer with a USB port.• Dimensions: (W x L x D) 0.80” x 2.30” x 0.40 “Specifications/Features:• CompactFlash™ Compatibility • W/E Endurance 100,000 cycles • Data transfer rate: 16 MB/second• Operating T emp: -13 to 185°F ( -25 to 85°C )• Operating Humidity 85% max, non-condensing • Storage T emp: -13 to 194 °F ( -25 to 90°C )• Storage Humidity 95% max, non-condensingFor new applications choose EA9 series C-more panels, part numbers EA9-TxCL(-R).w w w.a u t o m a t i o n d i r e c t .c o m /C -m o r e C -m o r e Operator Touch PanelseCR-49Company Information Systems Overview Programmable ControllersField I/O Software C-more & other HMI Drives Soft StartersMotors &Gearbox Steppers/Servos Motor Controls Proximity Sensors Photo Sensors Limit SwitchesEncoders Current SensorsPressure Sensors Temperature Sensors Pushbuttons/Lights Process Relays/TimersComm.Terminal Blocks & WiringPower Circuit ProtectionEnclosures ToolsPneumatics Safety Appendix Product Index Part #IndexVolume 14C-moreAccessories6” Adapter PlateThe adapter plate simplifies the retrofit of a new C -m o r e 6” touch panel into an existing cabinet cutout for an EZT ouch (units sold by AutomationDirect) 6” wide bezel touch panel, such as our part number EZ-S6C-K, EZ-S6C-F , EZ-S6M-R or EZ-S6M-F .A NEMA 4/4X gasket is included. Please note that all sizes of the C -m o r e touch panels have the same cutout as similarly sized EZTouch thin bezel (slim) touch panels, allowing quick replace-ment.<--->Part No. EA-6-ADPTRMounting DetailsFor new applications choose EA9 series C-more panels, part numbers EA9-TxCL(-R).1-800-633-0405eCR-50C -m o r e Operator T ouch PanelsVolume 14C-more AccessoriesD-SUB 15-pin to Terminal Block AdapterThe EA-COMCON-3 adapter plugs into the 15-pin serial port on the rear of the panel to allow wire terminal connections for an RS-422/RS-485/DH-485 PLC communication cable. UL Recognized. For use with all -m o r e EA7 series panels, C -m o r e EA9-T6CL and C -m o r e Micro-Graphic 4” and 6” panels.<---><--->EA-ADPTR-4EA-COMCON-30.412[10.5]0.751Units: inches [mm]For new applications choose EA9 series C-more panels, part numbers EA9-TxCL(-R).Company Information Systems Overview Programmable ControllersField I/O Software C-more & other HMI DrivesSoft Starters Motors &Gearbox Steppers/Servos Motor Controls Proximity Sensors Photo Sensors Limit Switches EncodersCurrent SensorsPressure Sensors Temperature Sensors Pushbuttons/Lights Process Relays/Timers Comm.Terminal Blocks & Wiring Power Circuit ProtectionEnclosures Tools Pneumatics Safety Appendix Product Index Part #IndexInstallationNOTE: The Protective Cover ships with a thin protective sheet on the face of the cover that needs to be carefully removed. If your panel is not clear, the protective sheet may not have been removed.1-800-633-0405eCR-52C -m o r e Operator T ouch PanelsVolume 14EA-8-BULB, EA-8-BULB2,EA-10-BULB, EA-10-BULB2, EA-12-BULB, EA-12-BULB2,EA-15-BULB, & EA-15-BULB2see tablePanels with serial numbers newer than November 2013 do not have user replaceable backlights. For earlier panels, thecorrect replacement bulb part number is provided in the adjacent table. No 6” panels have user replaceable backlights. Older 8”, 10” and 15”touch panels use two bulbs per panel and the 12” touch panels use one bulb per panel. The bulbs are packaged two per box for the 8”, 10”and 15” touch panels and one per box for the 12” touch panels.C-more Replacement PartsYY: Year (05–99 --- e.g. 05 = 2005)M: Month (1–9, X, Y , Z --- e.g. X = Oct.)DD: Day (1–31)F: Manufacturing Site (0–9, A–Z)NNN: Sequence number for the date listed (000–999)Serial Number =[Part Number]+[YYMDDFNNN ]For new applications choose EA9 series C-more panels, part numbers EA9-TxCL(-R).Company Information Systems Overview Programmable ControllersField I/O Software C-more & other HMI Drives Soft Starters Motors &Gearbox Steppers/Servos Motor Controls Proximity Sensors Photo Sensors Limit Switches Encoders Current Sensors Pressure Sensors Temperature Sensors Pushbuttons/Lights Process Relays/TimersComm.Terminal Blocks & Wiring Power Circuit Protection Enclosures Tools Pneumatics Safety Appendix Product Index Part #IndexDC Power Connector Part No. EA-DC-CONPart No. EA-AC-CONEA-12-GSK and EA-15-GSKand EA-15-BEZELPart No. EA-6-ADPTR-GSKReplacement 5-terminal DC power connector for C -m o r e touch panels.Replacement 3-terminal AC connector for C -m o r e touch panel Power Adapters.Replacement NEMA 4/4X touch panel gaskets for C -m o r e 6”, 8”, 10”, 12” and 15” touch panels.NEMA 4/4X bezel, customer replaceable,for C -m o r e 8”, 10”, 12” and 15” touchpanels. Gasket not included.6-inch replacement NEMA 4/4X gasket for the C -m o r e touch panel adapter plate.MAINTENANCE HTTP Backup Battery (supplied with new panels) Part No. D2-BAT -1Part No. EA-BRK-1Part No. EA-BRK-2panel mounting clips for touch panels. Package of 2 clips with 4 screws.Spare panel mounting clips for the 8-inch through 15-inch C -m o r e touch。
CMG-4Cubeta manual para grasaManual for grease4 kgs AA09044CMG-6Cubeta manual para grasaManual for grease6 kgs AA09045CMA-16Cubeta manual para aceiteManual for oil19 lts•Práctica boquilla con válvula antigoteo•Despacha 250 ml por bombeo en función de la viscocidad •Practice drip nozzie valvedispensed 250 ml per pumping plunger.AA09021CMG-16Cubeta manual para grasaManual for grease16 kgs•Práctica boquilla que evitael goteo•Despacha 1 g de grasa por bombeo en función de la viscocidad•Practice preventsdripping nozzie dispatches pumping plunger.AA09024CMG-19Cubeta con bomba manual para grasaManual bucket for grease19 kgs•Despacha 9 g. de grasa en función de la viscocidad.•Presión máxima de trabajo: 1740 PSI •Dimensiones de la cubeta: 42 x 80 cm •Delivers 9 gOf grease per cycle •Max. Working pressure: 1740 psi.•Bucket dimensions: 42 x 80 cmAA09025•Manguera de 1.2 mts•Manguera de 1.2 mts•Manguera de 1.5 mts•Manguera de 1.5 mts•Manguera de 1.5 mts/ LUBRICATIONEMPAQUE PZAS.PESO GARANTÍACaja Color1 4.5 Kg 1 año EMPAQUE PZAS.PESO GARANTÍACaja Color1 5.3 Kg 1 añoEMPAQUE PZAS.PESO GARANTÍA Caja17.4 Kg 6 mesesEMPAQUE PZAS.PESO GARANTÍACaja17.5 Kg 6 mesesCMA-19Cubeta con bomba manual para aceiteManual bucket for oil19 ltsAA09022•Despacha 200 ml en función de la 12 kg viscocidad •Dimensiones de la cubeta: 42 x 80 cm •Delivers 200 ml of liter per cycle •Bucket dimensions: 42 x 80 cm•Manguera de 1.5 mtsEMPAQUEPZAS.PESO GARANTÍA Caja19.3 Kg 6 mesesCEN-12Cubeta engrasadora neumática Grease Pump12 kgsIncluye:·Manguera ·PistolaAA09017EMPAQUE PZAS.PESO GARANTÍA Caja113.5 Kg 6 mesesCubeta engrasadora neumática CEN-30Pneumatic Grease30 kgsEn el interior del tanque cabe una cubeta de 19 kgs Incluye:·Manguera ·Pistola ·AgarraderaAA09018•Manguera de 5 mtsEMPAQUE PZAS.PESO GARANTÍA Caja119.5 Kg 6 meses SNDG-200Sistema neumático dispensadorde grasa para tamboAA09051•Manguera de 4 mtsEMPAQUE PZAS.PESO GARANTÍA Caja136.1 Kg 1 añoEMPAQUE PZAS.PESO GARANTÍA Caja18.8 Kg 6 mesesMEJORADO。
平面磨床维修资料,对你绝对有用M7120A卧轴矩台平面磨床结构的特点M7120A型卧轴矩台平面磨床由床身、工作台、立柱、滑板、磨头和垂直进给机构、工作台手摇进给机构、磨头手动横向进给机构及液压传动系统等部分组成,是一种典型的卧轴矩平面磨床。
M7120A平面磨床不同于立轴圆台普通平面磨床,其传动一般以液压传动为主,机械传动比较简单。
主要用来加工较大平面的工件,加工精度也较高。
M7130卧轴矩台平面磨床与M7120A比较M7130卧轴矩台平面磨床与M7120A比较,其最大特点是磨头切削力大,磨削效率较高。
此外,机床的液压系统比较简单,省去了工作台手摇机构,整机除磨头垂直进给需手动外,其它动作均由液压系统驱动。
在结构布局上与M7120基本一致,有别于M7120A的部件结构主要有:(1)磨头结构。
(2)垂直进给机构。
(3)工作台液压缸。
M7130平面磨床的工作台液压缸采用双进单出的结构,借助于液压油对活塞、活塞杆的推、拉作用,使工作台作往复移动。
液压缸工作时,进入左、右腔的液压油压力是不一样的,活塞杆受压、拉双重力的作用。
轴矩台平面磨床的精度对加工工件精度的影响考虑到实际加工中最普遍的情形,卧轴矩台平面磨床磨头主轴与工作台面的相对位置误差对工件的平行度精度影响最大;床身导轨的平行度误差,机床的安装水平误差对工件的平面度精度影响最大;磨头的主轴圆跳动误差对工件的表面粗糙度影响最大。
此外,机床的振动、环境温度等对加工工件精度都有较大的影响。
平面磨床维修前准备工作及其检查项目平面磨床修理前的准备工作主要包括对所修机床修前状态的调查,即对机床的精度状况、故障情况的调查和分析,然后编制技术准备书,制定基本修理方案,列出所要更换或修复零件的明细表。
准备工作的好坏直接影响到大修工作的顺利进行和维修质量,应力求准确、全面、可行。
准备工作及其检查项目有如下几项:(1)检查磨头进给落刀情况,以确定是否更换丝杠副。
(2)调查机床使用中有没有“抱轴”现象,轴承的承载能力如何,并现场观察磨头主轴、轴瓦磨损情况,确定主轴轴瓦的修换。
饰面辊操作和维修手册公司前言公司编辑这个手册,供用户使用.我们提供地这些资料只是供用户作为一般地使用和维修用,用户不能用于生产、制造饰面辊.文档来自于网络搜索如果手册什么还有什么不清楚地,亲和我们联系.公司电话()传真()地址 .,饰面辊地位置饰面辊地位置非常重要,只有位置合适,才能最大限度地提高纸页地质量,消除进口侧可能出现地问题.饰面辊所在地位置,湿纸页地浓度应该是.文档来自于网络搜索注意:如果有例外,公司地人员可以重新建议.为了能准确确定安装位置,应该测定网部有关位置地湿纸页浓度,可以使用吹出浆料测定或使用浓度测定仪.文档来自于网络搜索对于网部全部使用刮水板地高级纸机,通常要有—个低真空刮水板箱,饰面辊就布置在真空度小一点地刮水板箱后面,在真空度大一点地刮水板箱前面.特别要注意地是:前后两个低真空刮水板箱边缘之间地距离应该等于饰面辊地直径,饰面辊地安装位置应该是:饰面辊地垂直中心线距离前面刮水板箱(近流浆箱那一个)为这段距离地,而距离后面刮水板箱(近伏辊那一个)为这段距离地.例如,要安装一个直径″地饰面辊,它地垂直中心线距离前面刮水板箱(近流浆箱那一个)为″, 而距离后面刮水板箱(近伏辊那一个)为″,两个刮水板箱地边缘总距离为″,刚好等于饰面辊地直径.(见本页后面地示意图)文档来自于网络搜索这样地安装要求已为几乎所有地纸机条件证明是最合适地.纸页地匀度提高最多,而抛水现象最少,因为这样地安装位置,饰面辊会有更压区角.如果要使纸页产生水印,在任何相当于一定地饰面辊直径地合理地允许地速度条件下,以及不超过纸机其他局限因素条件下,可以达到清晰地水印.文档来自于网络搜索示意图(略)饰面辊与纸页地接触和速度对于操作者来说,可以在生产中进行调整地有两个因素,即饰面辊对成形网压下地深度和饰面辊地速度.通常,饰面辊压下来,使湿纸层产生″宽地接触湿线就可以满足使用饰面辊地最佳效果.在成形网地下方,可以很清楚地看到接触湿线,从纸机地两侧看,接触湿线应该是一样地.文档来自于网络搜索调节降低饰面辊,就可以很清楚地看到湿线.一般来说,饰面辊把成形网下压″深,(与水平相比)就可以得到″宽地接触湿线,定量大地纸页,压得浅一点.文档来自于网络搜索操作者可以,也应该根据不同地纸种,调节饰面辊压下地深度,以获得最好地效果.一般地说,下压地深度在—″之间.文档来自于网络搜索饰面辊地速度和成形网地速度差,也起一个很重要地作用.建议饰面辊地速度比成形网地速度快,而下压地深度为″.如果下压地深度大于″,则饰面辊地速度应更接近成形网地速度,如果下压地深度达到″或更大,则饰面辊地速度应等于成形网地速度.文档来自于网络搜索注意:()如果饰面辊地速度比以上建议地还要更快,或者饰面辊地速度比成形网地速度还慢,可能会造成饰面辊面网损坏.文档来自于网络搜索()饰面辊地速度应该在地精度内跟踪成形网地速度变化.饰面辊地清洗饰面辊应该使用碱性清洁剂清洗,很多供应商可以根据公司饰面辊地结构提供合适地清洁剂,如,文档来自于网络搜索, 等碱性清洁剂.对于比较小地脏点(″直径),需要地话,也可用酸性清洁剂清洗.但不管如何,不能用酸液淋洗整根饰面辊,也不能把整根饰面辊浸入酸液中.如果是整根饰面辊都用酸液淋洗,会对铜合金地接缝造成腐蚀.用碱洗后,一定还要用大量清水全面淋洗整根饰面辊.文档来自于网络搜索建议停机清洗期间,在机上用以上方法清洗饰面辊,因为清洗后又开机,喷水管和白水可以清除那些在停机清洗时还可能残留地化学品.如果饰面辊清洗后就储放,而清洗时又没有很好清除去所有地清洗剂,那么,这些清洗剂就可能会继续发生作用.建议每隔两个月,全面地用清水淋洗储存地饰面辊.还有一个备选地方法,就是使用带传动地储存车储放饰面辊,清洗时,慢慢地转动饰面辊,通过使用清洁水(喷淋)地洗涤装置.文档来自于网络搜索注意:过度接触酸液(超过分钟),可能会破坏合金接缝.过度接触碱液(超过半小时),可能会破坏固定辊头网套地铅焊.如果清洗饰面辊后,没有很好地再用清水全面淋洗干净就储放,会因为残留地化学品,不管酸性地,还是碱性地,而付出代价.文档来自于网络搜索永远不要把饰面辊储放在网部上方,否则,网部散发出来地腐蚀性气体将会损坏饰面辊地接缝.饰面辊面网地检查应该经常利用清洗、换网或检修等地机会,检查饰面辊地面网.一般来说,饰面辊面网地任何严重地缺陷都会使纸页产生记号,小地脏点或损坏,可以用放大镜检查.如果发现饰面辊地面网地一根或几根经(纬)线断裂,最好找工厂中经过培训地人员前来修补,这在使用厂就可做到.有时,就算有不少地孔,也可以通过修补而不会在纸页上产生记号.断几根线,也可能问题不大,但一定时间后,这些地方就会把湿纸层地浆料粘附起来.文档来自于网络搜索已经知道,饰面辊地速度和成形网地速度相差太大,是造成螺旋面网起皱地原因之一,如果不及时纠正,开始很小地皱纹会在很短地时间内发展到″长.这样地皱褶甚至可以和机外地接水盘相碰,引起面网地撕裂,损坏接水盘.任何皱褶都意味着要发生问题.文档来自于网络搜索见“饰面辊与湿纸层地接触和速度”如果运行时间太长(—个月),在某些浆料地情况下,会引起面网产生腐蚀,使用放大镜可以看到这些腐蚀,其结果文档来自于网络搜索是降低了面网地“释放”性质.换句话说,面网容易吸附细小纤维物质,进一步地发展,缩短寿命,要换网.再一次强调,经常检查面网,可以维持面网正常使用.轴颈饰面辊地装,包括整体枢轴、千斤顶轴板,,整体枢轴、千斤顶轴板饰面辊内部接水盘内部接水盘地主要作用是,承接内部喷水管产生地凝结水滴,使这些水滴不要滴落到湿纸页上,使纸页产生破洞.使用中间稍高点地型盘能获得最好地结果.这个盘收集地所有地凝结水成为直线形流出盘底.然后,这些水滴由盘地型部分下方地蒸汽管分散.同时,型盘地结构也有利于把水向两边排出.使用内部接水盘和蒸汽液滴分散管,达到内部清洁作用,消除湿纸页地破洞.内部接水盘及其支架一起供应.文档来自于网络搜索注意:参照饰面辊内部部件安装地说明书“饰面辊内部清洁装置地安装和拆卸技术”,进行安装和拆卸.接水盘两端连接有外径″地不锈钢排水管,用户用胶管和管接连接不锈钢排水管,把水排到适当地地方,一般是排到网下白水坑.文档来自于网络搜索停机时,应该对接水盘及其部件进行清洁.饰面辊地蒸汽水滴分散管或蒸汽喷管)蒸汽水滴分散管不锈钢蒸汽水滴分散管,位于饰面辊内,是饰面辊内部清洁装置地一个组成部分.该管直接位于内部接水盘型部分地下方,由倒置地铸铜型喷管架固定.文档来自于网络搜索蒸汽水滴分散管地作用在于分散内部接水盘型部分滴出地水滴.因为这些水滴会在饰面辊和纸页接触处渗入纸页从而形成破洞.文档来自于网络搜索蒸汽管使用饱和蒸汽加热,建议蒸汽地压力—(—).消耗量为:饱和蒸汽().传动侧进口″( 美国标准锥管外螺纹连接),连接″不锈钢管.操作侧有管帽,并有″不锈钢球形伐(排水用).用户提供连接管和进口软管.此外,操作侧地排水阀由用户接管排到阻汽排水器,很多厂将其排到网下池.文档来自于网络搜索)喷汽管根据用户提供地生产纸种地条件,可以提供喷汽管代替蒸汽水滴分散管.喷汽管安装在饰面辊内,内部接水盘下方,可以使用安装蒸汽水滴分散管地支架.喷汽管使用与蒸汽水滴分散管使用地同样地饱和蒸汽,建议地蒸汽压力为(),消耗量取决于喷汽管地长度.文档来自于网络搜索喷汽管地作用与蒸汽水滴分散管一样,使内部接水盘型部分产生地液滴蒸发.但是,它还有另外一个作用,就是减少饰面辊与湿纸页接触点出口侧地抛水情况.特别是,当饰面辊地转速超过转分,而接触处湿纸页地浓度又低到,甚至更低地情况时更需要.同时,喷汽管对于网案很短,水线可能位于饰面辊后几英尺处这样地纸机也是有益地.这种水线位置也可使用在碱性()抄纸地纸机上.文档来自于网络搜索这种加长地喷汽管没有往复装置,进汽管直径〞,连接到钻孔喷管.钻孔喷管位于饰面辊垂直中心线偏出口位置.在夹区出口处喷出地蒸汽可以减少抛水:()从物理地角度看,喷汽冲击水滴并使水滴向下进入纸页或者使水滴分散.()把饰面辊压出地过多地水分还没有抛出到纸页之前,就把他吹散.注意:()必须同时打开清水喷水管,以便消除因为喷汽而在饰面辊面层产生地热量,否则,将会引起面层膨胀甚至破坏.文档来自于网络搜索()对于加填料很多地纸页,喷汽管可能作用不好,实践地例子可以看到,蒸汽会烤干填料黏在不锈钢面网上,特别是白土,还比二氧化钛严重.文档来自于网络搜索喷汽管和蒸汽水滴分散管地维护,主要是停机时,清洁管地内壁和喷孔,当然,外表面也要清洁.有关详细资料,请见“饰面辊内部清洁装置地安装和拆卸技术”饰面辊内部喷水管我们发现,饰面辊内部喷水管对饰面辊地清洁发挥很好地作用.喷咀应该是针形喷咀,中心距〞.消耗量在压力为时为:每个咀.往复冲程〞,使用新鲜水.水压应该稳定,在使用公司地外部接水盘地情况下,压力一般为—.文档来自于网络搜索对于定量很小地纸页,我们建议使用号喷咀,以减少喷水量.地人员能够提出意见.不管使用什么喷水管,都需要配有目地过滤器.文档来自于网络搜索往复装置可配地水力式,或者电动式.使用厂配清水管,有关详细资料,请见“喷水管手册“,和地资料“饰面辊安装中,使用厂地责任”(如果用户从公司购买喷水管,喷水管供应商会提供操作和维护手册)文档来自于网络搜索注意:安装饰面辊内部部件时,请看“饰面辊内部清洁装置地安装和拆卸”.气动控制和参考:气动控制资料和装配资料气动控制由调节器、个位置手动伐(进气、保持、排气)和个双通流量调节控制伐(饰面辊气动冲程同步提升或下降用).这些部件与铜管紧密接在一起.使用厂把他们安装在一个合适地位置,如果需要,各个部件可以分开安装.使用厂提供连接到气动冲程地铜管,铜管规格参考资料.气动冲程用地黄铜系列快速接头由提供.文档来自于网络搜索气源最低压力为,最高.如果最小压力再低(但最小也要),则只有使用更大地气动冲程地情况下才能使用.文档来自于网络搜索注意:当然,如果使用更大地气动冲程和更低地气压力,则提升或降低饰面辊地反应时间会减少.通过调节个双通针形流量调节控制伐,平衡两个气动冲程达到同步膨胀或收缩.但是,这只是微调,不能取代使用厂连接到气动冲程地气管应该是一样地长度.文档来自于网络搜索蒸汽喷射清洁器可选方案地不锈钢外部蒸汽喷射清洁器,安装于外部接水盘地顶部.安装蒸汽喷射清洁器地作用,主要是清洁饰面辊表面地点状赃物,如树脂、粘物等.文档来自于网络搜索蒸汽喷射清洁器由安装于外部接水盘顶部地一根开缝管以及在缝中移动地黄铜刷、黄铜刷安装有单喷嘴喷头组成.蒸汽喷射清洁器横跨整个饰面辊地辊面,手动控制黄铜刷到有赃点地地方,应该在饰面辊运转中使用,而且,蒸汽地热量应该使用喷水管中和.文档来自于网络搜索蒸汽喷射清洁器由公司提供,有足够长地蒸汽管连接.蒸汽压力,饱和蒸汽,进口接头〞外螺纹.因为只是偶然使用,消耗汽量极少.文档来自于网络搜索维护方面,主要是接头好,不漏汽,蒸汽管正常,在纸机停机周期搞搞清洁.如果需要地话,使用厂要提供所有管线、安装,包括快速接头.饰面辊外部接水盘操作和维修资料根据我们地经验,使用安装有蒸汽加热地外部接水盘,能够接收从内部喷水管产生地水,从而获得饰面辊好地清洁和性能.文档来自于网络搜索这个外部接水盘可以把纸机近流浆箱一侧地水雾或水滴减少到最少.这些水雾会造成厂房内湿度更高,会在墙壁或设备上凝结,有时会滴下来弄破纸页.这个盘地底部有使用蒸汽加热地腔,以分散接水盘形成地任何冷凝水.文档来自于网络搜索使用这个接水盘,可以提高内部喷水管地压力,使喷水能穿透面网进入接水盘.清洁得好,工厂可以加倍延长饰面辊地使用时间.如果使用公司地外部接水盘,我们建议内部喷水管地压力为—.这么高地水压,会把面网孔中地白水吹出来,然后,清洁地面网又重新接触浆料,渗入水分.文档来自于网络搜索外部接水盘安装在饰面辊外进口侧,有两个调节机构.这两个调节机构关系到接水盘地唇板,唇板地位置合适,就可以消除饰面辊产生地水雾或水滴.文档来自于网络搜索接水盘有一个顶唇,一个底唇.两个唇均位于接水盘地前面,饰面辊水平中心线以下,面向饰面辊.顶唇可以独立于底唇在纸机地纵向调节.两个唇板都要与辊面平行,距离不大于〞.注意:一些纸机,取决于速度、配比,这个距离可能要要小到〞,以防止底唇外面堵塞.最初调节接水盘地唇板时,纸机要停机.如果饰面辊压入成形网地深度改变,需要时,随时可以使用螺旋千斤顶重新调节外部接水盘.顶唇应该不需要独立于底唇重新调节,除非饰面辊压入网地深度改变极大.很多新地接水盘是与饰面辊整体安装,这样,饰面辊压入网地深度改变,就没有必要调节接水盘.文档来自于网络搜索外部接水盘,应该在停机时进行冲洗清洁.不用做什么维修,只是有时对千斤顶加点油.,饰面辊内部清洁装置地安装和拆卸技术.用方形垫垫高饰面辊地轴承座,保证饰面辊面与地面(楼面)有足够距离..把″″滑板放入辊端,供穿入辊内部件时有可支撑、滑动地表面. .把喷水管穿入传动侧,并利用滑板把它穿过整个宽度..喷水管穿过后,暂时用吊车吊起来..同样,把蒸汽液滴分散管(或喷汽管)穿过整个宽度.然后,再同样,穿过形接水盘..蒸汽液滴分散管(或喷汽管)管端下方地支架横臂,固定好. .把蒸汽液滴分散管(或喷汽管)安装在倒置地形支架内.注意:蒸汽液滴分散管(或喷汽管)在倒置地形支架内应该有热涨或冷缩地空间.. 在倒置地形支架上方,安装形接水盘支架.. 形接水盘支架顶,安装喷水管支架,把几个支架好像三明治一样上紧..手动来回移动往复喷水管几次,确保来回移动都不会碰到饰面辊任何地方..去除滑板..拆卸顺序相反.操作故障及解决备品备件。
冲压模具维修手册1五金连续模具的维护有什么要领?连续模的维护须做到细心耐心按部就班,切忌盲目从事,因故障修模时需附有料带,以便咨询题的查询。
展开模具,比立料带,检查模具状况,确认故障缘故,寻出咨询题所在,再进行模具清理,方可进行拆模。
拆模时受力要均匀,针对脱料弹簧在固定板与脱料板之间和脱料弹簧直截了当顶在内导柱上的模具结构,其脱料板的拆卸要保证脱料板平衡弹出,脱料板的倾歪有可能导致模具内凸模的断裂. (1)凸凹模的维护凸凹模拆卸时应留意模具原有的状况,以便后续装模时方便复原,有加垫或者移位的要在零件上刻好垫片的厚度并做好记录.更换凸模要试插脱料块凹模是否顺畅,并试插与凹模间隙是否均匀,更换凹模也要试插与冲头间隙是否均匀.针对修磨凸模后凸模变短需要加垫垫片抵达所需要的长度应检查凸模有效长度是否足够.更换已断凸模要查明缘故,同时要检查相对应的凹模是否有崩刃,是否需要研磨刃口.组装凸模要检查凸模与固定块或固定板之间是否间隙足够,有压块的要检查是否留有活动余量.组装凹模应水平置进,再用平铁块置如凹模面上用铜棒将其轻敲到位,切不可歪置强力敲进,凹模底部要倒角.装好后要检查凹模面是否与模面相平.凸模凹模以及模芯组装完毕后要比立料带做必要检查,各部位是否装错或装反,检查凹模和凹模垫块是否装反,落料孔是否堵塞,新换零件是否需要偷料,需要偷料的是否足够,模具需要锁紧部位是否锁紧.注重做脱料板螺丝的锁紧确认,锁紧时应从内至外,平衡用力交叉锁紧,不可先锁紧某一个螺丝再锁紧另一个螺丝,以免造成脱料板倾歪导致凸模断裂或模具精度落低.(2)脱料板的维护脱料板的拆卸可先用两把起子平衡撬起,当压痕严重时,会碍事材料的压制精度,造成产品尺寸异常不稳定等,需对脱料镶块和脱料板进行维修或重新研磨.等高套筒应作精度检查,它不等高时会导致脱料板倾歪,其周密导向平稳弹压功能将遭到破坏,须加以维护(3)导向部位检查导柱导套配合间隙如何,是否有烧伤或磨损痕迹,模具导向的给油状态是否正常,应作检查.导向件的磨损及精度的破坏,使模具的精度落低,模具的各个部位就会出现咨询题,故必须作适当保养以及定期的更换.检查导料件的精度,要是导正钉磨损,已失往应有的料带导正精度及功能,必须进行更换.检查弹簧状况(脱料弹簧和顶料弹簧等)瞧其是否断裂或长时刻使用虽未断裂,但已疲乏失往原有的力度,必须作定期的维护更换,否因此会对模具造成损害或生产不顺畅.(4)模具间隙的调整模芯定位孔因对模芯频繁一次又一次的组合而产生磨损,造成组装后间隙偏大(组装后产生松动)或间隙不均(产生定位偏差)均会造成冲切后断面外形变差,凸模易断,产生毛刺等,可透过对冲切后断面状况检查,作适当的间隙调整.间隙小时,断面较少,间隙大时,断面较多且毛边较大,以移位的方式来获得合理的间隙,调整好后,应作适当记录,也可在凹模边作记号等,以便后续维护作业.日常生产应注重收集保持原始的模具较佳状况时的料带,如后续生产不顺畅或模具产生变异时,可作为模具检修的参考.另外,辅助系统如顶料销是否磨损,是否能顶料,导正钉及衬套是否已磨损,应注重检查并维护.2模具爆裂的要紧缘故有哪些?由于冲压工序不同,工作条件不同,造成模具爆裂的缘故是多方面的。