
Under Review
Abstract
Like Px Views, HX Views provide views of components in a running station. In contrast, HX Views provide the ability to interact programmatically with user input and station components as well as other Java objects. HX views are server side generated HTML views which use AJAX to dynamically update the display. Working with HX views requires knowledge of HTML, CSS, and JavaScript.
HX views provide the ability to display data of a target component and to save data back to the target component on which the view is declared.
Prerequisites
Compatibility
Niagara AX 3.x
Previous Study Guides
Study Guide-Modules and Components
Study Guide-Component Slots
Study Guide-Component Lifecycle
Study Guide-Slotomatic
Study Guide-Links and Application Logic
Study Guide-Component Subscription
Study Guide-Agents and the Registry
Study Guide-Niagara Widgets
Study Guide-HX Static and Dynamic Views
Module Dependencies
baja, bajaui, gx, hx, web
Baja Docs
BServletView, BSingleton, BHxView, BHxOp
Developer Docs
Hx, HxOp
HX Editors
HxViews are server side hosted Servlets which combine HTML, CSS, and JavaScript to create web-based displays for the end user. Each HxView is responsible for writing and managing an area of HTML content within the body content of a larger HTML document.
Like a Workbench View, an HX View is declared as an agent on a BObject type and used to visualize an instance of that BObject type through a web based client. An HX View can be used as an editor to not only view the data of a BObject instance, but modify that data through standard HTML form fields.
Form Fields and HX
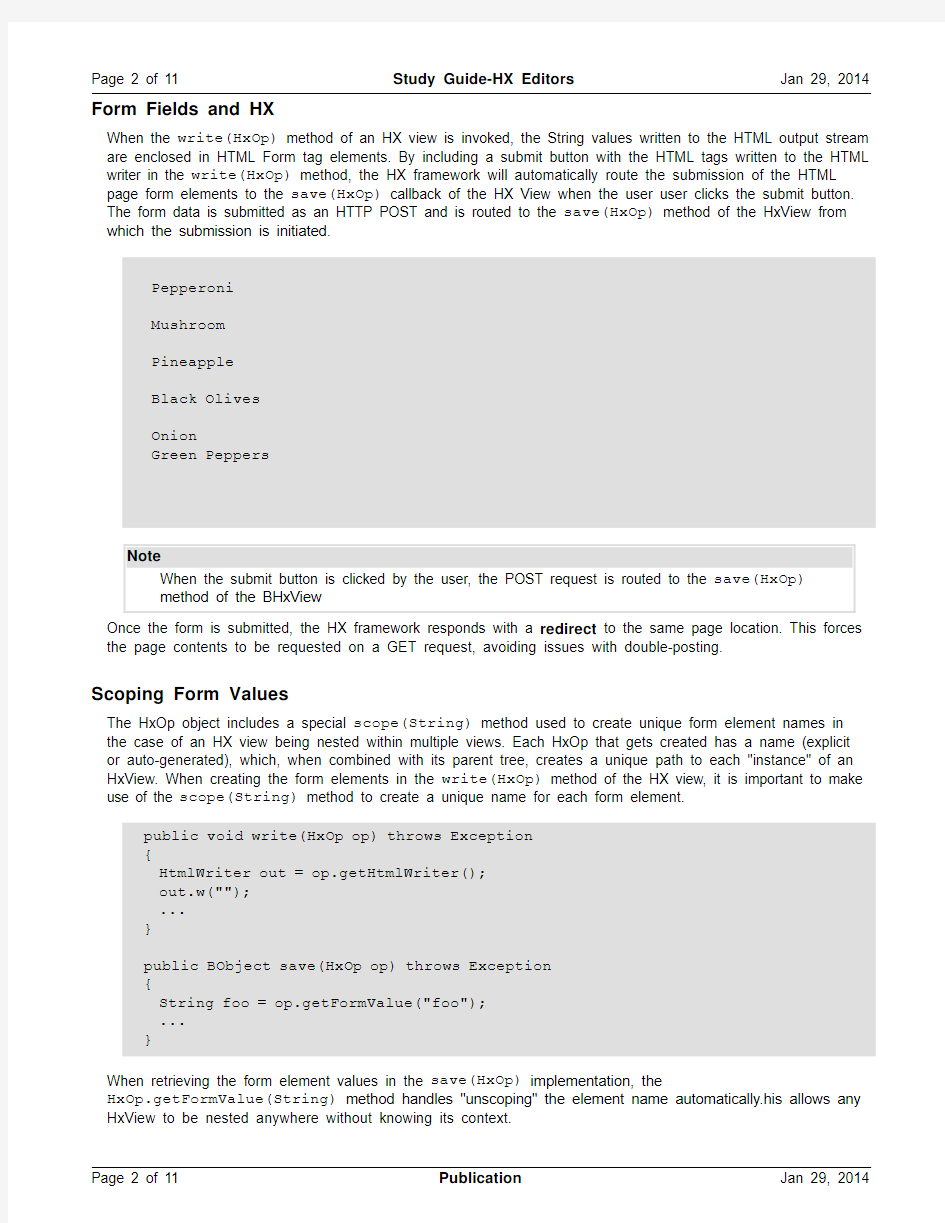
When the write(HxOp) method of an HX view is invoked, the String values written to the HTML output stream are enclosed in HTML Form tag elements. By including a submit button with the HTML tags written to the HTML writer in the write(HxOp) method, the HX framework will automatically route the submission of the HTML page form elements to the save(HxOp) callback of the HX View when the user user clicks the submit button. The form data is submitted as an HTTP POST and is routed to the save(HxOp) method of the HxView from which the submission is initiated.
Pepperoni
Mushroom
Pineapple
Black Olives
Onion
Green Peppers
Once the form is submitted, the HX framework responds with a redirect to the same page location. This forces the page contents to be requested on a GET request, avoiding issues with double-posting.
Scoping Form Values
The HxOp object includes a special scope(String) method used to create unique form element names in the case of an HX view being nested within multiple views. Each HxOp that gets created has a name (explicit
or auto-generated), which, when combined with its parent tree, creates a unique path to each "instance" of an HxView. When creating the form elements in the write(HxOp) method of the HX view, it is important to make use of the scope(String) method to create a unique name for each form element.
public void write(HxOp op) throws Exception
{
HtmlWriter out = op.getHtmlWriter();
out.w("");
...
}
public BObject save(HxOp op) throws Exception
{
String foo = op.getFormValue("foo");
...
}
When retrieving the form element values in the save(HxOp) implementation, the
HxOp.getFormValue(String) method handles "unscoping" the element name automatically.his allows any HxView to be nested anywhere without knowing its context.
Retrieving Form Values
The HxOp is used to store the form data for the submission. These values may be retrieved from the HxOp using the getFormValue(String) method, where the String argument is the form element name. A list of all form key names may also be retrieved from the HxOp through the getFormKeys() method.
Saving the Value
The save(HxOp) method is used to save the form data to a BObject, similar to the doSaveValue(BObject) callback used with Workbench views. Just as with Workbench views, in cases where the view represents a BSimple data object, the save(HxOp) method implementation should return a new BSimple object instance. If the view represents a BComplex, the method should modify the existing instance of that BComplex object with the save values.
public BObject save(HxOp op)
{
//Retrieve the named form values from HxOp
String pizzaSize = op.getFormValue("size.pizza");
String ingredients = op.getFormValue("ingredients.pizza");
//update our value if this is a complex
BPizzaOrder order = (BPizzaOrder)op.get();
order.setSize(pizzaSize);
order.setIngredients(ingredients);
return order;
}
Exercise: Saving Form Data
In this exercise, we will create a basic HX View which will display the values of a component and save changes made by the user on a submit invocation.
1.Open the Eclipse IDE and ensure that the Eclipse Niagara Plugin is installed. For details in setting up your
Eclipse environment and the Niagara Plugin, see the Study Guide Modules and Components.
2.From the Niagara menu in the Eclipse menu bar, select the New AX Module menu option. The New
Module Wizard will display.
3.Set the path directory to the bang (!) character. This is the directory of the currently selected Niagara AX
Home installation for the Niagara Plugin. You may alternately set the path to a directory of your choosing.
This is the directory which will store all module files and which will be used by the Eclipse IDE to create a Java project.
4.Set the module details using the following information. Ensure that both the Create Palette and Create
Lexicon check boxes are checked before proceeding.
1.Once the module fields are completed, click the Next button. The Dependencies setup page will display.
Add the following dependencies to the project.
1.Once the modules are added as dependencies, click the Next button.
2.We will want several default packages created with our module. On the Add Packages wizard page, add
the following packages:
com.examples.hxEditor
com.examples.hxEditor.ui
3.Click the OK button of the dialog. The package name should display in the Package table.
4.Click the module wizard Finish button. A Java Project will be created and will display in the Eclipse Project
Explorer tree view.
5.In the com.examples.hxEditor package, create a new class named BVaV which extends
BComponent.
6.At the top of the class file, below the package declaration, add the following import statements:
import javax.baja.sys.*;
7.In the BVaV class, add the following Slot declarations:
/*-
class BVaV
{
properties
{
fan : boolean
default {[ false ]}
damper : double
default {[0.0]}
setTemp : double
default {[ 50.0]}
minPressure : double
default {[ 200 ]}
maxPressure : double
default {[ 800 ]}
curPressure : double
default {[ 500 ]}
}
}
-*/
8.Run the Slotomatic tool to automatically generate the Slot code. From the Niagara menu option in the
Eclipse Niagara Plugin, select Niagara Tools -> Slotomatic. The class file will now be updated with
automatically generated code for the Property Slot definitions and the Type information. The module-include.xml file of the module will also be updated with the component type information.
9.Open the module.palette file and add the following declaration:
10.In the com.examples.hxEditors.ui package space, create a new class named BHxVaVView which
extends BHxView.
11.At the top of the class file, below the package statement, add the following import statements:
import javax.baja.hx.*;
import javax.baja.io.HtmlWriter;
import javax.baja.sys.*;
12.Within the class body before the Slotomatic pseudo-code add the following INSTANCE declaration:
public static final BHxVaVView INSTANCE = new BHxVaVView();
13.Run the Slotomatic tool to automatically generate the Type declaration of the class.
14.Our view will make use of several existing image files pre-packaged with the Niagara platform that can
be found in the kitPxHvac module. At the bottom of the class file, add the following contant declarations which will be used later in our code:
/////////////////////////////////////////////////////////////////
// Constants
/////////////////////////////////////////////////////////////////
public static final String MAX_PRES_ID = "maxPressure";
public static final String MIN_PRES_ID = "minPressure";
public static final String DAMPER_ID = "damper";
public static final String FAN_ID = "fan";
public static final String FAN_ON = "module://kitPxHvac/equipment/
fanRightTrue.gif";
public static final String FAN_OFF = "module://kitPxHvac/equipment/
fanRightFalse.gif";
public static final String DAMPER_1 = "module://kitPxHvac/dampers/
vavDamperA1.gif";
public static final String DAMPER_2 = "module://kitPxHvac/dampers/
vavDamperA2.gif";
public static final String DAMPER_3 = "module://kitPxHvac/dampers/
vavDamperA3.gif";
public static final String DAMPER_4 = "module://kitPxHvac/dampers/
vavDamperA4.gif";
public static final String DAMPER_5 = "module://kitPxHvac/dampers/
vavDamperA5.gif";
public static final String PIPE_START = "module://kitPxHvac/ducts/
hlend.gif";
public static final String PIPE_MID = "module://kitPxHvac/ducts/
hmid.gif";
public static final String PIPE_END = "module://kitPxHvac/ducts/
hrend.gif";
15.To create the initial HTML document that our HX view will display, we must override the write(HxOp)
method of the HxView. The HTML content is output to an HTML output stream. Implement the write method along with the two given helper methods as follows:
public void write(HxOp op) throws Exception
{
//get the object instance and HTML writer from HxOp
BVaV vav = (BVaV)op.get();
HtmlWriter out = op.getHtmlWriter();
//get the current values of our object instance
boolean fan = vav.getFan();
double damper = vav.getDamper();
double curPressure = vav.getCurPressure();
double minPressure = vav.getMinPressure();
double maxPressure = vav.getMaxPressure();
//get the right damper image
String damperImg = null;
if( damper < 20) damperImg = DAMPER_1;
else if( damper < 40) damperImg = DAMPER_2;
else if( damper < 60) damperImg = DAMPER_3;
else if( damper < 80) damperImg = DAMPER_4;
else damperImg = DAMPER_5;
//get the right fan image
String fanImg = fan ? FAN_ON: FAN_OFF;
//create border for our display
out.w("
//create images of damper and fan in duct work
out.w("
out.w("
>").w("
out.w("
out.w("");
out.w("
out.w("
out.w("
out.w("");
out.w("
out.w("
out.w("
out.w("
");out.w("
//create table of controls
out.w("
out.startTable(false);
out.w("
out.td("Fan :");
out.td(writeFanSelector(op, fan));
out.w("
out.w("
out.td("Damper % :");
out.td(writeDamperSlider(op, damper));
out.w("
out.w("
String minId = op.scope(MIN_PRES_ID);
out.td("Min Pressure:");
out.td("");
out.w("
out.w("
String maxId = op.scope(MAX_PRES_ID);
out.td("Max Pressure:");
out.td("");
out.w("
out.w("
out.td("Current Pressure:");
out.td("" + curPressure + "");
out.w("
out.w("
value='Save' />
out.endTable();
out.w("
out.w("
}
/**
* This method creates a fan on/off selector.
* @param op
* @param isOn
* @return
*/
private String writeFanSelector(HxOp op, boolean isOn)
{
String fanId = op.scope(FAN_ID);
String value = "
value += "";
value += "";
value += "";
return value;
}
/**
* This method writes the HTML for our slider
* @param op
* @param damper
* @return
*/
private String writeDamperSlider(HxOp op, double damper)
{
String damperId = op.scope(DAMPER_ID);
String value = "";
value += ""; return value;
}
1.To save changes made in the HX view back to the target object instance, we must override the
save(HxOp) method. This method will retrieve our form data values and set them on our target object instance. Implement the save method as follows:
/**
* Save the HX view form data back to the target object instance
*/
public BObject save(HxOp op) throws Exception
{
BVaV vav = (BVaV)op.get();
//get the form elements
String maxId = op.scope(MAX_PRES_ID);
String minId = op.scope(MIN_PRES_ID);
String fanId = op.scope(FAN_ID);
String damperId = op.scope(DAMPER_ID);
//convert the form elements to values
String maxVal = op.getFormValue(maxId);
String minVal = op.getFormValue(minId);
String fanVal = op.getFormValue(fanId);
String damperVal = op.getFormValue(damperId);
//set the values on the target object instance
vav.setMaxPressure(Double.parseDouble(maxVal));
vav.setMinPressure(Double.parseDouble(minVal));
vav.setFan(fanVal.toLowerCase().equals("true")? true : false);
vav.setDamper(Double.parseDouble(damperVal));
//return our reference
return vav;
}
2.Save the changes to the file.
3.To access the HX view via browser, we must declare the view as an agent on the BVaV. Open the
module-include.xml module descriptor file and modify the BHxVaVView type definition to include the agent registration information as shown below:
4.Build the module using the Niagara menu option in the Eclipse Niagara Plugin and select Niagara Tools -
> Build Full. Verify in the console output that the module builds successfully.
https://www.doczj.com/doc/a413354487.html,ing the Niagara Console, start a Niagara station. In a separate console, start Workbench, and login to
the running station.
6.In the running station, create a new Folder and add a BVaV component from the hxEditors palette in the
Workbench Palette sidebar.
7.Through Workbench, browse to the station's User Service. Create a new user with Web Profile property
set as "Default Hx Profile". Grant the user "Super User" permissions. Set the other properties as you see fit.
https://www.doczj.com/doc/a413354487.html,ing a web browser, log into the station using the special Web account created in the previous step.
9.Through the web browser, navigate to a VaV instance and click the component to view the HX view. If the
view doesn't immediately display, check that the Hx VaV View is selected in the views drop down list in the top right corner of the screen.
1.Modify the fan value of the VAV to be on. Set the Damper position to a value greater than 80, and modify
the min and max pressure to 300 and 700 respectively.
2.Click the Save button of the view.Verify that the view updates with the appropriate values set.
3.In Workbench, navigate to the VaV instance we manipulated in our web browser HX view. Verify that the
property values are consistent with the values set in the HX editor view.
Summary
HxViews are server side hosted Servlets which combine HTML, CSS, and JavaScript to create web-based displays for the end user. The save(HxOp) method of an HX View is used to retrieve form element data from the display using an HTTP POST.
The form elements of a POST request are accessed with the HxOp.getFormValue(String) method. When a form element is initially constructed in the write(HxOp) method of the HxView, it should use the HxOp.scope(String) method to provide a scoped name attribute for the form element. This will prevent name collision when the HxView is managed as a subview in a group of nested HxViews.
Solutions
Niagara AX 3.6.x Download Niagara AX 3.7.x Download